
The Basic Piping Skills That Transform Simple Bakes

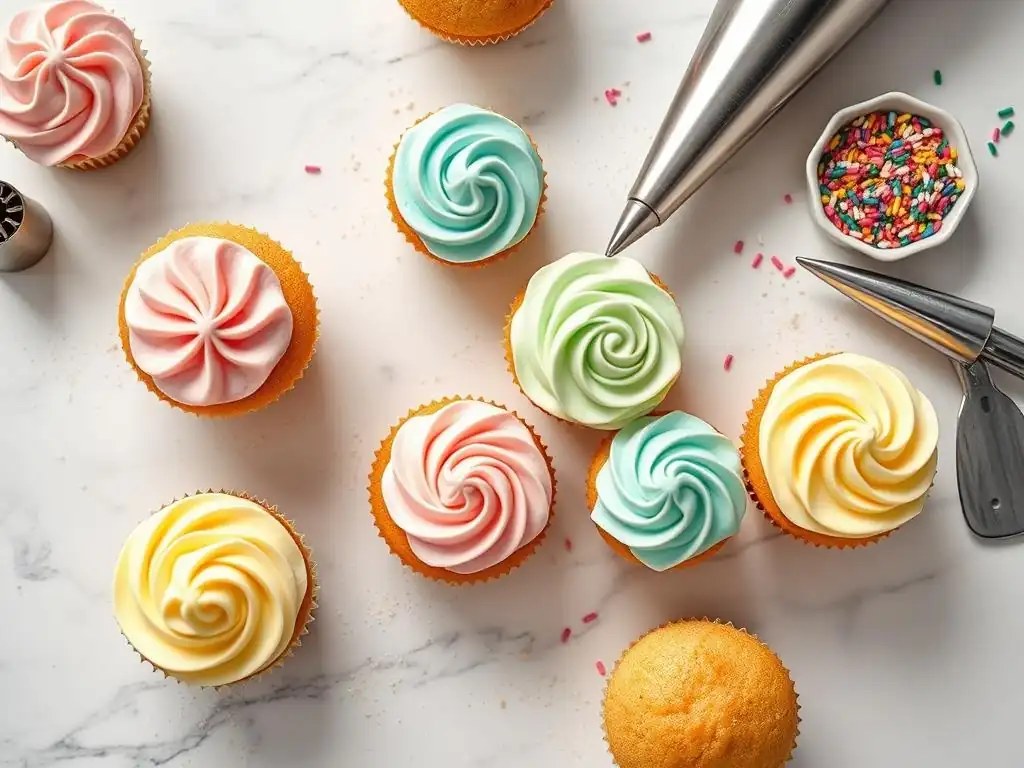
Welcome to BakeWithEase, where baking dreams become delicious realities! Ever wondered how to transform a simple cake into a show-stopping masterpiece? Unlocking the secrets of beautiful frosting is easier than you think. Dive in to discover our easy buttercream piping techniques tutorial and elevate your baking game today. You'll be amazed at the results you can achieve with just a few basic skills... let's get started!
- Mastering Buttercream Piping: From Beginner to Baker
- Elevate Your Cakes: Simple Buttercream Piping Techniques
- A Beginner's Guide to Buttercream Piping
- Buttercream Piping Techniques: A Step-by-Step Guide
- Troubleshooting Common Piping Issues
- Maintaining Your Piping Tools: Cleaning and Storage
- Expanding Your Skills: Introduction to Advanced Techniques
-
Frequently Asked Questions
- How do I choose the right piping tip for my buttercream design?
- What consistency should my buttercream be for easy piping?
- What's the best way to fill a piping bag without making a mess?
- How can I prevent air bubbles in my piped buttercream?
- What are some basic piping techniques for beginners to master?
- Final Reflection: Mastering the Art of Simple Piping
- Unleash Your Inner Piping Pro!
Mastering Buttercream Piping: From Beginner to Baker
Elevate Your Cakes: Simple Buttercream Piping Techniques
Learning how to pipe buttercream is a game-changer for home bakers. It transforms a simple cake or cupcake into a visually stunning dessert worthy of any celebration. While it might seem intimidating at first, mastering basic buttercream piping techniques is achievable with practice and the right guidance. This easy buttercream piping techniques tutorial will walk you through everything you need to know, from essential tools to fundamental skills, helping you add beautiful finishing touches to all your baked goods.
Buttercream piping allows you to create intricate designs, elegant borders, delicate flowers, and fun textures that elevate the perceived value and appeal of your bakes. Whether you're decorating a birthday cake, preparing cupcakes for a bake sale, or simply want to make your desserts look professional, understanding how to effectively use a piping bag and nozzle is a fundamental skill. Think of the difference between a plain frosted cupcake and one adorned with a perfect swirl – the visual impact is significant, and surprisingly easy to achieve once you know the basics.
A Beginner's Guide to Buttercream Piping
Why Learn Buttercream Piping? Enhancing Cake Decoration
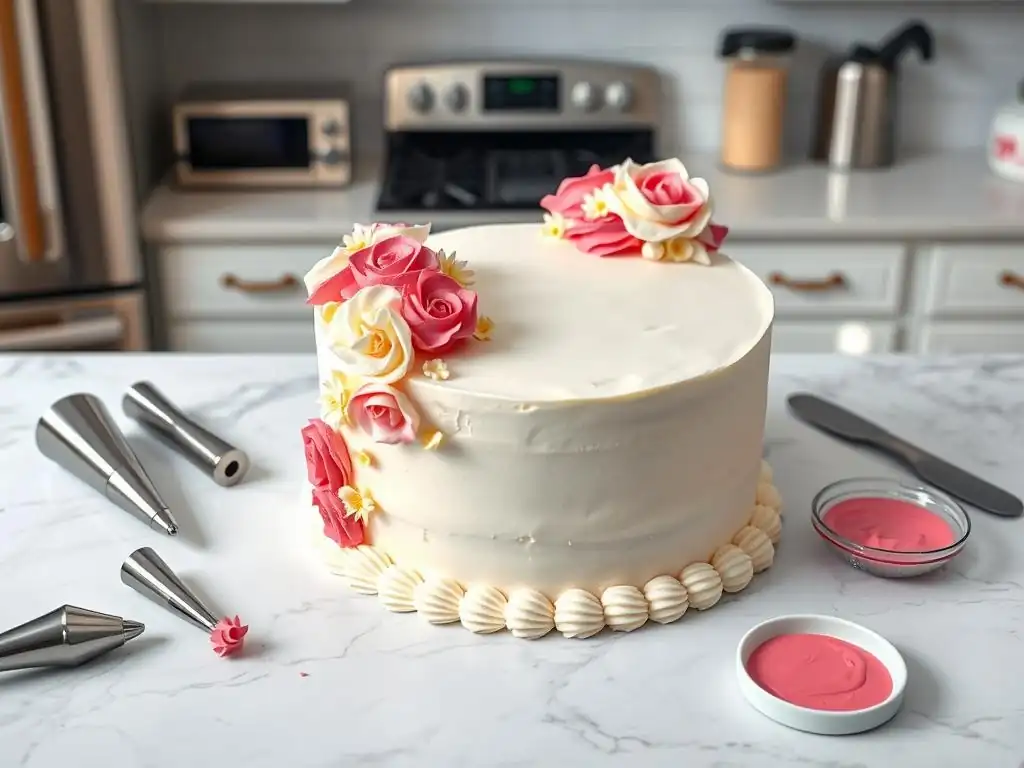
Learning easy buttercream piping techniques is more than just adding frosting; it's about bringing your creative vision to life on your baked canvas. It allows you to move beyond simply spreading frosting with a spatula and explore a world of textures, patterns, and details. This skill is particularly valuable for special occasions, turning homemade cakes for birthdays, anniversaries, or holidays into memorable centerpieces. For example, a simple vanilla cake can be transformed into a festive creation with piped stars and shells around the edges, adding a touch of elegance without requiring complex sculpting or fondant work.
Beyond aesthetics, piping provides structural benefits. Cleanly piped borders can act as dams to hold fillings in layered cakes, and consistent swirls on cupcakes ensure each serving looks uniform and appealing. Furthermore, practicing these techniques builds confidence in the kitchen, opening up possibilities for more advanced decorating in the future. Many home bakers find that once they master a few basic piping skills, they are eager to try more elaborate designs, continually improving their baking and decorating repertoire. It's a skill that truly enhances both the look and often the enjoyment of your baked goods.
Essential Tools and Equipment for Buttercream Piping
Having the right tools is crucial when you're starting your easy buttercream piping techniques tutorial journey. While you don't need a vast collection immediately, a few key items will make the process significantly smoother and more successful. The basic setup involves a piping bag, a nozzle (or tip), and, optionally, a coupler. High-quality tools, even basic ones, can make a noticeable difference in the ease of piping and the sharpness of your designs. Investing in a few durable pieces early on can save frustration and yield better results as you practice.
Beyond the core trio, a good offset spatula is essential for filling bags cleanly, and a small rubber spatula helps push the buttercream down into the bag. Some bakers also find a stand useful for holding the piping bag open while filling. Consider starting with a basic set that includes a few common nozzles like a star tip (like Wilton 1M or 2D), a round tip (like Wilton 12), and possibly a shell tip (like Wilton 21). This small collection allows you to practice a variety of easy buttercream piping techniques right away.
Piping Bags: Choosing Between Disposable and Reusable
Piping bags come in two main types: disposable and reusable. Disposable bags, typically made of plastic, are convenient for quick cleanup and are ideal for beginners or when using multiple colors. They are relatively inexpensive, often sold in rolls of 100 or more, making them a practical choice for frequent baking or large projects. While less environmentally friendly than reusable options, their ease of use is undeniable. For example, a small batch of cupcakes using two or three different colored buttercreams is much simpler with disposable bags.
Reusable piping bags are usually made from sturdy materials like silicone, canvas, or coated fabric. They are more durable and environmentally conscious but require thorough cleaning after each use. Many professional bakers prefer reusable bags for their feel and control. Silicone bags are popular for their flexibility and non-slip grip. While the initial cost is higher than disposable bags, a good quality reusable bag can last for years, making it a cost-effective option in the long run. The choice often comes down to personal preference regarding cleanup versus environmental impact and feel.
Piping Nozzles: Essential Tips for Basic Designs
Piping nozzles, also called tips, are the small cones inserted into the piping bag that shape the buttercream as it's squeezed out. They come in hundreds of shapes and sizes, creating everything from simple dots to complex flower petals. For mastering easy buttercream piping techniques, you'll want to start with a few basic shapes: round, star, and possibly open star or shell. A medium-sized round tip (like a Wilton #12) is perfect for dots, lines, and filling in areas.
Star tips (like Wilton #1M or #21) are incredibly versatile, creating classic swirls, stars, rosettes, and shell borders. The size of the tip affects the size of the design – a larger tip like the 1M makes big cupcake swirls, while a smaller tip like the 21 is great for delicate borders. Open star tips (like Wilton #18) create designs with more defined ridges.
Shell tips (like Wilton #32) are specifically designed for creating consistent shell borders. Starting with just 3-5 essential tips will allow you to practice a wide range of easy buttercream piping techniques without feeling overwhelmed by too many options.
Couplers: Switching Nozzles Effortlessly
A coupler is a two-part plastic piece that allows you to change piping nozzles on a single bag of buttercream without emptying the bag. The base of the coupler is inserted into the piping bag before filling, and the nozzle is placed over the base on the outside of the bag, secured by a ring that screws on. This is incredibly handy when you want to use the same color buttercream but create different designs, such as piping a border with a star tip and then switching to a round tip to add dots, all from the same bag.
Using a coupler streamlines the decorating process, saving time and reducing the number of bags you need to prepare. For example, if you're decorating 24 cupcakes with white buttercream and want to do a mix of swirls (using a star tip) and smooth domes (using a round tip), a coupler allows you to switch between the two tips instantly.
This is a key component in making easy buttercream piping techniques tutorials truly efficient. Make sure the coupler size matches the size of your nozzles – standard couplers work with most small to medium tips, while larger tips require a large coupler.
Buttercream: Achieving the Ideal Piping Consistency
The consistency of your buttercream is perhaps the most critical factor for successful piping. If it's too soft, your designs will be runny and lose their shape. If it's too stiff, it will be hard to squeeze from the bag and might break or look crumbly.
The ideal consistency for piping is firm enough to hold its shape when squeezed, but soft enough to flow smoothly through the nozzle without excessive pressure. A good test is to scoop some buttercream onto a spoon and turn it upside down – it should hold its shape for a few seconds before slowly starting to fall.
Achieving this perfect piping consistency often requires slight adjustments based on your recipe, the temperature of your kitchen, and even the type of butter used. American buttercream, made from butter, powdered sugar, and a liquid (milk or cream), is commonly used for piping due to its stability. Swiss or Italian meringue buttercreams can also be piped but often require chilling to firm up sufficiently. Learning to recognize and adjust your buttercream's consistency is a fundamental step in mastering easy buttercream piping techniques for consistent results.
Buttercream Piping Techniques: A Step-by-Step Guide
Preparing Your Buttercream for Piping
Proper preparation is key to successful piping. Once you've made your delicious buttercream, you need to ensure it's the right consistency and, if desired, colored before loading it into your piping bag. This preparation step is often overlooked but is vital for achieving clean, professional-looking piped designs. Taking a few extra minutes here can save you a lot of frustration during the piping process.
Start by giving your finished buttercream a good mix with a spatula or a stand mixer fitted with the paddle attachment. This helps remove air bubbles that can cause breaks in your piped lines and ensures a smooth, uniform texture. It's also the best time to check the consistency and make any necessary adjustments before adding color or filling the bag. Think of this as conditioning the buttercream, making it pliable and ready for shaping.
Achieving the Right Buttercream Consistency: Adjusting for Temperature
Buttercream consistency is highly sensitive to temperature. On a warm day, your buttercream might become too soft, while in a cool kitchen, it could be too stiff. If your buttercream is too soft for piping, you can thicken it by adding a tablespoon or two of sifted powdered sugar at a time, mixing thoroughly until the desired consistency is reached. Chilling it in the refrigerator for 10-15 minutes can also help firm it up quickly, but be careful not to let it get too hard.
Conversely, if your buttercream is too stiff, add liquid very gradually, about half a teaspoon of milk, cream, or even water at a time. Mix well after each addition. It's easy to add too much liquid, so go slowly. Sometimes, simply mixing the buttercream for an extra minute can soften it slightly due to the friction. The goal is a consistency that flows but holds shape, crucial for any easy buttercream piping techniques tutorial.
Coloring Your Buttercream: Gel vs. Liquid Food Coloring
When coloring buttercream for piping, gel food coloring is generally preferred over liquid food coloring. Gel colors are concentrated and require only a small amount to achieve vibrant hues, which is important because adding too much liquid coloring can alter the buttercream's consistency, making it too thin for piping. A tiny drop of gel color can transform a cup of white buttercream into a bright shade. Brands like Americolor or Wilton gel colors are popular choices among decorators.
To color your buttercream, add a small amount of gel color with a toothpick or the tip of a knife, then mix thoroughly. Add more color gradually until you achieve your desired shade. Remember that colors often deepen slightly as they sit. Liquid food coloring can be used for pastel shades, but be mindful of the amount you add. For deep or vibrant colors, gel or powder colors are almost always necessary to maintain the correct piping consistency.
Mastering Basic Piping Techniques
With your buttercream prepared, it's time to dive into the core easy buttercream piping techniques. These fundamental skills form the basis for almost all decorative piping you'll encounter. Practice is key here – don't expect perfection on your first try! Using parchment paper laid out on a flat surface is an excellent way to practice shapes and pressure control before moving to your final cake or cupcake.
Start by filling your piping bag correctly. Push a nozzle (with or without a coupler) into the tip of the bag and snip off the end of the bag just enough so the tip pokes out. Fold the top of the bag down to create a cuff, then use a spatula to fill the bag about two-thirds full with buttercream.
Unfold the cuff and twist the top of the bag closed, pushing the buttercream down towards the nozzle. This twisted part is where you'll apply pressure. Hold the bag with your dominant hand controlling the pressure on the twisted end and your other hand guiding the tip.
The Star Technique: Piping Classic Stars
The star technique is one of the most fundamental easy buttercream piping techniques. It uses a star tip (open or closed) to create simple, jagged-edged shapes. Stars can be piped individually to add texture, or piped closely together to cover a surface. They are perfect for filling in spaces, creating borders, or adding decorative accents. A common use is piping small stars all over a cake to create a textured surface, or piping a row of stars along the base of a cake.
To pipe a basic star, hold the piping bag perpendicular to the surface (at a 90-degree angle). Apply even pressure to squeeze out the buttercream. Once the star reaches your desired size, stop squeezing pressure before lifting the bag straight up. This allows the buttercream to break cleanly, forming the peak of the star. Practice varying the pressure and duration to see how it affects the size of the stars.
Piping a Perfect Star: Pressure Control and Technique
Achieving a perfect star relies heavily on consistent pressure and a clean break. Hold the bag firmly but not rigidly. Start with moderate, steady pressure. As the buttercream flows out, keep the tip close to the surface initially. Once the star is the size you want, immediately release the pressure completely. As you release pressure, give the bag a quick, slight flick upwards to help the buttercream detach cleanly without pulling a tail.
Piping multiple stars in a row for a border requires consistent spacing and pressure for uniformity. Try practicing on parchment paper first, piping rows of stars until they are all roughly the same size and shape. This focus on pressure control is applicable to almost all easy buttercream piping techniques, making the star a great shape to master early on.
The Rosette Technique: Piping Elegant Rosettes
Rosettes are beautiful, swirling flower-like shapes created with a star tip. They add a touch of elegance to cupcakes and cakes and are surprisingly easy to pipe once you get the hang of the swirling motion. Rosettes are incredibly popular for cupcake decoration, often covering the entire top of the cupcake with a single, generous swirl. They can also be piped onto the sides or top of a cake as decorative elements.
To pipe a rosette, use a star tip (like a Wilton 1M or 2D). Hold the bag perpendicular to the surface. Start piping in the center of where you want the rosette. Maintaining steady pressure, pipe in a circular motion, spiraling outwards from the center. Once the swirl is the desired size, stop applying pressure and gently lift the bag away.
Easy Rosette Piping: Starting Point and Swirl Direction
The key to an easy rosette piping technique is the starting point and consistent swirl. Begin in the very middle of your intended rosette area. Apply pressure and immediately start moving the tip in a tight spiral outwards. You can swirl clockwise or counter-clockwise – choose one direction and stick with it for a consistent look. The pressure should remain constant throughout the swirl for an even thickness.
Practice piping rosettes of different sizes by varying how many times you circle outwards. A single circle creates a small, tight rosette, while two or three circles create a larger, more dramatic swirl. Mastering this technique is a fundamental part of any easy buttercream piping techniques tutorial focused on cupcake decoration.
The Shell Technique: Adding Delicate Borders
The shell technique is a classic border design often seen on the base or top edge of cakes. It uses a star tip to create overlapping shapes that resemble sea shells. This technique is excellent for finishing the edge of a cake, covering any imperfections where the cake meets the board, or adding a decorative frame around the top surface.
To pipe a shell border, hold the piping bag at about a 45-degree angle to the surface, with the tip slightly tilted down. Apply firm pressure to start the base of the shell, allowing a good amount of buttercream to build up. As you decrease pressure, pull the tip slightly downwards and towards you, creating a tail. Stop pressure completely as you finish the tail, then lift the bag away. The next shell will overlap the tail of the previous one.
Creating Buttercream Shells: Angle and Pressure Application
The angle of the bag and the control of pressure are paramount for creating consistent buttercream shells. Keep the 45-degree angle steady. Start with firm, steady pressure to create the wide head of the shell. Gradually decrease the pressure as you pull the tip away, allowing the buttercream stream to taper into a smooth tail. The overlapping of the tails creates the characteristic look of the shell border.
Practice piping rows of shells on parchment paper, focusing on making each shell a similar size and shape, with consistent overlap. This easy buttercream piping technique requires a smooth transition from high to low pressure, so practice this motion until it feels natural.
The Dot Technique: Adding Texture with Dots
Piping simple dots might seem basic, but they are incredibly versatile. Dots can be used to fill in spaces, create patterns, add texture, or serve as small decorative accents. Using different sized round tips allows you to create dots ranging from tiny beads to large spheres. They are also useful for writing on cakes (using a very small round tip).
To pipe a dot, hold the piping bag perpendicular to the surface (90-degree angle). Apply gentle, steady pressure. As the dot reaches the desired size, stop applying pressure completely before lifting the bag straight up. This clean stop and lift helps prevent a peak or tail on the dot.
Piping Buttercream Dots: Spacing and Consistency
Consistency in pressure and spacing is key when piping multiple dots for a pattern or texture. For a uniform look, try to apply the same amount of pressure for the same duration for each dot. If piping a pattern, mark out your spacing lightly on the cake surface first as a guide.
Piping dots is perhaps the most straightforward of the easy buttercream piping techniques, making it an excellent starting point for beginners to practice pressure control and lifting the bag cleanly. You can practice piping rows or grids of dots on parchment paper until they are uniform in size and shape.
Practicing Your Piping Skills: Beginner Projects
Once you've practiced the individual techniques on parchment paper, it's time to apply your easy buttercream piping techniques to real baked goods! Starting with simple projects builds confidence and gives you tangible results to admire (and eat!). Cupcakes and small cakes are ideal for these initial practice sessions.
Don't aim for perfection on your first decorated cake. The goal is to get comfortable holding the bag, applying pressure, and executing the basic movements on an actual surface. Have fun with it! Piping is a creative process, and even slightly imperfect designs can look charmingly homemade.
Decorating Cupcakes: Simple Swirls and Stars
Cupcakes are the perfect canvas for practicing easy buttercream piping techniques. A classic cupcake decoration involves piping a single, generous swirl using a large star tip (like Wilton 1M). Hold the bag perpendicular to the center of the cupcake and pipe a spiral starting from the outside edge and moving inwards, or starting in the center and spiraling outwards.
Alternatively, you can pipe small stars all over the surface of the cupcake for a different texture. You can also pipe a smooth dome using a large round tip. Practicing on a dozen cupcakes allows for repetition and refinement of your technique. Try piping half with swirls and half with stars to compare results.
Adding Borders to Cakes: Shell and Rope Designs
Adding a border is a great way to finish a cake professionally. The shell border, as discussed earlier, is a fundamental technique. Practice piping a continuous shell border around the base of a small cake or even just on a cake board covered in parchment paper. Focus on consistent size and overlap.
Another popular border using easy buttercream piping techniques is the rope border. This uses a round tip (or sometimes a star tip for a textured rope) and involves piping overlapping loops that resemble a twisted rope. It's slightly more complex than the shell but very effective. Start with the shell border first, as it's one of the most accessible easy buttercream piping techniques for borders.
Creating Simple Buttercream Flowers: Daisies and Rosettes
While detailed buttercream flowers can be complex, you can create simple flower shapes using basic piping techniques. Rosettes, as covered earlier, are essentially a type of simple flower. You can pipe several rosettes together to create a cluster of flowers on a cake.
Another simple flower is a basic daisy. Using a small round tip (like Wilton #5 or #7) and white or yellow buttercream, pipe a small dot for the center. Then, using a petal tip (like Wilton #104) or even just a small round tip, pipe small, short strokes around the center dot to represent petals. This is a great way to introduce yourself to piping floral elements using easy buttercream piping techniques.
Troubleshooting Common Piping Issues
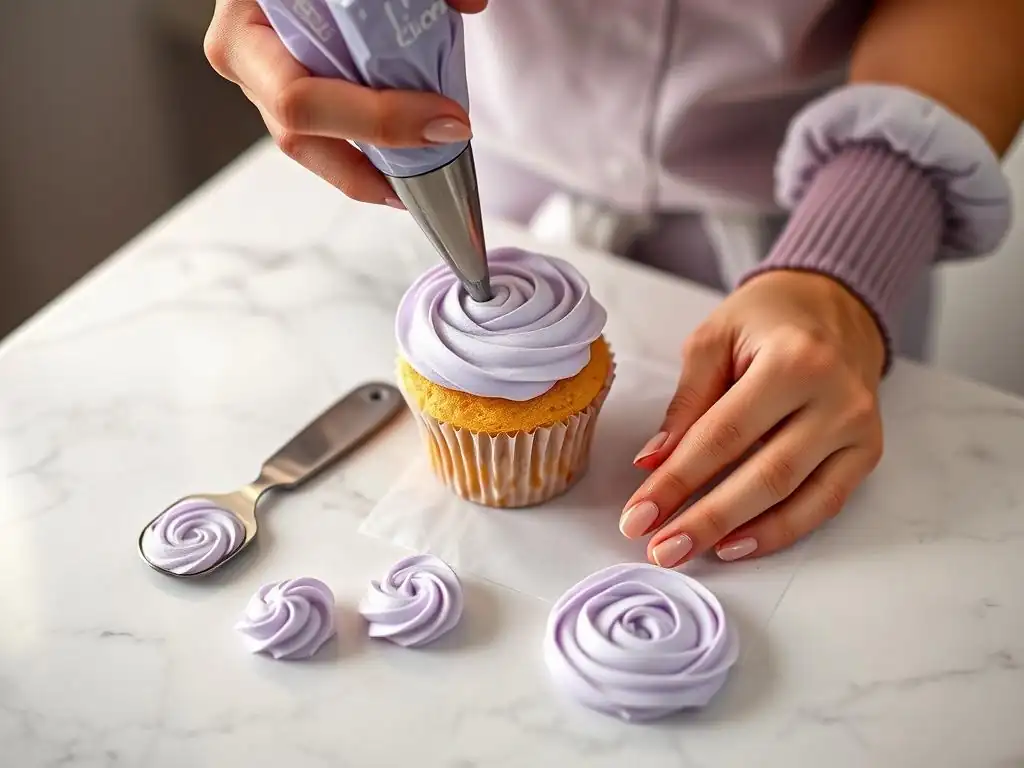
Even with the best easy buttercream piping techniques tutorial, you might encounter some challenges. Don't get discouraged! Many common issues are easily fixable with a few simple adjustments. Identifying the problem is the first step to finding the solution.
Keep in mind that environmental factors like room temperature can significantly impact your piping. If your hands are warm, they can heat the buttercream in the bag, making it too soft. Using a cold pack wrapped in a towel to hold the bag can sometimes help, or chilling the bag periodically in the fridge for a few minutes.
Buttercream Too Soft or Stiff: Adjusting with Powdered Sugar or Milk
If your buttercream is too soft and won't hold its shape when piped, the easiest fix is to add more sifted powdered sugar. Add it a tablespoon at a time, mixing thoroughly, until the consistency is firm enough to hold peaks. For example, if you have 3 cups of buttercream that's too soft, start by adding 2-3 tablespoons of powdered sugar and see if that helps.
If your buttercream is too stiff and hard to squeeze, or breaks when piping, it needs more liquid. Add milk, cream, or water, starting with just half a teaspoon. Mix well. Continue adding tiny amounts until the buttercream is smooth and pipes easily. For a 3-cup batch, you might only need 1-2 teaspoons total liquid. Remember to mix thoroughly after each addition to see the true consistency.
Piping Bag Leaking: Securing the Nozzle and Coupler
A leaking piping bag is usually due to the nozzle or coupler not being properly secured, or the end of the bag being cut too large. If using a coupler, ensure the ring is screwed on tightly, holding the nozzle firmly against the base inside the bag. If not using a coupler, make sure you've only snipped off just enough of the bag tip for the nozzle to poke through. The bag should fit snugly around the base of the nozzle.
If you've cut the bag too large for the nozzle, you can try inserting the bag into a second, smaller piping bag that is cut correctly for the nozzle. Alternatively, you'll need to switch to a larger nozzle or transfer the buttercream to a new bag. Always double-check that the bag is securely twisted closed at the top to prevent buttercream from squeezing out the wrong end.
Uneven Piping: Maintaining Consistent Pressure
Uneven piping – where lines or shapes are thicker in some spots and thinner in others – is almost always a result of inconsistent pressure on the piping bag. To achieve smooth, uniform piping, you need to apply steady, even pressure to the twisted end of the bag. Avoid squeezing harder and then letting up.
Practice applying pressure on parchment paper, trying to pipe lines or dots with consistent thickness. Pay attention to how much force you are using. It might help to hold the bag with your dominant hand providing the consistent squeeze, while your other hand simply guides the tip. Over time, your hand will develop the muscle memory needed for steady pressure, improving all your easy buttercream piping techniques.
Maintaining Your Piping Tools: Cleaning and Storage
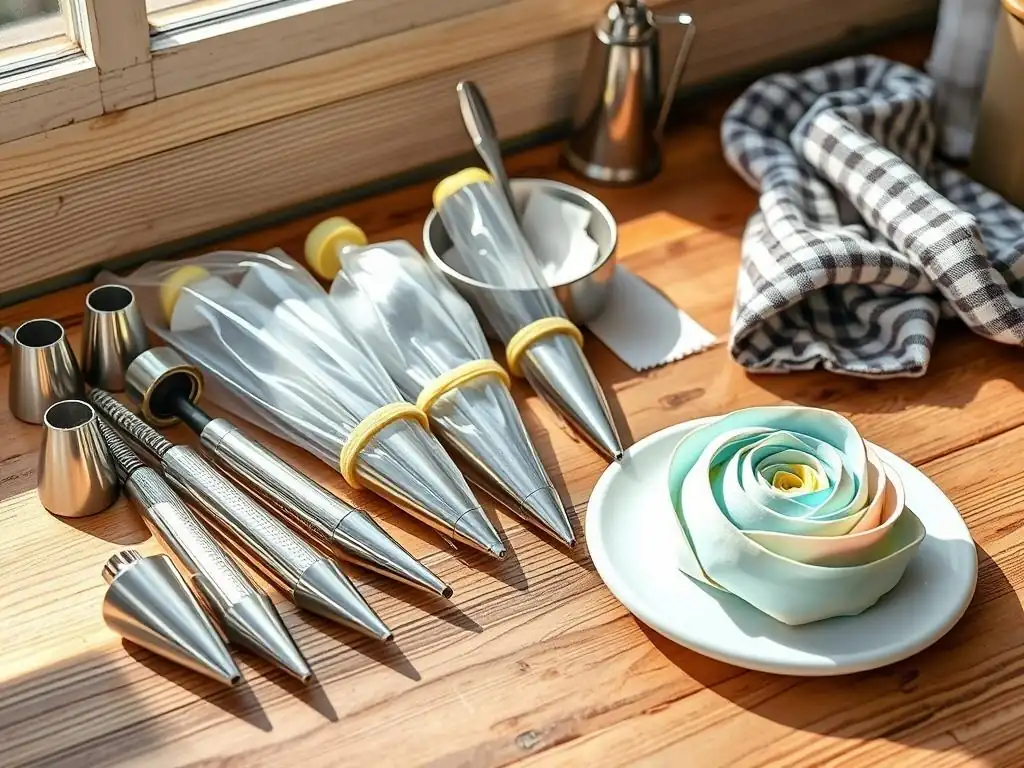
Properly cleaning and storing your piping tools is essential for hygiene and extending their lifespan. Buttercream, especially if it contains butter, can leave greasy residue that's difficult to remove if left to dry. Taking a few minutes to clean your tools immediately after use will make the process much easier and ensure they are ready for your next baking adventure.
Neglecting cleaning can lead to clogged nozzles and potentially harbor bacteria. Reusable bags can develop odors or stains if not cleaned and dried thoroughly. Treating your tools well is part of mastering the craft, ensuring your investment lasts and performs reliably.
Cleaning Piping Bags and Nozzles: Hot Water and Soap
The best way to clean piping bags and nozzles is immediately after use, before the buttercream hardens. Fill a bowl with hot, soapy water. Dismantle any couplers and drop all nozzles and coupler parts into the water. If using reusable bags, turn them inside out and add them to the bowl.
Allow the tools to soak for a few minutes to loosen any stuck-on buttercream. Use a small brush (like a bottle brush or even an old toothbrush) to scrub inside the nozzles and couplers, ensuring all buttercream is removed. For reusable bags, scrub both the inside and outside surfaces. Rinse everything thoroughly under hot running water until no soap residue remains.
Storing Piping Equipment Properly: Airtight Containers
Once your piping bags and nozzles are thoroughly clean, it's crucial to let them dry completely before storing them. Hang reusable bags upside down to air dry, or lay them flat on a clean towel. Ensure nozzles and couplers are completely dry inside and out. Storing damp equipment can lead to mold or mildew.
Store your dried piping equipment in a clean, airtight container or a designated drawer. This keeps them free from dust and organized. Many bakers use small plastic containers or tackle boxes with compartments to keep nozzles sorted by type or size. Storing reusable bags neatly prevents them from getting damaged or creased. Proper storage ensures your tools are clean, ready, and easy to find the next time you want to practice your easy buttercream piping techniques.
Expanding Your Skills: Introduction to Advanced Techniques
Mastering the basic easy buttercream piping techniques is a fantastic foundation, but the world of buttercream decoration is vast! Once you feel comfortable piping stars, rosettes, shells, and dots, you can start exploring more complex designs. This might include learning how to pipe different types of borders, such as the reverse shell or the basketweave pattern, which adds interesting texture and detail to cakes.
Further advanced techniques involve piping more intricate flowers, like roses, peonies, or chrysanthemums, often using specific flower tips and techniques like piping onto a flower nail. You can also learn techniques for writing with buttercream, creating elaborate patterns, or even piping 3D figures. Each new technique builds upon the fundamental skills of pressure control, angle, and movement learned in this easy buttercream piping techniques tutorial, opening up endless possibilities for decorating stunning baked creations.
Frequently Asked Questions
How do I choose the right piping tip for my buttercream design?
The right tip depends on the desired effect. Larger tips are great for covering large areas quickly, while smaller tips create intricate details. Experiment with different tips to find your preferred style!
What consistency should my buttercream be for easy piping?
Buttercream should be smooth and hold its shape without being too stiff or runny. A medium consistency is ideal – it should form peaks when lifted with a spatula but still be pliable enough to pipe easily.
What's the best way to fill a piping bag without making a mess?
Fold the top of the piping bag down to create a cuff. Place the bag in a tall glass and spoon the buttercream into the bag. Unfold the cuff, twist the bag closed, and you're ready to pipe! This helps avoid spills and keeps your hands clean.
How can I prevent air bubbles in my piped buttercream?
Burp the piping bag! Gently squeeze the bag to release any trapped air before you start piping. This ensures a smooth and consistent flow of buttercream.
What are some basic piping techniques for beginners to master?
Start with simple techniques like dots, stars, and swirls. Focus on consistent pressure and a steady hand to create neat and even designs. Practice makes perfect!
Final Reflection: Mastering the Art of Simple Piping
The ability to pipe buttercream flawlessly isn't just about creating visually stunning cakes; it's about unlocking a world of creative expression and elevating even the simplest bake to something truly special. This article explored fundamental piping techniques, demystifying what may seem initially daunting, and proving that anyone can achieve beautiful results with practice and the right tools. The ease with which these techniques can be mastered makes them accessible to both novice and experienced bakers alike, opening up a vast array of possibilities.
The impact of simple piping skills extends far beyond the kitchen. It's about the joy of creation, the satisfaction of transforming ordinary ingredients into extraordinary works of art, and the pride in sharing these creations with loved ones. The best things in life are homemade,
a sentiment perfectly captured by the simple act of adding a piped flourish to a cupcake or a carefully crafted rose to a layer cake. This seemingly small detail can significantly enhance the overall experience, transforming a simple treat into a cherished memory.
Now, it's your turn. Don't be intimidated by the seemingly intricate world of piping. Pick up a piping bag, choose your favorite frosting, and experiment! Start with the basic techniques outlined in this article, and let your creativity flow. Each swirl, each star, each perfectly formed rose is a step towards mastering a skill that will bring joy to you and those you share your creations with. Embrace the process, celebrate your progress, and most importantly, have fun!
Unleash Your Inner Piping Pro!
Thanks for taking the time to explore the world of piping with us! We hope you've gained the confidence to elevate your baking creations. Ready to put your newfound skills to the test?
- Master a new piping technique this week: Choose one of the techniques discussed and practice it on your next baking project. Even a simple cupcake can look extraordinary with a bit of piping flair!
- Share your piping masterpieces: Show us your creations on social media using #BakeWithEasePiping. We love seeing what you bake!
- Experiment with different piping tips and frosting consistency: Try a new tip or adjust your frosting recipe to achieve various textures and designs. This is where the real fun begins!
So, what delicious treat will you pipe first?