
Achieving Consistent Results with Whole Wheat Bread

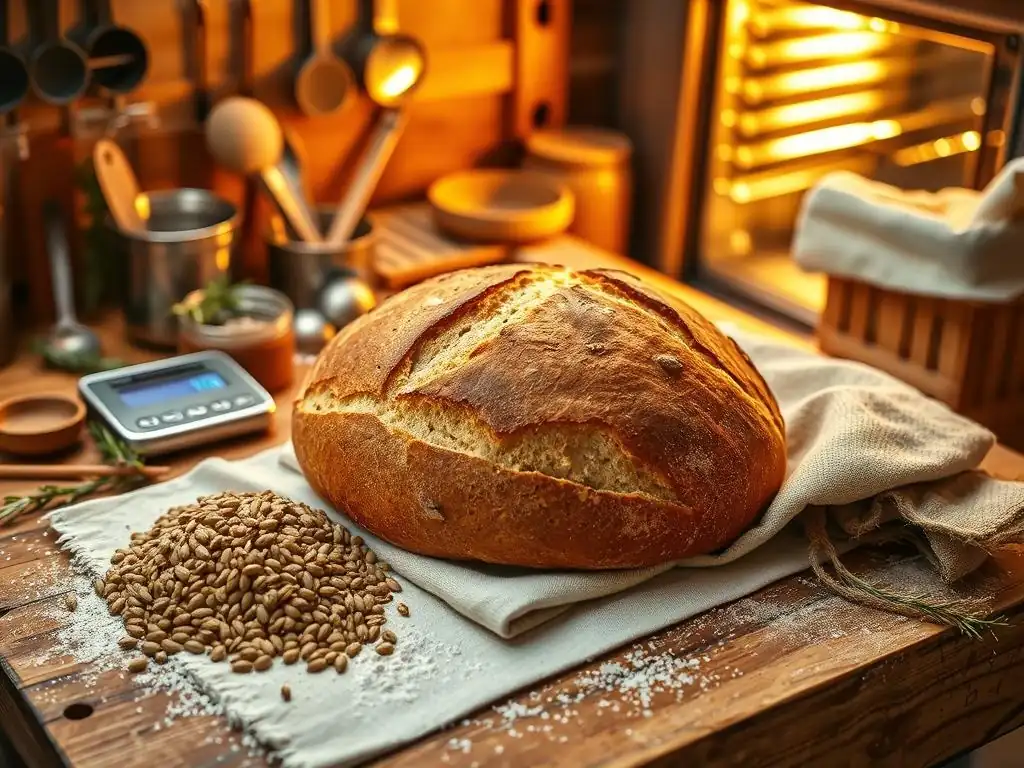
Welcome to BakeWithEase, your trusted guide to the delightful world of baking! Are you ready to unlock the secrets to consistently delicious whole wheat bread? We'll guide you through the essential techniques and tips that will transform your loaves from ordinary to extraordinary. Discover the key to achieving that perfect rise, texture, and flavor – the journey to baking mastery starts here!
- Achieving Consistent Results with Whole Wheat Bread: A BakeWithEase Guide
- Understanding the Fundamentals of Whole Wheat Bread Baking
-
Mastering the Whole Wheat Bread Baking Process: A Step-by-Step Approach
- Step 1: Activating the Yeast for Whole Wheat Bread
- Step 2: Combining Ingredients and Initial Mixing
- Step 3: Kneading Whole Wheat Dough for Optimal Gluten Development
- Step 4: The First Rise: Bulk Fermentation for Flavor
- Step 5: Shaping Your Whole Wheat Loaf
- Step 6: The Second Rise: Proofing Your Dough
- Step 7: Baking Your Whole Wheat Bread to Perfection
- Step 8: Cooling and Slicing for the Perfect Loaf
- Troubleshooting Common Whole Wheat Bread Baking Issues
- Tips and Tricks for Elevating Your Whole Wheat Bread
- Storing Your Homemade Whole Wheat Bread for Freshness
- Whole Wheat Bread Baking: Next Steps for the Aspiring Baker
-
Frequently Asked Questions
- What are the benefits of using whole wheat flour in bread baking?
- How can I achieve a lighter texture in whole wheat bread?
- What are some common mistakes when baking whole wheat bread?
- How can I ensure my whole wheat bread rises properly?
- Are there specific techniques for kneading whole wheat dough?
- Final Reflection: The Enduring Appeal of Perfect Whole Wheat Bread
- Unlock Your Inner Baker: Mastering Whole Wheat Bread
Achieving Consistent Results with Whole Wheat Bread: A BakeWithEase Guide
Understanding the Fundamentals of Whole Wheat Bread Baking
The Unique Challenges of Whole Wheat Flour in Bread Making
Baking with whole wheat flour presents a distinct set of challenges compared to using refined white flour. The primary difference lies in the composition of the flour itself. Whole wheat flour contains the entire grain kernel – the bran, germ, and endosperm – while white flour is milled only from the endosperm. The presence of the bran and germ, while adding significant nutritional value and flavor, interferes with gluten development. The sharp edges of the bran particles can cut the delicate gluten strands as they form during kneading, resulting in a weaker dough structure.
Furthermore, whole wheat flour tends to absorb more liquid than white flour, but it also releases that moisture more readily during baking and cooling. This can lead to loaves that are denser and potentially drier if not handled correctly. Achieving a light, airy crumb with a moist texture requires a different approach to hydration, kneading, and fermentation than you might be used to with all-purpose flour. Understanding these inherent properties is the first step toward successful whole wheat bread baking.
Key Ingredients for Successful Whole Wheat Bread
The quality and proportion of your ingredients are paramount when aiming for consistent results in whole wheat bread baking. Beyond the flour itself, yeast, water, and salt all play critical roles. Active dry or instant yeast is necessary to leaven the dough, creating the gas bubbles that give bread its volume and texture. The water hydrates the flour, dissolves the salt and sugar (if used), and activates the yeast; its temperature is crucial for yeast activity. Salt is vital for flavor, controlling the rate of fermentation, and strengthening the gluten structure.
Often, a small amount of sweetener like honey or molasses is included, which not only adds subtle flavor notes that complement whole wheat but also provides readily available food for the yeast, boosting fermentation. Fats like oil or butter can also be added to enrich the dough, improve tenderness, and extend the shelf life of the finished loaf. Paying attention to the quality and freshness of each ingredient, especially the yeast, will significantly impact your whole wheat bread baking success.
Selecting High-Quality Whole Wheat Flour
The type and quality of the whole wheat flour you choose can dramatically affect your whole wheat bread baking outcomes. Different varieties of wheat, such as hard red winter or hard white spring, yield flours with varying protein levels and characteristics. Hard wheats typically have higher protein content, often ranging from 13% to 14.5%, which is desirable for strong gluten development necessary for bread structure. Stone-ground whole wheat flour, which is milled using traditional stone mills, often retains more of the germ and bran and can have a coarser texture and stronger flavor than roller-milled varieties.
Look for flours that are labelled "whole wheat bread flour" if available, as these are often milled from high-protein hard wheat specifically for baking. The freshness of the flour also matters; whole wheat flour contains the germ, which is rich in oils and can go rancid more quickly than white flour. Storing whole wheat flour in a cool, dark place or even the refrigerator or freezer can help preserve its freshness and flavor, contributing to better results in your whole wheat bread baking projects.
The Role of Gluten Development in Whole Wheat Bread
Gluten, a protein network formed when glutenin and gliadin proteins in flour combine with water and are developed through mixing or kneading, is the backbone of bread structure. It traps the carbon dioxide gas produced by the yeast, allowing the dough to rise and giving the loaf its characteristic airy crumb. In whole wheat flour, the sharp particles of bran physically disrupt this network as it forms, making gluten development more challenging than with white flour.
Effective gluten development is crucial for a well-risen, less dense whole wheat loaf. Techniques like proper kneading (mechanical development) and the autolyse method (allowing flour and water to rest before adding other ingredients for enzymatic development) help build a stronger gluten structure despite the bran's interference. Without sufficient gluten development, the dough won't have the strength to hold its shape or trap gas effectively, leading to a heavy, compact loaf, a common pitfall in whole wheat bread baking.
Mastering the Whole Wheat Bread Baking Process: A Step-by-Step Approach
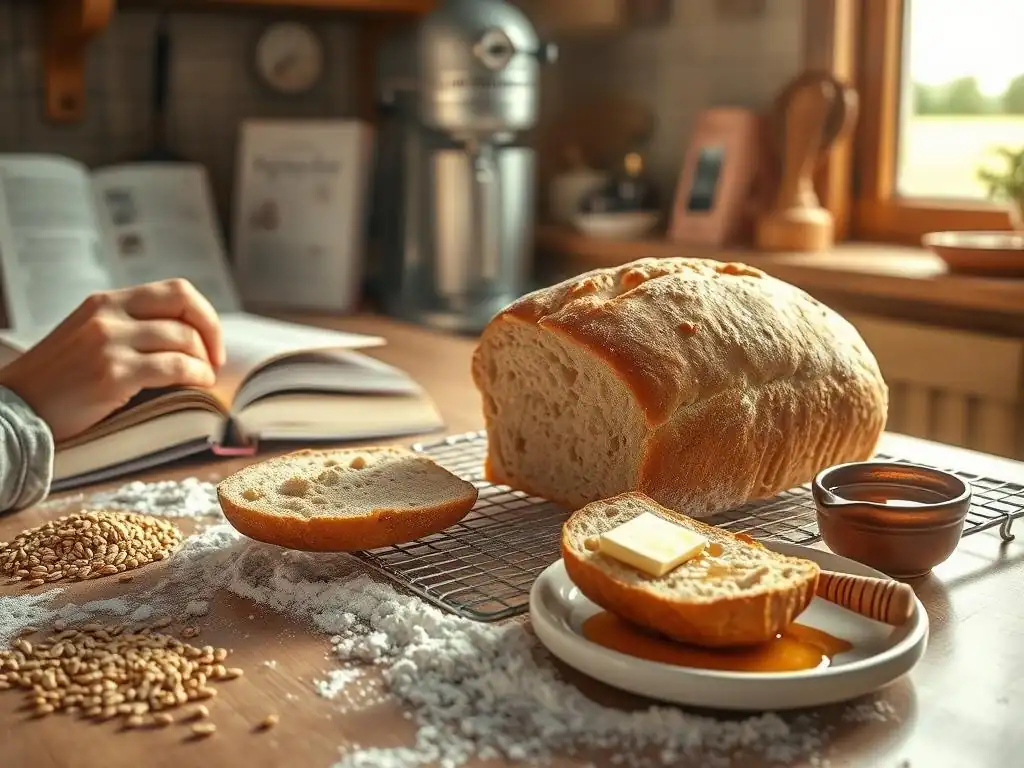
Step 1: Activating the Yeast for Whole Wheat Bread
The first step in many whole wheat bread baking recipes is activating your yeast, especially if you're using active dry yeast. This process, often called proofing, ensures your yeast is alive and active before you commit to mixing a large batch of dough.
Typically, you'll dissolve the yeast in warm water (usually between 105°F and 115°F, or 40°C and 46°C) along with a pinch of sugar or honey, which acts as food for the yeast. Within 5 to 10 minutes, the surface of the liquid should become foamy or bubbly, indicating that the yeast is active and ready to work its magic.
If your yeast mixture doesn't become foamy, it's possible the water was too hot or too cold, the yeast is old, or it was stored improperly. In this case, it's best to discard the mixture and start over with fresh yeast and correctly tempered water to avoid a flat, heavy loaf. Using instant yeast often bypasses this separate activation step, as it can be mixed directly with the dry ingredients, but proofing is still a good check for freshness, particularly if you're unsure about your yeast's viability for whole wheat bread baking.
Step 2: Combining Ingredients and Initial Mixing
Once your yeast is active (or if using instant yeast, combined with dry ingredients), the next step is to bring all your ingredients together. This typically involves mixing the activated yeast mixture (or water and yeast) with the flour, salt, and any other wet or dry ingredients specified in your recipe, such as sweetener, oil, or seeds.
Whole wheat flour absorbs liquid differently than white flour, often requiring higher hydration levels. A common hydration percentage for whole wheat bread can range from 70% to 80% (water weight relative to flour weight), sometimes even higher, to achieve a moist crumb and manageable dough.
The initial mixing stage, often called the "shaggy dough" stage, is where the ingredients are just combined until no dry pockets of flour remain. This can be done by hand with a spoon or spatula, or in a stand mixer on a low speed.
The dough will look rough and uneven at this point. Allowing the dough to rest for 15-30 minutes after this initial mix (an autolyse) can be particularly beneficial for whole wheat dough, allowing the flour to fully hydrate and enzymes to begin developing gluten before intensive kneading starts, making the subsequent kneading process more efficient for whole wheat bread baking.
Step 3: Kneading Whole Wheat Dough for Optimal Gluten Development
Kneading is the process that develops the gluten network, transforming a shaggy mass into an elastic, smooth dough capable of trapping gas and rising. For whole wheat dough, effective kneading is especially important to overcome the bran's interference with gluten strands.
The goal is to stretch and fold the dough repeatedly, aligning the gluten proteins and building strength. You'll know the dough is sufficiently kneaded when it becomes smooth, elastic, and passes the "windowpane test" – you can stretch a small piece thin enough to see light through it without tearing (though this test can be slightly harder to achieve perfectly with whole wheat due to the bran).
The time required for kneading varies depending on the method (hand vs. machine) and the hydration level. Hand kneading whole wheat dough can take 10-15 minutes or more, while using a stand mixer with a dough hook might take 8-12 minutes on medium speed (like speed 2 or 3). Over-kneading is possible but less common than under-kneading, especially with whole wheat. Proper kneading is a cornerstone of successful whole wheat bread baking, ensuring your loaf has the structure it needs to rise beautifully.
Techniques for Effective Whole Wheat Bread Kneading
Several techniques can be employed for effective whole wheat bread kneading. Hand kneading typically involves folding the dough onto itself, pressing down, and repeating, using a push-and-pull motion. The 'stretch and fold' method, where the dough is stretched out and folded over itself in the bowl every 20-30 minutes during the first rise, is also highly effective for developing gluten gently, especially for wetter whole wheat doughs. This intermittent kneading allows the gluten to relax between folds, making the process easier and the dough stronger.
Using a stand mixer with a dough hook is a less labor-intensive option. Start on a low speed to combine ingredients, then increase to a medium speed (often speed 2 or 3) for the main kneading. Observe the dough; it should eventually gather around the hook and pull away from the sides of the bowl, though wetter doughs might stick slightly at the bottom.
Monitoring the dough's temperature is also wise during machine kneading, as friction can heat it up; aim to keep the dough below 80°F (27°C) to avoid over-fermentation or harming the yeast. Consistent kneading technique is vital for reliable whole wheat bread baking results.
Step 4: The First Rise: Bulk Fermentation for Flavor
The first rise, or bulk fermentation, is a critical stage where the yeast actively ferments the sugars in the dough, producing carbon dioxide gas that makes the dough expand, and alcohol and organic acids that contribute significantly to the bread's flavor profile. This phase typically occurs after kneading and involves letting the dough rest in a warm, draft-free place until it has increased significantly in volume, often doubling in size. The length of bulk fermentation is influenced by temperature, yeast activity, and the dough's hydration.
During bulk fermentation, performing one or two "stretch and folds" about 30-60 minutes apart can further strengthen the gluten structure and equalize the temperature throughout the dough. For whole wheat bread, allowing sufficient time for bulk fermentation is key to developing complex flavors. Rushing this stage can result in a less flavorful loaf, while letting it go too long can lead to over-proofing issues later. Observing the dough's volume increase and using the poke test (indentation remains) helps determine readiness for the next step in your whole wheat bread baking journey.
Creating the Ideal Environment for Bulk Fermentation
Creating the right environment for bulk fermentation ensures consistent and predictable rising. Yeast is most active in temperatures ranging from 75°F to 80°F (24°C to 27°C). Placing the dough in a lightly oiled bowl, covered tightly with plastic wrap or a damp towel to prevent drying, in a warm spot like a turned-off oven with the light on, or on top of the refrigerator, can provide this ideal temperature range. Avoid placing the dough in direct sunlight or in an overly hot place, which can cause the yeast to over-activate and potentially exhaust itself too quickly.
The time required for bulk fermentation at room temperature is typically 1 to 2 hours, but this is just a guideline. It's more important to watch the dough than the clock; it should look visibly puffy and have increased in volume, roughly doubling. Colder temperatures will slow down fermentation, requiring longer rise times (e.g., 3-4 hours or more at 65°F/18°C), which can contribute to more complex flavors. Consistent temperature control during this phase is essential for reproducible results in whole wheat bread baking.
Step 5: Shaping Your Whole Wheat Loaf
After bulk fermentation, the dough needs to be gently deflated (often called "punching down," although a gentle folding is better for whole wheat) and shaped into its final form before the second rise. Shaping is crucial for creating tension on the surface of the dough, which helps the loaf hold its shape during proofing and baking and contributes to a good oven spring. It also distributes the gas bubbles more evenly throughout the dough. Avoid being too rough when handling the dough, as you don't want to completely degas it.
The specific shaping technique depends on the desired final loaf shape, whether it's a classic batard (oval), a round boule, or a loaf intended for a bread pan. The goal is always to create a smooth outer surface with tension underneath. For a pan loaf, you might gently flatten the dough into a rectangle, fold it into thirds like a letter, then roll it up tightly from one end.
For a boule or batard, folding and tucking the edges underneath creates surface tension. Proper shaping is a key skill in whole wheat bread baking, directly impacting the final appearance and crumb structure.
Different Shaping Techniques for Whole Wheat Bread
The art of shaping whole wheat bread dough involves manipulating the dough to build surface tension and create a desired form. For a round boule, gently flatten the dough, fold the edges into the center, flip it over, and then cup your hands around the dough, rotating it on a lightly floured surface to create a smooth, taut skin on top. This builds tension underneath.
For an oval batard, flatten the dough into a rough rectangle, fold the top edge down about two-thirds, press to seal, then fold the bottom edge up over the top fold, pressing to seal. Finally, roll the dough up from one end, creating a cylinder, and gently taper the ends.
For a standard pan loaf, flatten the dough into a rectangle approximately the width of your pan, fold it into thirds lengthwise, then roll it up tightly from one end and place it seam-side down in the greased pan. Practicing these techniques will improve the structure and rise of your whole wheat bread baking efforts.
Step 6: The Second Rise: Proofing Your Dough
The second rise, known as proofing or final fermentation, is when the shaped loaf undergoes its final expansion before baking. This typically occurs after shaping and involves placing the shaped dough in its final baking vessel (like a proofing basket, loaf pan, or directly on a baking sheet) and allowing it to rise again. During proofing, the yeast continues to produce gas, causing the loaf to increase in volume, though usually not quite double this time.
Proper proofing is essential for a well-risen, evenly textured loaf. Under-proofing will result in a dense loaf with poor oven spring, while over-proofing can cause the loaf to collapse in the oven or have a pale crust and gummy texture. The length of proofing depends heavily on temperature and dough activity, often taking 45-90 minutes at room temperature (around 70-75°F or 21-24°C). Covering the dough during proofing is important to prevent a dry skin from forming, which would inhibit oven spring in your whole wheat bread baking.
Determining When Your Whole Wheat Dough is Properly Proofed
Knowing when your whole wheat dough is perfectly proofed is crucial for achieving optimal oven spring and crumb structure. The most reliable method is the "poke test." Gently press your finger about half an inch deep into the side of the dough. If the indentation springs back immediately, the dough is under-proofed and needs more time. If the indentation remains completely without springing back at all, the dough is likely over-proofed.
A perfectly proofed whole wheat dough will show an indentation that springs back slowly and only partially, leaving a visible divot. The dough should look visibly puffy and feel light and airy. It's better to slightly under-proof whole wheat dough than to over-proof it, as under-proofed dough still has some energy left for oven spring, while severely over-proofed dough can collapse. Practice and observation are the best ways to learn the signs of correctly proofed dough for consistent whole wheat bread baking results.
Step 7: Baking Your Whole Wheat Bread to Perfection
Baking is the grand finale where heat transforms your proofed dough into a finished loaf. The initial heat of the oven causes a final burst of rising called "oven spring," as the trapped gases expand rapidly and the yeast gets a final push before dying off. As the temperature increases, the gluten network sets, the starches gelatinize, and the crust begins to brown through the Maillard reaction and caramelization, contributing flavor and texture.
Achieving a beautiful crust and fully cooked interior requires the correct oven temperature and baking time. Many whole wheat bread recipes call for baking at relatively high temperatures initially (e.g., 400-425°F or 200-220°C) for the first 15-20 minutes to maximize oven spring, then potentially reducing the temperature slightly to ensure the interior cooks through without the crust burning.
Using steam during the initial baking phase (by placing a tray of water in the oven or using a Dutch oven) can help keep the crust soft initially, allowing for better expansion before it sets. Proper baking is the culmination of successful whole wheat bread baking steps.
Oven Temperature and Baking Time Considerations
Oven temperature and baking time are critical variables in whole wheat bread baking. A common approach is to preheat your oven thoroughly, often to 400-425°F (200-220°C). The high initial heat helps the loaf achieve maximum oven spring. For a standard 1.5-pound loaf baked in a pan, the total baking time might range from 35 to 50 minutes, depending on the oven and the recipe.
To ensure the loaf is fully baked, check its internal temperature with an instant-read thermometer; it should register between 200°F and 210°F (93°C and 99°C). Another indicator is the sound the crust makes when tapped on the bottom – it should sound hollow. If the crust is browning too quickly before the interior is cooked, you can loosely tent the loaf with foil for the remainder of the baking time. Precise temperature control and timing are vital for consistent whole wheat bread baking results.
Step 8: Cooling and Slicing for the Perfect Loaf
Once your whole wheat bread is baked to a beautiful golden brown and registers the correct internal temperature, the process isn't quite finished. Cooling the loaf properly is just as important as the baking itself. As the bread cools, residual heat continues to cook the interior, moisture redistributes throughout the crumb, and the structure sets fully. Slicing into a hot loaf can result in a gummy, doughy texture because the starches haven't finished their transformation and the moisture hasn't settled.
Transfer the hot loaf immediately to a wire rack to allow air circulation around all sides. This prevents the bottom crust from becoming soggy as it cools. Allow the bread to cool completely, which can take anywhere from 1 to 3 hours depending on the size of the loaf. While it's tempting to slice in right away to enjoy that fresh-baked aroma, patience here will reward you with the best possible texture and flavor from your whole wheat bread baking efforts.
Troubleshooting Common Whole Wheat Bread Baking Issues
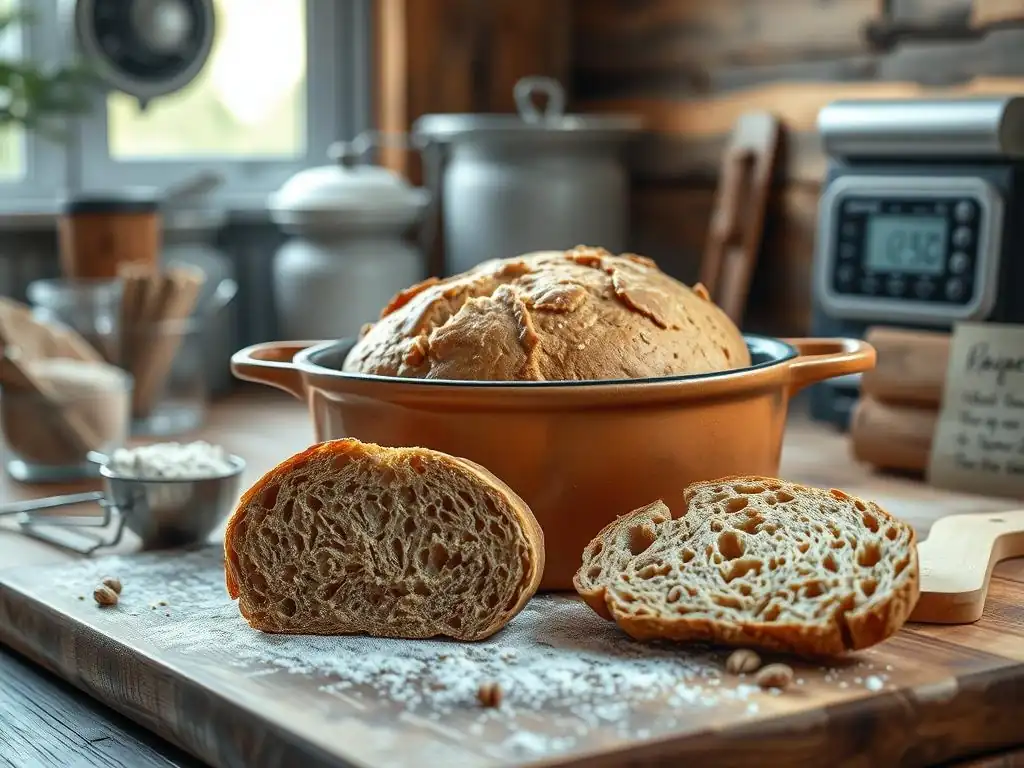
Dense and Heavy Whole Wheat Bread: Causes and Solutions
A common frustration in whole wheat bread baking is ending up with a loaf that is dense and heavy instead of light and airy. This is often caused by insufficient gluten development. Because bran interferes with gluten, whole wheat dough requires thorough kneading to build a strong structure capable of holding gas. Under-kneading means the gluten network isn't strong enough to support the rise, leading to a compact crumb. Ensure you are kneading for the full recommended time or using techniques like autolyse or stretch and folds to aid development.
Another frequent culprit is under-proofing. If the dough hasn't had enough time to ferment and expand sufficiently during the first or second rise, it won't achieve its full potential volume. Check the dough's readiness using the poke test and allow more time if needed, ensuring a warm enough environment (75-80°F is ideal). Insufficient hydration can also contribute; whole wheat flour needs plenty of water. Try increasing the hydration slightly in your next batch, perhaps by 5-10% relative to the flour weight, to see if it improves the texture of your whole wheat bread baking.
Dry and Crumbly Whole Wheat Bread: Tips to Improve Texture
Dry and crumbly whole wheat bread is another disappointing outcome that can be addressed. This texture issue is often linked to insufficient dough hydration. Whole wheat flour is very thirsty and needs more liquid than white flour to hydrate properly. If the dough is too dry initially, the resulting bread will likely be dry and crumbly. Ensure your recipe's hydration is adequate, potentially starting at 75% hydration for a standard whole wheat loaf and adjusting up to 80% or more for a moister result.
Over-baking can also dry out the loaf. Baking at too high a temperature for too long strips moisture from the bread. Make sure you are baking until the internal temperature reaches 200-210°F (93-99°C) but not significantly beyond that. Using an accurate oven thermometer is crucial, as oven temperatures can vary. Lastly, poor gluten development can contribute to a crumbly texture as the structure isn't strong enough to hold together well; revisit your kneading technique to ensure the gluten is properly developed for better whole wheat bread baking texture.
Over-Proofed or Under-Proofed Whole Wheat Dough: How to Adjust
Getting the proofing just right is a delicate balance in whole wheat bread baking. Under-proofed dough hasn't expanded enough during the final rise. When baked, it will often experience a large, uncontrolled burst of oven spring, potentially cracking severely on the sides, and the interior crumb can be dense, especially towards the bottom. If you suspect dough is under-proofed, allow it more time in a warm spot, monitoring closely with the poke test.
Over-proofed dough has expanded too much and the gluten structure has become weak and stretched too thin. It may look very puffy but can collapse when moved or slashed. In the oven, it will have little to no oven spring and may result in a pale crust and a gummy, uneven crumb.
If dough is slightly over-proofed, you might try baking it immediately at a slightly higher initial temperature. If significantly over-proofed, it's difficult to fully salvage, but it can sometimes be gently reshaped (though this will degas it significantly) and given a much shorter second proof, or repurposed into flatbreads or focaccia. Learning to recognize the signs of proper proofing is key to consistent whole wheat bread baking.
Tips and Tricks for Elevating Your Whole Wheat Bread
Enhancing Flavor with Add-Ins and Seeds
Adding ingredients beyond the basic flour, water, yeast, and salt can significantly enhance the flavor and texture of your whole wheat bread. Toasted nuts like walnuts or pecans, seeds such as sunflower, sesame, or flax seeds, and dried fruits like cranberries or raisins pair wonderfully with the nutty, earthy flavor of whole wheat. Incorporate these during the final stages of mixing or kneading, after the gluten has begun to develop, to ensure they are evenly distributed without interfering with gluten formation too early.
Spices like cinnamon, nutmeg, or cardamom, as well as herbs like rosemary or thyme, can also add aromatic complexity. For a savory twist, try adding roasted garlic, olives, or cheese. A common addition for enhancing whole wheat flavor is a tangzhong or yudane (a cooked flour paste), which adds incredible moisture and tenderness, or incorporating a portion of prefermented flour like a poolish or biga, which contributes depth of flavor through longer fermentation. Experimenting with these additions opens up a world of possibilities in whole wheat bread baking.
Improving Texture with Dough Hydration Techniques
Managing hydration is crucial for achieving a moist, tender crumb in whole wheat bread, given its tendency to be dry. Simply increasing the water percentage relative to the flour weight (aiming for 75-85% hydration) is a primary method, though working with wetter dough requires practice. Techniques like the autolyse method, where flour and water are mixed and rested for 20-60 minutes before adding salt and yeast, allow the flour to fully hydrate and enzymes to start gluten development, resulting in a more extensible dough that's easier to knead and yields a better texture.
Another highly effective technique is using a tangzhong (Japanese) or yudane (Chinese). This involves cooking a small portion of the flour with water or milk to create a thick paste before adding it to the main dough. This gelatinizes the starches, allowing the flour to hold significantly more moisture throughout the baking process. Breads made with a tangzhong are known for their incredibly soft, moist, and tender crumb that stays fresh longer. Incorporating these hydration techniques can truly elevate your whole wheat bread baking results.
Long Fermentation for Deeper Flavor Development in Whole Wheat Bread
Allowing your whole wheat bread dough to ferment for an extended period, especially in a cool environment like the refrigerator, is a fantastic way to develop complex flavors. While a standard room temperature bulk fermentation might take 1-2 hours, a cold fermentation can last anywhere from 12 to 48 hours or even longer. During this slow, cool rise, enzymes break down starches into sugars, and yeast and lactic acid bacteria (naturally present on flour, even without a sourdough starter) produce organic acids.
These acids contribute a pleasant tang and depth of flavor that cannot be achieved with a quick, warm fermentation. Cold fermentation also strengthens the gluten structure over time without intensive kneading, making the dough easier to handle and shape. Proofing the shaped loaf in the refrigerator overnight (cold proofing) is a common practice that allows for convenient baking the next day and contributes to improved flavor and texture, making it a valuable technique for enhancing your whole wheat bread baking.
Storing Your Homemade Whole Wheat Bread for Freshness
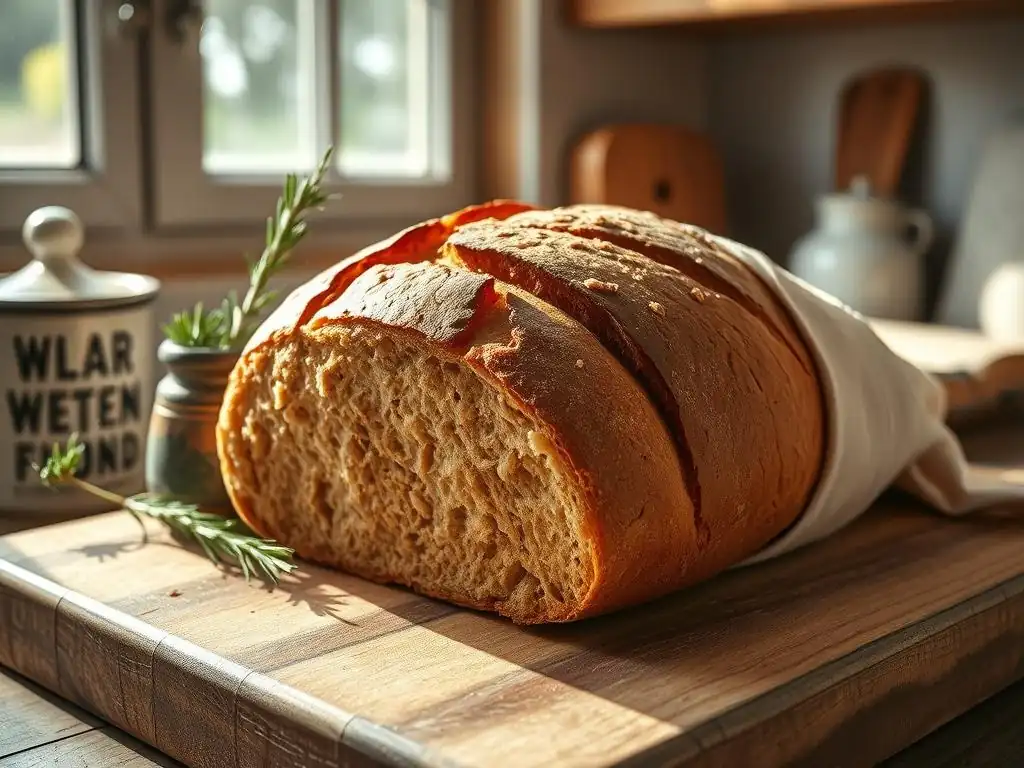
Proper Storage Methods to Extend Shelf Life
Proper storage is key to keeping your homemade whole wheat bread fresh and delicious for as long as possible. Once the loaf has cooled completely on a wire rack (this is critical! ), store it at room temperature. A simple paper bag is excellent for storing bread that will be eaten within a day or two, as it allows the crust to remain crisp. For slightly longer storage (3-5 days), a bread box or a linen bread bag provides a good balance of air circulation and moisture retention.
Avoid storing whole wheat bread in the refrigerator, especially for extended periods. While it might seem counterintuitive, refrigeration actually causes bread to stale faster through a process called retrogradation of starches. If you need to store it for more than a few days, freezing is a much better option. Always ensure the bread is fully cooled before storing it in any container or bag to prevent condensation, which can make the crust soggy and encourage mold growth, impacting your whole wheat bread baking enjoyment.
Freezing Whole Wheat Bread for Later Enjoyment
Freezing is the best way to preserve the quality of your homemade whole wheat bread for longer-term storage, allowing you to enjoy your baking efforts weeks or months down the line. Ensure the bread is completely cooled before freezing. You can freeze a whole loaf, half a loaf, or slice the entire loaf before freezing. Slicing beforehand is convenient as you can thaw only the amount you need.
To freeze, wrap the bread tightly to prevent freezer burn. Start with a layer of plastic wrap, ensuring full coverage with no gaps. Then, add a layer of aluminum foil or place the wrapped loaf in a freezer-safe zip-top bag, pressing out as much air as possible.
Properly wrapped whole wheat bread can be stored in the freezer for up to 3 to 6 months. To thaw, simply leave the loaf or slices wrapped at room temperature for a few hours, or pop slices directly into a toaster. Freezing is an excellent strategy for managing your yield from whole wheat bread baking.
Whole Wheat Bread Baking: Next Steps for the Aspiring Baker
Experimenting with Different Whole Wheat Flour Varieties
Once you've gained confidence with a basic whole wheat bread recipe, exploring different varieties of whole wheat flour can open up new dimensions in flavor and texture. Hard red winter wheat is the most common type used for whole wheat flour, providing a robust flavor and good gluten potential. Hard white spring wheat yields a milder, slightly sweeter flour with high protein, often resulting in a lighter colored crumb and less assertive flavor, which some bakers prefer.
Beyond common wheat, ancient grains milled into whole grain flours offer unique characteristics. Spelt, an ancient relative of wheat, has a slightly nutty, sweet flavor and a more delicate gluten structure. Kamut (Khorasan wheat) has a rich, buttery flavor and is also high in protein. Einkorn is another ancient grain with a simpler genetic structure and unique baking properties. Substituting a portion of your regular whole wheat flour with one of these varieties (start with 25-50%) can introduce exciting new flavors and textures to your whole wheat bread baking repertoire.
Incorporating Sourdough into Whole Wheat Bread Baking
For those looking to deepen the flavor and explore natural leavening, incorporating sourdough into whole wheat bread baking is a rewarding next step. Sourdough relies on a live culture of wild yeast and lactic acid bacteria (a sourdough starter) instead of commercial yeast. This natural leavening process produces organic acids that contribute a characteristic tangy flavor, enhance the keeping quality of the bread, and can improve the digestibility of whole grains.
Using a sourdough starter in whole wheat bread requires understanding fermentation times and starter activity, which differ from commercial yeast. Sourdough whole wheat loaves often undergo longer fermentation periods, including extended bulk fermentation and cold proofing, which further develops complex flavors. The strong gluten structure achievable with whole wheat flour works well with the slow, steady rise provided by sourdough. Combining whole wheat bread baking with sourdough techniques allows for incredibly flavorful and nutritious loaves.
Frequently Asked Questions
What are the benefits of using whole wheat flour in bread baking?
Using whole wheat flour adds nutritional value to your bread, providing more fiber, vitamins, and minerals compared to all-purpose flour. It also enhances the flavor and texture of your bread.
How can I achieve a lighter texture in whole wheat bread?
To achieve a lighter texture, consider adding vital wheat gluten to your whole wheat flour. This helps to improve the structure and rise of the bread, making it less dense.
What are some common mistakes when baking whole wheat bread?
Common mistakes include using too much whole wheat flour without adjusting the liquid, not allowing adequate kneading time, or skipping the proofing stage, which can lead to denser loaves.
How can I ensure my whole wheat bread rises properly?
To ensure proper rising, use fresh yeast, allow enough time for proofing, and maintain an optimal temperature during fermentation. Adding a bit of honey can also help feed the yeast.
Are there specific techniques for kneading whole wheat dough?
Yes, kneading whole wheat dough requires a bit more patience and can take longer. Use the stretch and fold technique, and make sure the dough remains hydrated to improve elasticity and rise.
Final Reflection: The Enduring Appeal of Perfect Whole Wheat Bread
The quest for consistently perfect whole wheat bread is more than just a culinary pursuit; it's a reflection of our desire for control, craftsmanship, and connection to the simple things. In a world of fast food and processed ingredients, the act of baking your own whole wheat loaf represents a powerful statement about mindful consumption and the satisfaction derived from creating something beautiful and nourishing from scratch. This article explored the nuances of achieving that perfect texture and flavor, from selecting the right flour to mastering the art of kneading and proofing.
The journey of perfecting whole wheat bread baking is a deeply personal one. It's about embracing imperfection, learning from each failed attempt, and celebrating the triumphs, however small. The best bread is made with love,
a wise baker once told me, and I believe it wholeheartedly. This isn't just about following a recipe; it's about understanding the science behind the process, the interplay of ingredients, and the subtle shifts in texture and taste that come with each experiment. The ongoing influence of this craft extends beyond the kitchen; it fosters patience, attention to detail, and a deep appreciation for the simple pleasures in life.
Now, I invite you to take what you've learned and apply it to your own baking journey. Don't be afraid to experiment, to deviate from the recipe, to embrace the inevitable imperfections. Each loaf, whether a triumph or a learning experience, is a step closer to mastering your own unique style of whole wheat bread baking.
The reward isn't just a delicious loaf; it's the satisfaction of creating something truly special, something made with your own two hands, and the joy of sharing that creation with those you love. So, gather your ingredients, preheat your oven, and embark on your own delicious adventure.
Unlock Your Inner Baker: Mastering Whole Wheat Bread
Thanks for joining us on this journey to perfect whole wheat bread! We hope you’ve gained valuable insights and feel more confident in your baking abilities. Now it's time to put your new knowledge into action.
- Bake your best loaf yet! Try the recipe variations we discussed, tweaking ingredients to your taste. Note your changes and results for future reference.
- Share your baking success (or challenges!). Let us know how it goes in the comments below – we love hearing from our baking community.
- Explore our other bread recipes to expand your baking repertoire! Who knows, you might discover your next favorite recipe.
Ready to transform your baking routine? What's the first step you'll take to elevate your whole wheat bread game?