
The Magic of Lamination: Creating Hundreds of Flaky Layers

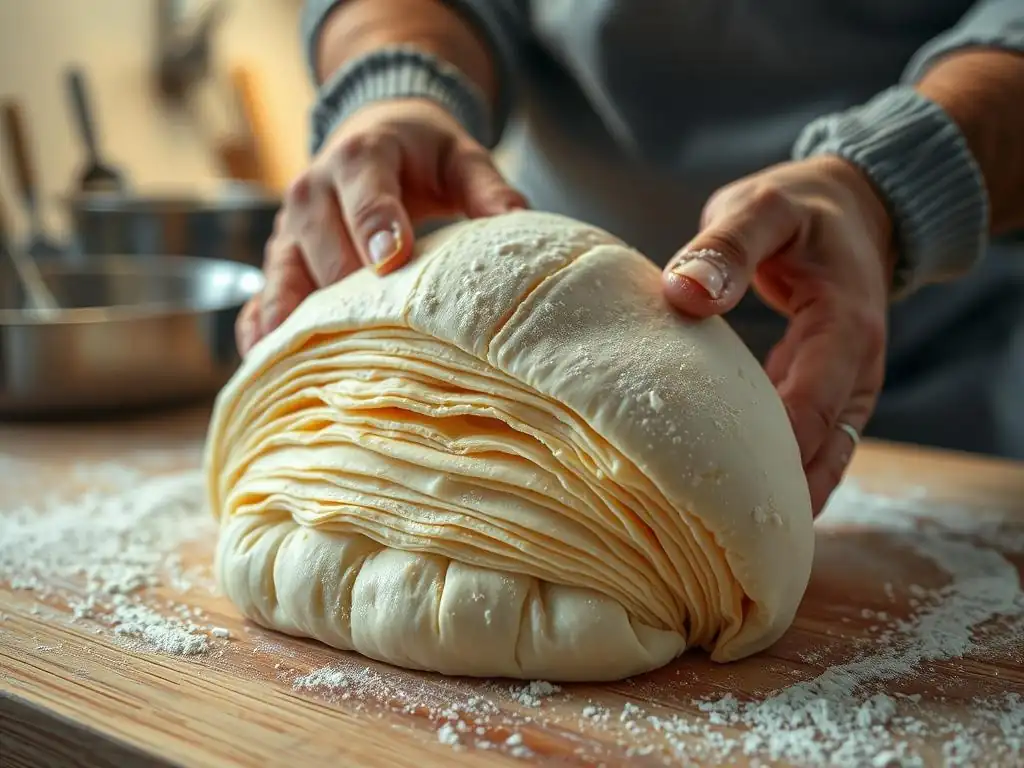
Welcome to BakeWithEase, your haven for baking mastery! Ever wondered how to create those unbelievably delicate, shatteringly crisp pastries that seem to defy gravity? This article dives deep into the secrets of flaky pastry lamination techniques, revealing the methods behind achieving hundreds of perfect, buttery layers. Prepare to unlock the magic and elevate your baking to a whole new level – the journey to pastry perfection starts here!
- The Magic of Lamination: Creating Hundreds of Flaky Layers for Perfect Pastries
- Understanding Flaky Pastry Lamination Techniques: An Introduction
- The Science Behind Flaky Layers: Butter and Dough Dynamics
- Step-by-Step Guide to Flaky Pastry Lamination: The Classic Method
- Advanced Lamination Techniques for Enhanced Flakiness
- Troubleshooting Common Lamination Problems
- Perfecting Your Puff Pastry: Baking and Storage Tips
- Flaky Pastry Lamination: Recipe Ideas and Applications
- Conclusion: Elevating Your Baking with Flaky Pastry Lamination Techniques
-
Frequently Asked Questions
- What is lamination in baking, and why is it important for flaky pastries?
- What type of fat is best for achieving optimal lamination in pastry dough?
- What are some common mistakes to avoid when laminating dough?
- How many folds are typically required to achieve a good lamination for flaky pastries?
- Can I use a stand mixer to make laminated dough, or is it best to do it by hand?
- Final Reflection: The Enduring Allure of Flaky Perfection
- Unleash Your Inner Pastry Chef: Master Flaky Layers Today!
The Magic of Lamination: Creating Hundreds of Flaky Layers for Perfect Pastries
Understanding Flaky Pastry Lamination Techniques: An Introduction
What is Lamination in Baking? The Secret to Flaky Layers
Lamination in baking is a technique that involves repeatedly folding and rolling a dough with a layer of butter or other fat sandwiched inside. This process creates alternating layers of dough and fat. As the pastry bakes, the fat melts, and the water in the fat and dough turns to steam, which forces the layers apart. This separation is what produces the characteristic light, airy, and incredibly flaky texture found in pastries like croissants, puff pastry, and danishes. It's a fundamental skill for anyone looking to elevate their baking from simple cookies to complex, layered delights.
The core principle relies on building multiple thin sheets of dough separated by equally thin sheets of fat. Think of it like a deck of cards, but instead of just cards, you have dough, butter, dough, butter, and so on. A typical puff pastry might undergo several "turns," which are cycles of rolling and folding.
A common method, like a six-turn process using a simple tri-fold, results in a remarkable number of layers: starting with roughly 3 layers (dough/butter/dough), after the first fold you have 9, after the second 27, third 81, fourth 243, fifth 729, and after the sixth turn, you've created 2187 individual layers of dough and butter! This intricate structure is the secret behind truly spectacular flaky pastry.
Why Lamination is Essential for Puff Pastry Success
Without proper lamination, puff pastry simply wouldn't puff. The fat acts as a barrier, preventing the gluten networks in the dough layers from sticking together during baking. When the pastry hits the hot oven, the sudden heat causes the moisture within the butter and dough to flash into steam. Trapped between the fat layers, this steam expands dramatically, pushing the delicate dough layers upwards and outwards. This rapid expansion is what gives puff pastry its incredible volume and delicate, shatteringly crisp texture.
Moreover, effective flaky pastry lamination techniques ensure even lift and texture throughout the finished product. If the butter isn't evenly distributed or the layers are inconsistent, you'll end up with dense, heavy spots or areas where the pastry doesn't rise properly. Mastering the lamination process is therefore crucial for achieving the desired height, crispness, and that signature melt-in-your-mouth flakiness that defines great puff pastry. It transforms a simple dough and butter into a marvel of baking physics.
BakeWithEase's Guide to Mastering Lamination for Intermediate Bakers
For intermediate bakers, mastering lamination is a rewarding step that unlocks a world of new recipes. Our approach focuses on understanding why each step is important, from controlling dough temperature to perfecting your folding technique. We emphasize patience and precision, as rushing the process or letting ingredients get too warm are common pitfalls. This guide provides a structured path to confidently creating beautiful, flaky pastries right in your own kitchen.
We'll walk you through the classic methods, explain the science, and offer practical tips to troubleshoot common issues. You'll learn how to handle the dough and butter at the correct temperatures, execute precise folds, and achieve the ideal thickness during rolling. By focusing on these fundamental flaky pastry lamination techniques, you'll build the skills needed to tackle everything from basic puff pastry sheets to intricate croissants and danishes, turning simple ingredients into stunning results.
The Science Behind Flaky Layers: Butter and Dough Dynamics
The Role of Cold Butter in Achieving Flaky Texture
Cold butter is arguably the most critical component in successful flaky pastry lamination techniques. When you incorporate cold, solid butter into the dough and laminate it, the butter remains in distinct pockets or layers between the dough. As the pastry bakes, this cold butter melts relatively slowly compared to softer or warmer butter. The key is that it melts after the dough layers have had a chance to set slightly.
As the butter melts, the water content within it (typically around 15-20%) turns into superheated steam. Because the steam is trapped between the impervious layers left by the melted fat, it forces the dough layers apart, creating lift. If the butter is too warm or soft during lamination, it can blend too readily with the dough, losing its ability to create distinct layers. This results in a more bread-like or cake-like texture rather than the desired flakiness, proving that the state of the butter is paramount to achieving those hundreds of delicate layers.
Gluten Development and its Impact on Lamination
Gluten, the protein network formed when flour is mixed with water and kneaded, plays a dual role in flaky pastry lamination. You need enough gluten development to create a dough that is elastic and strong enough to be rolled thinly without tearing. A dough that is too weak will break apart during the repeated rolling and folding, ruining the layers. However, you don't want too much gluten development, as this can make the dough tough and resistant to rolling, causing it to spring back excessively and making it difficult to create those thin, even layers.
Controlling gluten development is achieved through careful mixing (often just until combined), using lower-protein flour (like pastry flour or all-purpose), and crucially, resting the dough frequently between turns. Resting allows the gluten strands to relax, making the dough more pliable and easier to roll. Keeping the dough cold also slows down gluten development. Finding the right balance – a dough that is extensible but not overly elastic – is vital for successful flaky pastry lamination techniques.
Water Content and Steam: Key Factors in Puff Pastry
The water content in both the dough and the butter is the engine that drives the puff in puff pastry. As mentioned, the water turns to steam at high temperatures, creating the pressure needed to separate the layers. The amount of water in your ingredients directly impacts how much steam is generated and thus how much your pastry will rise. Standard butter contains about 15-20% water, while the dough itself will have water added during mixing, usually contributing another significant percentage to the overall moisture.
The rapid transition of water to steam requires high oven temperatures, typically between 400°F and 425°F (200°C to 220°C). This initial blast of heat ensures the steam is produced quickly and vigorously before the fat has completely melted and been absorbed. The trapped steam expands by a factor of roughly 1,600 times its liquid volume, providing immense lifting power. Managing the water content and ensuring a hot, steamy environment within the baking pastry are fundamental to achieving maximum lift and the signature flaky texture associated with expert flaky pastry lamination techniques.
Step-by-Step Guide to Flaky Pastry Lamination: The Classic Method
Preparing the Dough: Ingredients and Initial Mixing
The foundation of flaky pastry lamination is a well-prepared dough. Typically, this involves flour (often a mix of all-purpose and sometimes a bit of cake flour for tenderness), cold water, a pinch of salt, and sometimes a small amount of butter or shortening cut into the flour initially. The key is to keep everything very cold. The flour, water, and even your mixing bowl can be chilled before you begin.
Mix the ingredients minimally, just until they come together into a shaggy dough. Unlike bread dough, you are not aiming for significant gluten development at this stage. Overmixing will make the dough tough and difficult to roll later. Once the dough is formed, flatten it into a rough rectangle, wrap it tightly in plastic wrap, and refrigerate it for at least 30-60 minutes. This rest period chills the dough thoroughly and allows the small amount of gluten developed to relax, making it ready for the crucial next step of flaky pastry lamination.
Incorporating the Butter: Creating the Butter Block
The butter block is central to flaky pastry lamination techniques. You'll need a significant amount of cold butter, often equal in weight to about 50-75% of the flour used. This butter should be pliable but still very cold. You can achieve this by gently beating or rolling it between two sheets of parchment paper until it forms a flat, even rectangle about 1/2 to 3/4 inch thick. The goal is for the butter block's consistency to be similar to that of the chilled dough – cold and firm, but bendable rather than brittle.
Place the chilled dough rectangle on a lightly floured surface. The dough should be rolled out slightly larger than the butter block. Position the butter block on one half or the center of the dough rectangle, depending on your preferred starting method (envelope or book fold). The dough is then folded over the butter, completely enclosing it. The edges should be sealed tightly to prevent butter from leaking out during rolling. This creates your initial "butter package," ready for the first turn of the lamination process.
The First Turn: Folding and Rolling the Dough
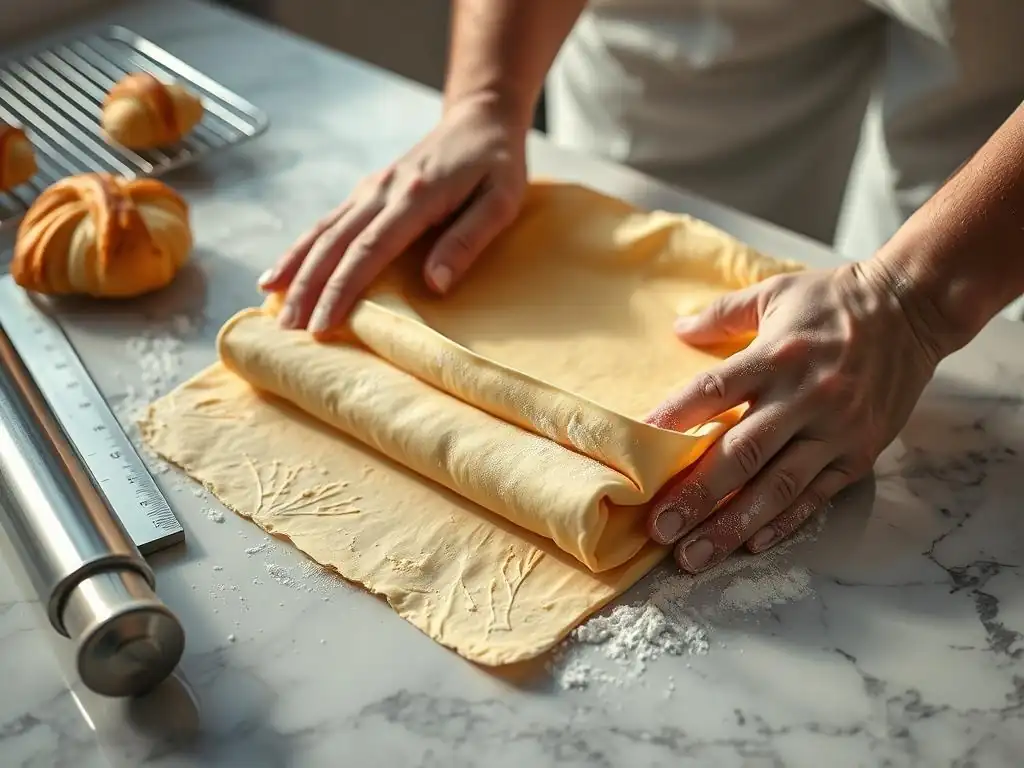
With the butter block fully encased in the dough, you are ready for the first turn – the initial folding and rolling that begins building layers. On a lightly floured surface, gently but firmly roll the dough package into a long rectangle, aiming for an even thickness, usually around 1/4 to 1/3 inch. Roll away from you, lifting and moving the dough occasionally to prevent sticking, and ensuring your pressure is consistent across the dough. The dough should be pliable but resist sticking.
Once you have a long rectangle, perform your first fold. The most common is the tri-fold (or letter fold): fold one end up about two-thirds of the way, then fold the other end down over the top, like folding a letter. This creates three layers of dough separated by two layers of butter.
Alternatively, you can perform a book fold (or four-fold): fold both ends towards the center, then fold the dough in half along the center line. This creates four layers. Mark the dough (e.g., with a finger indentation) to indicate how many turns you've completed, then wrap it tightly and refrigerate for another 30-60 minutes to allow the butter to firm up and the gluten to relax before the next step in your flaky pastry lamination journey.
Subsequent Turns: Building Layers for Maximum Flakiness
After the first turn and subsequent rest, you repeat the rolling and folding process. Take the chilled dough, orient it so the folded edge is to your side (for a tri-fold) or away from you (for a book fold), and roll it out again into a long rectangle of similar thickness as before. Perform the same type of fold (tri-fold or book fold). Each turn multiplies the number of layers. For example, starting with a tri-fold (3 layers) and performing subsequent tri-folds:
- Turn 1: 3 layers
- Turn 2: 3 x 3 = 9 layers
- Turn 3: 9 x 3 = 27 layers
- Turn 4: 27 x 3 = 81 layers
- Turn 5: 81 x 3 = 243 layers
- Turn 6: 243 x 3 = 729 layers (This is the number of dough layers, interspersed with butter layers, totaling 729+728 = 1457 total sheets if you count both)
A typical puff pastry recipe calls for 4 to 6 turns, depending on the desired flakiness and the type of fold used. Between each turn, the dough must be rested in the refrigerator for at least 30-60 minutes. This chilling is non-negotiable; it keeps the butter cold and solid, preventing it from incorporating into the dough, and allows the gluten to relax, making the dough manageable for the next rolling step. Patience during these resting periods is key to successful flaky pastry lamination techniques.
Resting the Dough: Why it's Crucial for Success
Resting the dough between turns is perhaps the most overlooked, yet most vital, step in flaky pastry lamination techniques. There are two primary reasons for this crucial rest period, typically lasting between 30 minutes and an hour in the refrigerator. First and foremost, chilling keeps the butter cold and firm. As you roll and handle the dough, heat from your hands and the friction of rolling can quickly warm the butter. If the butter becomes too soft, it will squeeze out during rolling or, worse, merge with the dough layers, destroying the distinct separation needed for flakiness.
Secondly, chilling allows the gluten network in the dough to relax. Each time you roll the dough, you develop the gluten slightly and stretch the dough, creating tension. If you try to roll dough that hasn't rested, it will be elastic and spring back, making it incredibly difficult to achieve the thin, even rectangle required for proper folding. A relaxed dough rolls out more easily and evenly, allowing you to create consistent layers without tearing. Skipping or shortening the rest periods is a fast track to lamination failure, resulting in tough, uneven, or non-flaky pastry.
Advanced Lamination Techniques for Enhanced Flakiness
The French Method vs. the English Method: A Comparison
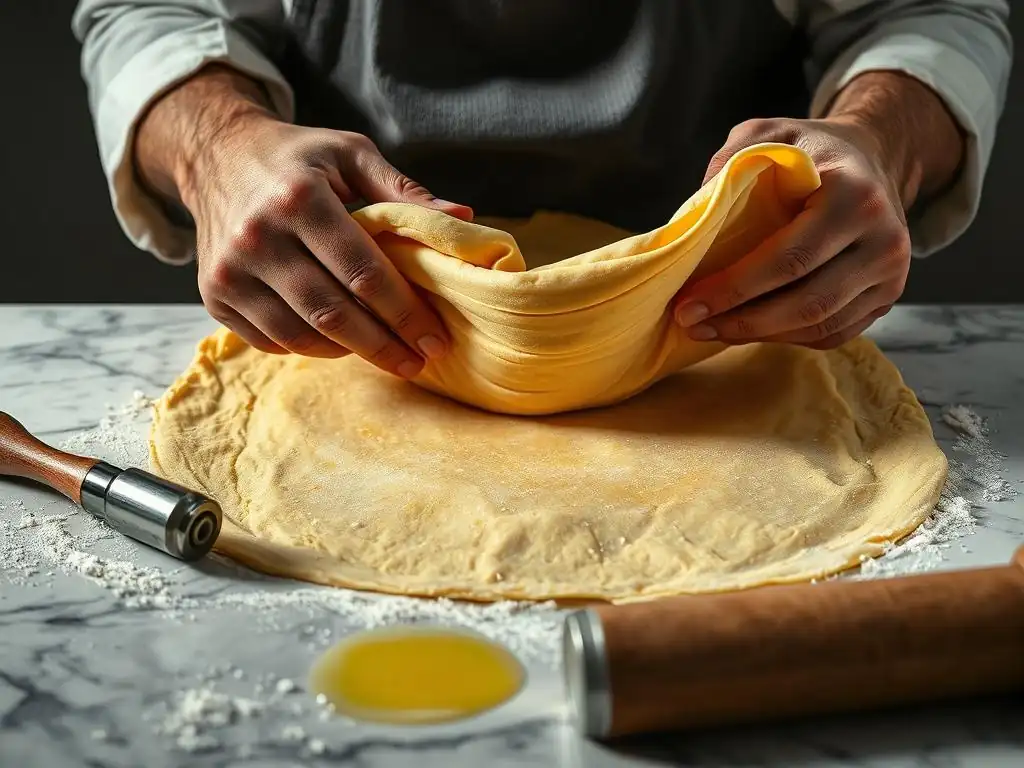
There are two primary methods for incorporating the butter in flaky pastry lamination techniques: the French method and the English method. In the French method, the butter block is placed on top of the dough, and the edges of the dough are folded up and over the butter to enclose it, creating an envelope. This method starts with three layers (dough/butter/dough) and is often preferred by professional bakers because it can be slightly easier to handle initially, especially with softer butter.
The English method, sometimes called the "detrempe method," incorporates some of the butter into the dough initially by cutting it in (like making a rough puff pastry base or pie crust dough), then rolling the remaining large butter block into the center of the dough rectangle and folding the dough over it like a book or letter. This method starts with an initial dough that already has some fat distributed, and the main lamination builds upon this base.
Both methods, when executed correctly with subsequent turns, achieve the same goal of creating numerous alternating layers of dough and butter for exceptional flakiness. The choice often comes down to personal preference and how the initial dough handles.
The Blitz Puff Pastry Method: A Faster Alternative
While traditional flaky pastry lamination techniques involve creating a separate butter block and meticulously folding it into the dough over several turns, the blitz puff pastry method offers a faster, though slightly less refined, alternative. In this technique, cold butter is cut into the flour and water mixture more roughly than for a pie crust, leaving visible, pea-sized to walnut-sized chunks of butter throughout the dough.
The dough is then rolled and folded a few times immediately, without the extensive chilling periods required in classic methods. As the dough is rolled, the large butter chunks are flattened into rough layers. While blitz puff pastry won't achieve the thousands of perfectly uniform layers of classic puff pastry (which can result in 700+ layers after 6 turns), it still creates enough separation to yield a reasonably flaky result. It's an excellent option when time is limited, offering a good balance of flakiness and speed, making flaky pastry accessible even on busy days.
Achieving Even Butter Distribution: Tips and Tricks
Even butter distribution is paramount for consistent lift and flakiness throughout your pastry. If the butter is thicker in some areas than others, those areas will rise more or less, leading to an uneven bake. Here are some tips for success with flaky pastry lamination techniques:
- Uniform Butter Block: Ensure your initial butter block is rolled to a consistent thickness and is roughly the same consistency as your dough – cold but pliable.
- Seal Edges: When enclosing the butter, seal the edges of the dough tightly to prevent butter from squeezing out during rolling.
- Even Rolling Pressure: Apply even pressure across the entire surface of the dough as you roll. Avoid pressing down harder in the center or on the edges. Use a consistent back-and-forth motion.
- Keep it Cold: This cannot be stressed enough. Work quickly, and if the dough or butter shows any sign of softening, immediately return it to the refrigerator for a rest. A cold dough and firm butter are essential for maintaining distinct layers.
- Orient Correctly: Always orient the dough correctly before each roll (folded edge typically facing you or away from you, depending on the fold). This ensures the layers are being multiplied properly with each turn.
Following these tips will significantly improve your chances of achieving perfectly even layers and consistently flaky results with your flaky pastry lamination techniques.
Troubleshooting Common Lamination Problems
Butter Leaking: Prevention and Solutions
Butter leaking during flaky pastry lamination is a common and frustrating issue, often indicated by streaks of melted butter appearing on your rolling surface or oozing from the edges of the dough. The primary cause is the butter becoming too warm and soft, either from insufficient chilling between turns, working in a warm kitchen, or handling the dough excessively. When the butter softens, it loses its structure and is easily squeezed out under the pressure of the rolling pin.
Prevention is the best approach: always ensure your dough and butter are thoroughly chilled (at least 30-60 minutes between turns, longer if needed). Work quickly and efficiently. If you notice butter starting to leak, immediately stop rolling, gently patch any small tears in the dough with your fingers, and return the dough to the refrigerator for a longer rest (at least 60 minutes, or even put it in the freezer for 10-15 minutes) until the butter is firm again.
A lightly floured surface also helps prevent sticking which can exacerbate leaking. While minor leaks can sometimes be salvaged, significant butter loss will compromise the final flakiness, highlighting the importance of temperature control in flaky pastry lamination techniques.
Dough Tearing: Causes and Remedies
Dough tearing during rolling is another hurdle in mastering flaky pastry lamination. Tears expose the butter layers, leading to leaks and uneven puffing. The most common causes are insufficient resting time between turns, which results in a tense, elastic dough that resists rolling, or rolling the dough too thin too quickly. Over-developed gluten or a dough that is too dry can also contribute to tearing.
If you encounter a small tear, you can often gently press the edges back together with your fingers. For larger tears that expose a lot of butter, it's best to carefully patch the area by folding a piece of dough over it and pressing firmly, then chill the dough immediately. To prevent tearing, always allow adequate resting time (minimum 30-60 minutes refrigerated after each turn) to let the gluten relax.
Roll the dough gradually, applying even pressure and stopping if the dough springs back excessively. Ensure your dough has the correct hydration level initially. Patience and gentle handling are key to avoiding tears and ensuring smooth flaky pastry lamination.
Uneven Layers: How to Achieve Consistent Results
Uneven layers manifest as some areas of the pastry rising beautifully while others remain flat and dense. This is typically caused by inconsistent rolling and folding during the flaky pastry lamination process. If the dough is rolled thicker in some spots than others, or if the folds are not precise, the distribution of dough and butter layers will be uneven. This means some sections will have more butter layers to create steam and lift, while others will have fewer.
To achieve consistent, even layers:
- Start with a uniformly shaped dough and butter block.
- Roll the dough into a consistent rectangle thickness before each fold. Use gentle, even pressure across the entire surface.
- Execute your folds neatly and precisely. Ensure the edges align properly in tri-folds or book folds.
- Always orient the dough correctly before starting the next turn's rolling.
- Maintain consistent temperature throughout the process. Warm spots in the butter will lead to thinner layers in those areas.
By focusing on precision in rolling and folding and maintaining consistent temperatures, you can greatly improve the uniformity of your layers and achieve that coveted even puff and flakiness across your entire pastry, showcasing mastery of flaky pastry lamination techniques.
Perfecting Your Puff Pastry: Baking and Storage Tips
Baking Temperatures and Times for Optimal Flakiness
Baking puff pastry correctly is as crucial as the lamination process itself. The general rule for achieving maximum puff and flakiness is to bake at a high initial temperature, typically between 400°F and 425°F (200°C to 220°C). This intense heat provides the necessary thermal shock to rapidly turn the water in the butter and dough into steam, forcing the layers apart before the fat fully melts and is absorbed.
The baking time will vary depending on the size and thickness of your pastry item. Small items like palmiers or turnovers might bake in 12-18 minutes, while larger items or sheets might take 20-30 minutes or longer. After the initial rapid rise (usually within the first 10-15 minutes), some bakers recommend slightly reducing the oven temperature (e.g., to 375°F or 190°C) to allow the layers to cook through and crisp up without burning the exterior.
Always preheat your oven thoroughly and avoid opening the oven door during the critical initial rise period. Achieving the right balance of temperature and time ensures your carefully crafted flaky pastry lamination techniques pay off with a perfectly baked result.
Recognizing Doneness: Signs of a Perfectly Baked Puff Pastry
Knowing when your puff pastry is perfectly baked is key to enjoying its full flaky potential. A properly baked puff pastry should be significantly risen, often doubling or tripling in height compared to its raw state. It should have a beautiful, deep golden-brown color all over, including on the sides and bottom. Pale areas indicate underbaking, which will result in a dense, doughy texture rather than flakiness.
The layers should be visibly separated and appear light and airy. If you gently tap the pastry, it should sound hollow. For larger pastries or those with fillings, ensuring the center is cooked through is important. If the top is browning too quickly, you can loosely tent it with foil. A perfectly baked puff pastry is crisp and shatteringly flaky when you bite into it, with no raw doughiness inside. Trust your eyes and ears – the color, rise, and sound are the best indicators that your flaky pastry lamination techniques have resulted in a successful bake.
Storing Puff Pastry: Keeping it Fresh for Future Use
Proper storage ensures your flaky pastry creations remain delicious. Unbaked puff pastry dough is best stored in the refrigerator for up to 2-3 days. Wrap it very tightly in plastic wrap to prevent it from drying out or absorbing odors. For longer storage, puff pastry freezes exceptionally well. You can freeze the entire block of dough, wrapped tightly, for up to 1-2 months.
Alternatively, you can shape the dough before freezing. Cut out shapes for tarts, turnovers, or croissants, place them on a baking sheet lined with parchment paper, and freeze until solid. Once frozen, transfer the shapes to an airtight container or freezer bag. Frozen unbaked pastry shapes can be baked directly from frozen, often requiring just a few extra minutes in the oven.
Baked puff pastry items are best enjoyed fresh on the day they are baked for maximum crispness. However, they can be stored at room temperature in an airtight container for a day or two, though they will lose some crispness. Reheating briefly in a warm oven (around 300°F/150°C) can help revive some of the flakiness. Proper storage ensures your efforts in mastering flaky pastry lamination techniques don't go to waste.
Flaky Pastry Lamination: Recipe Ideas and Applications
Classic Croissants: A Laminated Pastry Staple
Croissants are perhaps the most iconic example of flaky pastry lamination techniques put to delicious use. Originating in Austria but perfected in France, these buttery, crescent-shaped rolls rely entirely on the precise layering of dough and butter to achieve their signature airy interior and crisp exterior. The dough for croissants is slightly different from basic puff pastry, as it is enriched with milk, sugar, and sometimes egg, and includes yeast as a leavening agent in addition to the steam generated by the butter.
The lamination process for croissants is similar to puff pastry, involving multiple turns (typically 3-4 turns using a tri-fold) to create hundreds of layers. The dough is then shaped into crescents and allowed a final proofing period, where the yeast produces carbon dioxide, further expanding the dough layers before baking. The combination of yeast leavening and steam from the butter results in an incredibly light, open crumb structure and that irresistible flaky crust, making croissants a true test and triumph of flaky pastry lamination techniques.
Pain au Chocolat: Combining Lamination with Chocolate
Pain au chocolat, or chocolate bread, is another beloved viennoiserie that showcases the magic of flaky pastry lamination. Using the same rich, yeasted laminated dough as croissants, pain au chocolat involves rolling the dough into rectangles, placing one or two batons of dark chocolate on the dough, and then rolling the dough around the chocolate.
The lamination process ensures that as the pastry bakes, the dough layers puff up around the melting chocolate, creating pockets of rich, warm chocolate encased within the delicate, flaky layers. The contrast between the crisp, buttery pastry and the molten chocolate makes pain au chocolat a delightful treat. Mastering the flaky pastry lamination techniques for croissants is the direct path to creating perfect pain au chocolat, demonstrating the versatility of this foundational baking skill.
Savory Puff Pastry Applications: Quiches and Tarts
While often associated with sweet treats, puff pastry is incredibly versatile and widely used in savory applications, proving the value of mastering flaky pastry lamination techniques beyond just desserts. Its ability to create a sturdy yet light and flaky base makes it ideal for quiches, tarts, sausage rolls, and savory turnovers.
For a quiche or tart, a sheet of laminated puff pastry is typically rolled out and fitted into a tart pan. It's often blind-baked partially before adding a savory filling (like eggs, cheese, vegetables, or meats) and baking until the filling is set and the crust is golden brown and fully puffed around the edges. The flaky base provides a wonderful textural contrast to the often creamy or substantial fillings. Savory pastries like these highlight how mastering flaky pastry lamination opens up a whole realm of culinary possibilities, both sweet and savory.
Conclusion: Elevating Your Baking with Flaky Pastry Lamination Techniques
Mastering flaky pastry lamination techniques is a skill that truly elevates your baking. It's a process that requires patience, precision, and a good understanding of how temperature and ingredients interact, but the rewards are immense. The ability to transform simple flour, water, and butter into hundreds, even thousands, of delicate, crisp layers is a kind of kitchen magic.
By practicing these flaky pastry lamination techniques, understanding the science behind the puff, and learning to troubleshoot common issues, you gain the confidence to create a wide array of impressive pastries. From classic croissants and pain au chocolat to versatile savory tarts and turnovers, the world of laminated dough is rich with possibilities. So, embrace the challenge, follow the steps, and get ready to enjoy the incredible satisfaction of biting into a perfectly flaky, homemade pastry. Happy baking!
Frequently Asked Questions
What is lamination in baking, and why is it important for flaky pastries?
Lamination is the process of creating distinct, alternating layers of dough and fat, typically butter. This technique is essential because it's the foundation of flaky pastries like croissants and puff pastry, creating those airy, separate layers.
What type of fat is best for achieving optimal lamination in pastry dough?
While shortening or margarine can be used, butter is widely considered the best fat for lamination. The high-fat content and water content of butter contribute to superior flakiness and flavor.
What are some common mistakes to avoid when laminating dough?
Overworking the dough can develop the gluten too much, leading to a tough pastry. Also, allowing the butter to melt will prevent the formation of distinct layers. Make sure to keep everything cold.
How many folds are typically required to achieve a good lamination for flaky pastries?
The number of folds depends on the recipe and desired flakiness, but generally, 4 to 6 folds are sufficient. More folds create more layers, resulting in a very flaky final product.
Can I use a stand mixer to make laminated dough, or is it best to do it by hand?
While a stand mixer can be used for the initial dough mixing, the lamination process itself is best done by hand. This allows for greater control over the dough's temperature and prevents overmixing, which can compromise the desired flaky texture.
Final Reflection: The Enduring Allure of Flaky Perfection
The pursuit of the perfect flaky pastry transcends mere culinary skill; it's a testament to the power of precision and patience in achieving breathtaking results. From the delicate shatter of a perfectly laminated croissant to the melt-in-your-mouth layers of a buttery puff pastry, the magic of lamination continues to captivate both bakers and eaters alike. This enduring appeal speaks to a deeper human desire for beauty and craftsmanship in even the simplest of pleasures.
The impact of mastering lamination techniques extends far beyond the kitchen. The meticulous process, requiring careful attention to detail and a deep understanding of butter and dough, mirrors the dedication and precision needed to succeed in any field. The difference between ordinary and extraordinary is that little extra.
This quote, though often attributed to various sources, perfectly encapsulates the essence of lamination – that extra effort, that extra fold, that elevates the ordinary to the extraordinary. The beauty of a perfectly layered pastry is a visual representation of this dedication.
Now, consider your own pursuits. What seemingly small details, what acts of focused attention, could you apply to your own work, your own passions, to achieve a similar level of excellence? I challenge you to embrace the spirit of lamination – the patience, the precision, the unwavering commitment to detail – in whatever endeavor you undertake. The rewards, much like the exquisite layers of a perfectly flaky pastry, will be undeniably delicious.
Unleash Your Inner Pastry Chef: Master Flaky Layers Today!
Thanks for taking the time to explore the magic of lamination! You've now unlocked the secret to creating those incredibly delicate, melt-in-your-mouth layers in your pastries. Ready to put your new skills to the test?
- Bake a show-stopping masterpiece: Try the recipe from the article – it's easier than you think! Imagine the compliments you'll receive.
- Share your baking journey: Post a picture of your laminated creation on social media and tag us @BakeWithEase! We'd love to see your results.
- Experiment with different fillings: What exciting flavors will you discover with your newfound lamination skills?
Ready to transform your baking game? What delicious laminated treat will you create first?