
GlutenFree Bread Rolls That Taste Amazing

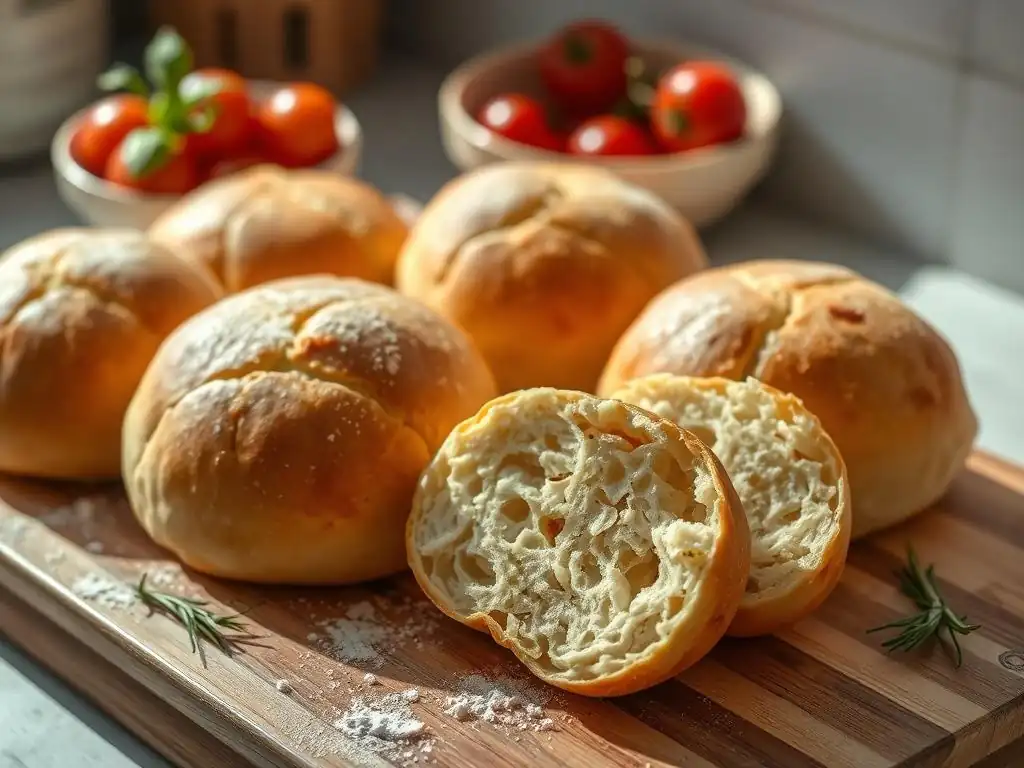
Welcome to BakeWithEase, your trusted companion on a delicious baking journey! Ever dreamt of perfectly soft and fluffy gluten-free bread rolls that actually taste amazing? We understand the challenge, and that's exactly why we're thrilled to share our ultimate recipe. Prepare to unlock the secrets to baking bread rolls that are not only gluten-free but also incredibly flavorful. Intrigued? Dive in and discover how easy it is to create these delightful treats!
- Soft & Fluffy Gluten-Free Dinner Rolls: A GlutenFreeJoy Recipe
- Introduction: Experience Delicious Gluten-Free Dinner Rolls
- The Ultimate Gluten-Free Dinner Rolls Recipe: Step-by-Step
- Step 1: Mixing the Gluten-Free Dough
- Step 2: Proofing the Gluten-Free Dough
- Step 3: Shaping the Gluten-Free Dinner Rolls
- Step 4: Baking Your Gluten-Free Dinner Rolls
- Step 5: Cooling and Serving Your Gluten-Free Rolls
- Troubleshooting Common Gluten-Free Roll Issues
- Variations and Flavor Enhancements for Your Gluten-Free Rolls
- Tips for Storing Gluten-Free Dinner Rolls
- Conclusion: Savor Delicious, Easy-to-Make Gluten-Free Dinner Rolls
-
Frequently Asked Questions
- What makes these gluten-free bread rolls taste amazing?
- Are the ingredients for this gluten-free bread rolls recipe easy to find?
- Can I modify this gluten-free bread rolls recipe to be vegan?
- How long does it take to make these gluten-free bread rolls from start to finish?
- What are some tips for ensuring my gluten-free bread rolls rise properly?
- Final Reflection: The Joy of Gluten-Free Baking, Rediscovered
- Unleash Your Inner Baker: Gluten-Free Bread Rolls Await!
Soft & Fluffy Gluten-Free Dinner Rolls: A GlutenFreeJoy Recipe
Introduction: Experience Delicious Gluten-Free Dinner Rolls
Creating truly soft and fluffy gluten-free bread rolls can sometimes feel like chasing a baking unicorn. Many bakers embarking on the gluten-free journey find that their initial attempts result in dense, crumbly, or heavy rolls that lack the delightful chew and tender interior of traditional bread. It's a common hurdle, but one that is entirely surmountable with the right approach and a little patience. Our goal at BakeWithEase, and specifically with this GlutenFreeJoy recipe, is to guide you past these challenges and into the rewarding world of delicious, gluten-free baking.
This particular gluten-free bread rolls recipe is designed to demystify the process, providing clear steps and explanations that highlight the unique characteristics of gluten-free dough. We focus on ingredient interactions and techniques specifically tailored for achieving that coveted light and airy texture. Forget past disappointments; these gluten-free dinner rolls are crafted to impress, offering a delightful addition to any meal and proving that giving up gluten doesn't mean giving up on amazing bread.
The Challenges of Gluten-Free Rolls (and Our Solution)
The primary challenge in gluten-free baking stems from the absence of gluten, the protein network that provides structure, elasticity, and chewiness in wheat-based doughs. Without gluten, doughs tend to be less cohesive, harder to handle, and prone to drying out or becoming excessively dense. Traditional kneading methods that develop gluten are not applicable, and alternative binders are crucial for holding the dough together and mimicking some of gluten's functions. Many early gluten-free bread recipes often relied heavily on single flours or lacked sufficient binding agents, leading to the common complaints of brick-like textures or rolls that crumbled upon touch.
Our solution, refined through extensive testing, involves a carefully balanced blend of gluten-free flours, starches, and essential binders like psyllium husk and xanthan gum. This combination works synergistically to create a dough that is manageable, rises beautifully, and bakes into soft, stable gluten-free bread rolls.
We also emphasize specific mixing and proofing techniques that are optimized for gluten-free doughs, ensuring proper hydration and air incorporation without relying on gluten development. For example, we use a slightly higher hydration percentage than traditional wheat doughs, often around 80-90% water relative to the flour weight, to compensate for the higher absorption rate of many gluten-free flours and starches and prevent dryness.
GlutenFreeJoy's Key to Light and Airy Gluten-Free Rolls
The secret to achieving truly light and airy gluten-free rolls with our GlutenFreeJoy approach lies in two main areas: the precise formulation of the dry mix and the meticulous control of hydration and proofing. Unlike many simplified gluten-free blends that can lead to gummy or heavy results, our recipe utilizes a specific ratio of protein-rich flours (like sorghum or brown rice flour) and light starches (such as tapioca or potato starch).
This balance ensures both structural integrity and tenderness. The inclusion of psyllium husk powder (not whole husks, which absorb water differently) is particularly vital; it forms a gel that provides much-needed elasticity and helps trap gases produced by the yeast, leading to a better rise and a softer crumb structure.
Furthermore, we pay close attention to the dough's consistency before and during proofing. Gluten-free dough is often wetter and stickier than its wheat counterpart – this is intentional and necessary for moisture retention and a lighter texture. We recommend mixing until the dough is smooth and cohesive, resembling a very thick batter or soft cookie dough rather than a firm bread dough.
Proofing is then conducted in a warm, humid environment, typically around 80-85°F (27-29°C), for a specific duration (usually 60-90 minutes) to allow the yeast sufficient time to produce carbon dioxide and expand the dough significantly. This careful control over temperature and time is paramount for developing the airy structure that defines these wonderful gluten-free dinner rolls.
The Ultimate Gluten-Free Dinner Rolls Recipe: Step-by-Step
Ready to bake? Let's gather the essentials. Making delightful gluten-free bread rolls starts with selecting the right ingredients and having the necessary tools on hand. Our recipe is designed for simplicity and success, even if you're new to gluten-free baking.
Ingredients for Exceptionally Soft Gluten-Free Rolls
Choosing the correct gluten-free ingredients is the foundation of this successful gluten-free bread rolls recipe. We recommend using a blend of flours and starches rather than a single type, as this creates a more balanced texture and flavor. A typical blend might include brown rice flour, sorghum flour, tapioca starch, and potato starch. It's crucial to use finely ground flours and starches for the best results. The psyllium husk powder is non-negotiable; it acts as a primary binder. We also use a small amount of xanthan gum as a secondary binder to further improve the dough's structure and elasticity.
Here's a list of the key ingredients you'll need. Precision in measurement, especially for the flours and binders, is important for consistent results. Using a kitchen scale for dry ingredients is highly recommended for accuracy. For example, 200 grams of brown rice flour is more precise than measuring by volume.
- Warm Water: ~105-115°F (40-46°C) - Essential for activating yeast
- Active Dry Yeast or Instant Yeast:Check expiration date!
- Sugar or Honey:Feeds the yeast
- Gluten-Free Flour Blend (Specific Ratio):e.g., Brown Rice Flour, Sorghum Flour, Tapioca Starch, Potato Starch
- Psyllium Husk Powder:Not whole husks
- Xanthan Gum:Binder
- Salt:Flavor and controls yeast activity
- Oil or Melted Butter:Adds tenderness and moisture
- Egg (Optional, for richer rolls):Adds structure and richness
Equipment for Optimal Gluten-Free Baking
Having the right tools can make the process of making gluten-free bread rolls much smoother and more efficient. You don't need a professional kitchen setup, but a few key pieces of equipment will significantly improve your baking experience and the outcome of your rolls. For mixing, a stand mixer with a paddle attachment is highly recommended because gluten-free dough can be quite sticky and hydration levels are often high. While hand mixing is possible, it requires more effort to achieve the necessary smoothness.
Other essential items include accurate measuring cups and spoons, and as mentioned, a digital kitchen scale for weighing dry ingredients. For proofing, a warm spot in your kitchen or a proofing box is ideal. Baking sheets lined with parchment paper are necessary to prevent sticking, and a gentle brush for applying an egg wash (if using) or water before baking helps achieve a lovely crust. A probe thermometer can be useful for checking the internal temperature of the baked rolls to ensure they are fully cooked, typically around 200-210°F (93-99°C).
- Stand Mixer with Paddle Attachment
- Digital Kitchen Scale
- Measuring Cups and Spoons
- Mixing Bowls
- Proofing Container or Warm Spot
- Baking Sheets
- Parchment Paper
- Pastry Brush
- Wire Cooling Rack
Step 1: Mixing the Gluten-Free Dough
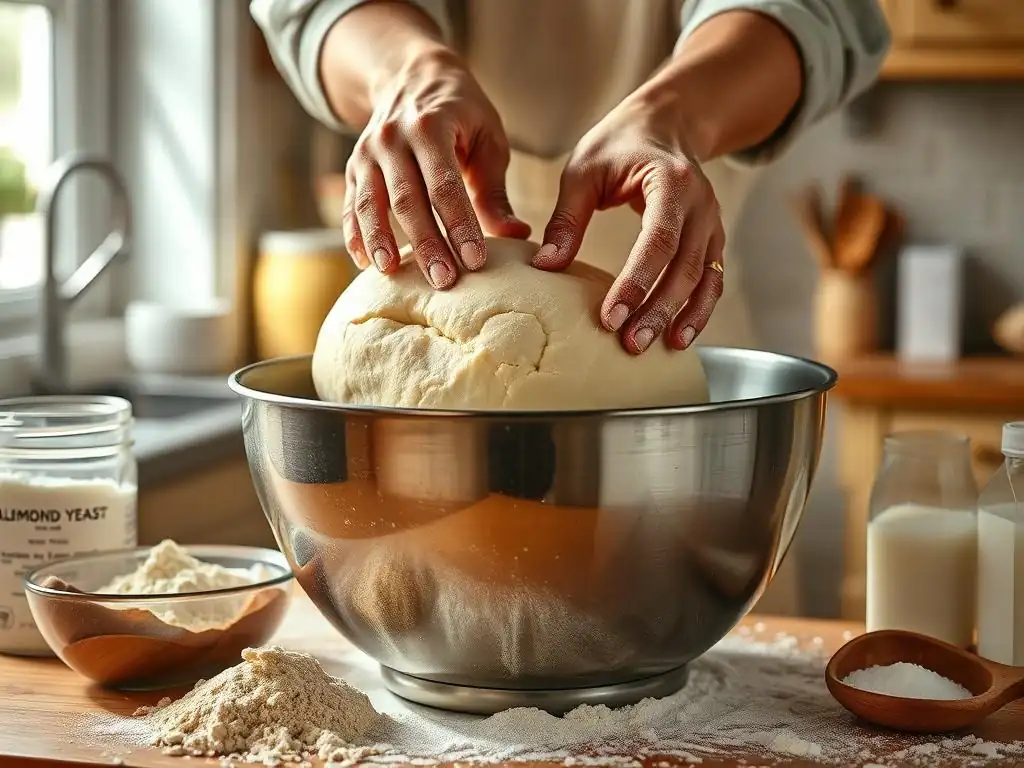
Mixing gluten-free dough differs slightly from traditional wheat dough. Since there's no gluten to develop through kneading, the focus is on thoroughly combining the ingredients and activating the binders. The goal is a smooth, homogenous mixture.
Blending Dry Ingredients: The Base of Your Rolls
Begin by accurately measuring all your dry ingredients: the gluten-free flour blend, psyllium husk powder, xanthan gum, salt, and sugar (if using sugar in the dry mix). Whisk them together thoroughly in a large mixing bowl or the bowl of your stand mixer. This step is more important than it might seem. Dry ingredients like psyllium husk and xanthan gum need to be evenly distributed throughout the flour blend before liquid is added. If they are not well dispersed, they can clump when they come into contact with water, leading to uneven texture in the final gluten-free bread rolls.
Imagine you have 250 grams of your custom gluten-free flour blend, 15 grams of psyllium husk powder, 5 grams of xanthan gum, and 6 grams of salt. Pour all these into the bowl and whisk for at least 30-60 seconds. This ensures that every grain of flour is surrounded by the binders, ready to absorb moisture evenly. Think of it as creating a perfectly uniform foundation for your dough.
Incorporating Wet Ingredients: Achieving the Ideal Texture
Once your dry ingredients are perfectly blended, it's time to introduce the wet components. This typically includes warm water, yeast, oil or melted butter, and potentially an egg. If you are using active dry yeast, you'll usually "proof" it first by dissolving it in the warm water with a pinch of sugar and letting it sit for 5-10 minutes until it becomes foamy. This confirms the yeast is alive and active. If using instant yeast, you can often add it directly to the dry ingredients, then add the warm water and other wet ingredients.
Add the activated yeast mixture (or just warm water and other wet ingredients if using instant yeast) to the dry ingredients. If using a stand mixer, start mixing on a low speed with the paddle attachment until everything is just combined, then increase the speed to medium. Mix for 3-5 minutes. The dough will transform from a shaggy mess into a smooth, very soft, and sticky consistency.
It won't pull away from the sides of the bowl like wheat dough; it will likely stick to the paddle and the sides. This stickiness is normal and desired for soft gluten-free bread rolls. The psyllium and xanthan gum will start to hydrate and develop their gel-like properties during this mixing phase.
Step 2: Proofing the Gluten-Free Dough
Proofing is a critical step in making any leavened bread, and it's no less important for gluten-free bread rolls. It's during proofing that the yeast gets to work, fermenting the sugars and producing carbon dioxide gas, which causes the dough to rise and develop flavor.
The Importance of Proofing in Gluten-Free Baking
In gluten-free baking, proofing serves a slightly different, but equally vital, purpose compared to wheat bread. While wheat dough relies on the gluten network to trap gases and expand, gluten-free dough depends on the binders (like psyllium and xanthan gum) to create a structure capable of holding these gases. Proper proofing allows the yeast sufficient time to produce enough gas to significantly increase the dough's volume and develop a lighter texture. Under-proofing results in dense, heavy rolls, while over-proofing can cause the structure to collapse during baking, leading to flat or misshapen rolls.
The ideal proofing temperature range for gluten-free dough is often slightly warmer than for wheat dough, typically between 80°F and 85°F (27°C and 29°C). This warmer temperature encourages yeast activity. The duration can vary depending on the recipe and environment, but expect it to take anywhere from 60 to 90 minutes for the dough to roughly double in size. This rise is crucial for achieving those soft, fluffy gluten-free dinner rolls.
Creating the Perfect Proofing Environment
Consistency in temperature and humidity is key to successful proofing for gluten-free bread rolls. A warm, draft-free environment is essential. One effective method is to preheat your oven to its lowest setting (often around 150-200°F or 65-95°C) for just a few minutes, then turn it off. Place the bowl of dough inside the turned-off oven. For added humidity, you can place a pan of hot water on the rack below the dough. This creates a warm, moist microclimate perfect for yeast activity.
Alternatively, you can place the dough in a warm spot in your kitchen, away from drafts. Covering the dough bowl tightly with plastic wrap or a damp kitchen towel is important to prevent the surface from drying out and forming a crust, which would inhibit rising. The dough should be covered and allowed to rise until it has visibly increased in size, ideally doubling. A good visual cue is that the surface will appear bubbly and expanded.
Step 3: Shaping the Gluten-Free Dinner Rolls
Shaping gluten-free dough requires a gentle touch and often a slightly different technique than traditional dough due to its sticky nature. The goal is to create uniform rolls that will bake evenly and have a pleasant appearance.
Techniques for Consistent, Beautifully Shaped Rolls
Because gluten-free dough is often wetter and stickier than wheat dough, using slightly wet hands or a little oil on your hands can prevent sticking during the shaping process. Avoid using too much flour, as this can dry out the dough and lead to a tougher crumb in your gluten-free bread rolls. Gently scoop portions of the dough (you can use a large spoon or an ice cream scoop for consistency) onto a lightly oiled or wetted surface.
To shape the rolls, you can use a simple technique of gently cupping your hand around the portion of dough and swirling it against the surface in a circular motion. This helps to create tension on the surface and form a round shape. Aim for rolls that are roughly equal in size to ensure even baking; a weight of about 60-70 grams per roll is typical for dinner rolls. Place the shaped rolls onto your parchment-lined baking sheet, leaving about 1-2 inches (2.5-5 cm) of space between them to allow for expansion during the second proof and baking.
Preventing Surface Cracks: A Shaping Tip
A common issue with gluten-free bread rolls is the development of cracks on the surface during baking. This often happens if the surface of the dough dries out before or during the initial stages of baking. To combat this, maintaining moisture is key. Ensure the rolls are covered lightly with plastic wrap or a damp towel during the second proofing (after shaping) to keep the surface moist.
Just before baking, you can lightly spray the tops of the rolls with water or brush them with a thin layer of melted butter or a simple egg wash (egg whisked with a tablespoon of water). This adds moisture to the surface, promoting even browning and helping to prevent cracking. Some recipes even recommend placing a tray of water in the bottom of the oven during baking to create steam, which also helps maintain a moist environment and results in a softer crust on your gluten-free dinner rolls.
Step 4: Baking Your Gluten-Free Dinner Rolls
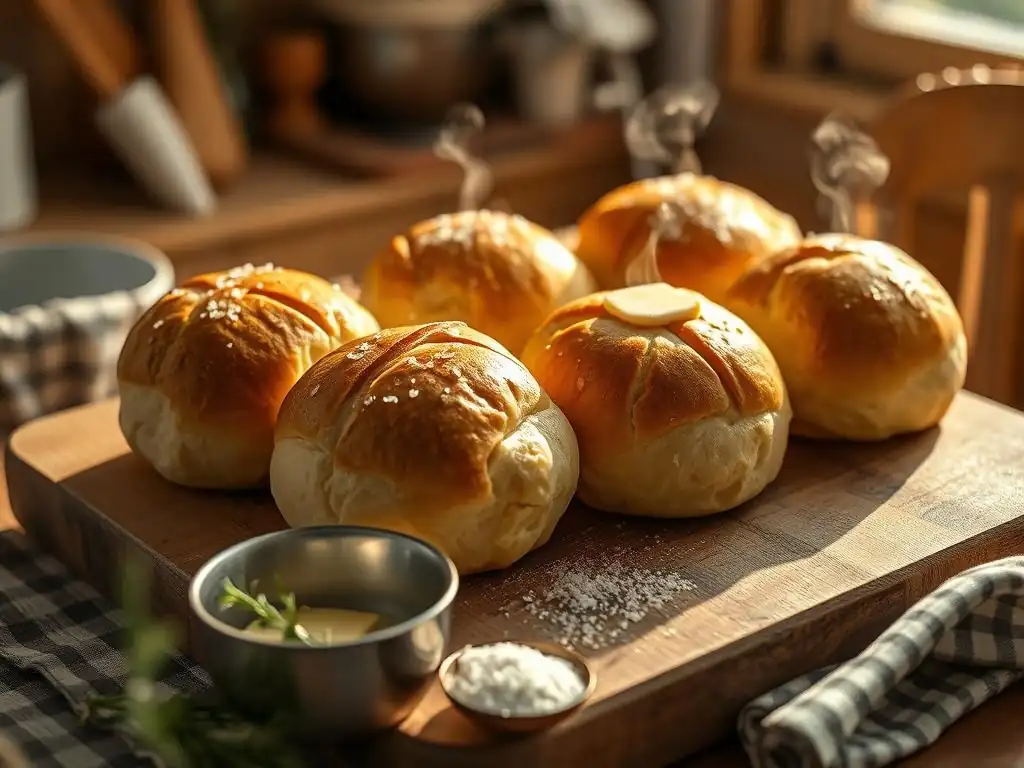
Baking is where the magic happens, transforming the proofed dough into golden, fluffy gluten-free bread rolls. Precision with oven temperature and timing is crucial for achieving the desired texture and color.
Optimal Oven Temperature and Baking Time
Preheating your oven correctly is the first step to successful baking. For most gluten-free bread rolls, a temperature of 375°F to 400°F (190°C to 200°C) is ideal. Preheat the oven for at least 15-20 minutes to ensure it reaches and stabilizes at the set temperature. Baking at a slightly higher initial temperature can help the rolls set quickly and achieve a good initial rise, often referred to as "oven spring."
The baking time will vary depending on your oven and the size of your rolls, but typically ranges from 18 to 25 minutes. You'll know the gluten-free bread rolls are done when they are golden brown on top and sound hollow when tapped on the bottom. For absolute certainty, you can check the internal temperature of a roll with a probe thermometer; it should register between 200°F and 210°F (93°C and 99°C). Baking them adequately ensures they are fully cooked through and helps prevent a gummy interior.
Achieving a Golden-Brown, Tender Crust
A visually appealing golden-brown crust is a hallmark of well-baked rolls, and it's achievable with gluten-free dough too. As mentioned earlier, brushing the tops of the rolls with melted butter, an egg wash, or even just water before baking can significantly contribute to a beautiful crust color and texture. The fat in butter or egg wash promotes browning, while water or steam helps keep the crust tender initially, allowing for better expansion before it sets.
During the last few minutes of baking, keep an eye on the rolls to prevent over-browning. If they are browning too quickly but don't seem fully cooked, you can loosely tent them with aluminum foil. This will protect the tops while the interiors finish baking. A perfectly baked gluten-free bread roll will have a crust that is firm enough to hold its shape but still yields to a gentle touch, giving way to a soft, tender interior crumb.
Step 5: Cooling and Serving Your Gluten-Free Rolls
The final steps, cooling and serving, are just as important as mixing and baking for enjoying the best gluten-free bread rolls. Patience during the cooling phase is key!
The Significance of Proper Cooling
Once your beautiful gluten-free dinner rolls come out of the oven, the temptation to tear into one immediately is strong! However, allowing them to cool properly on a wire rack is crucial. Bread, including gluten-free varieties, continues to cook internally as it cools. The steam within the rolls redistributes moisture throughout the crumb. Cutting into a hot roll can result in a gummy texture because the internal structure hasn't fully set and the moisture hasn't equalized.
Cooling on a wire rack allows air circulation around the entire roll, preventing the bottom from becoming soggy from trapped steam. Let the rolls cool for at least 20-30 minutes, or even longer for larger rolls, before slicing or pulling them apart. This cooling period is essential for achieving the intended soft, fluffy crumb texture that makes these gluten-free bread rolls so delightful.
Serving Ideas: Complementing Meals with Your Rolls
These soft and delicious gluten-free dinner rolls are incredibly versatile and make a wonderful accompaniment to a wide variety of meals. Serve them warm with a pat of butter alongside soups, stews, or chilis. Their tender crumb is perfect for soaking up flavorful broths.
Consider serving them with pasta dishes or roasted meats. They are also excellent as small sandwich buns for sliders or as the base for garlic bread. The simple, comforting flavor of these gluten-free bread rolls complements both savory and slightly sweet dishes. Don't forget they're fantastic on their own as a snack!
- Serve warm with butter.
- Pair with soups or stews.
- Use as slider buns.
- Make gluten-free garlic bread.
Troubleshooting Common Gluten-Free Roll Issues
Even with a great recipe, sometimes things don't go exactly as planned in baking. Here are some common issues you might encounter when making gluten-free bread rolls and how to address them.
Rolls are Dense and Heavy: [Use a Starch Blend, Adjust Hydration]
Density is one of the most frequent complaints about homemade gluten-free bread rolls. This can happen for several reasons, often related to the flour blend or hydration level. Using a blend that is too high in heavier flours (like brown rice or sorghum) without enough lighter starches (like tapioca or potato) can result in a heavy crumb. Ensure your blend incorporates a good percentage of starch, perhaps 30-40% of the total flour weight. For instance, a blend might be 40% brown rice flour, 30% sorghum flour, and 30% tapioca/potato starch.
Another major culprit is insufficient hydration. Gluten-free flours absorb more liquid than wheat flour. If your dough isn't wet enough – remember, it should be quite sticky, like a thick batter – the rolls will be dry and dense. Check your recipe's recommended hydration level (water weight relative to flour weight) and ensure you are adding enough liquid. Sometimes, even slight variations in flour brands require minor adjustments to the liquid. If the dough seems stiff during mixing, add a tablespoon or two more water until it reaches a very soft consistency.
Rolls are Dry and Fall Apart: [Add Psyllium Husk, Check Oven Temperature]
Crumbling is another common issue, indicating a lack of binding and moisture retention. This often points back to the binders, specifically psyllium husk powder. Ensure you are using the correct type (powder, not whole husks) and the specified amount in the recipe. Psyllium is crucial for providing structure and preventing the rolls from falling apart. If you've omitted or significantly reduced it, your rolls will likely be very crumbly. A typical recipe might call for 5-6% psyllium husk powder based on the flour weight.
Over-baking is also a significant cause of dryness and crumbling. If the oven temperature is too high or the rolls are left in for too long, too much moisture evaporates, leaving them dry and brittle. Ensure your oven thermostat is accurate (an oven thermometer can help verify this). Stick to the recommended baking time and temperature, checking for doneness with a tap test or internal thermometer. If the tops are browning too fast, tenting with foil is a good strategy to prevent over-drying while the inside finishes baking.
Rolls Didn't Rise Properly: [Ensure Yeast is Active, Check Proofing Temperature]
Poor rise is usually attributable to issues with the yeast or the proofing environment. First, check the expiry date on your yeast. Yeast is a living organism, and old or improperly stored yeast will not be active. If using active dry yeast, always proof it in warm water (105-115°F or 40-46°C) with a pinch of sugar to ensure it becomes foamy before adding it to the dry ingredients. If it doesn't foam after 5-10 minutes, your yeast is likely inactive, and you'll need a fresh packet.
Secondly, the proofing environment must be warm enough to encourage yeast activity. Temperatures below 75°F (24°C) will significantly slow down the rise, and the dough may not double within the expected time. Ensure your proofing spot is warm and draft-free, ideally in the 80-85°F (27-29°C) range. You can use a proofing box, a turned-off oven with a pan of hot water, or another warm spot. Patience is also key; sometimes, gluten-free dough takes a little longer to rise than wheat dough. Give it adequate time in the right conditions.
Variations and Flavor Enhancements for Your Gluten-Free Rolls
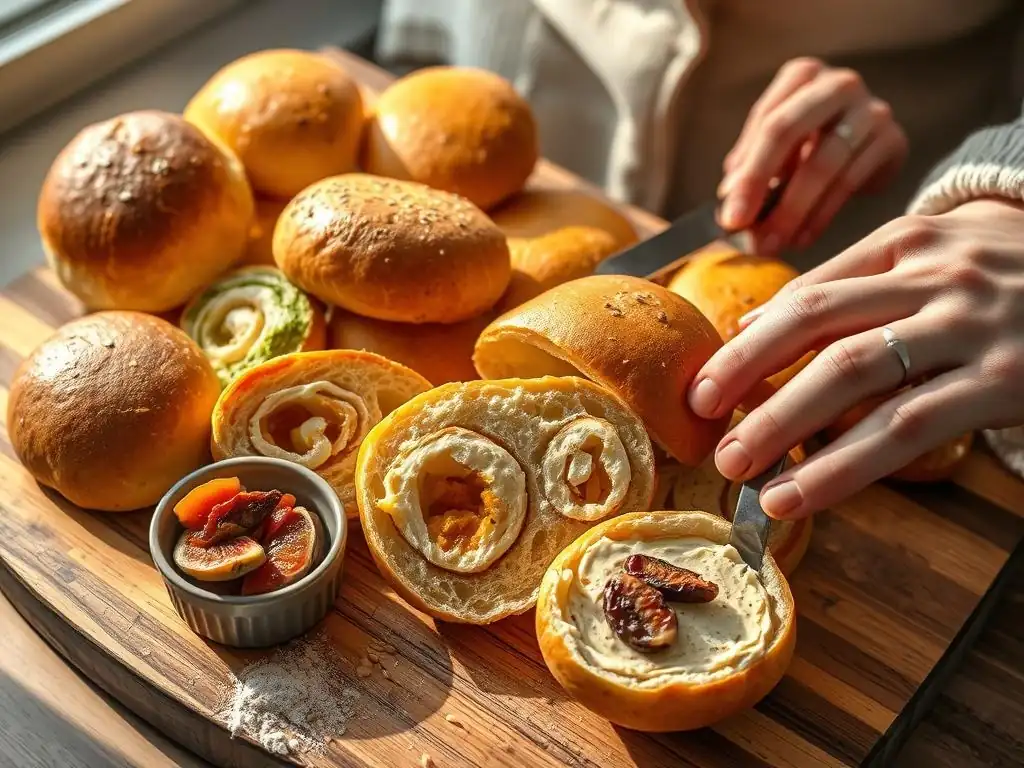
While the basic gluten-free bread rolls recipe is delicious on its own, you can easily customize them with various additions to create exciting flavor profiles. Here are a few ideas to spark your creativity.
Everything Bagel Gluten-Free Rolls: A Savory Twist
Transform your plain gluten-free dinner rolls into savory delights by adding the popular everything bagel seasoning. You can incorporate some of the seasonings directly into the dough for a more integrated flavor, perhaps 1-2 teaspoons per batch, adjusting to your preference.
The key step, however, is applying the seasoning generously to the exterior just before baking. After shaping the rolls and placing them on the baking sheet, lightly brush the tops with an egg wash or milk to help the seasoning adhere. Then, sprinkle a generous amount of everything bagel seasoning over each roll. The seasoning typically includes sesame seeds, poppy seeds, dried garlic flakes, dried onion flakes, and coarse salt. Bake as directed. These make fantastic rolls for breakfast sandwiches or served with cream cheese.
Rosemary Garlic Gluten-Free Rolls: Aromatic Herb Infusion
For an aromatic and flavorful variation, add fresh rosemary and garlic to your gluten-free bread rolls dough. Finely mince fresh rosemary leaves and garlic cloves. You can sauté the garlic briefly in a little oil to soften its flavor, though raw minced garlic works too for a stronger kick.
Add the minced rosemary and garlic to the wet ingredients before combining them with the dry ingredients, or incorporate them during the last minute or two of mixing the dough. Use about 1-2 tablespoons of fresh rosemary and 1-2 teaspoons of minced garlic per batch, adjusting based on how intense you want the flavor. These herb-infused gluten-free dinner rolls are perfect served with Italian meals, roasted chicken, or simply dipped in olive oil.
Sweet Potato Gluten-Free Rolls: Subtle Sweetness and Color
Adding mashed sweet potato or pumpkin puree introduces subtle sweetness, beautiful color, and extra moisture to your gluten-free bread rolls. This variation results in incredibly tender rolls. Use cooled, mashed sweet potato or pumpkin puree (make sure it's not watery).
Substitute a portion of the liquid in the recipe with the sweet potato puree, or simply add it to the wet ingredients before mixing with the dry. A good starting point is to add about 1/2 cup (around 120-150 grams) of puree per batch of rolls. You might need to slightly reduce the amount of other liquid depending on the consistency of your puree. These sweet potato gluten-free rolls are wonderful for holiday meals or as a comforting side dish.
Tips for Storing Gluten-Free Dinner Rolls
Proper storage is essential for maintaining the quality and freshness of your homemade gluten-free bread rolls, as they can sometimes dry out faster than wheat bread.
Maintaining Freshness and Softness
Once your gluten-free dinner rolls have cooled completely on the wire rack, store them in an airtight container or a resealable plastic bag at room temperature. This prevents them from drying out and helps maintain their soft texture. Avoid storing them in the refrigerator, as this can actually cause them to become stale more quickly.
For best quality, plan to consume the rolls within 2-3 days of baking. If you need to store them for longer, freezing is an excellent option. You can also briefly warm leftover rolls in a microwave (for 10-20 seconds) or in a warm oven (300°F or 150°C for 5-10 minutes) to refresh their texture before serving.
Freezing and Thawing Gluten-Free Rolls Effectively
Freezing is the best way to store gluten-free bread rolls for longer periods, preserving their freshness and texture for up to 2-3 months. Ensure the rolls are completely cool before freezing. You can freeze them individually by first placing them on a baking sheet in the freezer until solid (this prevents them from sticking together), then transferring them to a freezer-safe bag or container.
When you're ready to enjoy them, thaw the desired number of rolls at room temperature for a couple of hours, or overnight in the refrigerator. For best results, reheat thawed rolls in a preheated oven at 350°F (175°C) for 10-15 minutes, or until warmed through. Reheating helps to restore their soft texture. Avoid thawing and reheating multiple times, as this can degrade the quality of the gluten-free bread rolls.
Conclusion: Savor Delicious, Easy-to-Make Gluten-Free Dinner Rolls
You've done it! By following these steps and tips, you've successfully baked a batch of soft, fluffy, and utterly delicious gluten-free bread rolls. Gone are the days of dense or crumbly disappointments. This GlutenFreeJoy recipe, shared on BakeWithEase.com, provides a reliable method for creating gluten-free dinner rolls that rival their wheat counterparts in taste and texture. We've navigated the unique challenges of gluten-free dough together, from precise ingredient blending and hydration to proper proofing and baking techniques.
Remember the key takeaways: a balanced gluten-free flour blend with essential binders like psyllium husk, sufficient hydration for a sticky dough, careful proofing in a warm environment, and precise baking temperatures and times. Mastering these elements is the key to consistently achieving wonderful gluten-free bread rolls that you'll be proud to serve at any meal. Practice makes perfect, and with this detailed guide, you have all the tools to succeed.
Excelling at Gluten-Free Baking with GlutenFreeJoy
This gluten-free bread rolls recipe is just one example of how focusing on specific techniques and ingredient interactions can lead to fantastic results in gluten-free baking. At BakeWithEase, our GlutenFreeJoy approach is all about empowering you with the knowledge and confidence to tackle gluten-free recipes successfully. We aim to demystify the process, explaining why certain steps or ingredients are important so you can adapt and troubleshoot with confidence.
By understanding the role of binders like psyllium and xanthan gum, the importance of proper hydration for different flour blends, and the nuances of gluten-free proofing and baking temperatures, you are building a solid foundation for all your gluten-free baking endeavors. Whether you're making loaves of bread, muffins, or cakes, the principles learned from mastering these soft gluten-free rolls will be invaluable. Keep exploring and experimenting; the world of delicious gluten-free baking is vast and rewarding!
We love seeing your baking successes! Sharing your experiences and photos of your beautiful gluten-free bread rolls is a great way to connect with other bakers and inspire the community. Did you try one of the variations, like the rosemary garlic gluten-free rolls? Or did you discover a helpful tip during your baking process?
Join the conversation on BakeWithEase.com or share on social media using relevant hashtags. Your journey and results can provide encouragement and valuable insights for others who are also learning to bake delicious gluten-free rolls. Baking is often a shared joy, and the GlutenFreeJoy community is a supportive place to celebrate your achievements and ask questions. We can't wait to see your soft, fluffy creations!
Frequently Asked Questions
What makes these gluten-free bread rolls taste amazing?
These rolls use a blend of gluten-free flours and ingredients like psyllium husk to create a soft and chewy texture similar to traditional bread. The recipe focuses on balanced flavors that avoid the typical "gluten-free" taste.
Are the ingredients for this gluten-free bread rolls recipe easy to find?
Yes, the recipe uses readily available ingredients, like gluten-free flour blends, eggs, oil, and yeast, which can be found in most supermarkets or online. The psyllium husk, used as a binder, is also widely accessible.
Can I modify this gluten-free bread rolls recipe to be vegan?
Yes, you can. Substitute the eggs with a flax egg or aquafaba. Ensure all other ingredients are plant-based to create a vegan-friendly version of the rolls.
How long does it take to make these gluten-free bread rolls from start to finish?
Expect approximately 2-3 hours from start to finish, including proofing time. The active time for mixing and shaping the dough is relatively short, making it a simple baking project.
What are some tips for ensuring my gluten-free bread rolls rise properly?
Use warm water to activate the yeast, and ensure the dough is in a warm place to proof. Don't overmix the dough, as this can result in dense bread rolls.
Final Reflection: The Joy of Gluten-Free Baking, Rediscovered
The demand for delicious gluten-free alternatives is not just a trend; it's a testament to the power of inclusive and accessible culinary experiences. Finding truly satisfying gluten-free bread, especially rolls, remains a challenge for many, but the journey towards perfecting the recipe is a rewarding one, filled with experimentation and the ultimate satisfaction of a perfectly golden-brown, fluffy roll.
This exploration into gluten-free bread roll recipes has highlighted not only the technical challenges of baking without gluten, but also the profound impact food choices have on individuals' well-being and sense of community. The search for a perfect recipe often becomes a personal quest, reflecting our desire for connection and belonging through shared culinary experiences. Food is symbolic of love when words are inadequate.
- Alan D. Wolfelt. This quote perfectly encapsulates the emotional connection we forge with food, especially when we overcome challenges to create something delicious and nourishing.
Now, I invite you to step into your kitchen, armed with this knowledge and a renewed sense of possibility. Don't be afraid to experiment, to tweak the recipe, to make it your own. The journey of creating delicious gluten-free bread rolls is a testament to your creativity and resourcefulness. Embrace the process, savor the results, and share the joy with those you love. The perfect gluten-free roll awaits your touch.
Unleash Your Inner Baker: Gluten-Free Bread Rolls Await!
Thanks for joining us on this gluten-free baking adventure! You've just unlocked the secrets to creating incredibly delicious and satisfying rolls, even without gluten. Now it's time to put your new skills to the test!
- Bake a batch of these amazing rolls today! Use the recipe you just learned and impress your friends and family. Remember to experiment with different herbs and spices to find your perfect flavor profile.
- Share your baking triumphs (or even your baking mishaps!) with us on social media! Use #BakeWithEaseGlutenFree to connect with our community of passionate bakers.
- Explore other gluten-free recipes on BakeWithEase.com – we’ve got tons of delicious ideas waiting for you!
Ready to transform your baking game? What unique twist will you add to your next batch of gluten-free rolls?