
Classic Light Rye Bread: Simple Recipe for Home Bakers

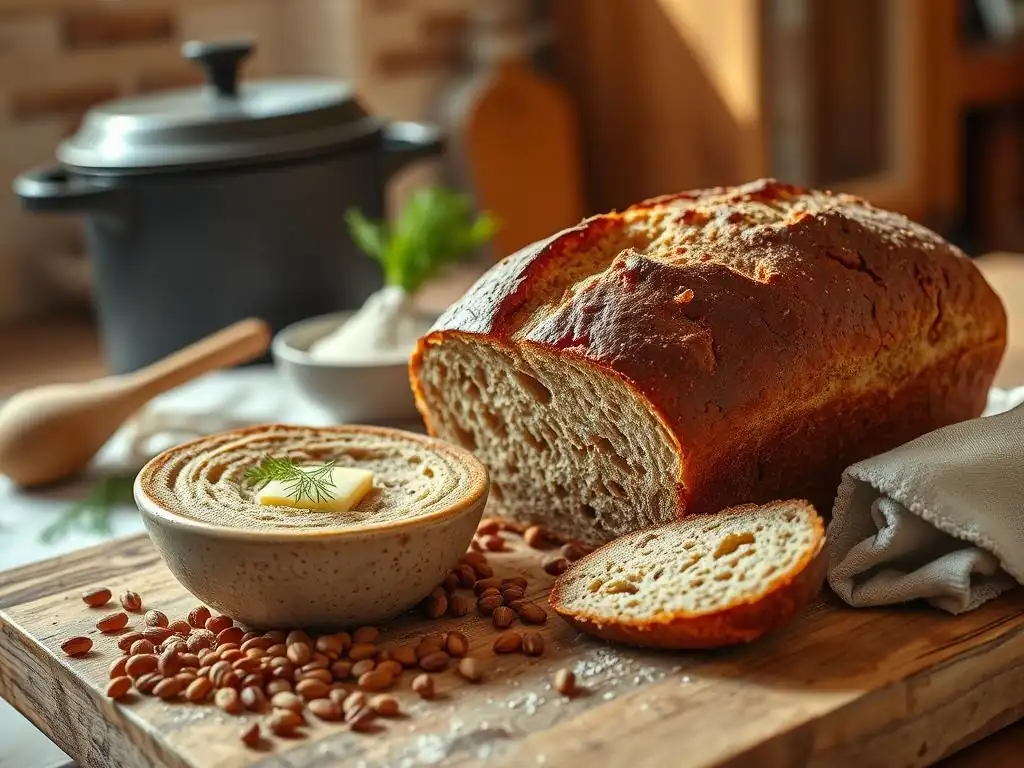
Welcome to BakeWithEase, your trusted companion on your baking journey! Ever dreamt of filling your kitchen with the comforting aroma of freshly baked rye bread? Our Easy classic rye bread recipe demystifies the process, guiding you step-by-step towards a light and flavorful loaf. Ready to unlock the secrets to perfect rye? Let's get baking!
- Classic Light Rye Bread: Simple Recipe for Home Bakers | BakeWithEase
- Bake Delicious Rye Bread at Home: An Easy Recipe for Beginners
- Why This Easy Classic Rye Bread Recipe Works
- Gather Your Ingredients: Easy Classic Rye Bread Recipe
- Step-by-Step: Baking Your Easy Classic Rye Bread
- Tips for Baking the Best Classic Rye Bread
- Serving Suggestions: Enjoying Your Freshly Baked Rye Bread
- Variations on the Classic Rye Bread Recipe
- The Ease of Baking Rye Bread at Home: A Recap
-
Frequently Asked Questions
- What makes this rye bread recipe "easy"?
- Is this rye bread recipe a "light" rye? What does that mean?
- Can I substitute any ingredients in this classic rye bread recipe?
- How long does it take to make this easy classic rye bread from start to finish?
- What's the best way to store this classic light rye bread to keep it fresh?
- Final Reflection: The Enduring Appeal of Simple Rye
- Unlock Your Inner Baker: Knead to Know More?
Classic Light Rye Bread: Simple Recipe for Home Bakers | BakeWithEase
Bake Delicious Rye Bread at Home: An Easy Recipe for Beginners
Welcome to BakeWithEase, where we believe that everyone can enjoy the satisfaction of baking delicious bread right in their own kitchen. If you've ever been intimidated by the idea of baking rye bread, this easy classic rye bread recipe is designed specifically for you. We've broken down the process into simple, manageable steps, making it accessible for even the most novice baker. Forget complicated techniques and hard-to-find ingredients; our goal is to show you how straightforward and rewarding baking a beautiful, flavorful light rye loaf can be.
This guide will walk you through everything from gathering your ingredients to achieving that perfect golden crust and tender crumb. You'll learn why this particular easy classic rye bread recipe is so reliable and gain confidence with every step. Baking bread at home not only fills your kitchen with an incredible aroma but also provides a truly satisfying result you can share with friends and family. Let's get started on your journey to baking wonderful homemade rye bread!
Why This Easy Classic Rye Bread Recipe Works
Simple Ingredients for a Flavorful Rye Loaf
One of the key reasons this easy classic rye bread recipe is so successful for home bakers is its reliance on readily available, simple ingredients. Unlike some complex bread recipes that call for specialty flours or starters, this recipe primarily uses all-purpose flour and a moderate amount of rye flour, typically around 25-35% of the total flour weight. This ratio strikes a balance, providing the distinct flavor of rye without making the dough overly dense or difficult to handle, which can happen with higher percentages of rye flour due to its lower gluten content compared to wheat flour.
Beyond the flour, the recipe includes standard baking staples: active dry or instant yeast for leavening, warm water to activate the yeast, a touch of sugar or honey to feed the yeast and add a hint of sweetness, and salt to enhance the overall flavor and control fermentation. Some recipes might also include a small amount of oil or butter for tenderness.
Using these common ingredients means you likely have most of what you need in your pantry already, reducing the barrier to entry and making it truly an easy classic rye bread recipe to attempt any day of the week.
Step-by-Step Instructions for Baking Success
The structure of this easy classic rye bread recipe is specifically designed for clarity and ease of execution, breaking down the baking process into logical, step-by-step instructions. We start with activating the yeast, a simple but crucial step that ensures your bread will rise properly. This is typically followed by combining wet and dry ingredients, mixing the dough, and then kneading. The kneading process for this light rye dough is less demanding than for a pure wheat loaf due to the rye content, making it less intimidating for beginners.
Each subsequent step, from the first rise (bulk fermentation) to shaping, the second rise (proofing), and finally baking, is explained in detail with approximate timings. For instance, the first rise usually takes about 60-90 minutes at room temperature, depending on kitchen warmth, while the second rise might be closer to 30-45 minutes. Baking typically occurs at temperatures around 375-400°F (190-200°C) for 30-40 minutes. By following these clear instructions, home bakers can confidently move through the process, understanding what to look for at each stage, significantly increasing their chances of achieving a successful and delicious loaf of classic rye bread.
Perfect Rye Bread Texture: Achieving the Ideal Crumb
Achieving the desired texture is a hallmark of a great classic rye bread, and this easy recipe guides you towards that goal. A light rye bread typically has a slightly tighter crumb than a pure wheat loaf, but it should still be relatively soft and moist, not dense or heavy like some traditional dark ryes. The specific ratio of rye to wheat flour in this recipe is calibrated to help achieve this balance.
Rye flour absorbs more water than wheat flour but develops less gluten, which is why a higher percentage can lead to a denser loaf. By keeping the rye content moderate, we ensure enough gluten development from the wheat flour to provide structure while allowing the rye to contribute its unique flavor and moisture retention properties.
Proper kneading, even for a shorter time than wheat dough, helps develop enough gluten for structure. Crucially, adequate rising time is essential. The first rise allows the dough to develop flavor and structure, while the second rise gives the loaf its final volume and contributes to a lighter texture.
Baking at the correct temperature ensures the loaf bakes through evenly, setting the crumb structure. Aiming for an internal temperature of around 200-210°F (93-99°C) confirms it's fully baked. Following the timing and temperature guidelines in this easy classic rye bread recipe helps home bakers reliably produce a loaf with a beautiful, soft, and flavorful crumb characteristic of light rye bread.
Gather Your Ingredients: Easy Classic Rye Bread Recipe
What You'll Need for Your Light Rye Bread
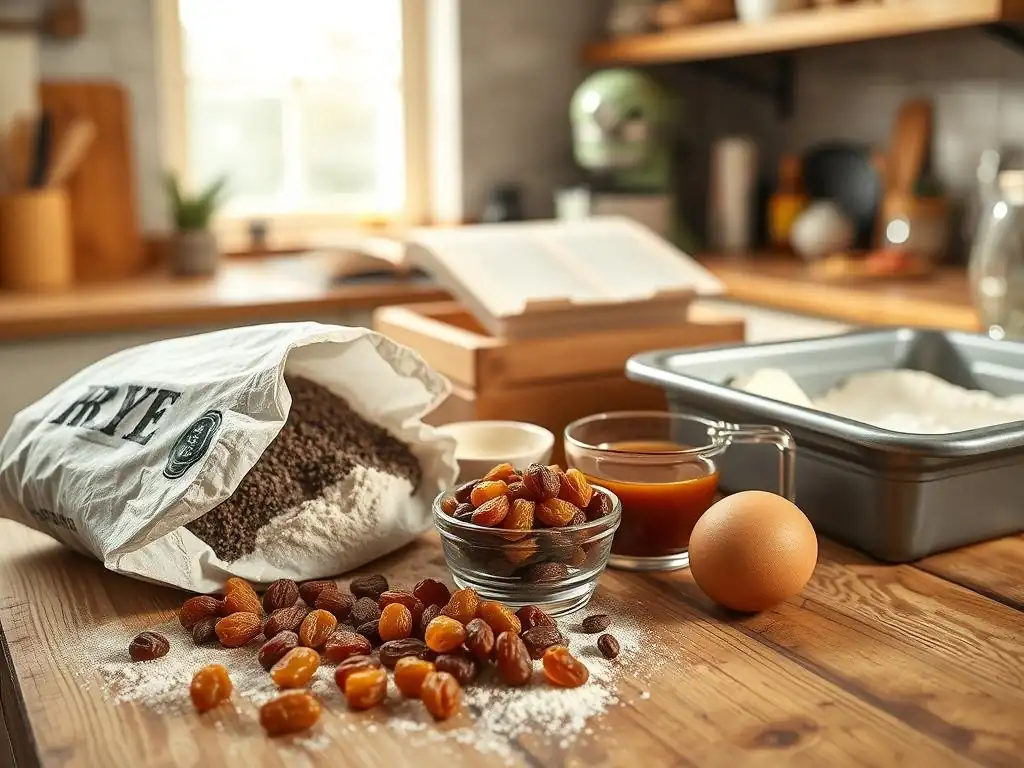
To bake this delightful easy classic rye bread recipe, you'll need just a few standard ingredients. Start with 3 cups (about 360g) of all-purpose flour and 1 cup (about 120g) of medium or light rye flour. Using medium rye flour will impart a slightly stronger rye flavor than light rye, but both work well.
You'll also need 1 ½ cups (about 360ml) of warm water, ideally between 105°F and 115°F (40°C and 46°C), which is the optimal temperature range for activating active dry yeast. If using instant yeast, slightly cooler water around 120-130°F (49-54°C) is also fine, or you can simply mix it directly with the dry ingredients.
You will need 2 ¼ teaspoons (one standard packet) of active dry or instant yeast. For flavor, include 2 teaspoons of salt. A touch of sweetness helps the yeast and enhances the taste; use 1 tablespoon of sugar, honey, or molasses.
Molasses will add a darker color and a more traditional rye flavor. Finally, a small amount of fat, such as 1 tablespoon of vegetable oil or melted unsalted butter, can improve the dough's texture and the crust's softness. Having these items measured and ready before you begin will make the baking process smooth and enjoyable, setting you up for success with this easy classic rye bread recipe.
Ingredient Substitutions and Tips for Rye Bread Baking
While the ingredients listed provide the base for a perfect easy classic rye bread recipe, there are a few potential substitutions or tips to keep in mind. If you only have dark rye flour, you can still use it, but be aware that it will result in a denser loaf with a more pronounced flavor and darker color.
You might consider slightly reducing the amount of dark rye flour to about ¾ cup (around 90g) if you want to maintain a lighter texture closer to the original recipe's intent. For the sweetener, brown sugar can be used in place of white sugar, honey, or molasses, offering a slightly different flavor profile.
If you prefer a more complex, tangy flavor, you could explore incorporating a small amount of sourdough starter discard (perhaps 50-100g), reducing the amount of water slightly to compensate for the starter's hydration. This isn't strictly part of the easy classic rye bread recipe as written but is a common variation for experienced bakers. For those sensitive to gluten, while this recipe uses wheat flour, experimenting with gluten-free flour blends designed for bread might be possible, though the results will differ significantly in texture and handling.
Always ensure your yeast is fresh; expired yeast is a common reason for bread failing to rise. Check the expiration date on the packet before you start.
Step-by-Step: Baking Your Easy Classic Rye Bread
Step 1: Preparing the Rye Bread Dough
The first step in creating your easy classic rye bread recipe is to prepare the dough. If using active dry yeast, begin by proofing it. In a large mixing bowl, combine the warm water (105-115°F / 40-46°C) with the sugar, honey, or molasses. Sprinkle the yeast over the top and let it sit for about 5-10 minutes.
You should see the yeast activate, becoming foamy and bubbly on the surface. This confirms your yeast is alive and ready to work. If using instant yeast, you can skip the proofing step and simply add it directly to the dry ingredients later.
Once the yeast is proofed (if applicable), add the salt and oil or melted butter to the wet mixture. In a separate bowl, whisk together the all-purpose flour and rye flour. Gradually add the flour mixture to the wet ingredients, mixing with a wooden spoon or a stand mixer with a dough hook until a shaggy dough forms.
Continue to mix or knead on a lightly floured surface for about 5-7 minutes. The dough will be slightly sticky due to the rye flour but should become smoother and more elastic as you knead. It won't develop as much gluten as a pure wheat dough, which is perfectly normal for this easy classic rye bread recipe.
Step 2: First Rise and Shaping the Dough
After kneading, the dough needs its first rise, also known as bulk fermentation. Lightly grease a clean bowl with oil or cooking spray. Place the dough in the bowl, turning it once to coat the surface with oil. Cover the bowl tightly with plastic wrap or a clean kitchen towel.
Place the bowl in a warm, draft-free spot. An oven with the light on (but the oven off) is often a good place. Let the dough rise until it has doubled in size, which typically takes about 60 to 90 minutes, though this can vary depending on the temperature of your kitchen.
Once the dough has doubled, gently punch it down to release the air. Turn the dough out onto a lightly floured surface. For a classic loaf shape, gently shape the dough into a round or oval.
Avoid excessive kneading at this stage; you just want to form it into a cohesive shape. If you want a longer, more traditional loaf, you can gently roll or pat the dough into a rectangle and then roll it up tightly from one end to the other, pinching the seam closed. This shaping prepares the dough for the second rise and helps determine the final structure of your easy classic rye bread.
Step 3: Second Rise and Scoring the Loaf
The second rise, or proofing, is the final rise before baking and is crucial for achieving a light texture in your easy classic rye bread. Place the shaped dough onto a baking sheet lined with parchment paper or into a greased loaf pan (a standard 9x5 inch loaf pan works well for this recipe). Cover the dough loosely with plastic wrap or a light kitchen towel.
Allow the dough to rise again in a warm spot for about 30 to 45 minutes, or until it has nearly doubled in size and looks puffy. Be careful not to over-proof, as this can cause the loaf to collapse during baking.
While the dough is completing its second rise, preheat your oven to 375-400°F (190-200°C). If you are using a baking stone or steel, place it in the oven as it preheats. Just before baking, it's beneficial to score the top of the loaf with a sharp knife or razor blade (a baker's lame is ideal).
Make one or two shallow cuts (about ¼ to ½ inch deep) across the top. Scoring helps control where the bread expands as it bakes, preventing uncontrolled cracking and resulting in a more attractive loaf. It's a simple technique that adds a professional touch to your homemade easy classic rye bread.
Step 4: Baking Your Perfect Light Rye Bread
With your oven preheated and the loaf scored, it's time to bake your easy classic rye bread. Carefully transfer the baking sheet or loaf pan to the preheated oven.
For a crispier crust, you can create steam in the oven by placing a pan of hot water on the rack below the bread or by spraying the oven walls with water immediately after putting the bread in (be careful not to spray the light or heating elements). Steam helps the crust remain pliable longer, allowing the loaf to expand fully before the crust sets, resulting in better volume and a crispier exterior.
Bake the bread for 30 to 40 minutes, or until the crust is golden brown and the internal temperature reaches 200-210°F (93-99°C). You can check the internal temperature using an instant-read thermometer inserted into the center of the loaf. Another traditional test is to tap the bottom of the loaf; if it sounds hollow, it's likely done. Once baked, remove the bread from the oven and transfer it to a wire rack to cool completely.
Allowing the bread to cool fully is essential for the crumb structure to set properly. Slicing into a hot loaf can result in a gummy texture. Patience is key to enjoying the perfect texture of your easy classic rye bread!
Tips for Baking the Best Classic Rye Bread
Achieving a Crispy Crust on Your Rye Bread
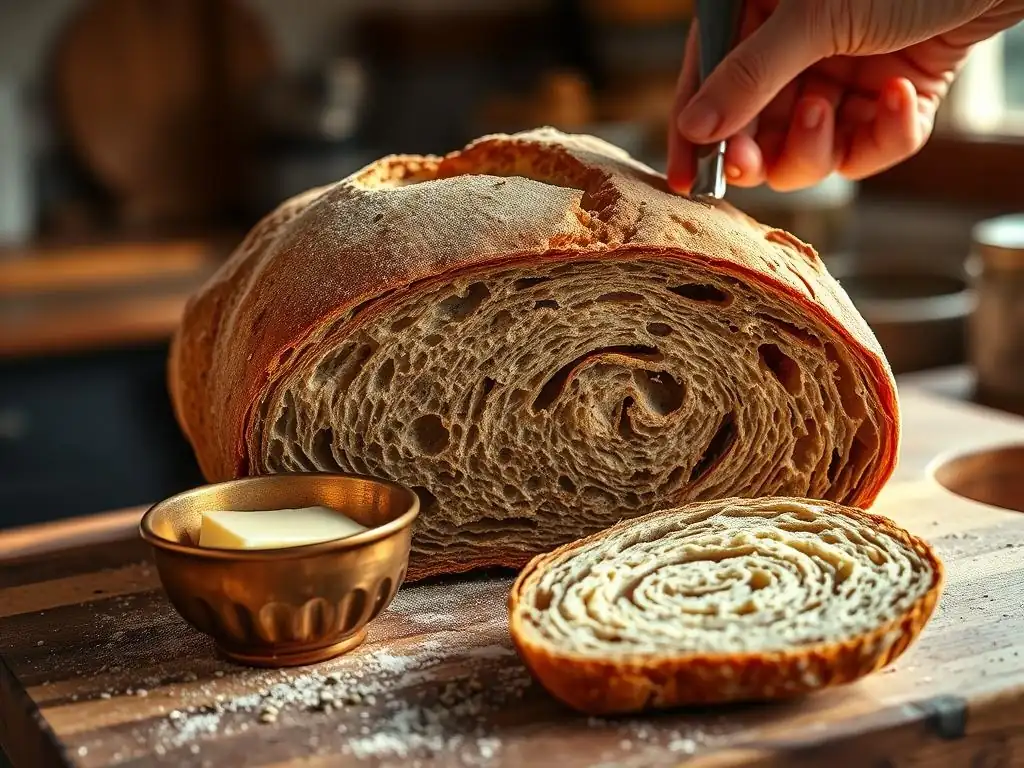
A hallmark of great classic rye bread is often a satisfyingly crispy crust. While rye flour tends to produce a slightly less crackly crust than pure wheat bread, you can still achieve a lovely texture with this easy classic rye bread recipe. The most effective method for a crispy crust is using steam during the initial phase of baking.
As mentioned in the baking step, placing a pan of hot water on a lower rack or carefully spraying the oven walls with water creates a steamy environment. This keeps the surface of the dough moist, allowing it to expand fully before the crust hardens.
Another tip is to bake on a preheated baking stone or steel if you have one. This provides a strong burst of heat from below, which helps the loaf spring and sets the crust quickly. Baking at a relatively high initial temperature (like 400°F / 200°C) for the first 10-15 minutes before potentially reducing the temperature slightly for the remainder of the bake can also contribute to a better crust development. Ensuring the loaf is fully baked until it reaches an internal temperature of 200-210°F (93-99°C) is also crucial; underbaked bread will have a pale, soft crust.
Troubleshooting Common Rye Bread Baking Problems
Even with an easy classic rye bread recipe, you might encounter a few issues. One common problem is a dense loaf. This can be caused by several factors: inactive yeast (always check the expiry date!
), insufficient kneading (though rye needs less than wheat, some development is needed), not allowing adequate rising time during the first or second rise, or over-proofing the dough. If your loaf is dense, try ensuring your yeast is fresh and active, giving the dough sufficient time to double during the rises, and checking its readiness by gently poking it – if the indentation springs back slowly, it's ready.
Another issue can be a tough or thick crust. This might happen if there wasn't enough steam in the oven during baking, or if the oven temperature was too high for too long. Uneven baking can occur if your oven has hot spots; rotating the loaf halfway through the baking time can help. If the loaf spreads too much during the second rise or baking, it might be under-proofed, or the surface tension wasn't sufficient during shaping. Practice with this easy classic rye bread recipe will help you identify what works best in your specific kitchen environment.
Storing Your Homemade Rye Bread
Proper storage is key to keeping your delicious homemade easy classic rye bread fresh. Once the loaf has cooled completely on a wire rack, the best way to store it depends on how quickly you plan to eat it and whether you want to preserve the crust's crispness. For short-term storage (1-2 days) while maintaining a crisper crust, store the loaf cut-side down on a cutting board or in a paper bag. This allows the crust to breathe.
For longer storage or if you prefer a softer crust and crumb, wrap the cooled loaf tightly in plastic wrap or place it in a resealable plastic bag. Stored this way at room temperature, the bread should stay fresh for 3-4 days.
To store for a week or longer, slicing the cooled loaf and freezing the slices in a freezer-safe bag or container is an excellent option. Frozen rye bread slices can be easily popped into a toaster or oven directly from the freezer, allowing you to enjoy the taste of freshly baked easy classic rye bread whenever you like.
Serving Suggestions: Enjoying Your Freshly Baked Rye Bread
Classic Pairings for Light Rye Bread
Your freshly baked easy classic rye bread is incredibly versatile and pairs wonderfully with a variety of foods. One of the most classic ways to enjoy light rye is toasted and spread generously with butter. The warmth enhances the bread's subtle rye flavor. Cream cheese is another popular companion, offering a creamy contrast to the bread's texture. For a simple yet satisfying snack, try a slice with a good quality jam or marmalade.
Moving beyond breakfast, light rye bread is a fantastic base for open-faced sandwiches. Consider classic European pairings like smoked salmon and cream cheese, or pickled herring. It also works beautifully with various cheeses, from sharp cheddar to creamy brie. Don't forget the simple pleasure of dipping fresh rye bread into soup or stew; its sturdy crumb holds up well. Explore these classic pairings to fully appreciate the unique flavor of your homemade easy classic rye bread.
Using Rye Bread for Sandwiches and More
While great on its own or with simple toppings, your easy classic rye bread also makes an excellent foundation for hearty sandwiches. Its slightly dense but tender crumb provides structure without being heavy. It's the traditional choice for classic deli sandwiches featuring pastrami, corned beef, or turkey, often layered with Swiss cheese, sauerkraut, and Russian or Thousand Island dressing for a Reuben or Rachel.
Beyond sandwiches, consider using slightly stale rye bread for croutons in salads or soups. Cut the bread into cubes, toss with olive oil and seasonings, and bake until golden and crisp. You can also use it in bread puddings, although its distinct flavor will influence the final taste compared to using plain wheat bread. Experiment with different uses to discover all the ways you can enjoy the fruits of your labor with this easy classic rye bread recipe.
Variations on the Classic Rye Bread Recipe
Adding Caraway Seeds for Authentic Flavor
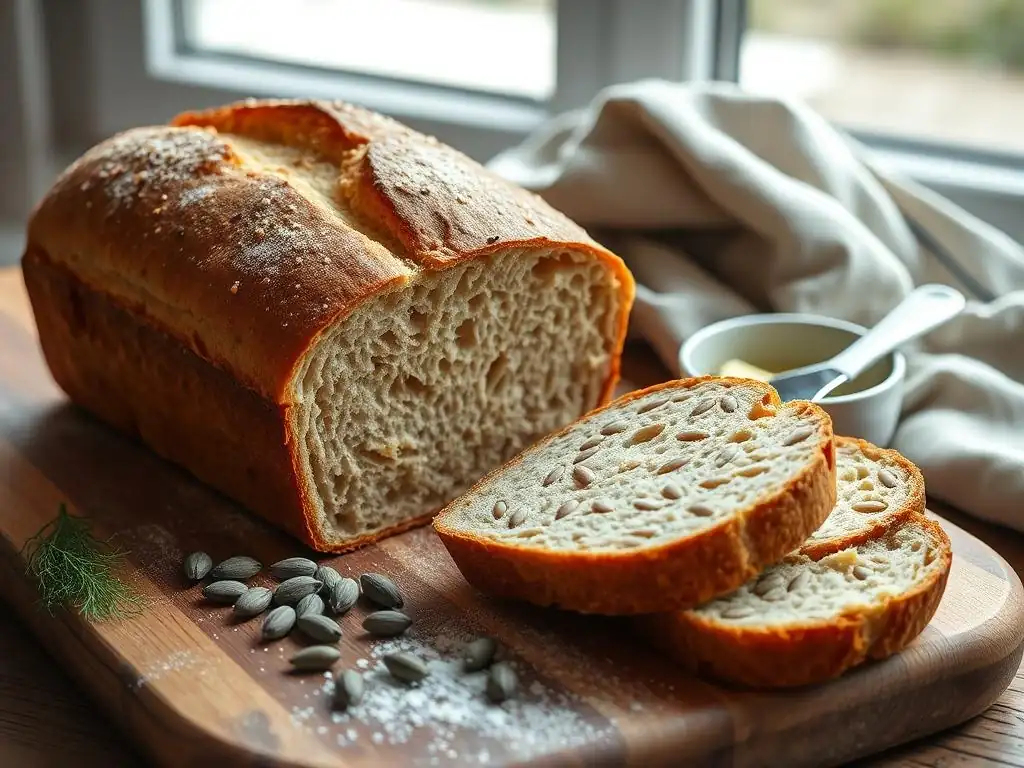
A common and beloved addition to classic rye bread is caraway seeds. These small seeds have a distinctive, slightly anise-like flavor that many people associate strongly with rye bread. Adding caraway seeds is a simple way to enhance the traditional taste of your easy classic rye bread recipe. You can incorporate caraway seeds directly into the dough during the kneading phase.
A typical amount to add to this recipe is 1 to 2 tablespoons of whole caraway seeds. Start with 1 tablespoon if you prefer a subtle hint of the flavor, or go up to 2 tablespoons for a more pronounced caraway presence. Simply add the seeds along with the flour mixture when combining your wet and dry ingredients. As the dough rises and bakes, the caraway seeds will infuse the bread with their characteristic aroma and taste, transforming your simple loaf into a more authentically flavored classic rye bread.
Dark Rye Bread Variation: Adjusting the Recipe
If you enjoy a stronger, darker rye flavor, you can adapt this easy classic rye bread recipe to create a dark rye variation. This typically involves using a higher percentage of dark rye flour and often incorporating color and flavor enhancers like molasses or cocoa powder.
To start, you might increase the dark rye flour to 1.5 or even 2 cups (about 180-240g), while reducing the all-purpose flour accordingly to maintain the total flour weight around 4 cups. Be prepared for a dough that is stickier and less elastic than the light rye version due to the higher rye content.
To achieve the characteristic dark color and deeper flavor, add 1 to 2 tablespoons of dark molasses or 1 tablespoon of unsweetened cocoa powder (or a combination) to the wet ingredients. These additions contribute to both the color and the rich, slightly bitter notes often found in dark rye bread. The dough might require slightly longer kneading to develop what gluten it can, and the rising times might be slightly different. The resulting loaf will be denser and more intensely flavored than the light easy classic rye bread recipe, perfect for pairing with strong cheeses or smoked meats.
Sourdough Rye Bread: A More Advanced Option
For bakers looking to expand their skills beyond a yeasted easy classic rye bread recipe, converting it to a sourdough version is a rewarding challenge. This variation replaces commercial yeast with a mature, active sourdough starter. The process involves feeding your starter and using a portion of it (typically 100-200g) to leaven the dough. You would adjust the amount of water and flour in the recipe to account for the flour and water contained within the starter.
Baking with sourdough takes longer, as fermentation relies on slower-acting wild yeasts and bacteria. The first rise (bulk fermentation) can take several hours, often 4-8 hours or even longer, depending on the starter's activity and ambient temperature.
A cold proof (refrigeration) for 8-12 hours is also common and helps develop a more complex, tangy flavor characteristic of sourdough. While not an easy classic rye bread recipe in the same vein as the yeasted version, the sourdough variation yields a loaf with exceptional depth of flavor and a wonderful chewy texture, making it a worthwhile endeavor for the adventurous home baker.
The Ease of Baking Rye Bread at Home: A Recap
Why This Recipe is Perfect for Home Bakers
This easy classic rye bread recipe truly lives up to its name, making the rewarding experience of baking rye bread accessible to everyone. Its success stems from using simple, common ingredients that are easy to find in any grocery store. The moderate amount of rye flour ensures the dough is manageable and forgiving, unlike doughs with very high rye percentages that can be tricky for beginners. Crucially, the clear, step-by-step instructions break down the process into logical phases, removing the guesswork often associated with bread baking.
From activating the yeast to kneading, rising, shaping, and baking, each stage is explained with enough detail for a novice to follow confidently. Approximate timings and visual cues (like dough doubling in size) provide helpful guidance. The tips on troubleshooting common issues and achieving a great crust further empower the home baker. This easy classic rye bread recipe is designed to build confidence, proving that baking delicious, authentic-tasting bread at home doesn't require years of experience or specialized equipment.
Enjoy Your Homemade Classic Light Rye Bread!
Having followed this easy classic rye bread recipe, you now have a beautiful, fragrant loaf of homemade bread ready to enjoy. Take a moment to appreciate the golden crust and the inviting aroma filling your kitchen – the satisfying result of your effort. Whether you slice it warm (exercising a little patience after cooling!) to spread with butter, prepare a classic deli sandwich, or simply enjoy it as a side with your meal, you've created something truly special.
Baking bread is a journey, and this easy classic rye bread recipe is a fantastic starting point for exploring the world of rye. Don't hesitate to bake it again, perhaps trying the caraway seed variation, or simply refining your technique. Each loaf you bake will teach you something new. So, slice in, savor the flavor, and share your delicious homemade classic rye bread with pride. Happy baking from all of us at BakeWithEase!
Frequently Asked Questions
What makes this rye bread recipe "easy"?
This recipe focuses on simple techniques and uses easy-to-find ingredients, making it accessible even for beginner bakers. We avoid complex steps and prefer a straightforward approach.
Is this rye bread recipe a "light" rye? What does that mean?
Yes, it's a "light" rye, meaning it uses a higher proportion of bread flour compared to rye flour, resulting in a milder flavor and lighter texture. It's less dense than a dark rye bread.
Can I substitute any ingredients in this classic rye bread recipe?
While substitutions are possible, they can affect the outcome. We recommend sticking to the recipe, especially for your first attempt. However, you could experiment with different types of seeds as a topping.
How long does it take to make this easy classic rye bread from start to finish?
The entire process, including proofing and baking, takes approximately 3-4 hours, though active preparation time is much less. Proofing time will vary depending on your environment.
What's the best way to store this classic light rye bread to keep it fresh?
Store the cooled bread in an airtight container or wrapped tightly in plastic wrap at room temperature. It's best consumed within 3-4 days for optimal freshness. Freezing is also an option.
Final Reflection: The Enduring Appeal of Simple Rye
The humble loaf of rye bread, once a staple of kitchens worldwide, is experiencing a well-deserved resurgence. Its earthy flavor and satisfying texture offer a comforting counterpoint to the often-processed foods dominating modern diets. This simple recipe, designed for home bakers of all skill levels, aims to reintroduce the joy and satisfaction of crafting this classic bread from scratch.
The enduring appeal of rye bread lies not just in its taste, but in the connection it fosters with tradition and the simple act of creation. It's a tangible link to generations past, a reminder of a time when food was made with care and intention, not just mass-produced for profit. Bread is the staff of life,
a common saying highlights its fundamental importance, and baking it yourself elevates that importance to a deeply personal level. This recipe, I hope, has helped bridge that gap, allowing you to experience the satisfaction of making something truly nourishing and delicious.
Now, I invite you to roll up your sleeves and try your hand at this recipe. Don't be intimidated by the seemingly complex process; the rewards are well worth the effort. The aroma of freshly baked rye bread filling your kitchen, the satisfying thud of the loaf as it cools, and the pure pleasure of sharing it with loved ones – these are experiences that transcend the simple act of baking. Embrace the challenge, savor the process, and rediscover the magic of homemade bread.
Unlock Your Inner Baker: Knead to Know More?
Thanks for taking the time to explore the world of classic light rye bread with us! We hope you gained some valuable baking knowledge and inspiration. Now it's time to put your newfound skills to the test.
- Bake your own loaf: Grab those ingredients and give our recipe a try! It's easier than you think. We guarantee the smell alone will be worth the effort.
- Share your baking journey: Post a picture of your creation on social media using #BakeWithEaseRye and tag us! Let's inspire each other.
- Explore more rye recipes: Dive into our recipe archives for more variations and baking techniques. You might just discover your new favorite bread!
What unique twist will you add to your own light rye bread masterpiece?