
Overnight Whole Wheat Bread: Minimal Effort, Maximum Flavor

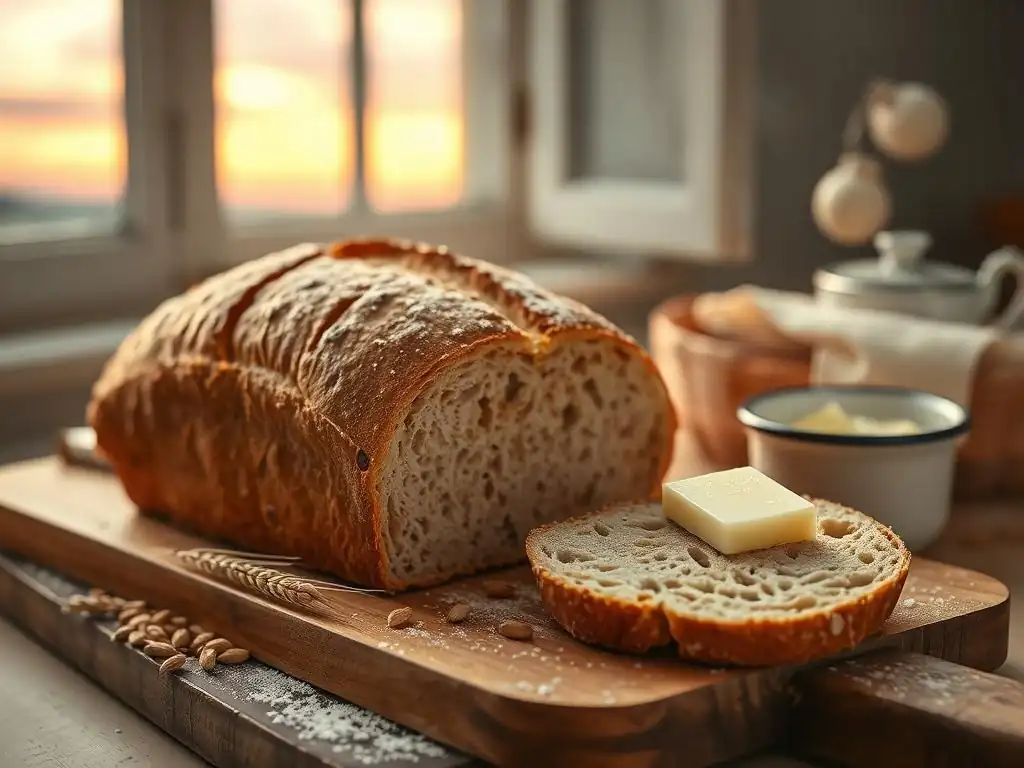
Welcome to BakeWithEase, where delicious baking becomes effortlessly achievable! Ever dreamt of waking up to the aroma of freshly baked bread without the fuss? You're in the right place. Discover the secrets to our Easy Whole Wheat Overnight Bread and unlock a world of simple, flavorful baking. Ready to transform your kitchen into a haven of homemade goodness? Let's get started and explore the surprisingly simple steps!
- Sourdough Boule: A Beginner's Guide to Rustic Bread - BakeWithEase
- Introduction: Embrace the Art of Sourdough Baking
- Crafting the Perfect Sourdough Boule Dough: A Step-by-Step Guide
- Baking Your Sourdough Boule to Perfection
- Tips and Tricks for the Best Sourdough Boule
- Serving Suggestions: Enjoying Your Sourdough Boule
- Conclusion: Embrace the Simplicity of Sourdough Boule Baking
-
Frequently Asked Questions
- How is this overnight whole wheat bread recipe different from other bread recipes?
- Can I substitute ingredients in this overnight whole wheat bread recipe?
- How long does the dough need to rise overnight?
- What's the best way to store leftover overnight whole wheat bread?
- Is this recipe suitable for someone completely new to baking bread?
- Final Reflection: Savor the Simplicity, Embrace the Flavor
- Unleash Your Inner Baker: Make Amazing Bread Tonight!
Sourdough Boule: A Beginner's Guide to Rustic Bread - BakeWithEase
Introduction: Embrace the Art of Sourdough Baking
Discover the Magic of Naturally Leavened Bread
Sourdough baking is a timeless craft, connecting us to ancient traditions of bread making. At its heart is the sourdough starter, a living culture of wild yeast and bacteria that naturally leavens the dough, replacing commercial yeast. This slow fermentation process unlocks incredible depth of flavor, complexity, and a wonderfully chewy texture that's hard to achieve otherwise. Beyond just taste, naturally leavened bread can often be easier to digest for some people due to the breakdown of gluten and phytic acid during the long fermentation.
The true magic lies in nurturing your starter and witnessing the dough transform. It's a process that teaches patience and observation, responding to the subtle cues of nature and temperature. As the starter bubbles and the dough rises slowly, you become part of a fascinating biological dance. The result is not just bread, but a loaf imbued with character, a tangy aroma, and a crust that crackles satisfyingly as it cools – a testament to the simple, yet profound power of natural fermentation.
Why Choose This Sourdough Boule Recipe?
This specific sourdough boule recipe is designed with the beginner in mind, stripping away complexity to focus on the fundamental steps that yield a beautiful, rustic loaf. We emphasize forgiving techniques and clear indicators of success, making the journey accessible even if you've never touched sourdough before. Unlike some complex recipes requiring precise timing and many steps, this approach simplifies the process, allowing you to build confidence with each bake.
We guide you through managing your starter, mixing the dough, understanding fermentation cues, and baking in a way that minimizes potential pitfalls. The goal is to demystify sourdough, proving that you don't need to be an expert to create delicious, naturally leavened bread at home. By focusing on a classic boule shape and using readily available equipment, this recipe provides a solid foundation for your sourdough adventures, setting you up for consistent success and loaves you'll be proud to share.
Crafting the Perfect Sourdough Boule Dough: A Step-by-Step Guide
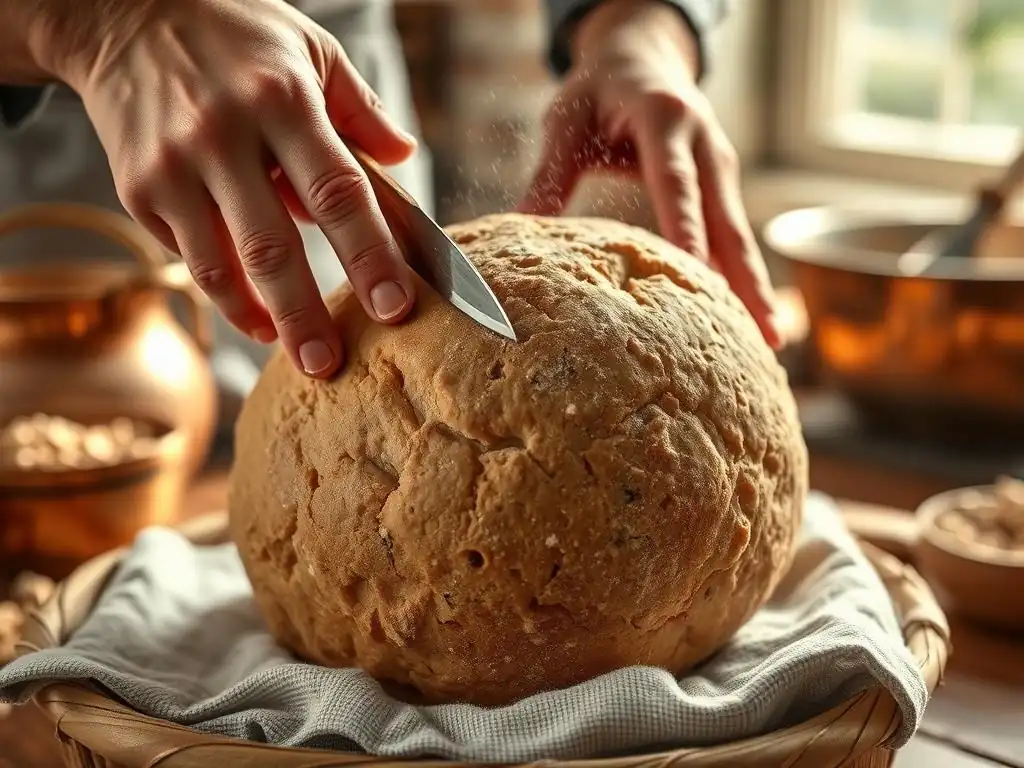
Ingredients for Your Sourdough Boule
- 100g active sourdough starter
- 350g warm water (around 85-90°F or 30-32°C)
- 500g strong bread flour (or a mix, see variations)
- 10g fine sea salt
Key Ingredients for Optimal Fermentation and Flavor
The success of your sourdough boule hinges on a few key ingredients, most importantly, your active sourdough starter. An "active" starter is one that has been recently fed and is bubbly, doubled in size, and passes the float test (a small dollop floats in water). This indicates the wild yeast is vigorous and ready to leaven your dough effectively. Using a starter at its peak ensures a good rise and contributes the characteristic tangy flavor that develops during fermentation. Aim for a starter that is typically fed with a 1:1:1 ratio of starter:water:flour.
The choice of flour also plays a crucial role. Strong bread flour, with its higher protein content (typically 12-14%), develops gluten more readily, providing the necessary structure to trap the gases produced by the starter, resulting in a well-risen loaf with a good crumb structure. While 100% bread flour works perfectly, incorporating a small percentage of whole wheat flour (say, 10-20%) can add nutritional value and a deeper, nuttier flavor profile, though it may require slight adjustments to hydration.
Water quality matters too; if your tap water is heavily chlorinated, consider using filtered water as chlorine can inhibit yeast activity. Finally, salt isn't just for flavor; it helps control the fermentation rate and strengthens the gluten network.
Equipment You'll Need
- Large mixing bowl
- Kitchen scale (essential for accuracy)
- Dough scraper or spatula
- Bench scraper
- Proofing basket (banneton) or bowl lined with a floured towel
- Dutch oven with lid (cast iron is ideal)
- Parchment paper
- Lame or sharp razor blade for scoring
Step-by-Step Instructions: Mixing and Developing the Dough
- Mix: In your large mixing bowl, whisk together the active sourdough starter and warm water until the starter is mostly dissolved.
- Add the flour and salt to the bowl.
- Using your hands or a spatula, mix until no dry flour remains and a shaggy dough forms. It will be sticky.
- Cover the bowl and let it rest for 30 minutes. This is an autolyse period, allowing the flour to hydrate.
- Develop Gluten: After the rest, perform your first set of stretch and folds. With wet hands, grab one side of the dough, stretch it up, and fold it over the center. Rotate the bowl and repeat 3-4 more times until the dough starts to show some tension.
- Rest the dough for 30-45 minutes.
- Repeat the stretch and fold process 2-3 more times over the next 2-3 hours, resting for 30-45 minutes between sets. You will notice the dough becoming smoother, stronger, and more elastic with each set.
Achieving the Perfect Dough Consistency and Strength
The key to successful sourdough is developing sufficient gluten strength to support the rise while maintaining proper hydration. After the initial mix and autolyse, the dough will feel shaggy and potentially quite wet, depending on the hydration level. This is normal. The subsequent stretch and fold sets are crucial for aligning the gluten strands and building tension. You'll feel the dough resisting more with each fold, becoming smoother and holding its shape better.
A good indicator of developing strength is the "windowpane test." Carefully pull a small piece of dough and gently stretch it between your fingers. If you can stretch it thin enough to see light through it without tearing, the gluten is well-developed. If it tears easily, it needs more development, potentially through additional gentle folds or simply more rest time. A well-developed dough will be elastic and resilient, ready to hold the gas produced during fermentation, leading to a beautiful crumb structure in the final loaf.
Bulk Fermentation: Developing Flavor and Structure
After the final set of stretch and folds, cover the bowl and let the dough ferment at room temperature. This phase, known as bulk fermentation or first rise, is where the magic happens. The starter works to produce carbon dioxide, causing the dough to rise, and organic acids, which develop the characteristic sourdough flavor.
The duration of bulk fermentation is highly dependent on the ambient temperature and the activity of your starter. In a warm kitchen (around 75°F or 24°C), it might take 4-6 hours. In a cooler kitchen (around 68°F or 20°C), it could take 8-12 hours or even longer.
Look for visual cues: the dough should increase significantly in volume (often doubling, but sometimes less depending on hydration and flour), appear bubbly on the surface and along the sides of the bowl, and feel soft and airy. A good way to check is the "poke test" – gently poke the dough with a wet finger; if the indentation slowly springs back about halfway, it's likely ready.
Maximizing Flavor Development During Bulk Fermentation
Flavor development in sourdough is directly linked to the fermentation process, particularly the production of lactic and acetic acids by the bacteria in your starter. Temperature plays a significant role here. A warmer bulk fermentation tends to favor lactic acid production, resulting in a milder, yogurt-like tang. A cooler, longer bulk fermentation encourages acetic acid production, leading to a sharper, more vinegary tang. Experimenting with temperature can help you achieve your preferred flavor profile.
Another technique to maximize flavor and improve handling is a cold proofing period in the refrigerator after the bulk fermentation and shaping. Retarding the dough in the fridge slows down yeast activity but allows the bacteria to continue producing flavorful acids. A cold proof can last anywhere from 8 hours to 24 hours (or even longer for some recipes). This not only deepens the flavor but also makes the dough firmer and easier to score before baking, contributing to a better oven spring.
Baking Your Sourdough Boule to Perfection
Preheating and Preparing Your Dutch Oven
Achieving that signature crispy sourdough crust requires a steamy environment during the initial phase of baking. The best way for home bakers to replicate a professional steam-injected oven is by using a preheated Dutch oven. Place your empty Dutch oven (with the lid on) into your oven while it preheats. Heat your oven to a high temperature, typically 450-500°F (230-260°C), for at least 30-45 minutes. This ensures the Dutch oven is scorching hot and will create instant steam when the dough is added.
Using parchment paper is highly recommended. Once your dough is shaped and ready to bake, gently turn it out onto a square of parchment paper. This makes it incredibly easy to lift and lower the dough safely into the hot Dutch oven, preventing burns and maintaining the dough's shape. Ensure the parchment paper is large enough to create handles for lowering the dough.
Shaping the Dough for Baking
After bulk fermentation and a potential cold proof, the dough needs a final shaping before baking. This process builds tension on the surface of the dough, which is essential for a good oven spring and helps the loaf maintain its round boule shape during baking. Gently turn the dough out onto a lightly floured surface. Be careful not to degas it completely.
For a round boule, there are several common techniques. A simple method involves gently folding the edges of the dough towards the center, creating a rough ball. Then, using a bench scraper or your hands, cup the dough and gently pull it towards you while rotating it. This motion creates surface tension underneath the dough.
Repeat this until the dough forms a taut, round ball. Another method is to flip the dough seam-side up, flatten it slightly, fold the top third down, the bottom third up, and then roll it into a tight cylinder before cupping and shaping. Practice helps you find the technique that works best for you and your dough's hydration level.
Shaping Techniques for a Round Boule
Developing sufficient surface tension is paramount when shaping a boule. This taut outer skin acts like a balloon, containing the expanding gases during oven spring and directing the rise upwards rather than outwards. After gently preshaping the dough into a rough ball and letting it rest briefly (5-20 minutes, depending on the dough), you perform the final shape.
A common and effective final shaping technique involves using lightly floured hands or a bench scraper to create tension. With the dough resting seam-side down, place your hands or the scraper behind it and gently pull the dough towards you across the surface of the counter. Rotate the dough slightly and repeat this pulling/tucking motion. You'll feel the surface tightening. Continue until you have a tight, round sphere with a smooth, taut top. The seam should be sealed underneath. This tension is what gives the boule its structure and helps it rise beautifully in the oven.
Baking Time and Temperature: Achieving a Golden Crust and Open Crumb
Baking sourdough in a Dutch oven typically involves two stages: the initial covered bake to create steam and promote oven spring, and the uncovered bake to develop the crust color and finish cooking. Preheat your oven and Dutch oven to a high temperature, often 450°F to 500°F (230-260°C). Carefully place your scored dough into the hot Dutch oven using parchment paper. Cover with the lid and bake for 20-25 minutes. The lid traps the moisture released by the dough, creating steam that keeps the crust soft, allowing the loaf to expand fully (oven spring).
After this initial phase, carefully remove the lid. You'll see the loaf has risen significantly and is likely pale but set. Reduce the oven temperature slightly, often to 425-450°F (220-230°C), and continue baking uncovered for another 20-30 minutes. This second phase allows the crust to brown beautifully, develop its signature crunch, and ensures the interior is fully cooked. The internal temperature of a fully baked loaf should reach around 200-210°F (93-99°C).
Cooling and Slicing: The Final Touches
Once your sourdough boule emerges from the oven, golden brown and glorious, the hardest part is waiting! It's absolutely crucial to let the bread cool completely on a wire rack before slicing into it. While it's tempting to cut into a warm loaf, the internal structure is still setting, and slicing too early can result in a gummy, dense crumb. As the bread cools, moisture redistributes throughout the loaf, and the starches finalize their structure.
Allow the boule to cool for at least 1-2 hours, or ideally longer, depending on its size. You'll hear it "sing" as it cools – the crust crackling as it contracts. Once fully cooled, use a sharp serrated knife to slice through the crust and reveal the beautiful open crumb you've worked so hard to achieve. The patience required during the cooling phase is rewarded with the perfect texture and flavor.
Tips and Tricks for the Best Sourdough Boule
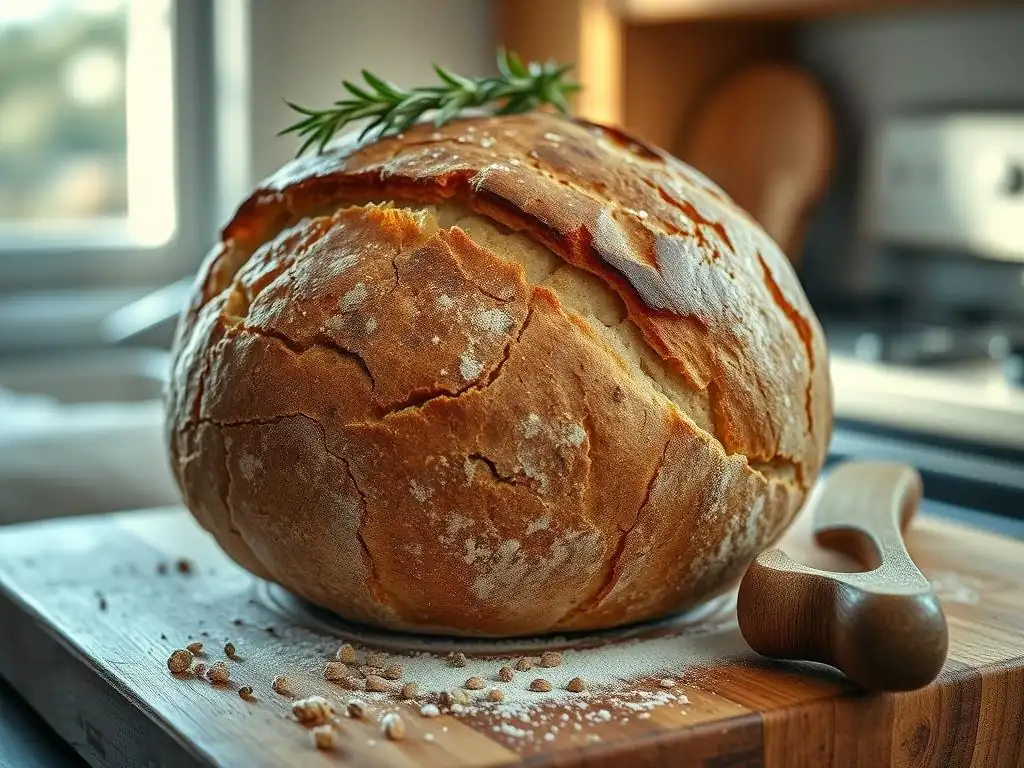
Troubleshooting Common Baking Issues
Even experienced bakers encounter challenges with sourdough. If your loaf is flat and dense, it could be due to an inactive starter, insufficient bulk fermentation (under-proofed), or excessive handling during shaping (degassing the dough). If the crust is pale, your oven might not be hot enough, or the covered baking time was too long/uncovered time too short. A gummy crumb often indicates the bread wasn't baked long enough or wasn't allowed to cool completely.
Sticky dough is common, especially with high hydration recipes. Using wet hands or a wet bench scraper can help manage stickiness. If your dough spreads rather than rises during baking, it likely lacks sufficient gluten strength or was over-proofed during bulk fermentation or cold proofing. Keeping a baking journal can help you track variables like temperature, timing, and hydration to identify patterns and troubleshoot issues effectively.
Addressing Dough That's Too Wet or Over-Proofed
Dealing with a dough that feels excessively wet or sticky during handling can be frustrating. While some hydration levels are naturally sticky, if it's unmanageable, you can try incorporating a little extra flour during the stretch and fold phase, a tablespoon at a time, until it becomes more manageable. Another technique is to perform "coil folds" instead of traditional stretch and folds; this involves lifting the dough from the center and letting the ends fold underneath, building tension without excessive sticking to your hands or the surface. Ensuring your hands and tools are wet can also prevent sticking.
An over-proofed dough, often indicated by excessive spread, a very fragile structure, or a complete lack of tension, is challenging but sometimes salvageable. If it's severely over-proofed, it might be better used for flatbreads or pizza dough. If only slightly over-proofed, handle it very gently during shaping to avoid deflating it entirely. Bake it sooner than planned. A cold proof can sometimes slow down an over-proofed dough, but it's crucial to catch it before it collapses. Learning the signs of perfectly proofed dough comes with practice.
Enhancing the Flavor: Flour Variations
While a basic sourdough boule using strong bread flour is delicious, experimenting with different flours can introduce exciting new flavors and textures. Substituting a portion of the bread flour with whole wheat flour (start with 10-20%) adds a nutty depth, increased nutrition, and a slightly denser crumb. Darker flours like rye or spelt can add significant flavor complexity, though they absorb water differently and may require hydration adjustments.
Consider incorporating heritage grains like einkorn or spelt for unique, nuanced flavors. These flours often behave differently than modern wheat, sometimes having weaker gluten structures, so they might require a lower hydration level or gentle handling. Adding seeds (like flax, sesame, or sunflower) or cooked grains (like oats or barley) during the mixing phase can also boost flavor, texture, and nutritional value, transforming your basic boule into something truly special.
Exploring Different Flour Combinations for Unique Flavors
Mixing different types of flour is a fantastic way to personalize your sourdough boule and explore a spectrum of flavors. A common variation is using a blend of white bread flour and whole wheat flour.
A mix like 80% white bread flour and 20% whole wheat flour provides a good balance – the white flour contributes to a light, open crumb and good rise, while the whole wheat adds a pleasant earthiness and nutritional boost. As you increase the percentage of whole wheat, the crumb will become denser, and the dough may require slightly more hydration as whole wheat absorbs more water.
Beyond whole wheat, flours like rye offer a distinct, slightly sour flavor and a denser, stickier dough that requires careful handling. Even a small percentage (5-10%) of rye can significantly impact the taste. Spelt is another popular alternative, offering a slightly sweet, nutty flavor and often being easier to digest for some people. Spelt gluten is more fragile than modern wheat gluten, so it's best used in moderation (up to 30-50% of the total flour) when aiming for a classic boule structure. Each flour combination presents a new learning opportunity and a unique flavor profile to discover!
Storing Your Freshly Baked Bread
Proper storage is key to keeping your homemade sourdough boule fresh and delicious for as long as possible. Once the bread is completely cooled, the best way to store it depends on how quickly you plan to eat it. For consumption within a day or two, simply storing it cut-side down on a cutting board or in a paper bag is often sufficient to maintain the crust's crispness. Avoid airtight containers initially, as they can trap moisture and soften the crust.
For longer storage, or if you live in a humid environment, you can wrap the cooled loaf tightly in a linen bread bag or a clean tea towel. If you won't finish the loaf within 2-3 days, freezing is an excellent option. Slice the cooled bread and freeze the slices flat on a baking sheet before transferring them to a freezer-safe bag or container.
Alternatively, you can freeze half or the whole loaf wrapped tightly in plastic wrap and then foil. Thawed slices can be quickly toasted, while a whole loaf can be refreshed in a warm oven (around 350°F or 175°C) for 10-15 minutes to revive the crust.
Serving Suggestions: Enjoying Your Sourdough Boule
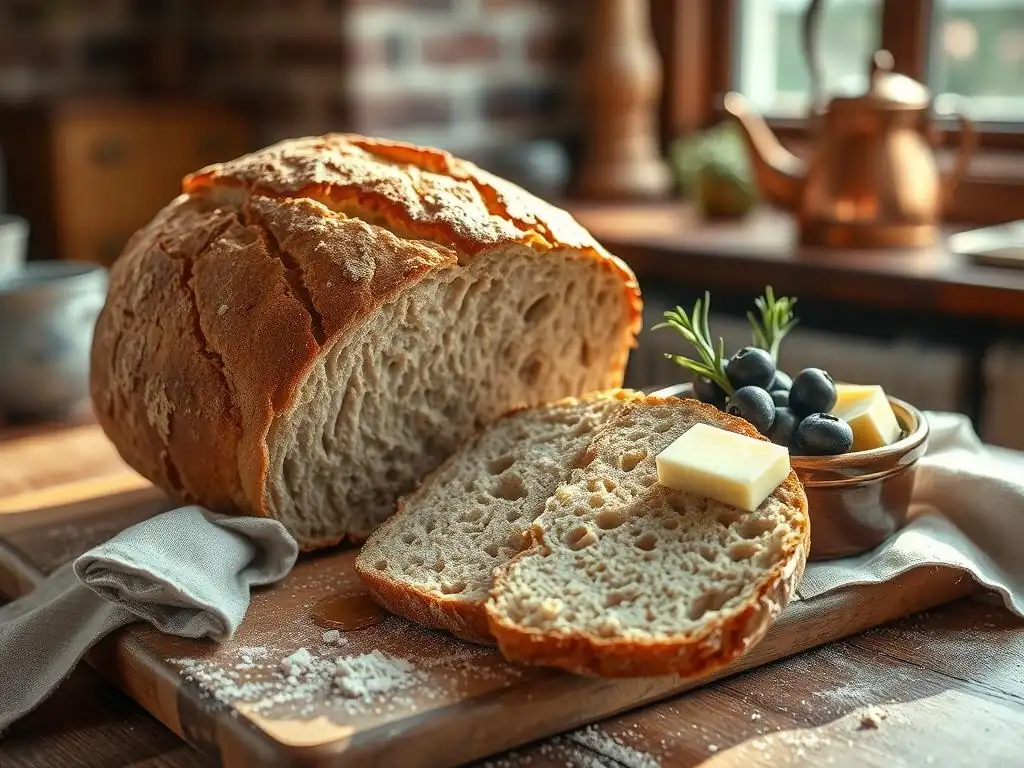
Delicious Ways to Enjoy Your Homemade Bread
Your freshly baked sourdough boule is incredibly versatile and can elevate countless meals. Of course, the simplest and often most satisfying way to enjoy it is sliced and served with just a smear of good quality butter. The tang of the bread pairs beautifully with the richness of the butter. Toasted slices make a fantastic base for avocado toast, bruschetta, or open-faced sandwiches.
Consider using your sourdough for hearty sandwiches – the sturdy crust and chewy interior hold up well to fillings. It's also perfect for dipping into soups, stews, or olive oil and balsamic vinegar. Day-old or slightly stale sourdough can be transformed into croutons for salads, breadcrumbs, or used in classic dishes like panzanella (Italian bread salad) or stratas. Don't let any of your delicious homemade bread go to waste!
Pairing Suggestions: Complements to Sourdough Bread
The tangy, slightly acidic profile of sourdough bread makes it an excellent companion to a wide variety of foods. It cuts through richness and complements creamy textures. Think about pairing it with strong cheeses – a sharp cheddar, a pungent blue cheese, or a creamy brie all find a perfect foil in sourdough. It's also wonderful alongside charcuterie, olives, and pickles on a cheese board.
For a simple yet delightful experience, serve warm slices with a robust olive oil for dipping, perhaps infused with garlic or herbs. Sourdough is also a classic accompaniment to hearty, rustic soups like lentil soup, minestrone, or French onion soup (where it can be used for the cheesy topping). Its structure makes it ideal for soaking up flavorful broths and sauces. The pairing possibilities are nearly endless, limited only by your culinary imagination!
Conclusion: Embrace the Simplicity of Sourdough Boule Baking
Experience the Satisfaction of Baking Delicious Bread at Home
Embarking on the journey of baking your own sourdough boule is an incredibly rewarding experience. From the initial feeding of your starter to the final golden loaf emerging from the oven, each step is a testament to the power of simple ingredients and natural processes. There's a unique sense of accomplishment that comes with creating something so fundamental and delicious from scratch. The aroma that fills your kitchen as it bakes is intoxicating, a promise of the delightful texture and flavor awaiting you.
Beyond the sensory pleasures, baking sourdough teaches patience, adaptability, and a deeper appreciation for the food we eat. It's a skill that, once learned, brings endless possibilities for variation and creativity. Holding that warm, rustic boule in your hands, hearing the crust crackle, and finally slicing into a beautiful, open crumb – these moments make the effort entirely worthwhile. You haven't just baked bread; you've created a connection to a timeless craft and a source of nourishment and joy.
Baking is often a solitary activity, but the results are meant to be shared! Your beautiful, homemade sourdough boule is a perfect centerpiece for any meal or gathering. Slice it up for sandwiches, serve it with dinner, or simply share warm pieces with friends and family. There's immense satisfaction in seeing others enjoy something you created with your own hands.
Don't forget to share your baking journey and successes! Take photos of your starter, your dough's rise, and your finished loaves. Share them with the BakeWithEase community online or with fellow baking enthusiasts. Trading tips, troubleshooting together, and celebrating milestones like your first successful oven spring or your best crumb yet makes the process even more enjoyable. Your experience can inspire others to try their hand at sourdough, spreading the joy of homemade bread one boule at a time!
Frequently Asked Questions
How is this overnight whole wheat bread recipe different from other bread recipes?
This recipe emphasizes ease and convenience, utilizing an overnight rise to develop flavor with minimal active effort. It focuses on being beginner-friendly with readily available ingredients.
Can I substitute ingredients in this overnight whole wheat bread recipe?
While the recipe is designed for a specific flavor profile, you can make some substitutions. For example, you might swap honey for maple syrup, but be mindful of how changes affect the final texture and taste.
How long does the dough need to rise overnight?
The dough needs to rise for approximately 8-12 hours in the refrigerator. This slow, cold fermentation process develops complex flavors and improves the bread's texture.
What's the best way to store leftover overnight whole wheat bread?
Store leftover bread in an airtight container at room temperature for up to 3 days. For longer storage, slice and freeze the bread for future use.
Is this recipe suitable for someone completely new to baking bread?
Yes! This recipe is specifically designed for beginner bakers. The instructions are clear, concise, and focus on making the process as simple and stress-free as possible.
Final Reflection: Savor the Simplicity, Embrace the Flavor
The ease of making overnight whole wheat bread transcends mere convenience; it's a gateway to healthier eating and a deeper appreciation for the simple pleasures of home baking. This isn't just about a quick recipe; it's about reclaiming time in our busy lives while simultaneously enriching our diets with wholesome, delicious bread. The minimal effort required belies the profound satisfaction of pulling a warm, crusty loaf from your oven, knowing you crafted it with your own hands.
The impact of this simple recipe extends beyond the individual kitchen. It speaks to a growing desire for healthier, more sustainable food choices, a movement away from processed foods and towards mindful cooking. The best things in life are simple,
a sentiment often repeated, rings especially true when considering the joy derived from this straightforward baking method. It’s a reminder that nourishing ourselves doesn't have to be complicated or time-consuming. The quiet satisfaction of kneading dough, the comforting aroma filling your home – these are the small joys that contribute to a richer, more fulfilling life.
Now, I invite you to consider your own relationship with food. Will you embrace the simplicity of this overnight bread recipe? Will you take the time to savor the process, the aroma, and the taste of something homemade and healthy? This isn't just about bread; it's about slowing down, connecting with the process of creation, and nourishing yourself – body and soul. Try it. You might be surprised at the profound impact this simple act can have.
Unleash Your Inner Baker: Make Amazing Bread Tonight!
Thanks for taking the time to explore the world of overnight whole wheat bread! We hope you've discovered how easy it is to create delicious, healthy bread without spending hours in the kitchen. Now it's time to put your newfound knowledge to work!
- Bake your own loaf tonight: Grab those ingredients and get started! The recipe is designed for minimal effort, so even busy schedules can accommodate this rewarding experience.
- Share your baking journey: Post a picture of your finished loaf on social media and tag us @BakeWithEase – we’d love to see your creations!
- Explore other easy bread recipes: Dive deeper into our website for more simple, yet impressive bread recipes perfect for any skill level.
Ready to transform your kitchen into a bread-baking haven? What’s your favorite part of the overnight bread-making process?