
Baking Rolls at High Altitude: Adjusting Your Recipe

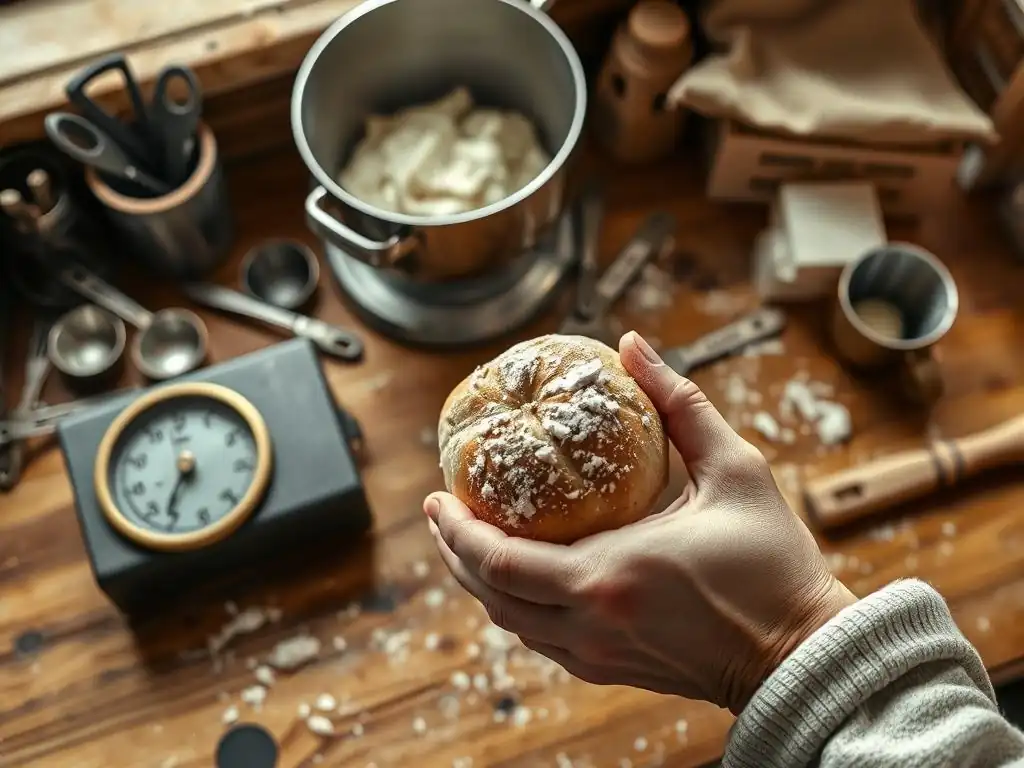
Welcome to BakeWithEase, your trusted companion in the world of baking! Ever wondered how to achieve perfectly fluffy rolls when baking at high altitude? It's more than just adding extra flour! Dive into our guide on High Altitude Baking Rolls and unlock the secrets to adapting your favorite recipes for truly irresistible results. Let's conquer those baking challenges together!
- Baking Rolls at High Altitude: A Comprehensive Guide
- Adjusting Your Roll Recipe for High Altitude Success
-
High Altitude Roll Baking Adjustments: Step-by-Step
- 1. Reducing Leavening Agents: Yeast and Baking Powder in Rolls: Preventing Over-Proofing
- 2. Increasing Liquid: Hydration for High Altitude Roll Dough: Combating Dryness
- 3. Adding Flour: Balancing the Dough Consistency: Strengthening Gluten Structure
- 4. Oven Temperature Adjustments for High Altitude Rolls: Preventing Rapid Browning
- 5. Adjusting Baking Time: Preventing Dry or Overbaked Rolls: Monitoring Internal Temperature
-
Troubleshooting Common High Altitude Roll Baking Problems
- Rolls Collapsing: Causes and Solutions: Too Much Leavening, Insufficient Gluten
- Dry and Crumbly Rolls: Hydration and Baking Time Fixes: Increase Liquid, Reduce Baking Time
- Dense and Heavy Rolls: Leavening Agent Issues: Insufficient Yeast Activity
- Uneven Baking: Oven Temperature and Placement Tips: Rotate Pans, Calibrate Oven
- High Altitude Roll Recipe Example: Adjusting a Basic Dinner Roll Recipe
-
Tips and Tricks for Perfect High Altitude Baked Rolls
- Using a Stand Mixer for High Altitude Roll Dough: Efficient Kneading and Gluten Development
- Proofing Techniques for Optimal Rise at Altitude: Shorter Proofing Times, Warmer Environment
- Scoring and Shaping High Altitude Rolls: Allowing Expansion, Creating Visual Appeal
- Achieving a Golden-Brown Crust at High Altitude: Egg Wash, Milk Wash, Temperature Control
- High Altitude Roll Baking: Mastering the Art of Bread Making
-
Frequently Asked Questions
- What is the main challenge when baking rolls at high altitude?
- Why do I need to adjust my roll recipe for high altitude?
- What are some common adjustments I can make to my roll recipe for high altitude?
- How much should I reduce the yeast when baking rolls at high altitude?
- What happens if I don't adjust my roll recipe for high altitude?
- Final Reflection: The Sweet Success of High-Altitude Baking
- Unlock Your High-Altitude Baking Potential!
Baking Rolls at High Altitude: A Comprehensive Guide
Why Altitude Affects Roll Baking: Lower Air Pressure and Faster Evaporation
Baking rolls at high altitude presents unique challenges primarily due to the significant difference in atmospheric pressure compared to sea level. At higher elevations, the air pressure is lower. This reduced pressure has a direct impact on leavening agents like yeast.
Yeast produces carbon dioxide gas, which causes dough to rise. Under lower pressure, this gas expands more rapidly and with less resistance than it does at sea level. Imagine a balloon at sea level versus one carried up a mountain – the mountain balloon will expand more.
This accelerated expansion can cause dough to over-proof too quickly, leading to potential structural issues before the dough is ready for baking. For example, in a city like Denver, Colorado, sitting at roughly 5,280 feet (about 1,600 meters), the atmospheric pressure is significantly lower than in coastal cities. This difference means that a standard roll recipe designed for sea level will behave very differently, often resulting in rolls that rise too fast and then collapse or become coarse-textured.
Furthermore, the air at high altitude is typically much drier than at sea level. This dryness causes moisture in the dough to evaporate more quickly during both the proofing stage and the baking process. Dough can develop a dry, crusty surface during proofing if not properly humidified, hindering its ability to rise evenly.
During baking, the faster evaporation can lead to rolls that are dry, dense, or crumbly instead of soft and moist. A typical kitchen in a high-altitude location like Flagstaff, Arizona (around 7,000 feet or 2,100 meters), might have much lower ambient humidity than one in, say, Miami, Florida. This environmental difference means bakers must actively work to maintain adequate hydration in their dough and prevent premature drying, which is a key aspect of successful high altitude baking rolls.
Key Differences: Sea Level vs. High Altitude Roll Recipes: Moisture Balance and Structure
The fundamental differences between successful sea level and high altitude roll recipes lie in achieving the correct moisture balance and developing adequate structural integrity in the dough. At sea level, standard recipes are formulated assuming typical atmospheric pressure and humidity, allowing for a predictable rate of leavening and moisture retention. Yeast activity proceeds at a moderate pace, and gluten development provides the necessary framework to support the rise without collapsing. A classic dinner roll recipe might call for a specific flour-to-liquid ratio and a set amount of yeast, yielding consistent results in a sea-level environment.
When attempting high altitude baking rolls with a sea-level recipe, the faster rise and increased evaporation disrupt this balance. The dough often becomes too dry too quickly, and the rapid gas expansion can stretch the gluten structure beyond its capacity to hold, leading to a coarse crumb or collapse. Therefore, high altitude adaptations focus on counteracting these effects.
This typically involves reducing the amount of leavening to slow down the rise, increasing the amount of liquid to compensate for faster evaporation, and potentially adding a small amount of extra flour or strengthening the gluten through more vigorous kneading to build a more robust structure capable of withstanding the rapid expansion. These adjustments are crucial for achieving the desired soft texture and appealing shape characteristic of well-baked rolls, making the high altitude baking rolls process distinct from its sea-level counterpart.
Adjusting Your Roll Recipe for High Altitude Success
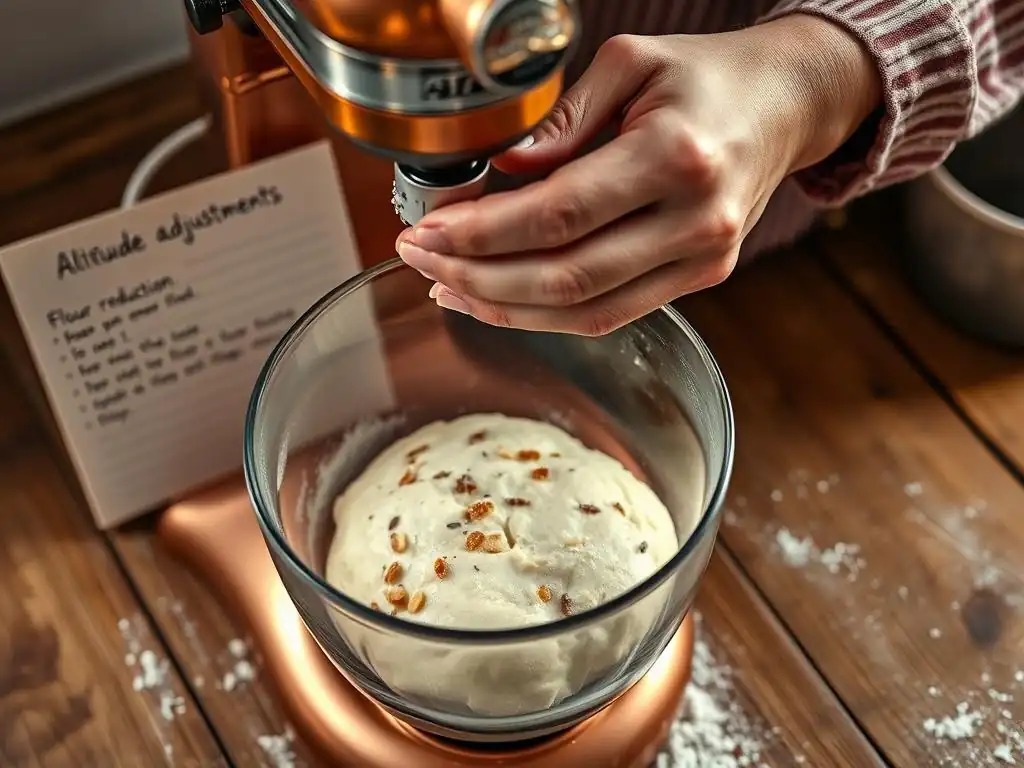
The Science Behind Recipe Adjustments at High Altitude: Gas Expansion and Gluten Development
The science behind adjusting recipes for high altitude baking rolls is centered on managing the increased rate of gas expansion and ensuring the gluten network can support it. At lower pressure, gases (primarily carbon dioxide from yeast) expand more readily. If the amount of leavening is not reduced, the dough will rise too quickly.
This rapid rise can lead to the gluten structure, which provides the framework for the dough, being stretched too thin. When the gluten is overstretched, it weakens and can't hold the gas bubbles effectively during baking, often resulting in the rolls collapsing in the oven or having a very coarse, open crumb structure. Reducing the yeast (or baking powder in non-yeasted rolls) slows down this initial expansion, allowing the gluten more time to develop strength and elasticity during kneading and proofing, creating a sturdier network capable of holding the gas during baking at high altitude.
Furthermore, the drier air at high altitude causes the surface of the dough to dry out faster, potentially forming a skin that restricts even rising and hinders gluten development. Increasing the liquid in the recipe helps combat this dryness, ensuring the dough remains pliable and moist throughout the process. This extra hydration also slightly slows down yeast activity and provides more moisture to convert to steam in the oven, which helps the rolls stay tender.
Strengthening the gluten, often through slightly longer kneading or sometimes adding a small amount of additional flour, is another key adjustment. A stronger gluten network is better equipped to support the increased internal pressure from gas expansion at altitude, preventing the rolls from collapsing and contributing to a better overall structure and texture in high altitude baking rolls.
Essential Ingredients to Modify for Perfect High Altitude Rolls: Flour, Water, and Yeast
Successfully baking rolls at high altitude hinges on carefully modifying the key ingredients that influence dough structure and leavening: flour, water, and yeast. Yeast is typically the first ingredient to adjust. Because gases expand more rapidly at altitude, the amount of yeast needs to be reduced to prevent the dough from over-proofing too quickly and collapsing. A common starting point for adjustments is to reduce the yeast by about 20-25% for every 3,000 feet (approx.
900 meters) above sea level. So, if a recipe calls for 2 teaspoons of yeast at sea level, you might reduce it to about 1.5 to 1.6 teaspoons when baking at 6,000 feet (approx. 1,800 meters). This adjustment helps slow down the initial rise, allowing for better gluten development and a more controlled final proof.
Water (or other liquids like milk) is crucial for dough hydration, and at high altitude, more is usually needed. The drier air causes faster evaporation from the dough surface and during baking. Increasing the liquid content helps keep the dough moist, prevents a dry crust from forming during proofing, and ensures the final rolls are tender and not dry or crumbly.
A good starting point is to add 1-2 tablespoons of extra liquid per cup of flour in the recipe. For example, if a recipe uses 3 cups of flour and 1 cup of liquid, you might increase the liquid to 1 cup plus 3-6 tablespoons. Flour itself might also need a slight adjustment.
Sometimes, after increasing the liquid, the dough can feel too slack. Adding just 1-2 tablespoons of extra flour per cup of flour (in addition to the original amount) can help absorb the extra liquid and strengthen the gluten structure, providing the necessary support for high altitude baking rolls. These adjustments to yeast, water, and flour are fundamental to adapting any roll recipe for successful high altitude baking.
High Altitude Roll Baking Adjustments: Step-by-Step
1. Reducing Leavening Agents: Yeast and Baking Powder in Rolls: Preventing Over-Proofing
The first critical step when adapting a recipe for high altitude baking rolls is to reduce the leavening agent, whether it's yeast for yeasted rolls or baking powder for quick rolls like biscuits or scones (though this article focuses on yeasted rolls). As discussed, the lower atmospheric pressure causes gases to expand more rapidly. If you use the same amount of yeast as a sea-level recipe, your dough will likely rise too fast, leading to over-proofing before the gluten structure is strong enough to support the expansion.
This can result in a coarse texture, large irregular holes, or even the dough collapsing during or after proofing. The goal is to slow down the gas production to allow the gluten network adequate time to develop and strengthen.
For yeast, a general guideline is to reduce the amount by about 20-25% for every 3,000 feet (approx. 900 meters) above sea level. So, if you're baking at 6,000 feet (approx. 1,800 meters), you might reduce the yeast by roughly 40-50% from the original sea-level amount. Start with a smaller reduction (like 20%) and adjust in future batches based on your results. For example, if a recipe calls for 2.25 teaspoons (one standard packet) of active dry yeast for a batch of rolls at sea level, you might try using only 1.8 to 1.35 teaspoons at higher altitudes, depending on your specific elevation. Pay close attention to the dough during the first rise; it should still double in size, but it should take longer than it would at sea level, indicating a more controlled rise. This controlled rise is essential for achieving the desired texture when high altitude baking rolls.
2. Increasing Liquid: Hydration for High Altitude Roll Dough: Combating Dryness
The second crucial adjustment for high altitude baking rolls is increasing the amount of liquid in your dough. The air at higher elevations is significantly drier than at sea level, which leads to faster evaporation of moisture from the dough. This drying can occur during mixing, kneading, proofing, and especially during baking. If the dough loses too much moisture, the resulting rolls will be dry, dense, and crumbly instead of soft and fluffy. Increasing the liquid helps compensate for this accelerated evaporation, ensuring the dough remains properly hydrated throughout the process.
A good starting point is to add 1 to 2 tablespoons of extra liquid (water, milk, etc., depending on your recipe) for every cup of flour called for in the original sea-level recipe. For instance, if your recipe uses 4 cups of flour, you would add an additional 4 to 8 tablespoons of liquid. Add the liquid gradually after the initial amount is mixed in, assessing the dough's consistency as you go. The dough should feel slightly stickier than you might be used to at sea level, but still manageable.
Remember that different flours absorb liquid differently, and ambient humidity (even at high altitude, it can vary slightly) plays a role. You might need to experiment to find the perfect amount for your specific location and ingredients. Proper hydration is key to preventing dry, heavy results and achieving tender, moist rolls when high altitude baking rolls.
3. Adding Flour: Balancing the Dough Consistency: Strengthening Gluten Structure
While increasing liquid is necessary at high altitude, it's important to balance this with the correct amount of flour to achieve the proper dough consistency and strengthen the gluten structure for high altitude baking rolls. After adding extra liquid to combat dryness, your dough might feel too wet or slack compared to what you're accustomed to.
A very wet dough can be difficult to handle and may not have enough structure to support the rapid rise at altitude, potentially leading to spreading or collapsing. Adding a small amount of additional flour beyond the original recipe quantity helps absorb the extra liquid and provides more protein to contribute to gluten development.
The amount of additional flour needed is typically modest, often just 1 to 2 tablespoons per cup of flour used in the recipe, added gradually. For example, if your recipe uses 4 cups of flour and you've added extra liquid, you might need to incorporate an extra 4 to 8 tablespoons of flour. The goal is to reach a dough consistency that is soft and slightly sticky, but still cohesive and elastic after kneading.
Adding too much flour will result in a stiff, dry dough that yields tough rolls. The extra flour, combined with proper kneading (which might need to be slightly longer than at sea level), helps build a stronger, more resilient gluten network. This robust structure is essential for trapping the quickly expanding gases at high altitude, preventing the rolls from collapsing and ensuring they hold their shape and rise beautifully during high altitude baking rolls.
4. Oven Temperature Adjustments for High Altitude Rolls: Preventing Rapid Browning
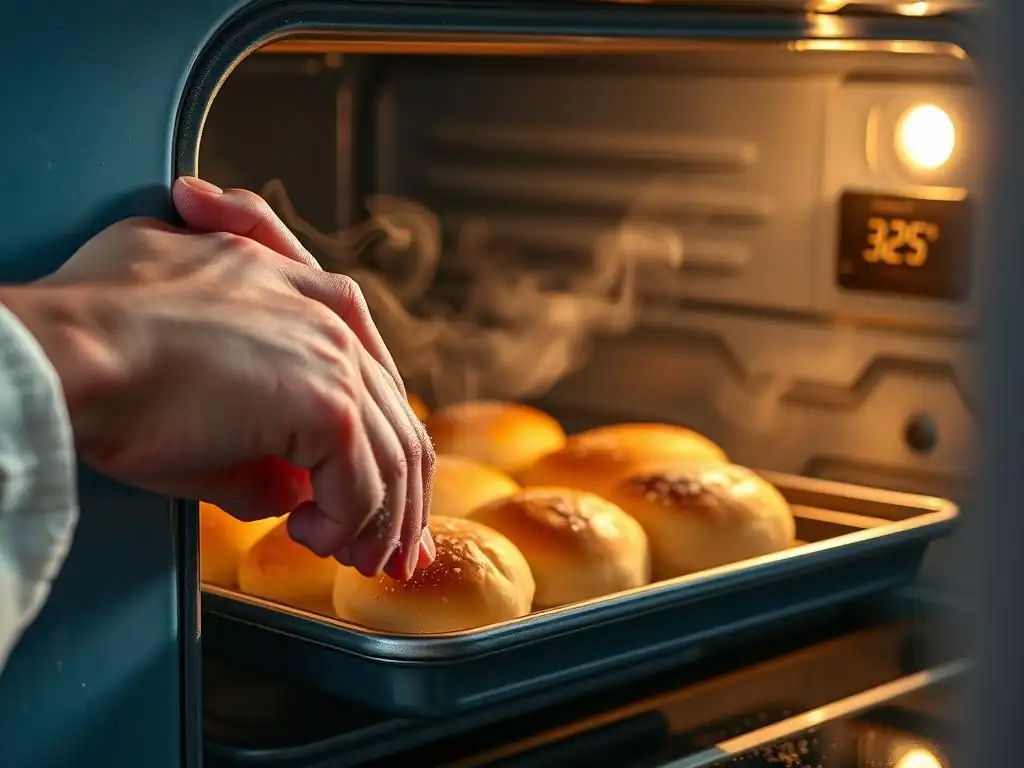
Adjusting oven temperature is another important step for successful high altitude baking rolls. Because water evaporates faster at high altitude, the surface of baked goods tends to dry out and brown more quickly than at sea level.
If you bake at the standard temperature, the outside of your rolls might brown and set before the inside is fully cooked, resulting in rolls that are dark on the outside but potentially doughy or undercooked in the center. Reducing the oven temperature allows the rolls to bake more evenly, giving the interior enough time to cook through before the exterior becomes too dark or hard.
A common recommendation is to reduce the oven temperature by about 15-25°F (approx. 8-14°C) from the temperature specified in the sea-level recipe. So, if a recipe calls for baking rolls at 375°F (190°C), you might try baking them at 350-360°F (175-180°C) at high altitude.
It's crucial to verify your oven's temperature with an oven thermometer, as many ovens are not calibrated accurately. An oven that runs hot at sea level will still run hot at high altitude. Lowering the temperature helps achieve a beautiful, golden-brown crust rather than a dark, hard one, and ensures the interior is perfectly baked, contributing to the soft texture desired in high altitude baking rolls.
5. Adjusting Baking Time: Preventing Dry or Overbaked Rolls: Monitoring Internal Temperature
Adjusting the baking time for high altitude baking rolls is less about a fixed formula and more about careful observation and using indicators like internal temperature. While rolls might bake slightly faster at high altitude due to the increased steam conversion from the added liquid, this is often counteracted by the reduced oven temperature.
Therefore, the total baking time might be similar to, or even slightly longer than, the sea-level time, depending on the specific adjustments made and the size of your rolls. The primary goal is to prevent the rolls from becoming dry or overbaked, which can easily happen with the faster evaporation at altitude.
Instead of strictly following the time listed in the original recipe, start checking for doneness slightly earlier. Rolls are typically done when they are golden brown, sound hollow when tapped on the bottom, and, most reliably, reach an internal temperature of 190-200°F (88-93°C) for soft dinner rolls. Using an instant-read thermometer is the most accurate way to ensure your rolls are perfectly cooked through without being dry.
If the tops are browning too quickly, you can loosely tent the rolls with foil. Monitor them closely during the last few minutes of baking. By focusing on visual cues and internal temperature rather than just the clock, you can ensure your high altitude baking rolls are perfectly baked – soft, moist, and delicious.
Troubleshooting Common High Altitude Roll Baking Problems
Rolls Collapsing: Causes and Solutions: Too Much Leavening, Insufficient Gluten
One frustrating issue when high altitude baking rolls is having them rise beautifully and then collapse, either during proofing, in the oven, or shortly after baking. The most common cause is using too much leavening agent (yeast) for the altitude. The lower atmospheric pressure causes the gas bubbles to expand too rapidly and forcefully. If there's too much yeast, the dough expands beyond the capacity of the gluten structure to support it, leading to over-proofing and collapse. Imagine blowing up a balloon too much – it pops. The same principle applies to dough with excessive leavening at high altitude.
The solution primarily involves reducing the amount of yeast used, as detailed in Step 1. You might need to experiment to find the optimal amount for your specific elevation. Another contributing factor can be insufficient gluten development. If the dough wasn't kneaded enough, the gluten network isn't strong or elastic enough to hold the rapidly expanding gases.
Ensure you knead your dough sufficiently until it passes the windowpane test (a small piece can be stretched thin enough to see light through without tearing). Sometimes, adding a small amount of vital wheat gluten (perhaps 1-2 teaspoons per cup of flour) can help strengthen the dough structure at high altitude, providing extra insurance against collapse. Proper leavening adjustment and robust gluten development are key to preventing this common problem in high altitude baking rolls.
Dry and Crumbly Rolls: Hydration and Baking Time Fixes: Increase Liquid, Reduce Baking Time
Dry and crumbly rolls are another frequent complaint from bakers attempting high altitude baking rolls with sea-level recipes. This is almost always a result of insufficient hydration combined with potentially over-baking. The dry air at altitude causes moisture to evaporate from the dough much faster throughout the entire process, from mixing to the final minutes in the oven. If the dough doesn't start with enough moisture, or if it loses too much during baking, the resulting rolls will lack the desired softness and tenderness.
The primary fix is to increase the amount of liquid in your recipe, as outlined in Step 2. Start by adding 1-2 tablespoons of extra liquid per cup of flour and adjust in future batches based on your results. The dough should feel noticeably softer and slightly stickier than a sea-level dough. Additionally, be mindful of your baking time and temperature (Steps 4 & 5).
Baking at too high a temperature or for too long will exacerbate moisture loss. Lowering the oven temperature slightly and baking until the rolls reach the correct internal temperature (190-200°F / 88-93°C) rather than simply following the time will prevent over-baking. Ensure the dough is covered during proofing to prevent surface drying. By increasing hydration and optimizing baking parameters, you can achieve moist, tender results when high altitude baking rolls.
Dense and Heavy Rolls: Leavening Agent Issues: Insufficient Yeast Activity
If your high altitude baking rolls turn out dense and heavy, lacking a light, airy texture, the issue usually relates to insufficient leavening activity. While reducing yeast is necessary at altitude, reducing it too much can lead to an under-risen dough. If there isn't enough active yeast producing carbon dioxide gas, the dough won't rise sufficiently during proofing or in the oven, resulting in a compact, heavy texture.
This problem can arise if you've reduced the yeast too drastically based on generalized guidelines, or if your yeast isn't as active as it should be (check the expiration date and proof it in warm water with a pinch of sugar before adding to the dough). It can also happen if the proofing environment is too cold or the proofing time is too short – even at high altitude, dough needs some time and warmth for the yeast to work.
If your rolls are consistently dense, try slightly increasing the amount of yeast in your adjusted recipe (e.g., if you reduced by 50%, try reducing by only 40% next time) or ensuring your proofing conditions are optimal (a warm, draft-free place, ideally around 75-80°F or 24-27°C).
Proper hydration and sufficient kneading are also necessary for a light texture, but insufficient leavening is a primary culprit for density in high altitude baking rolls.
Uneven Baking: Oven Temperature and Placement Tips: Rotate Pans, Calibrate Oven
Uneven baking, where some rolls brown faster or are more cooked than others on the same pan or across multiple pans, is a common problem not exclusive to high altitude but often exacerbated by the faster drying and browning tendencies at elevation. This is typically caused by hot spots in your oven or inconsistent heat distribution. Ovens rarely heat perfectly evenly, and factors like the heating element location, convection fan (if applicable), and pan placement can create variations.
To combat uneven baking when high altitude baking rolls, first, ensure your oven is calibrated correctly. Use an oven thermometer to check the temperature in several spots and compare it to the setting. If it's off, you might need to adjust the dial or consider professional calibration. During baking, rotate your baking sheets halfway through the baking time.
If using multiple sheets on different racks, swap their positions and turn them. Avoid crowding the oven, as this restricts airflow and can worsen unevenness. Use light-colored baking sheets, as dark sheets absorb more heat and can cause the bottoms of rolls to brown too quickly. By understanding your oven's quirks and rotating your pans diligently, you can achieve more uniform results in your high altitude baking rolls.
High Altitude Roll Recipe Example: Adjusting a Basic Dinner Roll Recipe
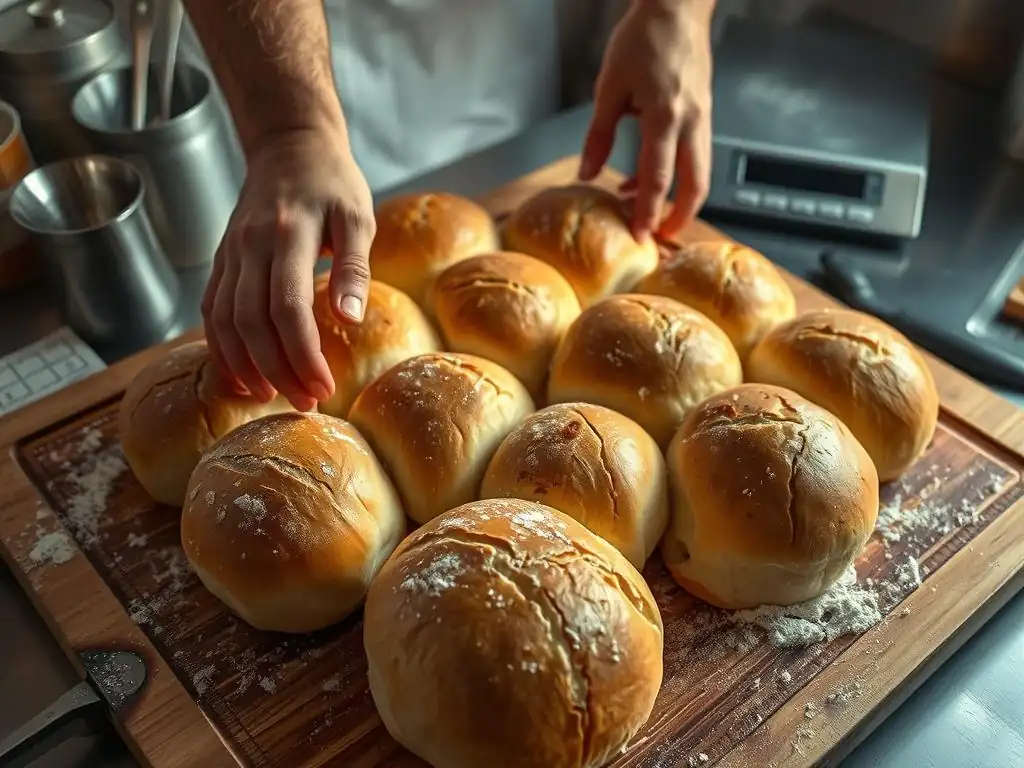
Original Sea Level Dinner Roll Recipe: Standard Recipe
Here is a typical basic dinner roll recipe designed for sea-level baking:
Yield: 12-16 rolls
Prep time: 2-3 hours (including rising time)
Bake time: 15-20 minutes

Ingredients:
- 1 cup warm milk (105-115°F / 40-46°C)
- 2 ¼ teaspoons active dry yeast (1 standard packet)
- 2 tablespoons granulated sugar
- 1 teaspoon salt
- ¼ cup unsalted butter, melted
- 1 large egg, room temperature
- 3 ½ to 4 cups all-purpose flour
Instructions typically involve proofing the yeast, combining wet ingredients, adding dry ingredients gradually, kneading until smooth and elastic, letting the dough rise until doubled (about 1-1.5 hours), shaping the rolls, letting them rise again (about 30-45 minutes), and baking at 375°F (190°C) for 15-20 minutes. This recipe provides a good starting point, but without adjustments, it would likely result in rolls that over-rise and are potentially dry when attempted as high altitude baking rolls.
High Altitude Adapted Dinner Roll Recipe: Adjusted Quantities
Let's adapt the previous recipe for baking at approximately 5,000-7,000 feet (approx. 1,500-2,100 meters) above sea level. These adjustments are starting points and might need fine-tuning for your specific kitchen and elevation.
Yield: 12-16 rolls
Prep time: 2-3 hours (likely slightly longer rising time required)
Bake time: 15-20 minutes (potentially slightly longer)

Ingredients:
- 1 cup + 3-4 tablespoons warm milk (105-115°F / 40-46°C) - INCREASED LIQUID
- 1 ½ to 1 ¾ teaspoons active dry yeast - REDUCED LEAVENING
- 2 tablespoons granulated sugar
- 1 teaspoon salt
- ¼ cup unsalted butter, melted
- 1 large egg, room temperature
- 3 ½ to 4 cups + 3-4 tablespoons all-purpose flour - INCREASED FLOUR
Baking Temperature Adjustment: Reduce oven temperature to 350-360°F (175-180°C). Baking Time Adjustment: Monitor closely; bake until internal temperature reaches 190-200°F (88-93°C), approximately 15-20 minutes or slightly longer. Proofing Time Adjustment: The first rise might take slightly longer due to reduced yeast (1.5-2 hours). The second rise will likely be shorter (20-30 minutes) due to faster expansion at altitude.
Ingredient Adjustments and Rationale: Reduced Yeast, Increased Water, Added Flour
Here's the rationale behind the ingredient adjustments for high altitude baking rolls based on the basic dinner roll example:
- Reduced Yeast: The original recipe calls for 2 ¼ teaspoons of active dry yeast. At 5,000-7,000 feet, the atmospheric pressure is significantly lower, causing gases to expand much faster. To prevent the dough from over-proofing and collapsing, the yeast amount is reduced to 1 ½ to 1 ¾ teaspoons. This is roughly a 25-33% reduction, slowing down the gas production to allow the gluten more time to develop strength and structure.
- Increased Water (Milk): The original recipe uses 1 cup of milk. High altitude air is drier, leading to faster moisture evaporation. To keep the dough hydrated, soft, and prevent dry, crumbly rolls, the liquid is increased by 3-4 tablespoons (about 2-3% of the total flour weight in liquid). This extra moisture compensates for the faster drying during proofing and baking, resulting in a more tender crumb in your high altitude baking rolls.
- Added Flour: The original recipe uses 3 ½ to 4 cups of flour. After increasing the liquid, the dough would be too wet and slack using the original flour amount. To absorb the extra liquid and provide additional protein for gluten development (which needs to be stronger at altitude), an extra 3-4 tablespoons of flour are added. This maintains a workable dough consistency and helps build a robust gluten network capable of supporting the rapid rise without collapsing. The total flour amount is now closer to 3 ¾ to 4 ¼ cups.
These specific adjustments demonstrate the principles of reducing leavening, increasing hydration, and balancing with flour to create a dough optimized for the unique conditions of high altitude baking rolls.
Tips and Tricks for Perfect High Altitude Baked Rolls
Using a Stand Mixer for High Altitude Roll Dough: Efficient Kneading and Gluten Development
Using a stand mixer can be particularly beneficial when making high altitude baking rolls. The dough often requires thorough kneading to develop a strong gluten structure capable of withstanding the faster gas expansion at altitude. While hand kneading is certainly possible, a stand mixer with a dough hook can achieve the necessary level of gluten development more efficiently and consistently, especially with slightly stickier high-altitude doughs resulting from increased liquid.
Kneading for 8-10 minutes on medium speed in a stand mixer is typically sufficient to develop strong, elastic gluten. The dough should pull away from the sides of the bowl and pass the windowpane test – you should be able to stretch a small piece very thin without it tearing. Adequate kneading is crucial; insufficient gluten development is a common cause of dense or collapsed rolls at high altitude. A stand mixer makes this process easier and more reliable, contributing significantly to the success of your high altitude baking rolls.
Proofing Techniques for Optimal Rise at Altitude: Shorter Proofing Times, Warmer Environment
Proofing dough for high altitude baking rolls requires careful attention because the reduced pressure causes gases to expand faster. While you've reduced the yeast, the dough will still likely rise more quickly than it would at sea level. Over-proofing is a significant risk and can lead to dough collapse or a coarse texture. Therefore, proofing times are often shorter than those specified in sea-level recipes.
Monitor your dough closely during the first rise. While a sea-level recipe might call for the dough to double in 1-1.5 hours, your high-altitude dough might reach that stage in 60-90 minutes, even with reduced yeast. The second rise (after shaping) will be even faster, potentially taking only 20-30 minutes instead of 30-45. Aim for the dough to be just shy of doubled for both rises; the rolls will get a final burst of rising (oven spring) in the oven.
Providing a slightly warmer proofing environment (around 75-80°F or 24-27°C) can help ensure consistent yeast activity, but be wary of making it too hot, which can accelerate the rise too much. Always cover your dough during proofing to prevent the surface from drying out in the low-humidity air. Proper proofing is a balancing act crucial for light, airy high altitude baking rolls.
Scoring and Shaping High Altitude Rolls: Allowing Expansion, Creating Visual Appeal
Shaping and scoring rolls play a role in how they rise and look during high altitude baking rolls. Shaping should be done gently but firmly enough to create some surface tension, which helps the rolls hold their shape as they expand rapidly at altitude. Avoid incorporating too much extra flour during shaping, as this can make the rolls dry.
For some types of rolls, like crusty rolls or those where you want a specific look, scoring the tops with a sharp knife or lame just before baking can be beneficial. Scoring provides weak points in the dough's surface, allowing the rapidly expanding gases to escape in a controlled manner.
This helps prevent the rolls from bursting unexpectedly and encourages them to expand upwards and outwards through the score marks, resulting in a more predictable shape and better oven spring. While not essential for all rolls (like soft dinner rolls), scoring can improve the appearance and structure, especially in recipes adapted for high altitude baking rolls where rapid expansion is a factor.
Achieving a Golden-Brown Crust at High Altitude: Egg Wash, Milk Wash, Temperature Control
Getting a beautiful, golden-brown crust on high altitude baking rolls can be tricky due to the faster drying and browning rate at lower humidity. Baking at the standard temperature often results in a crust that is too dark or hard before the interior is fully cooked. Reducing the oven temperature (Step 4) is the primary adjustment to slow down crust formation and browning.
To enhance browning and achieve a desirable finish, applying a wash to the surface of the rolls before baking is effective. A simple milk wash (brushing with milk) or cream wash adds moisture and sugars that promote gentle browning. An egg wash (beaten egg mixed with a little water or milk) provides a richer color and a slightly glossier finish.
For a softer crust, brushing with melted butter immediately after baking is a great technique. By combining a slightly lower baking temperature with a suitable wash, you can achieve that perfect golden-brown crust without over-baking the interior when high altitude baking rolls.
High Altitude Roll Baking: Mastering the Art of Bread Making
Exploring Different Types of Rolls for High Altitude Baking: Sweet Rolls, Savory Rolls
Once you've mastered the basics of adjusting a simple dinner roll recipe, you can confidently explore high altitude baking rolls across a wide variety of types. The principles of reducing leavening, increasing liquid, and adjusting flour, temperature, and time apply to most yeasted roll recipes, whether they are sweet or savory.
For sweet rolls like cinnamon rolls or sticky buns, the higher sugar content can sometimes slightly slow down yeast activity, but the core adjustments for altitude remain necessary. You'll still need to reduce the yeast to prevent over-proofing the enriched dough and increase the liquid (often milk or butter) to keep the rolls tender and moist, especially important with the longer baking times some sweet rolls require.
Savory rolls, such as garlic knots, focaccia rolls, or cheese rolls, also benefit from these high altitude adjustments. The texture might be slightly different depending on the recipe (e.g., a chewier focaccia versus a soft dinner roll), but preventing over-proofing and ensuring proper hydration are still key to success.
Experimentation is part of the fun; once you understand how altitude affects dough, you can apply the adjustment principles to virtually any roll recipe, allowing you to enjoy your favorite baked goods no matter your elevation. Mastering the techniques for high altitude baking rolls opens up a world of possibilities beyond basic dinner rolls.
Adapting Sourdough Roll Recipes for High Altitude: Adjusting Starter Activity and Hydration
Adapting sourdough roll recipes for high altitude baking presents a slightly different challenge because leavening relies on a wild yeast and bacteria starter rather than commercial yeast. Sourdough starters can be more sensitive to environmental conditions, including altitude and humidity. At high altitude, your starter might become active more quickly due to lower pressure, and the drier air can cause it to dry out faster if not properly maintained.
When adapting a sourdough roll recipe, you'll still need to consider the overall dough hydration, likely increasing the liquid amount as with commercial yeast recipes. The main adjustment comes in managing the starter's activity and the fermentation time. Because gases expand faster, the bulk fermentation and proofing times will likely be shorter.
You might also need to use a slightly less active starter (using it a little earlier in its peak) or reduce the proportion of starter used in the recipe to prevent over-fermentation and collapse. Pay close attention to the dough's signs of readiness (it should be airy and bubbly but not completely collapsed) rather than relying solely on time.
Maintaining your starter properly in the drier high-altitude climate is also crucial; ensure it's well-hydrated and fed regularly. Adapting sourdough for high altitude baking rolls requires patience and observation, but the principles of managing gas expansion and hydration still apply.
Further Resources and Recipes: Online Communities, Baking Books
Mastering high altitude baking rolls is a journey, and there are many resources available to help you fine-tune your techniques and explore new recipes. Numerous online baking communities and forums have dedicated sections for high altitude baking where experienced bakers share tips, adjusted recipes, and troubleshoot problems. Websites like BakeWithEase.com provide foundational knowledge, and many food blogs from high-altitude regions offer tested recipes specifically formulated for elevation.
Baking books focused on high altitude baking are also invaluable resources. These books often provide charts for adjusting standard recipes across different elevations and offer a range of recipes that have been developed and tested specifically for high-altitude conditions. Look for authors or publications based in areas known for high altitude, such as the Rocky Mountain region. By consulting these resources, experimenting in your own kitchen, and keeping notes on your results, you'll become increasingly proficient in high altitude baking rolls, allowing you to bake delicious, perfectly textured rolls regardless of where you live.
- [ ] Practice adjusting a basic roll recipe using the guidelines provided.
- [ ] Experiment with slightly different yeast reductions and liquid increases.
- [ ] Use an oven thermometer to verify your oven temperature.
- [ ] Use an instant-read thermometer to check the internal temperature of baked rolls.
- [ ] Join an online baking community focused on high altitude.
- [ ] Try adapting another type of roll recipe (e.g., sweet rolls) using the learned principles.
Frequently Asked Questions
What is the main challenge when baking rolls at high altitude?
The main challenge is the lower air pressure, which causes dough to rise faster and dry out more quickly. This often leads to uneven texture and a less desirable final product.
Why do I need to adjust my roll recipe for high altitude?
Adjustments are necessary because the reduced air pressure and faster evaporation at higher altitudes significantly impact the gluten development and moisture retention in your rolls.
What are some common adjustments I can make to my roll recipe for high altitude?
Common adjustments include reducing the amount of yeast, increasing the liquid, and slightly increasing the oven temperature. These help prevent over-proofing and dryness.
How much should I reduce the yeast when baking rolls at high altitude?
A general rule of thumb is to reduce the yeast by about 1/4 to 1/2 teaspoon per batch, depending on the original recipe and your specific altitude.
What happens if I don't adjust my roll recipe for high altitude?
Without adjustments, your rolls may rise too quickly, collapse during baking, or end up being dry and crumbly. The overall texture and flavor will likely be negatively affected.
Final Reflection: The Sweet Success of High-Altitude Baking
Mastering the art of high-altitude baking isn't just about adjusting recipes; it's about understanding the science behind the rise. The subtle shifts in air pressure significantly impact baking, and ignoring these nuances can lead to disappointing results. But with the right knowledge and a willingness to adapt, even the most challenging high-altitude recipes, like perfectly fluffy rolls, can be conquered.
The journey of perfecting high-altitude baking has been a personal one, filled with both floury triumphs and slightly deflated disappointments. It's a testament to the enduring power of culinary tradition, constantly evolving to meet the unique challenges of different environments. Baking is a labor of love, and the reward is a taste of home, no matter the altitude.
This quote, though not directly about high-altitude baking, perfectly captures the spirit of perseverance and the ultimate satisfaction of achieving a perfect bake, even under less-than-ideal conditions.
Now, it's your turn. Don't let the thin air intimidate you. Take the knowledge gained from this article, experiment with your favorite roll recipe, and embrace the challenge of adjusting it for your high-altitude kitchen. The perfectly risen, golden-brown rolls awaiting you are worth the effort, and the sense of accomplishment will be even sweeter. So, gather your ingredients, preheat your oven, and let the baking begin!
Unlock Your High-Altitude Baking Potential!
Thanks for joining us on this high-altitude baking adventure! We hope you now feel confident tackling those tricky recipes. Ready to take your skills to new heights?
- Try our adjusted roll recipe: We've provided a downloadable version with all the necessary modifications – give it a shot and let us know how it turns out!
- Share your baking triumphs (or challenges!): Connect with our community on social media and inspire other high-altitude bakers. Use #BakeWithEaseHighAltitude.
- Experiment with other recipes: Apply the principles we’ve discussed to your favorite recipes and see the magic unfold.
What high-altitude baking challenge are you ready to tackle next?