
Using a Stand Mixer for Easy Rustic Bread Dough

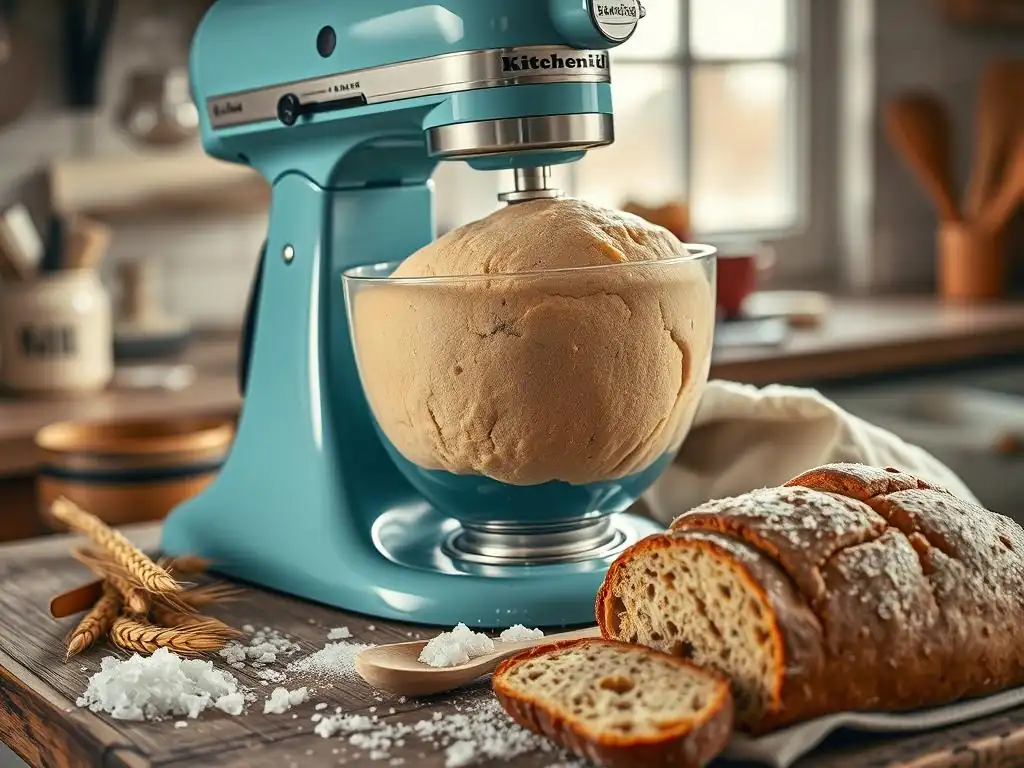
Welcome to BakeWithEase, your trusted guide to unlocking the joy of baking! Ever wondered if achieving that perfect, rustic loaf of bread is easier than you think? Prepare to be amazed! This article dives into the surprisingly simple method of using a stand mixer for rustic bread dough, taking the guesswork out of the process and putting delicious, homemade bread within everyone's reach. Discover the secrets and unlock your inner baker – your next delectable loaf awaits!
- Using a Stand Mixer for Easy Rustic Bread Dough: BakeWithEase Guide
- Introduction: Effortless Rustic Bread with Your Stand Mixer
- Why Use a Stand Mixer for Rustic Bread Dough? Benefits and Advantages
- Essential Ingredients for Stand Mixer Rustic Bread Dough
-
Step-by-Step Guide: Making Rustic Bread Dough with a Stand Mixer
- Step 1: Preparing Your Stand Mixer and Ingredients
- Step 2: Combining the Dry Ingredients
- Step 3: Adding Water and Yeast
- Step 4: Mixing on Low Speed: The Initial Dough Formation
- Step 5: Kneading on Medium Speed: Developing Gluten Strength
- Step 6: Checking Dough Consistency: The Windowpane Test for Rustic Bread
- First Fermentation (Bulk Fermentation): Developing Flavor in Your Rustic Bread
- Shaping Rustic Bread: From Dough to Loaf
- Second Fermentation (Proofing): The Final Rise
- Baking Your Rustic Bread: Achieving a Crispy Crust
- Cooling and Slicing Your Rustic Bread
- Troubleshooting Common Stand Mixer Rustic Bread Dough Issues
- Recipes: Stand Mixer Rustic Bread Dough Variations
- Storing Your Homemade Rustic Bread
- Conclusion: Mastering Rustic Bread Dough with Your Stand Mixer
-
Frequently Asked Questions
- How does a stand mixer simplify making rustic bread dough?
- What speed should I use on my stand mixer when making rustic bread dough?
- How long should I knead rustic bread dough in a stand mixer?
- Can I use a dough hook or paddle attachment for rustic bread dough?
- What are some signs that my rustic bread dough is over-kneaded in a stand mixer?
- Final Reflection: The Joy of Effortless Rustic Bread
- Unleash Your Inner Baker: Knead to Know More?
Using a Stand Mixer for Easy Rustic Bread Dough: BakeWithEase Guide
Introduction: Effortless Rustic Bread with Your Stand Mixer
Imagine pulling a warm, crusty loaf of rustic bread from your oven, the aroma filling your kitchen. Achieving that perfect texture and flavor might seem daunting, especially the kneading process. However, your trusty stand mixer can transform this task from a labor-intensive workout into a simple, almost hands-free operation.
This guide from BakeWithEase will walk you through everything you need to know to create delicious stand mixer rustic bread dough, making homemade bread accessible and enjoyable for bakers of all levels. We'll cover ingredient essentials, the step-by-step mixing process, fermentation, shaping, and baking, ensuring your journey to baking beautiful rustic loaves is as smooth as your well-kneaded dough.
Whether you're a seasoned bread baker looking for a more efficient method or a beginner taking your first steps into the world of yeast, using a stand mixer for rustic bread dough offers significant advantages. It takes the physical strain out of kneading and helps ensure consistent results every time. Get ready to discover how easy it is to make bakery-quality rustic bread right in your own kitchen using your stand mixer.
Why Use a Stand Mixer for Rustic Bread Dough? Benefits and Advantages
Using a stand mixer for your rustic bread dough is a game-changer, offering several key benefits that simplify the process and improve your results. It's not just about avoiding a strenuous workout; it's about efficiency, consistency, and convenience.
Time Savings: Let the Stand Mixer Do the Work
Manual kneading for rustic bread dough can typically take anywhere from 10 to 15 minutes of continuous, vigorous effort to properly develop the gluten structure. This is active time where you are constantly working the dough. In contrast, a stand mixer equipped with a dough hook can achieve the same level of gluten development in often less time, usually between 8 and 10 minutes, and critically, this time is almost entirely hands-free.
Consider a scenario where you're preparing dinner. While the mixer is kneading your stand mixer rustic bread dough, you can be chopping vegetables, preparing a sauce, or cleaning up. This ability to multitask significantly streamlines your kitchen workflow, making it much easier to fit homemade bread into a busy schedule. The small investment of hands-off time in the mixer yields a fresh loaf that adds a special touch to any meal.
Consistent Results: Achieving Perfect Dough Texture Every Time
One of the biggest challenges in manual kneading is maintaining consistent speed, pressure, and technique throughout the process. Fatigue can set in, leading to uneven gluten development, which in turn can result in a dense or irregular crumb structure in your finished bread. A stand mixer, however, operates at a constant speed and applies uniform pressure to the dough with its hook attachment.
This consistency is invaluable for developing a strong, elastic gluten network, which is crucial for the airy texture and good rise characteristic of rustic bread. By using a stand mixer, you minimize human variability, leading to more predictable and reliable outcomes loaf after loaf. You'll find it easier to achieve that desirable open crumb and chewy crust when your stand mixer rustic bread dough starts with perfectly developed gluten.
Hands-Free Convenience: Multitask While Your Dough Mixes
The most immediate and perhaps most appreciated benefit of using a stand mixer for rustic bread dough is the freedom it provides. Once the ingredients are in the bowl and the mixer is running, your hands are free to attend to other tasks in the kitchen or elsewhere.
This hands-free operation allows you to prepare other components of your meal, tidy up as you go, or simply relax for a few minutes. It transforms the kneading process from a dedicated, focused activity into a background task. This convenience is particularly appealing for recipes like rustic bread, which often involve multiple steps beyond just mixing, such as long fermentation periods and specific shaping techniques. Having the mixer handle the kneading allows you to dedicate your attention to these other crucial stages, making the overall baking process feel much more manageable and less like a chore.
Essential Ingredients for Stand Mixer Rustic Bread Dough
Crafting delicious rustic bread with a stand mixer starts with understanding the role of each ingredient. High-quality ingredients are key to flavor and texture, and using the right ones ensures your stand mixer rustic bread dough develops properly.
Flour Selection: Choosing the Right Flour for Rustic Bread
The type of flour you choose significantly impacts the texture and structure of your rustic bread. For a classic rustic loaf, bread flour is often the preferred choice due to its higher protein content, typically around 12-14%. This higher protein level facilitates greater gluten development during kneading, resulting in a strong, elastic dough that can trap gases produced by the yeast, leading to a well-risen loaf with an open, chewy crumb.
While bread flour is ideal, all-purpose flour (with 10-12% protein) can also be used, though the resulting bread might be slightly less chewy. Some rustic bread recipes also incorporate a percentage of whole wheat flour or other specialty flours (like rye) to add depth of flavor and a denser texture. When using these flours in your stand mixer rustic bread dough, be aware that they absorb water differently and can affect gluten development, sometimes requiring slight adjustments to hydration or kneading time. Aim for a good quality unbleached flour for the best results.
Water Temperature: The Key to Activating Yeast
Water plays a crucial role in hydrating the flour, dissolving the salt and yeast, and most importantly, activating the yeast. The temperature of the water is critical for getting your yeast off to a good start. For active dry yeast, lukewarm water between 105°F and 115°F (40°C to 46°C) is recommended. This temperature range is warm enough to wake up the yeast cells without being so hot that it kills them.
If you are using instant yeast, which can often be added directly to the dry ingredients, the water temperature is less critical, but still, aim for lukewarm (around 90-100°F or 32-38°C) rather than cold. Using water that is too cold will significantly slow down yeast activity, leading to a longer rise time and potentially a denser loaf.
Conversely, water that is too hot (above 120°F or 49°C) can kill the yeast, preventing your stand mixer rustic bread dough from rising at all. Using a kitchen thermometer is the most accurate way to ensure your water is at the correct temperature.
Yeast Types: Instant vs. Active Dry Yeast in Rustic Bread Dough
There are two primary types of dry yeast commonly used in home baking: active dry yeast and instant yeast. Both can be used successfully in stand mixer rustic bread dough, but they have slightly different requirements and characteristics. Active dry yeast typically comes in granules and needs to be proofed (dissolved and activated) in warm water before being added to the dry ingredients. This step allows you to verify that the yeast is alive and active – it should become foamy within 5-10 minutes. If it doesn't foam, your yeast is likely dead and needs replacing.
Instant yeast, also known as rapid-rise or fast-acting yeast, has finer granules and a higher percentage of live cells. It can usually be mixed directly with the dry ingredients without proofing, saving a step. It also tends to work faster than active dry yeast, potentially reducing rise times. While either works for rustic bread, instant yeast offers a bit more convenience for a stand mixer rustic bread dough recipe. Some bakers feel active dry yeast contributes a slightly more complex flavor due to its slower activity, but for most home bakers, the difference is negligible.
Salt: Enhancing Flavor and Controlling Gluten Development
Salt is far more than just a flavor enhancer in bread dough; it plays a vital structural role. In rustic bread, salt significantly improves the flavor, bringing out the natural sweetness of the flour and the tangy notes developed during fermentation. Without salt, bread can taste bland and flat.
Structurally, salt helps to strengthen the gluten network by tightening it. This makes the dough more elastic and easier to handle. However, salt also controls yeast activity by slowing it down.
This is why salt is typically added with the flour or after the initial mixing begins, rather than directly with the yeast and water during proofing (if using active dry yeast). Adding salt too early or in excessive amounts can inhibit the yeast too much, resulting in a poor rise. Most rustic bread recipes call for about 1.8% to 2% salt relative to the weight of the flour, a balance that provides flavor and structure without overly hindering the yeast in your stand mixer rustic bread dough.
Optional Additions: Herbs, Olives, and More
While classic rustic bread is often made with just flour, water, yeast, and salt, adding extra ingredients can introduce wonderful flavors and textures. These optional additions are best incorporated towards the end of the kneading process in your stand mixer to ensure they are evenly distributed without being completely broken down.
Popular additions include fresh or dried herbs like rosemary or thyme, chopped olives (like Kalamata or Castelvetrano), roasted garlic, sun-dried tomatoes, or even nuts and seeds. For a 500g batch of flour, you might add around 50-100g of olives or herbs, depending on how pronounced you want the flavor. Ensure wet additions like olives or sun-dried tomatoes are well-drained. Add these ingredients during the last minute or two of kneading on a lower speed setting in your mixer. This prevents them from tearing the gluten network excessively while still integrating them into the stand mixer rustic bread dough.
Step-by-Step Guide: Making Rustic Bread Dough with a Stand Mixer
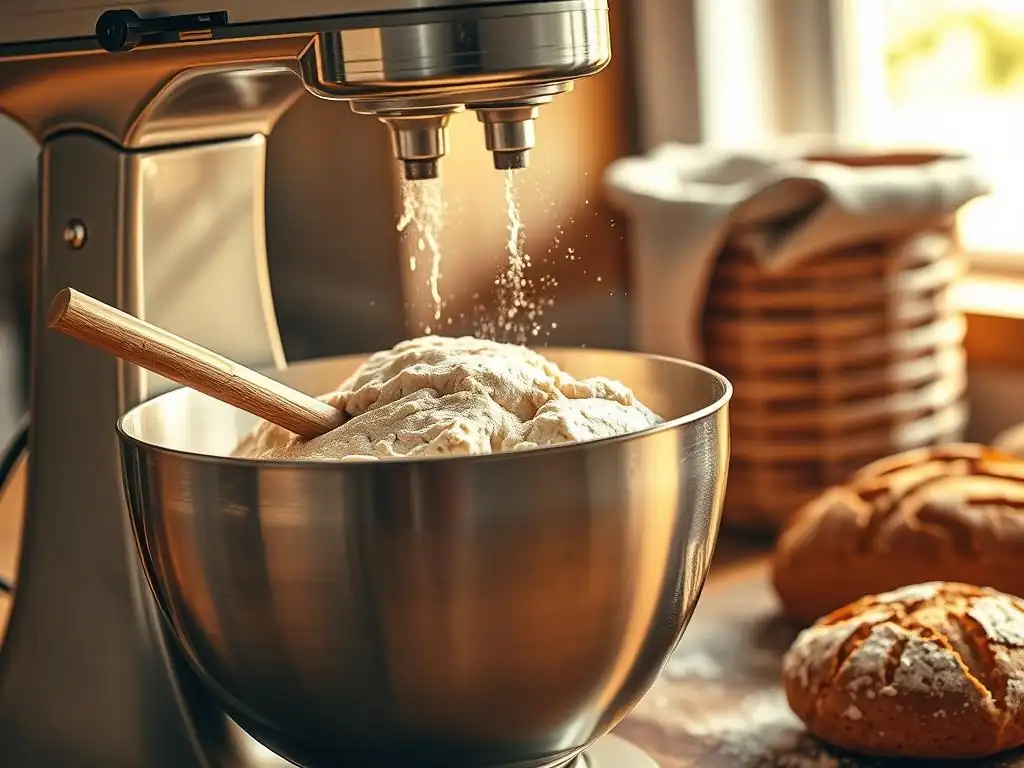
Making rustic bread dough with a stand mixer is a straightforward process once you understand the steps. This guide breaks down the process from start to finish, helping you achieve perfect dough consistency.
Step 1: Preparing Your Stand Mixer and Ingredients
Before you begin, gather all your ingredients and measure them accurately. Using a kitchen scale for flour and water is highly recommended for consistency in bread baking, as volume measurements can vary greatly. For example, 500 grams of bread flour might be roughly 4 cups, but this can change based on how you scoop and level. Ensure your stand mixer bowl and dough hook are clean and ready.
Have your measured flour, salt, yeast (if using instant), and warm water (with active dry yeast proofed, if using) at your workstation. Having everything prepped makes the mixing process smooth and efficient. This initial preparation sets the stage for successful stand mixer rustic bread dough.
Step 2: Combining the Dry Ingredients
Start by adding the measured flour and salt to the bowl of your stand mixer. If you are using instant yeast, add it now and whisk it briefly with the flour and salt to distribute it evenly. This step is quick and simple, ensuring the foundational dry components are ready for hydration.
Ensure the salt and yeast are not directly touching for an extended period before mixing begins, especially if using active dry yeast that hasn't been proofed yet, as salt can inhibit yeast activity. However, once mixing starts, this concern diminishes rapidly. Combining the dry ingredients ensures a uniform base for your stand mixer rustic bread dough.
Step 3: Adding Water and Yeast
If you are using active dry yeast, add the proofed yeast mixture (warm water and foamy yeast) to the dry ingredients in the mixer bowl. If using instant yeast, add the measured warm water to the dry ingredients.
Pour the water relatively quickly to start the hydration process. Ensure all the dry ingredients in the bottom of the bowl are reached by the water. This combination initiates the transformation from dry ingredients into a cohesive stand mixer rustic bread dough.
Step 4: Mixing on Low Speed: The Initial Dough Formation
Attach the dough hook to your stand mixer and lower the bowl into position. Begin mixing on the lowest speed setting (usually speed 1 or 2 on most mixers). This initial mixing phase, often called the 'autolyse' or initial mix, serves to bring all the ingredients together into a shaggy mass.
Mix just until there are no dry pockets of flour remaining, typically 1-2 minutes. At this stage, the dough will look rough, sticky, and uneven – this is perfectly normal. Resist the urge to add more flour unless the mixture is exceptionally wet and won't come together at all. This low-speed mix allows the flour to start absorbing the water, beginning the gluten development process for your stand mixer rustic bread dough.
Step 5: Kneading on Medium Speed: Developing Gluten Strength
Once the initial shaggy mass has formed, increase the mixer speed to medium (usually speed 3 or 4). Allow the mixer to knead the dough for 8 to 10 minutes. During this time, the dough will transform from a sticky, shaggy ball into a smooth, elastic, and cohesive mass.
You'll notice the dough starting to pull away from the sides of the bowl, though it might still stick to the bottom. The sound of the mixer will change as the dough becomes more developed. This extended kneading on medium speed is crucial for building the strong gluten network required for the structure and texture of rustic bread. This is where the stand mixer truly shines, doing the hard work to create perfect stand mixer rustic bread dough.
Step 6: Checking Dough Consistency: The Windowpane Test for Rustic Bread
After 8-10 minutes of kneading on medium speed, it's time to check if your stand mixer rustic bread dough has developed sufficient gluten. The classic test for this is the windowpane test. Carefully stop the mixer and take a small piece of dough, about the size of a golf ball. Gently stretch the dough between your fingers and thumbs.
If the dough is properly kneaded, you should be able to stretch it thin enough to see light through it without it tearing easily, much like a thin windowpane. If it tears quickly, the dough needs more kneading. Return the piece to the bowl and knead for another 1-2 minutes before testing again. Be careful not to over-knead, which can make the dough tough. Once the windowpane test is successful, your stand mixer rustic bread dough is ready for fermentation.
First Fermentation (Bulk Fermentation): Developing Flavor in Your Rustic Bread
The first fermentation, also known as bulk fermentation, is a critical stage where your stand mixer rustic bread dough develops flavor and volume. It's more than just rising; it's a complex process involving yeast activity and enzyme action.
Understanding Bulk Fermentation: Why It's Important
Bulk fermentation is the period after mixing and kneading but before shaping. During this time, the yeast consumes sugars in the flour and produces carbon dioxide gas, which causes the dough to rise, and alcohol and organic acids, which contribute significantly to the flavor of your rustic bread. Simultaneously, enzymes in the flour break down starches into simpler sugars, making them available for the yeast and also contributing to flavor and crust browning during baking.
This slow transformation is essential for creating the characteristic open crumb and complex flavor profile of rustic bread. Rushing this stage or skipping it entirely will result in a dense, flavorless loaf. Proper bulk fermentation of your stand mixer rustic bread dough ensures optimal flavor development and a good rise.
How to Properly Ferment Rustic Bread Dough
After kneading is complete and the windowpane test is successful, transfer your stand mixer rustic bread dough to a clean, lightly oiled bowl. Turn the dough over to coat it lightly with oil. Cover the bowl tightly with plastic wrap or a damp kitchen towel to prevent the surface from drying out and forming a skin.
Place the covered bowl in a warm, draft-free spot. Ideal temperatures for bulk fermentation are typically between 75°F and 80°F (24°C to 27°C). At room temperature (around 70°F or 21°C), bulk fermentation might take 1.5 to 2.5 hours, while in a slightly warmer spot like a turned-off oven with the light on, it might be quicker. For enhanced flavor development, some recipes call for a cold bulk fermentation in the refrigerator for 12-24 hours. The key is to let the dough rise until it has significantly increased in volume.
Signs Your Dough is Ready for Shaping
Knowing when your stand mixer rustic bread dough has completed its bulk fermentation is important. The most common indicator is that the dough has roughly doubled in size. However, relying solely on volume can be misleading, as the dough's activity depends on temperature and yeast vitality. A better test is the "poke test" applied to the bulk dough.
Gently press two fingers about half an inch deep into the dough. If the indentations slowly spring back only halfway, the dough is likely ready. If they spring back completely, the dough needs more time. If they stay indented fully and the dough looks deflated, it might be over-proofed (though this is less common during bulk fermentation than the final proof). The surface of the dough should also look smooth and slightly rounded. Once these signs are present, your stand mixer rustic bread dough is ready to be gently turned out for shaping.
Shaping Rustic Bread: From Dough to Loaf
Shaping is the process of transforming your fermented stand mixer rustic bread dough into the desired loaf form. Gentle handling is crucial here to preserve the gas bubbles created during bulk fermentation.
Dividing the Dough: Gentle Handling is Key
If your recipe yields more than one loaf from the batch of stand mixer rustic bread dough, you'll need to divide it. Gently turn the dough out onto a lightly floured surface. Use a bench scraper or sharp knife to divide the dough into the required number of portions. Try to make clean cuts rather than tearing or pulling the dough excessively.
Weighing the portions can help ensure your loaves are of equal size, leading to more consistent baking times. For example, a 1kg batch of dough might be divided into two 500g portions for medium-sized loaves. Handle the dough as little as possible during this step to avoid degassing it.
Pre-Shaping: Creating Initial Tension
After dividing, it's beneficial to pre-shape the dough. This step creates initial surface tension and makes the final shaping easier. For round loaves (boules), gently cup your hand around a dough portion on the counter and lightly pull it towards you while rotating it, creating a smooth, taut surface on top and gathering the seams underneath. For oval loaves (batards), gently fold the edges towards the center and then lightly roll it back and forth under your hand to create a rough oval.
Allow the pre-shaped dough balls or ovals to rest, covered, for 15-20 minutes. This rest period, called the bench rest, allows the gluten to relax, making the dough pliable enough for final shaping. This stage is important for developing the structure of your stand mixer rustic bread dough before its final form.
Final Shaping: Achieving the Desired Loaf Shape
The final shaping builds maximum tension on the surface of the dough, which helps the loaf hold its shape during proofing and baking and contributes to a good oven spring. Techniques vary depending on the desired shape (boule, batard, etc. ), but generally involve folding the dough onto itself multiple times and sealing the seams tightly.
For a boule, flatten the rested dough gently, fold the top edge down past the center, then fold the bottom edge up over the top. Fold the sides in, then flip the dough over and use the tension from the counter surface to create a tight ball. For a batard, flatten, fold the top edge down, then fold the top half over the bottom half, sealing the seam.
Then, roll the dough under your hands to elongate it while maintaining tension. Practice is key here! Proper final shaping of your stand mixer rustic bread dough is crucial for the final look and rise.
Placing the Shaped Dough: Preparing for the Final Proof
Once shaped, the dough needs a place to proof before baking. The goal is to support the shaped loaf so it holds its form as it rises. Common methods include placing the dough seam-side up in a floured proofing basket (banneton), placing it seam-side down on a piece of parchment paper on a baking sheet, or placing it in a loaf pan if making pan rustic bread.
If using a banneton, flour it generously, preferably with rice flour or a mix of rice and wheat flour, as rice flour is less likely to stick. Gently place the shaped stand mixer rustic bread dough in the prepared proofing vessel. If proofing on parchment, you can place the parchment on a pizza peel or the back of a baking sheet for easy transfer to the oven.
Second Fermentation (Proofing): The Final Rise
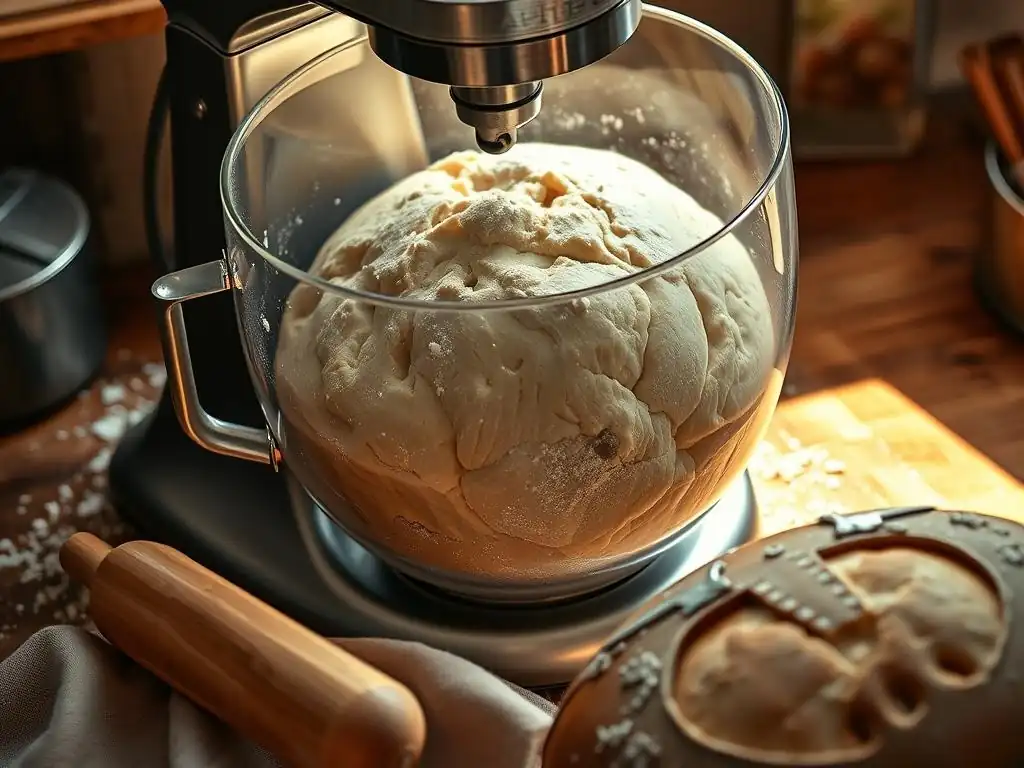
The second fermentation, or proofing, is the final rise your shaped stand mixer rustic bread dough undergoes before being baked. This stage is crucial for achieving a light, airy texture in the final loaf.
Proofing Techniques: Basket, Cloth, or Parchment Paper
As mentioned in the shaping section, your shaped stand mixer rustic bread dough needs support during its final rise. Proofing baskets (bannetons), especially those lined with cane or rattan, are excellent for giving boules or batards structure and imparting a lovely pattern on the crust. They are typically floured heavily to prevent sticking.
Alternatively, you can proof the dough on a piece of parchment paper placed on a baking sheet or peel. For soft-crusted rustic loaves or if you don't have a banneton, you can proof the dough seam-side down on parchment. Some bakers also use a couche (a piece of linen cloth) to support multiple loaves, creating folds in the cloth between them to prevent them from sticking together while they rise. Whichever method you choose, cover the dough loosely with plastic wrap or a light towel to prevent a skin from forming.
Determining Proofing Completion: The Poke Test
Knowing when your stand mixer rustic bread dough is perfectly proofed is one of the trickiest parts of bread baking. Over-proofed dough can collapse in the oven, while under-proofed dough won't achieve its full potential rise. The poke test is the most reliable indicator.
Gently and confidently poke the side of the shaped loaf with a lightly floured finger. If the indentation springs back immediately, the dough is under-proofed and needs more time. If the indentation remains and doesn't spring back at all, the dough is likely over-proofed. The sweet spot for rustic bread dough is when the indentation slowly springs back about halfway. This indicates the dough is fully relaxed and gassy but still has enough structure to hold up during baking. This stage is critical for the success of your stand mixer rustic bread dough.
Baking Your Rustic Bread: Achieving a Crispy Crust
Baking is where all your hard work on the stand mixer rustic bread dough pays off, transforming it into a beautiful, crusty loaf. Achieving a great crust and a well-risen interior requires high heat and steam.
Oven Temperature: The Ideal Heat for Rustic Bread
Rustic bread bakes best at high temperatures to achieve a rapid oven spring and a thick, crispy crust. Preheat your oven to a high temperature, typically between 450°F and 500°F (230°C to 260°C). It's essential to preheat the oven for at least 30-60 minutes to ensure that not only the air but also your baking vessel (stone or Dutch oven) is thoroughly heated.
This intense initial heat causes the water in the dough to rapidly turn to steam, expanding the gas bubbles and causing the dough to rise dramatically (oven spring). It also helps to set the crust quickly while the interior is still expanding. Baking your stand mixer rustic bread dough at this high temperature is key to achieving a professional-quality crust.
Baking Vessel: Dutch Oven vs. Baking Stone
Two popular methods for baking rustic bread at home are using a Dutch oven or a baking stone (or steel). A preheated Dutch oven (usually 5-7 quart cast iron) is excellent because it traps the steam released by the dough within the pot, creating a steamy environment that mimics professional bread ovens. Bake the bread with the lid on for the first part of the bake (e.g., 20 minutes), then remove the lid to allow the crust to brown and crisp up.
Using a baking stone or steel requires creating steam separately. Place the stone or steel in the oven while it preheats. When you add the dough, simultaneously add a cup of hot water to a pan placed on the bottom rack of the oven (or specifically designed for steam). The hot surface of the stone/steel provides a good thermal mass for heat transfer to the base of the loaf, contributing to a good rise and crust. Both methods work well for stand mixer rustic bread dough, producing excellent results.
Creating Steam: Essential for a Crusty Loaf
Steam is absolutely crucial during the initial phase of baking rustic bread. It keeps the surface of the dough soft and pliable, allowing it to expand freely during oven spring. Without sufficient steam, the crust forms too quickly and hardens, restricting the dough's ability to rise and resulting in a denser loaf with a thinner, less satisfying crust.
As mentioned, a Dutch oven naturally creates steam. If using a baking stone/steel, you need to generate steam manually. Methods include adding hot water to a preheated pan, spraying the oven walls with water (use caution), or using lava rocks or chains in a pan with water. Maintain steam for the first 15-20 minutes of baking. This steamy environment is vital for your stand mixer rustic bread dough to achieve maximum volume and a beautiful, crackly crust.
Baking Time: Monitoring Doneness
The total baking time for rustic bread varies depending on the size and shape of the loaf, as well as your oven. A typical medium-sized rustic loaf (made from about 500g of flour) baked at 450-500°F might take anywhere from 30 to 45 minutes. In a Dutch oven, this might be 20 minutes with the lid on and 15-25 minutes with the lid off.
Signs of doneness include:
- A deeply golden-brown crust.
- A hollow sound when tapped on the bottom of the loaf.
- An internal temperature of 200-210°F (93-99°C) when measured with an instant-read thermometer inserted into the center of the loaf. Relying on internal temperature is the most accurate way to ensure your stand mixer rustic bread dough is fully baked through.
Achieving a Golden-Brown Crust: Tips and Tricks
A beautiful, deeply colored crust is a hallmark of rustic bread. This color develops through the Maillard reaction and caramelization of sugars on the surface of the dough at high temperatures. To ensure a golden-brown crust, make sure your oven is fully preheated to the correct temperature and maintain the high heat throughout the baking process (or reduce slightly after the initial steam phase if your recipe calls for it).
Baking with the lid off in a Dutch oven for the final stage, or continuing to bake on a stone after removing steam, allows the direct heat to brown and crisp the crust. Some bakers lightly mist the surface of the dough with water just before placing it in the oven (if not using a Dutch oven) or brush it with a little water after removing the lid for an extra crispy finish.
Scoring the dough just before baking also helps control expansion and creates beautiful patterns that brown distinctively. A well-baked crust on your stand mixer rustic bread dough is essential for that authentic rustic feel.
Cooling and Slicing Your Rustic Bread
Once your beautiful rustic loaf is out of the oven, patience is required! Proper cooling is just as important as the baking process itself for achieving the best texture.
Cooling on a Wire Rack: Preventing Soggy Bottoms
Immediately upon removing your rustic bread from the oven or Dutch oven, transfer it to a wire cooling rack. Do not let the loaf cool on a solid surface like a baking sheet or counter. As the bread cools, moisture from the interior will evaporate. If the bottom is resting on a solid surface, this steam will condense, resulting in a soggy bottom crust.
Allow the bread to cool completely on the wire rack. This can take 1-2 hours for a large loaf. During this cooling period, the internal structure of the bread sets, and residual steam escapes, leading to a better texture and flavor. Cutting into hot bread can result in a gummy interior. Resist the urge to slice your stand mixer rustic bread dough creation until it's fully cooled!
Slicing Techniques: Using a Serrated Knife
Once your rustic bread is completely cool, it's ready to be sliced and enjoyed. The firm, crispy crust of rustic bread requires a proper tool for slicing. A long, sharp serrated bread knife is essential. The serrations grip the crust and saw through it cleanly without crushing the delicate interior crumb.
Use a gentle sawing motion rather than pressing down hard. This technique allows the knife to do the work and prevents the loaf from being flattened. For thick, rustic slices perfect for sandwiches or dipping in soup, position the knife accordingly. For thinner slices for toast, take your time and use smooth strokes. Enjoy the satisfying crunch as you slice into the crust of your homemade stand mixer rustic bread dough loaf!
Troubleshooting Common Stand Mixer Rustic Bread Dough Issues
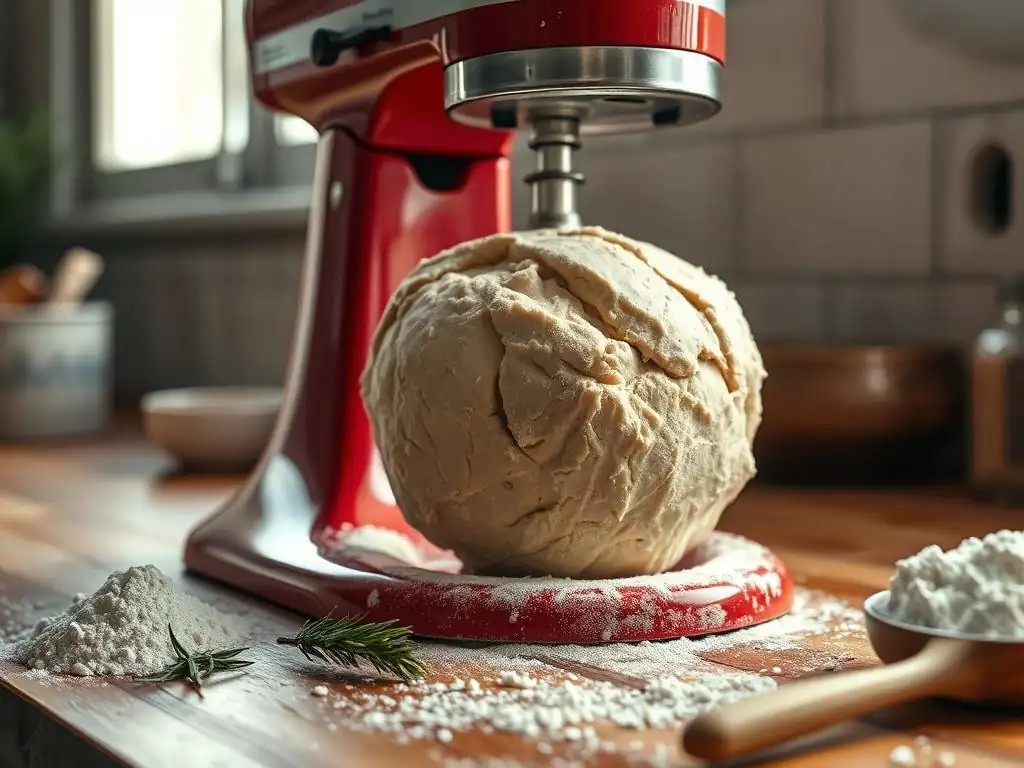
Even with the help of a stand mixer, you might encounter issues with your rustic bread dough. Don't worry, these are common and usually easy to fix with a few adjustments.
Dough Too Sticky: Adjusting Hydration Levels
High hydration is typical for rustic bread to achieve an open crumb, but sometimes the dough can be excessively sticky and difficult to handle, even for a stand mixer. This is often due to variations in flour absorption or inaccurate measurements. If your stand mixer rustic bread dough is sticking stubbornly to the sides of the bowl after several minutes of kneading and looks more like batter than dough, it's likely too wet.
Add flour, one tablespoon at a time, while the mixer is running on low speed. Allow each addition to be incorporated before adding more. Stop adding flour as soon as the dough starts to pull away from the sides of the bowl and forms a cohesive mass, even if it still sticks slightly to the bottom. Avoid adding too much flour, as this will result in a dense loaf.
Dough Too Dry: Adding More Water Gradually
Conversely, if your dough feels very stiff and isn't coming together into a smooth mass even after a few minutes of mixing, it might be too dry. This can happen if your flour is particularly dry or if you didn't add enough water initially. A dry dough will be hard to knead and will result in a dense, tight-crumbed bread.
Add water, one teaspoon at a time, while the mixer is running on low speed. Allow each addition to be fully absorbed before adding more. Continue adding water until the dough becomes more pliable and starts to smooth out. The dough should feel slightly tacky but not excessively sticky. Adjusting the hydration of your stand mixer rustic bread dough is key to achieving the right texture.
Dough Not Rising: Checking Yeast Activity
If your stand mixer rustic bread dough isn't rising during bulk fermentation, the most likely culprit is inactive yeast. This could be because the yeast was old, the water temperature was too hot (killing the yeast) or too cold (slowing it down excessively), or the salt was mixed directly with the yeast for too long before hydration.
If you used active dry yeast and didn't proof it first, or if it didn't foam when proofed, the yeast is likely dead. If you used instant yeast and are sure of your water temperature, the yeast itself might be expired. Unfortunately, there's little you can do to rescue a batch of dough if the yeast is completely inactive. It's best to discard the dough and start over with fresh, properly handled yeast. Ensure your storage of yeast is correct (usually airtight in the refrigerator or freezer) to maintain its viability.
Dense Bread: Over-Kneading or Under-Proofing
A dense crumb in your finished rustic bread can stem from several issues with your stand mixer rustic bread dough. One possibility is over-kneading, which can tighten the gluten too much, resulting in a tough, dense texture. While a stand mixer makes kneading easy, paying attention to the dough's consistency and stopping once the windowpane test is passed is important.
More commonly, a dense loaf is a result of under-proofing. If the dough hasn't had enough time to rise sufficiently during bulk fermentation or final proofing, it won't have enough gas bubbles to create an open, airy structure. Ensure you are allowing adequate time for both rises and using the poke test to confirm readiness before baking. Baking too soon will trap the dough in a dense state. Also, ensure your oven is properly preheated and steam is adequate; insufficient oven spring due to lack of heat or steam can also contribute to a dense loaf.
Recipes: Stand Mixer Rustic Bread Dough Variations
Once you've mastered the basic technique for stand mixer rustic bread dough, you can explore delightful variations. Here are a few ideas to get you started.
Simple Rustic Bread Recipe for Stand Mixer
This foundational recipe yields a classic, crusty rustic loaf using your stand mixer.
- Ingredients:
- 500g strong bread flour
- 375g lukewarm water (around 75% hydration)
- 10g salt
- 2g instant yeast
- Instructions:
- Combine flour, salt, and instant yeast in the stand mixer bowl.
- Add water.
- Mix on low speed for 1-2 minutes until shaggy.
- Increase to medium speed and knead for 8-10 minutes until smooth and elastic (passes windowpane test).
- Transfer to an oiled bowl, cover, and bulk ferment for 1.5-2 hours at room temp (or longer in the fridge) until doubled.
- Shape into a boule or batard.
- Proof for 45-60 minutes at room temp (or longer in fridge) until poke test is just right.
- Preheat oven to 475°F (245°C) with Dutch oven or baking stone inside for 30-60 mins.
- Score dough and bake in Dutch oven (lid on) for 20 mins, then lid off for 15-20 mins, or on stone with steam until golden and internal temp is 200-210°F.
- Cool completely on a wire rack.
Olive and Rosemary Rustic Bread Recipe (Stand Mixer)
Adding olives and rosemary infuses your rustic loaf with Mediterranean flavor. Incorporate these additions during the final minute of kneading your stand mixer rustic bread dough.
- Follow the Simple Rustic Bread Recipe above.
- Addition: 75g pitted and chopped Kalamata olives, 1-2 tablespoons fresh rosemary leaves, roughly chopped.
- Instructions: Add the chopped olives and rosemary during the last 1-2 minutes of kneading on low speed. Proceed with the rest of the steps (fermentation, shaping, proofing, baking) as in the basic recipe. The stand mixer ensures the add-ins are evenly distributed.
Sourdough Rustic Bread with Stand Mixer (Adaptation)
Adapting a sourdough rustic bread recipe for a stand mixer can simplify the kneading process, though the overall timeline will be longer due to sourdough starter fermentation.
- This requires an active sourdough starter. Hydration levels and timings will vary significantly based on your starter and recipe.
- General Process:
- Mix flour, water, and active sourdough starter in the stand mixer bowl on low speed until combined (autolyse) and let rest for 30-60 minutes.
- Add salt and knead on medium speed for 5-8 minutes until dough is smooth and elastic. Sourdough often requires less mechanical kneading than yeasted dough.
- Proceed with bulk fermentation, which is typically longer than with commercial yeast (4-6 hours at room temp or much longer in the fridge), often including 'stretch and folds' every 30-60 minutes during the first part of the fermentation. The stand mixer handles the initial tough kneading.
- Shape, proof (often 2-4 hours at room temp or 8-16 hours in the fridge), and bake as you would a yeasted rustic loaf, usually at a high temperature with steam. Using a stand mixer streamlines the most physically demanding part of making stand mixer rustic bread dough with sourdough.
Storing Your Homemade Rustic Bread
Proper storage helps keep your delicious stand mixer rustic bread dough creation fresh and enjoyable for as long as possible.
Best Practices for Maintaining Freshness
Rustic bread is best enjoyed the day it's baked, but it can be stored for a few days. The key is to protect the cut surface from drying out while allowing the crust to remain relatively crisp. Avoid storing rustic bread in airtight plastic bags at room temperature for extended periods, as this traps moisture and can make the crust soft and chewy.
Store the loaf cut-side down on a clean cutting board. For slightly longer storage (2-3 days), wrap the cooled loaf loosely in a linen bread bag or a clean cotton towel. This allows some air circulation, helping to maintain the crust's texture better than plastic. You can also store it in a paper bag. For cut loaves, you can wrap the cut end tightly in plastic wrap or beeswax wrap before placing it in a bread box or bag.
Freezing Rustic Bread: Tips and Techniques
If you won't finish your rustic loaf within a few days, freezing is an excellent way to preserve its freshness and quality. For the best results, freeze the bread as soon as it has completely cooled.
You can freeze a whole loaf or slice it first. To freeze a whole loaf, wrap it tightly in plastic wrap, then wrap it again in aluminum foil or place it in a large freezer bag, pressing out as much air as possible. For sliced bread, stack the slices and wrap them together tightly in plastic wrap or foil, or place them in a freezer bag with parchment paper between slices to prevent sticking.
Frozen rustic bread can last for several months (typically up to 3-4 months) without significant loss of quality. To thaw, unwrap the loaf (or slices) and let it sit at room temperature, or reheat slices directly in a toaster or oven. Reheating a whole loaf in a preheated oven (around 350°F or 175°C) for 10-15 minutes can help crisp up the crust again, bringing your frozen stand mixer rustic bread dough back to life.
Conclusion: Mastering Rustic Bread Dough with Your Stand Mixer
You've now seen how simple and efficient it can be to create beautiful, flavorful rustic bread using your stand mixer. From the initial mix and rigorous kneading to the crucial fermentation and final bake, the stand mixer takes the effort out of the most physically demanding steps, allowing you to focus on the nuances that make great bread.
Enjoy the Flavor and Simplicity of Homemade Rustic Bread
Embracing your stand mixer for rustic bread dough opens up a world of possibilities. You can easily experiment with different flours, hydration levels, and exciting additions like herbs, olives, or seeds. The consistency provided by the mixer helps build your confidence, leading to successful bakes time after time.
There's immense satisfaction in pulling a warm, crusty loaf from your oven, knowing you created it yourself with ease. The aroma, the crackling crust, the soft interior – it's an experience that store-bought bread simply can't replicate. So, set up your mixer, gather your ingredients, and start your journey to mastering stand mixer rustic bread dough. Happy baking!
Frequently Asked Questions
How does a stand mixer simplify making rustic bread dough?
A stand mixer significantly simplifies the process by automating the kneading process, which is crucial for developing the gluten structure necessary for rustic bread. This automation saves time and effort compared to hand-kneading.
What speed should I use on my stand mixer when making rustic bread dough?
Typically, you'll want to start on a low speed (like speed 2) to combine the ingredients. Then, increase to a medium-low speed (speed 4) for kneading until the dough is smooth and elastic.
How long should I knead rustic bread dough in a stand mixer?
Kneading time usually ranges from 6 to 8 minutes in a stand mixer. Watch for the dough to pull away from the sides of the bowl and become smooth and elastic.
Can I use a dough hook or paddle attachment for rustic bread dough?
A dough hook is essential for kneading bread dough in a stand mixer. A paddle attachment is not designed for kneading and won't develop the necessary gluten structure.
What are some signs that my rustic bread dough is over-kneaded in a stand mixer?
Over-kneaded dough can become sticky and slack, losing its shape easily. It might also appear shiny and excessively elastic.
Final Reflection: The Joy of Effortless Rustic Bread
The humble stand mixer has revolutionized home baking, transforming the once-daunting task of rustic bread making into a surprisingly accessible and enjoyable experience. No longer is the creation of this hearty, flavorful bread relegated to experienced bakers; with the right tools and techniques, anyone can achieve perfectly textured, golden-brown loaves. This accessibility opens up a world of culinary creativity and satisfaction for home cooks everywhere.
The ease of using a stand mixer to create rustic bread dough has profoundly impacted my own baking journey, and I suspect it's had a similar effect on many others. It's not just about the convenience; it's about the liberation it offers. The ability to focus on the nuances of flavor and technique, rather than battling a sticky dough by hand, allows for a deeper connection with the process and a greater appreciation for the final product. The best things in life are simple, but not easy.
This quote perfectly encapsulates the experience of making rustic bread with a stand mixer – the result is simple perfection, achieved with surprising ease.
Now, it's your turn. Consider the power of accessible tools in your own life. What seemingly complex tasks could be simplified, allowing you to focus on the joy of creation and the satisfaction of accomplishment? Don't be intimidated by the prospect of rustic bread; embrace the simplicity and the delicious reward that awaits. Grab your stand mixer, gather your ingredients, and embark on your own baking adventure. The journey, and the bread, will be worth it.
Unleash Your Inner Baker: Knead to Know More?
Thanks for joining us on this rustic bread journey! You've just unlocked the secret to effortlessly creating delicious, homemade bread. Now it's time to put your newfound knowledge into action.
- Bake your own rustic loaf today! Grab those ingredients and follow the recipe – you’ll be amazed at how simple it is.
- Share your baking success! Post a picture of your masterpiece on social media and tag us – we’d love to see your creations!
- Explore other easy bread recipes on our site – let's expand your baking horizons together!
Ready to transform your kitchen into a bakery? What’s your favorite part of the baking process?