
Best Ever Banana Cream Pie with Homemade Custard

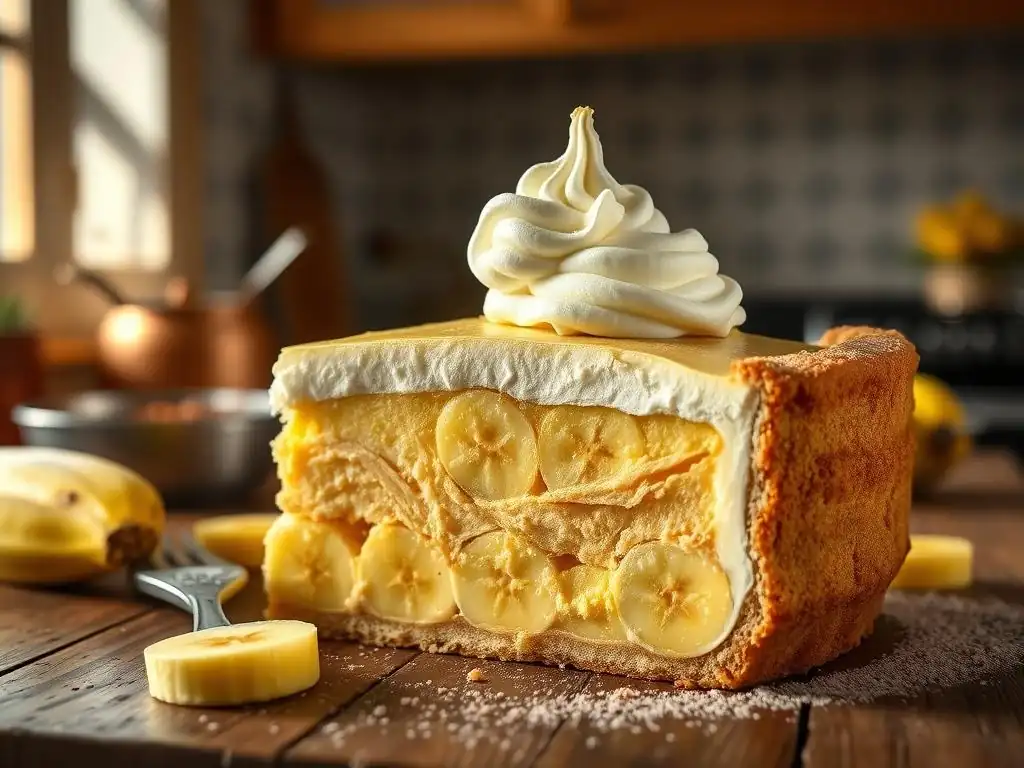
Welcome to BakeWithEase, your guide to unlocking baking confidence! Ever dream of creating a show-stopping dessert that's surprisingly simple? Then you're in the right place. Dive into our world of delicious possibilities, starting with our recipe for the Best Ever Banana Cream Pie with Homemade Custard. Prepare to be amazed at how easy it is to create this classic treat – but is it really that good? Read on to find out!
- BakeWithEase' Secret to the Best Easy Homemade Banana Cream Pie
- Mastering the Art of Homemade Banana Cream Pie: Step-by-Step
- Crafting the Sweetened Vanilla Pastry Crust: A Baker's Guide
- Making the Creamy Homemade Banana Custard Filling from Scratch
- Assembling Your Dreamy Banana Cream Pie
- Tips and Tricks for Banana Cream Pie Perfection
- Storing and Serving Your Banana Cream Pie
- Troubleshooting Common Banana Cream Pie Problems
- More Delicious Cream Pie and Custard Tart Recipes from BakeWithEase
- Frequently Asked Questions
- Final Reflection: The Sweet Simplicity of Homemade Happiness
- Unleash Your Inner Pastry Chef!
BakeWithEase' Secret to the Best Easy Homemade Banana Cream Pie
Why This Banana Cream Pie Recipe is the Ultimate Treat
Creating an easy homemade banana cream pie from scratch offers a level of flavor and texture complexity simply unattainable with pre-made components. The difference is palpable: store-bought fillings often rely on starches and artificial flavors, resulting in a gelatinous, bland product. Our approach focuses on crafting a rich, silky custard using fresh eggs, milk, and sugar, infused with real vanilla. This foundation provides a depth of flavor that perfectly complements the sweet, soft slices of ripe banana, creating a truly memorable dessert experience.
Furthermore, the satisfaction of presenting a beautiful, easy homemade banana cream pie you've crafted yourself is immense. From the buttery, flaky crust to the smooth, luscious custard and the billowy cloud of fresh whipped cream on top, every element contributes to a harmonious whole. This recipe simplifies the process without compromising on quality, making it accessible even for bakers who might feel intimidated by traditional pastry and custard techniques. It's a classic comfort dessert elevated to its highest potential.
Mastering the Art of Homemade Banana Cream Pie: Step-by-Step
Ingredients for the Perfect Banana Cream Pie
Gathering the right ingredients is the first crucial step in creating a truly exceptional easy homemade banana cream pie. The quality of each component significantly impacts the final taste and texture. For instance, using fresh, large eggs for the custard is paramount, as they provide structure and richness. Similarly, choosing ripe but firm bananas ensures they hold their shape when sliced and offer optimal sweetness without becoming mushy.
Paying attention to details like using whole milk or a mix of milk and cream for the custard will yield a richer result compared to lower-fat options. For the pastry crust, using very cold butter cut into small pieces is non-negotiable for achieving that desirable flaky texture. Don't underestimate the power of good vanilla extract either; it's a subtle but essential flavor enhancer throughout the pie.
Ingredients for the Sweetened Vanilla Pastry Crust
- All-purpose flour
- Granulated sugar
- Salt
- Unsalted butter, very cold and cut into cubes
- Ice water
Ingredients for the Creamy Homemade Banana Custard Filling
- Whole milk (or a mix of milk and heavy cream)
- Granulated sugar
- Egg yolks, large
- Cornstarch
- Salt
- Unsalted butter
- Vanilla extract
- Ripe but firm bananas
Ingredients for the Light and Fluffy Whipped Cream Topping
- Heavy whipping cream, very cold
- Powdered sugar
- Vanilla extract
Essential Baking Tools for Banana Cream Pie Success
- 9-inch pie plate
- Pastry blender or food processor
- Rolling pin
- Pie weights or dried beans
- Medium saucepan
- Whisk
- Heatproof bowl
- Fine-mesh sieve (optional but recommended)
- Electric mixer (stand or hand)
Crafting the Sweetened Vanilla Pastry Crust: A Baker's Guide
Preparing the Pastry Dough: From Flour to Flaky
The journey to a flaky, tender crust begins with combining the dry ingredients: flour, sugar, and salt. Whisk them together in a bowl to ensure they are evenly distributed. The critical next step involves cutting in the very cold butter. This can be done using a pastry blender, two forks, or a food processor.
The goal is to break the butter into pieces ranging from pea-sized to small crumbs. These small pockets of cold butter are what create steam in the oven, separating the layers of dough and resulting in that signature flakiness. Avoid using your hands too much, as their warmth can melt the butter prematurely.
Once the butter is cut in, gradually add the ice water, a tablespoon at a time, mixing until the dough just comes together. It's important not to add too much water; the dough should be shaggy but hold together when squeezed. Overmixing develops gluten, which leads to a tough crust. Once the dough forms a cohesive mass, turn it out onto a lightly floured surface, gather it into a disc, and wrap it tightly in plastic wrap.
Chilling the Dough: The Key to a Tender Crust
Chilling the pastry dough is a non-negotiable step for achieving a tender and flaky crust. After forming the dough disc, it needs to rest in the refrigerator for at least 30 minutes, but ideally for 1 to 2 hours. This chilling period serves two primary purposes. Firstly, it allows the gluten that may have developed during mixing to relax. Relaxed gluten results in a more tender crust that is easier to roll out without shrinking excessively during baking.
Secondly, chilling re-hardens the butter pieces within the dough. As mentioned earlier, these cold butter pockets are essential for creating steam and flakiness in the oven. If the butter is warm and soft when the dough goes into the oven, it will simply melt into the dough, resulting in a greasy, dense crust rather than a light, flaky one. Think of this chilling time as an investment in the final texture of your easy homemade banana cream pie crust.
Blind Baking the Crust: Achieving a Golden Perfection
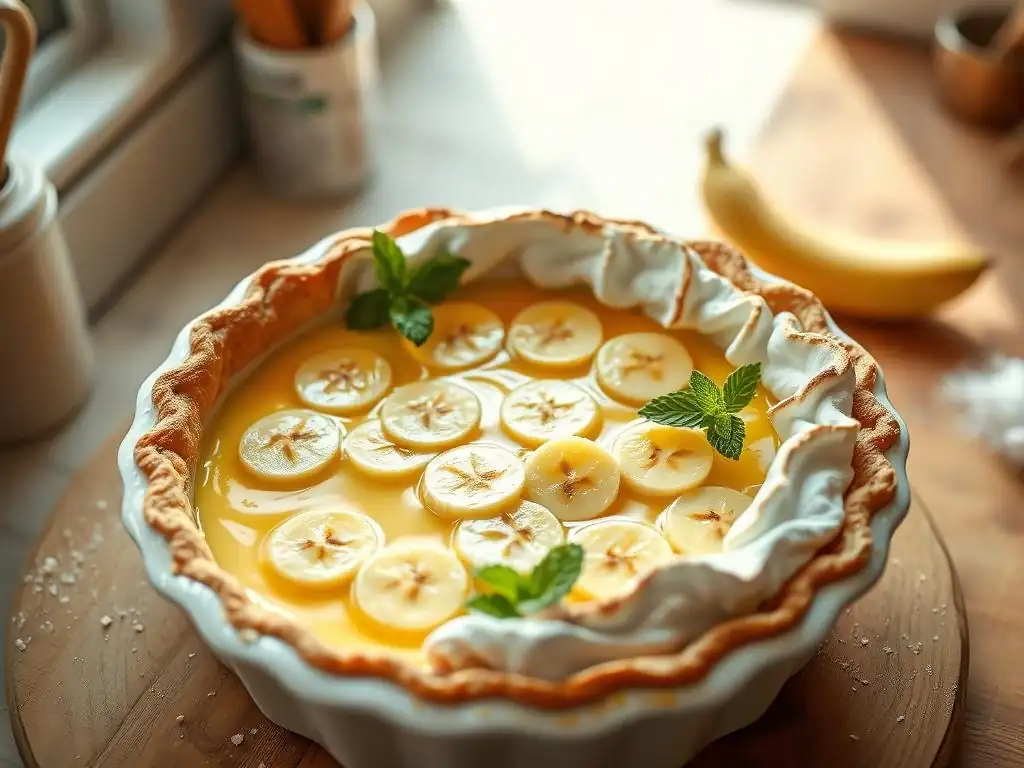
For a cream pie like our easy homemade banana cream pie, blind baking the crust is essential. This means partially or fully baking the crust before adding the filling. This prevents the bottom crust from becoming soggy from the moist custard. To blind bake, roll out your chilled dough and carefully fit it into your pie plate.
Crimp the edges decorately. Then, line the inside of the dough with parchment paper or foil and fill it with pie weights, dried beans, or even rice. These weights hold the dough in place and prevent the sides from collapsing or the bottom from puffing up during baking.
Bake the weighted crust in a preheated oven, typically around 190°C (375°F), for about 15-20 minutes, until the edges are set and lightly golden. Carefully remove the weights and the parchment/foil. If the recipe calls for a fully baked crust, return it to the oven for another 5-10 minutes, or until the bottom is golden brown and looks dry. For a partially baked crust, this second bake might be shorter. Allowing the crust to cool completely before adding the custard is crucial for preventing a soggy bottom.
Making the Creamy Homemade Banana Custard Filling from Scratch
Combining Ingredients for a Smooth Custard Base
The foundation of our creamy homemade banana cream pie custard begins by whisking together the key ingredients: egg yolks, sugar, cornstarch, and salt in a heatproof bowl. It's important to whisk these thoroughly until the mixture is pale yellow and thick. This process, often called "tempering" or simply creating a smooth paste, helps prevent lumps when the hot milk is added. The cornstarch acts as the primary thickening agent, ensuring the custard sets up beautifully.
Simultaneously, heat the milk (or milk/cream mixture) in a saucepan over medium heat until it's steaming but not boiling. Once hot, slowly and gradually pour about half of the hot milk into the egg yolk mixture while continuously whisking. This step, known as tempering, gently raises the temperature of the egg yolks, preventing them from scrambling when they hit the hotter liquid.
Cooking the Custard: Achieving the Perfect Consistency
After tempering the egg yolks, pour the warmed yolk mixture back into the saucepan with the remaining hot milk. Place the saucepan back over medium heat and whisk constantly. It's crucial to stir continuously, scraping the bottom and sides of the pan, to prevent the custard from sticking or scorching. The custard will gradually thicken as it cooks. You'll notice it coats the back of a spoon, and when you run your finger through it, the line holds.
Continue cooking and stirring for about 1-2 minutes after it thickens, ensuring the cornstarch is fully cooked out to avoid a starchy taste. The target temperature for a cornstarch-thickened custard is typically around 85°C (185°F), which ensures the starches have gelatinized. If you have a thermometer, aim for this range, but the visual cue of it coating the spoon is often sufficient for an easy homemade banana cream pie custard.
Cooling the Custard: Preventing a Skin from Forming
Once the custard has thickened to the desired consistency, remove it from the heat. Stir in the butter and vanilla extract until the butter is completely melted and incorporated. The butter adds richness and a silky texture. To prevent a skin from forming on the surface as it cools, which can create lumps, immediately press a layer of plastic wrap directly onto the surface of the hot custard. Ensure the wrap touches every part of the surface.
Allow the custard to cool at room temperature for a bit, then transfer it to the refrigerator to chill completely. This chilling process is vital for the custard to set properly. It typically takes at least 2-3 hours in the refrigerator. A well-chilled custard will be firm enough to hold its shape when sliced, creating clean layers in your easy homemade banana cream pie.
Adding the Banana Slices: Infusing the Custard with Flavor
Incorporating the banana slices is a step that requires careful timing to ensure the bananas are fresh and vibrant in the final pie. Bananas brown quickly once sliced, so they are usually added just before assembling the pie layers or mixed gently into the cooled custard. Slicing the bananas about 0.5 cm (approx. ¼ inch) thick provides substantial pieces without being too bulky.
You can arrange a layer of banana slices directly onto the cooled, blind-baked crust before pouring in the custard, or gently fold the slices into the cooled custard just before assembly. The latter method ensures the bananas are fully suspended within the filling. For an easy homemade banana cream pie, using ripe but still slightly firm bananas is key; overly soft bananas can turn mushy in the custard. About 3-4 medium bananas are typically sufficient for a 9-inch pie.
Assembling Your Dreamy Banana Cream Pie
Layering the Crust, Custard, and Bananas
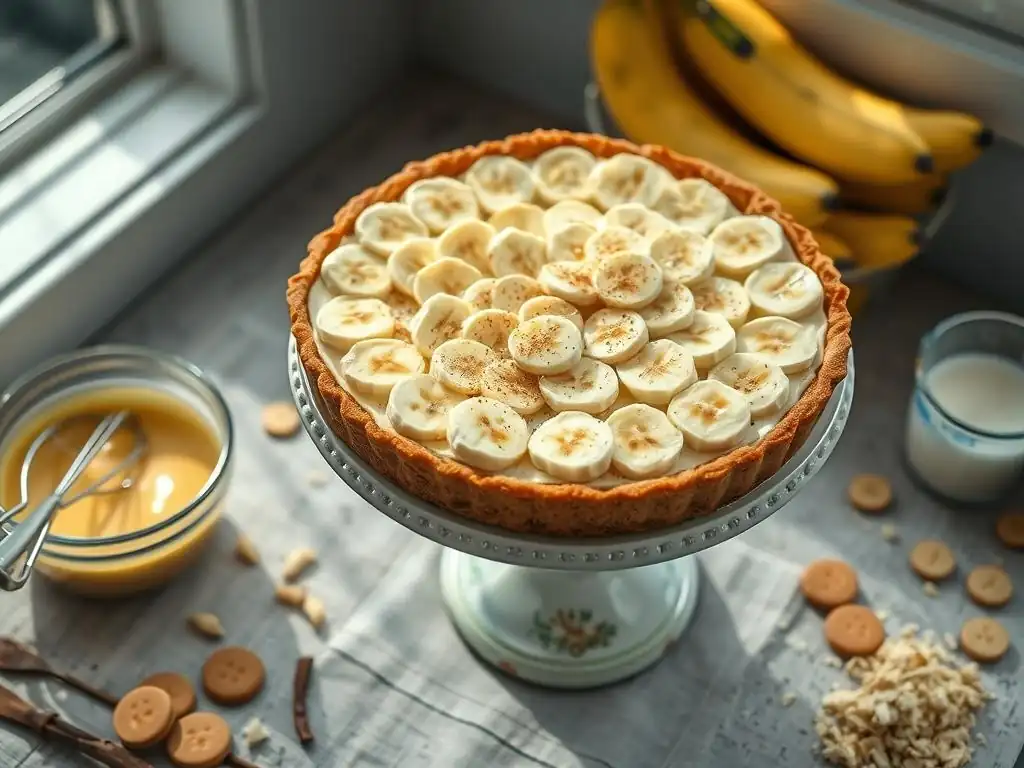
Assembling the easy homemade banana cream pie is where all your hard work comes together beautifully. Ensure your blind-baked crust is completely cool and your homemade custard is thoroughly chilled and set. The most common method is to start with a layer of banana slices on the bottom of the cooled crust. Arrange them neatly, covering the bottom surface.
Next, gently spoon or pour the chilled custard over the banana layer, spreading it evenly with an offset spatula or the back of a spoon. Make sure the custard fills the crust right up to the edges. If you chose to fold the bananas into the custard, simply pour the banana-custard mixture into the cooled crust. This layering creates distinct textures and flavors in every bite of your perfect easy homemade banana cream pie.
Creating the Light and Fluffy Whipped Cream Topping
No banana cream pie is complete without a generous topping of light and fluffy whipped cream. For the best results, ensure your heavy whipping cream is very cold. Using a chilled bowl and whisk attachments (if using an electric mixer) can also help the cream whip up faster and achieve greater volume. Combine the cold heavy cream, powdered sugar, and vanilla extract in the chilled bowl.
Begin whipping on low speed, gradually increasing to medium-high speed. Watch the cream carefully; it will go through stages from frothy to soft peaks, and then to stiff peaks. Stiff peaks hold their shape when the whisk is lifted. Be careful not to over-whip, as this can turn the cream grainy or even into butter. Whipping typically takes anywhere from 2 to 5 minutes depending on the speed and quantity. The whipped cream should be used shortly after making it for optimal texture.
Decorating Your Banana Cream Pie: Presentation Matters
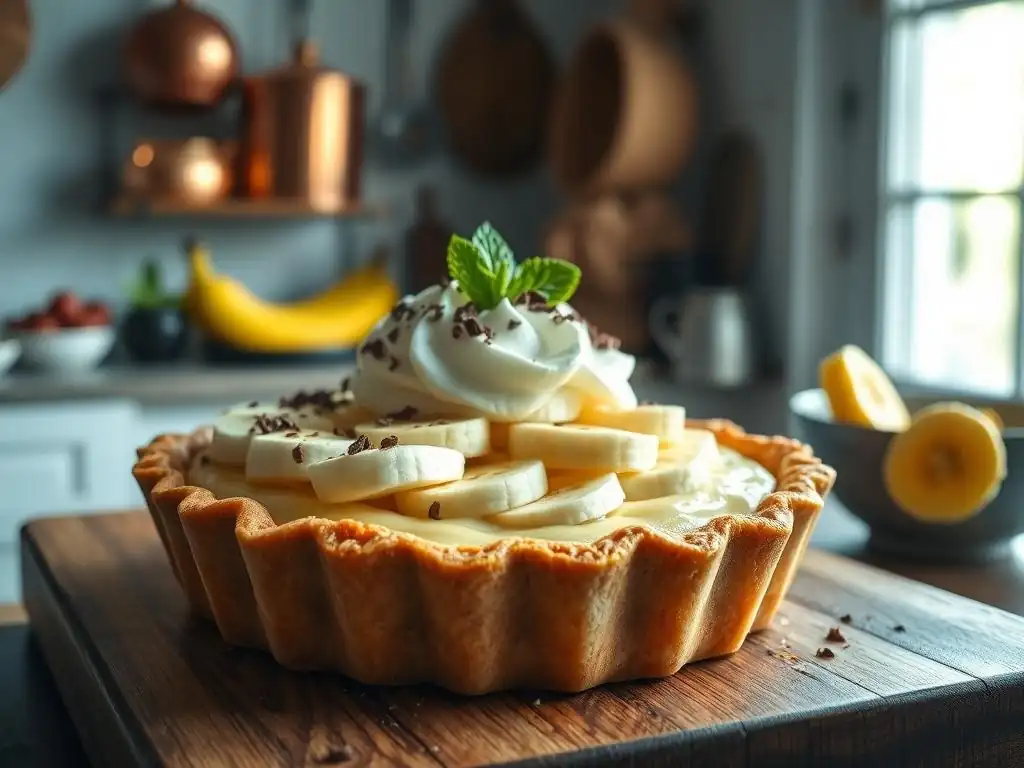
Decorating your easy homemade banana cream pie is the final touch that makes it look as incredible as it tastes. Once the whipped cream is ready, you can spread it evenly over the top of the custard using an offset spatula for a smooth, classic look. Alternatively, for a more decorative finish, transfer the whipped cream to a piping bag fitted with a large star tip and pipe swirls or rosettes over the entire surface.
For added visual appeal and flavor, consider garnishing the top. You can sprinkle toasted coconut flakes, shave some chocolate, or arrange a few extra banana slices (brushed with a little lemon juice to prevent browning) on top of the whipped cream just before serving. A dusting of cinnamon or nutmeg is also a lovely touch. Remember, presentation enhances the enjoyment of any dessert, especially a classic like an easy homemade banana cream pie.
Tips and Tricks for Banana Cream Pie Perfection
Achieving the Perfect Crust Texture
A truly great easy homemade banana cream pie starts with a perfect crust – tender, flaky, and golden brown. The secret lies in keeping everything cold. Cold butter cut into small pieces, cold water, and chilling the dough are all crucial steps. When rolling out the dough, work quickly and on a lightly floured surface to prevent the butter from warming up. If the dough becomes soft or sticky, pop it back in the refrigerator for 10-15 minutes before continuing.
Another key is not to overwork the dough. The less you handle it, the less gluten develops, resulting in a more tender crust. When blind baking, ensure you use enough pie weights to fill the crust cavity completely; this prevents shrinkage and ensures the bottom stays flat. Baking until the crust is truly golden brown, especially the bottom, provides structural integrity against the moist filling.
Preventing a Soggy Crust: Important Tips
A soggy bottom crust is a common pitfall with cream pies, but it's entirely avoidable with a few smart techniques for your easy homemade banana cream pie. The most critical step is blind baking the crust thoroughly until it's fully baked and golden brown, not just lightly colored. This creates a barrier against the moisture from the custard.
Ensure the baked crust is completely cooled before adding the custard. Adding warm custard to a warm or even room-temperature crust can introduce steam and moisture that leads to sogginess. Some bakers also like to brush the inside of the warm, blind-baked crust with a thin layer of melted chocolate or a lightly beaten egg white and bake for a few more minutes; this creates an extra waterproof layer, although blind baking properly is usually sufficient for an easy homemade banana cream pie.
Variations on the Classic Banana Cream Pie
While the classic easy homemade banana cream pie is a beloved dessert, it also serves as a wonderful canvas for creative variations. These simple tweaks can introduce new dimensions of flavor while keeping the core concept intact. Experimenting with different extracts, fruits, or even chocolate can transform the familiar into something excitingly new.
Adding a Hint of Spice
A subtle addition of spice can elevate the flavor profile of your easy homemade banana cream pie. A pinch of ground nutmeg or cinnamon whisked into the custard base adds warmth and complexity that pairs beautifully with the sweet bananas. You could also incorporate a tiny dash of ground cardamom for a more exotic note. These spices complement the vanilla and banana without overpowering them.
Using Different Types of Bananas
While Cavendish bananas are the standard, exploring other varieties can offer interesting twists. Red bananas, for instance, have a slightly sweeter and sometimes subtly raspberry-like flavor. Plantains, while less sweet, could be used in a more savory or caramelized application within the pie, though they require different preparation. For a typical easy homemade banana cream pie, ripe Cavendish are ideal, but feel free to experiment if you have access to other sweet, soft varieties.
Chocolate Banana Cream Pie: A Delicious Twist
For chocolate lovers, transforming this into a chocolate banana cream pie is straightforward. Melt some good quality chocolate (dark, milk, or semi-sweet) and whisk it into the hot custard after it's thickened and removed from the heat, before adding the butter and vanilla. About 100-150 grams (around 3.5 to 5 ounces) of chopped chocolate should be sufficient for a 9-inch pie. This creates a rich chocolate custard layer that is divine with the bananas and whipped cream.
Storing and Serving Your Banana Cream Pie
How to Keep Your Banana Cream Pie Fresh
Proper storage is key to maintaining the quality and freshness of your easy homemade banana cream pie. Because it contains dairy (custard and whipped cream) and fresh fruit, it must be kept refrigerated. Cover the pie loosely with plastic wrap or aluminum foil. If you've used a tall layer of whipped cream, consider using a pie carrier with a dome lid to avoid squashing the topping.
The pie is best enjoyed within 2-3 days of assembly. The bananas will soften and potentially brown over time, and the crust can eventually absorb moisture from the filling. While it's still safe to eat beyond this, the texture and appearance might degrade. For optimal freshness, add the whipped cream topping just before serving if possible, or within a few hours of serving.
Serving Suggestions for the Best Banana Cream Pie Experience
Serving your easy homemade banana cream pie at the right temperature enhances its flavors and textures. It should be served chilled, directly from the refrigerator. This ensures the custard is firm and the whipped cream is stable. Use a sharp knife to cut clean slices; dipping the knife in hot water and wiping it dry between cuts can help achieve neat portions.
For an extra touch, you could serve each slice with a sprinkle of powdered sugar, a drizzle of caramel sauce, or a few fresh berries on the side. A small scoop of vanilla ice cream is also a decadent accompaniment. Presenting your beautiful pie on a nice cake stand or platter adds to the occasion. Enjoying a slice of easy homemade banana cream pie is a simple pleasure that brings smiles.
Troubleshooting Common Banana Cream Pie Problems
Addressing a Runny Custard
A runny custard is a frustrating issue, but often fixable for your easy homemade banana cream pie. The most common causes are not cooking the custard long enough or not using enough thickener (cornstarch or egg yolks). If your custard is too thin after chilling, you can gently reheat it in a saucepan over medium-low heat.
In a separate bowl, whisk together a tablespoon or two of cornstarch with an equal amount of cold milk or water to create a slurry. Slowly whisk this slurry into the warm custard while continuously stirring. Continue to cook and stir until the custard thickens again, ensuring it bubbles gently for a minute or two to cook the cornstarch. Chill thoroughly before using.
Fixing a Cracked Crust
A cracked crust can happen during rolling, transferring, or even blind baking. Don't despair; minor cracks in your easy homemade banana cream pie crust are usually easy to patch. If the crack occurs before baking, you can use scraps of dough, dampen the edges slightly with water, and press them into the crack, smoothing the surface.
If the crack appears after blind baking, you can often "glue" it with a little bit of melted butter or a paste made from flour and water before the second bake (if doing a full blind bake). For cracks that appear after baking, especially on the bottom, a thin layer of melted chocolate or a bit of the thick custard itself can be used to seal it before adding the main filling, ensuring your easy homemade banana cream pie doesn't leak.
Preventing Whipped Cream from Deflating
Whipped cream can deflate over time, especially if the temperature is warm. To keep the topping on your easy homemade banana cream pie looking light and fluffy, start with very cold heavy cream and a chilled bowl. Don't over-whip the cream; stop just when stiff peaks form. Over-whipping can break down the fat structure, leading to weeping.
If you need the whipped cream to hold its shape for a longer period, you can stabilize it. A common method is to add a small amount of gelatin (about 1 teaspoon dissolved in 2-3 tablespoons of hot water, cooled slightly) to the cream just before it reaches soft peaks. Another simple stabilizer is a small amount of cream cheese (softened) whipped with the sugar before adding the cream. For a standard easy homemade banana cream pie served within a few hours, simply whipping cold cream to stiff peaks is usually sufficient.
More Delicious Cream Pie and Custard Tart Recipes from BakeWithEase
Explore Our Pastry and Dessert Collection
If you've enjoyed making this easy homemade banana cream pie, you'll find a wealth of other delightful recipes in our collection. Custard-based fillings offer incredible versatility, pairing well with various fruits, chocolates, and spices. Exploring different pastry techniques, from classic flaky crusts to sweet shortcrusts, opens up a world of dessert possibilities.
Our pastry and dessert collection includes classics like lemon meringue pie, chocolate silk pie, and fruit tarts with almond cream. We also delve into simpler options like no-bake cream pies and individual custard cups. Each recipe is designed with clear, step-by-step instructions, aiming to make the process approachable and rewarding, just like mastering this simple yet spectacular easy homemade banana cream pie.
Frequently Asked Questions
How difficult is this banana cream pie recipe, really?
This recipe is designed to be easy, even for beginners. The step-by-step instructions and easy-to-find ingredients make it approachable.
Can I use store-bought pie crust to make this recipe even faster?
Yes, you absolutely can! Using a store-bought pie crust will significantly reduce the prep time. However, a homemade crust adds a special touch.
What makes this banana cream pie "the best ever"?
The homemade custard is the key! It's rich, creamy, and far superior to store-bought pudding. Plus, the recipe uses fresh bananas for maximum flavor.
How long does it take to make the homemade custard from scratch?
The custard itself takes about 15-20 minutes to cook on the stovetop. Allow extra time for it to cool completely before assembling the pie.
What are some variations I can try with this banana cream pie?
Consider adding a layer of chocolate ganache at the bottom of the crust or topping the pie with toasted coconut. You could also use different types of bananas for a unique twist.
Final Reflection: The Sweet Simplicity of Homemade Happiness
The pursuit of the perfect banana cream pie isn't just about culinary skill; it's about the joy of creating something delicious and comforting from scratch. This recipe, designed for ease and accessibility, proves that even the most decadent desserts can be surprisingly simple to achieve. The satisfaction of biting into a creamy, custardy filling, perfectly complemented by the sweetness of ripe bananas and a flaky crust, is a testament to the power of homemade goodness.
The enduring appeal of banana cream pie speaks volumes about our collective desire for simple pleasures. It's a dessert that transcends generations, a nostalgic reminder of childhood memories and family gatherings. The best things in life are simple,
a sentiment often repeated, rings especially true when considering the humble yet deeply satisfying experience of baking this pie. The process itself, from carefully measuring ingredients to the delicate layering of the filling, becomes a meditative act, a moment of mindful creation in an often hectic world.
Now, I invite you to roll up your sleeves, gather your ingredients, and embark on your own banana cream pie adventure. Don't be intimidated by the seemingly complex nature of homemade desserts; this recipe proves that with a little patience and a dash of confidence, you can create something truly special. The taste of your own homemade banana cream pie, the pride in your accomplishment, and the joy of sharing it with loved ones – these are the lasting rewards that await. So, what are you waiting for? Let the baking begin!
Unleash Your Inner Pastry Chef!
Thanks for joining us on this creamy, dreamy banana cream pie adventure! We hope you gained some delicious inspiration and newfound confidence in your baking skills. Ready to take the next step?
- Whip up your own masterpiece: Use our recipe as a guide, but feel free to experiment with different crusts or toppings – let your creativity flow!
- Share your creation: Tag us on social media (@BakeWithEase) and show off your stunning banana cream pie. We love seeing your baking triumphs!
- Challenge a friend: Nominate a fellow baking enthusiast to try this recipe and share their results – a little friendly competition always sparks joy!
What unique twist will you add to your perfect banana cream pie?