
Slowing Down the Magic: Controlling Fermentation with Cold

Welcome to BakeWithEase, your guide to confident baking! Ever wondered how to coax the perfect flavor and texture from your sourdough, even with a busy schedule? This week, we're diving deep into cold fermentation sourdough tips, unlocking the secrets to slowing down the magic and controlling fermentation for unparalleled results. Curious how a simple temperature change can revolutionize your baking? Read on to discover the science and techniques behind this game-changing method.
- Demystifying Cold Fermentation in Sourdough
- Practical Cold Fermentation Techniques
- Cold Fermentation Tips for Beginners
- Troubleshooting Common Cold Fermentation Issues
- Cold vs. Room Temperature Fermentation: A Comparative Analysis
- Advanced Cold Fermentation Techniques
- Recipes Utilizing Cold Fermentation
- Conclusion: Elevating Your Sourdough with Cold Fermentation
-
Frequently Asked Questions
- What is cold fermentation in sourdough baking, and why is it used?
- How does cold fermentation impact the flavor of sourdough bread?
- At what stage of the sourdough process is cold fermentation typically implemented?
- How long can sourdough dough be cold fermented in the refrigerator?
- What are some key considerations when using cold fermentation to ensure a successful sourdough bake?
- Final Reflection: The Cool Embrace of Controlled Fermentation
- Unlock Your Inner Artisan: Mastering Cold Fermentation
Demystifying Cold Fermentation in Sourdough
Cold Fermentation Explained: A Slow and Steady Approach
Cold fermentation in sourdough refers to the process of slowing down the activity of yeast and bacteria in your dough by placing it in a cool environment, typically the refrigerator. This technique, often used after the initial bulk fermentation at room temperature, dramatically extends the fermentation period from a few hours to potentially several days. Instead of the rapid rise you see at warmer temperatures (like 24°C or 75°F), the dough ferments slowly at temperatures usually between 4°C and 7°C (about 39°F to 45°F).
This controlled slowdown is not just about convenience; it's a deliberate step to enhance the dough's structure, flavor, and handling properties. It's one of the most valuable cold fermentation sourdough tips you can learn to improve your bakes.
This extended, cool environment allows enzymes within the dough to break down complex starches and proteins more effectively. The lactic acid bacteria in the sourdough starter produce more lactic acid relative to acetic acid, contributing a different, often milder, tang compared to a purely room-temperature ferment. Meanwhile, the wild yeast continues its work, albeit at a much slower pace, producing carbon dioxide that creates the airy structure. This slow development is key to achieving a complex flavor profile and a robust dough structure that is easier to handle and score, making cold fermentation sourdough tips crucial for consistent results.
The Science of Slow: How Cold Affects Fermentation
Temperature is a critical factor influencing the metabolic rate of microorganisms, including the wild yeast and lactic acid bacteria in a sourdough starter. When dough is moved from room temperature to refrigeration temperatures (around 4-7°C), the enzymatic activity and microbial fermentation slow down significantly. Yeast activity, which is optimal between 24°C and 28°C (75°F and 82°F), drops dramatically in cooler conditions. Similarly, the bacteria that produce organic acids also become less active, though their relative activity levels can shift, influencing the final flavor. Understanding this slowdown is fundamental to mastering cold fermentation sourdough tips.
At these lower temperatures, the enzymes like proteases and amylases continue to work, breaking down proteins (like gluten) and starches into simpler compounds. This process strengthens the gluten network over time, leading to better dough structure and oven spring, while also releasing sugars that contribute to browning and flavor. The slow fermentation also allows for a more even distribution of fermentation byproducts throughout the dough.
For example, a dough fermented for 18 hours at 4°C will develop a different character than one fermented for 4 hours at 24°C, even if they reach a similar volume increase. This scientific basis underpins why cold fermentation sourdough tips are so effective for achieving superior results.
Benefits of Cold Fermentation: Flavor, Texture, and Scheduling
One of the primary benefits of cold fermentation is the significant enhancement of flavor. The extended, slow fermentation allows for the development of more complex organic acids and other aromatic compounds, resulting in a deeper, more nuanced, and often less overwhelmingly sour taste than quick, warm ferments. This process allows the unique characteristics of your specific starter and flour blend to shine through. Many bakers find that cold-fermented loaves have a richer, more satisfying flavor profile. Exploring these flavor possibilities is a key aspect of implementing cold fermentation sourdough tips.
Beyond flavor, cold fermentation greatly improves dough texture and handling. The slow breakdown of proteins strengthens the gluten network, making the dough more extensible yet resilient. This leads to a better open crumb structure and increased oven spring. Furthermore, cold dough is much easier to handle, shape, and score cleanly compared to warm, relaxed dough.
From a practical standpoint, cold fermentation offers immense scheduling flexibility. You can prepare dough one day and bake it the next, or even several days later, fitting baking into a busy schedule. This convenience, coupled with the quality improvements, makes cold fermentation sourdough tips invaluable for home bakers.
Practical Cold Fermentation Techniques
Preparing Dough for Refrigeration: A Step-by-Step Guide
Preparing your sourdough dough for cold fermentation is straightforward but requires attention to timing. Typically, cold fermentation occurs after the bulk fermentation phase. Once your dough has undergone its initial room-temperature rise (often doubling or increasing by 50-75%, depending on the desired final volume), it's ready to be transferred to the cold.
Ensure the dough has developed sufficient strength through folds before chilling. A common approach is to bulk ferment at room temperature for 2-4 hours, performing 2-4 sets of stretch and folds during this time, before moving it to the refrigerator. This initial room-temperature period gives the fermentation a necessary head start before the cold slows it down.
After the bulk fermentation, gently shape the dough into its final form (like a boule or batard). Place the shaped dough seam-side up in a floured proofing basket (banneton). Using rice flour or a blend of rice and bread flour works well to prevent sticking. Cover the proofing basket tightly with plastic wrap or place it inside a sealed plastic bag to prevent the dough from drying out in the refrigerator.
Immediately transfer the covered dough in its basket to the refrigerator. The rapid cooling helps halt the fermentation process effectively. Following these steps is fundamental to successful cold fermentation sourdough tips.
Optimal Refrigeration Time: Finding the Sweet Spot
Determining the optimal time for cold fermentation in the refrigerator depends on several factors, including the dough's hydration level, the temperature of your refrigerator, the strength and activity of your starter, and your desired flavor outcome. While some recipes call for a minimum of 12 hours, many bakers find that longer periods, such as 18-48 hours, yield more complex flavors and better texture. Some advanced techniques even push cold fermentation to 72 hours or more, particularly for pizza dough or specific bread types. Experimentation is key here.
Start with a shorter cold ferment, perhaps 12-18 hours, and observe the results. Note the dough's behavior, the crumb structure, and the flavor. Then, try extending the time on subsequent bakes, perhaps to 24 or 36 hours, and compare.
You'll find a sweet spot that aligns with your refrigerator's temperature and your preference for tang and texture. Remember that dough fermented for longer periods in the cold will have a stronger flavor profile and may require less final proofing time at room temperature before baking. Mastering these cold fermentation sourdough tips around timing is crucial for controlling your bake schedule and results.
Maintaining Consistent Temperature: Essential for Success
Consistency in refrigeration temperature is paramount for predictable cold fermentation. Ideally, your refrigerator should maintain a steady temperature between 4°C and 7°C (39°F to 45°F). Fluctuations outside this range can lead to inconsistent fermentation rates. If the temperature is too warm (e.g., above 8°C), the dough might over-proof quickly. If it's too cold (e.g., below 3°C), fermentation might stall almost completely, failing to develop flavor and structure. Using a separate refrigerator or a specific, less-used shelf can help minimize temperature swings caused by opening the door frequently.
Consider placing a thermometer inside your refrigerator to monitor the actual temperature where you store the dough. This simple step can reveal inconsistencies you might not be aware of. Avoid placing the dough near the back wall of the refrigerator if that's where condensation or freezing occurs, as this can damage the dough structure. By ensuring a stable, cool environment, you gain better control over the slow fermentation process, which is a core element of successful cold fermentation sourdough tips.
Container Considerations: Choosing the Right Vessel
The container you use for cold fermentation significantly impacts the dough's shape, moisture retention, and ease of handling. For the bulk fermentation phase before refrigeration, any food-grade container with a lid will work, such as a large plastic tub or a glass bowl. Ensure it's large enough to accommodate the dough's initial rise without overflowing. Lightly oiling the container can prevent sticking.
For the cold proofing phase in the refrigerator, after shaping, a proofing basket (banneton) is highly recommended. Bannetons, typically made of rattan or wood pulp, are lined with flour (often rice flour) and support the shaped dough, helping it maintain its form as it slowly ferments in the cold. They also wick away a small amount of surface moisture, contributing to a better crust.
If you don't have a banneton, you can proof the dough in a bowl lined with a floured tea towel or a colander lined with a well-floured cloth. Whichever vessel you choose, ensure it's covered tightly with plastic wrap or placed in a plastic bag to prevent the dough surface from drying out and forming a skin during the long cold ferment. Proper vessel choice is one of the practical cold fermentation sourdough tips that can make a big difference in your final loaf.
Cold Fermentation Tips for Beginners

Adjusting Starter and Hydration for Cold Fermentation
When starting with cold fermentation, you might need to make slight adjustments to your recipe, particularly concerning starter percentage and hydration. Because the fermentation is slowed down, you can often use a slightly higher percentage of starter than you might for a very short room-temperature proof. For instance, while a typical room-temp recipe might use 15-20% starter (baker's percentage), a cold-fermented loaf might use 20-25% to ensure adequate activity over the longer period. However, many standard recipes designed for overnight refrigeration already account for this, so it's often best to start with a recipe specifically written for cold fermentation.
Hydration level also plays a role. Higher hydration doughs (above 75%) tend to ferment faster than lower hydration doughs (65-70%). If you're new to cold fermentation, starting with a slightly lower hydration dough (around 70-75%) might be easier to manage and less prone to over-proofing in the refrigerator. As you gain experience, you can experiment with higher hydration doughs. Remember that a very active starter is key, regardless of the fermentation method, so ensure your starter is bubbly and active before mixing your dough. These are crucial cold fermentation sourdough tips for getting started successfully.
Monitoring Dough Rise in the Refrigerator
Monitoring dough rise during cold fermentation is different from monitoring it at room temperature. While the dough will increase in volume, the rise will be much slower and less dramatic. Don't expect it to double or triple in the same way it would on the counter. Instead, look for a noticeable increase in volume, maybe 20-50%, and signs of fermentation like small bubbles visible on the surface or edges of the dough. The dough should feel slightly gassy and less dense than when it went into the cold.
Using a clear container for the initial bulk fermentation before shaping and chilling can help you get a baseline for how much it has risen before the cold step. Once in the proofing basket in the fridge, it's harder to judge volume precisely. Focus more on the feel of the dough when you take it out – it should feel lighter and more aerated. Over time, you'll develop an intuition for how your dough behaves during cold fermentation based on your specific starter and refrigerator temperature. Patience and observation are key cold fermentation sourdough tips here.
Proofing After Refrigeration: Achieving Optimal Expansion
After its stint in the cold, your dough will be relatively firm and cold. It will need some time at room temperature before baking to relax and finish its final proofing. This step is often called the final proof or bench rest after cold fermentation.
The duration of this final proof depends heavily on the temperature of your kitchen and how long the dough was in the refrigerator. Dough that spent a very long time (e.g., 48 hours) in the cold might need less time at room temperature (perhaps 30-60 minutes), while dough chilled for a shorter period (e.g., 12 hours) might need longer (1-2 hours).
You'll know the dough is ready when it looks slightly puffier, and passes the "poke test" – gently poke the dough with a floured finger; if the indentation slowly springs back about halfway, it's likely ready. If it springs back immediately, it needs more time. If it doesn't spring back at all, it might be slightly over-proofed.
Baking cold dough directly from the refrigerator is also a common technique, particularly for achieving maximum oven spring and ease of scoring, as the firm dough holds its shape well. Many cold fermentation sourdough tips suggest baking straight from the fridge for the best bloom.
Scoring Cold-Proofed Dough: Techniques for a Perfect Bloom
Scoring is the process of cutting the surface of the dough just before baking. This controls where the dough expands in the oven, allowing for the desired oven spring and creating beautiful patterns. Cold-proofed dough is ideal for scoring because its cold temperature and firm structure make it much easier to make clean, precise cuts. Unlike warm, relaxed dough which can be sticky and difficult to score without dragging, cold dough holds its shape beautifully under the blade.
Use a sharp lame (a baker's razor blade on a handle) or a very sharp knife. Angle the blade at about 20-45 degrees relative to the dough surface for an ear (a flap of crust that lifts during baking). For simple cuts or patterns, you can hold the blade perpendicular. Work quickly and confidently. The clean cuts on cold dough allow for maximum expansion along the score lines in the hot oven, leading to impressive oven spring and a well-defined crust. Practicing scoring on cold dough is one of the most rewarding cold fermentation sourdough tips.
Troubleshooting Common Cold Fermentation Issues
Preventing Over-Proofing in the Refrigerator
While less common than over-proofing at room temperature, dough can still over-proof during an extended cold fermentation, especially if the refrigerator temperature is too warm or the dough had a very long initial bulk ferment before chilling. Signs of over-proofing in the fridge include the dough spreading out excessively in the banneton, a very bubbly or fragile surface, and potentially collapsing slightly when turned out. The resulting loaf may have poor oven spring and a dense crumb.
To prevent this, ensure your refrigerator is consistently between 4-7°C (39-45°F). Consider reducing the initial room-temperature bulk fermentation time slightly before chilling, giving the dough less of a head start. You can also slightly reduce the percentage of starter in your recipe if you consistently find your dough over-proofing in the cold. Monitoring the dough's behavior over repeated bakes at the same temperature and timing helps you learn what's normal for your setup. Adjusting these variables based on observation is key to applying cold fermentation sourdough tips effectively.
Addressing Under-Proofing: Identifying and Correcting
Under-proofing during cold fermentation means the dough hasn't developed enough structure or flavor in the cold. Signs include a dense, tight crumb, potentially a very thick crust, and less complex flavor. The dough might also feel very dense and heavy when taken out of the fridge. Under-proofing can occur if the refrigerator is too cold (below 4°C), the starter wasn't active enough, or the cold fermentation time was too short.
If you suspect your dough is under-proofed after refrigeration, you have a few options. You can give it a longer final proof at room temperature before baking. Allow it to sit out for 1-3 hours, monitoring its rise and using the poke test to gauge readiness. Be careful not to over-proof it at this stage.
Alternatively, if you bake it slightly under-proofed, you might get great oven spring, but the crumb and flavor might be less developed. Ensure your starter is vigorous before mixing your dough and check your refrigerator temperature to confirm it's within the optimal range for future bakes. These troubleshooting cold fermentation sourdough tips are vital for consistent results.
Preventing Dough Stickiness: Simple Solutions
Cold dough is generally less sticky and easier to handle than warm dough. However, issues with stickiness can still arise. If your dough is excessively sticky coming out of the refrigerator, it might indicate that the gluten structure wasn't sufficiently developed during mixing and bulk fermentation before chilling, or that the hydration is very high and the flour isn't absorbing the water effectively over time.
Ensure you are performing adequate stretch and folds or kneading during the initial phase to build a strong gluten network. For very high hydration doughs, a longer cold fermentation period (24-48 hours) can sometimes help the flour fully hydrate and the dough become less sticky. When shaping and handling sticky dough, use a minimal amount of flour on your hands and work surface.
A bench scraper is also an invaluable tool for handling sticky dough. If using a banneton, ensure it is very well-floured, especially if you're using a blend without rice flour, as rice flour is excellent at preventing sticking. These practical cold fermentation sourdough tips for managing stickiness improve handling.
Cold vs. Room Temperature Fermentation: A Comparative Analysis
Flavor Profile: Cold Fermentation's Impact on Taste
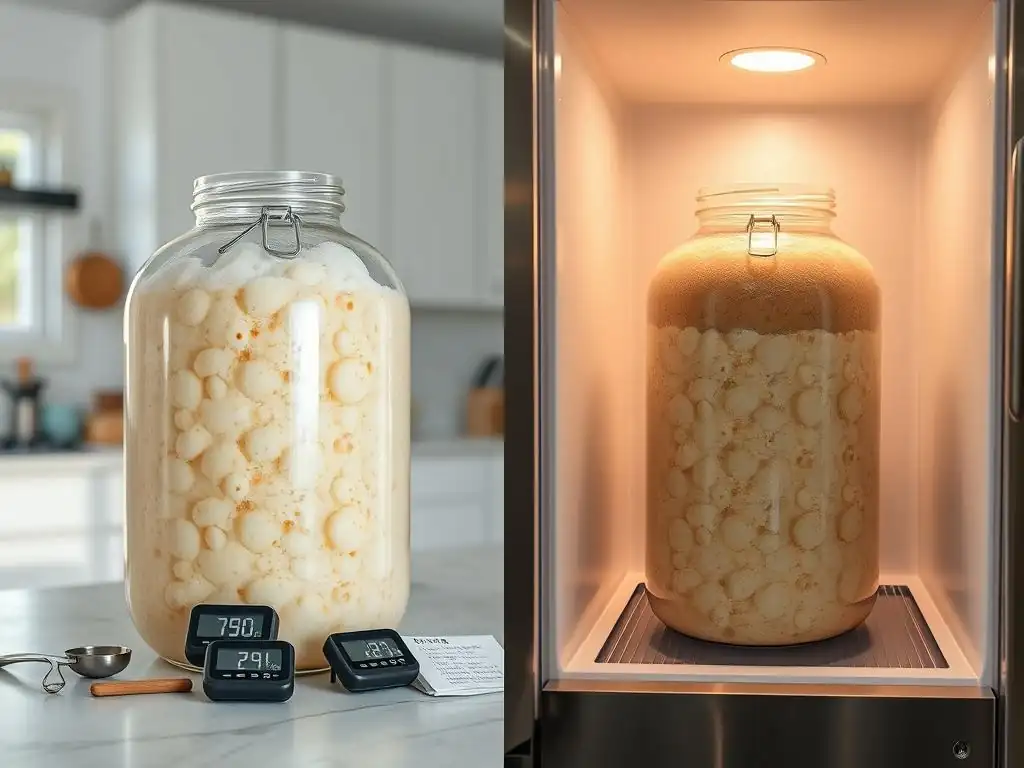
The impact on flavor is one of the most significant differences between cold and room temperature fermentation. Room temperature fermentation, especially at warmer temperatures (above 24°C), tends to favor the production of acetic acid by lactic acid bacteria, which contributes a sharper, more vinegary tang. While still desirable in some sourdoughs, this can sometimes be overpowering.
Cold fermentation, on the other hand, shifts the balance towards lactic acid production, which results in a milder, creamier, and more complex sourness. The slow enzymatic activity also breaks down starches into sugars over a longer period, contributing to deeper caramelization and a sweeter undertone in the crust. Many bakers find that cold-fermented loaves have a more sophisticated and layered flavor profile. Experimenting with both methods allows you to understand how temperature influences the taste of your sourdough, providing valuable insights for applying cold fermentation sourdough tips.
Time Management: Leveraging Cold Fermentation for Convenience
From a practical standpoint, time management is where cold fermentation truly shines. A typical room-temperature sourdough bake might require mixing in the morning, bulk fermenting for 3-5 hours, shaping, and then final proofing for 2-4 hours, leading to baking in the late afternoon or evening. This timeline can be restrictive.
Cold fermentation allows you to break up the process. You can mix and bulk ferment in the afternoon or evening, shape the dough, and place it in the refrigerator overnight or for a full day (12-48 hours). This means you can bake the loaf the next morning, afternoon, or even the day after, fitting baking into your schedule rather than letting it dictate your day. This flexibility is a major reason why cold fermentation sourdough tips are so popular among home bakers with busy lives.
Texture and Crumb Structure: The Influence of Temperature
Temperature during fermentation also significantly affects the final texture and crumb structure of the loaf. Room temperature fermentation, if not managed carefully, can sometimes lead to a less developed gluten network if the process is rushed, potentially resulting in a tighter crumb.
Cold fermentation, due to its extended duration, allows enzymes more time to modify the flour's proteins and starches. This process strengthens the gluten network over time, even without extensive kneading or folding. The slow, steady production of gas at low temperatures also helps to create more uniform bubbles throughout the dough, leading to a more open, airy, and consistent crumb structure. Furthermore, baking a cold loaf directly from the refrigerator often results in superior oven spring, contributing to a lighter texture and a well-defined structure. These textural benefits are key outcomes of applying effective cold fermentation sourdough tips.
Advanced Cold Fermentation Techniques
Combining Autolyse with Cold Fermentation for Enhanced Results
Autolyse is a technique where flour and water are mixed and allowed to rest before adding the starter and salt. This resting period, typically 30 minutes to a few hours, allows the flour to fully hydrate and enzymes to begin breaking down starches and proteins, making the dough easier to handle and promoting gluten development. Combining autolyse with cold fermentation can further enhance dough structure and flavor.
After the autolyse period, the starter and salt are added, and the dough is mixed. The process then continues with bulk fermentation (often including folds) before the cold fermentation step. The initial autolyse primes the dough, potentially leading to a stronger gluten network and better extensibility before the slow development in the cold. This can result in a more voluminous loaf with an even more open crumb structure. Experimenting with autolyse duration (e.g., 30 minutes vs. 2 hours) in combination with your standard cold fermentation sourdough tips can unlock new levels of texture and handling ease.
Exploring Different Flour Combinations in Cold Fermented Dough
Cold fermentation is an excellent technique for working with various flour types and blends, as the extended time allows less conventional flours to fully hydrate and integrate into the dough structure. While all-purpose or bread flour is standard, incorporating whole wheat, rye, spelt, or other ancient grains can add significant flavor and nutritional value.
When using a high percentage of whole grains (e.g., 30% or more), cold fermentation can be particularly beneficial. Whole grain flours absorb water more slowly and contain bran particles that can interfere with gluten development. The longer cold fermentation period allows ample time for hydration and enzymatic activity to soften the bran and strengthen the gluten network, leading to a better rise and crumb structure than might be achievable with a short, warm ferment.
Experimenting with blends like 70% bread flour, 20% whole wheat, and 10% rye, followed by a 24-hour cold ferment, can yield loaves with complex flavors and satisfying textures. These explorations expand the possibilities when applying cold fermentation sourdough tips.
Cold Fermentation for Baguettes: Achieving a Superior Crust
Cold fermentation is a popular technique for achieving the signature crispy crust and open crumb of artisanal baguettes. Baguette dough typically has a relatively high hydration and requires careful handling. A long, cold fermentation (often 18-24 hours) helps develop the gluten structure and makes the dough easier to shape into long, thin loaves without excessive stickiness or tearing.
After a brief bulk fermentation (perhaps 1-2 hours with folds), the dough is divided, pre-shaped, and then shaped into baguettes. These shaped baguettes are often proofed in a couche (linen canvas) or on a perforated tray, covered, and placed in the refrigerator. The cold firms up the dough, making scoring precise and easy. Baking cold baguettes directly on a hot baking stone or steel with steam results in maximum oven spring and the characteristic thin, crackly crust. Using cold fermentation sourdough tips specifically adapted for baguettes can significantly elevate your results for this challenging bread type.
Recipes Utilizing Cold Fermentation
Overnight Cold Fermented Sourdough Loaf
This classic recipe leverages the convenience of cold fermentation.
- Ingredients:
- Active sourdough starter: 100g
- Warm water (around 28-30°C): 350g
- Bread flour: 450g
- Whole wheat or rye flour: 50g
- Fine sea salt: 10g
- Instructions:
- Mix starter and water in a large bowl.
- Add flours and salt, mix until no dry spots remain. Rest 30 mins (autolyse).
- Perform 4 sets of stretch and folds over 2 hours.
- Allow dough to bulk ferment at room temperature for 1-2 hours, until slightly puffy.
- Shape dough into a boule or batard and place seam-side up in a floured banneton.
- Cover tightly and refrigerate for 12-18 hours.
- Preheat oven and Dutch oven to 230°C (450°F).
- Turn dough onto parchment paper, score, and transfer to Dutch oven.
- Bake covered for 20 mins, then uncovered for 20-25 mins, until deep golden brown.
72-Hour Cold Fermented Pizza Dough
Achieve pizzeria-quality crust at home with a long, cold ferment.
- Ingredients:
- Active sourdough starter: 50g
- Cool water (around 20°C): 320g
- '00' Pizza flour or strong bread flour: 500g
- Fine sea salt: 10g
- Olive oil (optional): 10g
- Instructions:
- Mix starter, water, flour, salt, and oil until combined.
- Knead gently for 5-10 minutes until smooth.
- Place dough in a lightly oiled container, cover, and rest at room temp for 1-2 hours.
- Divide dough into 2-4 balls, shape them smoothly.
- Place dough balls in individual lightly oiled containers or a proofing box.
- Refrigerate for 48-72 hours.
- Remove dough 2-3 hours before baking to come to room temperature.
- Gently stretch or roll dough balls into pizza rounds.
- Top and bake on a preheated pizza stone or steel at the highest oven temp.
No-Knead Cold Fermented Sourdough Rolls
Simple and delicious rolls with minimal effort thanks to cold fermentation.
- Ingredients:
- Active sourdough starter: 80g
- Warm water: 300g
- All-purpose or bread flour: 400g
- Fine sea salt: 8g
- Instructions:
- In a bowl, mix starter, water, flour, and salt with a spoon until just combined.
- Cover and let rest at room temperature for 12-18 hours (this is the bulk ferment). The dough will be very bubbly.
- Gently scrape dough onto a lightly floured surface. It will be sticky.
- Gently shape into a rough rectangle.
- Using a bench scraper, divide dough into 8-12 equal pieces.
- Gently shape each piece into a roll (minimal handling).
- Place rolls on a baking sheet lined with parchment paper.
- Cover loosely and refrigerate for 6-12 hours.
- Preheat oven to 220°C (425°F).
- Bake rolls directly from the fridge for 20-25 minutes, until golden brown.
Conclusion: Elevating Your Sourdough with Cold Fermentation
Cold fermentation is a powerful technique that offers significant advantages for sourdough bakers of all levels. By simply using the refrigerator, you can gain unparalleled control over the fermentation process, dramatically improve the flavor and texture of your bread, and introduce flexibility into your baking schedule. It transforms sourdough from a process that might require constant attention to one that can fit seamlessly into a busy lifestyle.
The slower enzymatic activity and microbial fermentation at cool temperatures lead to a more complex flavor profile, often with a milder acidity and richer undertones. The extended time also strengthens the gluten network, resulting in dough that is easier to handle, shape, and score, and ultimately produces a loaf with a more open and desirable crumb structure. Mastering cold fermentation sourdough tips is perhaps one of the most impactful steps you can take to elevate your sourdough baking from good to truly exceptional.
The Future of Sourdough: Innovations in Cold Fermentation
As home and professional bakers continue to explore the nuances of sourdough, innovations in cold fermentation are likely to focus on even greater precision and understanding. This includes exploring the specific effects of different cold temperatures (e.g., 4°C vs. 7°C) on various starter compositions and flour types. Research into optimizing specific strains of yeast and bacteria for enhanced cold activity could also lead to new starter cultures tailored for longer, colder ferments.
Furthermore, advancements in home refrigeration technology offering more precise temperature control could make achieving consistent cold fermentation results even easier for home bakers. As the understanding of the complex microbial and enzymatic interactions during slow, cold fermentation deepens, we can expect even more refined cold fermentation sourdough tips and techniques to emerge, pushing the boundaries of what's possible with this ancient yet ever-evolving craft.
Frequently Asked Questions
What is cold fermentation in sourdough baking, and why is it used?
Cold fermentation is the process of slowing down the fermentation process of sourdough by refrigerating the dough. It's used to develop more complex flavors and improve the dough's handling properties.
How does cold fermentation impact the flavor of sourdough bread?
Cold fermentation allows enzymes to break down starches and proteins over a longer period, resulting in a deeper, more tangy flavor. It also enhances the aroma of the baked bread.
At what stage of the sourdough process is cold fermentation typically implemented?
Cold fermentation is usually implemented after the initial bulk fermentation, once the dough has developed some structure. It can occur either after shaping the loaf, for a final proof, or before shaping, as a long, slow bulk ferment.
How long can sourdough dough be cold fermented in the refrigerator?
Sourdough dough can typically be cold fermented in the refrigerator for 12 to 72 hours, or even longer in some cases, depending on the recipe and desired flavor profile. Experimentation is key!
What are some key considerations when using cold fermentation to ensure a successful sourdough bake?
Monitor the dough's activity during cold fermentation, adjust the amount of starter used, and allow the dough to warm up slightly before baking. Ensure the refrigerator is cold enough but not freezing the dough, and watch for signs of over-proofing.
Final Reflection: The Cool Embrace of Controlled Fermentation
The art of sourdough baking, once shrouded in mystery, is increasingly accessible thanks to the precise control offered by cold fermentation. Mastering this technique isn't just about achieving a perfect loaf; it's about understanding the delicate dance between time, temperature, and microbial life, a dance that yields bread of unparalleled flavor and texture. This control allows for greater consistency and predictability, empowering even novice bakers to achieve professional-level results.
Cold fermentation has profoundly altered my own baking journey, shifting my perspective from a frantic rush to a mindful process. The patience required fosters a deeper connection with the ingredients and the process itself. It's a meditative practice, a quiet observation of nature's artistry at work. As the renowned baker, Chad Robertson, once said, Bread baking is a journey of discovery, not a race to the finish line.
This sentiment perfectly encapsulates the transformative power of slowing down and embracing the cool embrace of controlled fermentation. The subtle shifts in flavor profiles, the nuanced textures, the sheer satisfaction of a perfectly risen loaf – these are rewards that only patience can unlock.
Now, consider your own baking practice. Are you rushing through the process, sacrificing nuance for speed? I encourage you to experiment with cold fermentation, to embrace the slower pace, and to discover the unique magic it unlocks. Take your time, observe the subtle changes, and allow yourself to be surprised by the depth of flavor and texture that cold fermentation can bring to your sourdough. The journey is as rewarding as the destination, and the bread you create will be a testament to your patience and dedication.
Unlock Your Inner Artisan: Mastering Cold Fermentation
Thanks for joining us on this journey into the fascinating world of cold fermentation! We hope you've gained a deeper understanding of how controlling temperature can elevate your baking. Now it's time to put your newfound knowledge into practice.
- Embrace the chill: Plan your next baking project and experiment with cold fermentation techniques. Note the subtle differences in flavor and texture.
- Share your sourdough story: Post a picture of your perfectly risen loaf (or even your challenges!) on social media and tag us! Let's build a community of cold fermentation enthusiasts.
- Dive deeper: Explore our other articles on advanced baking techniques – you might discover your next favorite method!
Ready to transform your baking with the magic of controlled temperature? What unique flavor profile are you hoping to achieve with your next cold-fermented creation?