
The Sticky Science: Visualizing Gluten Formation


Welcome to BakeWithEase, your kitchen companion for unlocking baking brilliance! Ever wondered what really happens when you mix flour and water? Get ready to demystify the magic! This week, we're diving deep into the science behind baking with a visual explanation of gluten formation, revealing the secrets to that perfect rise, chew, and texture. Intrigued? Let's get baking!
- Bake Like a Pro: A Visual Guide to Gluten Formation
- Understanding Gluten: The Foundation of Baking
- Visualizing Gluten Development: From Mixing to Baking
- Factors Influencing Gluten Development in Baking
- Gluten Formation: A Step-by-Step Visual Guide
- Troubleshooting Gluten Issues in Your Baking
- Beyond the Basics: Advanced Gluten Techniques for Bakers
- Mastering Gluten: Tips and Tricks for Consistent Baking Results
-
Frequently Asked Questions
- How does gluten formation impact the texture of baked goods?
- What are the key ingredients needed for gluten to form effectively?
- Can gluten development be overdone during mixing?
- How can I visually assess if gluten has formed properly in my dough?
- Are there gluten-free alternatives for those with dietary restrictions that still mimic gluten's function in baking?
- Final Reflection: Unraveling the Mysteries of Gluten: From Science to Spoon
- Unlock Your Baking Potential: Master Gluten's Secrets!
Bake Like a Pro: A Visual Guide to Gluten Formation
Baking can feel like magic, but at its heart, it's a science. One of the most fascinating transformations happens when flour meets water and energy: the creation of gluten. Understanding and visualizing this process is key to achieving perfect texture in everything from airy loaves of bread to tender cakes. This guide will walk you through the sticky science of gluten formation, offering a visual explanation for bakers of all levels. Get ready to transform your baking results by mastering the art of gluten development.
Understanding Gluten: The Foundation of Baking
At the core of many beloved baked goods is a remarkable protein network known as gluten. It's the scaffolding that gives bread its structure, allows pastries to puff, and provides chewiness to cookies. For bakers, understanding gluten isn't just academic; it's practical knowledge that directly impacts the final product's texture and rise. Think of gluten as the invisible architect of your dough.
What is Gluten? A Baker's Perspective
From a baker's perspective, gluten isn't something you add to dough; it's something you develop from proteins already present in wheat flour. These proteins are primarily glutenin and gliadin. In their dry state, they exist as separate, coiled molecules, relatively inert and waiting to be activated. They make up a significant portion of the protein content in wheat flour, which can range from around 6-8% in cake flour to a robust 12-14% or more in strong bread flour.
When water is introduced to flour, these proteins begin to hydrate. Thegliadin molecules are somewhat sticky and fluid, while the glutenin molecules are larger and more elastic. As the dough is mixed or kneaded, these hydrated proteins come into contact and begin to link together, forming a complex, tangled network. This network is gluten. Its unique properties – elasticity (ability to stretch) and extensibility (ability to hold shape) – are what make wheat flour so versatile in baking.
Gluten Formation: The Chemical Process Explained Simply
The process of gluten formation begins the moment water is added to wheat flour. Water allows the glutenin and gliadin proteins to become mobile and interact. Initially, the flour absorbs the water, and the proteins hydrate, swelling slightly. This hydration is crucial because it allows the proteins to unfold and exposes sites where they can bond with each other. Without sufficient water, gluten development is minimal, resulting in a crumbly dough.
Once hydrated, mechanical energy, typically from mixing or kneading, provides the force needed for the glutenin and gliadin proteins to align and link. This mechanical action causes the proteins to stretch and fold repeatedly, encouraging the formation of disulfide bonds between glutenin molecules and hydrogen bonds and hydrophobic interactions between both glutenin and gliadin. This continuous stretching and folding organizes the initially chaotic protein mass into an ordered, three-dimensional network. This network traps gas produced by leavening agents (like yeast or baking powder), allowing the dough to rise and hold its shape during baking.
The Key Components: Glutenin and Gliadin in Baking
Glutenin and gliadin are the two primary protein components that form the gluten network in wheat flour. Glutenin is known for its elasticity and strength. It forms long, complex chains that provide the framework and structure to the dough, giving it resilience and the ability to spring back after being stretched. Think of glutenin as the steel rods in a building, providing the main support. Flours with higher amounts of glutenin, like bread flour, are excellent for creating chewy, structured baked goods like artisan loaves and pizza crusts.
Gliadin, on the other hand, is more viscous and extensible. It contributes to the dough's ability to stretch and flow without breaking. Gliadin allows the dough to expand as gases are produced during fermentation and baking. It provides the plasticity that makes shaping dough possible. Consider gliadin as the mortar or concrete that fills in and connects the glutenin framework, making the network cohesive and pliable. The ratio of glutenin to gliadin varies slightly between different wheat varieties and flour types, influencing the specific characteristics of the gluten formed.
Visualizing Gluten Development: From Mixing to Baking
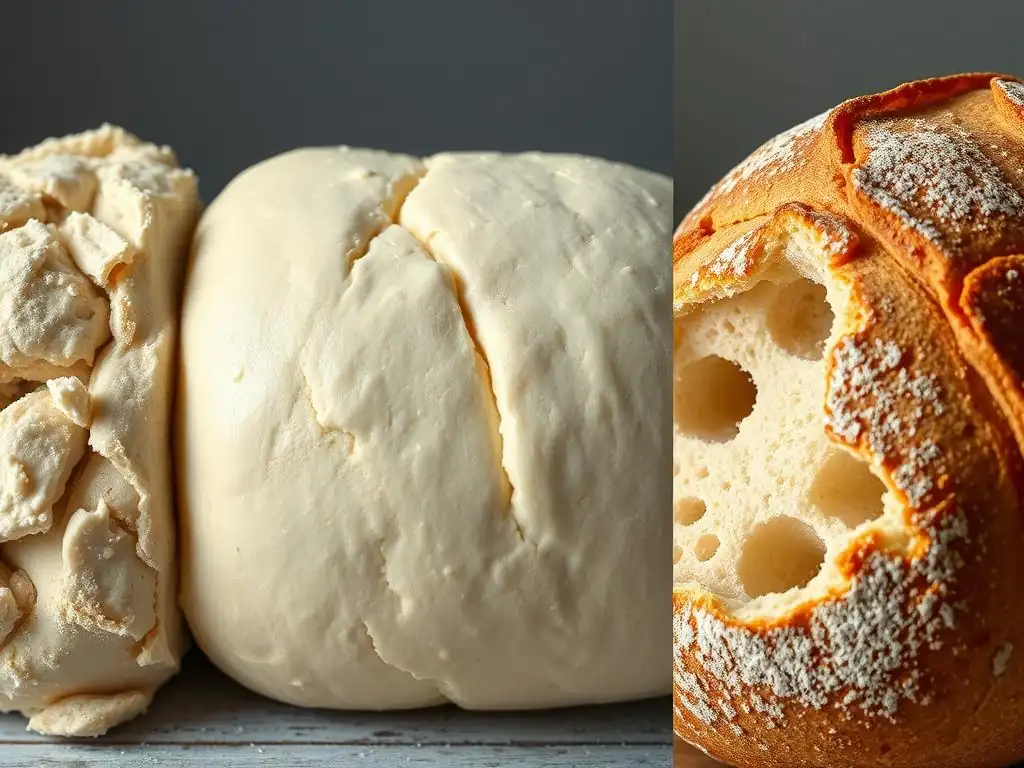
Understanding gluten formation is easier when you can visualize or feel its development in the dough. The process transforms the initial shaggy, wet mass into a smooth, elastic material. This transformation is a direct result of the gluten network forming and strengthening. Observing the dough as you mix and knead provides a powerful visual explanation of gluten formation in baking.
The Importance of Water in Gluten Formation
Water is the catalyst for gluten formation. Without sufficient hydration, the glutenin and gliadin proteins remain relatively separate and inactive. Adding water allows these proteins to absorb moisture and become mobile. This hydration process is essential; it swells the protein molecules, making them available to interact and form bonds. The amount of water used significantly impacts the dough's consistency and the speed and ease of gluten development.
A dough with a lower hydration level (e.g., 55-60% water relative to flour weight) will be stiff and require more physical effort to knead, as the proteins are less mobile. Gluten development will be slower.
Conversely, a dough with higher hydration (e.g., 70-80% or more) will be much wetter and stickier initially, but the proteins are more mobile, allowing gluten to develop more easily, often with less intensive kneading. The visual difference between a low and high hydration dough is striking – from a firm ball to a slack, spreadable mass – both relying on water to initiate the gluten network.
Kneading: Building Gluten Strength
Kneading is the traditional method for developing gluten strength in dough. It's a physical process of stretching, folding, and pressing the dough repeatedly. This mechanical action forces the hydrated glutenin and gliadin proteins to align and bond with each other. As you knead, you are essentially organizing the tangled mess of proteins into a more structured, ordered network. Each stretch and fold helps to lengthen the protein chains and create more connections.
Visually, dough changes dramatically with kneading. It starts as a rough, shaggy, and often sticky mass that tears easily. As you knead, it gradually becomes smoother, less sticky (though it might still be tacky), and more elastic. It will resist stretching initially but then stretch further without breaking. This change in texture and appearance is your visual cue that the gluten network is developing and strengthening. The more you knead (up to a point), the stronger and more organized the gluten becomes.
How Kneading Affects Gluten Structure: A Visual Demonstration
You can see the impact of kneading on gluten structure through a simple test called the "windowpane test." Take a small piece of dough that has been kneaded for several minutes. Gently stretch and pull it outwards from the center. If the gluten is well-developed, you should be able to stretch the dough very thin, almost translucent, so that light can pass through it, without it tearing. It will resemble a thin membrane or "windowpane."
If the dough tears easily when you try to stretch it thin, it indicates the gluten network is still weak and needs more development. The protein strands are not yet sufficiently linked or aligned to support being stretched so finely. Conversely, if the dough feels very tight and resists stretching significantly, snapping back aggressively, it might indicate the gluten is highly developed or potentially over-developed. The windowpane test is a fantastic visual demonstration of the gluten network's strength and elasticity.
Over-Kneading: When Gluten Gets Too Tough (and How to Avoid It)
While kneading is essential for developing gluten, it is possible to over-knead dough, especially when using a stand mixer on high speed or kneading very vigorously for an extended period. Over-kneading can cause the gluten network to become too tight and break down. The protein bonds become excessively developed and can begin to snap. Visually, over-kneaded dough might look smooth but feels incredibly tight and resistant to stretching, almost like rubber.
When baked, over-kneaded dough often results in a tough, dense product. The gluten network is too rigid to expand properly with the gases produced during fermentation and baking, limiting the dough's rise and resulting in a heavy texture. To avoid this, pay attention to the dough's feel and appearance. Stop kneading when the dough is smooth, elastic, and passes the windowpane test. For most bread doughs, this might be 8-12 minutes in a stand mixer or 15-20 minutes by hand, but rely more on the dough's characteristics than just the clock.
Factors Influencing Gluten Development in Baking
Beyond just adding water and kneading, several other factors significantly influence how gluten develops in your dough. Understanding these variables allows you to control the process and tailor the gluten structure to the specific type of baked good you are making, from a light, airy focaccia to a dense, chewy bagel.
Flour Type: The Impact of Protein Content on Gluten
The type of flour you use is perhaps the most significant factor determining gluten potential. Different flours have varying protein contents, which directly correlates with the amount of glutenin and gliadin available to form the gluten network. High-protein flours, like bread flour (typically 12-14% protein), contain more of these building blocks and will develop a strong, elastic gluten network suitable for rustic bread, pizza dough, and other chewy items.
Low-protein flours, such as cake flour (around 6-8% protein), have less gluten-forming proteins. When mixed with water, they form a much weaker, more tender gluten network. This is desirable for delicate baked goods like cakes, pastries, and biscuits, where a tender crumb is preferred over chewiness. Using the correct flour type is the first step in controlling gluten formation for your desired outcome. All-purpose flour, with a moderate protein content (around 10-12%), is versatile but will develop gluten differently than specialized flours.
Hydration Levels: Finding the Perfect Dough Consistency
As mentioned earlier, the amount of water used (hydration level) profoundly affects gluten development. A higher hydration dough allows the proteins greater mobility, making it easier for them to find each other and bond, often requiring less intensive kneading to achieve good development. For instance, a sourdough bread dough at 75% hydration will develop gluten differently than a bagel dough at 55% hydration. The higher hydration dough will be stickier but will develop a more extensible and less tight gluten structure, often leading to a more open crumb in the final bake.
Lower hydration doughs are stiffer and require more mechanical energy (kneading) to bring the proteins together and form bonds. The resulting gluten network is often tighter and stronger, suitable for baked goods that require significant structure or shaping, like pasta or some types of pastries. Adjusting hydration is a key technique for bakers to control the dough's texture and the resulting gluten structure, influencing everything from ease of handling to the final crumb structure.
Mixing Techniques: Hand Kneading vs. Stand Mixer
The method used to mix and knead the dough also impacts gluten development. Hand kneading is a manual process of folding, stretching, and pressing. It provides a tactile connection to the dough, allowing bakers to feel the gluten developing and adjust their technique. Gluten develops gradually through the physical manipulation, typically taking 15-20 minutes or more for a standard bread dough.
Stand mixers, equipped with a dough hook, automate the kneading process. They can develop gluten more quickly and efficiently than hand kneading, often in 8-12 minutes for a similar dough. However, the mechanical action can be more aggressive, increasing the risk of over-kneading if not monitored carefully. High-speed mixing generates heat, which can also affect gluten structure. Some techniques, like the autolyse method (mixing flour and water and letting it rest before adding other ingredients), leverage hydration and time to kickstart gluten development before intensive mixing begins, regardless of whether you use hands or a mixer.
The Role of Rest and Autolyse in Gluten Development
Allowing dough to rest is a crucial, often overlooked, step in gluten development and management. During rest periods, especially after initial mixing or kneading, the gluten network relaxes. The protein strands, which become tight and stressed from mixing, begin to realign and hydrate more fully. This relaxation makes the dough easier to handle, less resistant to stretching, and allows for further gluten development through enzymatic activity and simple diffusion of water within the dough.
The autolyse technique, specifically, involves mixing just the flour and water and letting it rest for 20 minutes to several hours before adding salt and yeast/starter and beginning the main kneading. This rest period allows hydration to occur fully and enzymes naturally present in the flour to begin breaking down some proteins, making the dough more extensible. It significantly kickstarts gluten formation visual explanation baking principles rely upon, making subsequent kneading more efficient and resulting in a dough that is easier to work with and develops a smoother, more elastic gluten structure.
Gluten Formation: A Step-by-Step Visual Guide
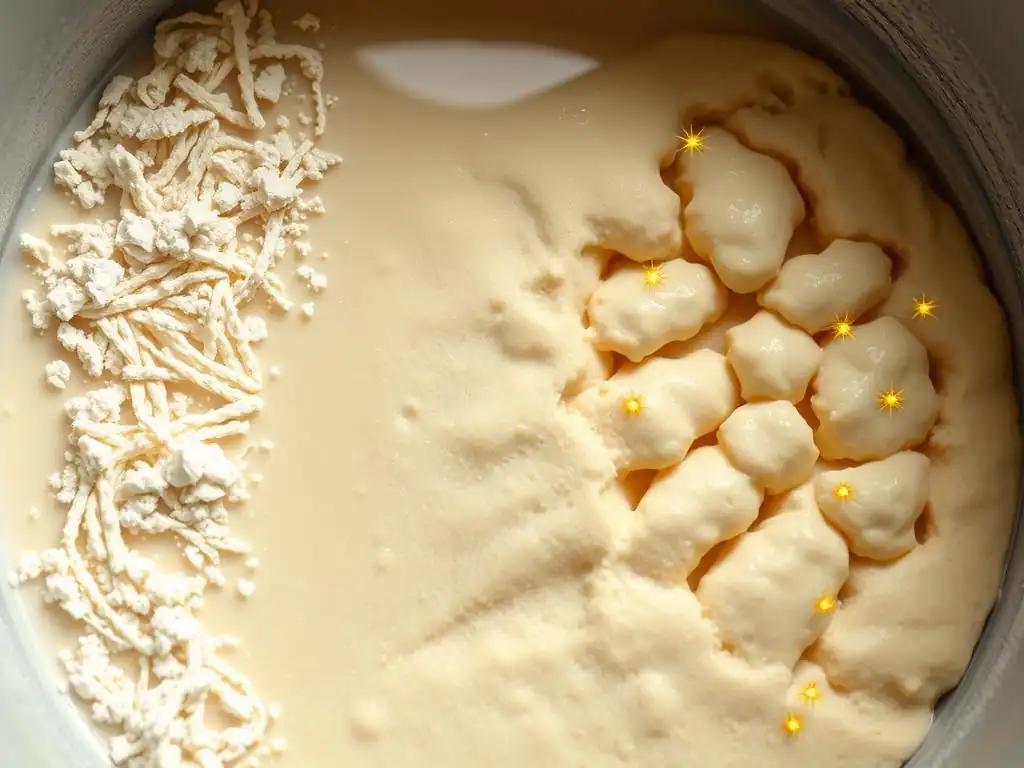
Visualizing gluten formation as a process helps understand the transformation happening in your dough. Let's break it down into observable stages, showing how the dough changes in appearance and feel as the gluten network builds.
Step 1: Initial Mixing and Hydration
The first step is combining flour and water (and often yeast or starter). Visually, the mixture is shaggy, uneven, and sticky. It doesn't hold a coherent shape and breaks apart easily. At this stage, the glutenin and gliadin proteins are hydrating, absorbing water and becoming mobile. Some initial, weak bonds may be forming, but there is no organized network yet. The dough has little elasticity or extensibility.
- Flour and water combined.
- Appearance: Shaggy, dry patches, inconsistent texture.
- Feel: Sticky, crumbly, tears easily.
- Gluten development: Minimal hydration, proteins separating.
Step 2: Developing Gluten Strength Through Kneading
As you begin to knead or mix the dough, you introduce mechanical energy. This action physically stretches and folds the dough, bringing the hydrated proteins into contact and encouraging bond formation. Visually, the dough starts to come together, becoming smoother on the surface. It will still be somewhat sticky but will begin to resist tearing and show some elasticity, springing back slightly when poked.
- Dough is kneaded or mixed.
- Appearance: Becoming smoother, more cohesive ball.
- Feel: Less sticky, more elastic, resists tearing.
- Gluten development: Proteins aligning, forming initial network bonds.
Step 3: Resting the Dough: Gluten Relaxation
After kneading, allowing the dough to rest is vital. During this time, the gluten network, which was tightened by the mechanical action, relaxes. Water continues to distribute evenly, and enzymatic activity further refines the network. Visually, the dough often spreads out slightly during rest. It feels less tight and is significantly more extensible – easier to stretch without snapping back aggressively. This relaxation improves the dough's handling properties.
- Dough is rested (bulk fermentation or bench rest).
- Appearance: Relaxes, may spread slightly, smooth surface.
- Feel: Less tight, very extensible, easy to shape.
- Gluten development: Network relaxes, strengthens through hydration and time.
Step 4: Shaping and Baking: The Final Gluten Transformation
After resting and shaping, the dough undergoes its final transformation in the oven. The heat causes the trapped gases (carbon dioxide from yeast, steam from water) to expand rapidly, causing the dough to rise dramatically – this is oven spring. The elastic gluten network stretches to accommodate this expansion. As the temperature increases, the proteins in the gluten network coagulate and set, solidifying the structure. This is the point where the gluten provides the permanent framework for the finished baked good's crumb structure.
- Dough is shaped and baked.
- Appearance: Expands significantly (oven spring), crust forms.
- Feel: Sets into a firm, structured crumb.
- Gluten development: Network stretches with gas, coagulates, sets permanent structure.
Troubleshooting Gluten Issues in Your Baking
Even with a good understanding of gluten formation, you might encounter issues like weak or tough dough. Knowing how to diagnose and fix these problems is part of mastering the craft and achieving consistent results.
Weak Gluten: Causes and Solutions
Weak gluten development is a common issue, resulting in dough that is sticky, lacks structure, and tears easily. It often leads to baked goods that are dense and flat, with a tight crumb. Common causes include using a low-protein flour (like cake flour) when a stronger flour is needed, insufficient hydration (not enough water), or inadequate mixing or kneading time.
To address weak gluten:
- Check Flour: Ensure you are using a flour with appropriate protein content for the recipe (e.g., bread flour for rustic loaves).
- Adjust Hydration: If the dough feels too dry and crumbly, add a tablespoon of water at a time during kneading until it becomes more cohesive.
- Knead Longer: If the dough is still shaggy and tears easily after the recommended kneading time, continue kneading. Feel the dough; it should become smoother and more elastic. A few extra minutes of kneading can make a significant difference in gluten formation visual explanation baking results demonstrate.
Tough Gluten: Preventing Over-Development
Tough gluten occurs when the network is over-developed, often through excessive or aggressive kneading, especially in a stand mixer. It can also happen if too much flour is added during kneading, making the dough too stiff, or if the dough doesn't get sufficient rest time to relax the tightened network. Tough dough resists stretching, snaps back forcefully when pulled, and results in a dense, heavy, sometimes rubbery texture in the final product.
To prevent or fix tough gluten:
- Mind the Mixer: If using a stand mixer, check the dough frequently. Stop kneading as soon as it becomes smooth, elastic, and passes the windowpane test. Avoid high speeds for extended periods.
- Use a Scale: Measure flour accurately by weight using a kitchen scale rather than volume (cups) to avoid accidentally adding too much flour.
- Allow Rest: If the dough feels very tight after kneading, let it rest for 20-30 minutes before attempting to shape it. This allows the gluten to relax and become more pliable. Gentle stretching and folding during bulk fermentation can also help align gluten without over-developing it.
Achieving the Perfect Gluten Structure for Different Bakes
The "perfect" gluten structure isn't universal; it depends entirely on the type of baked good you're making. For a crusty artisan bread or chewy pizza crust, you want a strong, well-developed gluten network that can trap lots of gas for a high rise and open crumb. This requires higher protein flour, adequate hydration, and sufficient kneading or folding over time.
For a tender cake or scone, minimal gluten development is desired. Using low-protein flour, minimal mixing, and often incorporating fats (like butter or oil) that coat the flour particles and inhibit gluten formation are key techniques. For something in between, like a soft sandwich bread, a moderate gluten development is needed – enough for structure and a good rise, but not so much that it becomes tough. Understanding the role of flour type, hydration, mixing, and rest allows bakers to intentionally control gluten formation visual explanation baking results will show.
Beyond the Basics: Advanced Gluten Techniques for Bakers
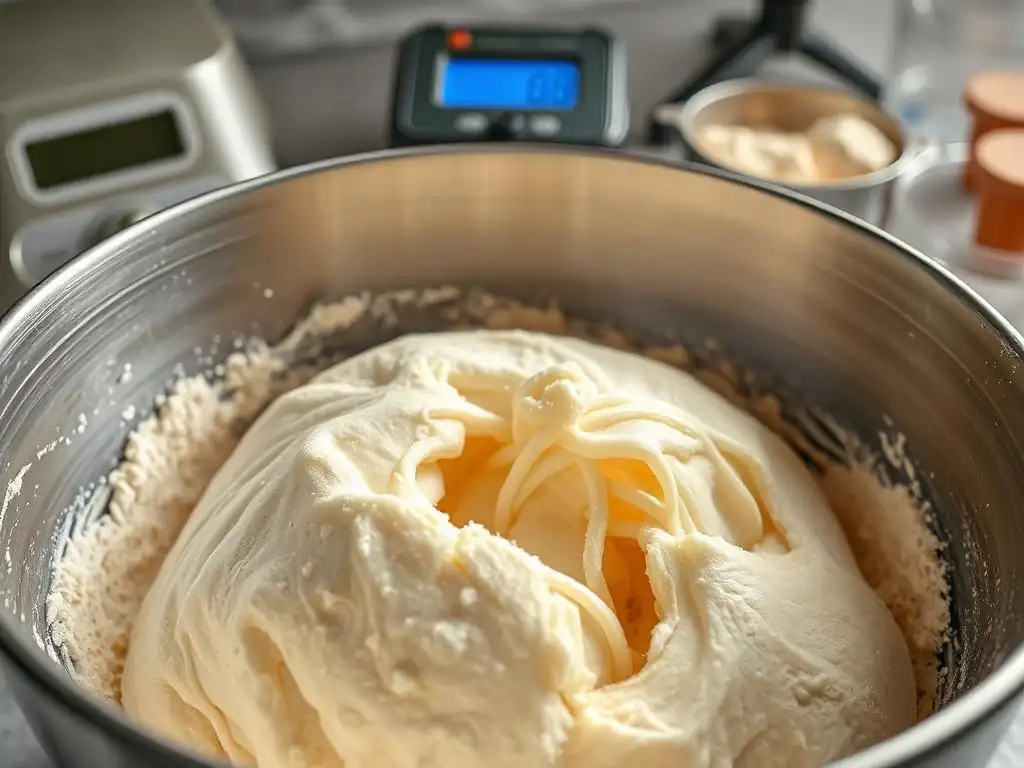
Once you've mastered the fundamentals of gluten formation, you can explore more advanced techniques used by professional bakers to manipulate gluten development for specific outcomes. These methods often involve time, specific hydration strategies, and combining different flours.
Using Different Flours to Control Gluten Development
Experienced bakers often blend different types of flour to achieve a desired gluten structure. For example, combining a high-protein bread flour with a lower-protein all-purpose or even whole wheat flour (which has components that can interfere with gluten) allows for precise control over the final dough strength and extensibility. A blend might be used to create a loaf with good structure but a slightly more tender crumb than 100% strong bread flour would yield.
Adding small amounts of specialty flours, like vital wheat gluten (which is almost pure gluten protein), can significantly boost the gluten potential of a dough made with lower-protein flour or non-wheat flours. Conversely, adding flours like rye or spelt, which have different protein structures that don't form gluten in the same way as wheat, or adding ingredients like milk, eggs, or fat, can inhibit gluten formation, resulting in a more tender product. This intentional blending is a key part of advanced gluten formation visual explanation baking recipes often don't fully detail.
Autolyse and Poolish: Enhancing Gluten Development in Sourdough
Techniques like autolyse (already discussed) and using preferments like poolish or biga are common in sourdough and artisan bread baking and significantly impact gluten development. A poolish is a wet, prefermented mixture of equal parts flour and water plus a small amount of yeast, allowed to ferment for several hours. This process begins hydrating the flour and initiating some enzymatic activity and initial gluten development before the main dough is mixed.
When the ripe poolish is added to the final dough ingredients, the flour is already partially hydrated and the proteins are more ready to form bonds. This can lead to faster and more efficient gluten development during the main mix, resulting in a stronger, more extensible dough with potentially better oven spring and a more open crumb structure. These techniques leverage time and hydration to enhance the natural process of gluten formation visual explanation baking science supports.
Gluten-Free Baking: Understanding Alternatives to Gluten Formation
For bakers working with gluten-free flours, the challenge is replicating the structure and elasticity that gluten provides. Gluten-free flours like rice, almond, or oat flour do not contain gluten-forming proteins. Therefore, bakers must rely on alternative ingredients and techniques to build structure and bind ingredients.
Common gluten-free binders include xanthan gum, guar gum, psyllium husk, or eggs. These ingredients absorb water and create a gel-like or viscous texture that helps hold the dough together and prevent crumbling. While these alternatives don't replicate the elastic network of gluten, they provide necessary structure and moisture retention, allowing gluten-free baked goods to hold their shape and achieve a desirable texture, offering a different kind of visual explanation in baking structure.
Mastering Gluten: Tips and Tricks for Consistent Baking Results
Developing a feel for gluten is one of the most valuable skills a baker can cultivate. It moves beyond just following a recipe's instructions and allows you to adapt to variations in flour, environment, and hydration.
Tips for Visualizing Gluten Development in Your Dough
- Observe the Surface: Watch how the dough changes from shaggy to smooth and satiny. A smooth, even surface is a good visual indicator of developing gluten.
- Perform the Windowpane Test: Regularly check your dough's elasticity and extensibility by stretching a small piece thin enough to see light through it. This is the classic visual test for sufficient gluten formation visual explanation baking pros rely on.
- Feel the Resistance: Pay attention to how the dough feels as you knead. Initially, it might feel loose and tear easily. As gluten develops, it will offer increasing resistance to stretching and will spring back when poked.
- Note the Stickiness: Dough starts very sticky due to unabsorbed water. As gluten develops and organizes, water becomes more bound within the protein network, and the dough becomes less sticky (though it should remain slightly tacky).
Understanding the Feel of Perfectly Developed Gluten
The feel of perfectly developed gluten is often described as elastic, smooth, and pliable. When you press your finger into the dough, it should slowly spring back. When you stretch it, it should extend without tearing easily, exhibiting both elasticity (resistance to stretching) and extensibility (ability to stretch). It shouldn't feel overly tight or stiff, nor should it feel loose and sticky.
Achieving this feel consistently comes with practice. Different doughs (low vs. high hydration, different flours) will feel different even when perfectly developed. A low-hydration dough will feel firmer than a high-hydration one, but both should exhibit elasticity and extensibility appropriate for their type.
Achieving Optimal Gluten Formation
Achieving optimal gluten formation for your specific bake involves considering all the factors discussed:
- Choose the Right Flour: Match the flour's protein content to the desired texture.
- Hydrate Correctly: Use the appropriate amount of water for the recipe and flour type.
- Develop Sufficiently: Knead or mix until the dough passes the windowpane test or reaches the desired feel and appearance.
- Allow Proper Rest: Give the dough time to relax and for gluten to mature.
- Control Temperature: Warm environments speed up gluten development (and fermentation), while cold environments slow it down.
- Use Add-ins Wisely: Fats, sugar, and other ingredients can inhibit gluten development; consider when and how you add them.
By paying attention to these elements and observing the visual and tactile cues the dough provides, you can consistently achieve optimal gluten formation visual explanation baking success hinges upon. Practice makes perfect, and soon you'll be able to feel and see the difference that well-developed gluten makes in your baked goods.
Frequently Asked Questions
How does gluten formation impact the texture of baked goods?
Gluten formation is crucial for structure and elasticity. It creates a network that traps gases during baking, resulting in a light and airy texture in breads and cakes. Without it, you'd get a denser, crumblier result.
What are the key ingredients needed for gluten to form effectively?
The two main ingredients are glutenin and gliadin, which are proteins found in wheat flour. Water is also essential, as it hydrates the proteins and allows them to link together.
Can gluten development be overdone during mixing?
Yes, overmixing can lead to overdeveloped gluten. This results in a tough and chewy texture, especially in cakes and pastries where a tender crumb is desired.
How can I visually assess if gluten has formed properly in my dough?
Look for a smooth and elastic dough that springs back when gently poked. The windowpane test (stretching a small piece of dough until it's translucent without tearing) is a good indicator.
Are there gluten-free alternatives for those with dietary restrictions that still mimic gluten's function in baking?
Yes, various gluten-free flours and starches can be combined with gums like xanthan gum or guar gum. These gums mimic gluten's binding properties to provide structure and texture.
Final Reflection: Unraveling the Mysteries of Gluten: From Science to Spoon
Understanding gluten formation is no longer just a niche scientific pursuit; it's the key to unlocking truly exceptional baking. The ability to visualize this complex process, as explored throughout this article, directly impacts the quality and consistency of the bread, pastries, and other baked goods we create and consume daily. This isn't just about science; it's about the art and craft of baking elevated through a deeper understanding of its fundamental building blocks.
The journey of exploring gluten's intricate structure has profoundly shifted my own approach to baking. It's moved beyond simply following recipes to actively participating in a chemical transformation, a dance of proteins and water that results in the airy lightness of a croissant or the satisfying chew of a sourdough loaf. The more you know, the more you can control,
a wise baker once told me, and this rings truer than ever when considering the power of understanding gluten formation. This knowledge empowers bakers to troubleshoot issues, experiment with new techniques, and ultimately, create baked goods that are not only delicious but also reflect a deep appreciation for the science behind the craft.
Now, it's your turn. Consider the next time you mix flour and water: visualize the gluten strands forming, stretching, and developing. Experiment with different flours, hydration levels, and kneading techniques, observing how these variables impact the final product. By actively engaging with the science of gluten formation, you'll not only improve your baking skills but also deepen your appreciation for the fascinating interplay between science and culinary art. Embrace the sticky science, and watch your baking rise to new heights.
Unlock Your Baking Potential: Master Gluten's Secrets!
Thanks for diving into the fascinating world of gluten! We hope you now have a clearer understanding of how this protein impacts your baking. Ready to put your newfound knowledge into practice?
- Experiment with different flour types: Try substituting some of your usual all-purpose flour with whole wheat or rye to see how it alters gluten development and the final texture of your bread or pastry. This is the key step to truly mastering gluten!
- Share your baking adventures: Post a picture of your gluten-conscious creation on social media and tag us – we’d love to see your results!
- Dive deeper: Explore our other articles on advanced baking techniques to further refine your skills.
What surprising textures or flavors did you discover by adjusting your gluten approach? Let's discuss!