
Common Bread Baking Mistakes and How to Avoid Them

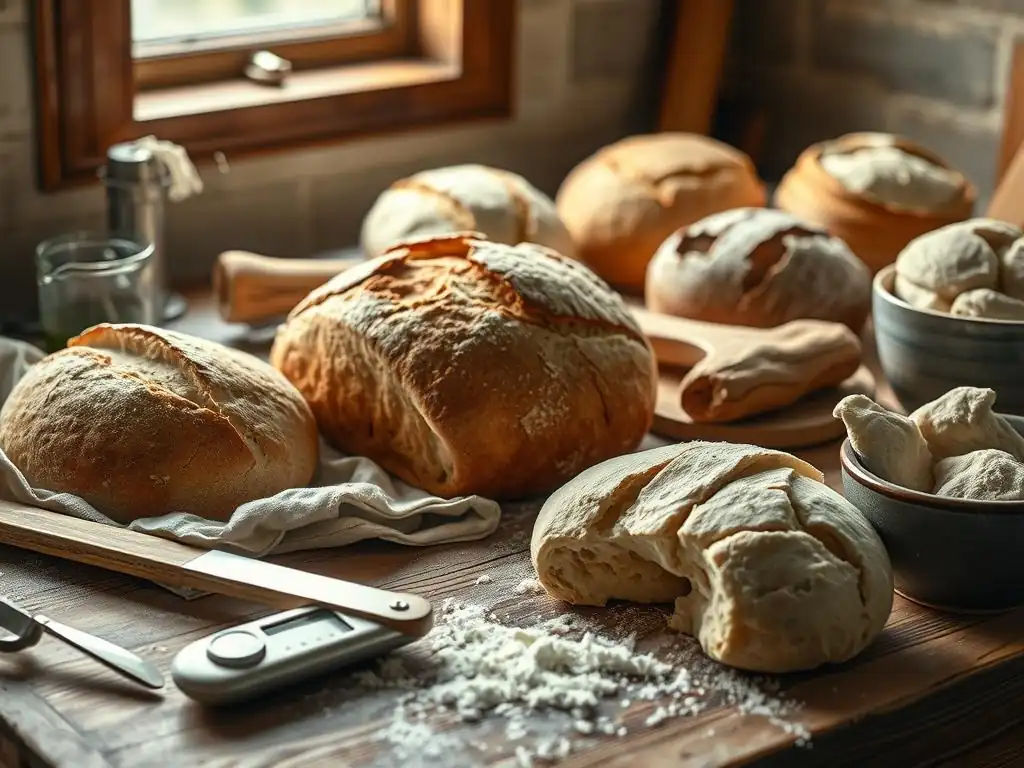
Welcome to BakeWithEase, your trusted guide to baking bliss! Are you tired of dense loaves and collapsed cakes? Unlock the secrets to perfect bread every time. Dive in to discover our comprehensive guide on preventing common bread baking errors and transform your baking from frustrating to fantastic. What are the most common pitfalls, and how can you effortlessly sidestep them? Let's find out!
- Introduction: Mastering Bread Baking
- Understanding the Fundamentals of Bread Baking
- Mistake #1: Using Expired or Inactive Yeast
- Mistake #2: Incorrect Water Temperature
- Mistake #3: Over-Kneading or Under-Kneading
- Mistake #4: Inadequate Proofing Time
- Mistake #5: Baking at the Wrong Temperature
- Mistake #6: Improper Scoring Techniques
- Mistake #7: Opening the Oven Door Too Early
- Mistake #8: Not Allowing the Bread to Cool Properly
- Troubleshooting Common Problems
- Conclusion: Achieving Baking Success
- Frequently Asked Questions
- Final Reflection: The Humble Loaf and the Triumph of Patience
- Unlock Your Inner Baker: Perfect Loaves Await!
Introduction: Mastering Bread Baking
Baking bread is a rewarding process, transforming simple ingredients into a delicious loaf. However, it's also a craft that can sometimes feel intimidating, with many potential pitfalls along the way. From dense bricks to loaves that refuse to rise, common bread baking errors can discourage even enthusiastic home bakers. Understanding these frequent issues and, more importantly, how to prevent them is key to consistently achieving baking success. This guide will walk you through the most common mistakes and provide practical, friendly advice on how to avoid them, ensuring your journey to baking perfect bread is smooth and enjoyable.
Preventing common bread baking errors is achievable with a little knowledge and attention to detail. Many problems stem from fundamental misunderstandings of the ingredients and processes involved. By addressing these basics and learning simple troubleshooting techniques, you can dramatically improve your results. Think of each bake as a learning opportunity, and don't be discouraged by setbacks. With the right guidance, you'll be producing beautiful, flavorful loaves in no time, confidently preventing common bread baking errors with every batch.
BakeWithEase.com: Your Resource for Perfect Bread
BakeWithEase.com is dedicated to helping you master the art of baking, including tackling the challenges of bread making. Our site offers a wealth of resources designed to guide you through every step, whether you're just starting out or looking to refine your technique. You'll find simple, reliable recipes, detailed guides on essential methods, and practical tips for bakers of all skill levels. We believe that baking should be accessible and enjoyable for everyone, and our mission is to provide the knowledge and support you need to bake with confidence and ease.
From understanding the science behind yeast activity to perfecting your kneading skills, BakeWithEase.com breaks down complex topics into easy-to-understand instructions. We cover everything from classic sandwich loaves to rustic sourdoughs, ensuring you have the tools and information necessary to succeed. Navigating common bread baking errors becomes much simpler when you have a trusted resource to turn to for clear explanations and proven solutions. Let us be your partner in your baking journey, helping you achieve consistently excellent results and truly bake with ease.
Understanding the Fundamentals of Bread Baking
The Importance of Accurate Measurements
Precision is paramount in baking, especially when working with bread. Unlike cooking, where a pinch of this or a dash of that is often acceptable, baking relies on specific ratios of ingredients to achieve the desired chemical reactions and structure. Using a kitchen scale to measure ingredients by weight, rather than volume, is the most accurate method.
For example, a cup of flour can vary significantly in weight depending on how it's scooped and whether it's sifted, potentially ranging from 120g to 150g. This difference, compounded across multiple cups, can drastically alter the dough's hydration level and overall consistency, leading to unpredictable results like a dough that is too wet or too dry. Accurate measurements are a critical first step in preventing common bread baking errors.
Consider the impact of just a small error in measuring yeast. Too little yeast, and your bread may not rise properly; too much, and it could rise too quickly, resulting in a coarse texture and potentially an off-flavor. Similarly, the amount of salt is crucial – it controls yeast activity, adds flavor, and strengthens the gluten structure.
Even a slight deviation can affect the final texture and taste. While some experienced bakers can make adjustments by feel, for consistent results, especially when trying a new recipe, sticking to precise measurements using a scale for dry ingredients and a liquid measuring cup for liquids is the best practice for avoiding common bread baking errors right from the start.
The Role of Gluten Development
Gluten is a protein network formed when two proteins, gliadin and glutenin, found in wheat flour, combine with water and are agitated through mixing or kneading. This network is essential for bread making because it provides the dough with elasticity and extensibility. Elasticity allows the dough to spring back after being stretched, while extensibility allows it to be stretched without tearing.
As yeast produces carbon dioxide gas during fermentation, the gluten network traps these gas bubbles, causing the dough to rise. Without sufficient gluten development, the dough would be unable to hold the gas, resulting in a dense, flat loaf. Understanding and properly developing gluten is vital for preventing common bread baking errors related to structure and volume.
The process of kneading is primarily about developing this gluten structure. As the dough is worked, the gluten strands align and strengthen, creating a resilient network. Different types of flour have different protein contents, affecting gluten development.
Bread flour, for instance, typically contains 12-14% protein, making it ideal for well-structured bread, while all-purpose flour has a lower protein content (around 10-12%). The amount of water in the dough also impacts gluten development; higher hydration doughs can develop gluten more easily but require different handling techniques. Recognizing when your dough has achieved optimal gluten development – often indicated by passing the "windowpane test" – is a key skill in preventing common bread baking errors and ensuring a good crumb structure.
Mistake #1: Using Expired or Inactive Yeast
One of the most common reasons for a loaf failing to rise is using yeast that is no longer active. Yeast are living microorganisms that consume sugars and produce carbon dioxide gas and alcohol, which are essential for leavening bread. If your yeast is old or hasn't been stored correctly, it may be dead or dormant, rendering it incapable of performing its job. This results in a dense, heavy dough that doesn't rise, frustrating your efforts to bake a light and airy loaf. Preventing common bread baking errors like this starts with ensuring your leavening agent is viable.
The lifespan and activity of yeast depend heavily on how it's stored. Dry active yeast and instant yeast are typically sold in packets or jars and should be stored in a cool, dry place. Once opened, they are best kept in an airtight container in the refrigerator or freezer, which can extend their shelf life significantly, often for several months past the printed date if stored cold.
Compressed fresh yeast is more perishable and must be refrigerated, typically lasting only a couple of weeks. Using yeast that is past its prime or improperly stored is a frequent culprit when troubleshooting bread baking problems.
Testing Yeast Activity
To avoid the disappointment of a flat loaf caused by inactive yeast, it's wise to test your yeast before adding it to your dough, especially if you're unsure of its age or storage history. This simple test, often called "proofing" the yeast, takes just a few minutes. For active dry yeast, dissolve the recommended amount (usually one packet or about 2.25 teaspoons) in about 1/4 cup of warm water, ideally between 105°F and 115°F (40-46°C).
Stir in a pinch of sugar – the yeast needs food to become active. Let the mixture sit for 5-10 minutes. If the yeast is alive and active, it will consume the sugar and produce gas, causing the mixture to become foamy and bubbly on the surface.
If your yeast mixture doesn't show significant foam or bubbles after 10 minutes, it's likely inactive or dead and should be discarded. Using dead yeast is a surefire way to guarantee your bread won't rise, making this simple test a crucial step in preventing common bread baking errors.
Instant yeast is formulated to be added directly to dry ingredients and doesn't strictly require proofing, but if you're concerned about its viability, you can test it the same way as active dry yeast; it should also become foamy. For sourdough starters, activity is visually judged by how much it rises and bubbles after feeding.
Storing Yeast Properly
Proper storage is essential for maintaining yeast viability and preventing common bread baking errors related to poor rise. Dry active yeast and instant yeast are relatively stable but are sensitive to moisture, air, and warmth. An unopened packet or jar can last for quite a while at room temperature, but once opened, exposure to air and humidity begins to degrade the yeast's potency. For long-term storage after opening, transfer any remaining yeast to an airtight container, such as a small jar with a tight-fitting lid or a zip-top bag with the air squeezed out.
Storing opened dry yeast in the refrigerator can keep it active for several months, while freezing it can extend its life for a year or even longer. Just be sure to let it come back to room temperature for about 15-30 minutes before using it in a recipe. Fresh yeast is highly perishable and must be stored in the refrigerator, wrapped tightly to prevent drying out, and used within its expiration date, usually within 1-2 weeks. Following these simple storage guidelines significantly reduces the risk of using inactive yeast and helps in preventing common bread baking errors.
Mistake #2: Incorrect Water Temperature
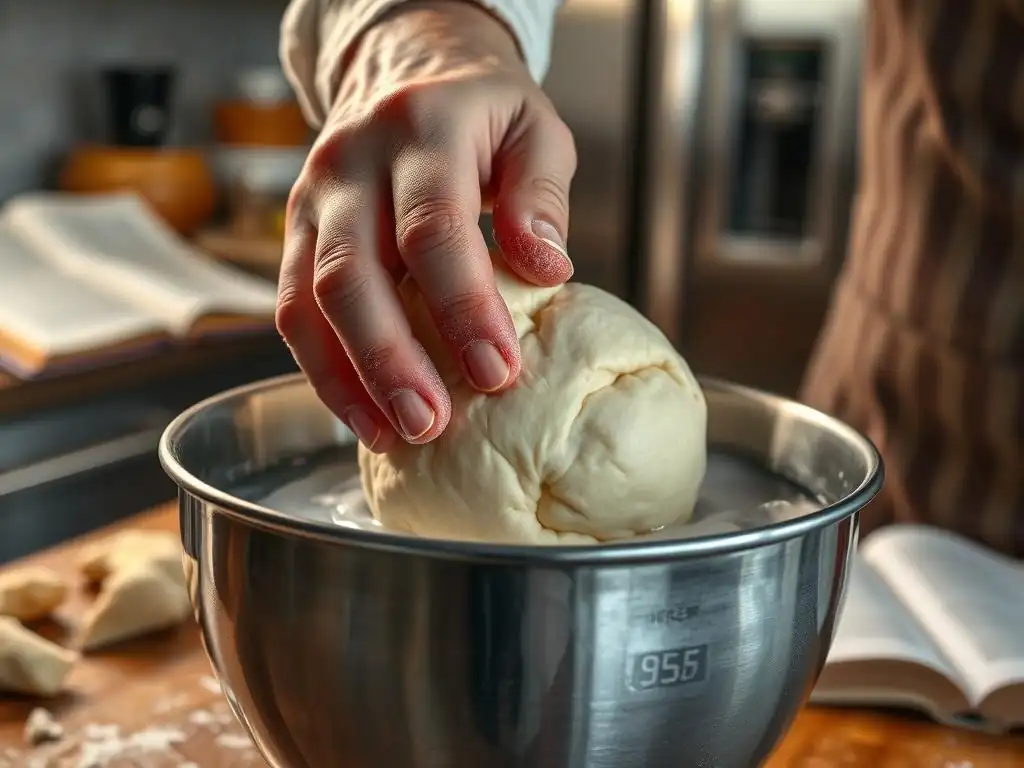
Water temperature plays a critical role in activating and sustaining yeast activity. Using water that is too cold will slow down or even inhibit the yeast, leading to a sluggish or nonexistent rise. On the other hand, water that is too hot can kill the yeast outright, rendering it completely inactive. Yeast are sensitive microorganisms, and providing them with the optimal temperature range is fundamental for successful fermentation and preventing common bread baking errors related to rise.
The ideal water temperature depends on the type of yeast you are using. For active dry yeast, which typically needs to be dissolved in water before being added to the dry ingredients, the water should be warm enough to wake up the yeast but not so hot that it harms it.
Instant yeast is more robust and can be added directly to dry ingredients, relying on the temperature of the mixed dough to become active, though slightly warmer liquid can speed things up initially. Getting the water temperature right is a small detail that has a massive impact on your bread's rise.
Ideal Water Temperature for Yeast
For active dry yeast, the recommended water temperature is typically between 105°F and 115°F (40-46°C). This range is warm enough to quickly activate the yeast granules after their dormancy but is still cool enough not to damage the yeast cells. Think of it as bathwater temperature – comfortably warm, not hot.
Using water within this range ensures that the yeast starts producing carbon dioxide gas efficiently soon after being mixed into the dough, leading to a reliable and consistent rise. Using water colder than this range might still activate the yeast eventually, but it will take much longer, potentially extending proofing times significantly.
When using instant yeast, which is designed to be mixed directly with the dry ingredients, the water temperature can be slightly warmer, often up to 120°F to 130°F (49-54°C). Because the yeast is mixed with dry flour, the overall temperature of the dough mixture will be lower than the water temperature alone, preventing the yeast from overheating. However, using water above 130°F is generally risky as it can still kill yeast cells. Sticking to these recommended temperature ranges based on your yeast type is a key strategy for preventing common bread baking errors related to poor fermentation.
Measuring Water Temperature
While some experienced bakers might be able to judge water temperature by feel, using a thermometer is the most accurate and reliable way to ensure your water is in the ideal range for yeast activity. An instant-read digital thermometer or a simple kitchen thermometer works perfectly for this.
Simply heat your water to the desired temperature range (105-115°F for active dry yeast, 120-130°F for instant yeast) and verify it with the thermometer before adding your yeast or combining it with dry ingredients. This eliminates guesswork and is a simple yet effective method for preventing common bread baking errors caused by temperature issues.
Even if your recipe calls for "lukewarm" or "warm" water, these terms can be subjective. What feels lukewarm to one person might be too cool or too warm for optimal yeast activity. By using a thermometer, you remove this variability and provide the yeast with precisely the conditions it needs to thrive. This small step adds minimal time to your process but significantly increases your chances of a successful rise, making it an invaluable practice in preventing common bread baking errors.
Mistake #3: Over-Kneading or Under-Kneading
Kneading is the process of developing the gluten network in bread dough, but finding the right balance is crucial. Under-kneading means the gluten hasn't been sufficiently developed to create a strong, elastic structure capable of trapping gas. This results in a dough that is slack, sticky, and produces a dense loaf with a tight crumb. Conversely, over-kneading can break down the gluten structure, making the dough weak, sticky, and sometimes unable to hold its shape or rise properly. Both extremes are common bread baking errors that negatively impact the final texture of your bread.
Recognizing when your dough is perfectly kneaded is a skill that comes with practice, but there are specific visual and tactile cues to look for. The goal is to develop a smooth, elastic dough that is resilient and extensible. Whether you're kneading by hand or using a stand mixer, paying attention to these signs will help you stop at just the right moment. Preventing common bread baking errors related to kneading involves understanding what properly developed dough looks and feels like.
Signs of Properly Kneaded Dough
A well-kneaded dough should feel smooth and elastic. It should be less sticky than when you started, pulling away cleanly from the sides of the bowl (if using a mixer) or your hands (if kneading by hand). When you press your finger into the dough, the indentation should slowly spring back. One of the most reliable tests for gluten development is the "windowpane test."
To perform this test, pinch off a small piece of dough and gently stretch it between your fingers. If the dough can be stretched thinly enough that you can see light through it without tearing, it means the gluten is sufficiently developed. If it tears easily, it needs more kneading.
Another sign is the dough's surface. Under-kneaded dough often looks rough and shaggy. As you knead, the surface becomes progressively smoother and more uniform. When it's properly kneaded, the surface will be taut and have a satin-like sheen. Paying attention to these physical characteristics is essential for preventing common bread baking errors caused by improper kneading. Stopping when the dough passes the windowpane test and feels smooth and elastic ensures you've built a strong enough structure for a good rise and crumb.
Effective Kneading Techniques
Whether you choose to knead by hand or use a stand mixer, employing effective techniques maximizes gluten development. For hand kneading, the standard method involves folding the dough over itself, pushing down and away with the heel of your hand, rotating the dough, and repeating. This action stretches and aligns the gluten strands. Kneading by hand typically takes longer, often 10-15 minutes or more, depending on the dough and your technique. It's a good workout and allows you to feel the dough's development directly.
Using a stand mixer with a dough hook is often faster and less labor-intensive. Mix on a low speed initially to combine ingredients, then increase to a medium speed (often speed 2 on many mixers) to knead. Mixer kneading can take anywhere from 5 to 10 minutes.
It's important to monitor the dough; it should gather around the hook and pull away from the sides of the bowl. Over-mixing is easier with a stand mixer, so stop periodically to check the dough's temperature (friction increases heat, which can damage gluten) and perform the windowpane test. Using these techniques correctly is vital for preventing common bread baking errors related to gluten structure.
Mistake #4: Inadequate Proofing Time
Proofing, also known as fermentation or rising, is the period during which yeast produces carbon dioxide gas, causing the dough to increase in volume. This step is crucial for developing the bread's flavor and texture. Under-proofing occurs when the dough hasn't had enough time to rise sufficiently. This results in a dense, heavy loaf with a compact crumb, as there aren't enough gas bubbles trapped within the gluten structure. It's a very common issue when rushing the baking process. Preventing common bread baking errors often involves patience, particularly during proofing.
Conversely, over-proofing happens when the dough rises for too long or in a too-warm environment. The gluten structure can become overstretched and weak, unable to support the weight of the dough. When baked, over-proofed dough may collapse in the oven ("oven spring" is minimal or absent) and result in a loaf with a poor structure, potentially large, irregular holes, and a gummy texture. Finding the sweet spot for proofing time is essential for a well-risen, light loaf.
Understanding the Proofing Process
Proofing typically occurs in one or two stages. The first proof (often called the bulk fermentation) happens after kneading, where the entire mass of dough rises. This stage is crucial for developing flavor as yeast and other microorganisms (if using sourdough) produce various compounds. The dough is usually left to rise until it has roughly doubled in size, which can take anywhere from 1 to 3 hours at room temperature (around 70-75°F or 21-24°C), but much longer in a cooler environment (like the refrigerator for an overnight rise).
The second proof (sometimes called the final proof or proofing the shaped loaf) occurs after the dough has been shaped into its final form. This rise is usually shorter than the first, often lasting 30-60 minutes, but it's equally important for achieving the final volume and shape. The dough should increase significantly in size again, though not necessarily double. Proper timing for both proofs is critical for preventing common bread baking errors that lead to poor volume or texture.
Factors Affecting Proofing Time
Several factors influence how quickly dough proofs. The most significant is temperature. Yeast is more active in warmer temperatures, so dough will rise faster in a warm kitchen than a cool one. Ideal room temperature for proofing is generally between 70-80°F (21-27°C). Using warmer water initially (as discussed earlier) can also speed up the process. The amount of yeast used also plays a role; more yeast means faster rising.
Other factors include the type of flour (whole wheat often proofs faster than white), the hydration level of the dough (wetter doughs can rise faster), and the presence of sugar (which feeds the yeast). Recipe instructions usually provide a time estimate for proofing, but it's crucial to use visual cues rather than relying solely on the clock, as actual proofing time can vary. Learning to judge the dough's state is key to preventing common bread baking errors related to proofing.
Mistake #5: Baking at the Wrong Temperature
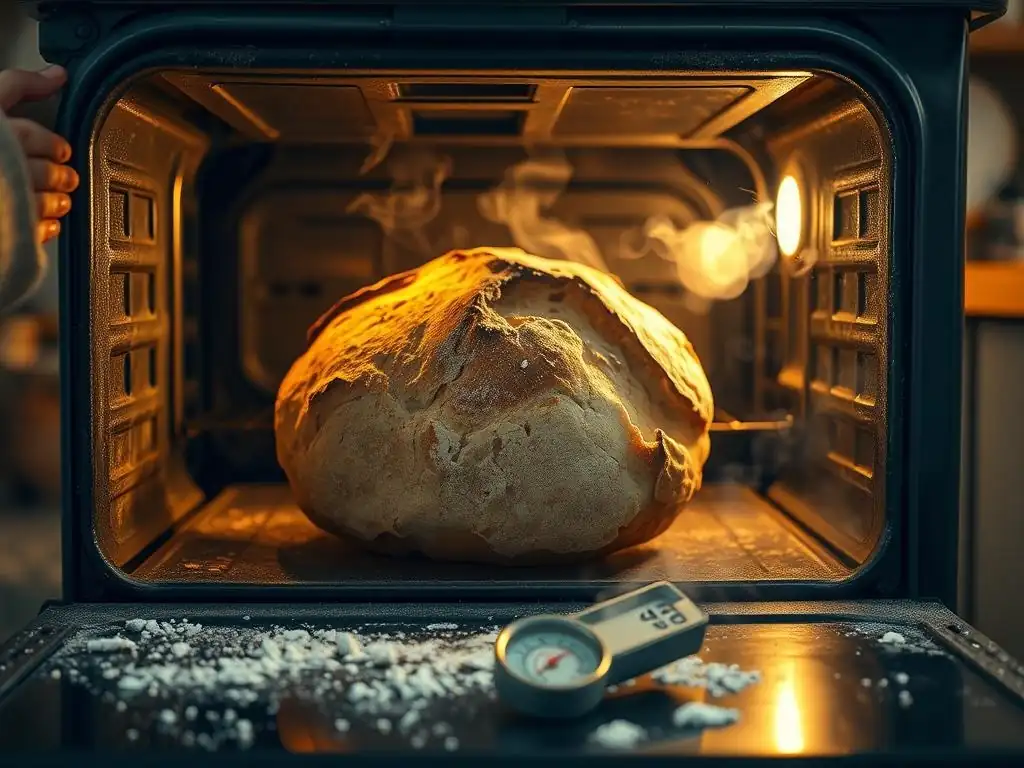
Baking temperature is just as critical as ingredient measurements and proofing. An oven that is too cool will cause the loaf to spread out excessively before the crust sets, resulting in a flat loaf with poor oven spring. The crust may also be pale and soft.
An oven that is too hot can cause the crust to set too quickly, preventing the loaf from expanding fully and potentially resulting in a dense interior. It can also lead to a burnt crust while the inside remains undercooked. Baking at the correct temperature is essential for achieving proper oven spring, crust development, and a well-cooked interior, effectively preventing common bread baking errors related to the final bake.
Different types of bread require different baking temperatures, but most lean doughs (breads without much fat or sugar, like baguettes or rustic loaves) are baked at high temperatures, often between 400°F and 475°F (200-245°C). Enriched doughs (like challah or brioche) are typically baked at slightly lower temperatures, around 350°F to 400°F (175-200°C), to prevent the sugar and fat from burning before the interior is cooked.
Calibrating Your Oven
Most home ovens have thermostats that are not perfectly accurate. They can be off by as much as 25-50°F (15-30°C) or even more. Relying on the dial setting without knowing your oven's true temperature can easily lead to baking at the wrong temperature. The best way to know your oven's actual temperature is to use an independent oven thermometer. Place it inside the oven and check the temperature after it has preheated for at least 20-30 minutes. You might find that when your oven dial is set to 400°F, the actual temperature is only 375°F, or perhaps it's 425°F.
Once you know how much your oven is off, you can adjust your dial setting accordingly. If your oven bakes 25°F cool, set the dial 25°F higher than the recipe calls for. If it bakes 25°F hot, set the dial 25°F lower. Regularly checking your oven's temperature with a thermometer is a simple yet powerful step in preventing common bread baking errors and ensuring consistent results.
Importance of Preheating
Preheating your oven for a sufficient amount of time is just as important as setting the correct temperature. The oven needs time not only to reach the target air temperature but also for the oven walls, racks, and any baking surfaces (like a baking stone or Dutch oven) to absorb enough heat. When you place dough into a properly preheated oven, the intense initial heat causes a rapid burst of yeast activity and expansion (oven spring) and quickly sets the crust.
If you place dough into an oven that hasn't been fully preheated, the lower temperature and lack of radiant heat will result in poor oven spring, a pale crust, and potentially an undercooked interior. For most bread, preheating for at least 20-30 minutes after the oven indicates it has reached temperature is a good practice. If using a baking stone or steel, preheating for 45-60 minutes is often necessary for the stone to become fully saturated with heat. Adequate preheating is a non-negotiable step in preventing common bread baking errors and achieving a beautiful, well-risen loaf.
Mistake #6: Improper Scoring Techniques
Scoring, also known as slashing or making cuts in the surface of the dough just before baking, serves several critical purposes in bread baking. Firstly, it acts as a controlled release point for the expanding gases inside the loaf during oven spring. Without scoring, the expanding dough will find the weakest point in the crust to burst through, often resulting in an uncontrolled, jagged tear. Scoring allows the baker to dictate where the expansion occurs, helping to achieve a predictable shape and preventing common bread baking errors like blowouts.
Secondly, scoring contributes significantly to the aesthetic appeal of the finished loaf, creating beautiful patterns on the crust. It also affects the crust development and overall structure. Proper scoring encourages the loaf to expand upwards and outwards in a desirable way, contributing to volume and shaping the final crumb structure beneath the crust.
Why Scoring is Essential
When bread dough is placed into a hot oven, the rapid increase in temperature causes the yeast to become hyperactive for a short period, producing a final burst of carbon dioxide. Simultaneously, water in the dough turns to steam, which also contributes to expansion. This sudden, rapid rise is known as oven spring. If the dough's surface has already begun to dry and set slightly, scoring provides the necessary weak points for this expansion to occur without the crust tearing randomly.
Think of the crust setting in the oven like a balloon skin tightening. As the air inside expands, the skin needs to stretch. Scoring is like making strategic cuts in the balloon skin, allowing it to expand along those lines rather than bursting unexpectedly. For loaves baked freeform on a baking sheet or stone, scoring is particularly important for directing oven spring upwards. Even loaves baked in a pan can benefit from a simple score, helping the top crust develop properly. Mastering scoring is key to preventing common bread baking errors that result in misshapen loaves or uncontrolled tears.
Different Scoring Patterns
The type of scoring pattern used often depends on the shape of the loaf and the desired aesthetic. For a round loaf (boule), common patterns include a simple cross, a square grid, or a circular pattern. These cuts allow the loaf to expand evenly from the center outwards. For an oval loaf (batard), a series of diagonal slashes along the length of the loaf is typical. These slashes should overlap slightly and be made at an angle (often around 45 degrees) to create an "ear" – a desirable flap of crust that lifts during baking.
The depth and angle of the cuts are also important. Cuts that are too shallow may not provide adequate release for expansion, while cuts that are too deep can cause the loaf to spread too much or collapse. For most doughs, a depth of about 1/4 to 1/2 inch (about 0.5-1 cm) is sufficient.
Using a sharp blade is crucial for making clean cuts that allow for controlled expansion and prevent the dough from dragging or tearing messily. Practicing different patterns helps you understand how they influence the final shape and appearance, improving your ability to prevent common bread baking errors in crust development.
Mistake #7: Opening the Oven Door Too Early
It can be tempting to peek at your bread while it's baking, especially in the first 10-15 minutes when the most dramatic oven spring occurs. However, opening the oven door during this critical phase is a significant mistake. Every time the door is opened, the temperature inside the oven drops rapidly, often by 50-100°F (30-55°C) or more. This sudden temperature fluctuation interrupts the baking process, particularly the crucial period of oven spring and crust setting.
During the first part of the bake, the high heat causes rapid expansion and sets the structure of the loaf. If the temperature drops significantly by opening the door, the dough's expansion can slow or stop prematurely. The crust may also cool and set too quickly in an undesirable way, inhibiting further rise. This can result in a denser loaf with less volume and a less attractive crust. Patience is key to preventing common bread baking errors during the baking stage.
Maintaining Oven Temperature
Maintaining a consistent high temperature during the initial phase of baking is vital for maximizing oven spring and achieving good crust development. Once the loaf is placed in the preheated oven, resist the urge to open the door for at least the first 15-20 minutes, or even longer for larger loaves. During this time, the heat is working to expand the dough and begin forming the crust. Allowing the oven temperature to remain stable ensures that these processes occur optimally.
Some bakers use methods to create steam in the oven during the initial bake (like placing a tray of hot water or ice cubes in the oven) which also helps keep the crust pliable longer, allowing for maximum expansion. If using such methods, quickly add the steam source immediately after placing the dough in the oven and close the door promptly. Minimizing the time the oven door is open is essential for preventing common bread baking errors related to poor oven spring and structure.
Checking Doneness Without Opening
How can you tell if your bread is baking properly or if it's done without constantly opening the door? Most recipes provide a total baking time range. For example, a medium loaf might bake for 30-40 minutes. Plan to check the bread towards the end of the suggested time range. Many ovens have a light and a window, allowing you to observe the bread's color and rise without opening the door. You can usually tell if the crust is developing a nice brown color and if the loaf has expanded well just by looking.
Once the bread looks golden brown and appears fully risen, you can open the door briefly to perform the final test for doneness, which is checking the internal temperature. Avoid opening the door repeatedly throughout the bake. Trust the process and the recipe's timing, using the oven window as your primary means of observation until it's time for the final check. This disciplined approach is effective in preventing common bread baking errors caused by temperature fluctuations.
Mistake #8: Not Allowing the Bread to Cool Properly
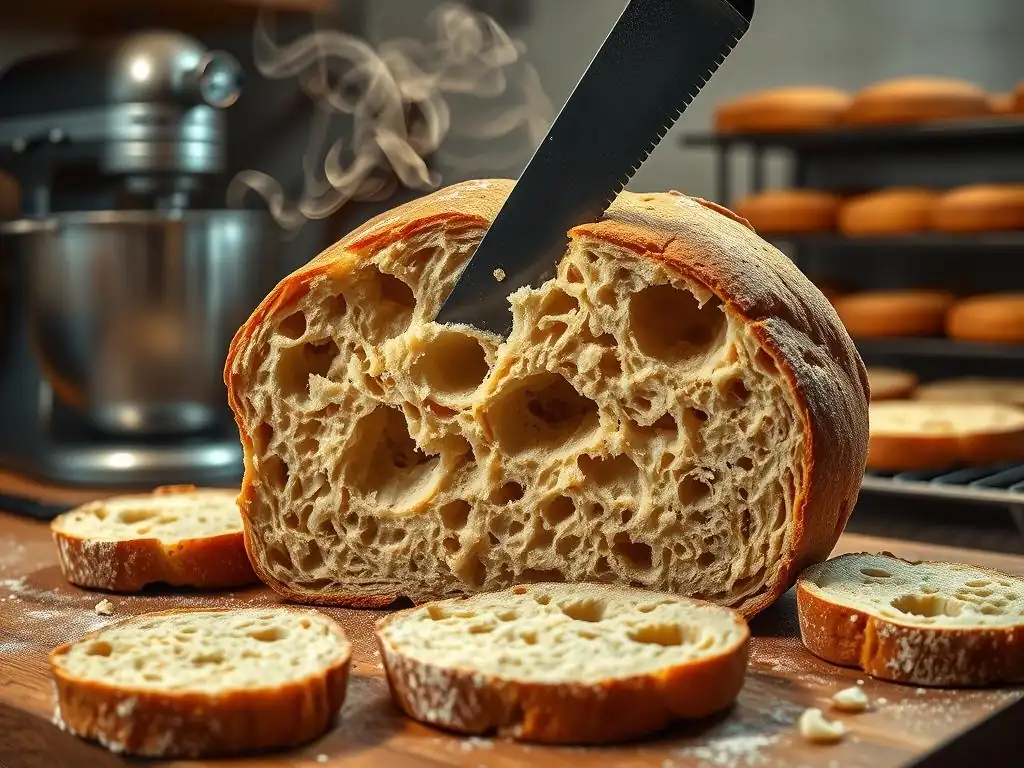
After successfully baking a beautiful loaf, the final mistake many bakers make is cutting into it too soon. While the aroma of fresh bread straight from the oven is incredibly tempting, slicing into a hot loaf interrupts crucial processes that are still occurring as the bread cools. The internal structure is still setting, and moisture is redistributing throughout the crumb. Cutting into hot bread can result in a gummy or doughy texture inside, even if the outside is perfectly baked. It also makes clean slicing very difficult.
Allowing the bread to cool completely on a wire rack is a vital step for achieving the best possible texture, flavor, and sliceability. This seemingly simple step is often overlooked in the excitement of a fresh bake but is essential for preventing common bread baking errors related to crumb structure.
Why Cooling is Crucial
As bread cools, residual heat continues to cook the interior very gently. More importantly, moisture that has migrated towards the crust during baking begins to redistribute back into the crumb. This process helps to set the crumb structure and ensures a moist, tender interior. If you cut into the bread while it's still hot, the steam escapes rapidly, taking moisture with it, and the crumb hasn't had time to stabilize.
The starches within the bread are also undergoing changes as they cool, a process called retrogradation. This process contributes to the bread's structure and helps prevent a gummy texture. For optimal texture and flavor, most loaves should be allowed to cool completely to room temperature. This can take anywhere from 1-2 hours for smaller loaves or rolls, to 3-4 hours or even longer for larger, dense loaves like sourdough boules. Patience during the cooling phase is just as important as patience during proofing for preventing common bread baking errors.
Recommended Cooling Techniques
The best way to cool bread is on a wire cooling rack. Placing the hot loaf on a solid surface, like a countertop or cutting board, traps steam on the bottom, leading to a soggy bottom crust. A wire rack allows air to circulate around the entire loaf, permitting steam to escape evenly and allowing the crust to remain crisp. Ensure the rack is elevated so air can circulate underneath.
Place the loaf directly from the oven onto the wire rack. Resist the urge to cover it while it's cooling, as this will trap steam and soften the crust. Let it sit undisturbed until it is completely cool to the touch. While it might feel warm inside, the exterior temperature is a good indicator. For very large loaves, you might even need to wait overnight before slicing for the best texture. Proper cooling is the final, necessary step in preventing common bread baking errors and enjoying your perfectly baked bread.
Troubleshooting Common Problems
Even with careful attention to detail, sometimes things don't go exactly as planned. Understanding common bread baking errors and their typical causes can help you diagnose issues and improve your technique for future bakes. Here are some frequent problems and how to address them.
Dense Bread: Causes and Solutions
Dense bread, a loaf that feels heavy for its size and has a tight, compact crumb, is one of the most frustrating common bread baking errors. Causes can include:
- Inactive or too little yeast: If the yeast didn't produce enough gas, the dough won't rise properly. Solution: Test your yeast before using it and ensure you're using the correct amount specified in the recipe.
- Under-kneading: Insufficient gluten development means the dough can't trap gases effectively. Solution: Knead the dough until it passes the windowpane test and feels smooth and elastic.
- Under-proofing: The dough didn't rise long enough to double in volume before baking. Solution: Allow adequate time for both the bulk fermentation and the final proof, using visual cues rather than just the clock. Ensure your proofing environment is warm enough.
- Incorrect water temperature: Water too cold or too hot inhibits yeast activity. Solution: Use a thermometer to ensure water is in the optimal range (105-115°F for active dry, 120-130°F for instant).
- Too much flour: Adding too much flour makes the dough stiff and heavy, hindering rise. Solution: Measure flour by weight using a scale for accuracy.
To remedy dense bread, review your process step-by-step on your next bake, focusing specifically on yeast activity, kneading, and proofing times and temperatures. Small adjustments in these areas can make a significant difference in achieving a lighter crumb.
Flat Bread: Causes and Solutions
Flat bread, which spreads out sideways rather than rising upwards during baking, is another common bread baking error. Causes can include:
- Over-proofing: The gluten structure became too weak to support the dough's weight. Solution: Do not let the dough rise excessively during the final proof. It should look well-risen but not deflated or fragile. The poke test (gently poking the dough; if the indentation springs back very slowly or not at all, it might be over-proofed) can help.
- Under-kneading: Similar to dense bread, poor gluten development can't support the structure. Solution: Ensure adequate kneading as tested by the windowpane test.
- Not enough tension during shaping: The final shaping step creates tension on the dough's surface, which helps it hold its shape and encourages upward rise. Solution: Practice shaping techniques to create a taut surface on your loaf.
- Oven not hot enough / Not preheated properly: Lack of intense initial heat means the crust doesn't set quickly enough to support the rising dough. Solution: Use an oven thermometer to verify temperature and preheat for sufficient time, especially if using a stone or steel.
- Too high hydration for the flour/technique: Very wet doughs are harder to handle and require strong gluten development and shaping techniques to hold their shape. Solution: If you're new to high-hydration doughs, start with lower hydration recipes (e.g., 60-65%) and gradually increase as you gain experience.
Preventing flat bread involves paying close attention to proofing, shaping, and oven temperature. Mastering shaping techniques to build surface tension is particularly effective for freeform loaves.
Large Holes: Causes and Solutions
While some breads (like ciabatta or sourdough) are known for their open, irregular crumb with large holes, unintended large tunnels or uneven holes in a standard loaf can be a sign of common bread baking errors. Causes can include:
- Uneven mixing or kneading: Pockets of flour or areas with poor gluten development can lead to large voids. Solution: Ensure ingredients are thoroughly combined and the dough is kneaded uniformly.
- Improper shaping: Trapping large air bubbles during shaping can result in big holes. Solution: Gently degas the dough slightly before shaping (don't punch it down aggressively) and shape carefully to avoid incorporating large air pockets.
- Over-proofing: While over-proofing can cause collapse, it can also lead to an irregular crumb with large, fragile bubbles that collapse during baking. Solution: Monitor proofing carefully using visual cues and avoid letting the dough rise excessively.
- Dough too wet for the flour or technique: High hydration doughs naturally produce a more open crumb, but if the gluten isn't strong enough to support the large bubbles, they can merge into massive tunnels. Solution: Ensure strong gluten development for wet doughs and consider slightly reducing hydration if consistently getting unwanted large holes.
Addressing unintended large holes typically involves refining mixing, kneading, and shaping techniques to create a more uniform dough structure and prevent the incorporation or trapping of large air pockets.
Conclusion: Achieving Baking Success
Mastering bread baking is a journey, not a destination. Every loaf you bake offers an opportunity to learn and improve. By understanding the science behind the ingredients and processes, and by being mindful of the most common bread baking errors, you can significantly increase your success rate. Remember that baking is a craft that rewards patience, observation, and persistence. Don't be discouraged by loaves that don't turn out perfectly; instead, use them as learning experiences to refine your technique.
Preventing common bread baking errors boils down to a few key principles: accurate measurements, active yeast, proper water temperature, sufficient (but not excessive) kneading, careful proofing guided by visual cues, correct oven temperature and preheating, controlled scoring, and patient cooling. Addressing these areas will resolve most issues home bakers face.
Key Tips for Preventing Errors
To recap, here are some essential tips for preventing common bread baking errors:
- Use a kitchen scale to measure ingredients by weight, especially flour.
- Always check your yeast's activity, especially if it's been stored for a while.
- Use a thermometer to ensure your water is in the correct temperature range for your yeast type.
- Develop gluten properly through kneading until the dough passes the windowpane test.
- Proof your dough based on its appearance (doubled in size, poke test) rather than strictly by the clock.
- Use an oven thermometer to verify your oven's actual temperature and preheat thoroughly.
- Score your loaves with a sharp blade just before baking to control expansion.
- Allow your bread to cool completely on a wire rack before slicing.
By focusing on these fundamentals, you'll be well on your way to consistently baking delicious, well-structured loaves.
Continuing Your Baking Journey
Preventing common bread baking errors is part of the continuous learning process that makes baking so fulfilling. As you gain experience, you'll develop a better feel for dough and become more adept at recognizing and correcting potential problems. Don't be afraid to experiment with different flours, hydration levels, and techniques. Each variation will teach you more about how ingredients interact and how adjustments impact the final loaf.
BakeWithEase.com is here to support you every step of the way. Explore our recipes, guides, and troubleshooting tips to deepen your understanding and expand your skills. With practice and patience, you'll overcome challenges and discover the immense satisfaction of pulling a perfectly baked loaf from your own oven. Keep baking, keep learning, and enjoy the delicious results!
Frequently Asked Questions
What are some of the most common mistakes beginners make when baking bread?
New bakers often struggle with incorrect measuring of ingredients and not kneading the dough long enough. These can lead to dense or poorly risen bread.
How can I ensure my bread dough rises properly?
Proper rising relies on the correct temperature and active yeast. Ensure your yeast isn't expired and that the dough is kept in a warm, draft-free environment.
What causes bread to be too dense and heavy?
Dense bread is frequently caused by insufficient kneading or using too much flour. Over-proofing can also contribute to a dense texture.
How do I prevent my bread from having a tough crust?
A tough crust often results from baking at too high a temperature or not enough moisture during baking. Try adding a pan of water to the oven or lowering the temperature slightly.
What is the best way to store homemade bread to keep it fresh?
Store your bread in an airtight container or a bread bag at room temperature. Slicing the bread only when needed also helps maintain freshness.
Final Reflection: The Humble Loaf and the Triumph of Patience
The pursuit of the perfect loaf is a journey, not a destination, and understanding the common pitfalls along the way is crucial to achieving consistently delicious results. The seemingly simple act of bread baking reveals a complex interplay of ingredients, technique, and timing, each demanding attention and precision. Mastering these elements, as explored throughout this article, unlocks a world of fragrant, crusty, and deeply satisfying bread.
The impact of good bread extends far beyond the simple satisfaction of a well-made loaf. It's a connection to history, a celebration of simple ingredients transformed, and a testament to the power of patience and precision. Bread is the staff of life,
a phrase often repeated, speaks to its fundamental importance in human sustenance and culture. It's a truth I've come to appreciate even more deeply through the process of researching and writing this piece. The act of baking itself, with its rhythmic kneading and the anticipation of the rising dough, offers a meditative quality, a welcome respite from the frenetic pace of modern life.
Now, I invite you to take what you've learned and apply it to your next baking adventure. Don't be discouraged by initial setbacks; every imperfectly risen loaf is a lesson learned, a step closer to mastering the art. Embrace the process, experiment with different flours and techniques, and most importantly, enjoy the journey. The reward—a warm, crusty loaf of homemade bread—is well worth the effort. Remember, the perfect loaf is not just about the recipe, it's about the experience.
Unlock Your Inner Baker: Perfect Loaves Await!
Thanks for taking the time to learn about common bread baking pitfalls! We hope you gained valuable insights that will elevate your baking game. Ready to put your new knowledge into practice?
- Bake your dream loaf today! Try out one of the techniques you learned and let us know how it goes. The taste of freshly baked bread is its own reward!
- Share your baking journey! Post a picture of your creation on social media and tag us – we'd love to see your success (and maybe even your fails! ).
- Explore more baking tips: Dive into our other articles for even more bread-making wisdom. You might be surprised by what you discover!
What innovative bread recipe will you tackle first? Let us know in the comments!