
Advanced Gluten Techniques for Perfecting Your Bakes

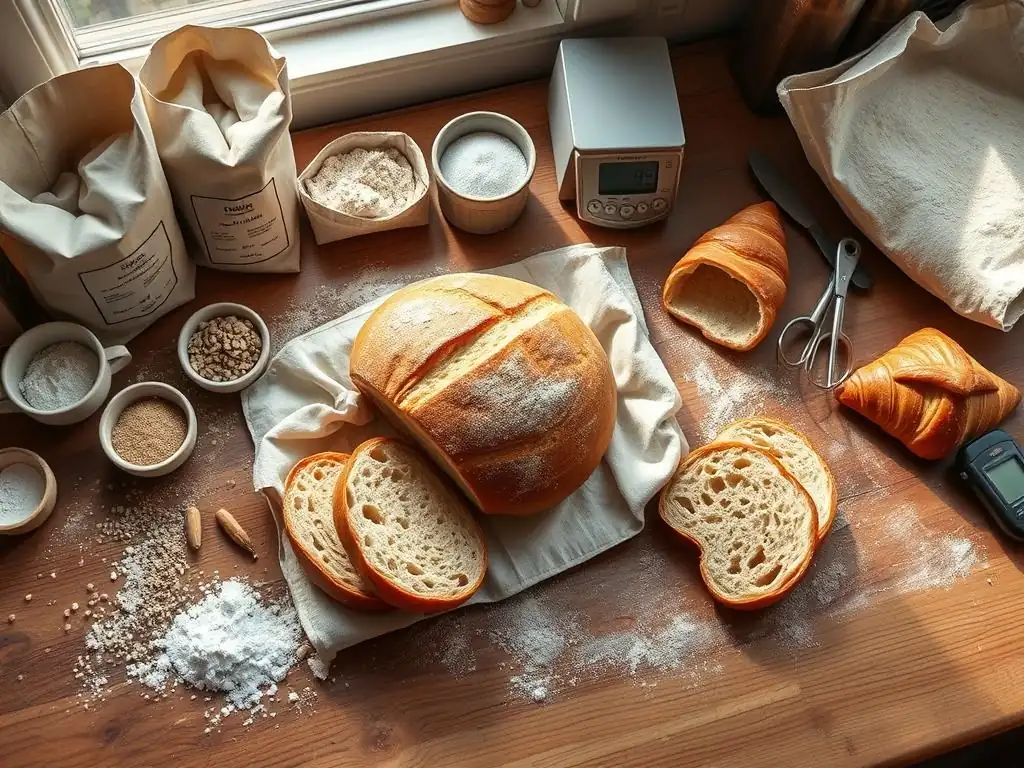
Welcome to BakeWithEase, your haven for baking brilliance! Are you ready to unlock the secrets to truly exceptional gluten-free treats? Delve into Advanced Gluten-Free Baking Techniques and discover how to achieve the perfect texture, flavor, and rise, even without gluten. We're about to debunk some myths and share expert Glutenfree baking techniques tips that will transform your baking. Intrigued? Let's get started!
- Mastering Gluten Techniques for Perfect Bakes
- Understanding Gluten's Role in Baking
- Advanced Gluten Development Techniques
- Optimizing Gluten for Specific Recipes
- Troubleshooting Gluten-Related Baking Problems
- Gluten-Free Baking Techniques: Adapting Recipes
-
Frequently Asked Questions
- What are some common challenges in gluten-free baking?
- What is the role of xanthan gum in gluten-free baking?
- Can I substitute all-purpose flour directly with a gluten-free flour blend?
- What are some alternative flours I can use in gluten-free baking besides rice flour?
- What tips can help improve the texture of my gluten-free baked goods?
- Final Reflection: The Flour Power of Gluten-Free Baking
- Unleash Your Inner Baking Guru!
Mastering Gluten Techniques for Perfect Bakes
The Science of Gluten Development: A Deep Dive
Baking success often hinges on understanding the fundamental science behind ingredients, and few components are as critical as gluten. Gluten is a protein structure that forms when water is combined with certain proteins in wheat flour, primarily gliadin and glutenin. This network is responsible for trapping gases produced by leavening agents (like yeast or baking soda), allowing dough or batter to rise and hold its shape. The strength and extensibility of this gluten network directly influence the texture, volume, and overall structure of baked goods, from the airy crumb of a baguette to the tender crumb of a cake.
The process of gluten development isn't instantaneous; it requires hydration and mechanical action, such as mixing or kneading. As water is absorbed by the flour, the gliadin and glutenin proteins begin to link together. Kneading or mixing helps these proteins align and form stronger, more organized bonds, creating an elastic and extensible network. Different types of flour contain varying amounts and types of these proteins, which is why bread flour (higher protein) behaves differently than cake flour (lower protein). Mastering how to control this development is paramount for achieving desired results in a wide range of baking applications.
Understanding Gluten's Role in Baking
What is Gluten and Why is it Important?
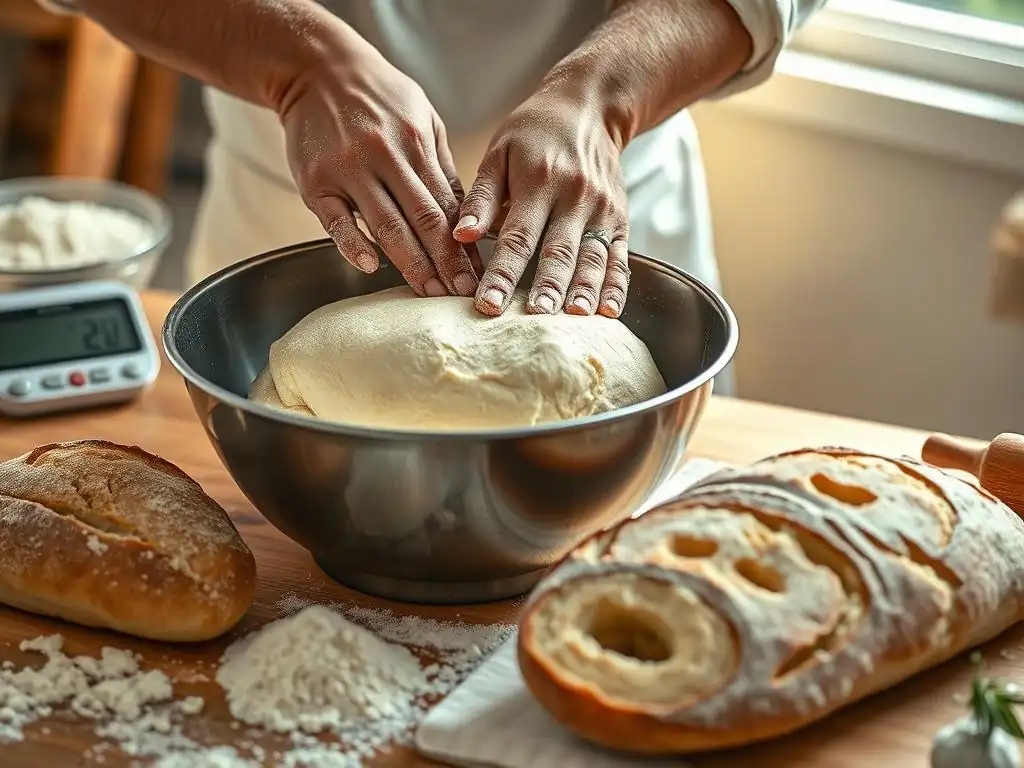
Gluten is essentially a complex network of proteins found in wheat, barley, and rye. When flour from these grains is mixed with water, two primary proteins, gliadin and glutenin, begin to interact. Gliadin provides extensibility (the ability to stretch), while glutenin provides elasticity (the ability to spring back).
As you mix or knead the dough, these proteins bond together through disulfide bonds, forming a viscoelastic network. This network is crucial because it provides the structure and framework necessary for baked goods to rise and maintain their shape during baking. Without sufficient gluten development (in gluten-containing flours), baked goods would be dense and flat, unable to hold the gases produced by leavening.
The importance of gluten extends beyond just providing structure. It also contributes significantly to the texture and mouthfeel of many baked goods. In bread, a well-developed gluten network creates a chewy texture and an open crumb structure. In pastries, controlling gluten development is key to achieving flakiness. In cakes, minimizing gluten development results in a tender, delicate crumb. Understanding how to manipulate gluten formation allows bakers to intentionally create different textures and achieve specific outcomes tailored to the type of bake they are creating.
Key Gluten Proteins: Gliadin and Glutenin Explained
Gliadin and glutenin are the two main protein components that form gluten. Found within the endosperm of wheat grains, these proteins are relatively inactive when the flour is dry. However, upon hydration, they undergo conformational changes and begin to interact. Gliadin is a monomeric protein, meaning it exists as individual molecules. It is responsible for the viscosity and extensibility of dough – its ability to flow and stretch without breaking. Think of gliadin as the 'stretch' component of gluten. Different types of gliadin exist, influencing the dough's handling properties.
Glutenin, on the other hand, is a polymeric protein, meaning it forms large, complex structures by linking together many individual protein units via disulfide bonds. Glutenin is primarily responsible for the elasticity and strength of the dough – its ability to resist deformation and spring back after being stretched. It forms the strong scaffolding of the gluten network.
The ratio of gliadin to glutenin and the molecular weight distribution of glutenin polymers vary between different wheat varieties and flour types, which is why flours have different baking characteristics. For instance, bread flour has a higher proportion of high molecular weight glutenin polymers compared to cake flour.
How Gluten Development Impacts Texture and Structure
The extent to which gluten is developed fundamentally dictates the texture and structure of the final baked product. In processes like bread making, where a strong, elastic framework is desired to trap carbon dioxide and create a lofty loaf, significant gluten development through kneading is essential. This results in a chewy texture and an open, airy crumb structure with visible holes. Insufficient gluten development in bread leads to a dense, heavy loaf that doesn't rise well.
Conversely, in delicate baked goods like tender cakes, muffins, or flaky pastries, excessive gluten development is undesirable. A strong gluten network in a cake would result in a tough, rubbery texture and a coarse crumb. Techniques like using low-protein flour, incorporating fat, sugar, or chemical leaveners, and minimizing mixing time are employed to inhibit gluten formation, ensuring a tender, fine-crumbed result or distinct, flaky layers in pastries. The baker's ability to control this protein network is the secret to achieving the perfect texture for each specific recipe.
Advanced Gluten Development Techniques
Autolysing: Unlock Flour Potential
Autolysing is a simple yet powerful technique that involves mixing flour and water and letting the mixture rest for a period before adding other ingredients like salt and yeast. This resting period allows the flour to fully hydrate and gives the gluten proteins (gliadin and glutenin) time to naturally align and bond without the mechanical stress of kneading or the interference of salt or fat.
The process was popularized by French baking professor Raymond Calvel. A typical autolyse might involve mixing just flour and water to a shaggy dough consistency and letting it rest for anywhere from 20 minutes to several hours at room temperature.
Benefits of Autolysing for Hydration and Formation
One of the primary benefits of autolysing is improved hydration. The resting period allows water to penetrate more deeply and uniformly into the flour particles, leading to a more homogenous dough. This increased hydration potential can be particularly beneficial for whole wheat or high-extraction flours.
Furthermore, the enzymatic activity that occurs during the autolyse helps to break down complex starches and proteins, making the dough more extensible and easier to handle during subsequent kneading. This pre-development of gluten means less intensive kneading is required later, which can result in a more open crumb structure and improved volume in bread. For example, a dough autolysed for 30 minutes might require 20-30% less kneading time to reach the same level of gluten development compared to a dough where all ingredients were mixed at once.
Step-by-Step Guide to Autolysing Dough
Here's a simple guide to incorporating autolyse into your baking process:
- Measure: Accurately measure the flour and water required for your recipe's initial dough mix. Typically, this is all the flour and all or most of the water.
- Combine: In a mixing bowl, combine only the flour and water. Mix just until no dry flour remains. The mixture will look shaggy and rough.
- Rest: Cover the bowl tightly with plastic wrap or a damp towel to prevent the surface from drying out. Let the mixture rest at room temperature for the time specified in your recipe, or typically between 20 minutes and 1 hour for lean doughs. Some recipes might suggest longer rests, especially with minimal yeast.
- Add Remaining Ingredients: After the rest period, add the remaining ingredients (yeast, salt, sourdough starter, fats, etc.) to the autolysed dough.
- Mix/Knead: Proceed with your normal mixing or kneading process. You will likely find the dough is smoother, more extensible, and requires less effort to develop the gluten fully.
The Importance of Kneading Techniques
Kneading is the traditional and most direct method for developing gluten in dough. It involves physically working the dough by stretching, folding, and pressing it. This mechanical action helps to align the hydrated gliadin and glutenin proteins and encourages them to form stronger, more extensive networks through disulfide bonds.
Proper kneading transforms a sticky, shaggy mass into a smooth, elastic, and resilient dough capable of holding its shape and trapping gases. Insufficient kneading results in a weak gluten structure, leading to poor rise and a dense texture, while excessive kneading can overdevelop the gluten, making the dough tough and difficult to handle.
Different kneading techniques exist, each with its own advantages and suitability for various dough types. Traditional hand kneading involves repeatedly folding and pushing the dough. Stand mixer kneading uses a dough hook to replicate this action mechanically, often more efficiently.
Modern no-knead or minimal-knead methods rely more on time (fermentation) and gentle folding (like stretch and folds or coil folds) to develop gluten over longer periods. Understanding the principles behind these methods allows bakers to choose the best approach for their specific recipe and desired outcome. For instance, a stiff dough for pasta requires vigorous kneading, while a high-hydration ciabatta dough benefits more from gentle folds over time.
Windowpane Test: Assessing Gluten Development
The windowpane test is a classic method used by bakers to assess whether gluten has been sufficiently developed in a dough. It involves taking a small piece of dough (about the size of a golf ball) and gently stretching it between your fingers. If the gluten is well-developed, you should be able to stretch the dough into a thin, translucent membrane without it tearing. It should be thin enough that you can see light passing through it – like looking through a windowpane.
If the dough tears easily before you can stretch it thin, it indicates that the gluten network is still weak and requires more kneading or resting time. A dough that stretches thin but then springs back aggressively might be slightly over-developed or very elastic but lacking extensibility, sometimes needing a brief rest. This test provides a visual and tactile confirmation of the dough's structural integrity and helps prevent both under-kneading (leading to poor volume) and over-kneading (leading to a tough texture).
Different Kneading Methods: Coil Folds, Lamination
Beyond traditional kneading, techniques like coil folds and lamination are used, particularly in artisan bread and pastry making, to further strengthen and organize the gluten network. Coil folds are a gentle method often used for high-hydration doughs. They involve wetting your hands, reaching under the dough in the bowl or on a wet surface, and lifting the center, allowing the ends to fold under themselves like a coil.
This is repeated several times around the dough, often done in intervals during bulk fermentation (e.g., every 30-60 minutes for the first few hours). This technique builds strength without degassing the dough significantly, promoting an open crumb.
Lamination, commonly used for croissants, puff pastry, and some enriched breads (like challah or brioche), involves repeatedly folding a slab of butter or fat into the dough, creating many thin layers. Each fold effectively stretches and aligns the gluten layers within the dough while separating them with fat. This process not only develops gluten but also creates the potential for distinct, flaky layers during baking as the fat melts and creates steam. A typical lamination process for croissants might involve three "single" folds or two "double" folds, resulting in dozens or even hundreds of layers of dough and butter.
Controlling Gluten Development Through Hydration
Dough hydration, which is the ratio of water to flour by weight, is a critical factor influencing gluten development. Water is essential for the gliadin and glutenin proteins to hydrate and interact. Higher hydration levels generally lead to more extensible doughs because the water molecules help to separate the protein strands, allowing them to slide past each other more easily. This can make high-hydration doughs seem weaker initially, but with proper technique (like gentle folding over time), they can develop a very strong yet extensible gluten network capable of producing incredibly open crumbs.
Conversely, lower hydration levels result in stiffer doughs. While these doughs are easier to handle and shape, the limited water restricts the mobility of the protein strands, leading to a tighter, less extensible gluten network. Such doughs often require more vigorous kneading to achieve adequate development but will produce a denser crumb structure compared to high-hydration doughs. For example, a baguette dough might be 75% hydration, resulting in a very wet dough that requires coil folds, while a bagel dough might be 50-55% hydration, requiring firm kneading.
High-Hydration Doughs: Challenges and Techniques
Working with high-hydration doughs (often 75% hydration or more) presents unique challenges due to their stickiness and slackness. They can be difficult to handle and shape using traditional methods.
However, the high water content contributes to a more active fermentation and, with proper gluten development, leads to a significantly more open and airy crumb structure. Techniques specifically designed for high-hydration doughs include using wet hands or a bench scraper for handling, performing stretch and folds or coil folds in the bowl or on a wet surface instead of kneading, and utilizing extended bulk fermentation times to allow gluten to develop passively.
Another crucial technique for high-hydration doughs is using a strong bread flour with a high protein content (12-14%). The higher amount of glutenin in these flours can absorb more water and form a stronger network capable of supporting the high water load. Minimal handling and careful shaping on a well-floured or wet surface just before baking are also key to preserving the delicate structure. For instance, a ciabatta dough at 80% hydration relies almost entirely on time and gentle folding over 3-4 hours to build strength before being shaped minimally and baked.
Optimal Hydration for Different Baked Goods
The optimal hydration level varies significantly depending on the type of baked good you are making and the desired outcome.
- Lean Breads (like baguettes, rustic loaves): Often use high hydration (65-85%), aiming for an open, irregular crumb.
- Enriched Breads (like brioche, challah): Typically use moderate hydration (55-65%). The added fat and sugar interfere with gluten development, so a slightly lower hydration makes the dough more manageable.
- Pizza Dough: Varies widely, but often falls in the 60-70% range for a good balance of chew and crispness.
- Pasta Dough: Very low hydration (around 50%) to create a stiff, kneadable dough that holds its shape when cooked.
- Cake Batters: Very high hydration (often over 100% relative to flour weight, considering other liquids), but mixing is minimal to inhibit gluten development for a tender crumb.
- Cookie Doughs: Relatively low hydration, combined with high fat and sugar, to limit gluten development and ensure a tender, crumbly texture.
Understanding the typical hydration ranges for different products helps predict dough handling and guides techniques for achieving the desired texture.
The Role of Salt in Gluten Strengthening
Salt (sodium chloride) plays a vital, often overlooked, role in gluten development. While it might seem counterintuitive, salt strengthens the gluten network. It does this by tightening the protein structure and making the dough less sticky and easier to handle. Chemically, salt helps to neutralize some of the negative charges on the glutenin proteins, allowing them to get closer together and form stronger bonds. This results in a dough that is more elastic and less extensible – it resists stretching more and springs back more readily.
Adding salt too early, particularly in an autolyse, can hinder the initial hydration and enzymatic activity. Therefore, salt is typically added after the initial mixing or autolyse period, often alongside the yeast or starter. The standard salt percentage in bread dough is usually between 1.8% and 2.2% of the total flour weight. Using too little salt results in a slack, sticky dough with poor structure, while too much salt can inhibit yeast activity and make the gluten network excessively tight and difficult to stretch, leading to a dense loaf.
How Salt Affects Gluten Structure and Dough Elasticity
Salt has a significant impact on the viscoelastic properties of dough. By strengthening the protein-protein interactions, salt makes the gluten network more cohesive and ordered. This increased order translates to greater elasticity; the dough is better able to resist deformation and return to its original shape after stretching. While it increases elasticity, salt slightly decreases extensibility (the ability to stretch without breaking) compared to a salt-free dough. This balance between elasticity and extensibility is crucial for bread dough, allowing it to hold the gases produced during fermentation and oven spring without collapsing or tearing.
Consider two identical doughs, one with 2% salt and one with no salt. The salt-free dough will likely feel stickier and more slack, stretching easily but potentially tearing under tension because the gluten bonds are weaker. The salted dough will feel firmer, less sticky, and more resistant to stretching, springing back readily when poked. This firmer structure provided by salt is essential for shaping loaves that maintain their form and for achieving good oven spring.
Using Salt Effectively in Baking Recipes
To effectively use salt in your baking, follow these guidelines:
- Accurate Measurement: Always weigh your salt for precision. Even a small variation can impact flavor and dough structure.
- Timing: For most yeasted doughs, add salt after the initial mixing of flour and water (autolyse) or after the first few minutes of kneading. This allows the flour to hydrate properly first.
- Dispersion: Ensure the salt is evenly distributed throughout the dough. Undissolved salt granules can inhibit nearby yeast and create weak spots in the gluten network. Dissolving salt in a small amount of the recipe's water before adding can help, especially in low-hydration doughs.
- Adjust for Recipe: The optimal salt percentage can vary slightly depending on the recipe and desired flavor profile, but 1.8-2.2% is a good starting point for bread. Richer doughs or those with strong flavors might use slightly more or less.
- Use a fine-grained salt like table salt or fine sea salt for easier dissolution.
- Taste your dough (safely, before adding yeast if concerned) or baked goods to evaluate salt levels.
Optimizing Gluten for Specific Recipes
Gluten Development in Bread Making: Achieving the Perfect Loaf
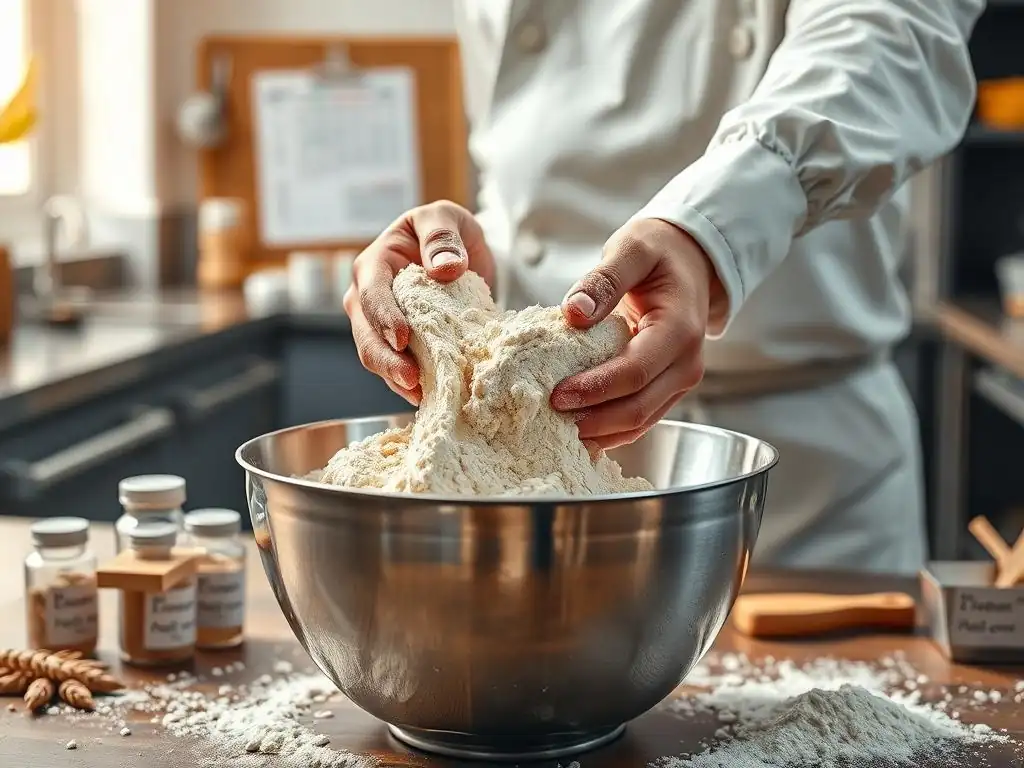
In bread making, the goal is typically to develop a strong, elastic, and extensible gluten network capable of trapping the carbon dioxide produced by yeast. This network allows the dough to rise during fermentation and expand dramatically in the oven (oven spring), resulting in a light, airy loaf with good volume and an open crumb structure. Achieving this requires selecting the right flour (high-protein bread flour is common), ensuring adequate hydration, and applying sufficient mechanical action through kneading or time through long fermentation with gentle folds.
The degree of gluten development needed depends on the specific bread type. A rustic sourdough or ciabatta benefits from a highly developed but extensible network achieved through high hydration and stretch-and-folds over several hours. A sandwich loaf made with commercial yeast might require more intensive kneading to develop a strong, tight network that creates a fine, even crumb. Monitoring the dough's progress using the windowpane test and adjusting kneading time or resting periods is key to optimizing gluten for your desired loaf.
Tips for Creating Strong Gluten Networks in Bread Dough
Here are some practical tips for maximizing gluten development in your bread dough:
- Use High-Protein Flour: Bread flour (12-14% protein) is ideal as it contains more gluten-forming proteins than all-purpose or cake flour.
- Hydrate Properly: Ensure your dough has sufficient water. While very high hydration can be challenging, inadequate water prevents proper protein hydration and bonding.
- Knead Thoroughly: Whether by hand or mixer, knead until the dough is smooth, elastic, and passes the windowpane test. This can take 10-15 minutes by hand or 6-10 minutes in a stand mixer on medium speed, depending on the dough.
- Incorporate Autolyse: Resting the flour and water mixture for 20-60 minutes before adding other ingredients significantly aids in initial gluten formation and makes subsequent kneading more efficient.
- Perform Stretch and Folds: For high-hydration or long-fermentation doughs, performing a series of stretch and folds during the first hour or two of bulk fermentation helps build strength gently without degassing the dough. Typically, 3-4 sets of folds are done at 30-minute intervals.
Troubleshooting Common Bread Baking Issues Related to Gluten
Several common bread baking problems stem from issues with gluten development:
- Dense, Heavy Loaf: Often caused by under-developed gluten. The network wasn't strong enough to trap gases and support the rise. Solution: Knead longer, ensure proper hydration, or incorporate stretch and folds.
- Dough Tears Easily: Indicates a weak gluten network, either from under-development or using low-protein flour. Solution: More kneading/folding, or check your flour type.
- Dough is Too Tight/Springs Back Excessively: Can be a sign of over-kneading or insufficient rest. The gluten is too strong and elastic. Solution: Allow the dough to rest (bench rest) to relax the gluten before shaping.
- Poor Oven Spring: Can result from either under- or over-developed gluten, or improper shaping/proofing. A weak network collapses, while an overly tight one resists expansion. Solution: Assess gluten development (windowpane test), adjust kneading/folding, ensure proper proofing.
Gluten Management in Pastry Making: Achieving Flaky Crusts
Unlike bread, the goal in many pastry applications, such as pie crusts, tarts, and biscuits, is to limit gluten development. Excessive gluten in pastries results in a tough, hard texture, which is undesirable. The desired texture is often tender and flaky. Flakiness in pastries is achieved by incorporating cold fat (like butter or shortening) into the flour in such a way that it creates distinct layers. During baking, the fat melts, creating steam that forces the layers apart. A strong gluten network would prevent these layers from separating properly.
Techniques used to inhibit gluten development in pastries include using low-protein flour (like pastry flour, ~8-10% protein), keeping ingredients cold (especially the fat and water), cutting the fat into the flour rather than mixing it thoroughly, minimizing the amount of liquid used, and handling the dough as little as possible. Overworking pastry dough activates gluten, leading to toughness. For example, a classic pie crust recipe calls for cutting cold butter into flour until it resembles coarse crumbs or small peas, using minimal ice water, and chilling the dough before rolling.
Techniques for Inhibiting Gluten Development in Pastries
Several key techniques help prevent excessive gluten formation in pastry doughs:
- Use Low-Protein Flour: Cake or pastry flour is preferred over bread flour. All-purpose flour can work, but results may be tougher.
- Keep Ingredients Cold: Cold fat and ice-cold water are crucial. Cold inhibits the hydration of flour proteins and keeps the fat solid in distinct pieces, which is essential for flakiness.
- Cut in the Fat: Instead of creaming or mixing thoroughly, fat is cut into the flour using a pastry blender, forks, or a food processor pulse method. This coats flour particles with fat, preventing them from hydrating fully and forming gluten. The fat should remain in visible pieces.
- Minimal Liquid: Use just enough liquid to bring the dough together. Excess water leads to more gluten development.
- Minimize Handling: Overworking the dough through excessive mixing or kneading activates gluten. Mix just until the dough barely comes together.
- Resting/Chilling: Chilling the dough after mixing allows the gluten network to relax and the fat to solidify, making the dough easier to roll and further inhibiting toughness.
Creating Tender and Delicate Pastry Crusts
Achieving a tender and delicate pastry crust relies directly on effectively managing gluten. The aim is a structure that holds together but easily breaks apart when bitten. This is the opposite of the chewy structure sought in bread. Using a combination of the inhibition techniques mentioned above is key. For a classic flaky pie crust, ensure your butter is very cold and cut into pieces ranging from pea-sized down to coarse meal. Use ice water sparingly, adding just enough tablespoon by tablespoon until the dough just holds together when squeezed.
Avoid the temptation to knead the dough smooth; it should look somewhat shaggy in the bowl. Gently press it into a disc, wrap, and chill for at least 30 minutes. When rolling, use minimal flour and work quickly to keep the dough cold. The small pieces of fat will melt in the oven, creating steam that pushes the dough layers apart, resulting in that desirable flaky texture. For a more tender (less flaky) crust like for a tart, you might cut the fat in more finely, closer to a sandy consistency, still using cold ingredients and minimal handling.
Gluten Control in Cake Baking: Achieving a Light and Airy Texture
In cake baking, the primary leavening is usually chemical (baking powder, baking soda) or mechanical (creaming butter and sugar, whipping eggs). While cake flour contains gluten-forming proteins, extensive gluten development is detrimental to the desired light, tender, and fine-crumbed texture. A strong gluten network would make the cake tough and potentially cause tunneling (large holes). Therefore, techniques are employed to minimize gluten formation while still providing just enough structure to support the batter during baking.
Low-protein flour (cake flour, ~7-9% protein) is often used because it forms less gluten than all-purpose or bread flour. Ingredients like fat and sugar also interfere with gluten development by coating flour particles (sugar also absorbs some water), limiting hydration. The mixing methods used in cake baking, such as the creaming method or reverse creaming method, are designed to incorporate air and distribute fat and sugar throughout the batter before the liquid is added, further inhibiting gluten formation.
Strategies for Balancing Gluten Development in Cakes
Balancing gluten development in cakes means creating just enough structure to hold the cake together without making it tough.
- Choose the Right Flour: Cake flour is preferred for its low protein content. If using all-purpose flour, you can sometimes approximate cake flour by replacing a small amount of flour with cornstarch (e.g., for every cup of AP flour, remove 2 tablespoons and replace with 2 tablespoons cornstarch).
- Use Fat and Sugar: High ratios of fat and sugar in cake recipes coat the flour particles, preventing full hydration and thus limiting gluten formation. This is why rich cakes are often very tender.
- Incorporate Air Early: Methods like creaming butter and sugar or whipping eggs incorporate air bubbles that serve as nucleation sites for leavening gases and provide early structure, reducing the reliance on gluten for lift.
- Minimize Mixing After Adding Liquid: Once wet ingredients are added, mix only until the dry ingredients are just combined. Overmixing at this stage rapidly develops gluten, leading to toughness. You might still see a few small lumps, which is preferable to overmixing.
- Use Chemical Leaveners: Baking powder and baking soda provide lift without relying on a strong gluten network to trap gases, further reducing the need for significant gluten development.
Achieving a Fine Crumb Structure in Cakes
A fine, velvety crumb structure is a hallmark of a well-made cake with properly controlled gluten. This is achieved by minimizing gluten strands, which tend to create a coarser, more open crumb (like in bread). Techniques like the reverse creaming method are particularly effective for a fine crumb. In this method, dry ingredients (flour, sugar, leavening, salt) are mixed first, then cold, softened butter is added and mixed until the mixture resembles wet sand. This coats the flour particles with fat before any liquid is introduced.
Finally, liquids (often including eggs and milk) are added gradually and mixed just until combined. This method ensures that gluten development is significantly inhibited from the start, resulting in a very tender cake with a consistently fine crumb. Using superfine sugar can also contribute to a finer crumb by dissolving more easily and interfering more effectively with gluten formation. The goal is a structure that is delicate and uniform, achieved by letting chemical leaveners and aerated fat/sugar do the heavy lifting, while gluten provides only minimal support.
Common Gluten Issues and Solutions
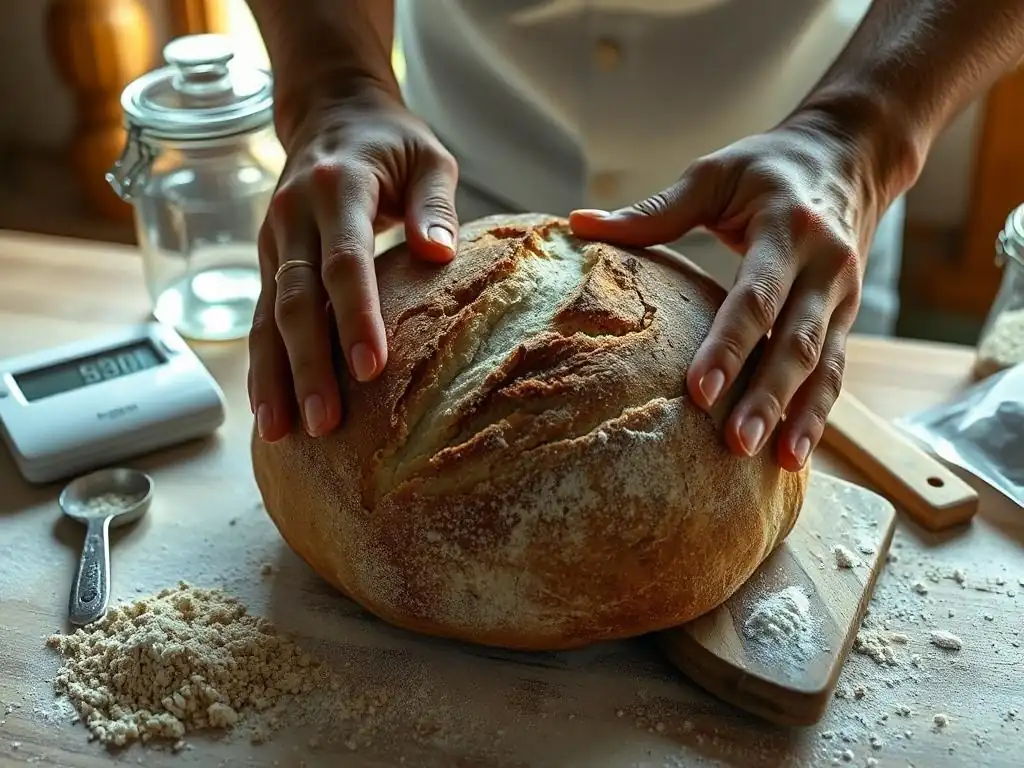
Understanding how gluten behaves allows you to diagnose and fix common baking problems. Many issues with texture, rise, and dough handling can be traced back to gluten development – either too much or too little. Recognizing the symptoms is the first step to correcting them and improving your bakes.
Dough Too Stretchy: Understanding Over-Development
If your dough feels very tight, resistant to stretching, and snaps back aggressively when you try to pull it, it might be over-developed. This happens when the gluten network becomes too tight and aligned, losing its extensibility. While it feels very elastic, it won't stretch easily to accommodate the gases produced during fermentation and oven spring. This can lead to loaves with poor volume, a tough crust, and a dense, sometimes rubbery, crumb. Over-development is often caused by kneading for too long or at too high a speed, especially with a stand mixer.
To fix over-developed dough: The best solution is often to let the dough rest. A bench rest of 20-30 minutes can allow the gluten network to relax slightly. If you suspect over-kneading early in the process, you might try incorporating a small amount of fat (like butter or oil) into the dough, which can help shorten the gluten strands and increase extensibility, though this isn't always effective if the development is severe. Prevention is key: monitor your dough's texture while kneading and stop as soon as it passes the windowpane test and feels smooth and elastic, but still extensible.
Dough Too Weak: Addressing Under-Development
Dough that is under-developed feels slack, sticky, and tears easily when stretched, without forming a thin membrane in the windowpane test. The gluten network hasn't fully formed or isn't strong enough to support the dough's structure. This leads to poor gas retention, resulting in low volume, a dense crumb, and potentially a flat, spread-out loaf. Under-development can be caused by insufficient kneading, inadequate hydration (too little water), using low-protein flour when a strong structure is needed, or adding too much fat or sugar too early in the process.
To fix under-developed dough: If the dough is still in the mixing stage, continue kneading until it reaches the desired consistency and passes the windowpane test. If you are using a minimal-knead method, ensure you are performing enough stretch and folds at appropriate intervals. Check your recipe's hydration level; if it seems too low for the flour type, you might be able to carefully work in a little more water.
Ensure you are using the appropriate flour type for your bake (e.g., bread flour for rustic loaves). Sometimes, simply giving the dough a bit more rest time during bulk fermentation can also help gluten develop passively.
Preventing Gluten Issues: Best Practices
Preventing gluten issues starts with understanding your ingredients and recipe.
- Know Your Flour: Use the type of flour recommended by the recipe (bread, all-purpose, cake) as each has a different protein content suited for specific gluten development needs.
- Measure Accurately: Use a kitchen scale to weigh flour and liquids for consistent hydration.
- Control Temperature: Warmer temperatures can speed up gluten development (and fermentation), while cold slows it down.
- Monitor Mixing/Kneading: Don't rely solely on time; feel the dough and use the windowpane test to assess development. Stop when it's just right.
- Understand Ingredient Interactions: Be aware that fat and sugar inhibit gluten, while salt strengthens it. Add these ingredients at the appropriate stages.
- Handle Appropriately: Use gentle techniques like stretch and folds for high-hydration doughs and minimal handling for tender pastries and cakes.
Following these practices will significantly reduce the likelihood of encountering gluten-related problems in your baking.
Gluten-Free Baking Techniques: Adapting Recipes
For those who need or choose to avoid gluten, mastering glutenfree baking techniques tips is essential. Gluten-free baking presents a unique challenge because you are working without the primary structural protein found in traditional flour. Simply substituting gluten-free flour cup-for-cup in a standard recipe rarely yields good results because you lose the elasticity and structure that gluten provides. Successful glutenfree baking techniques tips involve understanding the roles of alternative ingredients and employing methods to mimic the functions of gluten.
A key aspect of glutenfree baking techniques tips is recognizing that different gluten-free flours have vastly different properties. Rice flour is fine but can be grainy; almond flour adds moisture and richness but doesn't absorb much liquid; tapioca starch provides chewiness and elasticity. Therefore, gluten-free recipes often rely on a blend of several flours and starches to achieve a balanced texture and structure. Furthermore, binders like xanthan gum or psyllium husk are critical for providing the necessary cohesion and elasticity that gluten would normally provide.
Understanding Gluten-Free Baking Challenges
The main challenge in gluten-free baking is replacing the unique viscoelastic properties of gluten. Gluten provides structure, elasticity, extensibility, and the ability to trap gases. Without it, baked goods tend to be dense, crumbly, and lack the characteristic chewiness or rise of their gluten-containing counterparts. Achieving a good crumb structure, whether open and airy like bread or fine and tender like cake, requires a different approach to ingredient selection and technique. Hydration levels also need careful adjustment, as gluten-free flours often absorb liquids differently than wheat flour.
Another challenge is achieving a pleasant texture and mouthfeel. Gluten-free baked goods can sometimes be dry, gritty, or gummy. This is often due to using a single gluten-free flour, improper hydration, or insufficient binding. Using a blend of flours, incorporating binders effectively, and ensuring adequate moisture through fats, eggs, or dairy are crucial glutenfree baking techniques tips to overcome these hurdles. For instance, using a mix of rice flour, sorghum flour, and tapioca starch can yield better results than just using rice flour alone.
The Role of Gluten Substitutes
Since gluten is absent, gluten-free baking relies heavily on substitutes and binders to provide structure and cohesion. These ingredients help hold the dough or batter together, prevent crumbling, and trap gases to allow for some rise.
Using Xanthan Gum, Psyllium Husk
Two of the most common and effective gluten substitutes are xanthan gum and psyllium husk.
- Xanthan Gum: This is a polysaccharide produced by the fermentation of sugar by a bacterium. When hydrated, it forms a gel-like substance that provides elasticity and viscosity to gluten-free doughs and batters. It helps prevent crumbling and gives baked goods a more cohesive structure. The amount used is typically very small, usually 0.25% to 0.5% of the flour weight for cakes and muffins, and 0.5% to 1% for bread doughs. Too much xanthan gum can result in a gummy texture.
- Psyllium Husk (or Powder): Derived from the seeds of the Plantago ovata plant, psyllium husk is a soluble fiber that absorbs a significant amount of water, forming a viscous gel. It provides structure, elasticity, and helps create a more bread-like texture and crumb in gluten-free baking, particularly for loaves. It also improves the dough's handling properties. Psyllium is often used at a slightly higher percentage than xanthan gum, typically 1% to 2% of the flour weight, especially in bread recipes.
Both xanthan gum and psyllium husk are vital glutenfree baking techniques tips for mimicking gluten's function, often used together or separately depending on the desired outcome.
Essential Gluten-Free Baking Techniques Tips
Mastering gluten-free baking requires adopting specific techniques tailored to the properties of gluten-free ingredients. One of the most important glutenfree baking techniques tips is to use a precise recipe from a reliable source, as the ratios of flours, starches, and binders are critical. Unlike wheat dough, which develops structure through kneading, gluten-free doughs and batters often rely on mixing just until combined to avoid a gummy texture. Rest periods can still be beneficial for hydration, but they don't develop a gluten network.
Another key glutenfree baking techniques tips is adjusting hydration. Gluten-free flours absorb liquids differently and often require more moisture than wheat flour. However, adding too much liquid can lead to a gummy result. It's often a fine balance. Incorporating fats and eggs generously is also a common technique, as they add richness, moisture, and contribute to structure and tenderness in the absence of gluten. For instance, many gluten-free cake recipes have a higher fat-to-flour ratio than traditional ones.
Combining Different Gluten-Free Flours
A crucial glutenfree baking techniques tips is understanding the necessity and function of flour blends. Using a single gluten-free flour, like rice flour, often results in a dense, dry, or crumbly product. Blending different flours and starches leverages their individual strengths to create a more balanced texture and performance. A typical gluten-free flour blend might include a mix of:
- Whole Grain Flours: Brown rice flour, sorghum flour, oat flour, buckwheat flour – these add nutrients, flavor, and some structure.
- Starches: Tapioca starch, potato starch, cornstarch – these provide lightness, tenderness, and help with browning and crisping.
- Nut/Seed Flours: Almond flour, coconut flour – these add moisture, richness, and flavor but absorb liquids differently and don't contribute significant structure.
The specific ratio of these components is critical and varies depending on whether you're making bread, cakes, cookies, or muffins. Using a pre-mixed, reputable gluten-free blend can simplify this, but understanding the role of each component allows for customization and troubleshooting. For example, increasing the starch proportion in a blend can lead to a lighter, more tender cake.
Rice Flour, Tapioca Starch, Almond Flour
Let's look closer at some common components in gluten-free flour blends, crucial for understanding glutenfree baking techniques tips:
- Rice Flour (White and Brown): White rice flour is finely ground and relatively neutral in flavor, making it a staple base. Brown rice flour includes the bran, adding more nutrients and a slightly nutty flavor. Both can result in a somewhat gritty texture if not finely ground or properly hydrated. They provide some structure but lack elasticity.
- Tapioca Starch/Flour: Derived from the cassava root, tapioca starch provides elasticity and chewiness, helping to bind ingredients together. It gives gluten-free baked goods a pleasant texture, especially in breads and pizza crusts. It also contributes to crisping.
- Almond Flour: Made from ground almonds, this flour is high in fat and protein but low in carbohydrates. It adds moisture, richness, and a slightly sweet, nutty flavor. It doesn't absorb much liquid compared to grain flours and provides less structure, often resulting in denser baked goods unless combined with other flours and binders. It's excellent for cakes, muffins, and cookies where tenderness is desired.
These are just a few examples; many other gluten-free flours and starches exist, each contributing unique properties. Effective glutenfree baking techniques tips involve understanding how these components interact and balancing them appropriately.
Advanced Gluten-Free Baking: Achieving Similar Results
While gluten-free baking has its limitations, advanced glutenfree baking techniques tips and ingredients can help achieve results remarkably similar to traditional baked goods, particularly in bread making. This often involves a deeper understanding of ingredient interactions and sometimes using specialized ingredients like enzymes or modified starches that are less common in home baking but used in commercial gluten-free products. These ingredients can improve texture, shelf life, and mimic gluten's behavior more closely.
Techniques like tangzhong or yudane (creating a cooked paste of flour and liquid) can also be adapted for gluten-free flours. This process pre-gelatinizes starches in the flour, allowing them to hold significantly more moisture. When incorporated into a gluten-free dough, this can lead to a much softer, more tender crumb and extend the shelf life of gluten-free bread, which often goes stale quickly. This is an example of how advanced glutenfree baking techniques tips borrow and adapt methods from traditional baking science.
Using Enzymes, Modified Starches
In commercial or advanced home gluten-free baking, enzymes and modified starches can play a role in improving texture and structure.
- Enzymes: Amylase enzymes, for example, can break down starches into sugars, which feeds yeast and contributes to better browning and crust development. Protease enzymes can modify proteins in gluten-free flours (though less significant than in wheat), potentially impacting texture. These are often used in very small amounts and are food-safe.
- Modified Starches: These are starches that have been physically, chemically, or enzymatically altered to change their properties, such as increasing their ability to absorb water, gel, or resist retrogradation (staling). Modified tapioca starch, for instance, might be used in gluten-free bread to improve elasticity and crumb structure beyond what regular tapioca starch provides.
While not typically found in standard home baking recipes, understanding that these ingredients exist highlights the ongoing innovation in glutenfree baking techniques tips aimed at closing the gap between gluten-free and traditional baked goods.
Task List for Advanced Gluten-Free Baking:

- [ ] Experiment with different gluten-free flour blend ratios.
- [ ] Accurately weigh binders like xanthan gum or psyllium husk.
- [ ] Try the tangzhong method adapted for gluten-free bread.
- [ ] Research the use of enzymes or modified starches for specific goals (optional).
- [ ] Ensure proper hydration levels based on the specific flour blend used.
- [ ] Allow adequate resting time for doughs to hydrate fully.
Frequently Asked Questions
What are some common challenges in gluten-free baking?
Gluten-free baking often faces challenges like lack of structure and binding, leading to crumbly textures. Achieving the right moisture balance is also crucial to avoid dryness.
What is the role of xanthan gum in gluten-free baking?
Xanthan gum acts as a gluten substitute, providing structure and binding ability to gluten-free recipes. It helps prevent the final product from being too crumbly.
Can I substitute all-purpose flour directly with a gluten-free flour blend?
Generally, a 1:1 substitution isn't recommended. Gluten-free blends often require adjustments to liquid and binding agents like xanthan gum for optimal results.
What are some alternative flours I can use in gluten-free baking besides rice flour?
You can explore options like almond flour for a nutty flavor, oat flour for a softer texture, or tapioca starch for binding and lightness.
What tips can help improve the texture of my gluten-free baked goods?
Using room temperature ingredients, avoiding overmixing, and experimenting with different flour blends can significantly improve the texture. Also, consider adding moisture through ingredients like applesauce.
Final Reflection: The Flour Power of Gluten-Free Baking
Mastering gluten-free baking isn't just about avoiding gluten; it's about unlocking a world of delicious possibilities. The techniques explored in this article—from understanding the unique properties of gluten-free flours to mastering hydration and achieving the perfect texture—are more relevant than ever in a world increasingly focused on dietary diversity and inclusive culinary experiences. The demand for delicious and satisfying gluten-free options continues to grow, and with the right knowledge, anyone can create truly exceptional bakes.
The journey of perfecting gluten-free baking has been a personal one for me, filled with both frustrating failures and exhilarating successes. It's a testament to the power of experimentation and the importance of understanding the fundamental science behind baking. The subtle nuances of each gluten-free flour, the critical role of starches and binders, and the impact of proper mixing techniques—all these factors contribute to the final product. As I've learned, and as many gluten-free bakers will attest, the results are worth the effort. The best things in life are worth fighting for, and a perfect gluten-free cake is no exception.
(Paraphrased)
Now, it's your turn. Take the knowledge you've gained from this article and embark on your own gluten-free baking adventures. Don't be afraid to experiment, to adapt recipes to your preferences, and to embrace the challenges as opportunities for growth. The world of gluten-free baking is vast and rewarding, and with dedication and a little flour power, you can create bakes that are not only delicious but also deeply satisfying. So, gather your ingredients, preheat your oven, and let the baking begin!
Unleash Your Inner Baking Guru!
Thanks for diving into the world of gluten-free baking with us! We hope you've gained valuable insights and new techniques to elevate your gluten-free creations. Now it's time to put your newfound knowledge into practice.
- Try out one of the advanced techniques from the article this week – you might be surprised at the results! Start with the method that seems most appealing, and don't be afraid to experiment.
- Share your baking triumphs (or even your learning experiences!) with our community on social media using #BakeWithEaseGlutenFree – we'd love to see what you create!
- Subscribe to our newsletter for more exclusive tips and tricks, delivered straight to your inbox.
What exciting gluten-free recipe will you tackle first?