
Understanding Flour Absorption: Why Hydration Matters in Dough

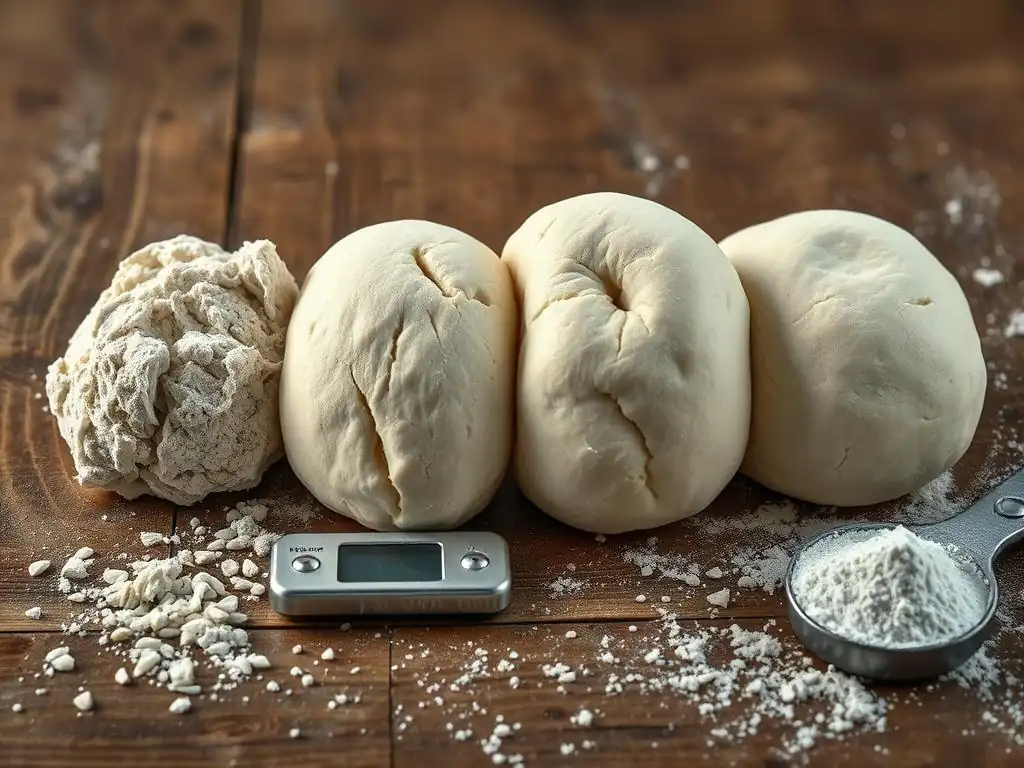
Welcome to BakeWithEase, your trusted guide to demystifying the delicious world of baking! Ever wondered why some doughs are perfectly smooth while others are stubbornly sticky? The secret often lies in understanding flour absorption. This article dives deep into the science behind hydration and its profound impact on your dough, unlocking the secrets to creating consistently perfect results. Curious to learn how mastering this crucial element can elevate your baking from good to extraordinary? Let's explore!
- Understanding Flour Absorption: Achieving Optimal Dough Hydration
- Introduction to Flour Hydration in Baking
- What is Flour Absorption? A Deep Dive
- The Impact of Hydration on Dough Characteristics
- The Importance of Accurate Hydration in Recipes
- Factors Affecting Flour's Water Absorption
- Hydration and Different Types of Flour
- Troubleshooting Dough Hydration Issues
- Advanced Techniques for Optimizing Flour Hydration
- Mastering Dough Hydration: Tips and Tricks
- Hydration in Practice: Application and Evaluation
- Conclusion: Achieving Baking Success Through Flour Hydration Mastery
-
Frequently Asked Questions
- How does flour absorption affect my dough's consistency?
- Why is hydration level important in a dough recipe?
- What factors influence flour's ability to absorb water?
- How can I adjust my dough recipe if my flour isn't absorbing water properly?
- Where can I find simple dough recipes that account for flour absorption?
- Final Reflection: The Essential Role of Hydration in Dough Mastery
- Unlock Your Baking Potential: Master Flour Hydration Today!
Understanding Flour Absorption: Achieving Optimal Dough Hydration
Introduction to Flour Hydration in Baking
Why Flour Absorption is Crucial for Baking Success
Achieving the perfect dough consistency is fundamental to successful baking, and this largely hinges on understanding flour absorption and hydration. Flour, the backbone of most baked goods, acts like a sponge, soaking up water or other liquids. The amount of liquid it absorbs, known as hydration, directly impacts the dough's texture, structure, and handling properties.
Too little hydration results in a stiff, hard-to-work dough that yields dry, dense baked goods. Conversely, too much hydration leads to a sticky, unmanageable dough that can collapse or result in a gummy texture. Mastering flour absorption hydration dough recipe techniques is therefore paramount for bakers aiming for consistent, high-quality results, whether crafting a crusty loaf of bread or a tender cake.
The ability of flour to absorb and retain water is influenced by several factors, including protein content, starch composition, and milling process. For instance, bread flour, with its higher protein content (typically 12-14%), has a greater capacity for water absorption compared to cake flour (around 7-9% protein). This difference dictates the hydration levels required in different recipes.
Ignoring the nuances of flour absorption means flying blind in the kitchen, often leading to frustration and unpredictable outcomes. By paying close attention to how flour interacts with liquid, bakers can troubleshoot issues, adapt recipes, and confidently create doughs that perform beautifully, resulting in baked goods with the desired crumb structure, texture, and volume.
Understanding Hydration for Consistent Baking Results
Consistency is key in baking, and a deep understanding of hydration is your most powerful tool for achieving it. Every bag of flour, even of the same type, can vary slightly in its absorption capacity depending on factors like storage conditions (humidity) and the specific wheat variety used.
This means a flour absorption hydration dough recipe might require minor adjustments based on the flour you are using on a particular day. Experienced bakers learn to feel the dough, recognizing when it has reached the optimal hydration level for the intended bake, rather than relying solely on the recipe's stated hydration percentage.
Developing an intuitive sense for dough hydration comes with practice. By observing how the dough comes together, its stickiness, elasticity, and how it feels in your hands, you can make informed decisions about adding a little more liquid or flour.
This ability to adjust on the fly is what separates a good baker from a great one. It allows you to compensate for variables and ensure that, regardless of minor fluctuations in ingredients or environment, your dough is always in the ideal state for proofing, shaping, and baking, leading to reliably excellent outcomes every time you use a flour absorption hydration dough recipe.
What is Flour Absorption? A Deep Dive
Defining Flour Absorption Capacity
Flour absorption capacity refers to the maximum amount of water or liquid that a given weight of flour can absorb and retain. This capacity is typically expressed as a percentage of the flour's weight. For example, if 100 grams of flour can absorb 60 grams of water, its absorption capacity is 60%.
This percentage is a critical piece of information, especially in professional baking and for anyone wanting to understand the science behind a flour absorption hydration dough recipe. It's not just about how much water the flour can hold initially, but how much it can hold throughout the mixing, kneading, proofing, and baking processes.
Different flour types have varying absorption capacities due to differences in their composition, particularly protein and starch content, and the extent of starch damage during milling. High-protein flours like bread flour generally have higher absorption capacities (often 60-70% or more) because protein molecules, especially gluten-forming proteins, are excellent at absorbing water. Low-protein flours, such as cake flour, have lower absorption capacities (typically 50-55%). Understanding this capacity is the first step in controlling dough hydration and predicting how a flour absorption hydration dough recipe will behave.
How Flour Type Affects Water Absorption Rates
The type of flour used is a primary determinant of its water absorption rate and capacity. As mentioned, protein content plays a significant role; the higher the protein, the more water the flour can typically absorb.
For example, a strong bread flour with 13% protein might comfortably handle 65-70% hydration or even higher for artisan loaves, while a soft cake flour with 8% protein is usually hydrated at around 50-55% for tender cakes. This difference isn't just about the amount of water; it's also about how quickly the water is absorbed and how firmly it is held within the dough structure.
Beyond protein, the presence of bran and germ in whole grain flours significantly increases their absorption capacity. Whole wheat flour, for instance, can absorb substantially more water (often 75-85% or even more) than white flour because the bran layers are highly fibrous and soak up a lot of liquid. However, bran can also interfere with gluten development, so while the hydration is higher, the dough might feel less elastic than a white flour dough at a similar (relative) hydration level. Understanding these differences is vital when working with various flour types in a flour absorption hydration dough recipe.
The Science Behind Flour Hydration and Dough Development
The science of flour hydration is fascinating and involves the interaction of water with the flour's main components: starch and protein. When water is added to flour, it is rapidly absorbed by both starch granules and protein molecules. Starch granules absorb water and swell, contributing to the dough's initial consistency. However, it's the protein, specifically glutenin and gliadin, that undergoes the most transformative change. These proteins, when hydrated and worked (through mixing or kneading), link together to form a complex, elastic network called gluten.
This gluten network is crucial for trapping the gases produced by yeast or leavening agents, allowing the dough to rise and creating the open, airy structure in baked goods like bread. The amount of water available significantly impacts how effectively the gluten network can form and develop. Sufficient hydration allows the protein molecules to move freely and bond efficiently.
Too little water restricts this movement, resulting in poor gluten development and a dense product. Too much water can dilute the proteins, making the network weak and sticky. Thus, the precise hydration level in a flour absorption hydration dough recipe is a delicate balance that directly influences gluten development and, consequently, the final texture and volume of the bake.
The Impact of Hydration on Dough Characteristics
Dough Consistency and the Role of Water
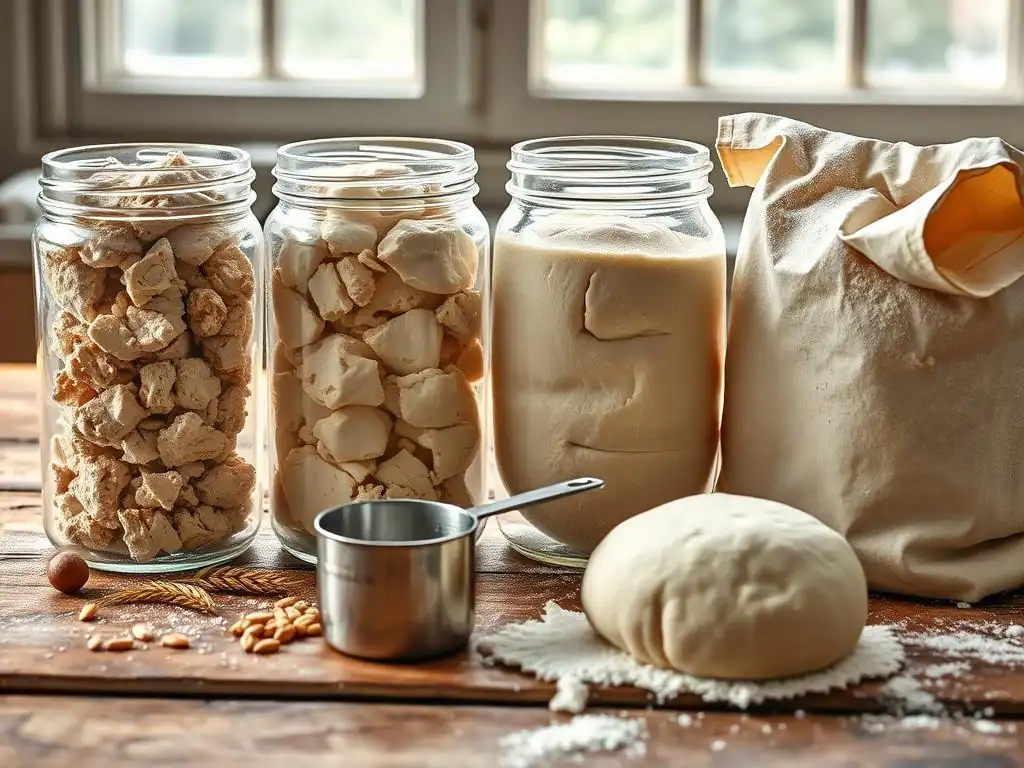
The consistency of dough is perhaps the most immediate and noticeable result of its hydration level. Water acts as the solvent that allows the dry flour particles to come together and form a cohesive mass. At low hydration levels (e.g., 50-55% for white flour), the dough will be stiff, firm, and relatively dry to the touch. It might be crumbly initially but can be worked into a smooth, albeit tough, dough with sufficient kneading. This consistency is often desired for pastries like pie crusts or some types of cookies where minimal gluten development is preferred for tenderness.
As hydration increases (e.g., 60-70% for white flour), the dough becomes softer, more pliable, and slightly sticky. It's easier to knead and work with, and it develops gluten more readily.
Higher hydration levels (75% and above, especially for high-protein or whole grain flours) result in very soft, often slack and sticky doughs that may be difficult to handle by hand but are favored for artisan breads like ciabatta or focaccia, contributing to an open, airy crumb structure. The feel and handling of the dough are direct indicators of its hydration, guiding the baker in a flour absorption hydration dough recipe.
How Hydration Affects Dough Elasticity and Extensibility
Hydration plays a critical role in determining the dough's elasticity and extensibility – two properties essential for successful bread baking. Elasticity is the dough's ability to spring back to its original shape after being stretched, while extensibility is its ability to be stretched or pulled without tearing. These properties are primarily governed by the gluten network. Adequate hydration allows the gluten proteins to fully hydrate and form strong, flexible bonds.
A well-hydrated dough with good gluten development will be both elastic and extensible. It will resist stretching initially (elasticity) but can then be stretched thinly without breaking (extensibility). Low hydration limits gluten development, resulting in a dough that is less elastic and may tear easily when stretched.
Very high hydration can make the gluten network so slack that while the dough is extensible, it might lack the elasticity needed to hold its shape during proofing and baking. Balancing these properties through careful hydration in a flour absorption hydration dough recipe is key to achieving good oven spring and a desirable crumb structure.
Understanding Dough Stickiness and Over-Hydration
Dough stickiness is a common challenge, especially for novice bakers, and it is directly related to hydration levels. While some degree of stickiness is normal and even desirable in higher hydration doughs, excessive stickiness usually indicates over-hydration. When too much water is added relative to the flour's absorption capacity, the water molecules essentially get in the way of the gluten proteins trying to bond with each other. This results in a weak, loose gluten network that cannot effectively bind all the water and other ingredients, causing the dough to cling excessively to hands and surfaces.
Over-hydrated dough can be difficult, if not impossible, to shape effectively. It may spread out rather than hold tension, leading to flat loaves. While kneading can help develop the limited gluten structure present, it often doesn't fully resolve the issue if the hydration is significantly too high. Recognizing the point where dough transitions from ideally hydrated (perhaps slightly tacky) to over-hydrated (excessively sticky and slack) is a crucial skill. It emphasizes the importance of accurate measurement and careful observation when working with any flour absorption hydration dough recipe.
The Importance of Accurate Hydration in Recipes
Why Recipe Hydration Ratios Matter
Recipe hydration ratios are fundamental guidelines that provide a starting point for achieving the desired dough consistency and structure for a specific baked good. The hydration ratio is typically expressed as the weight of liquid divided by the weight of flour, multiplied by 100 (Baker's Percentage). For example, a recipe calling for 500g flour and 325g water has a hydration of (325/500) * 100 = 65%. This percentage is a powerful tool because it remains constant regardless of the batch size, allowing bakers to scale recipes up or down reliably.
Following the stated hydration ratio in a flour absorption hydration dough recipe is important because the recipe developer has chosen that specific level based on the type of flour, the desired gluten development, and the intended final product texture. A recipe for crusty artisan bread might call for 70-80% hydration to achieve an open crumb, while a recipe for soft sandwich bread might use 60-65% hydration for a finer, more even crumb. Deviating significantly from this ratio without understanding the consequences will likely lead to a dough that handles differently and a finished product that doesn't meet expectations.
Measuring Flour and Water for Consistent Results
Accurate measurement of ingredients, especially flour and water, is absolutely critical for controlling hydration and achieving consistent results from any flour absorption hydration dough recipe. The most reliable method for measuring baking ingredients is by weight using a digital kitchen scale. Measuring flour by volume (cups) can lead to significant variations depending on how the flour is scooped and packed. A cup of flour can weigh anywhere from 120g to 150g or more, leading to wildly different hydration levels even if the water is measured accurately.
Water should also be measured by weight (1 gram of water = 1 milliliter), as volume measurements can be less precise, especially for small quantities. Using a scale ensures that you are hitting the target hydration percentage specified in the flour absorption hydration dough recipe every time. This precision removes a major variable in the baking process, making it easier to troubleshoot issues and consistently produce high-quality baked goods. Get yourself a reliable scale – it's one of the best investments a baker can make.
Adjusting Hydration Levels Based on Flour Type and Environment
While a flour absorption hydration dough recipe provides a starting point, savvy bakers know that adjustments are often necessary. As discussed, different brands or batches of the same type of flour can have slightly different absorption capacities. Additionally, environmental factors like humidity can affect how much moisture the flour has already absorbed from the air. In a dry climate, flour might be drier and require slightly more water, while in a humid climate, it might need a little less.
To account for these variations, it's best to initially withhold a small amount of the recipe's water (say, 5-10%) and gradually add it as you mix the dough, observing how the flour is absorbing the liquid and how the dough is feeling. You might not need all the water, or you might even need a tiny bit more. Pay attention to the dough's consistency – is it coming together?
Is it too stiff or too slack? Is it developing gluten? Learning to make these small, intuitive adjustments based on feel and observation is a mark of baking skill and ensures optimal hydration regardless of minor ingredient or environmental variables when following a flour absorption hydration dough recipe.
Factors Affecting Flour's Water Absorption
Protein Content and Hydration Needs
One of the most significant factors determining flour's water absorption capacity is its protein content, specifically the amount of gluten-forming proteins (glutenin and gliadin). These proteins are hydrophilic, meaning they have a strong affinity for water. When water is added, they absorb it and begin to form the complex, elastic gluten network upon mixing and kneading. Flours with higher protein content, such as bread flour (12-14% protein), can absorb and hold more water than flours with lower protein content, like cake flour (7-9% protein) or pastry flour (9-10% protein).
This difference in protein content directly translates to different hydration needs in a flour absorption hydration dough recipe. A recipe designed for bread flour will typically have a higher hydration percentage than a recipe for cake flour. For instance, a typical baguette recipe using high-protein bread flour might call for 75% hydration, while a standard yellow cake recipe using low-protein cake flour might only require around 50-55% hydration relative to the flour weight, primarily for moistening the batter rather than developing a strong gluten structure. Understanding the protein content of your flour is crucial for predicting its hydration requirements.
Starch Damage and Its Influence on Water Uptake
Beyond protein, the starch component of flour also absorbs water, though differently than protein. Healthy, undamaged starch granules absorb water primarily through their surface and swell gradually. However, starch granules can be damaged during the milling process, especially with certain types of mills or if the wheat is particularly hard. Damaged starch granules absorb water much more rapidly and in larger quantities than undamaged ones, often absorbing two to four times their weight in water compared to undamaged starch absorbing only about one-third its weight.
While this might seem like it would increase overall absorption capacity, damaged starch doesn't hold onto the water as effectively during baking. Dough made with flour having high levels of damaged starch (e.g., over 8-10% damaged starch, whereas ideal is around 4-6%) can feel overly sticky and slack despite high hydration.
The water absorbed by damaged starch is less available for gluten development and can lead to a gummy texture in the final product. While not always specified on packaging, understanding the potential impact of starch damage helps troubleshoot sticky dough issues even when following a standard flour absorption hydration dough recipe.
The Role of Gluten Development in Hydration
While water is necessary for gluten formation, the process of gluten development itself also influences how the dough handles hydration. As the gluten network forms and strengthens through mixing and kneading, it becomes more capable of holding onto the absorbed water. A well-developed gluten network forms a continuous, elastic structure that effectively traps water within its matrix, reducing stickiness and creating a cohesive dough.
This is why processes like autolyse (mixing flour and water and letting it rest before adding other ingredients) or prolonged fermentation can improve dough handling even at high hydration levels. The rest period allows the flour to fully hydrate and enzymatic activity to begin breaking down proteins, and the subsequent kneading or stretching and folding helps align the hydrated proteins into a stronger network. The better the gluten development, the more manageable a higher hydration dough becomes, allowing bakers to push hydration levels in a flour absorption hydration dough recipe for desired textural outcomes like a very open crumb.
Hydration and Different Types of Flour
Bread Flour Hydration: Achieving Optimal Gluten Development
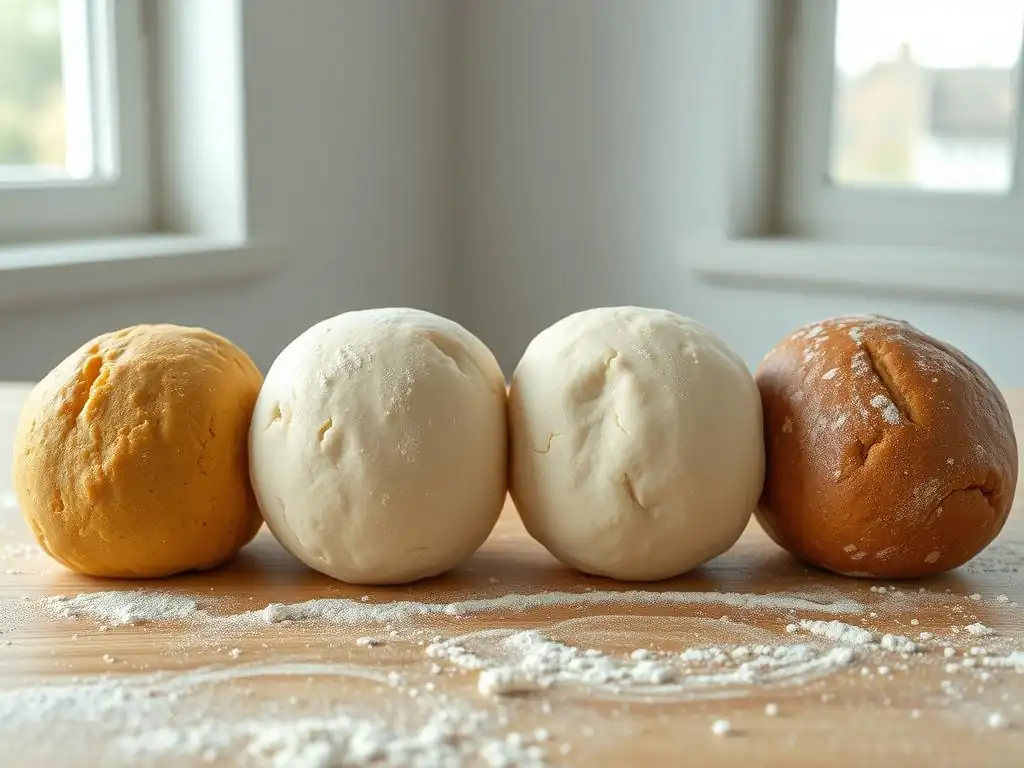
Bread flour, with its high protein content (typically 12-14%), is specifically milled for yeast-leavened breads where strong gluten development is essential for structure and volume. Its high protein means it has a high water absorption capacity, generally ranging from 60% to 75% or even higher for very strong flours or specific bread types like ciabatta or focaccia. The higher hydration levels possible with bread flour allow for the formation of a robust gluten network that can trap significant amounts of carbon dioxide gas produced during fermentation.
Optimal hydration for bread flour depends on the specific bread being made and the desired crumb structure. A standard sandwich loaf might use 60-65% hydration for a fine, even crumb, while a rustic artisan loaf might use 70-80% hydration or more to encourage a very open, irregular crumb with large holes. Achieving the right hydration in a bread flour absorption hydration dough recipe is key to developing sufficient gluten strength without making the dough overly difficult to handle. It's a balance between providing enough water for gluten formation and maintaining a manageable dough consistency.
All-Purpose Flour Hydration: Balancing Structure and Tenderness
All-purpose flour is designed to be versatile, suitable for a wide range of baked goods from cakes and cookies to breads and pastries. It has a moderate protein content, typically ranging from 10% to 12%. This means its water absorption capacity is lower than bread flour but higher than cake flour. All-purpose flour hydration levels usually fall between 55% and 65% in bread recipes, depending on the desired outcome, and even lower for cakes, cookies, or pastries.
When used for bread, all-purpose flour can still develop a decent gluten network, but it may require slightly lower hydration than bread flour to achieve a similar dough consistency, or longer kneading times to develop sufficient strength at higher hydration. For cakes and cookies, hydration levels are much lower, as the goal is minimal gluten development to ensure tenderness. Understanding this versatility and its impact on hydration is important when adapting a flour absorption hydration dough recipe or using AP flour in place of another type.
Cake Flour Hydration: Creating a Tender Crumb
Cake flour is a soft, low-protein flour (typically 7-9%) that is finely milled and often bleached, which slightly alters its starch structure to hold more liquid and sugar. Its low protein content means it has the lowest water absorption capacity among common wheat flours. Hydration levels in cake recipes are not typically discussed in the same "baker's percentage" terms as bread hydration, as the structure relies more on chemical leaveners and fat than gluten. However, the ratio of liquid to flour is crucial for achieving the characteristic tender, fine crumb of cakes.
Using too much liquid relative to cake flour's absorption capacity can result in a weak structure that collapses or becomes gummy. Too little liquid leads to a dry, crumbly cake. While a strict "hydration percentage" isn't the focus, the principle of matching liquid quantity to flour type for desired texture holds true. Cake recipes are carefully formulated to provide just enough liquid for the low-protein flour to create a delicate batter that sets into a tender, light structure upon baking.
Whole Wheat Flour Hydration: Addressing Bran's Impact on Water Absorption
Whole wheat flour includes the bran, germ, and endosperm of the wheat kernel, unlike white flour which only contains the endosperm. The presence of bran and germ significantly impacts the flour's water absorption. Bran is highly fibrous and absorbs a large amount of water, and it does so more slowly than the starch and protein in the endosperm. This gives whole wheat flour a much higher water absorption capacity than white flours, often requiring 75% hydration or even up to 100% or more for some recipes.
However, bran particles can also act like tiny razors, cutting the developing gluten strands during mixing and kneading. This means that while whole wheat flour absorbs more water, the resulting dough may feel less elastic and strong than a white flour dough at a comparable relative hydration. Bakers often use techniques like longer autolyse periods, adding vital wheat gluten, or combining whole wheat with white flour to mitigate the bran's interference with gluten development and manage the high hydration required for a workable whole wheat flour absorption hydration dough recipe.
Troubleshooting Dough Hydration Issues
Common Problems: Sticky Dough, Dry Dough, and Inconsistent Results
Dealing with dough that is either too sticky or too dry are among the most common challenges bakers face. Sticky dough is usually a sign of over-hydration – too much water relative to the flour's absorption capacity – or insufficient gluten development to handle the amount of water present. It clings excessively to hands and surfaces, is difficult to shape, and may spread instead of holding tension. Dry dough, conversely, results from under-hydration. It feels stiff, crumbly, hard to bring together, and resists stretching or kneading. It often yields dense, dry baked goods.
Inconsistent results, where the same flour absorption hydration dough recipe yields different outcomes each time, are often traceable to variations in hydration that stem from inaccurate measurement (especially measuring flour by volume), differences in flour absorption capacity between batches or brands, or environmental factors like humidity. Learning to recognize the signs of improper hydration and knowing how to correct them is essential for consistent baking success.
Solutions for Over-Hydrated Dough: Adding Flour and Adjusting Kneading
If you find your dough is excessively sticky after the initial mix, indicating over-hydration, the most straightforward solution is to gradually add small amounts of flour. Add a tablespoon or two at a time, incorporating it fully before deciding if more is needed. Be cautious not to add too much, which can lead to a dry dough. Kneading the dough for a bit longer can also help. As gluten develops further, the network strengthens and becomes better able to absorb and manage the water, often making a slightly sticky dough more manageable.
For very high hydration doughs that are meant to be sticky (like ciabatta), using wet hands or a bench scraper for handling, rather than relying on adding flour, is the correct approach. However, if the stickiness is unintentional in a standard flour absorption hydration dough recipe, adding flour and increasing kneading time are your primary tools to bring the hydration level and gluten development into balance.
Solutions for Under-Hydrated Dough: Gradually Adding Water and Allowing Rest
When dough feels too stiff, dry, and crumbly, it is under-hydrated. The solution is to add more liquid. This should be done gradually, a teaspoon or tablespoon at a time, especially if the dough has already been kneaded for a while. Adding too much water at once can disrupt the developed gluten structure. Incorporate the small amount of water by kneading or folding it into the dough until it is absorbed before adding more.
Allowing the dough to rest for 5-10 minutes after adding water can help the flour absorb the new liquid more effectively before you continue kneading. This rest period gives the flour time to hydrate fully without the stress of immediate kneading. Continue adding small amounts of water and resting until the dough reaches the desired consistency – pliable, smooth, and no longer stiff or crumbly. Patience and gradual addition are key when correcting under-hydration in a flour absorption hydration dough recipe.
Advanced Techniques for Optimizing Flour Hydration
Autolyse: Enhancing Hydration and Gluten Development
Autolyse is a simple yet powerful technique that involves mixing only the flour and water from a flour absorption hydration dough recipe and letting the mixture rest for 20 minutes to several hours before adding the salt, yeast, and other ingredients. During this rest period, the flour fully hydrates, and enzymatic activity begins to break down proteins, making them more extensible.
The benefits of autolyse include improved dough extensibility (making it easier to stretch without tearing), reduced mixing/kneading time needed for gluten development, and potentially better volume and crumb structure in the final bread. By allowing the flour to hydrate thoroughly without the presence of salt (which can tighten gluten) or yeast (which starts fermentation), autolyse optimizes the initial interaction between flour and water, setting the stage for better gluten development and handling, particularly useful for higher hydration doughs.
Poolish and Biga: Pre-Ferments for Improved Hydration
Poolish and biga are types of pre-ferments, which are portions of the flour and water (and a small amount of yeast) from the main recipe that are mixed and allowed to ferment for several hours or overnight before being added to the final dough. A poolish is typically liquidy (100% hydration, equal parts flour and water by weight), while a biga is stiffer (lower hydration, e.g., 50-60% water to flour).
Using a pre-ferment allows a portion of the flour to undergo a long, slow hydration and fermentation process. This enhances the flavor of the bread, improves gluten structure, and increases the dough's overall water absorption capacity. The acids produced during the pre-ferment's fermentation also strengthen the gluten network. Incorporating a poolish or biga into a flour absorption hydration dough recipe is an excellent way to improve dough handling, oven spring, and the texture and aroma of the final bread, especially for loaves aiming for a more complex flavor profile and open crumb.
Using Tangzhong (Water Roux) for Extra Softness and Hydration
Tangzhong, or water roux, is a technique originating from Asia (popular in Japanese milk bread) where a small portion of the flour and liquid (usually milk or water) from the recipe is cooked into a thick paste before being added to the main dough. This cooking process gelatinizes the starch in the flour, allowing it to absorb and hold onto a significantly larger amount of liquid at a molecular level.
When this cooked paste is added to the dough, it introduces a high amount of pre-absorbed water that the flour can retain throughout the baking process. This results in incredibly soft, moist, and tender bread that stays fresh longer. Using the tangzhong method effectively increases the dough's overall hydration without making it excessively wet or sticky, as the water is bound within the gelatinized starch. It's a clever way to boost hydration and improve texture in a flour absorption hydration dough recipe, particularly for soft, enriched breads.
Mastering Dough Hydration: Tips and Tricks
Using the Baker's Percentage for Precise Hydration Control
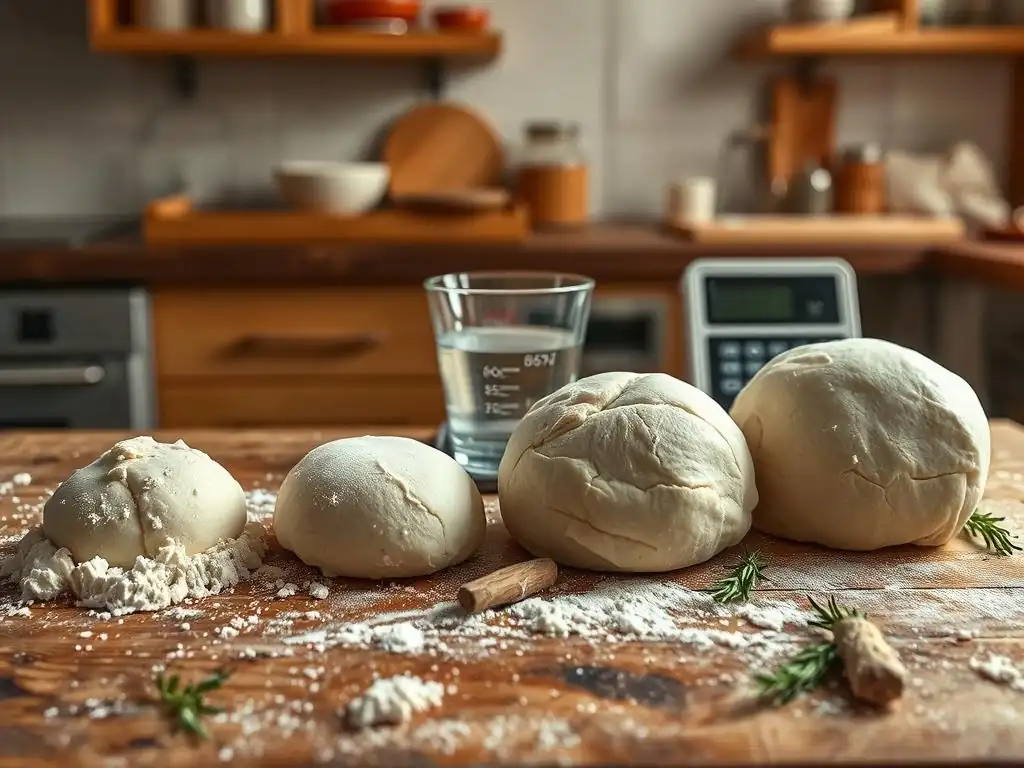
Mastering dough hydration begins with precise measurement, and the baker's percentage is the standard language of hydration control. In baker's percentage, the weight of each ingredient is expressed as a percentage of the total flour weight, which is always set at 100%. So, if a recipe uses 500g of flour and 350g of water, the hydration is (350g / 500g) * 100% = 70%. This method makes it easy to scale recipes and understand the relative proportions of ingredients, particularly the hydration level.
**Example Baker's Percentage Breakdown:**

*   Flour: 500g (100%)
*   Water: 350g (70%)
*   Yeast: 5g (1%)
*   Salt: 10g (2%)

Total Dough Weight = 865g
Total Percentage = 173%
By thinking in baker's percentages, you gain a deeper understanding of how ingredient ratios, especially the flour absorption hydration dough recipe ratio, impact the final product. It allows you to confidently adjust hydration based on the specific flour you're using or the desired outcome, moving beyond simply following a recipe to truly understanding the dough.
The Windowpane Test: Assessing Gluten Development and Hydration
The windowpane test is a classic technique used to assess whether the gluten in your dough is sufficiently developed and whether the hydration is appropriate for that development level. To perform the test, take a small piece of dough (about the size of a golf ball), gently stretch and pull it using your fingers. If the dough can be stretched thinly enough to see light through it without tearing, creating a "windowpane," the gluten is well-developed and can handle the hydration.
If the dough tears easily when stretched, it indicates either insufficient kneading/gluten development or potentially improper hydration (too dry or too wet for the current development). A very sticky dough that cannot be stretched at all likely indicates over-hydration or very poor gluten development. Practicing the windowpane test helps you visually assess the dough's structure and provides feedback on whether your hydration and kneading are on track for a successful flour absorption hydration dough recipe.
Adjusting Water Temperature for Better Hydration
The temperature of the water used in mixing can also influence how quickly and effectively the flour hydrates and how the dough develops. Warmer water (around 90-105°F or 32-40°C) helps activate yeast more quickly and can speed up the initial hydration process, potentially leading to faster gluten development. This is often preferred in recipes with shorter fermentation times.
However, very hot water can damage yeast and can make the dough feel stickier initially before the flour fully absorbs it. Colder water (chilled or room temperature) slows down yeast activity and gluten development. This is useful for doughs undergoing long, slow fermentation (like overnight proofs) or in warm kitchen environments where you want to control the dough temperature. While temperature doesn't change the flour's capacity for absorption, it affects the rate of absorption and the overall dough temperature, which in turn influences fermentation and handling characteristics in a flour absorption hydration dough recipe.
Hydration in Practice: Application and Evaluation
Applying Hydration Principles to Different Doughs
The principles of flour absorption and hydration are universally applicable across all types of dough, from lean bread doughs made with just flour, water, salt, and yeast, to enriched doughs containing eggs, milk, butter, and sugar, and even non-yeasted doughs like pastry or pasta. For lean doughs, hydration is critical for gluten development and creating an open crumb. Higher hydration often leads to a more irregular, open structure and a crispier crust in bread.
For enriched doughs, the added fats and sugars can interfere with gluten development, so hydration levels might be adjusted to compensate, or techniques like tangzhong might be used to ensure softness and moisture retention. Pastry doughs typically have very low hydration, as the goal is minimal gluten development to create flaky layers. By understanding the role of hydration in each context, you can apply the knowledge gained from studying flour absorption hydration dough recipe principles to virtually any baking project, predicting how changes in liquid will impact the final texture and structure.
Step-by-Step Guide to Evaluating and Adjusting Hydration
Evaluating and adjusting hydration is a skill honed through practice, but here's a basic step-by-step approach when working with a flour absorption hydration dough recipe:
- Measure Accurately: Always measure flour and water by weight using a scale.
- Initial Mix: Combine flour and most of the liquid (hold back 5-10%). Mix until just combined into a shaggy mass.
- Rest (Optional but Recommended): Let the dough rest for 20-30 minutes (autolyse) to allow initial hydration.
- Evaluate Consistency: After resting (or initial mix if skipping rest), feel the dough. Is it too stiff? Too wet? Too sticky?
- Add Remaining Liquid (Gradually): If the dough feels too dry, gradually add the reserved liquid while mixing or kneading until the desired consistency is reached.
- Add More Flour (Gradually): If the dough feels too wet and sticky (beyond what's expected for the recipe type), add flour a tablespoon at a time, incorporating fully before adding more.
- Knead and Re-Evaluate: Continue kneading. As gluten develops, the dough's feel will change. Periodically check consistency and perform the windowpane test. The dough should become smoother, less sticky (unless it's meant to be very high hydration), and more elastic.
- Observe During Bulk Fermentation: Pay attention to how the dough behaves as it rises. Does it hold its shape? Does it spread excessively? This provides further clues about its hydration and gluten development.
- [ ] Measure ingredients by weight.
- [ ] Withhold a small amount of liquid initially.
- [ ] Mix ingredients to a shaggy dough.
- [ ] Allow for a rest period (autolyse).
- [ ] Evaluate dough consistency by feel.
- [ ] Add remaining liquid or small amounts of flour as needed.
- [ ] Knead the dough.
- [ ] Use the windowpane test to assess gluten development.
- [ ] Observe dough behavior during fermentation.
By following these steps and paying close attention to the dough, you'll become more adept at evaluating and adjusting hydration, leading to better results from any flour absorption hydration dough recipe.
Conclusion: Achieving Baking Success Through Flour Hydration Mastery
Recap of Key Concepts in Flour Absorption
Understanding flour absorption and hydration is truly fundamental to achieving consistent success in baking. We've explored how flour acts like a sponge, absorbing liquid based on its composition, particularly protein content and starch characteristics. The hydration level, the ratio of liquid to flour by weight, directly dictates the dough's consistency, its handling properties, and the resulting texture of the baked good. High hydration often leads to a more open crumb and crisp crust in bread, while lower hydration is crucial for tender cakes and flaky pastries.
Factors like flour type (bread, all-purpose, cake, whole wheat), protein content, starch damage, and even environmental humidity all play a role in how much water flour will absorb and how the dough will behave. Mastering the flour absorption hydration dough recipe involves accurate measurement, the ability to evaluate dough consistency by feel, and knowing how to make small adjustments. Techniques like autolyse, pre-ferments, and tangzhong can further optimize hydration and improve dough structure and final product quality.
Further Resources for Learning About Dough Hydration
To deepen your understanding of flour absorption hydration dough recipe principles, continue experimenting in your own kitchen. Try making the same recipe with slightly different hydration levels to observe the changes in dough handling and the final bake. Explore recipes specifically designed for different hydration percentages (e.g., a 60% hydration sandwich loaf versus an 80% hydration ciabatta).
Many excellent baking books and online resources delve further into the science of baking, providing detailed explanations of flour composition, gluten development, and the impact of hydration. Look for resources that explain baker's percentages and provide visual guides to dough consistency at different hydration levels. Practice, observation, and a willingness to experiment are your best teachers on the path to mastering dough hydration and elevating your baking skills.
Frequently Asked Questions
How does flour absorption affect my dough's consistency?
Flour absorption significantly impacts dough consistency because different flours absorb varying amounts of water. Insufficient absorption leads to a sticky dough, while excessive absorption results in a dry, crumbly dough. Aim for the right balance for optimal results.
Why is hydration level important in a dough recipe?
Hydration, or the ratio of water to flour, is crucial because it affects the gluten development and the final texture of your baked goods. Higher hydration often leads to a chewier texture.
What factors influence flour's ability to absorb water?
Several factors influence flour absorption, including the type of flour (e.g., bread flour vs. cake flour), its protein content, and even the humidity of your environment.
How can I adjust my dough recipe if my flour isn't absorbing water properly?
If your dough is too wet, gradually add more flour, a tablespoon at a time, until it reaches the desired consistency. If it's too dry, add water similarly. Remember to adjust incrementally to avoid over-correction.
Where can I find simple dough recipes that account for flour absorption?
BakeWithEase.com offers a wide range of simple recipes with clear instructions and tips for managing flour absorption. Look for recipes with detailed hydration ratios and guidance on adjusting for different flour types.
Final Reflection: The Essential Role of Hydration in Dough Mastery
Understanding the intricacies of flour absorption and hydration is more relevant today than ever, as home bakers and professional chefs alike strive for the perfect dough. The art of baking transcends mere recipes; it is a science that hinges on the delicate balance of ingredients and their interactions. As we delve deeper into the world of flour hydration, we uncover the fundamental truth that the quality of our baked goods is directly tied to our understanding of these principles.
The influence of hydration on dough is profound, shaping not only the texture and flavor of our creations but also the very culture of baking itself. As we embrace the nuances of hydration, we foster a community of bakers who appreciate the craft's depth and complexity. Baking is both an art and a science, and understanding the science allows us to express our creativity more fully.
This ongoing dialogue about hydration encourages us to experiment, innovate, and share our findings, enriching the collective knowledge of our baking community.
As you reflect on the insights shared in this article, I invite you to embrace the journey of mastering dough hydration in your own baking endeavors. Consider how you can apply these principles to elevate your recipes, experiment with different flours, and ultimately create delicious, well-hydrated doughs that reflect your unique style. Let this exploration of flour absorption inspire you to connect more deeply with the ingredients you use, fostering a greater appreciation for the transformative power of hydration in the art of baking.
Unlock Your Baking Potential: Master Flour Hydration Today!
Thanks for diving into the world of flour absorption with us! We hope you now feel more confident understanding how hydration impacts your baking success. Ready to put this knowledge into practice?
- Bake a test loaf: Experiment with different hydration levels using your favorite recipe to see the impact firsthand. Note the changes in texture and taste – this is where the real learning happens!
- Share your results: Tell us about your baking journey! What did you discover? Post a picture of your loaf on social media and tag us – we'd love to see your creations.
- Explore advanced techniques: Consider researching other baking methods that emphasize hydration control, like sourdough or no-knead bread making.
What unique hydration experiment will you try next to perfect your baking?