
Why Your Sourdough Isn't Rising (Common Starter Issues Solved)


Welcome to BakeWithEase, your companion in the delightful world of baking! Are you frustrated because your sourdough starter isn't rising? Don't despair! We've all been there. This guide dives deep into the common culprits behind a sluggish starter and provides practical solutions to get your sourdough journey back on track. Prepare to unlock the secrets of a vibrant, bubbly starter and create phenomenal loaves – let's get baking!
- Understanding Sourdough Starter Behavior: A BakeWithEase Guide
-
Common Reasons Why Your Sourdough Starter Isn't Rising Properly
- Inactive Starter: Addressing the Root Cause of the Problem
- Temperature Troubles: Finding the Ideal Fermentation Environment
- Inconsistent Feeding Schedule: How Irregular Feeding Impacts Starter Activity
- Contamination Concerns: Identifying and Preventing Mold and Unwanted Bacteria
- Flour Quality: Choosing the Right Flour for a Healthy Sourdough Starter
- Hydration Levels: Finding the Perfect Water-to-Flour Ratio for Optimal Rise
- Over-Fermentation: Recognizing and Preventing Starter Collapse
- Diagnosing Your Sourdough Starter's Rise Issues: A Step-by-Step Approach
-
Solutions for a Sourdough Starter That Won't Rise
- Reviving a Weak Starter: Techniques to Boost Activity
- Correcting Temperature Issues: Maintaining Optimal Fermentation Temperature
- Establishing a Consistent Feeding Schedule: The Key to Long-Term Starter Health
- Addressing Contamination: Recognizing and Preventing Mold Growth
- Choosing the Right Flour: Selecting Flour That Feeds Your Starter Well
- Optimizing Hydration Levels: Getting the Perfect Water-to-Flour Balance
- Preventing Over-Fermentation: Knowing When to Use Your Starter
- Maintaining a Healthy and Active Sourdough Starter for Consistent Rise
- Enjoy Baking with a Lively Sourdough Starter: BakeWithEase Final Thoughts
-
Frequently Asked Questions
- Why is my sourdough starter not rising at all, even after several days?
- How can I tell if my sourdough starter is actually dead?
- What's the ideal temperature for my sourdough starter to rise properly?
- I'm using whole wheat flour, is that affecting my starter's rise?
- How often should I be feeding my sourdough starter if it's not rising well?
- Final Reflection: The Humble Rise of Sourdough, and Yours Too
- Unleash Your Inner Baker: Perfect Sourdough Awaits!
Understanding Sourdough Starter Behavior: A BakeWithEase Guide
Embarking on the sourdough journey is incredibly rewarding, but it can also come with its unique set of challenges. One of the most common hurdles bakers face is figuring out why their sourdough starter not rising as expected. A starter is a living culture of wild yeast and bacteria, and its activity level is directly reflected in its ability to rise after feeding.
Understanding this behavior is fundamental to successful sourdough baking. When your starter is sluggish or refuses to grow, it's a clear signal that something in its environment or feeding routine needs attention. This guide will walk you through the nuances of starter behavior and provide practical solutions.
The process of a sourdough starter rising is a visual indicator of fermentation. The wild yeast consume the sugars in the flour and produce carbon dioxide gas, which gets trapped in the network formed by the gluten. This trapped gas is what causes the starter to expand and increase in volume.
The accompanying lactic acid bacteria also contribute to the starter's health and the signature tangy flavor of sourdough bread. A healthy starter will show predictable patterns of activity – bubbling, rising, and then slowly falling as the food supply is depleted. If you see minimal or no rise, it suggests the yeast are not sufficiently active, which is a primary reason why your sourdough starter not rising effectively for baking.
The Importance of a Vigorous Sourdough Starter for Bread Baking
A vigorous, active sourdough starter is the powerhouse behind a well-risen loaf of sourdough bread. It's not just about aesthetic appeal; the starter's strength directly impacts the dough's fermentation, structure, and final texture. When a starter is at its peak activity, it contains a high concentration of active wild yeast cells ready to leaven your dough. Using a weak or inactive starter, a common issue when your sourdough starter not rising properly, will likely result in a dense, flat loaf because there isn't enough leavening power to create the necessary lift during proofing and baking.
Think of your starter as the engine for your bread. A robust engine provides the necessary power to move the vehicle efficiently. Similarly, a vigorous starter provides the fermentation power to make your dough rise beautifully.
For example, a starter fed with a 1:2:2 ratio (1 part starter, 2 parts water, 2 parts flour) that doubles or triples in volume within 4-8 hours at room temperature (around 75°F or 24°C) is generally considered vigorous enough for baking. If your starter struggles to achieve even a 50% increase in volume within that timeframe, it's a strong indicator of low activity and a key reason your sourdough starter not rising, necessitating some troubleshooting.
What Does a Healthy, Active Sourdough Starter Look Like?
Identifying a healthy, active sourdough starter is crucial for knowing when it's ready to bake with and for diagnosing issues like a sourdough starter not rising. A healthy starter exhibits several visual and olfactory cues. After being fed, it will typically become bubbly throughout, not just on the surface.
These bubbles indicate active fermentation. As fermentation progresses, the volume of the starter will increase significantly – often doubling, tripling, or even quadrupling depending on the feeding ratio and temperature. This rise is usually accompanied by a pleasant, slightly tangy, yeasty aroma, sometimes described as smelling like ripe fruit or yogurt.
Furthermore, a healthy starter will develop a domed or slightly peaked top at its peak activity before beginning to slowly deflate as the yeast consumes the available food. You might also notice small bubbles breaking on the surface.
When stirred, it should have a light, airy texture. If your starter remains flat, shows only minimal surface bubbles, smells strongly of acetone (nail polish remover), or develops a liquid layer on top called "hooch" very quickly after feeding without significant rise, these are all signs that the starter is not vigorous or healthy, explaining why your sourdough starter not rising as it should be.
Common Reasons Why Your Sourdough Starter Isn't Rising Properly
Experiencing a sourdough starter not rising can be frustrating, but it's a very common issue with several potential causes. Understanding these underlying problems is the first step to bringing your starter back to life. Often, a combination of factors, rather than a single one, contributes to a sluggish starter. By systematically examining each potential issue, you can pinpoint what's hindering your starter's activity and implement the necessary adjustments. Let's explore the most frequent culprits behind a lackluster rise.
Identifying the specific reason why your sourdough starter not rising is a bit like detective work. Is it a new starter that hasn't developed strength yet? Is it an old starter that hasn't been fed regularly? Has the kitchen temperature changed drastically? Have you switched flour brands? Each of these scenarios points towards a different potential problem. Fortunately, most issues are easily rectifiable with minor adjustments to your feeding routine, environment, or ingredients. Patience and consistent observation are your best tools in this process.
Inactive Starter: Addressing the Root Cause of the Problem
An inactive starter is perhaps the most direct reason why your sourdough starter not rising. This inactivity means the wild yeast population within your starter is either too low, dormant, or not reproducing effectively. Several factors can lead to an inactive starter, including infrequent feeding, improper feeding ratios that starve the yeast, or storing the starter in conditions that are too cold for fermentation. A starter that sits neglected in the refrigerator for too long without regular feeding will become sluggish as the yeast run out of food and become dormant.
To address an inactive starter, the primary goal is to provide the yeast with a consistent and abundant food source in a favorable environment to encourage reproduction and activity. This often involves a period of more frequent feeding – perhaps once or twice a day – at a consistent warm temperature, using a feeding ratio that provides plenty of fresh flour (like 1:1:1, 1 part starter, 1 part water, 1 part flour, or even higher ratios of fresh flour like 1:2:2 or 1:3:3 if you can maintain frequent feeding).
For example, if your starter hasn't been fed in weeks, discarding a large portion (leaving maybe just 10-20g) and feeding it 50g of fresh flour and 50g of water daily for several days can often wake it up and resolve the issue of your sourdough starter not rising.
Temperature Troubles: Finding the Ideal Fermentation Environment
Temperature plays a critical role in the activity of wild yeast and bacteria in a sourdough starter. If your sourdough starter not rising, the ambient temperature is often a major factor. Yeast are living organisms and are highly sensitive to temperature fluctuations. Temperatures that are too cold significantly slow down fermentation, making the starter appear sluggish or inactive. Conversely, temperatures that are too hot can accelerate fermentation too quickly, potentially leading to over-fermentation or even killing the yeast.
The ideal temperature range for most sourdough starters to thrive and rise vigorously is typically between 70°F and 80°F (approximately 21°C to 27°C). Within this range, the yeast and bacteria are most active, leading to predictable rising patterns. If your kitchen is consistently cooler than 70°F, you will likely notice your sourdough starter not rising as much or as quickly as sources suggest.
For example, a starter that doubles in 6 hours at 75°F might take 12-18 hours or even longer to achieve the same rise at 65°F (around 18°C). Finding a warm spot in your home, like on top of a refrigerator, inside a microwave with the light on, or using a proofing box, can significantly help maintain an optimal temperature and encourage better rise.
Inconsistent Feeding Schedule: How Irregular Feeding Impacts Starter Activity
Consistency is key when maintaining a healthy sourdough starter, especially if you're troubleshooting why your sourdough starter not rising. An irregular feeding schedule disrupts the natural cycle of fermentation. When you feed your starter, you're providing fresh food (flour) for the yeast and bacteria.
They consume this food, multiply, and produce gas (causing the rise) and acids. If you wait too long between feedings, the microorganisms run out of food, become dormant, and produce more acidic byproducts (like hooch), which can weaken the starter. If you feed too frequently, you might dilute the microbial population before it has a chance to reproduce sufficiently.
A regular feeding routine, whether it's daily, every 12 hours, or less frequent for refrigerated starters, helps maintain a stable and active microbial ecosystem. For a starter kept at room temperature, feeding once every 24 hours is a common practice to keep it active and prevent your sourdough starter not rising due to starvation. If you're trying to revive a sluggish starter or build strength for baking, feeding every 12 hours might be necessary.
The goal is to feed when the starter has peaked or just begun to fall, indicating the yeast have consumed most of the available food and are ready for more. Skipping feedings or feeding at vastly different intervals makes it difficult for the yeast population to remain consistently vigorous.
Contamination Concerns: Identifying and Preventing Mold and Unwanted Bacteria
While sourdough starters are resilient and host beneficial bacteria, they can occasionally fall prey to unwanted invaders like mold or harmful bacteria, which can be a reason why your sourdough starter not rising or behaving strangely. Mold typically appears as fuzzy patches on the surface of the starter, often in colors like green, black, orange, or pink. These molds indicate contamination and can render the starter unusable. Less visible bacterial contamination can sometimes cause off-smells (beyond the normal tangy or hooch smell) or unusual textures.
Preventing contamination starts with good hygiene. Always use clean jars and utensils when feeding your starter. Wash your hands thoroughly.
Ensure the jar lid is clean; while some airflow is good, leaving the starter completely exposed can increase the risk of airborne mold spores settling on the surface. If you see any sign of mold, it is generally recommended to discard the entire starter and begin a new one from scratch to avoid potential health risks and to ensure you are working with a healthy culture. A healthy, active starter is less susceptible to contamination because its strong microbial population creates an environment less favorable for invaders, reducing the likelihood of your sourdough starter not rising due to spoilage.
Flour Quality: Choosing the Right Flour for a Healthy Sourdough Starter

The type and quality of flour you use significantly impact your sourdough starter's health and activity. Different flours contain varying levels of nutrients (sugars and minerals) that the yeast and bacteria feed on. Using the wrong type of flour or inconsistently switching between types can be a reason why your sourdough starter not rising predictably. Highly processed or bleached flours often have fewer natural nutrients and microorganisms compared to less processed options.
Many bakers find that their starters thrive on a blend of flours or specific types like organic unbleached all-purpose flour, bread flour, or rye flour. Rye flour, in particular, is rich in nutrients and enzymes that yeast love, often leading to very active starters, especially in the initial stages.
Using a mix, like 50% all-purpose and 50% rye, can give your starter a significant boost if you're seeing a sourdough starter not rising well on just one type. Once your starter is established and vigorous, you can often transition to feeding it primarily with the type of flour you plan to bake with (like bread flour), but ensuring it's unbleached provides a better food source than bleached alternatives.
Hydration Levels: Finding the Perfect Water-to-Flour Ratio for Optimal Rise
The hydration level, or the ratio of water to flour by weight, is another critical factor influencing your sourdough starter's consistency and rise. A standard 1:1:1 ratio (equal parts starter, water, and flour by weight) results in a 100% hydration starter, which has a thick, pancake-batter-like consistency and is quite common. However, variations in hydration can affect how your starter behaves and appears to rise. A very stiff starter (lower hydration, like 50% or 60%) will trap gas differently than a very wet starter (higher hydration, like 150% or 200%).
If your sourdough starter not rising as much as you expect, check your hydration ratio. While a 100% hydration starter is a good starting point, environmental factors like humidity can influence the perceived hydration. Also, different flours absorb water differently.
If your starter seems too dry and dense after feeding, the yeast might struggle to expand the gluten network with gas, resulting in less visible rise. Conversely, a very wet starter might produce plenty of gas, but the loose structure might not trap it effectively, leading to less impressive volume increase, even if the yeast are active. Experimenting with slightly different hydration levels (e.g., 1:1:1 vs. 1:0.9:1 or 1:1.1:1 by weight) and observing the results can help you find the sweet spot for your specific flour and environment.
Over-Fermentation: Recognizing and Preventing Starter Collapse
Sometimes, your sourdough starter not rising isn't the problem; rather, it rose beautifully and then fell. This collapse is a sign of over-fermentation. It means the yeast consumed all the available food, reached peak activity, and then began to die off, causing the starter to deflate. While a healthy starter should rise and fall, consistently using it after it has peaked and fallen can weaken the culture over time, eventually leading to a situation where the sourdough starter not rising vigorously even after feeding.
Recognizing the signs of over-fermentation is key. The starter will often have a strong, pungent, sometimes acetone-like smell. It will have collapsed significantly from its peak volume, leaving streaks on the side of the jar indicating how high it rose.
There might also be a layer of hooch (the liquid byproduct) on top. To prevent chronic over-fermentation and maintain a strong starter, the solution is often to either feed it a larger ratio of fresh flour (e.g., 1:2:2 or 1:3:3) so it has more food to work through, or to feed it more frequently so it doesn't sit hungry after peaking. Using your starter for baking when it is at or near its peak activity (before it starts to fall) ensures you're harnessing its full leavening power.
Diagnosing Your Sourdough Starter's Rise Issues: A Step-by-Step Approach
When faced with a sourdough starter not rising, a systematic approach to diagnosis can save you time and frustration. Instead of guessing, take a few steps to observe and test your starter's behavior. This process will help you pinpoint the likely cause of the issue, whether it's temperature, feeding, or something else. By gathering data on how your starter is behaving after a consistent feeding, you can make informed decisions about how to troubleshoot it effectively.
This diagnostic phase involves simple but crucial observations. Grab your starter, give it a fresh feeding under controlled conditions (like a consistent temperature), and then watch it closely over the next several hours. Documenting what you see can provide valuable clues. Is there any activity at all? How long does it take for bubbles to appear? Does it show any increase in volume? These questions will guide you toward the specific problems discussed in the previous section and help you understand exactly why your sourdough starter not rising as it should be.
Observing Your Starter: Signs of Activity and Inactivity
The most basic step in diagnosing why your sourdough starter not rising is simply observing it after a fresh feeding. A healthy, active starter will begin to show signs of life within a few hours, depending on the temperature and feeding ratio. Look for bubbles forming on the surface and throughout the mass of the starter.
These bubbles are the carbon dioxide produced by the yeast. As activity increases, the starter's volume will increase, and the texture will become lighter and more airy. You might also see streaks on the side of the jar where the starter level is rising.
Conversely, an inactive starter will show minimal or no bubbling, even after several hours in a warm environment. Its volume will remain largely unchanged. The texture might stay dense or pasty.
The smell could be weak, overly acidic (like vinegar or acetone), or even unpleasant if contamination is present. If, after 6-8 hours at 75°F (24°C) following a 1:1:1 feeding, you see no significant bubbling or rise, this confirms you have an inactive starter, and you can then move on to addressing the root causes like temperature or feeding schedule to resolve the issue of your sourdough starter not rising.
The Float Test: Determining Starter Readiness for Baking
While not a direct test for why your sourdough starter not rising in general, the float test is a classic method to determine if your starter is at its peak activity and ready to be used for baking. This test works because a starter at its peak is full of trapped gas bubbles, making it less dense than water. To perform the test, gently take a small spoonful of your starter (without stirring it down) when you believe it is at its peak volume. Carefully drop this spoonful into a glass of room-temperature water.
If the starter floats on the surface of the water, it is considered ready for baking – it's light and airy from sufficient gas production. If the starter sinks to the bottom of the glass, it indicates that it either hasn't built up enough gas yet (it needs more time) or it has already peaked and collapsed (it's past its prime). A starter that consistently sinks even when you think it should be active is a strong indicator that your sourdough starter not rising sufficiently or not holding its structure due to underlying inactivity issues that need troubleshooting.
Measuring Starter Rise: Using a Jar with Markings for Accuracy
Subjective observation is useful, but for precise diagnosis of why your sourdough starter not rising, measuring its rise is invaluable. Using a clear jar or container with straight sides allows you to mark the starting level immediately after feeding. You can use an elastic band, a piece of tape, or a marker to indicate the height. This provides a clear visual reference to track the starter's progress over time.
After marking the starting level, place the jar in a consistent temperature environment and observe it periodically (e.g., every hour or two). Note the time when it reaches its maximum height before starting to fall.
This allows you to quantify the percentage increase in volume (e.g., it doubled, tripled, or only increased by 20%). If your starter consistently fails to at least double in volume within a reasonable timeframe (like 6-10 hours at typical room temperature with a standard feeding ratio), the measurement provides concrete evidence that your sourdough starter not rising adequately, guiding your troubleshooting efforts towards factors like temperature, feeding ratio, or starter health.
Solutions for a Sourdough Starter That Won't Rise
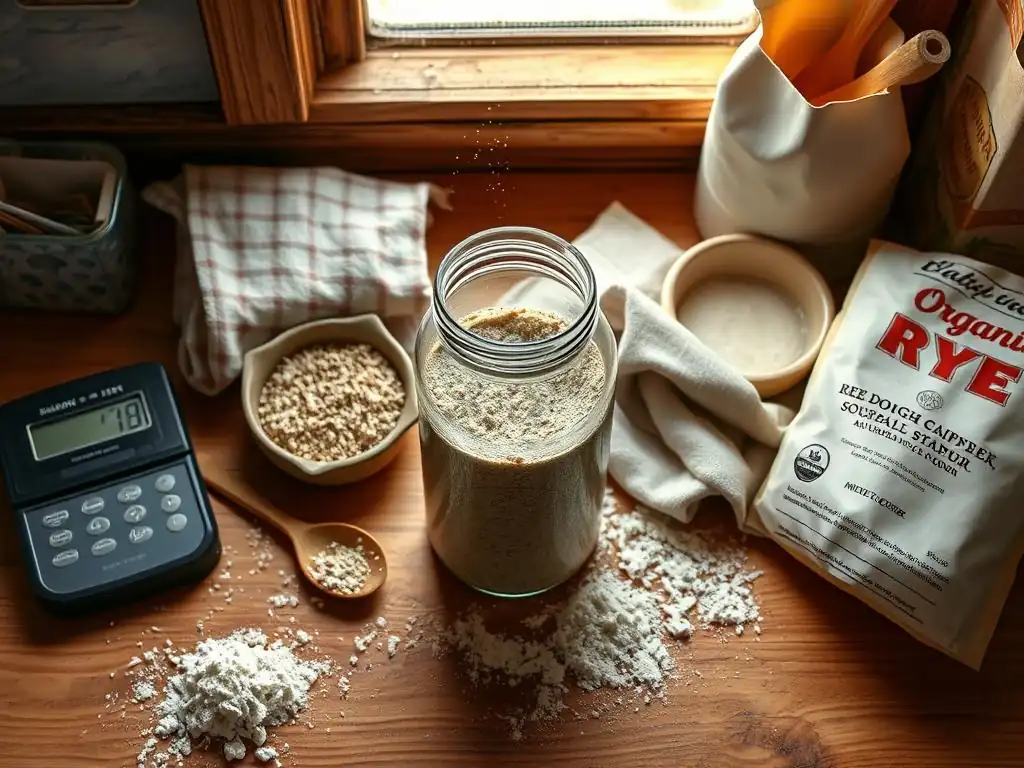
Discovering your sourdough starter not rising is a common setback, but thankfully, most issues are fixable. The key is to identify the specific problem based on your observations and then apply the appropriate solution. Don't get discouraged; reviving or strengthening a sluggish starter is a normal part of the sourdough journey. The solutions often involve optimizing the starter's environment and feeding routine to give the yeast and bacteria the best chance to thrive and become active again.
Implementing these solutions requires consistency and a bit of patience. It might take several days of adjusted feeding and temperature control to see a significant improvement in your starter's activity and rise. Keep observing and measuring its progress. By systematically addressing the potential causes, you can encourage your starter to become vigorous and reliable, ensuring your sourdough starter not rising is a problem of the past.
Reviving a Weak Starter: Techniques to Boost Activity
If your observations confirm you have a weak or inactive starter, the main goal is to boost its microbial activity. This often involves a period of more frequent and generous feeding in optimal conditions. Think of it as giving your starter a nutrient-rich, warm spa treatment. The specific technique depends on how inactive the starter is. For a starter that's been neglected for a long time, you might need to start with a small amount and feed it frequently to build up the population again.
Adjusting Feeding Ratios: Experimenting with Flour and Water Amounts
One effective way to revive a sluggish starter is by adjusting the feeding ratio to provide more 'food' relative to the amount of existing starter. Instead of a standard 1:1:1 ratio (starter:water:flour), try a 1:2:2 or even 1:3:3 ratio by weight. For example, if you keep 20g of starter, feed it 40g water and 40g flour (1:2:2), or 60g water and 60g flour (1:3:3).
These higher ratios give the yeast more fresh flour to consume, encouraging more robust reproduction and gas production. This can often kickstart a sourdough starter not rising effectively on lower ratios. Continue these higher-ratio feedings once or twice a day until you see consistent doubling or tripling within 8-12 hours.
Warming Up a Cold Starter: Creating a Warmer Environment
As temperature is a major factor in yeast activity, warming up a cold starter is crucial if your environment is too cool. Aim for a consistent temperature between 70°F and 80°F (21-27°C). Several methods can help achieve this.
Placing the starter in a warm spot, like near a heater (but not directly on it), on top of a refrigerator, or inside a turned-off oven with the light on (which generates a small amount of heat) can make a significant difference. For instance, moving a starter from a 65°F (18°C) countertop to a 75°F (24°C) spot can dramatically increase its activity and help resolve the issue of your sourdough starter not rising. Using a proofing box with temperature control is the most consistent method.
Patience is Key: Allowing Sufficient Time for Fermentation
Reviving a weak starter doesn't happen overnight. It requires patience. After adjusting feeding ratios and temperature, it might take several days (sometimes 3-7 days) of consistent care before you see truly vigorous activity. Don't expect dramatic results after just one or two feedings. Continue the adjusted feeding schedule and maintain the warmer temperature. Observe the starter's behavior each day – look for increasing bubble activity and a more noticeable rise. This consistent effort over time is essential to build a strong microbial population capable of resolving why your sourdough starter not rising.
Correcting Temperature Issues: Maintaining Optimal Fermentation Temperature
If you've identified temperature as the primary reason why your sourdough starter not rising, the solution is to find a way to provide a consistent, warm environment. Yeast activity is highly dependent on temperature, and fluctuations can lead to inconsistent results. Maintaining a steady temperature within the optimal range ensures the yeast and bacteria can work efficiently and predictably.
Using a Proofing Box or Warm Oven
For consistent temperature control, especially in cooler climates, a proofing box is ideal. These devices are designed to maintain a precise temperature, usually between 70°F and 90°F (21-32°C). If you don't have a dedicated proofing box, a common household trick is to use your oven. Turn the oven on to its lowest setting for just a minute or two, then turn it off.
The residual heat will create a warm environment. Placing your starter inside the turned-off oven with the light on can also provide a steady, low level of heat, often bringing the temperature up to the ideal range and preventing your sourdough starter not rising due to cold. Always check the temperature inside the oven before placing your starter to ensure it's not too hot.
Monitoring Temperature with a Thermometer
Guessing the temperature isn't enough when troubleshooting a sourdough starter not rising. Use a simple kitchen thermometer to measure the ambient temperature where you store your starter. You can also measure the temperature of the starter itself right after feeding. Aim for the starter's internal temperature to be within the 70-80°F (21-27°C) range a few hours after feeding. If the ambient temperature is too low, you'll need to employ one of the warming methods mentioned above. Consistently monitoring the temperature helps you ensure your starter is in the optimal zone for activity.
Establishing a Consistent Feeding Schedule: The Key to Long-Term Starter Health
Inconsistent feeding is a major contributor to a sourdough starter not rising reliably. Establishing and sticking to a regular feeding schedule is fundamental for long-term starter health and predictable activity. This doesn't mean you can never deviate, but having a routine helps maintain a stable microbial population.
Creating a Regular Feeding Routine
Decide on a feeding frequency that suits your baking habits and the temperature of your environment. If keeping your starter at room temperature (70-80°F or 21-27°C), daily feeding is standard. If you bake frequently, you might feed every 12 hours to keep it at peak strength.
If storing in the refrigerator, feeding once a week is usually sufficient, but remember it will need several consecutive daily feedings at room temperature to become active again before baking. Stick to your chosen routine as much as possible; for example, feeding every morning around 8 AM. This regularity helps the yeast population anticipate the fresh food and maintain consistent activity, reducing the likelihood of your sourdough starter not rising unexpectedly.
Understanding the Impact of Time Between Feedings
The time between feedings directly impacts when your starter peaks and how long it remains active. At warmer temperatures (e.g., 78°F or 26°C), a starter might peak and begin to fall within 4-6 hours after a 1:1:1 feeding. At cooler room temperatures (e.g., 70°F or 21°C), that same starter might take 8-12 hours.
If you consistently wait too long after your starter has peaked and fallen (indicated by hooch forming), the yeast population diminishes, leading to decreased activity and potentially a sourdough starter not rising well even after the next feeding. Understanding your starter's cycle at your typical feeding ratio and temperature helps you time your feedings appropriately.
Addressing Contamination: Recognizing and Preventing Mold Growth
While less common than temperature or feeding issues, contamination can be a reason why your sourdough starter not rising properly or behaving abnormally. Mold is the most visible form of contamination and requires immediate action.
Using Clean Utensils and Jars
Preventing contamination is primarily about cleanliness. Always use clean, food-safe jars or containers for your starter. Wash them thoroughly with hot, soapy water and rinse well, or run them through a dishwasher. Similarly, use clean spoons or spatulas for stirring and feeding. While sterilization isn't strictly necessary for sourdough, ensuring your equipment is free of old food particles or residues from other ferments helps prevent the introduction of unwanted microorganisms that could compete with or harm your starter culture, thereby potentially preventing issues where your sourdough starter not rising as it should.
Discarding Contaminated Starter
If you spot any fuzzy mold (green, black, orange, pink) on the surface or sides of your starter, it is best practice to discard the entire batch. While some sources suggest scraping off the mold, it's often an indicator that mold spores have spread throughout the starter. Attempting to salvage it risks introducing harmful mold into your bread.
Starting fresh with a new starter culture is the safest and most reliable way to ensure you are working with a healthy, uncontaminated starter that has the best chance of rising vigorously. Don't risk baking with a potentially contaminated starter; it's a key reason why your sourdough starter not rising might be the least of your worries.
Choosing the Right Flour: Selecting Flour That Feeds Your Starter Well
The flour you use is the primary food source for your sourdough starter. The type and quality of flour significantly impact its health, activity, and flavor. If your sourdough starter not rising well, try evaluating the flour you are using.
Understanding Different Flour Types (Bread Flour, All-Purpose Flour, Rye Flour)
Different flours have varying protein content (gluten), nutrient levels, and enzyme activity. Bread flour, with its higher protein content (typically 12-14%), provides a strong gluten structure that traps gas well, leading to a good rise. All-purpose flour (typically 10-12% protein) is also suitable.
Rye flour, although lower in gluten, is rich in enzymes and nutrients that can really boost yeast activity, making it excellent for starting or reviving a sluggish starter. Using unbleached flour is generally recommended as the bleaching process can remove some nutrients beneficial to the starter. If your sourdough starter not rising, experimenting with switching from bleached to unbleached flour, or incorporating some rye flour, can sometimes make a noticeable difference.
Experimenting with Different Flour Combinations
You don't have to stick to just one type of flour. Many bakers find success feeding their starters a mix. For example, feeding with 50% strong bread flour and 50% whole rye flour can provide both good structure for trapping gas and a rich food source for the yeast, potentially improving the rise compared to using just one type.
Once your starter is active and consistently rising well, you can transition to feeding it primarily with the type of flour you'll use for baking. If your sourdough starter not rising consistently on your current flour, try feeding a small amount with a different, nutrient-rich flour like rye or whole wheat for a few days to see if activity improves.
Optimizing Hydration Levels: Getting the Perfect Water-to-Flour Balance
The hydration level of your starter affects its consistency, how it traps gas, and how quickly the yeast can access the food in the flour. Finding the optimal hydration for your starter can help if your sourdough starter not rising as expected.
Adjusting Water Ratio for Different Climates
Environmental humidity can slightly affect the perceived hydration of your starter. In very humid climates, you might find you need slightly less water, while in very dry climates, you might need a touch more to achieve the desired consistency when aiming for a specific hydration percentage like 100%. If your sourdough starter not rising well and seems overly stiff or soupy, adjusting the water amount by just a few grams relative to the flour can sometimes improve its texture and ability to rise. For instance, if using 100g flour, try 95g water or 105g water instead of exactly 100g.
Observing Starter Consistency
Pay attention to the consistency of your starter right after feeding. At 100% hydration (equal parts water and flour by weight), it should resemble thick pancake batter or a very thick glue. If it feels like a stiff dough, it's likely too low hydration; if it pours easily, it's too high.
A too-stiff starter can make it harder for the yeast to expand the matrix, potentially making it look like your sourdough starter not rising much. A too-wet starter might produce plenty of gas but lack the structure to hold it, resulting in less visible volume increase. Adjust the water slightly at your next feeding based on your observation of the consistency.
Preventing Over-Fermentation: Knowing When to Use Your Starter
Using your starter at the right time – when it's at its peak activity – is crucial for successful baking and helps maintain the starter's overall health. Consistently using a starter that has already peaked and collapsed (over-fermented) can weaken it over time, eventually leading to a situation where your sourdough starter not rising reliably even when fed.
Recognizing Signs of Peak Activity
Peak activity is when your starter has reached its maximum volume after feeding and before it starts to deflate. It will look domed or flat across the top, and you'll see lots of bubbles. For a 100% hydration starter, this often happens when it has doubled or tripled in volume. The float test (mentioned earlier) is a good indicator of peak readiness. If you're observing your starter in a marked jar, note the highest point it reaches. This peak window is the ideal time to use your starter for baking or to feed it again if you're maintaining it.
Using Starter Sooner Rather Than Later
If you find your starter consistently peaking and then collapsing quickly, indicating it's over-fermenting before you can use it, you have a few options:
- Feed it a larger ratio (e.g., 1:2:2 or 1:3:3) so it has more food and a longer fermentation cycle.
- Store it at a slightly cooler temperature to slow down fermentation.
- Plan your baking schedule to use the starter when it reaches its peak, rather than waiting.
- Consider feeding it more frequently (e.g., every 12 hours instead of 24) if keeping it at room temperature and baking often.
By using or feeding your starter before it fully collapses, you maintain a stronger, more active culture, which helps prevent the problem of your sourdough starter not rising due to chronic weakness.
Maintaining a Healthy and Active Sourdough Starter for Consistent Rise

Once you've successfully troubleshooted why your sourdough starter not rising and have brought it back to life, the focus shifts to consistent maintenance. A well-maintained starter is a reliable starter, leading to more predictable and successful sourdough baking. Establishing good long-term habits is key to avoiding future issues and enjoying the process.
Maintaining a healthy starter isn't complicated once you understand its basic needs: food (flour), water, and a suitable temperature. Regular feeding, proper storage, and consistent observation are the pillars of a vigorous culture. By incorporating these practices into your routine, you minimize the chances of encountering problems like a sourdough starter not rising in the future.
Long-Term Starter Care: Tips for Continuous Success
Long-term success with your sourdough starter hinges on routine and responsiveness. Pay attention to your starter's cues. Is it rising predictably after feeding? Does it smell healthy? Is the texture right?
Consistent daily or weekly feeding (depending on storage) is the most important factor. Avoid drastic changes in flour types or feeding schedules unless you're intentionally experimenting or troubleshooting. Keep your starter in a clean jar. If you need a break from baking, refrigerate your starter, but remember to refresh it with a few consecutive daily feedings at room temperature before you plan to bake again to ensure it's active and your sourdough starter not rising sluggishly when you need it.
Consider keeping a small amount of 'backup' starter dried or frozen as a safeguard against accidents or contamination. This ensures you don't have to start completely from scratch if something goes wrong with your main starter. Sharing a piece of your active starter with a friend is another way to have a backup and spread the joy of sourdough!
Feeding and Storage Recommendations: Keeping Your Starter Happy
For a starter kept at room temperature (70-80°F or 21-27°C) and used frequently, feeding once every 24 hours at a 1:1:1 ratio (starter:water:flour by weight) is a common and effective maintenance schedule. Use unbleached flour and filtered water if your tap water is heavily chlorinated. If you bake less often, storing your starter in the refrigerator is ideal.
Feed it, let it become active on the counter for 1-2 hours, then place it in the fridge. In the refrigerator (around 40°F or 4°C), yeast activity slows dramatically, and you only need to feed it about once a week. Before baking with a refrigerated starter, take it out, let it come to room temperature, and feed it daily (or even twice daily) for 1-3 days until it shows consistent doubling or tripling within 6-10 hours, confirming that your sourdough starter not rising is no longer an issue.
Always discard a portion of your starter before feeding (unless you plan to bake a very large batch). This keeps the total volume manageable and ensures you're always feeding a healthy, active portion of the culture, rather than just diluting a large, potentially weak batch. A common discard amount is to keep just 20-50g of starter and feed that amount with fresh flour and water.
Troubleshooting Future Problems: Identifying and Addressing Issues Early On
Even with good maintenance, you might occasionally notice your sourdough starter not rising quite as much as usual or showing other subtle signs of stress. The key to preventing minor issues from becoming major problems is early identification and intervention. Pay attention to changes in smell, texture, and rise pattern.
If you notice a slight decrease in activity, review the common causes: Has the temperature changed? Have you missed a feeding? Did you switch flour? Often, a minor adjustment – like moving the starter to a warmer spot or feeding it a slightly larger ratio for a couple of days – is enough to correct the issue. Don't wait until your sourdough starter not rising at all before you start troubleshooting. Regular observation helps you catch problems when they are small and easy to fix, ensuring your starter remains a reliable partner in your baking adventures.
Enjoy Baking with a Lively Sourdough Starter: BakeWithEase Final Thoughts
Mastering the art of sourdough baking starts with understanding and nurturing your starter. While facing a sourdough starter not rising can be disheartening, remember that it's a common experience, and most issues are easily resolved with patience and attention to detail. By understanding the factors that influence yeast activity – temperature, feeding consistency, hydration, and flour quality – you gain the power to troubleshoot and maintain a healthy, vigorous starter.
With consistent care and observation, your sourdough starter will become a reliable engine for your bread. You'll learn to read its cues and know when it's at its peak, ready to transform simple flour and water into delicious, naturally leavened loaves. Don't be afraid to experiment slightly with feeding ratios or temperatures to find what works best in your specific environment. With the tips and techniques outlined here from BakeWithEase, you're well-equipped to tackle the challenge of a sourdough starter not rising and move towards consistently successful sourdough baking. Happy baking!
Frequently Asked Questions
Why is my sourdough starter not rising at all, even after several days?
A starter that isn't rising at all likely hasn't developed enough active yeast. This could be due to incorrect feeding ratios, inappropriate temperature, or contaminated flour.
How can I tell if my sourdough starter is actually dead?
A truly dead starter will show signs like mold growth, foul odors, or no activity whatsoever even after consistent feeding and warm temperatures. A healthy starter should have a pleasant, slightly sour smell.
What's the ideal temperature for my sourdough starter to rise properly?
The ideal temperature range for sourdough starter activity is generally between 70-75°F (21-24°C). Temperatures outside this range can slow down or inhibit yeast activity, leading to a poor rise.
I'm using whole wheat flour, is that affecting my starter's rise?
Whole wheat flour can actually be beneficial for sourdough starters because it contains more nutrients and microorganisms that feed the yeast. Ensure the flour is fresh and not rancid, as that could inhibit growth.
How often should I be feeding my sourdough starter if it's not rising well?
If your starter is struggling, try feeding it twice a day with equal parts starter, flour, and water. This can help boost yeast activity and get it rising again, especially when combined with a warmer environment.
Final Reflection: The Humble Rise of Sourdough, and Yours Too
The persistent mystery of a stubbornly inactive sourdough starter is a common frustration, but understanding the underlying science transforms this challenge into a rewarding journey of patience and precision. A thriving starter isn't just about baking bread; it's a testament to the delicate balance of nature, a living ecosystem thriving in your kitchen. This understanding empowers bakers to troubleshoot effectively and achieve consistent success.
The journey of nurturing a sourdough starter mirrors the larger human experience: it demands care, attention, and a willingness to adapt to unexpected circumstances. It's a process that teaches patience and resilience, qualities that extend far beyond the kitchen. The best bread is made with love,
a baker once told me, and I believe it's true not just of the final product, but of the entire process of cultivating the starter itself. The connection to something living and growing, responding to your care, is deeply satisfying.
Now, consider your own starter. Perhaps it's currently bubbling happily, or maybe it's stubbornly refusing to cooperate. Regardless, I invite you to approach it with renewed understanding. Don't be discouraged by setbacks; see them as opportunities to learn and refine your technique. Remember the principles outlined in this article, and most importantly, remember the joy of creating something delicious and unique with your own hands. The perfect loaf awaits – and so does the satisfaction of mastering this ancient art.
Unleash Your Inner Baker: Perfect Sourdough Awaits!
Thanks for diving into the world of sourdough with us! We hope you gained valuable insights into common starter problems and feel more confident in your baking journey. Now it's time to put that knowledge to the test!
- Prioritize your starter: Give your sourdough starter the TLC it deserves – feed it regularly, monitor its activity, and note any changes in its behavior. This consistent attention will be key to future baking success.
- Share your sourdough story: Tell us about your baking triumphs (and challenges!) in the comments below. Let's build a supportive community where we can all learn and grow together.
- Try our next recipe: Ready to put your improved starter to the test? Explore our extensive recipe library for new and exciting sourdough creations! (We have a fantastic spelt sourdough recipe you might enjoy).
What’s the first step you'll take to improve your sourdough starter today?