
Bake Adorable Mini Croissants: Perfect for Sharing


Welcome to BakeWithEase, your haven for baking bliss! Ever dreamt of creating those flaky, buttery layers of a perfect croissant, but felt intimidated? Think smaller, think simpler, think...mini! Today, we're diving into an easy mini croissant recipe that's surprisingly achievable, even if you're still honing your baking skills. Prepare to impress your friends and family with these adorable, shareable treats. Curious how to unlock the secrets to croissant perfection on a smaller scale? Let's get baking!
- Bake Adorable Mini Croissants: Perfect for Sharing (BakeWithEase)
- Introduction: Mastering the Easy Mini Croissant Recipe at Home
- The BakeWithEase Guide to Easy Mini Croissant Recipe
- Step-by-Step: Creating Your Mini Croissant Dough
- Shaping and Baking Your Mini Croissants
- Tips and Tricks for Perfect Mini Croissants
- Conclusion: Enjoying Your Easy Mini Croissant Recipe Success
-
Frequently Asked Questions
- What makes this mini croissant recipe "easy"?
- Can I substitute any ingredients in the mini croissant recipe?
- How long does it take to make these mini croissants from start to finish?
- What's the best way to store leftover mini croissants?
- What are some variations I can try with this mini croissant recipe?
- Final Reflection: The Joy of Tiny, But Mighty, Croissants
- Unleash Your Inner Pastry Chef!
Bake Adorable Mini Croissants: Perfect for Sharing (BakeWithEase)
Introduction: Mastering the Easy Mini Croissant Recipe at Home
Welcome to the World of Homemade Mini Croissants
Embarking on the journey of making croissants at home might seem daunting, but with the right guidance, crafting an easy mini croissant recipe is a rewarding experience. These delightful, flaky pastries, scaled down to a charming size, are perfect for breakfast, brunch, or simply as a sweet treat alongside coffee. The process, while requiring patience, is broken down into manageable steps that even intermediate bakers can confidently tackle.
Imagine pulling warm, golden mini croissants from your own oven – a truly satisfying achievement. This guide is designed to demystify the process, making your first attempt at an easy mini croissant recipe a successful one.
Mastering the laminated dough technique, the heart of any croissant recipe, is key to achieving those signature airy layers. We'll walk you through preparing the dough, creating the butter block, and the crucial folding steps. While traditional croissants can be quite large, the mini version offers a less intimidating starting point. They bake faster and are easier to handle during shaping. Get ready to transform simple ingredients into stunning pastries that will impress everyone.
Why Mini Croissants are the Perfect Baking Project
Choosing an easy mini croissant recipe for your next baking project offers several distinct advantages. Firstly, their small size means quicker baking times, typically ranging from 12 to 18 minutes, compared to the 20-25 minutes needed for full-sized croissants. This reduces the chance of burning and allows for more precise control over the golden-brown finish. Secondly, mini croissants are inherently suited for sharing; a batch yields numerous small pastries, making them ideal for gatherings or gifting. A typical recipe might yield anywhere from 18 to 24 mini croissants, depending on the size you cut them.
Moreover, the smaller scale makes the shaping process slightly less cumbersome, especially for beginners. Working with smaller pieces of dough can feel more manageable. Despite their size, they deliver the same satisfying crunch and buttery layers as their larger counterparts. An easy mini croissant recipe allows you to practice the fundamental techniques of lamination without committing to a large, potentially overwhelming batch. They are also portion-controlled, making them a delightful indulgence without overdoing it.
The BakeWithEase Guide to Easy Mini Croissant Recipe
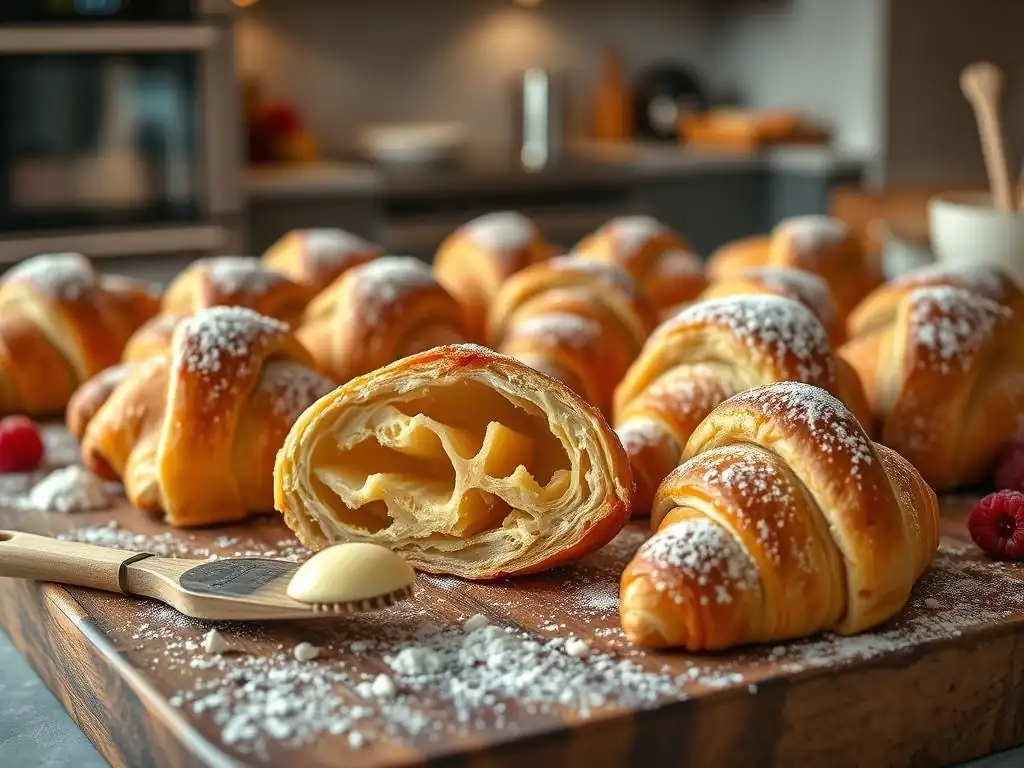
Essential Ingredients for Perfect Mini Croissants
High-Quality Flour: The Foundation of Flaky Croissants
The quality of your flour significantly impacts the final texture of your mini croissants. For the best results in an easy mini croissant recipe, opt for a good quality all-purpose flour with a protein content typically ranging from 10-12%. This protein is essential for developing gluten, which provides the structure and elasticity needed for the dough to stretch and hold those delicate layers during lamination and baking.
While bread flour (higher protein, 12-14%) can also be used and provides more structure, it might make the dough slightly tougher to work with for beginners. A balanced all-purpose flour strikes the right balance between strength and tenderness.
Using fresh flour, stored properly in a cool, dry place, is also crucial. Stale flour can affect the rise and flavor. Consider sifting your flour before measuring to ensure accuracy and remove any clumps. The precise amount of flour needed will vary slightly depending on humidity and the specific brand, but a standard easy mini croissant recipe might call for approximately 250-300 grams for a modest batch, ensuring enough dough for practice and enjoyment.
The Importance of Butter in Mini Croissant Dough
Butter is arguably the most critical ingredient in achieving the characteristic flaky layers of an easy mini croissant recipe. High-quality unsalted butter with a high fat content (typically 82% or higher) is preferred. The butter needs to be cold and pliable, not soft or melted, when creating the butter block for lamination. As the croissants bake, the water in the butter turns to steam, forcing the layers of dough apart and creating those signature air pockets. Using butter with a lower fat content can result in less defined layers and a greasier texture.
The amount of butter used is substantial; a typical easy mini croissant recipe might use butter equal to 40-50% of the flour weight. For example, if you use 250g of flour, you might need 100-125g of cold butter just for the lamination block, plus a small amount in the initial dough mix. This high fat ratio is what gives croissants their rich flavor and incredibly light, flaky texture. Ensure your butter is consistently cold throughout the lamination process by chilling the dough between folds.
Other Key Ingredients: Yeast, Sugar, and Salt
Beyond flour and butter, yeast, sugar, and salt play vital roles in your easy mini croissant recipe. Active dry or instant yeast is necessary for leavening, producing the carbon dioxide that makes the dough rise and gives the croissants their airy structure. Typically, about 5-7 grams of yeast is sufficient for a batch using 250-300g of flour. Sugar provides food for the yeast, aiding fermentation, and also contributes to the browning of the crust and adds a subtle sweetness. A small amount, perhaps 20-30 grams, is usually enough.
Salt is essential for flavoring and controlling the yeast activity. It enhances the overall taste and prevents the yeast from rising too quickly. About 5-6 grams of fine salt is standard. Milk or water (often a combination) is used to hydrate the dough; the liquid temperature is important for activating the yeast. Using cold liquid helps keep the dough cool during mixing, which is beneficial before the lamination process begins. These ingredients, working together, create the foundation for a delicious and easy mini croissant recipe.
Tools and Equipment You'll Need
Rolling Pin Essentials for Mini Croissant Baking
A good rolling pin is indispensable for an easy mini croissant recipe. You'll need it to roll out the dough evenly and consistently during the initial preparation and, most importantly, during the lamination process. A large rolling pin, preferably one made of wood or marble, is ideal as it covers more surface area and helps maintain an even thickness. French-style rolling pins (tapered ends, no handles) offer great control and feel for the dough, while standard rolling pins with handles are also perfectly effective.
The key is to apply even pressure across the dough to ensure the butter block is spread uniformly within the layers. Aiming for a consistent thickness, often around 1/4 inch (about 6mm) or less depending on the step, is crucial for successful lamination. Having a sturdy, smooth rolling pin will make this repeated task much easier and less frustrating, contributing significantly to the ease of your easy mini croissant recipe.
Baking Sheets and Parchment Paper: Crucial for Even Baking
Baking sheets and parchment paper are non-negotiable for baking your easy mini croissant recipe. Sturdy, light-colored aluminum baking sheets are recommended as they conduct heat evenly, preventing the bottoms of your croissants from burning before the tops are golden. Avoid dark-colored sheets, which absorb more heat and can lead to over-browning on the bottom. You will likely need at least two sheets, as the mini croissants need adequate spacing to expand during baking; overcrowding will result in uneven baking and soft sides.
Lining your baking sheets with parchment paper is essential for preventing sticking and ensuring easy cleanup. It also helps the bottoms of the croissants brown nicely. Reusable silicone baking mats are another excellent option, offering similar non-stick properties. Using parchment or a silicone mat ensures that the delicate layers formed during lamination remain intact as the croissants bake and are easily removed from the sheet.
Other Useful Tools: Dough Scraper, Pizza Cutter, and Thermometer
Several other tools can make the easy mini croissant recipe process smoother. A bench scraper (or dough scraper) is invaluable for handling the sticky dough, portioning it, and cleaning your work surface. Its straight edge allows you to cleanly lift and move the dough without tearing the delicate layers. A pizza cutter or a sharp knife is necessary for cleanly cutting the rolled-out dough into triangles for shaping; a clean cut prevents the layers from sealing shut.
A kitchen thermometer is useful, particularly for checking the temperature of the liquid when activating yeast, ensuring it's in the optimal range (typically 105-115°F or 40-46°C for active dry yeast). While not strictly necessary for every step, having these tools on hand streamlines the process and contributes to a better outcome, making your attempt at an easy mini croissant recipe more successful and less stressful.
Step-by-Step: Creating Your Mini Croissant Dough
Preparing the Dough: A Detailed Guide
Activating the Yeast for Optimal Dough Rise
The first critical step in any easy mini croissant recipe is properly activating the yeast. If using active dry yeast, you'll need to "proof" it first. Gently warm your liquid (milk or water, or a mix) to a temperature between 105°F and 115°F (40°C to 46°C). This temperature range is warm enough to awaken the yeast but not so hot that it kills it.
Sprinkle the yeast and a pinch of sugar (to feed the yeast) over the warm liquid. Let it sit for 5-10 minutes. You should see a foamy layer develop on the surface, indicating the yeast is alive and active. If no foam appears, your yeast may be dead, and you should start again with fresh yeast.
Instant yeast does not strictly require proofing and can often be mixed directly with the dry ingredients. However, proofing instant yeast in warm liquid (around 120-130°F or 49-54°C) for 5 minutes can still be a good way to confirm its vitality, though be careful not to overheat. Ensuring vigorous yeast activity from the start is crucial for a good rise later in the easy mini croissant recipe process, contributing to a light, airy crumb.
Combining the Ingredients: Mixing the Perfect Dough
Once your yeast is active (if proofing), combine it with the remaining liquid, sugar, salt, and a small portion of the softened butter (if using) in a large mixing bowl. Gradually add the flour, mixing until a shaggy dough forms. You can mix by hand or using a stand mixer with a dough hook. Knead the dough for about 5-8 minutes until it becomes relatively smooth and elastic. Unlike bread dough, croissant dough doesn't require extensive kneading; over-kneading can make it too tough. The goal is a smooth, but not overly developed, dough.
The dough should be slightly sticky but should pull away from the sides of the bowl. The total amount of flour needed might vary slightly based on humidity and the specific flour brand; add a little more if the dough is excessively sticky, but be careful not to add too much, which will result in a dry dough.
After mixing, the dough should be formed into a rectangle or square, wrapped tightly in plastic wrap, and chilled thoroughly in the refrigerator for at least 1-2 hours. This initial chill is vital for firming up the dough before the butter block is incorporated, setting the stage for successful lamination in your easy mini croissant recipe.
The Lamination Process: Achieving Those Signature Layers
The Butter Block: Preparing for Lamination
The lamination process, the heart of an easy mini croissant recipe, begins with preparing the butter block. Take your cold, but not rock-hard, butter (ideally around 60-65°F or 15-18°C) and place it between two sheets of parchment paper. Using a rolling pin, pound and roll the butter into a smooth, even rectangle. The size of the butter block is crucial; it should be roughly one-half the size of your chilled dough rectangle. For example, if your dough rectangle is 12x8 inches, aim for a butter block of about 6x8 inches.
The butter must be pliable enough to roll without breaking but cold enough to maintain its shape. If it's too cold, it will crack; if too warm, it will melt into the dough. Aim for a thickness of about 1/4 inch (6mm). Trim the edges to create sharp corners, which helps ensure even layers. Chill the butter block in the refrigerator until it is firm but still bendable, roughly 15-30 minutes, while your dough finishes its initial chill. This carefully prepared butter block is essential for creating the distinct layers in your easy mini croissant recipe.
Folding and Rolling: Step-by-Step Lamination Technique
Lamination involves enclosing the butter block within the dough and repeatedly rolling and folding the dough to create hundreds of thin layers of dough separated by thin layers of butter. This is often referred to as performing "turns." For an easy mini croissant recipe, you'll typically perform 3 or 4 "single turns."
To do a single turn, roll your chilled dough into a rectangle large enough to enclose the butter block (usually about double the length of the butter block). Place the butter block on one half of the dough, leaving a small border. Fold the other half of the dough over the butter block, sealing the edges tightly.
Now, rotate the dough 90 degrees so the seam is on your right or left. Roll the dough into a long rectangle, about 1/4 inch (6mm) thick. Perform the first fold: fold one-third of the dough up from the bottom, then fold the top third down over it, like folding a letter. This completes one single turn, resulting in three layers of dough and two layers of butter.
Wrap the dough tightly and chill for 30-60 minutes. Repeat this roll-and-fold process, chilling between each turn, until you have completed the required number of turns (e.g., 3 or 4 total). Each turn exponentially increases the number of layers; 3 single turns result in 3^3 = 27 dough layers (and 26 butter layers), while 4 turns yield 3^4 = 81 dough layers.
The Importance of Resting the Dough: Time and Temperature
Resting and chilling the dough between turns is absolutely crucial for a successful easy mini croissant recipe. This resting period, typically 30-60 minutes in the refrigerator (around 38-40°F or 3-4°C), serves multiple purposes. Firstly, it allows the gluten in the dough to relax after the stress of rolling, making it easier to roll out thinly for the next turn without tearing. Trying to roll dough that hasn't rested will result in it springing back constantly, making it difficult to achieve an even rectangle.
Secondly, and perhaps most importantly, chilling keeps the butter cold and firm. If the butter warms up, it will melt into the dough layers instead of remaining distinct sheets. This would prevent the formation of separate layers during baking, resulting in a bready, rather than flaky, croissant. Proper chilling ensures the butter stays solid, allowing you to create those hundreds of thin layers that are essential for the characteristic texture of an easy mini croissant recipe. Don't rush this step; patience is key to perfect lamination.
Shaping and Baking Your Mini Croissants

Cutting and Shaping the Dough: Creating Mini Croissant Perfection
Precise Measurements for Uniform Mini Croissants
Once your laminated dough has completed its final chill (usually overnight for best results), it's time to roll it out for cutting. On a lightly floured surface, roll the dough into a large, thin rectangle, typically about 1/8 inch (3mm) thick. Aim for a consistent thickness across the entire sheet of dough.
For uniformity in your easy mini croissant recipe, precise cutting is important. Using a ruler or measuring tape, mark the top edge of the dough at regular intervals – for mini croissants, this is usually every 3-4 inches (7.5-10 cm). Mark the bottom edge offset by half that distance (e.g., 1.5-2 inches or 3.75-5 cm).
Use a pizza cutter or a sharp knife to cut from the top mark down to the bottom offset mark, creating long triangles. Continue cutting triangles across the entire rectangle. This method ensures that each triangle is roughly the same size and shape, leading to uniformly sized mini croissants that bake evenly. A typical batch using 250-300g of flour might yield 18-24 triangles of this size. Discard or re-roll scraps carefully (re-rolling can disrupt layers, so use sparingly).
Mastering the Mini Croissant Roll
Shaping the mini croissants is the final step before proofing. Take one triangle of dough and gently stretch the base slightly wider. Make a small slit (about 1/2 inch or 1-2 cm) in the center of the base. This slit helps the base spread open slightly as you roll, creating a more classic croissant shape. Starting from the base, roll the dough up towards the point. As you roll, gently stretch the dough lengthwise slightly with your fingers.
Roll tightly but without compressing the layers too much. The point of the triangle should end up tucked underneath the finished roll. Curve the ends inwards slightly to form the crescent shape. The key is a firm but gentle roll that maintains the layers. Place the shaped mini croissants on your prepared baking sheets, leaving ample space (at least 2-3 inches or 5-7 cm) between them to allow for expansion during proofing and baking. This careful shaping ensures the beautiful form of your easy mini croissant recipe.
Proofing the Shaped Croissants: The Final Rise
Creating the Ideal Proofing Environment
Proofing is the final rise for your shaped mini croissants before baking, and it's a critical step in any easy mini croissant recipe. During proofing, the yeast ferments, producing gas that causes the croissants to double in size and become light and airy. The ideal proofing environment is warm and humid, typically around 75-80°F (24-27°C) with about 70-80% humidity. Avoid temperatures above 85°F (30°C), as this can cause the butter to melt out of the layers.
There are several ways to create this environment at home. You can place the baking sheets in a slightly warm, turned-off oven with a pan of hot water on the rack below. Another method is to use a proofing box or simply cover the sheets loosely with plastic wrap and let them proof at room temperature if your kitchen is warm enough.
Proofing usually takes 1.5 to 3 hours, depending on the temperature. The croissants are ready when they are visibly puffy, have doubled in size, and the layers are distinct but jiggle slightly when the sheet is gently shaken. They should feel light and airy.
Baking to Golden Perfection: Achieving the Perfect Crust
Oven Temperature and Baking Time: Key to Success
Baking is the final step to transform your proofed easy mini croissant recipe into golden, flaky pastries. Preheat your oven to a relatively high temperature, typically between 375°F and 400°F (190°C and 200°C). The high initial heat helps the butter melt rapidly and create steam, which lifts the layers. Once the croissants have puffed up and the layers are set (usually within the first 5-8 minutes), you might slightly reduce the temperature (e.g., to 350-375°F or 175-190°C) to ensure they bake through without the exterior burning.
Mini croissants bake much faster than full-sized ones, typically taking 12-18 minutes total. The exact time will depend on your oven and the size of your mini croissants. They are done when they are deeply golden brown all over – not just on top. A pale croissant is likely underbaked and will be doughy inside. Rotate the baking sheets halfway through baking for even browning.
Egg Wash: Adding Shine and Color
Applying an egg wash just before baking gives your easy mini croissant recipe that beautiful, glossy, golden-brown finish. A standard egg wash is made by whisking one whole egg with a tablespoon or two of milk or water. For extra shine, some bakers use only the egg yolk mixed with a little cream. Gently brush the tops and sides of the proofed croissants with the egg wash, being careful not to let it drip down and glue the layers together at the base.
Apply the egg wash evenly using a pastry brush. This step not only enhances the visual appeal but also contributes to the crispness of the outer crust. Some bakers apply a second, lighter coat of egg wash partway through the proofing process or just before they go into the oven. This simple final touch elevates the appearance of your homemade easy mini croissant recipe from good to stunning.
Tips and Tricks for Perfect Mini Croissants

Troubleshooting Common Mini Croissant Baking Issues
Dough Too Sticky? Here's What to Do
If you find your easy mini croissant recipe dough is too sticky during the mixing or rolling process, there are a few things you can do. Firstly, ensure you are using the correct amount of liquid called for in your recipe; too much liquid is a common cause of overly sticky dough. The type and humidity of your flour can also play a role; some flours absorb less liquid than others. If the dough is only slightly sticky, lightly flour your work surface and hands. Use a bench scraper to help handle and move the dough.
If the dough is excessively sticky after initial mixing, you can try adding a very small amount of flour, a tablespoon at a time, while mixing until it reaches the desired consistency. However, avoid adding too much extra flour, as this can make the baked croissants tough. During rolling and lamination, excessive stickiness is often due to the dough or butter warming up too much.
Ensure you are chilling the dough sufficiently between turns (at least 30-60 minutes) and working quickly on a cool surface. A sticky dough can make the lamination process very difficult and compromise the layers in your easy mini croissant recipe.
Croissants Not Rising Properly? Check These Factors
Several factors can contribute to your easy mini croissant recipe not rising properly during proofing or baking. The most common issue is inactive or dead yeast. Ensure your yeast is fresh and was proofed correctly in the right temperature liquid if required. Another cause is insufficient proofing time or an incorrect proofing environment; the temperature might be too cold, slowing down yeast activity, or too hot, killing the yeast or melting the butter. Ensure your proofing space is warm (75-80°F) and humid, and allow enough time for the croissants to double in size.
Overworking the dough during mixing or rolling can also inhibit rise by developing too much gluten, making the dough too tight to expand. Conversely, under-kneading or insufficient lamination turns can result in a dough that lacks structure and layers, leading to a poor rise. Finally, oven temperature plays a role; if the oven is not hot enough, the initial steam burst from the butter may not be sufficient to lift the layers properly. Double-check your oven temperature with a thermometer. Troubleshooting these points will help ensure a beautiful rise for your easy mini croissant recipe.
Flavor Variations: Expanding Your Mini Croissant Repertoire
Chocolate Mini Croissants: A Decadent Treat
Transforming your easy mini croissant recipe into a chocolate delight is simple and incredibly popular. Before rolling up the triangles, place one or two pieces of high-quality dark or semi-sweet chocolate (often called pain au chocolat sticks or batons) at the base of each triangle. As you roll the dough, the chocolate gets encased inside. During baking, the chocolate melts into a luscious center.
Ensure you use chocolate specifically designed for baking, as regular chocolate chips or bars may contain stabilizers that prevent smooth melting. You can also add cocoa powder to the dough mixture for a subtle chocolate flavor throughout the pastry. Baking time and temperature might remain similar, but keep an eye on them as the chocolate could potentially cause slight variations. Chocolate mini croissants are a decadent twist on the classic easy mini croissant recipe.
Almond Mini Croissants: Adding a Nutty Twist
Almond mini croissants, often made with day-old croissants, can also be adapted for your freshly baked batch from an easy mini croissant recipe. After baking, you can slice the mini croissants horizontally, brush them with a simple syrup (equal parts sugar and water, heated until dissolved), and fill them with frangipane (almond cream).
Frangipane is typically made from butter, sugar, ground almonds, eggs, and a touch of flour or cornstarch. Spread a generous layer of frangipane inside the sliced croissant, replace the top, spread more frangipane on top, and sprinkle with sliced almonds. Bake again at a lower temperature (around 350°F or 175°C) for 10-15 minutes until the frangipane is set and the almonds are golden brown. This transforms your easy mini croissant recipe into a rich, nutty pastry.
Storing and Serving Your Homemade Mini Croissants
Keeping Your Croissants Fresh
Homemade mini croissants are best enjoyed fresh from the oven, but you can store them to extend their life slightly. Once completely cooled, store them in an airtight container at room temperature for up to 1-2 days. To maintain their flakiness, avoid refrigerating them, as this can make them stale quickly. If you won't eat them within a couple of days, freezing is the best option.
To freeze baked mini croissants from your easy mini croissant recipe, let them cool completely. Place them in a single layer on a baking sheet and freeze until solid, about 1-2 hours. Then, transfer the frozen croissants to a freezer-safe bag or container. They can be frozen for up to 2-3 months. To reheat, place frozen croissants on a baking sheet and warm in a preheated oven at 350°F (175°C) for 10-15 minutes until crisp and warmed through.
Serving Suggestions: Perfect Pairings for Mini Croissants
Your delicious easy mini croissant recipe creations are versatile and pair wonderfully with various accompaniments. Serve them warm for breakfast or brunch alongside butter and your favorite jam or preserve. Strawberry, raspberry, or apricot jams are classic choices.
For a more substantial treat, serve with scrambled eggs, bacon, or a fruit salad. Mini croissants are also fantastic with coffee, tea, or hot chocolate. For dessert, slice them open and fill with whipped cream and berries, or drizzle with chocolate sauce. Their small size makes them ideal for a pastry platter at a gathering. Enjoy the fruits of your labor from mastering this easy mini croissant recipe!
Conclusion: Enjoying Your Easy Mini Croissant Recipe Success
Congratulations on successfully baking your easy mini croissant recipe! You've navigated the steps of dough preparation, lamination, shaping, and baking to create these delightful, flaky pastries. We love seeing what our community bakes. Share photos of your beautiful mini croissants on social media using the hashtag #BakeWithEaseMinis, or tag us in your posts. Your success can inspire others to try their hand at this rewarding baking project.
Seeing the variety of results and hearing about your experiences helps us continue to provide the best resources for home bakers. Whether you stuck to the classic or experimented with chocolate or almond variations, your homemade mini croissants are something to be proud of. Enjoy sharing them with friends and family!
Further Baking Adventures: Exploring More Recipes at BakeWithEase.com
Mastering an easy mini croissant recipe is a significant achievement and opens the door to exploring more advanced baking techniques. Now that you're comfortable with laminated dough, why not try making danishes, puff pastry, or even full-sized croissants? BakeWithEase.com is packed with a wide range of recipes and guides for all skill levels.
From simple cookies and cakes for beginners to challenging bread and pastry projects, you'll find step-by-step instructions, helpful tips, and inspiration for your next kitchen adventure. Keep practicing your skills, try new ingredients, and continue to enjoy the wonderful world of baking at home. Your success with this easy mini croissant recipe is just the beginning!
Frequently Asked Questions
What makes this mini croissant recipe "easy"?
The recipe is designed with beginner bakers in mind, using simple ingredients and clear, step-by-step instructions. No prior croissant-making experience is necessary!
Can I substitute any ingredients in the mini croissant recipe?
While we recommend sticking to the recipe for best results, you could experiment with different types of flour or dairy-free butter substitutes, though the texture may vary.
How long does it take to make these mini croissants from start to finish?
The process takes approximately 3-4 hours, including chilling time for the dough. Don't be intimidated; much of that time is inactive!
What's the best way to store leftover mini croissants?
Store them in an airtight container at room temperature for up to 2 days, or freeze them for longer storage. Reheat in a warm oven to revive their crispy texture.
What are some variations I can try with this mini croissant recipe?
You can add chocolate chips or almond paste before rolling them up, or brush them with a sweet glaze after baking for extra flavor.
Final Reflection: The Joy of Tiny, But Mighty, Croissants
The seemingly simple act of baking mini croissants transcends mere culinary creation; it's a potent symbol of connection and joy, perfectly suited to our increasingly busy yet craving-connection world. These bite-sized pastries, easily achievable with the recipe detailed above, offer a delightful way to share happiness, whether with loved ones, colleagues, or even oneself. The ease of the recipe makes the act of baking accessible to everyone, regardless of experience.
The enduring appeal of baked goods, particularly those as universally loved as croissants, lies in their ability to evoke feelings of warmth, comfort, and shared experience. They're a small gesture that can speak volumes. Baking is at once child's play and adult joy. And love, of course.
This quote perfectly encapsulates the magic of creating something delicious and sharing it with others, a sentiment deeply resonating with the simple act of baking these mini croissants. The process itself, from the initial kneading to the golden-brown finish, is inherently therapeutic and rewarding.
Now, I invite you to consider the possibilities. Don't just bake these mini croissants; bake them with intention. Share them with someone you care about, use them to brighten someone's day, or simply savor the delicious reward of your own handiwork. Let the aroma fill your kitchen with warmth and the taste bring a smile to your face. The joy isn't just in the eating, but in the making and the sharing – a tiny croissant, a mighty impact.
Unleash Your Inner Pastry Chef!
Thanks for joining us on this delicious journey into the world of mini croissants! We hope you've gained the confidence to tackle this seemingly daunting treat. Now it's time to put your newfound skills to the test!
- Bake a batch of these mini croissants today! Use the recipe as a springboard – experiment with different fillings and glazes.
- Share your baking triumphs (and even your failures!) on social media using #BakeWithEaseMiniCroissants. Let's inspire each other!
- Challenge a friend to a mini croissant bake-off – may the best baker win!
Ready to transform your kitchen into a Parisian patisserie?