
Advanced Whole Wheat Pizza Dough: Achieving a Light and Delicious Crust


Welcome to BakeWithEase, your haven for baking brilliance! Ever dream of crafting a light and airy whole wheat crust that defies expectations? Finally, achieving that perfect balance of healthy and delicious is within reach. Dive in to unlock the secrets behind this surprisingly simple technique, and prepare to elevate your pizza nights forever. Curious about the key? Let's get baking!
- Introduction: Elevating Your Whole Wheat Pizza Game with BakeWithEase
- Understanding Whole Wheat Flour for Pizza
- Key Techniques for a Light and Airy Whole Wheat Pizza Dough
- The BakeWithEase Recipe: Light and Airy Whole Wheat Pizza Dough
- Tips and Tricks for Perfect Whole Wheat Pizza Crust
- Serving and Storage Suggestions for Your Whole Wheat Pizza
- Conclusion: Enjoying the Deliciousness of Light and Airy Whole Wheat Pizza with BakeWithEase
-
Frequently Asked Questions
- What makes this whole wheat pizza dough "light and airy" compared to other whole wheat recipes?
- Is it possible to substitute all-purpose flour for some of the whole wheat flour?
- What is the ideal proofing time for this advanced whole wheat pizza dough?
- Can I use this dough recipe for other types of bread besides pizza?
- What are some tips for ensuring the dough doesn't become too dense or tough?
- Final Reflection: The Flour Power of Light and Airy Whole Wheat
- Unleash Your Inner Pizzaiolo: Craft the Perfect Crust!
Introduction: Elevating Your Whole Wheat Pizza Game with BakeWithEase
Why Whole Wheat Pizza Dough Deserves a Second Look
Whole wheat pizza dough offers a delightful depth of flavor and nutritional benefits that white flour simply can't match. While often perceived as dense or heavy, a properly made whole wheat crust brings a rustic, nutty aroma and a satisfying chew that complements a wide variety of toppings. Moving beyond the standard white flour base opens up a new world of textures and tastes for your homemade pizza nights.
Furthermore, incorporating whole wheat flour increases the fiber content of your pizza crust significantly. For instance, a typical serving of white flour pizza crust might contain around 1-2 grams of fiber, whereas a similar serving made with 100% whole wheat flour could boast 4-5 grams or more. This added fiber contributes to a feeling of fullness and supports digestive health, making your delicious pizza a slightly more wholesome meal option without sacrificing taste.
The Challenge of Light and Airy Whole Wheat Crust
Achieving a light and airy whole wheat crust presents a unique challenge compared to working with refined white flour. Whole wheat flour contains the bran and germ of the wheat kernel, which are sharp and can interfere with gluten development. Gluten, the protein network that gives bread its structure and elasticity, is crucial for trapping the carbon dioxide produced by yeast, creating those desirable bubbles and a light and airy whole wheat texture.
The presence of bran and germ essentially acts like tiny knives, cutting the developing gluten strands. This makes the dough less extensible and more prone to being dense. Overcoming this requires specific techniques focused on hydrating the flour properly, developing gluten gently but effectively, and managing fermentation to encourage maximum gas production and retention. It's a rewarding process that transforms what could be a heavy base into a wonderfully light and airy whole wheat foundation for your pizza.
Understanding Whole Wheat Flour for Pizza
The Composition of Whole Wheat Flour and its Impact on Dough
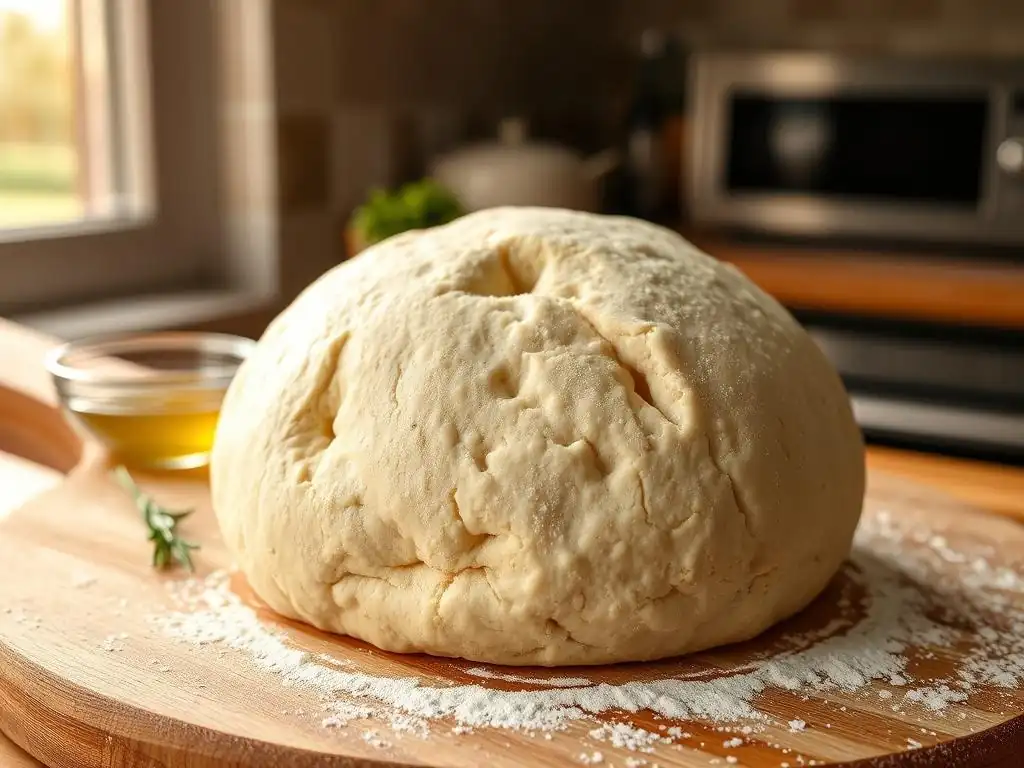
Whole wheat flour is milled from the entire wheat kernel, including the endosperm, bran, and germ. The endosperm is primarily starch and protein (gluten), similar to white flour. However, the bran (the outer layer) and the germ (the embryo) are rich in fiber, fats, vitamins, and minerals. While these components are nutritionally valuable, they significantly impact dough structure.
The bran particles are particularly challenging. They are rough and sharp, physically cutting the gluten network as it forms during kneading and fermentation. The germ, containing fats and enzymes, can also affect gluten development and dough stability over longer fermentation periods. This composition is why 100% whole wheat dough often feels less elastic and rises less dramatically than dough made with refined flour, presenting a hurdle to achieving a truly light and airy whole wheat result.
Choosing the Right Type of Whole Wheat Flour for Pizza Dough
Not all whole wheat flours are created equal when it comes to pizza. The type of wheat kernel used and the milling process can make a big difference. Hard red wheat, commonly used for bread flour, has a higher protein content (often 13-15%) which is beneficial for developing a strong gluten network. Hard white wheat is another excellent option; it has a similar protein level but a milder flavor and lighter color, which some prefer.
For a light and airy whole wheat pizza, look for whole wheat flours labeled as "bread flour" or specifically noted for higher protein content. Avoid all-purpose whole wheat flour if possible, as its protein content is typically lower (around 10-11%), making it harder to build sufficient structure. Some specialty flours, like organic stone-ground whole wheat, can offer exceptional flavor but may require hydration adjustments due to varying absorption rates.
Exploring Different Grinds: Fine vs. Coarse Whole Wheat
The grind of the whole wheat flour also plays a crucial role in dough texture and your ability to create a light and airy whole wheat crust. Finely ground whole wheat flour has smaller bran particles, which cause less damage to the gluten network during mixing and kneading. This results in a smoother, more extensible dough that is easier to work with and can achieve a better rise.
Coarsely ground whole wheat flour, on the other hand, has larger, more abrasive bran particles. While these flours offer a more rustic texture and often a more intense flavor, they pose a greater challenge to gluten development. Dough made with coarse whole wheat flour is typically less elastic and more prone to tearing. If using coarse flour, techniques like extended autolyse and gentle, prolonged fermentation become even more critical to mitigate the bran's impact and achieve any semblance of lightness.
Key Techniques for a Light and Airy Whole Wheat Pizza Dough
The Importance of Proper Hydration for Whole Wheat Dough
Hydration, the ratio of water to flour, is paramount when working with whole wheat flour. Whole wheat absorbs significantly more water than white flour due to the presence of bran and germ. A typical white pizza dough might use a hydration level of 60-65% (water weight as a percentage of flour weight), but a whole wheat dough often requires 70-80% hydration, or even higher, to feel pliable and workable.
Using sufficient water allows the bran and germ to soften and absorb moisture, reducing their abrasiveness on the gluten structure. It also facilitates gluten development by providing the necessary medium for proteins to bond. A dough that feels too stiff or dry at the start is unlikely to become a light and airy whole wheat crust, no matter how much you knead it. Don't be afraid of a wet, sticky dough initially; proper technique will make it manageable.
Mastering the Autolyse Technique for Enhanced Flavor and Texture
Autolyse is a simple yet powerful technique that involves mixing just the flour and water and letting the mixture rest for 20 minutes to an hour before adding yeast, salt, or other ingredients. This resting period allows the flour to fully hydrate and gives enzymes naturally present in the flour time to start breaking down proteins.
For whole wheat dough, autolyse is particularly beneficial. It allows the bran and germ to soak up water, softening them and minimizing their negative impact on gluten. It also kickstarts the gluten development process without the stress of kneading, making the subsequent mixing much easier and more effective. An autolysed dough is noticeably smoother and more extensible, setting the stage for a truly light and airy whole wheat texture.
Developing Gluten Strength: Kneading and Folding Methods
Developing a strong gluten network is essential for trapping gas and creating a light and airy whole wheat crust. Whole wheat dough requires careful handling to build this structure without overworking it. Traditional vigorous kneading can be effective, but it's important to monitor the dough's progress closely. Aim for kneading times that might be slightly longer than for white dough, perhaps 8-12 minutes in a stand mixer or 15-20 minutes by hand, until the dough feels smoother and more elastic.
Alternatively, the stretch and fold method is excellent for whole wheat. This gentle technique involves periodically folding the dough over itself during the bulk fermentation period. Typically, you might perform 3-5 sets of folds at 20-45 minute intervals. This method develops gluten gradually, causes less stress on the delicate network, and helps build structure effectively, contributing significantly to a light and airy whole wheat outcome.
The Windowpane Test: Knowing When Your Dough is Ready
The windowpane test is a classic method for assessing gluten development. To perform it, gently pull a small piece of dough from the main mass. Slowly stretch it outwards with your fingers. If the dough can be stretched very thin without tearing, becoming translucent enough that you could theoretically see light through it (like a windowpane), then the gluten is well-developed.
For whole wheat dough, achieving a perfect windowpane might be slightly harder due to the bran particles. Don't expect it to be as smooth or transparent as white dough. However, you should still be able to stretch it reasonably thin before it breaks. If it tears immediately, it needs more kneading or folding. If it stretches well, you've likely built sufficient gluten for a light and airy whole wheat crust.
Proofing Strategies for Optimal Rise and Flavor
Proofing, or fermentation, is where yeast produces the gas that makes dough rise and develops complex flavors. Proper proofing is critical for a light and airy whole wheat crust. Temperature and time are key factors.
Bulk Fermentation: The Key to a Light and Airy Crust
Bulk fermentation is the first rise of the dough before it's divided and shaped. This is where most of the gas production occurs. For whole wheat dough, a longer, slower bulk fermentation is generally beneficial. At room temperature (around 22-24°C or 72-75°F), this might take 2-4 hours, or until the dough has significantly increased in volume (perhaps 50-75%).
During this time, the yeast is active, producing CO2 and alcohol. Enzymes continue to break down starches into sugars, feeding the yeast and contributing to flavor. The gluten network continues to relax and become more extensible, allowing the dough to expand. Proper bulk fermentation builds the internal structure needed for a light and airy whole wheat pizza.
Cold Fermentation: Developing Complex Flavors
Cold fermentation involves refrigerating the dough for an extended period after the bulk fermentation or shaping. This slows down yeast activity dramatically but allows enzymes to continue their work, creating more complex and nuanced flavors. Cold fermentation for 24 to 72 hours at refrigerator temperature (around 4-5°C or 39-41°F) can transform a simple dough into something truly special.
Beyond flavor, cold fermentation also improves the dough's handling qualities and contributes to a light and airy whole wheat texture. The slow rise makes the gas bubbles smaller and more evenly distributed. The gluten network relaxes further, making the dough easier to stretch without tearing. Dough that has been cold fermented typically results in a crust with a better structure and a more satisfying chew, alongside its enhanced taste.
The BakeWithEase Recipe: Light and Airy Whole Wheat Pizza Dough
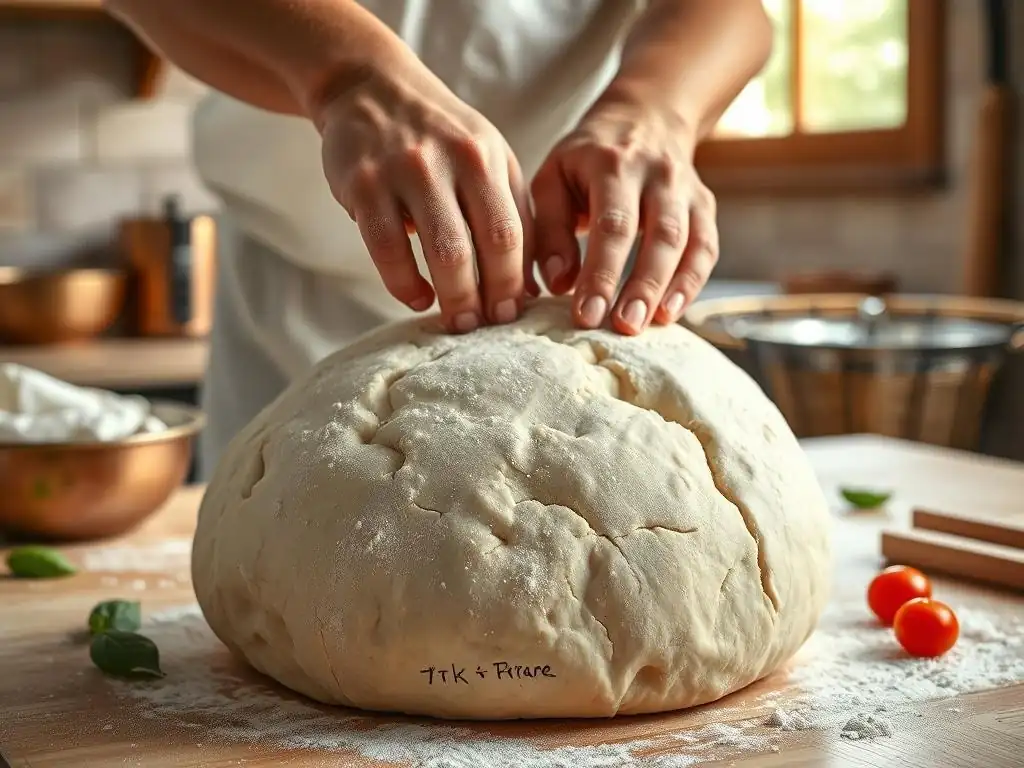
Creating a truly light and airy whole wheat pizza starts with quality ingredients and precise measurements. This recipe is designed for success, focusing on hydration and protein content.
Here’s what you'll need for approximately two 12-inch pizzas:
- 400 grams (about 3 1/4 cups) High-Protein Whole Wheat Bread Flour
- 300 grams (about 1 1/4 cups) Warm Water (around 30-35°C or 85-95°F)
- 8 grams (about 1 teaspoon) Fine Sea Salt
- 3 grams (about 1 teaspoon) Instant Dry Yeast
- 10-15 grams (about 1-2 tablespoons) Olive Oil (optional, adds softness)
Using precise measurements by weight (grams) is highly recommended for consistent results, especially with whole wheat flour which can vary in volume depending on the grind.
Step-by-Step Instructions: From Mixing to Shaping
Follow these steps carefully to guide your dough from simple ingredients to a potential light and airy whole wheat crust. Patience and attention to detail are key.
Mixing the Dough: Achieving the Right Consistency
- In a large bowl, combine the whole wheat flour and warm water. Mix with a spoon or your hand until just combined and no dry flour remains. This is your autolyse mix.
- Cover the bowl and let it rest for 30 minutes to 1 hour. This allows the flour to hydrate and gluten development to begin.
- After the rest, sprinkle the instant yeast and salt over the dough. If using, add the olive oil now.
- Mix everything together thoroughly. You can use a stand mixer with a dough hook on low speed for 8-10 minutes, or knead by hand on a lightly floured surface for 15-20 minutes. The dough will be sticky initially due to the high hydration.
- [ ] Did the dough start sticky? (Expected)
- [ ] Did the dough become smoother and more elastic after kneading? (Goal)
- The goal is a dough that is still quite soft and slightly tacky, but pulls away from the sides of the bowl (in a mixer) or your hands (by hand). It should pass a modified windowpane test (stretches thin before tearing).
First Rise (Bulk Fermentation): Time and Temperature
- Lightly grease a clean bowl with a little olive oil.
- Place the dough in the bowl, turning it to coat all sides.
- Cover the bowl tightly with plastic wrap or a damp cloth.
- Let the dough rise at room temperature (around 22-24°C or 72-75°F) for 2-3 hours. During this time, perform 3-4 sets of stretch and folds every 30-45 minutes during the first 1.5-2 hours.
- [ ] Performed first stretch and fold?
- [ ] Performed second stretch and fold?
- [ ] Performed third stretch and fold?
- [ ] Performed fourth stretch and fold?
- The dough should increase in volume by about 50-75% and feel noticeably gassier. This bulk fermentation is crucial for developing the light and airy whole wheat internal structure.
Shaping the Dough: Gentle Handling for Air Retention
- Gently turn the dough out onto a lightly floured surface. Avoid degassing it too much.
- Divide the dough into two equal portions.
- Gently shape each portion into a loose ball by tucking the edges underneath. Let the balls rest for 15-20 minutes, covered, to relax the gluten.
- Working with one ball at a time, gently stretch or press the dough from the center outwards to form your pizza shape. Avoid pressing out all the gas bubbles, especially around the rim, to encourage a light and airy whole wheat crust. Use your fingertips or knuckles rather than a rolling pin if possible.
Second Rise (Proofing): Ensuring a Light Texture
- Once shaped, carefully transfer the pizza base to a pizza peel or baking sheet dusted with cornmeal or semolina.
- Allow the shaped dough to proof for another 30-60 minutes at room temperature while you prepare your toppings and preheat your oven. It should puff up slightly.
- Alternatively, for enhanced flavor and texture, you can cold ferment the dough balls. After dividing and gently shaping into balls (step 3 above), place them in individual lightly oiled containers or bags and refrigerate for 24-72 hours. Allow them to come to room temperature for 1-2 hours before shaping and baking. This cold proofing significantly contributes to a light and airy whole wheat crust with complex flavor.
Baking: Temperature and Time for a Crispy Crust
- Preheat your oven to the highest possible temperature, ideally 250-260°C (480-500°F) or even higher if your oven allows. If using a pizza stone or steel, place it in the oven during preheating for at least 30-60 minutes. High heat is essential for a quick bake and a crispy exterior while keeping the interior light and airy whole wheat.
- Carefully transfer the topped pizza onto the preheated stone or steel using the peel, or place the baking sheet directly into the oven.
- Bake for 8-12 minutes, or until the crust is golden brown and the cheese is melted and bubbly. Baking time will vary depending on your oven and toppings.
- Use a pizza peel or spatula to remove the pizza from the oven.
Tips and Tricks for Perfect Whole Wheat Pizza Crust
Troubleshooting Common Whole Wheat Pizza Dough Problems
Working with whole wheat can sometimes present challenges, but understanding common issues helps you fix them.
Dense Crust: Causes and Solutions
A dense crust is a common complaint with whole wheat pizza. This is often caused by insufficient gluten development, inadequate hydration, or under-proofing. If your dough is dense, consider increasing the hydration slightly in your next batch (add 10-20 grams more water). Ensure you are kneading or folding sufficiently to build strength. Also, allow adequate time for bulk fermentation and the final proof – rushing these steps leads to a heavy crust. For example, if your typical room temperature bulk ferment is 2 hours, try extending it to 3 hours and see if the dough feels gassier and lighter.
Another factor can be using flour that is too low in protein or too coarsely ground. Switching to a high-protein, finely ground whole wheat bread flour can make a significant difference in achieving a light and airy whole wheat texture. Over-handling the dough during shaping can also deflate it; try to be as gentle as possible when forming the pizza base.
Dough That's Too Sticky: Adjusting Hydration
High hydration is necessary for whole wheat, but sometimes dough can feel too sticky to handle. If your dough is unmanageably sticky after mixing and initial kneading, resist the urge to add large amounts of flour. Instead, try adding just a tablespoon of flour at a time while continuing to knead, until the dough reaches a point where it's still soft and tacky but can be handled without sticking excessively to your hands or the work surface. A dough that's too dry will never yield a light and airy whole wheat result.
Alternatively, ensure you are using sufficient flour on your work surface and hands when shaping. A bench scraper can be invaluable for handling sticky dough. Remember that dough tends to become less sticky as gluten develops during kneading and as it rests during fermentation. So, sometimes, just giving it time (during an autolyse or rest period) can help manage stickiness without adding more flour.
Lack of Flavor: Enhancing Whole Wheat Flavor
While whole wheat inherently has more flavor than white flour, you can enhance its natural nuttiness and develop deeper, more complex tastes. The most effective way is through cold fermentation. Allowing the dough to ferment in the refrigerator for 24-72 hours dramatically increases enzymatic activity, producing more flavorful compounds. A 48-hour cold ferment, for instance, will yield a much richer flavor than a 2-hour room temperature proof.
Using a small amount of sourdough starter alongside or instead of commercial yeast can also impart wonderful tangy notes that complement the whole wheat flavor profile. Additionally, consider using high-quality sea salt, which contributes clean flavor. A touch of olive oil in the dough also adds richness.
Experimenting with Flavors and Add-ins
Once you've mastered the basic light and airy whole wheat dough, you can start experimenting with additions to the dough itself.
Herbs, Spices, and Cheese Additions
Incorporating dried herbs like oregano, basil, or rosemary directly into the dough during the initial mixing phase can infuse every bite with aromatic flavor. Generally, a teaspoon or two per batch of dough (for two pizzas) is a good starting point. Spices such as garlic powder or a pinch of red pepper flakes can also add subtle heat or pungency.
For an extra layer of richness, shredded hard cheese like Parmesan or Pecorino Romano can be added during the final stages of kneading. About 20-30 grams of finely grated cheese per batch can melt into the dough during baking, creating savory pockets and a slightly richer crust. Just be mindful that cheese adds fat and can slightly inhibit gluten, so don't add too much.
Achieving a Crispy Crust: Baking Stone vs. Pizza Steel
A crispy crust exterior contrasting with a light and airy whole wheat interior is the ideal. This is best achieved with high heat and a conductive surface.
A pizza stone is a porous ceramic or cordierite surface that absorbs and radiates heat, simulating a brick oven floor. A pizza steel, made of steel or iron, is even more conductive and transfers heat to the dough faster and more intensely. Both need to be thoroughly preheated in a hot oven (250°C+/480°F+) for at least 30 minutes, preferably 60 minutes, before baking.
Placing the pizza directly onto this hot surface provides an intense burst of heat to the bottom of the dough, causing the moisture to instantly turn to steam and create a crispy base and encouraging a rapid, airy rise in the crust edges. A steel generally produces a crispier bottom faster than a stone.
Serving and Storage Suggestions for Your Whole Wheat Pizza

Best Toppings for a Light and Airy Whole Wheat Pizza
The rustic flavor and texture of a light and airy whole wheat crust pair wonderfully with robust toppings. Consider ingredients that stand up to the nutty base.
- Roasted Vegetables: Bell peppers, onions, mushrooms, zucchini, or broccoli tossed with olive oil, salt, and herbs, roasted until tender and slightly caramelized.
- Hearty Sauces: A robust tomato sauce made with crushed San Marzano tomatoes or even a pesto base works well.
- Strong Cheeses: Mozzarella is a must for meltiness, but consider adding dollops of ricotta, crumbled goat cheese, or sharp cheddar for bursts of flavor.
- Savory Proteins: Italian sausage, pepperoni, grilled chicken, or even plant-based alternatives like seasoned lentils or beans complement the whole wheat base.
- Finishing Touches: Fresh basil leaves added after baking, a drizzle of spicy honey, or a sprinkle of red pepper flakes elevate the final product.
Aim for toppings that are flavorful but not excessively wet, as too much moisture can prevent the light and airy whole wheat crust from crisping properly.
Storing Leftover Dough and Baked Pizza
If you have leftover dough, it can be stored for later use. After the bulk fermentation, shape the dough into balls and place them in individual lightly oiled airtight containers or zip-top bags. They can be stored in the refrigerator for up to 3-4 days, continuing to cold ferment and develop flavor. To use, remove from the fridge 1-2 hours before shaping and baking. For longer storage, dough can be frozen for 2-3 months. Thaw overnight in the refrigerator, then let it come to room temperature for 1-2 hours before shaping.
Leftover baked pizza can be stored in the refrigerator for 3-4 days. For best results when reheating and to maintain some crispiness in your light and airy whole wheat crust, reheat slices in a skillet over medium heat until warm and the bottom is crispy, or on a baking sheet in a hot oven (around 180-200°C or 350-400°F) for 5-10 minutes. Avoid using a microwave if you want to preserve the texture.
Conclusion: Enjoying the Deliciousness of Light and Airy Whole Wheat Pizza with BakeWithEase
Mastering Whole Wheat Pizza Dough: A Rewarding Baking Journey
Embarking on the journey to master light and airy whole wheat pizza dough is incredibly rewarding. It challenges common perceptions about whole wheat and opens up a world of flavor and texture possibilities that are both delicious and offer added nutritional benefits. By understanding the unique properties of whole wheat flour and employing techniques like proper hydration, autolyse, careful gluten development through kneading or folding, and strategic fermentation (especially cold fermentation), you can consistently produce crusts that are far from dense or heavy.
The process requires a bit more attention and patience than working with white flour, but the results are well worth the effort. Each bake is a learning opportunity, allowing you to fine-tune your hydration, fermentation times, and handling techniques. With practice, the feel of the dough will become familiar, and you'll instinctively know how to coax that desirable light and airy whole wheat texture from your ingredients. Enjoy the process, experiment with flavors, and most importantly, savor the delicious, wholesome pizzas you create right in your own kitchen using the techniques you've learned here at BakeWithEase.
Frequently Asked Questions
What makes this whole wheat pizza dough "light and airy" compared to other whole wheat recipes?
This recipe uses specific techniques like a long fermentation and high hydration to develop gluten structure, resulting in a lighter texture despite using whole wheat flour.
Is it possible to substitute all-purpose flour for some of the whole wheat flour?
While possible, it will change the flavor and texture. Substituting a small amount (e.g., 25%) can make the dough slightly easier to handle, but stick to the recipe initially for best results.
What is the ideal proofing time for this advanced whole wheat pizza dough?
Proofing time depends on room temperature, but generally, aim for at least 12-24 hours in the refrigerator for optimal flavor and texture development.
Can I use this dough recipe for other types of bread besides pizza?
Yes, with some modifications! The recipe can be adapted for focaccia or flatbreads. Adjust baking time and temperature based on the desired outcome.
What are some tips for ensuring the dough doesn't become too dense or tough?
Avoid over-kneading the dough. Also, ensure you are using fresh, high-quality whole wheat flour, as older flour can affect the gluten development and final texture.
Final Reflection: The Flour Power of Light and Airy Whole Wheat
The pursuit of a light and airy whole wheat pizza crust isn't just a culinary quest; it's a testament to the power of innovation in the kitchen. We've explored techniques that challenge the preconceived notions surrounding whole wheat dough, proving that a hearty, nutritious crust doesn't have to be dense and heavy. This isn't just about pizza; it's about reimagining the possibilities of whole grains in our everyday cooking.
The journey to mastering this recipe has been a personal one, highlighting the importance of patience and experimentation in baking. It's a reminder that even seemingly simple recipes can hold layers of complexity and reward those who dedicate time and effort to perfecting their craft. The best things in life are worth waiting for,
and this perfectly captures the satisfaction of biting into a perfectly risen, light-as-air whole wheat pizza crust. The subtle nuances of flavor, the satisfying chew, and the overall lightness are a testament to the transformative power of understanding the ingredients and techniques involved.
Now, I invite you to embark on your own culinary adventure. Don't be afraid to experiment with different flours, hydration levels, and proofing times. The recipe provided is a starting point, a foundation upon which you can build your own unique masterpiece. Embrace the process, celebrate the small victories, and most importantly, savor the delicious results. The journey to the perfect light and airy whole wheat pizza crust is yours to discover.
Unleash Your Inner Pizzaiolo: Craft the Perfect Crust!
Thanks for joining us on this delicious journey into the world of whole wheat pizza dough! We hope you’ve gained the knowledge and confidence to create truly amazing pizzas at home. Now it’s time to put your newfound skills to the test.
- Bake your masterpiece! Use the recipe and techniques you just learned to make your own light and airy whole wheat pizza. Experiment with different toppings and share your creations with us!
- Share your pizza journey: Tag us on social media with your pizza photos – we'd love to see what you create! Use #BakeWithEaseWholeWheatPizza.
- Explore other BakeWithEase recipes: Dive deeper into our collection of bread and pizza recipes for even more inspiration.
Ready to transform your pizza nights? What unique topping combination will you try first?