
Troubleshoot International Breads: Fix Common Issues for Global Recipes

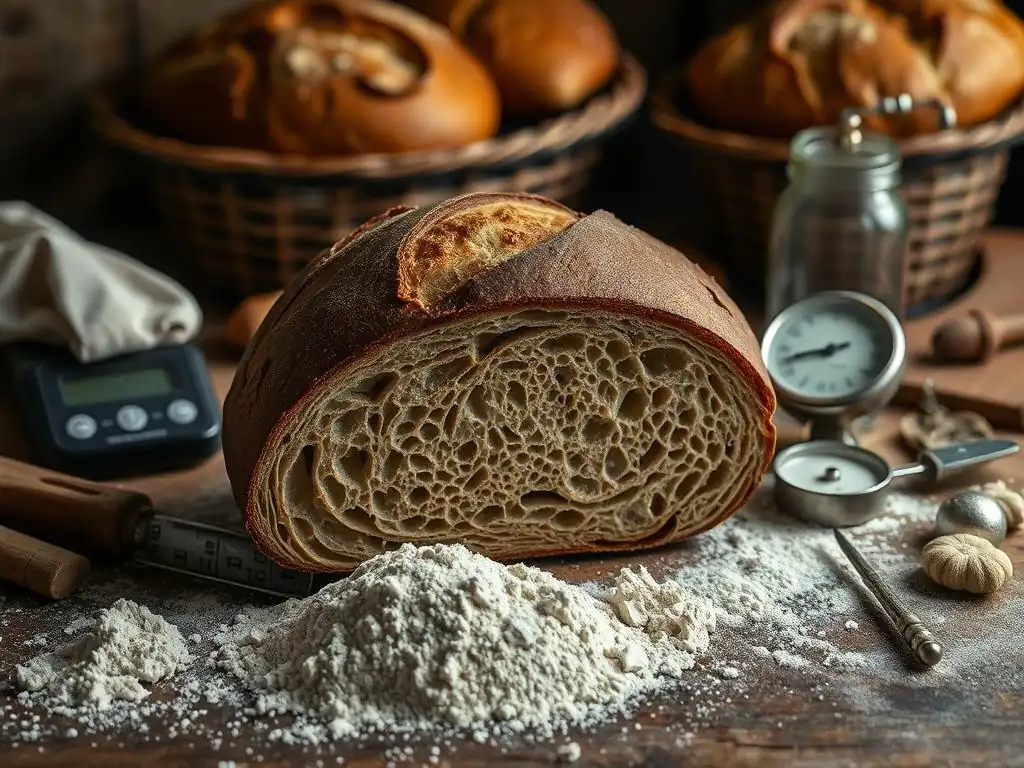
Welcome to BakeWithEase, your trusted guide to the delightful world of baking! Ever dreamt of perfectly crusty sourdough bread but struggled with common pitfalls? This article dives deep into sourdough bread troubleshooting tips, offering practical solutions to fix those frustrating issues. Discover how to achieve baking perfection, one delicious loaf at a time. Ready to unlock the secrets?
- Introduction to International Bread Baking Challenges
- Sourdough Bread Troubleshooting Tips for Global Recipes
- Common Problems and Solutions in International Bread Baking
- Specific International Bread Troubleshooting
- Mastering Dough Hydration for International Breads
- Flour Selection: Choosing the Right Flour for Global Breads
- Troubleshooting Oven Issues for Perfect International Breads
- Advanced Sourdough Bread Troubleshooting for International Bakers
- Conclusion: Confidently Baking International Breads
-
Frequently Asked Questions
- What are some common problems encountered when baking sourdough bread, especially when trying international variations?
- How can I tell if my sourdough starter is active enough for baking?
- What causes sourdough bread to be too dense or gummy inside?
- How do different types of flour affect the outcome of my sourdough bread?
- Where can I find reliable recipes and techniques specifically for baking international sourdough breads?
- Final Reflection: The Global Rise of Sourdough and the Art of Troubleshooting
- Unlock Your Global Baking Potential!
Introduction to International Bread Baking Challenges
Baking Beyond Borders: Understanding Unique Bread-Making Issues
Embarking on a journey through international bread recipes can be incredibly rewarding, offering a taste of cultures from around the globe right in your kitchen. However, translating a recipe from its origin to your home environment often introduces unique challenges. Factors like local flour characteristics, prevailing humidity and temperature, and even the type of oven used in the original context can significantly impact the outcome. For instance, a recipe perfected in the dry climate of the Mediterranean might behave very differently in a humid tropical setting, affecting everything from dough hydration to proofing time.
Furthermore, many traditional international bread recipes rely on subtle cues and experienced intuition rather than precise measurements, making them harder to replicate. Consider rustic European loaves, often made with regional flours that have specific protein levels and absorption rates not found in standard all-purpose flour. Or think about Asian steamed buns, which require a delicate balance of ingredients and specific steaming conditions to achieve their signature soft texture. Understanding these inherent variables is the first step in successfully troubleshooting international breads and adapting recipes to your specific baking conditions.
Why International Breads Need Specific Troubleshooting
While general bread troubleshooting principles apply across the board, international breads often require a more nuanced approach. Their diverse ingredients, unique techniques, and varied baking methods mean that a one-size-fits-all solution rarely works. A dense loaf might be under-proofed in one recipe but require a specific kneading technique or flour type in another. Common sourdough bread troubleshooting tips for a high-hydration Italian loaf, for example, will differ from those needed for a dense German rye sourdough, even though both use a sourdough starter.
The specific equipment required can also be a factor. Baking naan traditionally uses a tandoor oven, while baguettes thrive with ample steam in a conventional oven, and some Scandinavian flatbreads are cooked on a griddle. Each method presents distinct potential pitfalls. Therefore, targeted troubleshooting that considers the cultural context, ingredient specifics, and intended baking method of an international bread is crucial for achieving authentic and delicious results. This tailored perspective helps bakers identify the root cause of issues more accurately and apply effective fixes.
Sourdough Bread Troubleshooting Tips for Global Recipes
Identifying Sourdough Bread Problems in International Baking
Sourdough baking adds another layer of complexity, and when you apply it to international recipes, the variables multiply. A key challenge is understanding how different flours used globally interact with a sourdough starter. For instance, a starter thriving on strong bread flour might behave sluggishly when introduced to a recipe calling for softer French T55 flour or dense German rye flour. Signs of trouble include a starter that doesn't double within a predictable timeframe (perhaps 4-8 hours at room temperature), dough that shows minimal activity during bulk fermentation, or a loaf with very little oven spring.
Furthermore, the ambient temperature and humidity, which vary significantly worldwide, heavily influence sourdough fermentation rates. A recipe developed in a cool European kitchen might over-ferment rapidly in a warm, humid climate, leading to a slack, difficult-to-handle dough and a dense, gummy crumb.
Conversely, baking in a cold environment can lead to under-fermented dough and a tight, heavy loaf. Recognizing these symptoms – like excessive spread during proofing, a sticky, unmanageable dough, or a lack of airy pockets in the crumb – are vital first steps in applying effective sourdough bread troubleshooting tips tailored to the specific international recipe and your environment.
Key Sourdough Bread Troubleshooting Tips
Effective sourdough bread troubleshooting tips for international recipes often begin with assessing your starter's health and adapting the fermentation schedule. Ensure your starter is active and robust by feeding it regularly and observing its rise and fall. If using a different flour type than usual for a specific international recipe (like a high-rye or whole wheat), consider feeding your starter a small portion of that flour alongside its usual feed for a few cycles to help it adapt.
Adjusting fermentation times based on your kitchen temperature is paramount. If your kitchen is warmer than the recipe assumes (say, above 24°C), reduce bulk fermentation and proofing times, potentially by 20-30%. If it's cooler (below 20°C), you may need to extend times or find a warmer spot for your dough. For many international sourdoughs, especially high-hydration ones like Italian ciabatta or pain de campagne, using a cold proofing step in the refrigerator ( typically 8-24 hours) can help control fermentation, develop flavor, and make the dough easier to handle, providing a valuable tool in your sourdough bread troubleshooting tips arsenal. Monitoring the dough itself – looking for signs like increased volume ( often 50-100% depending on the recipe), the development of gas bubbles, and a slightly domed surface during bulk fermentation – is more reliable than strictly adhering to timed schedules.
Common Problems and Solutions in International Bread Baking
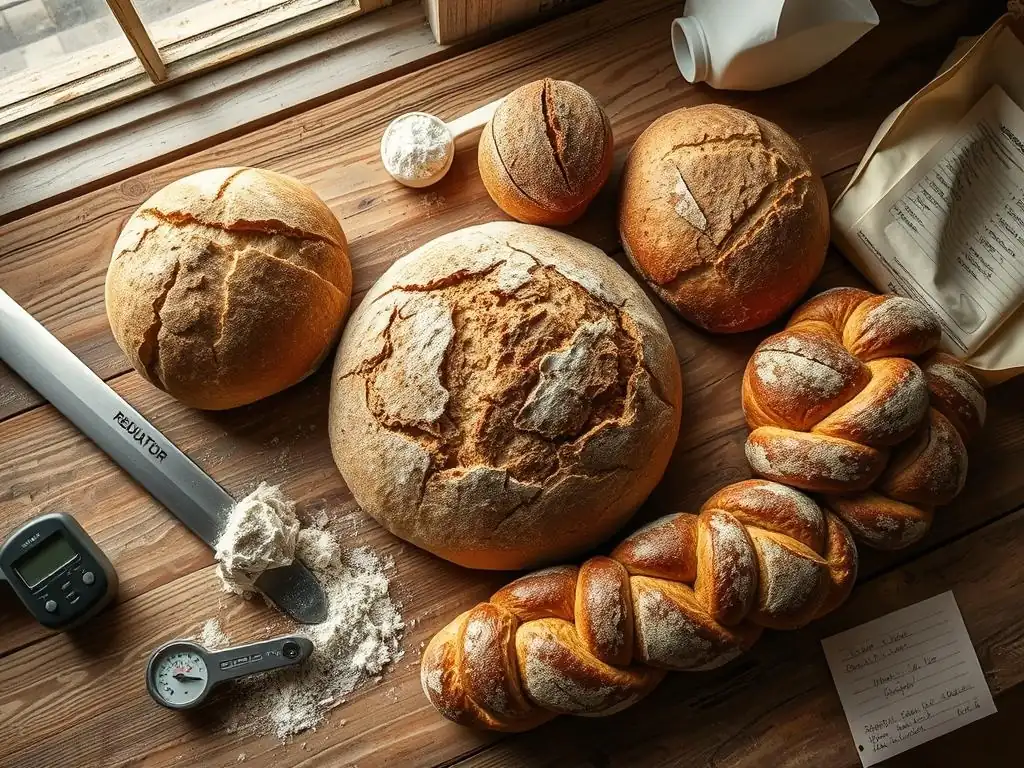
Dense and Heavy Breads: Troubleshooting Density Issues
A dense or heavy texture is one of the most common frustrations when baking any bread, and international recipes are no exception. This issue often stems from insufficient leavening, whether due to an inactive yeast or starter, under-proofing, or a dough structure too weak to support expansion.
For instance, enriched doughs like challah or brioche, or those with a high percentage of add-ins like nuts or fruits, can sometimes be denser if not handled and proofed correctly. Similarly, breads made with a high proportion of whole grains or rye flour often have a naturally tighter crumb structure than white flour loaves, but they shouldn't be excessively heavy.
Identifying the cause requires examining the process. Did the dough visibly increase in size during bulk fermentation and proofing? Was the yeast fresh, or the sourdough starter active? Was the dough properly kneaded to develop sufficient gluten structure? Sometimes, even the type of flour used can contribute; a low-protein flour may not develop enough structure for a light loaf. Tackling density involves addressing these foundational steps before baking.
Problem: Dough Not Rising Properly
If your dough isn't rising as expected, whether during the initial bulk fermentation or the final proof, it's likely an issue with the leavening agent or the environment. Inactive yeast (check the expiration date!) or a sluggish sourdough starter are prime suspects. However, temperature plays a huge role; dough ferments much slower in a cold environment. Over-kneading can also tighten the gluten too much, restricting expansion, while under-kneading means there isn't enough structure to hold the gas produced.
Solution: Explain Proofing Techniques for Specific Bread Types
Proper proofing is critical. For most yeasted doughs, a warm, draft-free environment ( around 24-27°C) is ideal, leading to significant volume increase ( often doubling). The "poke test" is a good indicator: gently poke the dough; if the indentation springs back slowly and partially, it's ready. However, international breads vary. Some rustic European loaves benefit from a long, slow, cold proof ( 4-24 hours in the refrigerator) which develops flavor and improves handling. Enriched doughs like brioche or challah often require slightly warmer proofing conditions and careful monitoring as the fat can inhibit yeast activity slightly. Flatbreads like focaccia may only need a shorter proof after shaping. Always refer to the specific recipe's guidance but be prepared to adjust based on your kitchen temperature and the dough's visual cues. If using sourdough, ensure your starter is vigorous before starting the main dough.
Troubleshooting Flat Breads: Achieving the Right Texture
Flatness in breads can manifest in different ways – from flatbreads that don't puff up to standard loaves that spread outwards instead of rising upwards. For breads meant to be airy and voluminous, a flat result often points to over-proofing (where the gluten structure collapses after rising) or under-developed gluten. For flatbreads like pita or naan, lack of puffing is usually related to insufficient heat or incorrect dough consistency. Overworking the dough can also lead to a tough, flat texture, particularly in recipes where tenderness is desired.
Achieving the right texture, whether it's the airy crumb of a ciabatta or the soft chew of a naan, relies on a combination of proper dough handling, hydration, and baking technique specific to the bread type. A flat focaccia might be due to insufficient hydration or proofing, while a flat pita is likely a baking temperature issue. Understanding the intended texture of the specific international bread is key to troubleshooting its flatness.
Problem: Flat Breads Are Too Tough
When flatbreads like tortillas, chapatis, or even thin-crust pizzas turn out tough and hard instead of pliable, it's usually a sign of overworking the dough or not allowing sufficient rest time. Overworking develops too much strong gluten, which is great for a chewy baguette but undesirable for a tender flatbread. Rolling the dough too thin too quickly can also contribute to toughness.
Solution: Detail Dough Handling and Rolling Techniques
For tender flatbreads, gentle handling is paramount. Knead only enough to bring the dough together smoothly; excessive kneading should be avoided. After mixing or a brief knead, allow the dough to rest ( typically 15-30 minutes) before dividing and shaping. This relaxation period is crucial for gluten to relax, making the dough easier to roll without springing back or becoming tough. When rolling, use just enough flour to prevent sticking and roll gently, working from the center outwards to achieve even thickness. For breads like naan or pita, aiming for an even thickness of about 0.5 cm is often necessary for proper puffing. Avoid stretching or pulling the dough excessively, as this can also develop too much toughness.
Crust Problems: Fixing Overly Hard or Soft Crusts
The crust is a defining characteristic of many international breads, from the shattering crust of a French baguette to the soft, glossy exterior of a challah. Issues with the crust – being too thick, too hard, too soft, or burning – often relate directly to the baking environment, specifically temperature and humidity. High temperatures and the presence of steam promote a thin, crisp crust, while lower temperatures and enriched doughs lead to softer crusts.
Troubleshooting crust problems requires adjusting the baking process to match the desired outcome for the specific bread. A challah baked at too high a temperature without egg wash might develop an unpleasantly hard crust, while a rustic boule baked without steam will likely have a thick, dull crust instead of a thin, blistered one. Identifying the intended crust type for the international recipe is the starting point.
Problem: Crust is Too Thick or Burns Easily
A crust that is too thick, hard, or burns quickly is often a result of baking at too high a temperature without adequate steam, or baking for too long. The initial high heat sets the crust rapidly, preventing the dough from expanding fully (limiting oven spring), and without steam, the crust forms too quickly and thickly. If the crust burns, the oven temperature might be too high overall, or the bread is positioned too close to a heating element.
Solution: Explain Baking Temperatures and Steaming Techniques
Achieving the correct crust involves controlling oven temperature and humidity. For rustic loaves like baguettes, pain de campagne, or sourdough boules, preheat your oven and baking surface (stone or steel) to a high temperature ( typically 230-250°C or 450-475°F). Introducing steam at the beginning of the bake is critical. Methods include:
- Baking in a preheated Dutch oven with the lid on for the first
15-20 minutes. - Placing a tray of hot water or ice cubes on the bottom rack of the oven just before loading the bread.
- Spritzing the oven walls with water.
The steam keeps the crust moist initially, allowing the dough to expand fully before the crust sets. After the initial steaming period, reduce the temperature ( to 200-220°C or 400-425°F) and remove the steam source to allow the crust to crisp and brown. For enriched breads like challah or brioche, lower baking temperatures ( 180-200°C or 350-400°F) are usually sufficient, and an egg wash applied before baking provides a beautiful soft, golden crust without needing steam.
Understanding and Fixing Gumminess in International Breads
A gummy or wet texture inside the bread, even after it looks properly baked on the outside, is a frustrating issue. This often indicates the bread is underbaked internally, despite the crust color. Other culprits can include slicing the bread before it has cooled completely, using too much hydration for the type of flour or baking method, or issues with fermentation, particularly in sourdoughs where insufficient acidity can affect crumb structure. High-hydration breads like ciabatta or breads with a high percentage of rye flour are sometimes more prone to gumminess if not baked correctly.
Troubleshooting gumminess requires ensuring the internal temperature of the bread reaches a sufficient level during baking and considering the flour type and hydration used in the specific international recipe. A gummy rye loaf might require a different baking approach than a gummy white loaf.
Problem: Bread Has a Gummy Texture
If your bread feels dense, wet, or gummy when sliced, even if the crust looks done, it's most likely underbaked. The internal starches haven't fully gelatinized and set. This can happen if the oven temperature is too high (causing the crust to set too quickly before the inside is done), if the baking time is too short, or if the loaf is very large and requires a longer bake.
Solution: Detail Flour Types and Hydration Levels
To fix gumminess, ensure the bread is baked through. The internal temperature should reach 93-100°C ( 200-212°F) when measured with an instant-read thermometer inserted into the center of the loaf. If the crust is browning too quickly, tent the loaf loosely with foil for the remainder of the baking time. Also, consider the flour type and hydration. Different flours absorb water differently; rye flour, for example, absorbs water more slowly but retains it more effectively than wheat flour, often requiring lower hydration or longer baking at a slightly lower temperature. Ensure your recipe's hydration level ( water weight / flour weight x 100%) is appropriate for the flour used. High hydration doughs ( above 75%) naturally have a more open and slightly moist crumb, but shouldn't be gummy. Always let the bread cool completely on a wire rack ( often 1-2 hours for a standard loaf, longer for very large loaves) before slicing; slicing too soon traps steam and can create a gummy texture.
Specific International Bread Troubleshooting
Naan Bread Troubleshooting: Achieving Softness and Bubbles
Authentic naan is soft, chewy, and covered in characteristic bubbles. Common issues include naan that is too stiff, tough, or fails to puff and bubble when cooked. This often relates to the dough's consistency, hydration, and the high heat required for cooking. If the dough is too dry or not kneaded enough, it won't be pliable enough to stretch properly or form bubbles. If the cooking surface isn't hot enough, the moisture in the dough won't instantly turn to steam to create those desired pockets of air.
Troubleshooting naan involves ensuring the dough is soft and extensible and that you are using a method that delivers intense, fast heat.
Problem: Naan Not Puffing Up
The hallmark of a well-cooked naan is the large bubbles that form as it cooks, indicating the dough is transforming steam into pockets of air. If your naan stays flat or only forms small blisters, the most likely culprits are insufficient cooking temperature or a dough that is too stiff or hasn't rested enough. The dough needs to be pliable and contain enough moisture, and the heat needs to be high enough to create instant steam inside the dough.
Solution: Describe Pan Temperatures and Dough Consistency
Achieving puffy naan requires very high heat. If you don't have a tandoor, use a very hot cast iron skillet, griddle, or baking stone preheated in the oven at the highest possible temperature ( often 250°C / 480°F or higher) for at least 20-30 minutes. Place the rolled-out naan directly onto the searing hot surface. The dough itself should be quite soft and slightly sticky after mixing; avoid adding too much flour. Allow the dough balls to rest ( at least 10-15 minutes) after dividing and before rolling, and roll them relatively thin and evenly ( about 0.5 cm). The combination of soft, rested dough and extreme heat is key to generating the steam needed for puffing.
Baguette Troubleshooting: Achieving a Crispy Crust and Open Crumb
The baguette is iconic for its thin, crispy crust and open, airy crumb (known as alveoli). Common problems include a thick, dull crust, a dense crumb, or a lack of characteristic shape. These issues are often linked to kneading, proofing, shaping, scoring, and crucially, the baking environment – specifically, the need for high heat and steam. Under-developed gluten leads to a dense crumb, while improper scoring or lack of steam results in a poor crust and limited oven spring.
Troubleshooting baguettes requires attention to detail at every stage, focusing on developing strength in the dough while maintaining extensibility, and creating the perfect humid environment in the oven.
Problem: Baguette Lacks Crispy Crust
A baguette should have a thin crust that audibly crackles when you squeeze it. If yours is thick, hard, or soft and chewy, it's almost certainly an issue with steam during baking. Without sufficient humidity in the oven during the first phase of baking, the crust sets too quickly, preventing the dough from expanding fully and resulting in a thicker, less desirable crust.
Solution: Explain Scoring Techniques and Oven Humidity
To achieve that signature crispy baguette crust, proper scoring and oven humidity are non-negotiable. Score the shaped baguettes just before baking using a sharp lame or razor blade at an angle ( about 20-30 degrees) to create overlapping cuts ( typically 3-5 cuts along the length). This allows the dough to expand controllably during oven spring. Simultaneously, introduce steam into the oven as soon as the baguettes go in. Use a preheated baking stone or steel ( at 240-250°C / 460-480°F), and create steam by pouring hot water into a preheated pan on the oven floor or using a Dutch oven method. Maintain steam for the first 10-15 minutes of baking before venting the oven to allow the crust to dry out and crisp up.
Challah Bread Troubleshooting: Fixing Braiding and Rising Issues
Challah, a beautiful braided bread, is known for its soft, rich, slightly sweet crumb and often glossy, golden crust. Common issues include braids that unravel during proofing or baking, or a loaf that doesn't rise sufficiently. These problems often arise from the dough being too sticky, under-rested, or over-proofed, which weakens the structure needed to hold the braid shape.
Troubleshooting challah involves mastering enriched dough handling and braiding techniques. The richness from eggs and oil/butter makes the dough different to work with compared to lean doughs.
Problem: Challah Braid Unraveling
If your carefully constructed challah braid loses its definition, spreads, or even unravels during proofing or baking, the dough is likely too slack. This can happen if the dough hasn't developed enough gluten strength, is over-proofed (where the yeast has exhausted its food supply and the structure begins to collapse), or wasn't allowed sufficient rest before shaping and braiding.
Solution: Explain Braiding Techniques and Dough Relaxation
To prevent challah braids from unraveling, ensure your dough is properly kneaded to develop sufficient, but not excessive, gluten. After the initial bulk fermentation, divide the dough and allow the strands to rest ( about 10-15 minutes) before rolling them out and braiding. This rest period relaxes the gluten, making the strands easier to roll evenly and less likely to spring back. When braiding, ensure the strands are of even thickness. Braid firmly but not tightly, and tuck the ends securely underneath the loaf. Avoid over-proofing the shaped loaf; it should look puffy but still hold its shape well. A light egg wash applied before proofing and/or baking helps the strands adhere and gives that characteristic glossy finish.
Brioche Troubleshooting: Achieving Richness and Fluffiness
Brioche is a luxurious, enriched bread known for its high butter and egg content, resulting in a tender, fluffy crumb and golden crust. Common issues include a dense or dry texture, or a dough that is difficult to handle due to its richness. These problems often stem from insufficient kneading (fat can inhibit gluten development), improper butter incorporation, or overbaking.
Troubleshooting brioche requires patience, especially when incorporating the high volume of butter, and careful control of proofing and baking.
Problem: Brioche is Too Dry
A hallmark of brioche is its moist, tender crumb. If your brioche turns out dry, it's likely either under-enriched (not enough butter or eggs) or overbaked. Overbaking is a common issue, as the high sugar and fat content can cause the crust to brown quickly, leading bakers to remove it from the oven before the interior is fully cooked but still moist.
Solution: Describe Butter Incorporation and Proofing Times
Achieving a moist and fluffy brioche depends heavily on how butter is incorporated and controlling the bake. High-quality brioche recipes often use a significant amount of butter ( sometimes up to 50-60% of the flour weight). The butter should typically be cold and added gradually to the dough after the initial mixing and kneading, allowing the gluten to develop around the fat. Knead until the dough is smooth, elastic, and passes the windowpane test. For proofing, many brioche recipes benefit from a long, slow cold proof ( overnight in the refrigerator) which develops flavor and makes the dough easier to handle. When baking, watch the internal temperature ( should reach about 88-93°C / 190-200°F). If the crust is browning too fast, loosely tent the loaf with foil. Avoid overbaking; the total time will depend on the size and shape of the loaf.
Mastering Dough Hydration for International Breads
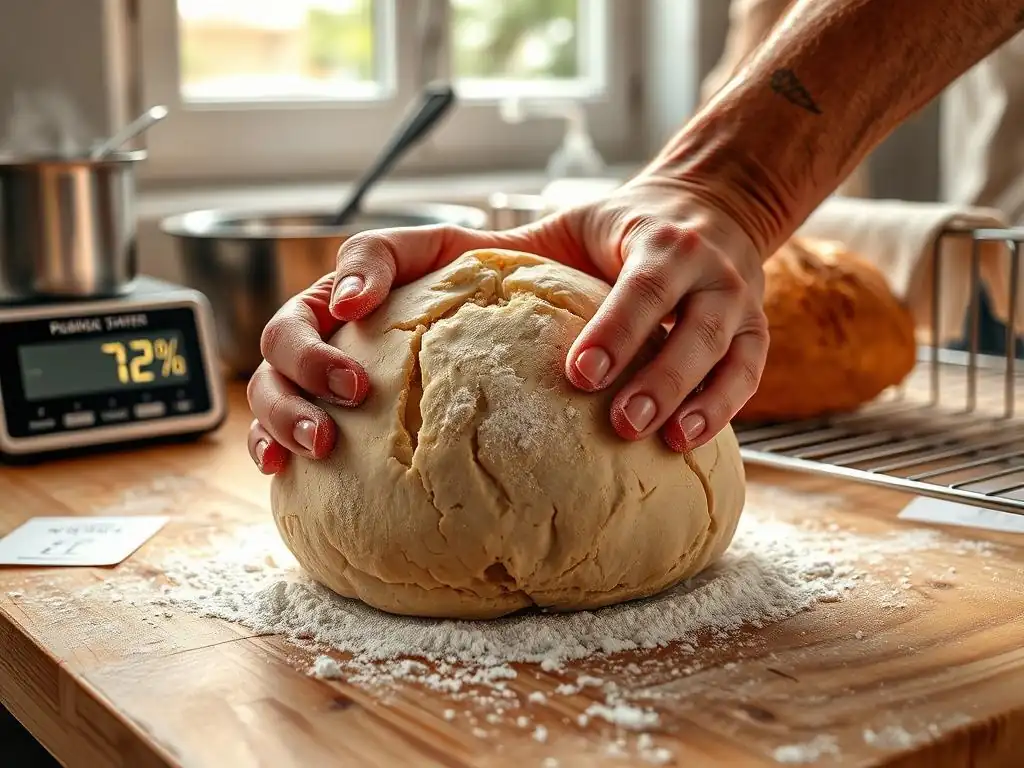
The Importance of Hydration in International Bread Recipes
Dough hydration refers to the ratio of water to flour in a recipe, usually expressed as a percentage ( water weight / flour weight x 100%). This is a fundamental concept in bread baking and varies dramatically across international bread styles. A low-hydration dough ( around 55-65%), typical for bagels or some enriched doughs, is stiff and easy to handle, producing a tight crumb. A high-hydration dough ( 75-85% or even higher), common for ciabatta or many rustic sourdoughs, is wet and sticky but yields a very open, airy crumb.
Understanding the intended hydration is crucial because it dictates the dough's consistency, how it should be handled, and the resulting texture of the bread. Different international recipes call for specific hydration levels to achieve their characteristic structure and crumb. For example, attempting to make a ciabatta with low hydration will result in a dense loaf, while using very high hydration for bagels would be unmanageable and produce the wrong texture.
Troubleshooting Hydration Levels: Too Wet or Too Dry
Sometimes, even following a recipe, your dough's hydration might seem off. This is often due to variations in flour absorption (different brands or types absorb water differently) or environmental factors like humidity. If your dough feels too wet and slack compared to the recipe description, it may have too much hydration for the flour or conditions. If it feels stiff, crumbly, and difficult to bring together, it's likely too dry.
To troubleshoot hydration:
- Too Wet: Add small amounts of flour (
a tablespoon at a time) during mixing or kneading until the dough reaches the desired consistency described in the recipe. Be patient and add gradually. - Too Dry: Add small amounts of water (
a teaspoon at a time) during mixing or kneading until the dough is properly hydrated. Allow the dough to absorb the water before adding more.
Pay attention to how the dough feels rather than strictly sticking to the numbers if the texture seems incorrect. Experienced bakers often adjust hydration slightly based on the flour they are using that day and the feel of the dough.
Flour Selection: Choosing the Right Flour for Global Breads
Understanding Different Flour Types for Baking International Breads
Flour is the backbone of bread, and international recipes often specify particular types that are key to the bread's character. Different flours vary in protein content, which directly impacts gluten development. High-protein bread flour ( ~12-14% protein) is excellent for strong, chewy breads like baguettes or sourdoughs that require significant structure. All-purpose flour ( ~10-12% protein) is more versatile but may result in a less open crumb in rustic loaves. Low-protein cake or pastry flour ( ~8-10% protein) is used for tender baked goods, not typically for structural breads.
Beyond protein, other flours like rye, spelt, or durum wheat (used for semolina) have different absorption rates and gluten-forming properties. Rye, for instance, has compounds that interfere with gluten development, resulting in denser loaves that rely more on fermentation acids for structure. Understanding these differences is vital when tackling international recipes that call for specific flour types.
Troubleshooting Flour Issues: Protein Content and Gluten Development
Using the wrong flour type for an international recipe can lead to unexpected results. If you use a low-protein flour for a recipe designed for high-protein bread flour, your dough may be weak and unable to hold its shape or achieve good volume and an open crumb. Conversely, using a very strong flour in a recipe intended for a softer flour might result in a tough bread.
If you can't source the exact flour specified, you may need to make adjustments. If using a weaker flour, you might need slightly less water (lower hydration) or more gentle handling. If using a stronger flour, you might need slightly more water (higher hydration) and potentially longer kneading to fully develop the gluten. Be aware that substituting flours, especially non-wheat flours like rye or spelt, will significantly alter the outcome and may require specific sourdough bread troubleshooting tips if using a starter.
Troubleshooting Oven Issues for Perfect International Breads

Optimizing Oven Temperature for Different Bread Styles
The oven is where the magic of transformation happens, and controlling temperature is crucial for achieving the desired crust and crumb in international breads. Different styles require different temperatures. Rustic, lean loaves like baguettes or sourdough boules benefit from a very hot oven ( 230-250°C / 450-480°F) initially to maximize oven spring and develop a thin, crispy crust. Enriched breads like challah or brioche, with their higher sugar and fat content, require lower temperatures ( 180-200°C / 350-400°F) to prevent the crust from burning before the inside is cooked.
Understanding the recommended temperature range for the specific international bread you are baking and ensuring your oven accurately reaches and maintains that temperature are key steps in successful baking. An oven thermometer is a baker's best friend to verify accuracy.
Troubleshooting Uneven Baking in International Breads
Uneven baking, resulting in one side or part of the loaf being darker or more cooked than another, is a common oven issue. This is usually caused by hot spots within the oven or placing the bread too close to a heating element. Some ovens naturally run hotter in the back, front, or on one side.
To troubleshoot uneven baking:
- Use an oven thermometer to identify if your oven's temperature is consistent and accurate.
- If hot spots are known, rotate the bread halfway through the baking time (
typically after 15-25 minutesdepending on the total bake time) to ensure even browning. - Use a baking stone or steel on the rack where you bake to help stabilize the temperature and distribute heat more evenly from below.
- Ensure the oven is fully preheated for the recommended time (
at least 20-30 minutes, often longer for stones/steels). - Avoid opening the oven door unnecessarily during baking, as this causes temperature fluctuations.
Advanced Sourdough Bread Troubleshooting for International Bakers
Addressing Complex Sourdough Starter Issues
Sometimes, standard sourdough bread troubleshooting tips aren't enough when dealing with challenging international recipes or persistent starter problems. Complex issues might include a starter that consistently produces excessive hooch (a sign of hunger), develops unusual colors or smells (beyond the normal tangy aroma), or struggles to rise consistently despite regular feeding. These can stem from imbalances in the feeding ratio, incorrect flour types for the starter, or environmental stress.
Addressing these requires closer observation and adjustment. If there's excessive hooch, try feeding a larger ratio of flour to starter (e.g., 1:2:2 or 1:3:3 starter:flour:water) or feeding more frequently. If the starter seems weak, try using a small amount of starter in your feeding ( perhaps 1:5:5) to give the yeast more food. Experimenting with different flour types for feeding (e.g., adding a bit of rye or whole wheat, which are rich in nutrients) can sometimes boost activity. Maintaining a consistent temperature ( around 22-25°C) is also crucial for a happy, predictable starter. Consistent application of targeted sourdough bread troubleshooting tips is key to reviving a struggling culture.
Fine-Tuning Fermentation for Specific International Bread Recipes
Mastering the art of fermentation is key to excellent sourdough, and applying sourdough bread troubleshooting tips to international recipes means fine-tuning this process. Different international breads benefit from varying fermentation profiles. A light, airy French boule might require a shorter, warmer bulk fermentation followed by a cold proof, while a dense German rye sourdough needs a longer, often slightly warmer bulk fermentation and a specific final proof time to prevent collapsing.
Monitoring the dough itself is more reliable than relying solely on timing. Look for signs like increased volume ( often 50-100% increase during bulk fermentation), the appearance of bubbles on the surface and sides of the dough, and the dough feeling airy and slightly puffy. For proofing, the poke test is useful – the dough should spring back slowly. If the dough seems to be moving too fast (warm kitchen, active starter), consider shortening fermentation times or using a cold retard in the refrigerator ( from 4 to 48 hours) to slow things down and develop complex flavors. Conversely, if fermentation is sluggish (cool kitchen, less active starter), extending times or finding a warmer spot will be necessary. Applying precise sourdough bread troubleshooting tips based on these observations will lead to better results.
Conclusion: Confidently Baking International Breads
Troubleshooting is an essential part of the baking journey, especially when exploring the rich and diverse world of international breads. By understanding the unique challenges posed by different ingredients, techniques, and baking methods – from mastering dough hydration and flour selection to optimizing oven conditions and applying specific sourdough bread troubleshooting tips – you can tackle common problems with confidence. Embrace the learning process, pay close attention to your dough, and don't be afraid to adjust based on observation. With practice and patience, you'll be well on your way to successfully recreating delicious breads from kitchens around the globe.
Frequently Asked Questions
What are some common problems encountered when baking sourdough bread, especially when trying international variations?
Common sourdough issues include a weak starter, uneven rise, and a dense or gummy crumb. International variations can introduce further complexities due to differing flour types and fermentation techniques.
How can I tell if my sourdough starter is active enough for baking?
An active starter will have doubled in size within a few hours of feeding and exhibit lots of bubbles. A sluggish starter needs more frequent feedings or a warmer environment.
What causes sourdough bread to be too dense or gummy inside?
A dense crumb often results from under-proofing, too much flour, or insufficient oven temperature. Gummy texture can indicate under-baking or too much moisture in the dough.
How do different types of flour affect the outcome of my sourdough bread?
Different flours have varying protein contents, which impact gluten development and the bread's structure. Higher protein flours create a chewier texture, while lower protein flours result in a softer crumb.
Where can I find reliable recipes and techniques specifically for baking international sourdough breads?
Websites like BakeWithEase.com offer step-by-step guides and easy-to-find ingredient lists for a variety of international sourdough bread recipes, helping you troubleshoot common issues.
Final Reflection: The Global Rise of Sourdough and the Art of Troubleshooting
The quest for perfect sourdough transcends borders; mastering this ancient craft requires understanding not just the recipe, but the subtle nuances of environment and ingredient. From the bustling bakeries of Paris to the cozy kitchens of rural America, the challenges of sourdough baking remain remarkably consistent, highlighting the universal appeal and inherent complexities of this beloved bread.
This journey through international sourdough recipes has underscored the importance of adaptability and patience. The seemingly simple act of baking becomes a fascinating exploration of chemistry and culture, revealing how seemingly minor variations in flour, water, and even ambient temperature can drastically alter the final product. The most beautiful thing we can experience is the mysterious. It is the source of all true art and science.
- Albert Einstein. This quote resonates deeply, as the mystery of sourdough fermentation, its unpredictable nature, and the constant learning involved, truly embodies the spirit of both art and science.
Now, armed with a deeper understanding of common sourdough pitfalls and their solutions, I invite you to embrace the challenge. Don't be discouraged by a less-than-perfect loaf; instead, view each attempt as a valuable lesson, a step closer to mastering the art of sourdough. Experiment with different flours, explore various hydration levels, and most importantly, trust the process. The reward – a crusty, tangy, and utterly satisfying loaf of bread – is well worth the effort.
Unlock Your Global Baking Potential!
Thanks for joining us on this delicious journey through international bread baking! You've now got the knowledge to tackle some tricky doughs and conquer those common baking mishaps. Ready to put your newfound skills to the test?
- Master your next loaf: Try out one of the recipes mentioned in the article, adapting it to your own pantry and preferences. This is your chance to experiment and refine your technique!
- Share your baking triumphs (and challenges!): Let's connect! Share your baking adventures and photos on social media using #BakeWithEaseGlobalBreads – we'd love to see what you create.
- Dive deeper into global baking techniques: Explore our other articles on BakeWithEase.com for even more tips and recipes from around the world!
What unique ingredient are you excited to experiment with in your next international bread baking adventure?