
Simple Basic Sourdough Using a Baking Stone

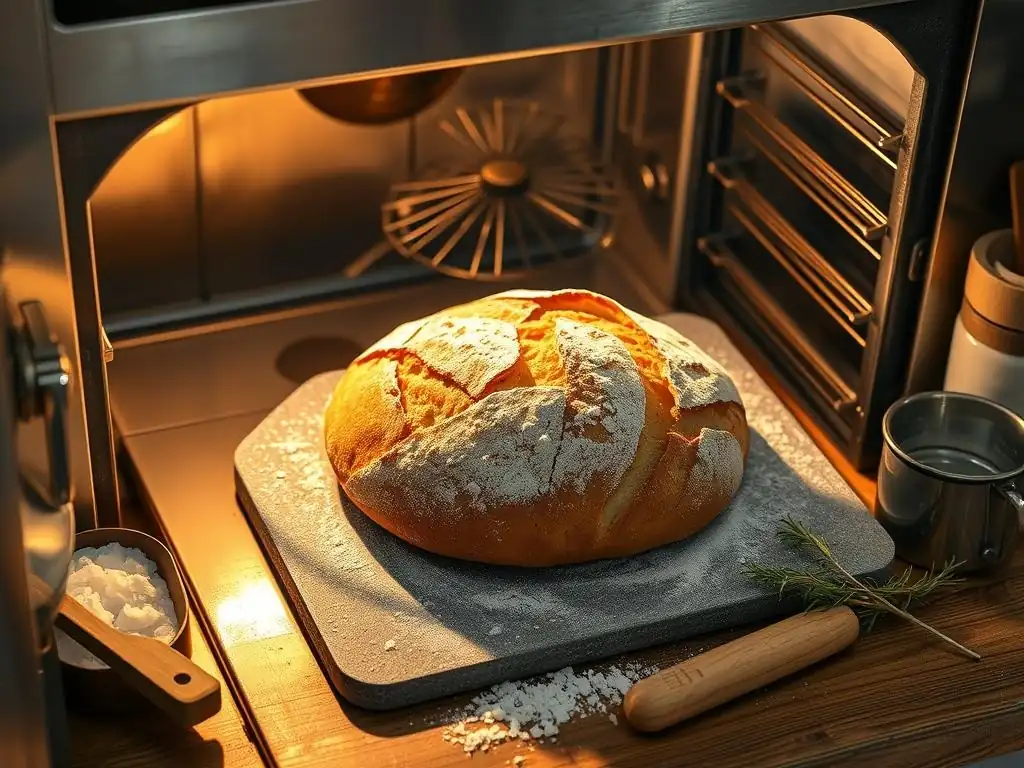
Welcome to BakeWithEase, your guide to confident baking! Ever dreamt of achieving that perfect, crackling crust on your homemade sourdough? This article delves into a surprisingly simple technique: our Easy Sourdough Baking Stone Recipe. Discover how this readily available tool can transform your loaves, even if you're new to intermediate baking. Intrigued? Let's unlock the secrets to bakery-quality sourdough, right in your own kitchen!
- Sourdough Bread Baking on a Baking Stone
- Introduction to Baking Sourdough on a Stone
- Essential Equipment
- Ingredients for a Basic Sourdough Loaf
-
Step-by-Step Baking Guide
- Step 1: Preparing the Sourdough Starter
- Step 2: Autolyse: Enhancing Dough Hydration
- Step 3: Mixing the Dough: Developing Gluten
- Step 4: Bulk Fermentation: Monitoring Dough Development
- Step 5: Shaping the Dough: Building Tension
- Step 6: Cold Proofing: Slowing Down Fermentation
- Step 7: Preheating the Baking Stone
- Step 8: Scoring the Dough: Controlling Expansion
- Step 9: Baking: Time, Temperature, and Steam
- Step 10: Cooling and Resting the Loaf
- Troubleshooting
- Tips for Improvement
- Recipe Variations
- Conclusion
-
Frequently Asked Questions
- What is a baking stone, and why should I use one for sourdough?
- Can I bake sourdough without a baking stone, or is it essential?
- What type of flour is best for this "Easy Sourdough Baking Stone Recipe"?
- How long should I preheat the baking stone before baking my sourdough?
- What temperature should I bake my sourdough at when using a baking stone?
- Final Reflection: The Humble Stone and the Bountiful Loaf
- Unleash Your Inner Baker: Craft the Perfect Sourdough Loaf!
Sourdough Bread Baking on a Baking Stone
Introduction to Baking Sourdough on a Stone
Baking sourdough bread at home is a rewarding journey, and choosing the right method can significantly impact your results. While Dutch ovens are popular, baking sourdough on a stone offers a unique approach that can yield exceptional crust development and a beautiful rise. This method mimics the environment of a professional deck oven, providing intense, even heat from below. Understanding the nuances of using a baking stone is key to unlocking its full potential for your easy sourdough baking stone recipe.
This guide will walk you through the essential steps, equipment, and techniques needed to bake a delicious basic sourdough loaf directly on a preheated stone. We'll cover everything from maintaining your starter to troubleshooting common issues, helping you achieve that coveted golden crust and airy crumb. Whether you're new to baking on a stone or looking to refine your technique, this information will provide a solid foundation for your sourdough adventures.
Benefits of Baking Sourdough on a Baking Stone
Using a baking stone provides intense, direct heat transfer to the base of the loaf. This rapid heat surge is crucial during the initial moments of baking, helping the dough spring upwards quickly before the crust sets. This phenomenon, known as oven spring, contributes significantly to the final volume and shape of your sourdough bread. Unlike a regular baking sheet, the stone retains and radiates heat consistently, ensuring even cooking throughout the base and preventing a soggy bottom.
Furthermore, the high heat from the stone helps to create a very crispy crust. As the moisture within the dough turns to steam, the intense heat from the stone and the oven helps to push the steam outwards, expanding the loaf and creating blisters on the surface for that characteristic artisanal look.
While achieving sufficient steam is important for preventing the crust from setting too early (which inhibits oven spring), the stone's radiant heat plays a vital role in the final crisping phase once the steam dissipates. Mastering this aspect is part of perfecting your easy sourdough baking stone recipe.
Achieving Oven Spring and a Crispy Crust
Oven spring is the rapid expansion of the dough in the first 10-15 minutes of baking, driven by the production of carbon dioxide and steam within the loaf. A properly preheated baking stone delivers a powerful thermal shock to the base of the dough, maximizing this initial rise.
To aid oven spring further when baking on a stone, creating a steamy environment is critical. This can be achieved by placing a tray of hot water or ice cubes on a rack below the stone just before loading the bread, or by using a baking dome or inverted pot placed over the loaf on the stone for the first part of the bake.
Once the oven spring is complete and the crust has started to set, the continued high heat from the stone ensures the crust browns beautifully and becomes wonderfully crisp. For instance, baking at temperatures around 450-500°F (230-260°C) on a stone preheated for at least 45-60 minutes ensures the stone is saturated with heat.
After the initial steamy phase (typically 15-20 minutes), removing the steam source or dome allows the dry heat to finish the bake, focusing on crust development. This two-phase approach is fundamental to achieving both maximum oven spring and a desirable crispy crust with your easy sourdough baking stone recipe.
Essential Equipment
Baking sourdough on a stone requires a few key tools to handle the dough effectively and maximize the stone's potential. Having the right equipment makes the process smoother and contributes to better results. From the stone itself to tools for handling the dough, each piece plays a role in the journey from a sticky mass to a beautiful loaf.
Understanding the function of each item helps you prepare adequately and execute your easy sourdough baking stone recipe with confidence. While some tools are optional depending on your technique and preference, others are nearly indispensable for working with high-hydration sourdough doughs.
Baking Stone: Material and Size Considerations
Baking stones are typically made from ceramic, cordierite, or sometimes cast iron. Ceramic stones are the most common and affordable, but can be prone to cracking from thermal shock if not handled carefully. Cordierite stones are more durable and resistant to thermal shock, often favored by serious home bakers. Cast iron stones (or baking steels, which function similarly) heat up faster and retain heat exceptionally well, providing even more intense heat transfer. A good stone should be at least ½ inch thick to retain sufficient heat.
Size is also important; choose a stone that fits comfortably on one of your oven racks, leaving about an inch of space around the edges for air circulation. Common sizes range from 14x16 inches to 16x20 inches. A larger stone provides more surface area if you bake multiple loaves or larger ones, but ensure it fits your oven. Preheating the stone thoroughly, usually for 45-60 minutes at your target baking temperature (often 450-500°F), is crucial for it to store enough energy for powerful oven spring in your easy sourdough baking stone recipe.
Dough Scraper: Handling Sticky Dough
A dough scraper, also known as a bench scraper, is an invaluable tool when working with sticky sourdough dough. It typically has a rigid blade (metal or plastic) and a handle. Its primary uses include scraping dough from your work surface without damaging it, dividing dough into portions, and helping to shape loaves by providing tension.
For sourdough, which often has a higher hydration level than other breads, a bench scraper is essential for cleaning your workspace and transferring the dough from the counter to the proofing basket or directly onto the baking stone. A metal scraper is generally preferred for its durability and ability to cleanly lift dough. Using a scraper minimizes handling the sticky dough directly with your hands, making the process less messy and more efficient when preparing your easy sourdough baking stone recipe.
Banneton Basket: Proofing for Shape and Texture
A banneton, or proofing basket, is used for the final proofing of the shaped dough. It provides support, helping the dough maintain its shape as it expands, especially during a cold proof in the refrigerator. Bannetons are typically made from cane, wood pulp, or plastic and are often lined with flour or rice flour to prevent sticking.
The basket imparts a rustic pattern on the surface of the dough, which looks beautiful after baking. It also helps to wick away a small amount of moisture from the surface, contributing to a slightly firmer skin that is easier to score and helps the loaf hold its shape during baking. Using a banneton is a standard practice for many sourdough bakers and significantly improves the presentation and structural integrity of the final loaf in an easy sourdough baking stone recipe.
Baking Stone versus Dutch Oven
Both baking stones and Dutch ovens are excellent tools for baking sourdough at home, but they employ slightly different methods. A Dutch oven creates a self-contained steamy environment for the first part of the bake, trapping the moisture released by the dough. This steam prevents the crust from setting too early, allowing for maximum oven spring. After 15-20 minutes, the lid is removed to allow the crust to brown and crisp.
Baking on a stone, conversely, is an 'open bake' method where the dough is placed directly onto the preheated stone in the open oven cavity. To achieve sufficient steam for oven spring, the baker must actively create steam within the oven using methods like water trays or a baking dome placed over the loaf on the stone.
The stone provides intense heat from below, while radiant heat from the oven walls and top element cooks the top. While a Dutch oven is often considered simpler for beginners due to its built-in steam system, mastering steam techniques with a baking stone allows for baking larger loaves or multiple loaves simultaneously, offering flexibility for your easy sourdough baking stone recipe.
Ingredients for a Basic Sourdough Loaf
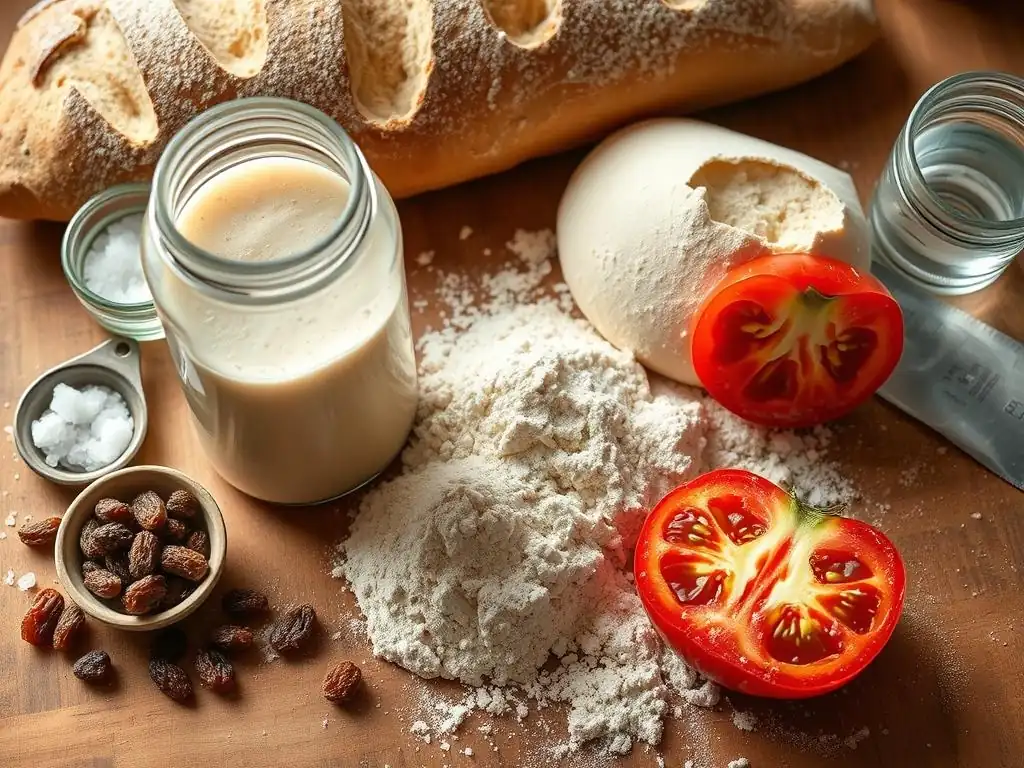
A great sourdough loaf starts with a few simple, high-quality ingredients. The magic happens through the interaction of your active sourdough starter with flour, water, and salt, guided by time and temperature. Understanding the role each ingredient plays is key to controlling the fermentation process and achieving delicious results.
While variations exist, a basic sourdough recipe typically relies on these four core components. Their quality and how they are handled directly impact the dough's structure, flavor, and texture. Getting these fundamentals right is essential for any easy sourdough baking stone recipe.
Sourdough Starter: Maintaining Activity and Strength
Your sourdough starter is the heart of your bread; it's a living culture of wild yeast and bacteria that leavens the dough and provides its characteristic tangy flavor. An active and strong starter is crucial for successful baking. This means feeding it regularly (typically daily if kept at room temperature, or weekly if refrigerated and then revived before use) with a consistent ratio of flour and water, allowing it to double or triple in size within a few hours (e.g., 4-8 hours at room temperature around 75°F or 24°C) and show lots of bubbles.
A healthy starter should pass the float test: drop a small piece into a glass of water; if it floats, it's ready to use. Using a starter that isn't sufficiently active will result in a dense, flat loaf with poor oven spring, even when using an optimal easy sourdough baking stone recipe. Maintaining your starter's vigor through consistent feeding schedules and observing its behavior is a fundamental skill in sourdough baking.
Bread Flour: Protein Content and Gluten Development
Bread flour is typically used for sourdough because it has a higher protein content (usually 12-14%) compared to all-purpose flour (around 10-12%). This higher protein level means more gluten can be developed. Gluten is the network of proteins that forms when flour and water are mixed and worked; it provides the dough with structure and elasticity, allowing it to trap the gases produced by the yeast and rise properly.
Developing a strong gluten network is essential for achieving a well-risen loaf with an open, airy crumb structure. Techniques like autolyse, stretching and folding, and kneading all contribute to gluten development. The type and quality of bread flour you use will impact how much water the dough can absorb (hydration) and how easily the gluten develops, affecting the overall handling and outcome of your easy sourdough baking stone recipe.
Water: Temperature and its Effect on Dough
Water is not just a hydration agent; its temperature significantly influences the dough's temperature, which in turn affects the rate of fermentation. Warmer water (e.g., 80-85°F or 27-29°C) will speed up fermentation, while cooler water (e.g., 70-75°F or 21-24°C) will slow it down. Controlling the dough temperature is key to managing the bulk fermentation time and ensuring the dough develops properly.
The amount of water (hydration level) also affects the dough's handling characteristics and the final crumb. Higher hydration doughs (e.g., 75% or more water relative to flour weight) are stickier and harder to handle but can result in a more open crumb. Lower hydration doughs (e.g., 65-70%) are easier to work with and produce a more even crumb. Adjusting water temperature and hydration based on your kitchen environment and desired dough consistency is an important skill when following an easy sourdough baking stone recipe.
Salt: Balancing Flavor and Fermentation
Salt is a crucial ingredient that plays multiple roles in sourdough baking. Most notably, it significantly enhances the flavor of the bread, bringing out the complex notes developed during fermentation. Without salt, sourdough can taste bland. Typically, salt is added at about 2% of the total flour weight (e.g., 10 grams of salt for 500 grams of flour).
Beyond flavor, salt also helps to strengthen the gluten network, making the dough more manageable and improving its structure. Additionally, salt helps to regulate the fermentation rate by slowing down yeast activity. It's usually added after the autolyse phase or mixed in thoroughly with the other ingredients. Ensuring accurate salt measurement is important for both taste and dough development in your easy sourdough baking stone recipe.
Step-by-Step Baking Guide
Baking sourdough on a stone involves a series of carefully managed steps, from preparing your starter to cooling the final loaf. Following these steps diligently is key to achieving consistent and delicious results. Each stage plays a vital role in developing the dough's structure, flavor, and texture.
This guide outlines a common workflow for a basic sourdough loaf baked on a stone. While timings can vary based on your starter's activity, kitchen temperature, and desired outcome, the sequence of steps remains largely the same for an easy sourdough baking stone recipe.
Step 1: Preparing the Sourdough Starter
Ensure your sourdough starter is active and ready for baking. This typically involves feeding your starter 4-12 hours before you plan to mix your dough, depending on its feeding schedule and the ambient temperature. A properly fed starter will roughly double or triple in volume, exhibit numerous bubbles on the surface and throughout, and smell pleasantly tangy.
To confirm readiness, perform the float test: drop a small spoonful of starter into a glass of water. If it floats, it has enough gas production to leaven your dough. If it sinks, it likely needs more time to ferment or another feeding. Using a starter that is at its peak activity is fundamental to getting good oven spring and a well-risen loaf from your easy sourdough baking stone recipe.
Step 2: Autolyse: Enhancing Dough Hydration
Autolyse is a simple technique where you mix only the flour and water for your recipe and let it rest for 30-60 minutes (or sometimes longer). Do not add the salt or starter at this stage. This resting period allows the flour to fully hydrate and enzymes naturally present in the flour to begin breaking down proteins, initiating gluten development without any mechanical work.
This process makes the dough more extensible and easier to handle later, requiring less kneading or stretching and folding to develop gluten. It's particularly beneficial for higher hydration doughs. The autolyse step prepares the dough matrix, making it receptive to the starter and salt and setting the stage for successful gluten development in your easy sourdough baking stone recipe.
Step 3: Mixing the Dough: Developing Gluten
After the autolyse, add your active sourdough starter and salt to the dough. Incorporate them thoroughly, either by hand using a 'pinching' or 'Rubaud' method, or using a stand mixer on a low speed for 5-10 minutes. The goal is to distribute the starter and salt evenly and begin building the gluten structure.
Following the initial mix, the dough will still be relatively shaggy. Over the next 2-3 hours, you will perform a series of 'stretching and folding' or 'coil folding' actions, typically every 30 minutes for the first 2 hours. These gentle manipulations help to strengthen the gluten network and build tension in the dough without tearing it, preparing it for a good rise and structure in your easy sourdough baking stone recipe.
Step 4: Bulk Fermentation: Monitoring Dough Development
Bulk fermentation, also known as the first rise, is the period after mixing and initial folds where the dough sits undisturbed at room temperature to ferment and develop flavor. This phase is complete when the dough has increased significantly in volume (typically by 50-100%, depending on temperature and hydration) and shows signs of activity like bubbles on the surface. This usually takes 4-6 hours at a room temperature of around 75°F (24°C), but can be much longer or shorter depending on temperature.
Monitoring the dough, not the clock, is key during bulk fermentation. The dough should feel lighter, softer, and aerated. A good test is the 'poke test': gently poke the dough with a wet finger; if the indentation slowly springs back only partially, it's likely ready. Over-fermenting can lead to a lack of structure and a flat loaf, while under-fermenting results in a dense crumb, impacting the outcome of your easy sourdough baking stone recipe.
Step 5: Shaping the Dough: Building Tension
Once bulk fermentation is complete, gently turn the dough out onto a lightly floured surface. The goal of shaping is to create tension on the surface of the dough, which helps it hold its shape during proofing and provides the necessary structure for oven spring. Avoid degassing the dough too much; handle it gently. For a boule (round loaf), gently preshape the dough into a rough ball and let it rest for 15-20 minutes (bench rest).
After the bench rest, perform the final shape. Fold the edges of the dough into the center and then flip it over, using your hands or a bench scraper to create tension by pulling the dough towards you across the surface. Shape it into a tight ball or batard (oval) and place it seam-side up (if proofing in a banneton) or seam-side down (if proofing in a bowl) into your prepared banneton basket. Proper shaping is crucial for the loaf's structure when it hits the hot surface of your baking stone in your easy sourdough baking stone recipe.
Step 6: Cold Proofing: Slowing Down Fermentation
Cold proofing involves placing the shaped dough in its banneton basket into the refrigerator for an extended period, typically 8-12 hours, but often up to 24-48 hours. The cold temperature significantly slows down the fermentation process. This slow, cold fermentation develops more complex flavors in the bread and makes the dough easier to handle and score when cold.
Cold dough holds its shape better when transferred onto a hot surface like a baking stone and is less likely to stick. While some recipes call for a short room-temperature proof, a cold proof is highly recommended for baking on a stone as it simplifies the handling of the dough and improves flavor depth for your easy sourdough baking stone recipe.
Step 7: Preheating the Baking Stone
Preheating your baking stone is arguably the most critical step when baking sourdough on it. Place the stone on a rack in the middle or lower-middle of your oven. Preheat the oven to a high temperature, usually between 450°F and 500°F (230°C and 260°C). It's not enough for the oven to reach the set temperature; the stone itself needs time to absorb and store that heat.
Allow the oven and stone to preheat for at least 45-60 minutes after the oven indicates it has reached temperature. Using an oven thermometer can help verify the actual temperature inside the oven and on the stone's surface if you have a laser thermometer. A properly preheated stone provides the essential thermal mass needed for powerful oven spring and a crispy crust when baking your easy sourdough baking stone recipe.
Step 8: Scoring the Dough: Controlling Expansion
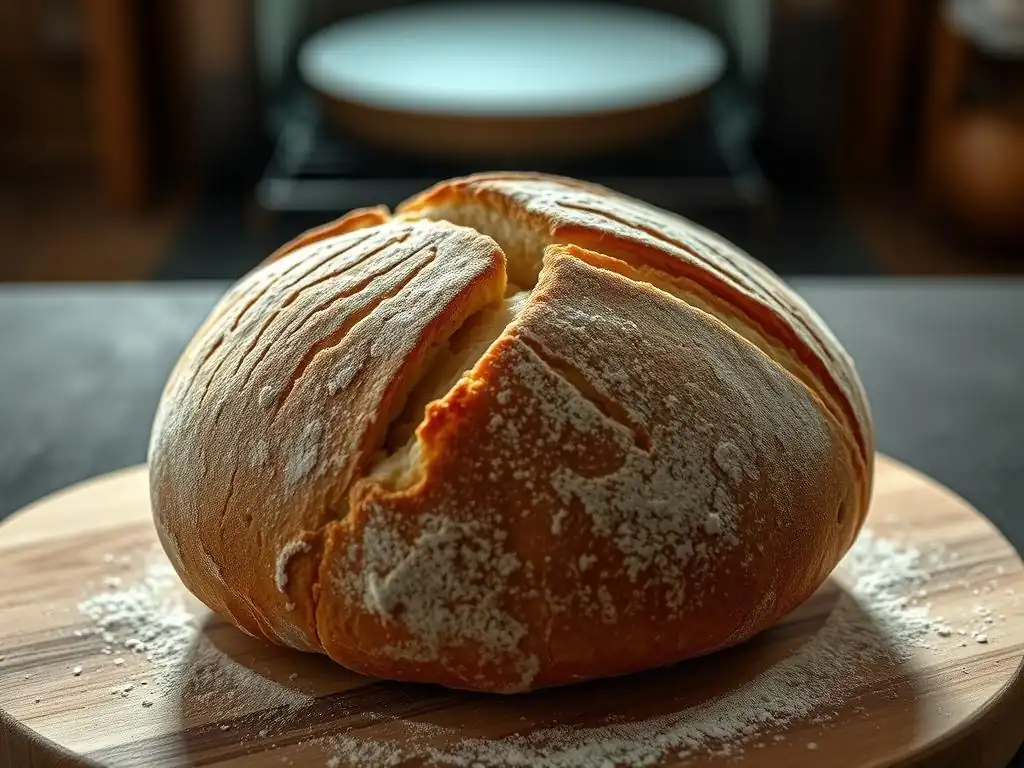
Just before baking, carefully invert the cold, proofed dough from the banneton onto a piece of parchment paper or a peel dusted with cornmeal or semolina. Scoring involves making cuts on the surface of the dough with a sharp blade (a lame or razor blade works best). These cuts are not just for decoration; they serve a critical function.
Scoring controls where the loaf expands during oven spring. Without scores, the crust would tear unpredictably. A primary score down the length of a batard or across the top of a boule allows the dough to expand upwards and outwards elegantly. Deeper scores encourage more expansion, while shallow scores are more for aesthetics or controlling blistering. Scoring cold dough from the refrigerator is much easier and cleaner than scoring dough proofed at room temperature, making this step simpler for your easy sourdough baking stone recipe.
Step 9: Baking: Time, Temperature, and Steam
Carefully transfer the scored dough on its parchment paper or peel onto the preheated baking stone. If using a steam method, add water to your steam tray or place a baking dome/inverted pot over the loaf immediately. Bake at a high initial temperature (e.g., 475°F or 245°C) for the first 15-20 minutes to maximize oven spring and set the structure.
After the initial steaming period, carefully remove the steam source (tray or dome) and reduce the oven temperature slightly, typically to 425-450°F (220-230°C). Continue baking for another 20-30 minutes, or until the crust is deep golden brown and the internal temperature of the loaf reaches around 205-210°F (96-99°C). Baking directly on the stone ensures a strong, crispy bottom crust, a hallmark of an easy sourdough baking stone recipe done well.
Step 10: Cooling and Resting the Loaf
Once the loaf is baked, remove it from the oven and carefully slide it off the baking stone onto a wire cooling rack. It is absolutely essential to let the bread cool completely before slicing into it. This cooling period, which can take 2-4 hours depending on the size of the loaf, allows the internal structure (the crumb) to set properly and the flavors to fully develop.
Cutting into a hot loaf will result in a gummy, dense texture because the starches haven't finished their transformation. Patience during this final cooling phase is rewarded with the best possible texture and flavor from your easy sourdough baking stone recipe. Resist the urge to slice too early!
Troubleshooting
Even with a great easy sourdough baking stone recipe and careful technique, issues can sometimes arise. Understanding common problems and their likely causes is key to improving your process and achieving better results with each bake. Don't be discouraged by imperfect loaves; they are learning opportunities.
Here are some frequent troubleshooting scenarios encountered when baking sourdough on a stone, along with potential solutions. Identifying the specific issue helps pinpoint where adjustments are needed in your process.
Dense Sourdough: Addressing Insufficient Rise
A dense crumb with small, tight holes is often a sign of insufficient fermentation or proofing. This could be due to an inactive starter, bulk fermentation that was too short or too cold, or final proofing that didn't allow the dough enough time to expand. For example, if your kitchen is cooler than 70°F, bulk fermentation might take 8-10 hours instead of 4-6.
To address this, ensure your starter is consistently active (doubling in size reliably). Pay close attention to the dough during bulk fermentation – watch for a significant increase in volume (aim for at least 50-75% visual increase) and signs of aeration. If cold proofing, ensure the dough was sufficiently developed during bulk fermentation before refrigerating. Allowing more time for fermentation or slightly increasing dough temperature can help improve the rise in your easy sourdough baking stone recipe.
Flat Sourdough: Causes and Solutions
A loaf that spreads wide rather than rising upwards during baking can be caused by several factors. Weak gluten development during mixing and folds can lead to a dough that lacks the structure to hold its shape. Over-proofing the dough can also cause it to collapse when transferred to the hot stone, as the gluten structure has degraded and cannot support the gas anymore. Improper shaping, failing to create enough surface tension, is another common culprit.
To improve loaf structure, ensure you are developing sufficient gluten through adequate mixing and stretching/folding (the dough should pass the windowpane test, where a small piece can be stretched thin enough to see light through). Pay close attention to the bulk fermentation endpoint – dough that is too wobbly or sticky may be over-proofed. Practice shaping techniques to build good surface tension. A well-shaped, properly proofed dough stands a much better chance of achieving good height when baked on your hot baking stone using your easy sourdough baking stone recipe.
Over-Browned Crust: Preventing Burning
If your sourdough crust is getting too dark or even burning, especially on the bottom, the oven temperature might be too high, or the baking time might be too long for your specific oven. Baking stones absorb and radiate intense heat, which is great for crispness but can lead to burning if not managed.
Try reducing the oven temperature slightly after the initial high-heat phase (e.g., drop from 475°F to 425°F after 15-20 minutes). If the bottom crust is consistently too dark while the top is perfect, try placing the baking stone on a slightly higher rack in the oven, or place a baking sheet on the rack below the stone during the latter part of the bake to shield the bottom from radiant heat.
Adjusting your timing based on visual cues – the crust should be a rich, deep golden brown, not black – is key to preventing burning in your easy sourdough baking stone recipe.
Gummy Sourdough Crumb: Addressing Underbaking
A gummy or wet-looking crumb often indicates the bread was underbaked. This happens when the internal temperature doesn't reach a sufficient level (205-210°F or 96-99°C) to fully cook the starches and evaporate excess moisture. Cutting into the loaf before it has cooled completely can also make the crumb appear gummy.
To ensure proper baking, use an instant-read thermometer to check the internal temperature of the loaf before removing it from the oven. If it's below the target range, return it to the oven for another 5-10 minutes. Ensure your oven is accurately calibrated (an oven thermometer is helpful). Also, be patient and allow the loaf to cool completely on a wire rack for at least 2-4 hours before slicing. Proper baking and cooling are essential for a light, open crumb in your easy sourdough baking stone recipe.
Tips for Improvement
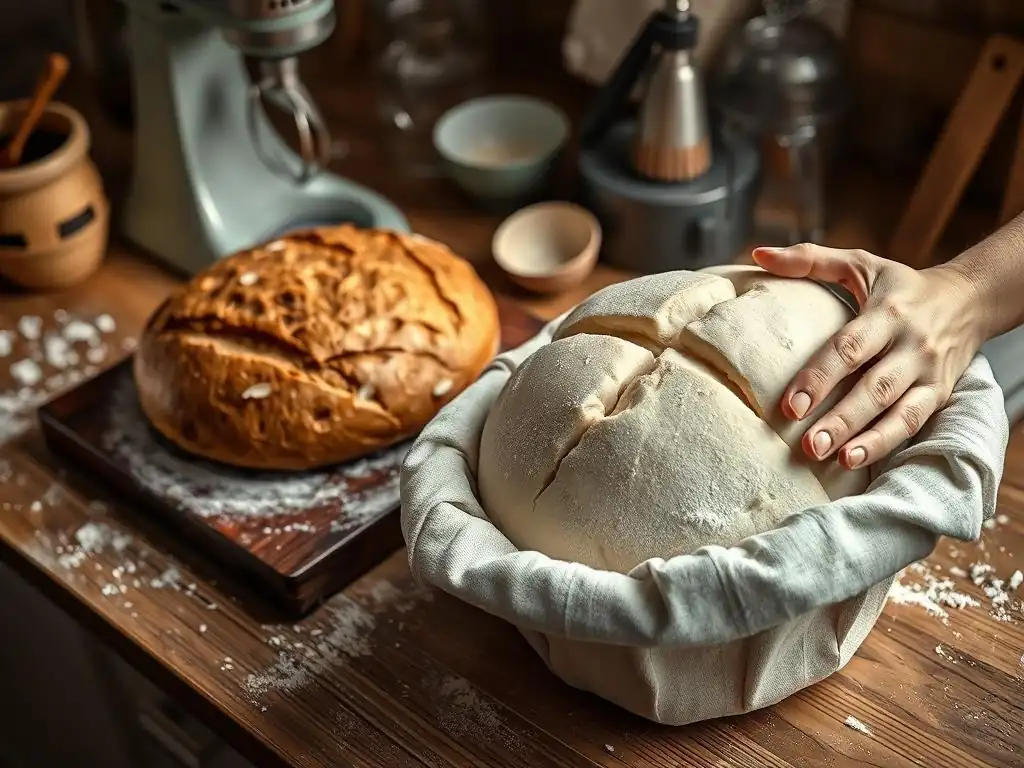
Beyond the basic steps, several tips can help you refine your sourdough baking on a stone and achieve even better results. Small adjustments in technique or care for your equipment can make a noticeable difference in the final loaf. Continuous learning and experimentation are part of the fun of sourdough baking.
Incorporating these tips can help you elevate your easy sourdough baking stone recipe from good to great. Pay attention to the details and observe how different approaches affect your bread.
Caring for Your Baking Stone
Proper care ensures your baking stone lasts for many years and performs optimally. Never use soap to clean a baking stone, as it is porous and will absorb the soap, potentially imparting an unpleasant flavor to your bread. For most cleaning, simply scrape off any baked-on bits with a metal spatula or brush after the stone has cooled completely.
If there are stubborn stains or burnt areas, you can try scraping them off or even placing the stone in a self-cleaning oven cycle (check the manufacturer's instructions first). The stone will naturally darken over time with use; this is normal and doesn't affect performance. Ensure the stone is completely dry before its next use to prevent cracking from steam expansion. A well-maintained stone is crucial for consistently achieving a crispy crust with your easy sourdough baking stone recipe.
Experimenting with Different Grains
While a basic sourdough often uses 100% bread flour, incorporating other grains can add complexity of flavor and texture. Try substituting 10-20% of the bread flour with whole wheat flour, rye flour, or spelt flour. Whole grains absorb water differently and can affect gluten development, so you may need to slightly adjust the hydration level.
Adding whole grains often results in a slightly denser crumb and a more rustic flavor profile. For example, adding 15% whole wheat flour will give a nuttier taste and darker color. Experimenting with small percentages of different flours can be a fun way to customize your easy sourdough baking stone recipe and discover new favorite flavor combinations.
Adding Flavor: Incorporating Add-ins
Once you're comfortable with a basic sourdough, you can enhance its flavor by incorporating various add-ins. Seeds (like sesame, poppy, sunflower, or pumpkin seeds), nuts, dried fruits (cranberries, raisins), cheese, herbs (rosemary, thyme), or even roasted garlic can be folded into the dough during the mixing or bulk fermentation stage.
For seeds, you might want to soak them beforehand (hydration) to prevent them from absorbing moisture from the dough during fermentation. A common approach is to add seeds at about 10-20% of the flour weight. Incorporating add-ins adds a new dimension to your easy sourdough baking stone recipe, allowing for endless creative possibilities.
Improving Scoring Technique
Scoring is both functional and artistic. Practicing your scoring technique can lead to more predictable oven spring and more beautiful loaves. Use a very sharp blade, held at an angle (around 30-45 degrees) to the surface of the dough. This angle helps create a 'lip' or 'ear' on the crust as it expands.
Experiment with different patterns – a single long score for a batard, a cross or square for a boule, or multiple shallow cuts. Cold dough is much easier to score cleanly than warm dough. Watching videos or looking at pictures of scoring patterns can provide inspiration. Improving your scoring adds a professional touch to the loaves baked using your easy sourdough baking stone recipe.
Recipe Variations
Once you've mastered the basic easy sourdough baking stone recipe, you can explore variations by changing the flour composition. Different flours absorb water differently and behave uniquely during fermentation and baking. Adjusting your technique slightly for these variations will yield diverse and delicious results.
These variations introduce new textures and flavors, building upon the fundamental sourdough process. They are a great way to expand your baking repertoire.
Whole Wheat Sourdough
Making a sourdough loaf with a higher percentage of whole wheat flour (e.g., 50% or more) results in a heartier loaf with a distinct nutty flavor and denser crumb compared to white bread sourdough. Whole wheat flour absorbs more water than white bread flour due to the presence of the bran and germ.
You might need to increase the hydration slightly when working with higher percentages of whole wheat. The gluten development process can also be different; whole wheat flour has components that can interfere with gluten formation, sometimes requiring longer or more gentle handling. Baking time might also be slightly longer. Adapting your easy sourdough baking stone recipe for whole wheat requires attention to hydration and fermentation time.
Rye Sourdough
Rye flour contains very little gluten compared to wheat flour. As a result, sourdough loaves made with significant amounts of rye (e.g., 30% or more) tend to be denser and have a tighter crumb structure. Rye adds a strong, tangy flavor that pairs wonderfully with sourdough fermentation.
Rye dough is often stickier and less elastic than wheat dough. It's typically handled differently, sometimes requiring less kneading and more gentle shaping. Fermentation times can also vary. Baking rye sourdough on a stone still benefits from the direct heat for crust development, but the loaf's structure will be different from a wheat loaf. Adjusting your easy sourdough baking stone recipe to incorporate rye offers a distinctly different bread experience.
Seeded Sourdough
Adding seeds to your sourdough, as mentioned earlier, introduces texture and flavor. Common additions include flax, chia, sunflower, pumpkin, and sesame seeds. A typical ratio is 10-20% seeds relative to the flour weight. Soaking some seeds (like flax or chia) overnight in a small amount of water before adding them to the dough is often recommended to prevent them from drying out the final loaf.
Seeds can be added during the initial mix or folded in during the first few sets of stretch and folds. They add visual appeal and a pleasant crunch. Baking seeded sourdough on a stone works well; the seeds on the surface can crisp up nicely. Incorporating seeds is an easy way to add complexity to your easy sourdough baking stone recipe.
Conclusion
Baking sourdough bread on a baking stone is a rewarding process that connects you to age-old baking traditions. While it requires attention to detail, particularly regarding oven temperature and steam, the results – a loaf with fantastic oven spring, a beautifully open crumb, and a wonderfully crispy crust – are well worth the effort. Mastering the techniques for an easy sourdough baking stone recipe opens up a world of possibilities in your home kitchen.
Each loaf you bake teaches you something new about working with your starter, understanding dough development, and controlling the baking environment. Don't be afraid to experiment, learn from loaves that don't turn out perfectly, and celebrate your successes.
The Rewards of Sourdough Baking
The satisfaction of pulling a warm, crackling loaf of sourdough from your oven, baked to perfection on your stone, is immense. Beyond the tangible result of delicious bread, the process itself is deeply rewarding. It's a practice that requires patience, observation, and a connection to the living culture of your starter.
Enjoying a slice of your homemade sourdough, with its complex tangy flavor and satisfying chew, is the culmination of your efforts. It's a testament to the simple magic that happens when flour, water, salt, and time come together. The skills learned mastering an easy sourdough baking stone recipe build confidence for future baking endeavors.
Sourdough bread is meant to be shared. There's a special joy in offering a slice of your homemade creation to friends and family. The unique flavor and texture of sourdough make it perfect for countless uses – toasted with butter, as the base for a delicious sandwich, or simply dipped in olive oil.
Store your cooled loaf properly (cut-side down on a cutting board or in a bread bag) to maintain its freshness and crust. Remember the journey you took, from nurturing your starter to achieving that perfect bake on your stone, as you savor each bite. Enjoy the fruits of your labor and the simple pleasure of truly homemade bread from your easy sourdough baking stone recipe.
Frequently Asked Questions
What is a baking stone, and why should I use one for sourdough?
A baking stone is a flat slab, usually made of ceramic, stone, or cordierite, that is heated in the oven before baking. It helps to create a crispier crust and more even baking by providing a consistent heat source.
Can I bake sourdough without a baking stone, or is it essential?
You can bake sourdough without a baking stone, but it's highly recommended for achieving optimal results. Alternatives include a Dutch oven or a baking sheet.
What type of flour is best for this "Easy Sourdough Baking Stone Recipe"?
While the recipe likely allows for some flexibility, using bread flour is usually recommended for its higher protein content, which contributes to a stronger gluten structure and a better rise in sourdough.
How long should I preheat the baking stone before baking my sourdough?
Preheating the baking stone for at least 30-60 minutes at the oven's highest temperature is crucial. This ensures it's thoroughly heated and will transfer that heat to the dough for a crispy crust.
What temperature should I bake my sourdough at when using a baking stone?
Typically, sourdough baked on a baking stone starts at a high temperature, around 450-500°F (232-260°C), and may be lowered slightly partway through baking to prevent burning.
Final Reflection: The Humble Stone and the Bountiful Loaf
The resurgence of sourdough baking isn't just a trend; it's a testament to our desire for connection to simpler times and the satisfaction of creating something beautiful from humble ingredients. Using a baking stone elevates this process, transforming a simple loaf into a masterpiece. The crisp crust and airy crumb achieved with this method are a reward in themselves, a tangible representation of patience and care.
The journey of sourdough, from starter creation to the golden-brown perfection of the baked loaf, is a deeply rewarding experience. It's a process that connects us to generations of bakers past, a quiet ritual in a fast-paced world. Bread is the staff of life,
a simple phrase, yet it holds a profound truth. It speaks to the fundamental role bread plays in our sustenance and culture, and the baking stone, in its own way, enhances this ancient tradition.
Now, consider your own kitchen. Imagine the aroma of freshly baked sourdough filling your home, the satisfying weight of the loaf in your hands. You, too, can experience the joy of baking sourdough with a baking stone. Don't be intimidated by the seemingly complex process; embrace the journey, learn from each loaf, and savor the delicious results. The reward is far greater than just a delicious meal; it's a connection to something timeless, a sense of accomplishment, and a taste of pure, simple satisfaction.
Unleash Your Inner Baker: Craft the Perfect Sourdough Loaf!
Thanks for taking the time to explore the world of sourdough baking with us! We hope you’ve gained valuable insights into creating a delicious and satisfying loaf using a baking stone. Now it's time to put your newfound knowledge into practice.
- Bake your own sourdough masterpiece! Use the recipe and tips from this article to create your first (or next!) perfect sourdough loaf. Don't be afraid to experiment – the journey is half the fun!
- Share your baking journey! Post a picture of your sourdough creation on social media and tag us – we'd love to see your results!
- Explore advanced sourdough techniques: Dive deeper into the world of sourdough by researching different shaping methods, hydration levels, and starter care techniques.
What unique flavor or texture will you experiment with in your next sourdough bake?