
Baking Delicious Vegan Bread: It's Easier Than You Think

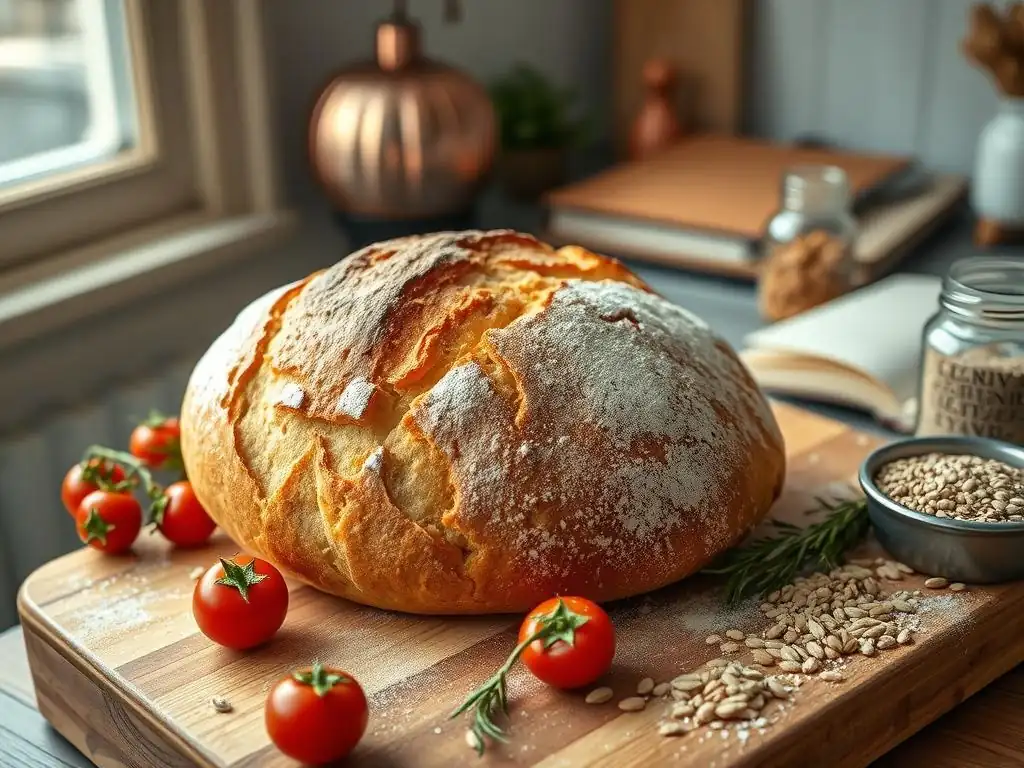
Welcome to BakeWithEase, your companion in the delightful world of baking! Are you ready to discover that achieving perfectly fluffy and delicious bread, even without traditional ingredients, is entirely within your reach? This week, we're diving deep into the surprisingly simple techniques behind vegan bread baking recipes. Prepare to be amazed as we unveil secrets to creating loaves that are both satisfying and plant-based. Intrigued? Let's get baking!
- Baking Delicious Vegan Bread: A Comprehensive Guide
- Simple Vegan Bread Baking Recipes for Every Baker
- Understanding Vegan Bread Baking: From Novice to Expert
- The Essential Vegan Bread Baking Ingredients
- Our Top 3 Vegan Bread Baking Recipes
- Troubleshooting Your Vegan Bread Baking
- Advanced Vegan Bread Baking Techniques
- Storing Your Vegan Bread for Optimal Freshness
- Conclusion: The Joy of Homemade Vegan Bread
-
Frequently Asked Questions
- How difficult is it to bake vegan bread compared to traditional bread?
- What are some common substitutions for eggs and dairy in vegan bread recipes?
- Can I use any type of flour for vegan bread baking?
- Are vegan bread recipes less flavorful than traditional bread recipes?
- Where can I find reliable vegan bread baking recipes for beginners?
- Final Reflection: The Unexpected Joys of Vegan Baking
- Unleash Your Inner Baker: Craft Your First Vegan Loaf!
Baking Delicious Vegan Bread: A Comprehensive Guide
Simple Vegan Bread Baking Recipes for Every Baker
Diving into the world of vegan bread baking recipes can seem daunting at first, but it's a wonderfully rewarding journey. Whether you're a seasoned baker or just starting out, crafting a delicious loaf without traditional animal products is entirely achievable. The principles are similar to conventional baking, with clever substitutions making all the difference. This guide aims to demystify the process, proving that baking vegan bread can be simple, accessible, and incredibly tasty. We'll explore the fundamentals, tackle common challenges, and share some fantastic vegan bread baking recipes to get you started.
Many home bakers are discovering the joy of creating their own vegan loaves. It offers control over ingredients, allows for customization, and fills your home with that incomparable aroma of fresh bread. From rustic sourdough to soft dinner rolls, there's a vast array of vegan bread recipes waiting to be explored. Our goal is to equip you with the knowledge and confidence to bake delicious, plant-based bread consistently.
Understanding Vegan Bread Baking: From Novice to Expert
Embarking on vegan bread baking opens up a world of plant-based ingredients and techniques. At its core, it's about understanding the role of traditional bread components and finding effective, vegan alternatives. This section breaks down the basics, helping you build a solid foundation for successful baking.
What Makes Bread Vegan? Core Ingredient Substitutions
Traditional bread often contains ingredients derived from animals, primarily eggs and dairy. Eggs are sometimes used for richness, binding, or creating a soft crumb, while dairy (milk, butter) adds flavor, tenderness, and helps with browning. To make bread vegan, these ingredients must be replaced.
Instead of dairy milk, bakers use plant-based milks like almond, soy, oat, or cashew milk. Butter is swapped for vegetable oils, vegan butter, or margarine. Eggs, if used in a recipe, can be replaced with ingredients like mashed banana, applesauce, flax eggs (ground flaxseed mixed with water), or commercial egg replacers, depending on the function they serve in the specific vegan bread baking recipe.
Yeast, the leavening agent in most bread, is a fungus and is naturally vegan. However, some commercial breads might contain non-vegan additives like L-cysteine (derived from animal sources) or monoglycerides/diglycerides (which can be animal or plant-derived). When baking at home following vegan bread baking recipes, you have complete control over these ingredients, ensuring everything is plant-based. Checking labels on yeast and any pre-mixed flours or additives is a good practice for strict vegans.
Common Vegan Bread Baking Challenges (and How to Overcome Them)
One frequent challenge in vegan bread baking is achieving the same richness and tenderness that dairy and eggs provide in traditional recipes. Without butter or milk, loaves can sometimes turn out drier or less flavorful. This can often be overcome by incorporating ingredients like mashed potato, cooked grains, or a small amount of vegetable oil directly into the dough.
For example, using a portion of olive oil in a rustic loaf adds moisture and contributes to a tender crumb and crisp crust. Additionally, some plant-based milks, particularly those with a higher fat content like soy or cashew milk, can mimic the richness of dairy milk effectively.
Another hurdle can be replicating the binding and structure that eggs provide in enriched doughs. While many basic lean breads don't use eggs, enriched doughs for brioche-style breads or rolls often do. When adapting these for vegan bread baking, using a flax egg (1 tablespoon ground flaxseed + 3 tablespoons water, left to sit for 5-10 minutes) can provide some binding properties, though it may impart a slightly nutty flavor.
For recipes relying heavily on egg for structure, achieving an identical texture can be difficult, and it might require adjusting hydration levels or incorporating a small amount of a commercial vegan egg replacer designed for baking. Experimentation is key to finding the perfect balance for your specific vegan bread recipes.
The Essential Vegan Bread Baking Ingredients
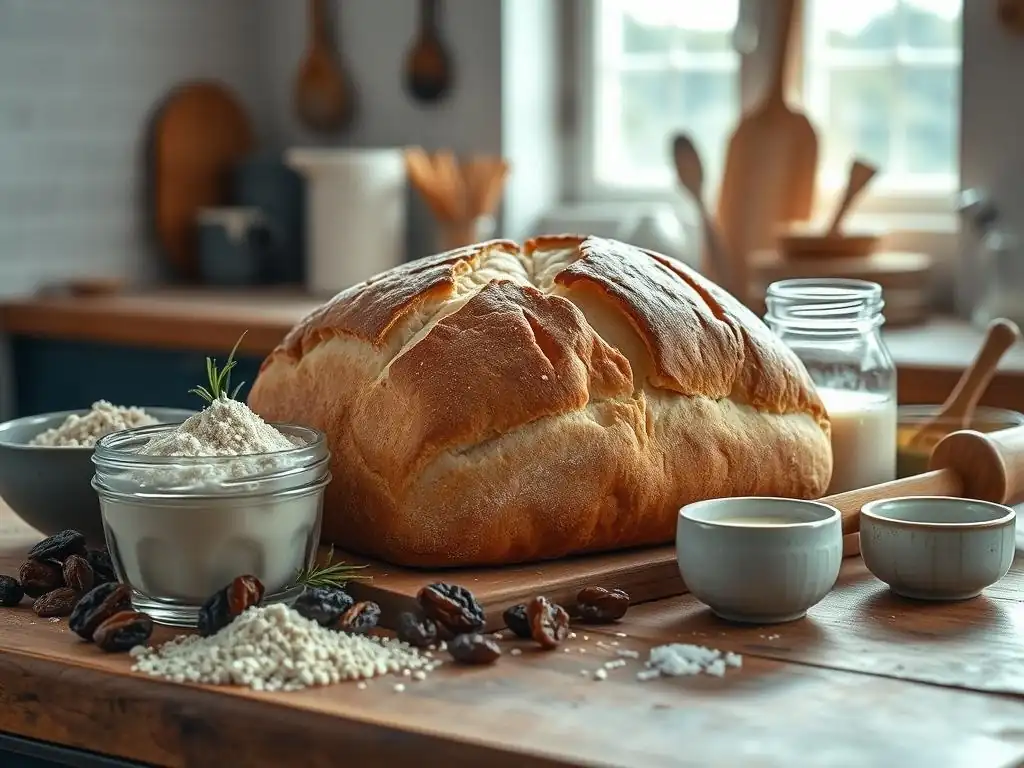
Success in vegan bread baking hinges on understanding your ingredients and how they interact. While the core components remain similar to conventional baking – flour, liquid, yeast, salt – the specific choices and their roles are crucial.
Flour Power: Selecting the Ideal Flour for Vegan Bread
Flour provides the structure for bread, primarily through its protein content, which forms gluten when hydrated and kneaded. For most vegan bread baking recipes, all-purpose flour is a versatile choice, typically containing 10-12% protein.
Bread flour, with a higher protein content (12-14%), develops stronger gluten, resulting in a chewier texture and better rise, making it ideal for loaves that require strong structure like sourdough or crusty boules. Whole wheat flour adds fiber and nutrients but has broken gluten strands due to the bran, often requiring a mix with white flour (e.g., 50-75% whole wheat, 25-50% white) in vegan bread recipes to achieve a good rise and texture.
Exploring different flours can significantly impact the final loaf in vegan bread baking. Spelt flour, an ancient grain, has a unique flavor and structure, requiring slightly different hydration. Rye flour, common in European breads, develops less gluten but adds distinct flavor and density. Gluten-free flour blends, specifically formulated for baking, are necessary for gluten-free vegan bread. When using alternative flours or blends in your vegan bread baking recipes, it's important to note that their absorption rates can vary, so you might need to adjust the liquid content accordingly.
Liquid Assets: Water, Plant-Based Milk, and Hydration Techniques
Liquid is essential in vegan bread baking for activating yeast, hydrating the flour to develop gluten (or hydrate starches in gluten-free baking), and bringing the dough together. The most common liquid is water, which is neutral and allows the flour's flavor to shine. The temperature of the water is important; lukewarm water (around 95-105°F or 35-40°C) is ideal for activating active dry yeast, while cooler water is often used for slower fermentation methods like overnight proofs.
Plant-based milks like soy, almond, oat, or cashew milk can be used instead of water in enriched vegan bread recipes to add richness, a slightly sweeter flavor, and help with browning. Just like water, they should be warmed slightly if using active dry yeast. Hydration refers to the ratio of liquid to flour by weight.
A higher hydration percentage (e.g., 70-80% hydration or more) results in a wetter, stickier dough that often yields a loaf with a more open crumb structure, while a lower hydration (e.g., 50-60%) produces a firmer dough that's easier to handle, resulting in a tighter crumb. Mastering hydration is a key skill in baking vegan bread, as it significantly impacts the dough's texture and the final loaf's characteristics.
Sweetness and Flavor: Natural Vegan Sweeteners and Flavor Enhancers
While many basic vegan bread baking recipes require only a pinch of sugar to feed the yeast, others benefit from added sweetness for flavor and browning. Vegan-friendly sweeteners include granulated sugar, brown sugar, maple syrup, agave nectar, or date syrup. It's worth noting that some granulated sugars are processed using bone char, making them non-vegan, so look for certified vegan or organic sugar if this is a concern. Molasses, a byproduct of sugar refining, is also vegan and adds a distinct flavor and color, particularly in whole wheat or rye vegan bread recipes.
Beyond sweeteners, various ingredients can enhance the flavor of vegan bread. Salt is critical not just for taste but also for controlling yeast activity and strengthening gluten; typically, recipes use about 1.8-2% salt relative to the flour weight. Herbs like rosemary, thyme, or oregano, spices such as cinnamon or cardamom, and additions like roasted garlic, sun-dried tomatoes, olives, or seeds can transform a basic loaf into something extraordinary. When adding moist ingredients like roasted vegetables in vegan bread baking, you might need to slightly reduce the liquid content to maintain the correct dough consistency.
Binding Agents: Replacing Gluten in Vegan Bread Recipes
Gluten, formed from proteins in wheat, rye, and barley, provides structure and elasticity to bread dough, trapping gases produced by yeast and allowing the bread to rise. In traditional baking, developing a strong gluten network is crucial. However, in vegan bread baking, especially for gluten-free variations, alternative binding agents are necessary.
Psyllium husk or ground psyllium husks are excellent vegan binders for gluten-free bread, absorbing significant amounts of water and creating a gel-like substance that mimics some of gluten's structural properties. Using about 10-15 grams of psyllium husk per 500 grams of gluten-free flour is a common ratio in many vegan bread recipes.
Xanthan gum is another popular binder in gluten-free vegan bread baking, typically used in smaller amounts (around 1-2 teaspoons per cup of gluten-free flour blend). It helps improve the texture and elasticity of doughs lacking gluten.
Other natural binders like ground chia seeds or flax seeds (which form a gel when mixed with water) can also be used, although they may impart a more noticeable texture and flavor. When adapting traditional vegan bread baking recipes to be gluten-free, selecting the right binder and ensuring proper hydration are critical steps for achieving a loaf that holds its shape and has a pleasant texture.
Understanding Gluten Development in Vegan Bread Alternatives
In vegan bread baking using wheat flour, gluten develops just as it does in conventional baking through the hydration of flour and mechanical action (kneading or folding). The proteins glutenin and gliadin in wheat flour combine with water to form gluten. Kneading stretches and aligns this gluten network, creating elasticity and strength. Vegan doughs containing wheat flour benefit from proper kneading or a series of stretch-and-folds during a bulk fermentation period to build this structure, essential for trapping carbon dioxide produced by yeast.
However, in gluten-free vegan bread recipes, the focus shifts from developing gluten to creating structure using alternative ingredients. Binders like psyllium husk or xanthan gum form a matrix that holds the dough together and provides some elasticity. Starch components in gluten-free flour blends (like tapioca starch, potato starch, or cornstarch) gelatinize when heated, contributing to the crumb structure. Achieving a good texture in gluten-free vegan bread baking relies heavily on the right balance of flour types, starches, and binders, often resulting in a dough that is more like a thick batter than a traditional kneadable dough.
Vegan Gluten-Free Bread Options: A Detailed Comparison
For those seeking vegan bread baking recipes free from gluten, the options are expanding rapidly. Gluten-free flour blends are the most convenient starting point, combining various flours (rice, sorghum, millet), starches (tapioca, potato, corn), and binders (xanthan gum, psyllium). These blends offer a texture closest to wheat bread when used in vegan bread recipes, but the exact composition varies between brands, affecting results. Baking with single-origin gluten-free flours like buckwheat, oat (certified gluten-free), or teff is also possible but often requires more specialized techniques and combining flours to achieve a balanced texture and flavor.
| Gluten-Free Flour/Binder | Typical Characteristics in Vegan Bread | Binding Strength | Flavor Profile |
|---|---|---|---|
| Rice Flour (Brown/White) | Base for blends, adds structure | Moderate | Neutral (White), Nutty (Brown) |
| Sorghum Flour | Soft texture, good structure | Moderate | Mild, slightly sweet |
| Tapioca Starch | Adds chewiness and crust crispness | Low (used with others) | Neutral |
| Psyllium Husk | Excellent binder, creates elasticity | High | Neutral (can be slightly earthy) |
| Xanthan Gum | Good binder, improves elasticity | High | Neutral |
When developing vegan bread baking recipes using gluten-free flours, it's common to use a combination, such as a base of rice or sorghum flour mixed with tapioca starch for chewiness and psyllium husk or xanthan gum for binding. For example, a typical blend might be 40% brown rice flour, 30% sorghum flour, 20% tapioca starch, and 10% other flours like millet or buckwheat, plus 1.5-2% binder by flour weight. This careful selection and ratio of ingredients are crucial for successful vegan bread baking in the gluten-free realm.
Our Top 3 Vegan Bread Baking Recipes
Ready to get your hands doughy? Here are three popular vegan bread baking recipes to try at home, covering different styles and techniques. These recipes are designed to be approachable for various skill levels.
Recipe 1: Classic Vegan Sourdough Bread
Baking a classic sourdough loaf is a highlight of vegan bread baking. It relies on a naturally fermented starter for leavening, creating a distinct tangy flavor and chewy texture. This recipe yields one beautiful loaf.
Ingredients for Vegan Sourdough Bread
- 150g active vegan sourdough starter (fed and active)
- 350g lukewarm water (approx. 90°F or 32°C)
- 500g strong bread flour (or a mix of bread and all-purpose)
- 10g fine sea salt
Step-by-Step Instructions: Baking Vegan Sourdough Bread
- Mix the Dough: In a large bowl, whisk together the active sourdough starter and water until the starter is mostly dissolved. Add the flour and salt. Mix with a spoon or your hands until no dry flour remains and a shaggy dough forms.
- Autolyse (Rest): Cover the bowl and let the dough rest for 30-60 minutes. This step allows the flour to fully hydrate and begins gluten development naturally, making the dough easier to work with later in your vegan bread baking.
- Kneading/Folding: Perform a series of stretch-and-folds over the next 2-3 hours. Every 30-45 minutes, wet your hand, grab one side of the dough, stretch it up, and fold it over the rest of the dough. Rotate the bowl and repeat 3-4 times. This builds strength in the dough without intensive kneading.
- Bulk Fermentation: Cover the bowl and let the dough ferment at room temperature (ideally 75-80°F or 24-27°C) until it has increased in volume by about 50-75% and looks bubbly and airy. This can take anywhere from 4 to 8 hours depending on your starter's activity and ambient temperature. This is a critical stage in vegan bread baking for sourdough.
- Shape the Dough: Gently turn the dough out onto a lightly floured surface. Shape it into a boule (round) or batard (oval) by gently folding and tucking the edges under to create surface tension.
- Proofing: Place the shaped dough seam-side up into a floured banneton (proofing basket) or a bowl lined with a floured linen cloth. Cover and refrigerate for 8-12 hours (cold proof) or proof at room temperature for 2-4 hours until it passes the poke test (gently poke the dough; if it slowly springs back, it's ready). The cold proof develops more flavor in vegan bread baking.
- Preheat Oven & Dutch Oven: Preheat your oven to 475°F (245°C) with a Dutch oven inside for at least 30 minutes.
- Score and Bake: Carefully remove the hot Dutch oven. Invert the dough onto a piece of parchment paper or directly into the Dutch oven. Score the top of the loaf with a sharp razor or knife. Cover with the lid and bake for 20 minutes.
- Finish Baking: Remove the lid and reduce the oven temperature to 450°F (230°C). Continue baking for another 20-25 minutes, or until the crust is deep golden brown and the internal temperature is around 205-210°F (96-99°C).
- Cool: Carefully remove the bread from the Dutch oven and let it cool completely on a wire rack before slicing. This is essential for the crumb structure to set properly in vegan bread baking.
Tips for Achieving the Perfect Vegan Sourdough
Achieving a perfect oven spring and a beautiful crumb in vegan bread baking with sourdough requires attention to detail. Ensure your sourdough starter is active and bubbly before you begin; it should double in size a few hours after feeding. The temperature during bulk fermentation significantly impacts the timeline; warmer temperatures speed it up, cooler temperatures slow it down. Aiming for a room temperature around 75-80°F (24-27°C) is often ideal for a predictable rise.
Proper shaping is also crucial for oven spring. Create enough surface tension to help the loaf hold its shape when it hits the heat. Don't skip the cold proof in the refrigerator if time allows; it develops complex flavors and makes the dough easier to handle and score. Finally, baking in a preheated Dutch oven traps steam, which keeps the crust soft initially, allowing the loaf to expand fully before the crust hardens, resulting in that desirable oven spring in your vegan bread baking.
Recipe 2: Wholesome Vegan Whole Wheat Bread
This recipe focuses on creating a soft and nutritious whole wheat loaf, perfect for sandwiches or toast. It uses active dry yeast for a reliable rise, making it an excellent introduction to vegan bread baking recipes.
Ingredients for Vegan Whole Wheat Bread
- 1.5 cups (360ml) lukewarm water (approx. 105-115°F or 40-46°C)
- 2.25 teaspoons active dry yeast (one standard packet)
- 1 tablespoon agave nectar or maple syrup
- 1 tablespoon vegetable oil
- 1.5 teaspoons salt
- 2.5 cups (300g) whole wheat flour
- 1.5 cups (180g) all-purpose flour (approx.)
Baking Vegan Whole Wheat Bread: A Comprehensive Guide
- Activate Yeast: In a large mixing bowl, combine the lukewarm water, yeast, and agave nectar. Stir gently and let stand for 5-10 minutes until foamy. This confirms your yeast is active, a vital first step in vegan bread baking.
- Add Wet Ingredients: Stir in the vegetable oil and salt into the yeast mixture.
- Add Flour: Gradually add the whole wheat flour and then the all-purpose flour, one cup at a time, mixing with a wooden spoon or dough hook until a shaggy dough forms that pulls away from the sides of the bowl. You may not need all the all-purpose flour; add just enough until the dough is manageable but still slightly sticky.
- Knead: Turn the dough out onto a lightly floured surface and knead for 8-10 minutes, or until the dough is smooth and elastic. Alternatively, use a stand mixer with a dough hook for 6-8 minutes. Proper kneading develops the gluten for structure in your vegan bread baking.
- First Rise (Bulk Fermentation): Lightly grease a clean bowl with a little oil. Place the dough in the bowl, turn to coat, and cover with plastic wrap or a damp towel. Let rise in a warm place (around 70-75°F or 21-24°C) for 1-1.5 hours, or until doubled in size.
- Shape the Loaf: Punch down the dough to release air. Turn it out onto a lightly floured surface and shape it into a loaf that fits your loaf pan. To shape, flatten the dough into a rectangle, fold the top third down, then the bottom third up, pressing edges to seal. Fold in half lengthwise and pinch the seam closed.
- Second Rise (Proofing): Place the shaped loaf seam-side down in a lightly greased 9x5 inch loaf pan. Cover and let rise again in a warm place for 30-45 minutes, or until the dough crests about 1 inch above the rim of the pan. This final rise is crucial for a light texture in vegan bread baking.
- Preheat Oven: Preheat your oven to 375°F (190°C) during the last 15 minutes of the second rise.
- Bake: Bake for 30-40 minutes, or until the crust is golden brown and the internal temperature reaches 200-205°F (93-96°C). If the top browns too quickly, you can loosely tent it with foil.
- Cool: Remove the loaf from the pan immediately after baking and let it cool completely on a wire rack before slicing. Cooling is essential for the crumb to set.
Variations: Adding Seeds, Nuts, or Dried Fruit
Enhancing your wholesome vegan bread baking recipes with additions like seeds, nuts, or dried fruit is easy and adds flavor, texture, and nutritional value. You can incorporate these during the kneading phase after the initial ingredients are combined. For a standard loaf, about 1/2 cup to 1 cup total of mix-ins works well.
Consider adding sunflower seeds, pumpkin seeds, or poppy seeds for crunch. Chopped walnuts or pecans add richness. Dried cranberries, raisins, or chopped apricots provide bursts of sweetness. For example, adding 1/4 cup of sunflower seeds and 1/4 cup of pumpkin seeds to this whole wheat recipe creates a lovely seeded loaf. If adding dried fruit, soaking it in warm water for 10 minutes and draining it before adding can prevent it from drawing moisture out of the dough during vegan bread baking.
Recipe 3: Soft and Fluffy Vegan Dinner Rolls
These vegan dinner rolls are incredibly soft and light, perfect for serving with a meal or enjoying on their own. This recipe utilizes plant-based milk and a touch of vegan butter or oil for richness, showcasing another facet of vegan bread baking recipes.
Ingredients for Vegan Dinner Rolls
- 1 cup (240ml) warm unsweetened plant-based milk (approx. 105-115°F or 40-46°C)
- 2.25 teaspoons active dry yeast (one standard packet)
- 2 tablespoons granulated sugar (certified vegan)
- 1/4 cup (55g) melted vegan butter or vegetable oil
- 1 teaspoon salt
- 3 - 3.5 cups (360-420g) all-purpose flour
Mastering the Technique: Baking Fluffy Vegan Dinner Rolls
- Activate Yeast: In a large bowl, combine the warm plant-based milk, yeast, and sugar. Stir and let stand for 5-10 minutes until foamy. This confirms yeast activity, a crucial step for light rolls in vegan bread baking.
- Add Wet Ingredients: Stir in the melted vegan butter or oil and salt into the yeast mixture.
- Add Flour: Gradually add the all-purpose flour, about 1/2 cup at a time, mixing until a soft, slightly sticky dough forms. You might not need all the flour.
- Knead: Turn the dough out onto a lightly floured surface and knead for 5-7 minutes, or until smooth and elastic. The dough should be soft and slightly tacky.
- First Rise (Bulk Fermentation): Place the dough in a lightly greased bowl, turn to coat, cover, and let rise in a warm place for 1 hour, or until doubled in size.
- Shape Rolls: Gently punch down the dough. Divide it into 12 equal pieces (about 60-65g each). Shape each piece into a smooth ball by tucking the edges underneath.
- Second Rise (Proofing): Arrange the rolls in a lightly greased 9x13 inch baking pan, leaving a small space between them. Cover and let rise again in a warm place for 30-45 minutes, or until puffy and nearly doubled. This final proof ensures fluffy results in your vegan bread baking.
- Preheat Oven: Preheat your oven to 375°F (190°C) during the last 15 minutes of the second rise.
- Optional Glaze: For a golden top, you can brush the tops of the rolls with a little melted vegan butter or a mix of plant milk and a pinch of sugar just before baking.
- Bake: Bake for 18-22 minutes, or until the rolls are golden brown and sound hollow when tapped on the bottom.
- Cool: Let the rolls cool in the pan for a few minutes before transferring them to a wire rack. Best served warm.
Achieving the Perfect Texture and Flavor
The key to soft and fluffy rolls in vegan bread baking lies in using a slightly wetter dough than you might for a loaf and ensuring adequate fat. The melted vegan butter or oil contributes significantly to the tenderness. Don't be tempted to add too much flour during kneading; a dough that is slightly sticky will result in a softer crumb.
Over-kneading can also make rolls tough, so stop when the dough is smooth and elastic, typically after 5-7 minutes of hand kneading. Allowing sufficient time for both the first and second rises is critical for a light texture. The rolls should look noticeably puffy before baking. For added flavor, you can mix herbs like dried parsley or garlic powder into the dough during the initial mixing phase of your vegan bread baking.
Troubleshooting Your Vegan Bread Baking
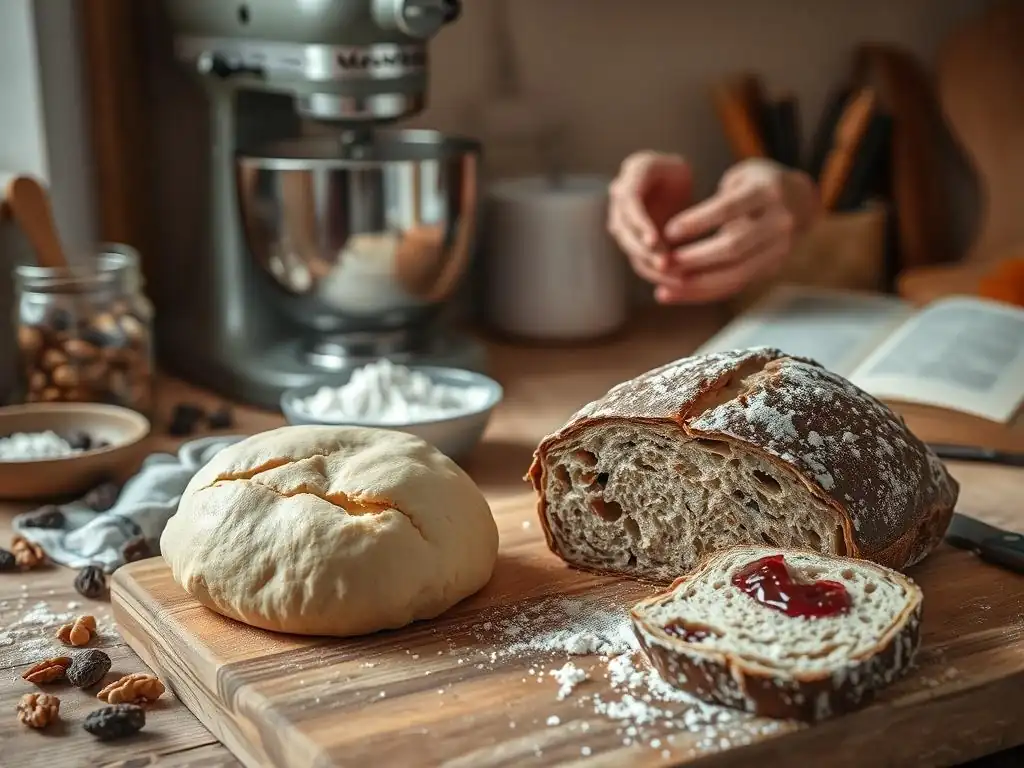
Even with the best vegan bread baking recipes, sometimes things don't go exactly as planned. Understanding common issues and how to fix them is a key part of becoming a confident baker.
My Bread Didn't Rise: Diagnosing and Correcting Issues
A loaf that doesn't rise is one of the most frustrating issues in vegan bread baking. The primary culprit is usually yeast inactivity.
- Check Yeast Viability: Was your yeast fresh? Active dry yeast typically lasts about a year, but its activity can diminish. Proofing the yeast in warm liquid with a pinch of sugar before adding flour (as done in recipes 2 and 3) is a good test. If it doesn't get foamy after 5-10 minutes, your yeast is likely dead and needs to be replaced.
- Liquid Temperature: Was the liquid temperature correct? Water or milk that is too hot (above 130°F or 54°C) will kill the yeast. Too cold (below 90°F or 32°C) will make it sluggish. Aim for the range specified in the recipe.
- Proofing Environment: Was the dough in a warm enough place for rising? Yeast is most active between 70-80°F (21-27°C). Cold drafts or low room temperature can significantly slow or halt the rise. Try placing the covered dough in a slightly warm oven (turned off, or briefly warmed to about 80°F and then turned off) or near a sunny window.
- Salt Contact: Did the salt come into direct contact with the yeast for too long before mixing? Salt can inhibit yeast activity. It's best to add salt after the yeast has started activating or mix it in with the flour before combining with the wet ingredients in your vegan bread baking.
If your dough had a minimal rise but isn't completely flat, you can try reshaping it gently and giving it a longer second rise in a warm spot. If the yeast is completely inactive, unfortunately, the dough won't rise, and you'll need to start over with fresh yeast.
My Bread is Too Dense: Techniques for a Lighter Texture
Dense bread can result from several factors in vegan bread baking, often related to gluten development, hydration, or proofing.
- Insufficient Kneading: Did you knead the dough long enough? Proper kneading develops the gluten network, which traps the gas produced by yeast, leading to a light, airy crumb. For wheat doughs, knead until smooth and elastic – it should pass the windowpane test (you can stretch a small piece thin enough to see light through it without tearing).
- Incorrect Hydration: Was the dough too dry? A dough that is too stiff won't expand easily. Ensure you're using the correct liquid amount specified in the vegan bread baking recipe. If the dough feels very stiff during kneading, add a tablespoon of water or plant milk at a time until it reaches the right consistency (often slightly sticky for softer breads).
- Under-Proofing: Did the dough rise enough during the first and second proofs? Under-proofed dough hasn't developed enough gas to expand fully during baking, resulting in a dense crumb. Allow the dough to rise until it has visibly increased in volume according to the recipe's instructions (often doubled for the first rise and significantly increased for the second). The poke test is a good indicator for the final proof before vegan bread baking.
- Over-Proofing: Can also lead to density. If dough rises too much, the gluten structure can collapse, and the gas escapes. The dough might look puffy but feel very fragile or start to deflate. Baking over-proofed dough results in a loaf that rises initially in the oven but then falls back, leading to a dense, sometimes gummy texture.
For future vegan bread baking recipes, pay close attention to dough consistency during mixing and kneading, and ensure adequate, but not excessive, proofing time based on your environment's temperature.
My Bread is Too Dry: Hydration Strategies and Baking Time Adjustments
Dry bread is often a result of insufficient hydration or over-baking, issues that can be managed in vegan bread baking.
- Low Hydration: Was enough liquid used in the recipe? Different flours absorb liquid differently. Whole wheat flour, for instance, typically requires more liquid than all-purpose flour. If you substituted flour or used approximations, you might need to adjust the liquid. The dough should feel slightly tacky or sticky, depending on the type of bread. Don't be afraid to add a little extra liquid (a tablespoon at a time) if the dough feels too dry during mixing.
- Over-Baking: Was the bread baked for too long or at too high a temperature? Over-baking evaporates too much moisture from the loaf. Always bake for the minimum time specified and check for doneness using internal temperature (200-210°F or 93-99°C for most yeast breads) rather than solely relying on visual cues. A golden-brown crust is a good sign, but the internal temperature is more accurate for ensuring the bread is cooked through without becoming dry.
- Cooling: Did you let the bread cool completely before slicing? Slicing hot bread allows steam (moisture) to escape, resulting in a drier texture. Always let the loaf cool fully on a wire rack to allow the internal moisture to redistribute. This patience is rewarded with better texture in your vegan bread baking.
For future vegan bread baking, consider the hydration level suggested by the recipe and be prepared to slightly increase the liquid if your flour seems particularly absorbent or if you live in a dry climate. Using a thermometer to check for doneness is the most reliable way to avoid over-baking.
Advanced Vegan Bread Baking Techniques
Once you're comfortable with basic vegan bread baking recipes, you can explore more advanced techniques to elevate your craft.
Exploring Different Vegan Sourdough Starters
While a basic flour and water starter is the most common for vegan bread baking, you can experiment with different flour types to create starters with unique characteristics. A whole wheat starter will often be more vigorous due to the extra nutrients in the bran and germ, potentially leading to faster fermentation. A rye starter is known for its robustness and distinct tangy flavor, often resulting in a more sour loaf.
You can also create starters using gluten-free flours like brown rice or sorghum for gluten-free vegan bread baking. These require a different feeding schedule and consistency than wheat starters but can successfully leaven gluten-free doughs. Maintaining multiple starters with different flour types allows you to choose the best starter for a specific vegan bread baking recipe, influencing the flavor profile and fermentation speed. A well-maintained starter is the heart of great sourdough.
Incorporating Ancient Grains for Enhanced Nutrition and Flavor
Adding ancient grains to your vegan bread baking recipes boosts nutritional value and introduces complex flavors and textures. Grains like spelt, farro, kamut, or einkorn can replace a portion of the all-purpose or bread flour in a recipe (start with replacing 10-20% of the flour and gradually increase). These grains often require slightly different hydration and handling due to their protein structure and absorption rates.
For instance, spelt flour develops gluten quickly but can break down easily if over-mixed, so gentle handling is key when using it in vegan bread baking. Incorporating cooked grains like quinoa, millet, or barley into the dough adds moisture, chewiness, and nutrients. For example, adding 1/2 cup of cooked quinoa per 500g of flour in a whole wheat vegan bread recipe adds protein and a pleasant texture. Experimenting with these additions allows you to create truly unique and wholesome vegan loaves.
Creating Unique Vegan Bread Flavors [Example: Sun-Dried Tomato, Rosemary]
Infusing your vegan bread baking with savory or sweet flavors opens up a world of culinary possibilities. Savory additions like herbs, spices, garlic, olives, or sun-dried tomatoes are popular. For a Sun-Dried Tomato and Rosemary loaf, you could add about 1/2 cup of chopped, oil-packed sun-dried tomatoes (drained) and 2 tablespoons of fresh chopped rosemary per 500g of flour in a basic lean dough recipe.
Mix these additions into the dough during the last few minutes of kneading. Be mindful that additions like sun-dried tomatoes can add moisture, so you might need a slight adjustment to the liquid content. Sweet variations can include cinnamon and raisins, orange zest and cranberries, or chocolate chips. These additions transform simple vegan bread recipes into special treats perfect for specific meals or occasions.
Storing Your Vegan Bread for Optimal Freshness
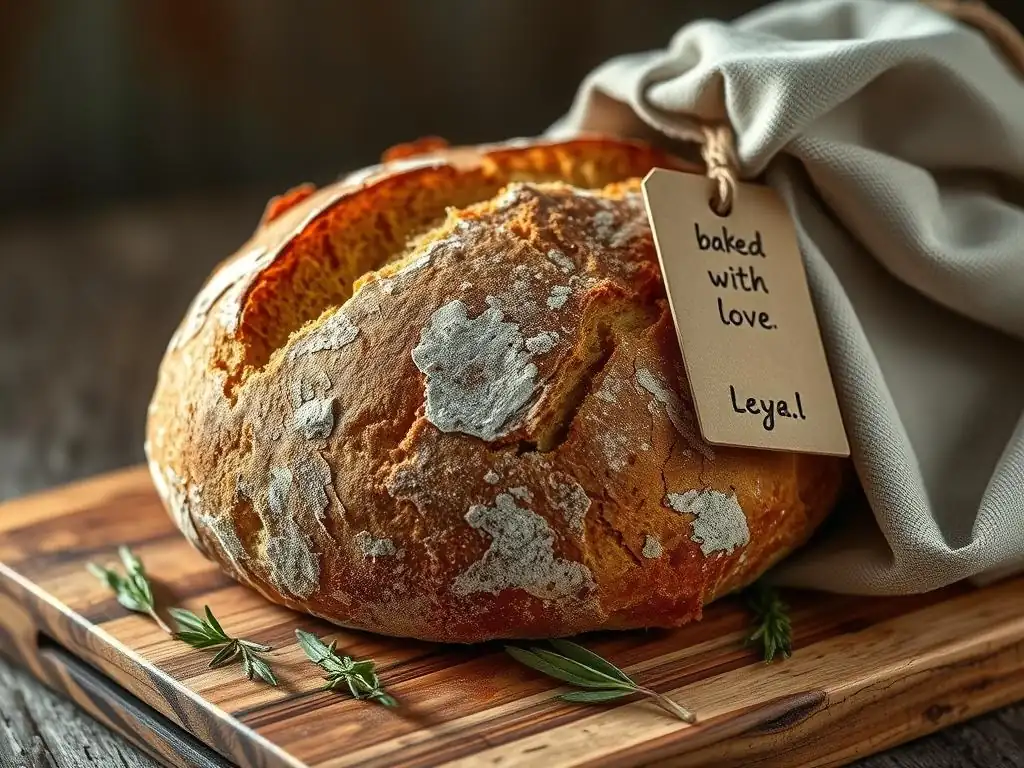
Proper storage is key to keeping your delicious homemade vegan bread baking creations fresh and enjoyable for as long as possible.
Best Practices for Storing Vegan Bread
Once your vegan bread has cooled completely on a wire rack (which can take 2-3 hours for a large loaf), the best storage method depends on how quickly you plan to eat it. For bread that will be consumed within 1-2 days, storing it at room temperature is ideal.
- A paper bag is excellent for crusty loaves as it allows the crust to remain crisp while preventing the interior from drying out too quickly.
- A bread box is another good option, providing a dark, cool environment that helps regulate moisture.
- For softer loaves or rolls from your vegan bread baking, a reusable bread bag made of cloth or beeswax wrap can help maintain softness, though it might soften the crust of a crusty loaf.
- Avoid storing bread in the refrigerator, as this can actually cause it to stale faster due to a process called retrogradation of starches.
Freezing Vegan Bread: Preserving Quality and Taste
Freezing is the best method for long-term storage of your vegan bread baking efforts, preserving both quality and taste for several weeks.
- Ensure the bread is completely cool before freezing.
- You can freeze a whole loaf, half a loaf, or individual slices. Freezing slices is very convenient for toasting or quick use.
- Wrap the bread tightly in plastic wrap, ensuring no air pockets, then wrap again in aluminum foil or place in a freezer-safe bag. This double layer helps prevent freezer burn.
- When ready to eat, thaw a whole loaf at room temperature, still wrapped, which can take several hours. You can refresh a thawed loaf by warming it in a preheated oven (350°F or 175°C) for 10-15 minutes.
- Individual slices can often be toasted directly from frozen, making them perfect for quick breakfasts or snacks from your vegan bread baking. Frozen bread typically maintains good quality for up to 2-3 months.
Conclusion: The Joy of Homemade Vegan Bread
Embarking on the journey of vegan bread baking is a rewarding experience that allows you to create wholesome, delicious loaves right in your own kitchen. From understanding the role of plant-based ingredients to mastering proofing and baking techniques, each step brings you closer to a perfect loaf. The process is not only about the final product but also the mindful act of creation, transforming simple ingredients into something truly special.
Vegan Bread Baking: A Sustainable and Delicious Skill
Vegan bread baking is more than just following vegan bread baking recipes; it's a skill that offers numerous benefits. It provides control over the ingredients you consume, allowing you to avoid additives and tailor loaves to dietary needs or preferences. Baking at home can also be more sustainable, reducing packaging waste compared to store-bought bread.
Moreover, the aroma of fresh bread filling your home and the satisfaction of sharing a warm, homemade loaf are joys that are hard to beat. Whether you're perfecting a sourdough starter or whipping up a batch of fluffy dinner rolls, every successful bake reinforces the simple pleasure and fulfillment found in baking vegan bread. It's a delicious skill worth cultivating.
Frequently Asked Questions
How difficult is it to bake vegan bread compared to traditional bread?
Baking vegan bread is often easier than you think! The primary difference is substituting ingredients like eggs and dairy. Once you understand the swaps, the process is very similar.
What are some common substitutions for eggs and dairy in vegan bread recipes?
Common substitutions include applesauce, flax eggs, and plant-based milks. These ingredients help provide the necessary moisture and binding for the bread.
Can I use any type of flour for vegan bread baking?
Yes, you can use various flours! All-purpose, bread flour, whole wheat, and even gluten-free blends can be used depending on the desired texture and recipe. Experiment to find your favorite!
Are vegan bread recipes less flavorful than traditional bread recipes?
Not at all! With the right ingredients and spices, vegan bread can be incredibly flavorful. Using high-quality ingredients and adding herbs or seeds can enhance the taste.
Where can I find reliable vegan bread baking recipes for beginners?
BakeWithEase.com offers a wide variety of simple and easy-to-follow vegan bread recipes suitable for beginners. Look for recipes marked as "beginner-friendly" to start with.
Final Reflection: The Unexpected Joys of Vegan Baking
The accessibility and deliciousness of vegan bread baking are shattering preconceived notions, proving that plant-based cooking can be both simple and incredibly rewarding. No longer a niche pursuit, vegan baking is experiencing a surge in popularity, driven by both ethical concerns and a growing appreciation for the diverse flavors and textures achievable without animal products. This shift reflects a broader cultural movement towards more sustainable and compassionate food choices.
My own journey into vegan bread baking has been a revelation. I initially approached it with some trepidation, fearing complex recipes and disappointing results. However, the experience has been far more enriching than I anticipated. The process itself is meditative, the aroma of freshly baked bread incredibly comforting, and the final product – a testament to the power of simple ingredients – consistently delights. The best things in life are simple,
a phrase often used, rings particularly true when considering the pure satisfaction derived from creating something delicious and wholesome from scratch, without compromising on ethics.
Now, it's your turn. Don't be intimidated by the seemingly complex world of vegan baking. Try one of the recipes outlined in this article, experiment with different flours and flavors, and discover the joy of creating your own delicious, plant-based bread. The rewards – both culinary and personal – are well worth the effort. Embrace the challenge, and you might just surprise yourself with your newfound baking skills and the delicious results.
Unleash Your Inner Baker: Craft Your First Vegan Loaf!
Thanks for joining us on this delicious journey into the world of vegan baking! We hope you discovered just how easy and rewarding it can be to create amazing bread without any animal products. Now it's time to put your newfound knowledge to the test!
- Bake your own vegan masterpiece: Try out one of the recipes we shared – or get creative and experiment with your own flour and spice combinations! This is your chance to truly own the process.
- Share your baking triumphs (and challenges!): Post pictures of your creations on social media using #BakeWithEaseVeganBread and inspire others to join the vegan baking revolution.
- Explore our other vegan recipes: Dive deeper into our collection of delicious vegan treats – from cakes and cookies to savory pies – and discover a whole new world of plant-based possibilities!
What unique ingredient will you add to your first vegan loaf to make it truly your own?