
Making Adorable Mini Cream Pies & Custard Tarts

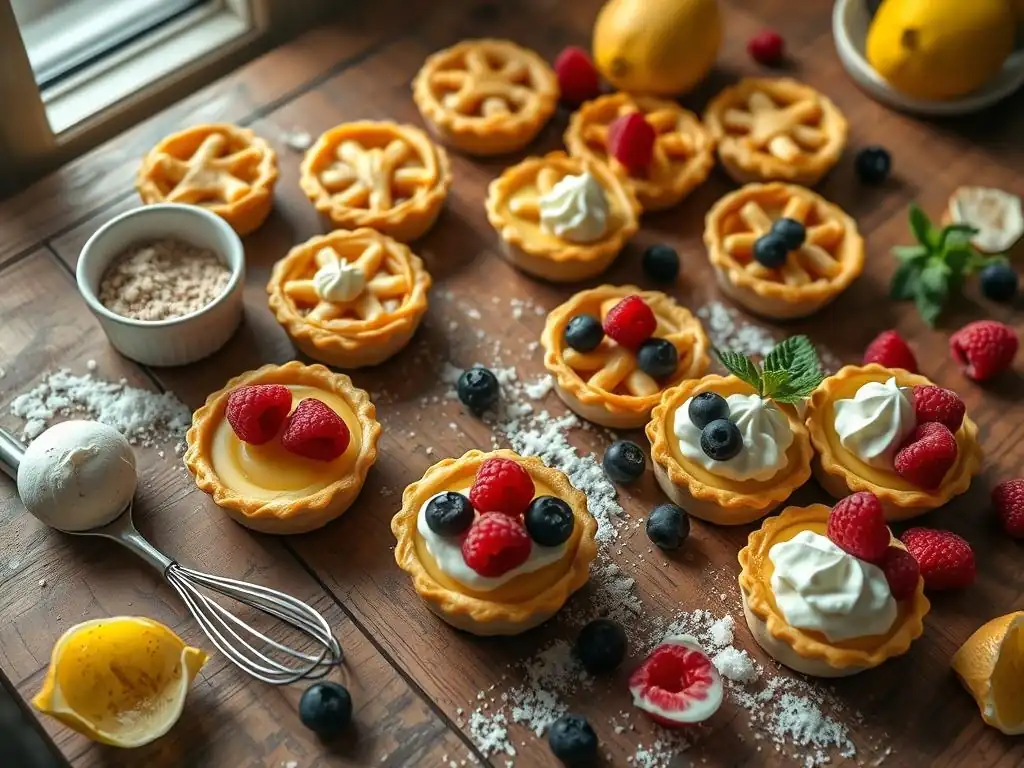
Welcome to BakeWithEase, where baking becomes a joy, not a chore! Ever dreamt of perfectly portioned, irresistibly delicious desserts? Get ready to unlock the secrets to making adorable mini cream pies and custard tarts. We'll guide you through creating these delightful treats, one simple step at a time. Discover easy-to-follow recipes and baking tips that will have everyone begging for more! Intrigued? Let's get baking!
- Making Adorable Mini Cream Pies & Custard Tarts: BakeWithEase
- Introduction to Mini Cream Pies and Custard Tarts
- Essential Ingredients for Mini Cream Pie Recipes
- Step-by-Step Guide to Mini Cream Pie Perfection
- Baking Exquisite Custard Tarts: A Detailed Process
- Decorating Your Mini Cream Pies and Custard Tarts
- Tips and Tricks for Baking Mini Cream Pies & Custard Tarts
- Variations and Adaptations for Mini Cream Pie Recipes and Custard Tarts
- Conclusion: Enjoying Your Homemade Mini Cream Pies & Custard Tarts
-
Frequently Asked Questions
- What makes mini cream pies and custard tarts so appealing?
- What are the key ingredients needed for most mini cream pie recipes?
- Can I use store-bought pie crust for mini cream pies?
- What are some variations I can make to my mini cream pie recipes?
- How do I prevent my mini cream pie crusts from shrinking during baking?
- Final Reflection: The Enduring Allure of the Mini Cream Pie
- Unleash Your Inner Pastry Chef!
Making Adorable Mini Cream Pies & Custard Tarts: BakeWithEase
Introduction to Mini Cream Pies and Custard Tarts
Why Mini Cream Pies are the Perfect Dessert
Mini cream pies offer a delightful take on a classic dessert, providing individual portions that are both charming and incredibly convenient. Their small size, typically ranging from 3 to 4 inches in diameter, makes them ideal for parties, potlucks, or simply enjoying a single-serving treat without committing to an entire pie. This format simplifies serving and allows guests to easily try different flavors, transforming a standard dessert offering into a tasting experience. They look absolutely adorable arranged on a platter, adding a touch of homemade elegance to any table.
Beyond their portability and visual appeal, mini cream pie recipes often bake faster than their full-sized counterparts. While a large pie might require 45-60 minutes in the oven, mini pie crusts can be blind-baked in as little as 15-25 minutes, and fillings often set quickly, especially when chilled properly.
This reduced preparation and baking time makes whipping up a batch of these delightful treats more accessible for home bakers, even on a busy schedule. The ability to easily diversify flavors within a single baking session means you can please a crowd with varying preferences, offering everything from classic vanilla mini cream pie recipes to rich chocolate or tropical coconut variations.
Discover the Charm of Individual Custard Tarts
Individual custard tarts possess a unique elegance and a wonderfully smooth texture that sets them apart. Unlike cream fillings thickened with starches or gelatin, traditional custard relies primarily on eggs for its set, resulting in a silky, delicate consistency that practically melts in your mouth. These tarts, often baked in small fluted molds, have a refined appearance, making them suitable for slightly more formal occasions or when you want to showcase a specific baking technique.
The beauty of custard tarts lies in their simplicity and the focus on the quality of a few core ingredients. A perfectly baked custard tart features a rich, wobbly filling encased in a crisp, buttery crust.
While the ingredient list is short (eggs, dairy, sugar, vanilla), achieving the ideal smooth, non-curdled texture requires careful technique, particularly regarding temperature control during baking. This makes the process a rewarding challenge for bakers looking to hone their skills, resulting in a sophisticated dessert that can be served warm or chilled, often enhanced by a simple dusting of sugar or a dollop of fruit compote.
Essential Ingredients for Mini Cream Pie Recipes
The Best Crust for Mini Cream Pies: A Detailed Guide
Choosing the Right Flour for a Flaky Crust
The foundation of any great mini cream pie recipe is a flaky, tender crust. Selecting the right flour is crucial for achieving this desired texture. All-purpose flour is the most common choice for home bakers, offering a good balance of protein content, typically between 10-12%. This protein forms gluten when hydrated and worked, providing structure to the dough. For a flaky crust, the goal is to develop just enough gluten for structure but not so much that the crust becomes tough. Using a standard all-purpose flour works well when combined with careful handling to minimize gluten development.
While all-purpose flour is reliable, some bakers prefer pastry flour, which has a lower protein content, usually around 8-9%. This lower protein means less potential for gluten development, resulting in an even more tender crust. However, pastry flour is not as widely available as all-purpose. Regardless of the flour type, sifting it before use can help ensure accuracy in measurement and contribute to a lighter texture. The key takeaway is that standard all-purpose flour is perfectly suitable for delicious mini cream pie recipes, provided you handle the dough gently.
The Importance of Cold Butter in Pie Crust
Cold butter is arguably the most critical ingredient for achieving a truly flaky pie crust for your mini cream pie recipes. When cold butter is cut into the flour, it remains in small, discrete pieces. During baking, the water within these cold butter pieces turns to steam. This steam expands rapidly, creating tiny pockets and pushing apart the layers of dough. As the butter melts, it coats the flour particles, preventing excessive gluten formation and contributing to tenderness. The resulting texture is a beautiful layering of crisp, buttery flakes.
To maximize flakiness, it is essential to use very cold butter, ideally straight from the refrigerator and cut into small cubes (about the size of peas or even smaller). Some bakers even recommend freezing the butter briefly before cutting it in. It's also important to work quickly when incorporating the butter into the flour, using a pastry blender, fork, or your fingertips, to avoid melting the butter with the warmth of your hands. Keeping the butter cold throughout the mixing process and chilling the dough before rolling are non-negotiable steps for a successful, flaky crust.
Creating Delicious Cream Fillings for Mini Pies
Vanilla Cream Filling Recipe
A classic vanilla cream filling is a staple for many mini cream pie recipes, offering a rich, smooth, and comforting flavor. The base typically consists of milk (whole milk provides the best richness), sugar, egg yolks (for richness and thickening), and a starch like cornstarch or flour to ensure a stable set. A common ratio might involve 2 cups of whole milk, 1/2 cup sugar, 4-5 large egg yolks, and 1/4 cup cornstarch. Butter and vanilla extract are added at the end for flavor and texture.
The process involves heating the milk while whisking together the sugar, thickener, and egg yolks separately. A crucial step is tempering the egg mixture by slowly whisking a small amount of the hot milk into the yolks to gradually raise their temperature and prevent scrambling. The tempered mixture is then whisked back into the remaining hot milk and cooked over medium heat, stirring constantly, until it thickens significantly, usually reaching a temperature around 170-175°F (77-79°C).
Once thickened, it's removed from the heat, and butter and vanilla are stirred in until smooth. This hot filling is then poured into pre-baked mini crusts and chilled until firm.
Chocolate Cream Filling Recipe
For chocolate lovers, a smooth and decadent chocolate cream filling elevates mini cream pie recipes to a new level. This filling builds upon the vanilla base by incorporating chocolate. Key ingredients include milk, sugar, egg yolks, a thickener (cornstarch or flour), vanilla, butter, and crucially, chopped chocolate. Using a good quality bittersweet or semi-sweet chocolate is recommended for the best flavor; about 4-6 ounces of chopped chocolate per 2 cups of milk base provides a rich, intense chocolate flavor.
The process mirrors that of the vanilla filling: heat the milk, temper the egg yolk/sugar/thickener mixture with hot milk, and cook until thickened. Once the base is thickened and removed from the heat, the chopped chocolate is added immediately. The residual heat of the filling will melt the chocolate; stir gently until it is completely smooth and glossy. Finally, stir in the butter and vanilla extract. The hot chocolate filling is then poured into cooled, pre-baked mini pie crusts and refrigerated until fully set.
Coconut Cream Filling Recipe
Coconut cream filling brings a tropical flair to mini cream pie recipes, combining rich creaminess with the distinct texture and flavor of coconut. This variation typically uses milk (sometimes substituting part or all with full-fat coconut milk for a more intense flavor), sugar, egg yolks, a thickener, vanilla, butter, and shredded coconut. Some recipes also benefit from a touch of coconut extract to enhance the flavor profile. The amount of shredded coconut can vary, but 1/2 to 1 cup per 2 cups of liquid base is common.
The method is similar to other cream fillings: prepare the base by heating the liquid and thickening it with tempered egg yolks and starch. Once the filling is cooked and off the heat, stir in the butter, vanilla, and the shredded coconut. If using toasted coconut, add it at this stage. Toasted coconut, achieved by baking shredded coconut at 300°F (150°C) for 5-10 minutes until golden, adds a deeper, nuttier flavor. The warm filling, now infused with coconut, is poured into pre-baked mini crusts and chilled thoroughly before serving, often topped with whipped cream and more toasted coconut.
Custard Tart Ingredients: Achieving the Perfect Consistency
Key Ingredients for a Smooth and Silky Custard
Achieving a perfectly smooth and silky custard for tarts relies on the right balance of key ingredients and careful technique. The base liquid is typically milk or cream, with higher fat content yielding a richer, more luxurious custard. The eggs are the primary thickener, providing structure as they cook. Most recipes use a combination of whole eggs and egg yolks; whole eggs contribute to a firmer set, while extra yolks add richness and silkiness. A common ratio might be 2 whole eggs plus 2-3 egg yolks per 1.5 to 2 cups of dairy.
Sugar adds sweetness and also helps tenderize the custard, preventing it from becoming rubbery. Vanilla extract or, for superior flavor, a scraped vanilla bean, is essential for classic custard. A pinch of salt can help balance the sweetness. Unlike cream fillings, custard typically contains no added starch (like cornstarch or flour); its set comes solely from the coagulation of egg proteins. Using fresh, high-quality ingredients is paramount, as their flavor is front and center in a simple custard tart.
Flavor Variations for Custard Tarts
While classic vanilla custard tarts are undeniably delicious, the simple base is ripe for creative flavor variations. Infusing the milk or cream with aromatics before making the custard is an excellent way to add depth. For example, you can steep citrus zest (lemon, orange), cinnamon sticks, star anise, coffee beans, or even tea leaves (like Earl Grey) in the dairy as it heats, then strain them out before proceeding with the custard. This imparts subtle yet complex flavors.
Other variations involve adding extracts or liqueurs. Almond extract pairs beautifully with custard, as does a touch of lemon or orange extract. Liqueurs like rum, brandy, or Grand Marnier can be added in small amounts (1-2 tablespoons per batch) after the custard has baked or cooled, providing a sophisticated kick. You can also experiment with layering flavors in the tart shell before pouring the custard, such as a thin layer of caramel sauce, a sprinkle of toasted nuts, or some fresh berries, allowing the custard to bake over them.
Step-by-Step Guide to Mini Cream Pie Perfection
Preparing the Mini Pie Crusts
Rolling and Shaping the Dough
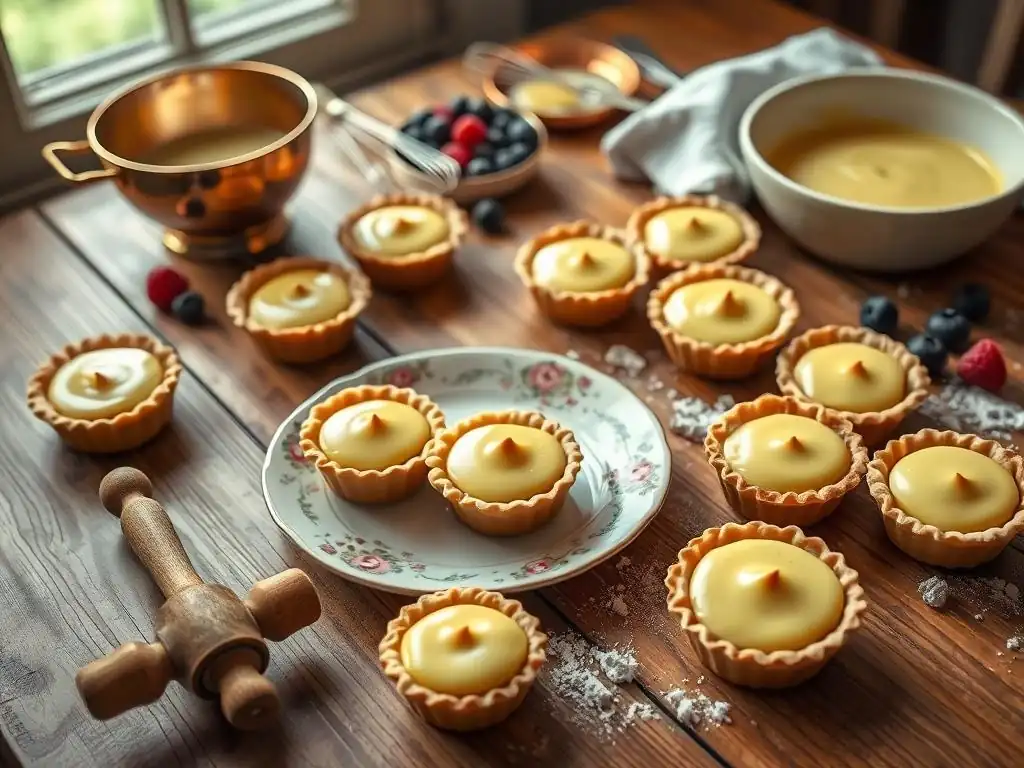
Once your pie dough is made and thoroughly chilled (ideally for at least 30-60 minutes), it's time to prepare the individual crusts for your mini cream pie recipes. On a lightly floured surface, roll the dough out evenly to a thickness of about 1/8 inch. Avoid using too much flour, as this can make the crust tough.
To create the individual shells, you'll need to cut out circles of dough. Use a cookie cutter or a sharp knife to cut circles that are slightly larger than the cavities of your mini pie pan or muffin tin – for instance, a 4 to 4.5-inch circle works well for a standard 3-inch mini pie cavity.
Carefully transfer the cut dough circles into the prepared mini pie pans or muffin tin cavities. Gently press the dough into the bottom and up the sides, ensuring it fits snugly into the contours without stretching it. Stretching the dough can cause it to shrink back significantly during baking. Trim any excess dough, leaving a small overhang if desired, or crimp the edges decoratively. Once shaped, the mini crusts should be chilled again for at least 15-20 minutes before blind baking. This second chill helps the butter stay cold and the crust hold its shape during baking.
Blind Baking for a Crispy Crust
Blind baking is an essential step when making mini cream pie recipes because the wet filling is added after the crust is baked. Without blind baking, the crust would become soggy and unappetizing. To blind bake mini crusts, first line the chilled dough shells with parchment paper or foil, pressing it gently into the corners. Fill the lined shells with pie weights, dried beans, or uncooked rice, filling them almost to the top. This prevents the crust from puffing up or shrinking during the initial bake.
Bake the weighted crusts in a preheated oven, typically at a moderate temperature around 375°F (190°C), for about 15-20 minutes, or until the edges appear set and lightly golden. Carefully remove the weights and the parchment or foil liner. Return the crusts to the oven and continue baking for another 5-10 minutes, or until the bottom of the crust looks dry and is golden brown. This ensures the bottom is fully cooked and crisp, creating a sturdy base for your creamy filling. Allow the crusts to cool completely on a wire rack before filling them.
Assembling the Mini Cream Pies
Filling Techniques for a Neat Presentation
Once your mini pie crusts are completely cooled after blind baking, it's time to add the prepared cream filling. Since these are individual desserts, a neat presentation is key. One of the easiest and cleanest ways to fill the small shells is by using a piping bag. You don't necessarily need a special tip; simply snip off the corner of a sturdy piping bag (or a large zip-top bag) and pipe the cooled filling smoothly into each crust, filling it just below the rim. This method allows for precise control and minimizes drips.
Alternatively, you can use a spoon, though this requires a bit more care to avoid getting filling on the crust edges. Use a small spoon or an ice cream scoop (if the filling is thick enough) to portion the filling into each shell. Use the back of the spoon or a small offset spatula to gently smooth the surface of the filling.
Whichever method you choose, ensure the filling has been adequately cooled according to the recipe instructions before adding it to the crusts. Adding warm filling to a cooled crust can create condensation, potentially leading to a soggy bottom over time.
Chilling for Optimal Texture
Chilling is a critical step after filling your mini cream pie recipes. Cream fillings, which are often thickened with starches and/or egg yolks, require time in the refrigerator to set properly and achieve their desired texture. Without adequate chilling, the filling can be loose, runny, and unstable. The cold temperature allows the starches to fully hydrate and the egg proteins to firm up, resulting in a smooth, sliceable, or spoonable consistency that holds its shape within the mini crust.
After filling the mini pies, place them in the refrigerator, ideally uncovered initially for about 30 minutes to allow the surface to cool and prevent condensation, then loosely covered with plastic wrap to prevent a skin from forming. They should chill for at least 2-4 hours, or until the filling is completely firm throughout. This ensures the pies are properly set and ready to be topped and served cold, which is the ideal temperature for enjoying rich cream pies. Patience during this chilling phase pays off with a perfectly textured dessert.
Baking Exquisite Custard Tarts: A Detailed Process
Making the Custard Base
Achieving the Ideal Custard Consistency
Achieving the ideal smooth and silky consistency for custard tarts is a matter of balancing ingredients and applying gentle heat. Unlike cream fillings that are cooked to a thick pudding-like consistency on the stovetop, custard for tarts is typically poured into the crust while still liquid and set during baking. The ratio of eggs to dairy is key; too few eggs result in a runny custard, while too many can make it rubbery. A typical ratio is around 2-3 whole eggs plus additional yolks per 1.5 to 2 cups of milk or cream.
The most reliable method for baking custard tarts smoothly and evenly is using a water bath, or bain-marie. This involves placing the tart pan containing the filled shells into a larger baking dish and filling the outer dish with hot water about halfway up the sides of the tart pan. The water bath insulates the custard, ensuring it cooks gently and evenly at a lower temperature. This prevents the edges from overcooking and becoming tough or curdled before the center is set, leading to that desired smooth, uniform texture.
Preventing Curdling and Overbaking
Preventing curdling and overbaking are the primary challenges when baking custard tarts, but they are easily overcome with careful technique. Curdling occurs when the egg proteins in the custard cook too quickly or at too high a temperature, causing them to seize up and separate, resulting in a lumpy or grainy texture. Using a water bath, as mentioned, is the most effective way to avoid this, as it regulates the temperature and promotes gentle cooking. Additionally, ensure your oven temperature is accurate; baking at a moderate temperature, usually between 325-350°F (160-175°C), is crucial.
Overbaking leads to a tough, rubbery texture instead of a delicate, silky one. It's important to watch the custard tarts carefully towards the end of the baking time. They are done when the edges are set and appear slightly puffed, but the center still has a slight, gentle wobble when the pan is lightly nudged. An internal temperature of around 170°F (77°C) is a good indicator of doneness. Remove them from the oven promptly when they reach this stage, as residual heat will continue to cook the custard slightly as it cools.
Baking and Cooling Your Custard Tarts
Tips for a Golden-Brown Crust and Smooth Custard
To achieve both a beautifully golden-brown crust and a perfectly smooth custard in your tarts, attention to detail during baking is key. Start by ensuring your mini tart shells are properly blind-baked before adding the custard. They should be fully baked and golden brown on the bottom and sides to prevent a soggy crust once the wet custard is added. This pre-baking step is non-negotiable for a crisp base.
When baking the filled tarts, place them in a preheated oven (typically 325-350°F or 160-175°C) and utilize the water bath technique described earlier. The lower temperature and gentle heat from the water bath ensure the custard cooks slowly and evenly, resulting in a smooth texture without cracking or curdling. Bake until the edges are set but the center still has that signature slight wobble. Baking time will vary based on size and oven, but mini tarts might take anywhere from 20 to 35 minutes.
Cooling Techniques to Avoid Cracking
Cracking is a common issue with baked custards and often occurs due to sudden temperature changes or cooling too rapidly. To minimize the risk of your beautiful custard tarts developing cracks, allow them to cool gradually. Once removed from the oven, leave the tart pan sitting in the hot water bath for about 10-15 minutes. This allows the tarts to transition from the hot oven environment more slowly.
After this initial period in the water bath, carefully remove the tart pan from the water and place it on a wire rack. Allow the tarts to cool completely on the wire rack at room temperature. Cooling on a rack ensures air circulation around the entire tart, preventing condensation from forming on the bottom of the crust and allowing the custard to cool evenly. Avoid placing warm or hot custard tarts directly into the refrigerator, as the abrupt temperature change is a major cause of cracking. Only refrigerate them once they have fully cooled to room temperature.
Decorating Your Mini Cream Pies and Custard Tarts
Creative Topping Ideas for Mini Cream Pies
Whipped Cream Rosettes and Chocolate Shavings
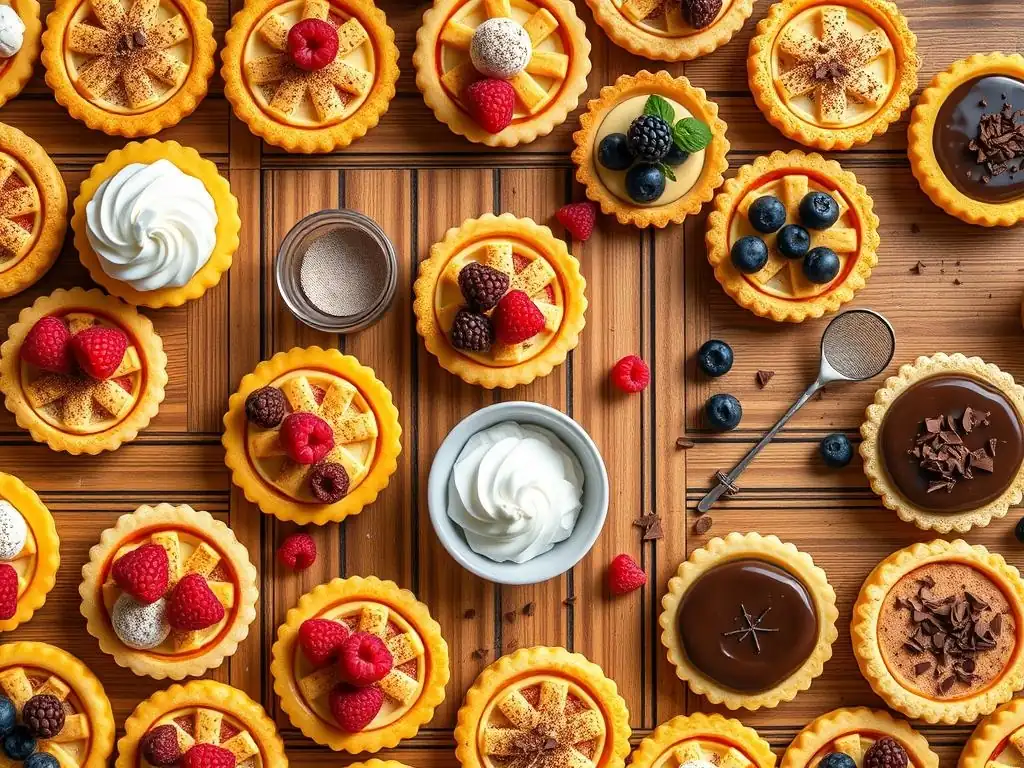
Whipped cream is the classic and arguably most perfect topping for many mini cream pie recipes, adding lightness and complementing the rich filling. Freshly made whipped cream (heavy cream, a touch of sugar, and vanilla extract, whipped to medium or stiff peaks) is far superior to store-bought. For an elegant look, transfer the whipped cream to a piping bag fitted with a star tip, such as an Ateco 1M, and pipe decorative rosettes or swirls onto the top of each chilled mini pie.
Adding chocolate shavings provides texture and visual appeal, especially on chocolate or vanilla mini cream pie recipes. To make chocolate shavings, simply run a vegetable peeler or a sharp knife along the edge of a block of chocolate (dark, milk, or white). The type of chocolate will affect the size and shape of the curls. Sprinkle these delicate shavings generously over the whipped cream or directly onto the filling for a professional finish.
Fresh Fruit Arrangements and Nutty Sprinkles
Adding fresh fruit is a wonderful way to introduce color, freshness, and a slight tang that cuts through the richness of cream fillings. Berries like raspberries, blueberries, or sliced strawberries are popular choices and look beautiful arranged on top of the filling or whipped cream. Slices of kiwi, mandarin orange segments, or even a fan of sliced banana (brushed with lemon juice to prevent browning) can also create stunning toppings.
Toasted nuts or crushed cookies add a delightful textural contrast to the smooth filling. Lightly toasting chopped nuts like pecans, walnuts, or almonds in a dry pan or oven for a few minutes enhances their flavor significantly. Sprinkle them around the edges or over the center of the mini pies. Alternatively, crushed cookies, such as crushed Oreos for chocolate pies or graham cracker crumbs for others, can provide a complementary flavor and satisfying crunch.
Garnishing Custard Tarts for a Professional Look
Simple Glazes and Fruit Compotes
Garnishing custard tarts can be simple yet effective, enhancing their elegant appearance. A light glaze can add a beautiful sheen to the surface of the baked custard. A classic option is an apricot glaze, made by heating apricot jam with a little water or liqueur and then straining it to remove any fruit pieces. This warm glaze can be gently brushed over the cooled custard surface. A clear pastry glaze can also be used for a neutral shine.
Adding a dollop of fruit compote or a drizzle of fruit coulis introduces vibrant color and a burst of fresh, tart flavor that balances the rich custard. A quick compote can be made by simmering fresh or frozen berries (like raspberries or cherries) with a little sugar and lemon juice until thickened. Spoon a small amount onto the center of the cooled tart just before serving, or drizzle a smooth fruit coulis artfully across the surface.
Edible Flowers and Dustings of Cocoa
For a truly delicate and sophisticated garnish, consider using edible flowers. Small, food-grade edible flowers like violas, pansies, or borage add a touch of natural beauty and color. Ensure you source them from a reputable supplier and that they are pesticide-free. Place a single small flower or a few colorful petals gently on the surface of the custard or on a glaze.
A simple dusting can provide a classic and elegant finish. Use a fine-mesh sieve to lightly dust the cooled custard tarts with powdered sugar or cocoa powder. For an extra flourish, you can place a small stencil (like a star or heart) on the tart before dusting to create a pattern. This minimalist approach highlights the smooth surface of the custard while adding a subtle visual detail.
Tips and Tricks for Baking Mini Cream Pies & Custard Tarts
Troubleshooting Common Baking Issues
Preventing Soggy Crusts
A soggy bottom crust is a common pitfall in mini cream pie recipes and custard tarts, but it can be effectively prevented. The most important step is thorough blind baking. Ensure the crust is baked until it is fully cooked and golden brown on the bottom, not just pale and set. This creates a strong, crisp structure that resists moisture.
Another protective measure is to create a barrier between the baked crust and the wet filling. After blind baking and cooling, you can brush the inside of the crust with a thin layer of egg white and bake for another minute or two until set, or brush it with a thin layer of melted chocolate (especially for chocolate mini cream pie recipes) and let it harden. These layers help seal the crust and prevent moisture from the filling from penetrating it. Always ensure your filling is cooled before adding it to the crust.
Avoiding a Lumpy Filling
Lumps in cream filling usually stem from thickeners (cornstarch, flour) not being properly incorporated or from egg bits scrambling. To avoid this, ensure your starch is thoroughly whisked with the sugar and egg yolks until completely smooth before adding any hot liquid. Alternatively, mix the starch with a small amount of cold milk or water to form a smooth slurry before adding it to the hot dairy mixture.
When cooking the filling, whisk continuously and ensure the heat is not too high. If using eggs, tempering them by gradually whisking in hot milk is crucial to prevent scrambling. If, despite your best efforts, a few lumps form in your finished cream filling, simply strain it through a fine-mesh sieve before pouring it into the mini crusts. This will result in a perfectly smooth filling every time.
Storage and Serving Suggestions
Keeping Your Mini Pies and Tarts Fresh
Due to their dairy and egg content, mini cream pies and custard tarts require proper refrigeration to remain fresh and safe to eat. Once cooled, they should be stored in the refrigerator. The best way to store them is in an airtight container. If stacking, place a layer of parchment paper between them to prevent sticking or damaging the toppings. If they have delicate toppings like whipped cream rosettes, store them in a container tall enough that the lid doesn't touch the topping, or cover loosely with plastic wrap, being careful not to flatten the decoration.
Mini cream pies and custard tarts are typically best enjoyed within 2-3 days of baking for optimal texture and flavor, though they can often last up to 4-5 days if stored correctly. Note that whipped cream toppings are prone to weeping over time, so for the freshest look and texture, it's often best to add the whipped cream just before serving.
Serving Ideas for Parties and Gatherings
Mini desserts like these are perfect for entertaining. They are easy for guests to handle and allow you to offer a variety of flavors. Arrange your assortment of vanilla mini cream pie recipes, chocolate mini cream pie recipes, coconut mini pies, and custard tarts on tiered stands or beautiful platters to create an inviting display.
Serve them chilled directly from the refrigerator. If serving outdoors or for an extended period, keep them cool by placing the serving platter on a bed of ice. Provide small plates and forks or spoons, as the delicate crust and creamy/silky fillings are best enjoyed with utensils. Offering a selection ensures there's something for everyone and adds a festive touch to any party or gathering.
Variations and Adaptations for Mini Cream Pie Recipes and Custard Tarts
Vegan Mini Cream Pie Options
Creating vegan versions of mini cream pie recipes is entirely possible with thoughtful ingredient substitutions. For the crust, a standard vegan pie crust recipe uses flour, sugar, salt, and a solid plant-based fat like vegan butter sticks or vegetable shortening, combined with ice water. The technique for making and blind baking the crust remains largely the same as a traditional crust.
For the filling, dairy milk and cream can be replaced with full-fat canned coconut milk, cashew milk, soy milk, or oat milk, depending on the desired richness and flavor profile. Eggs are typically replaced with a combination of cornstarch, agar-agar, or a commercial vegan egg replacer to achieve the correct thickening and setting. Sweeteners like sugar or maple syrup work well, and vegan butter can be added for extra richness. Flavorings like vanilla, cocoa powder, or coconut extract are naturally vegan.
Gluten-Free Custard Tart Alternatives
Making gluten-free custard tarts primarily involves adapting the crust, as the custard filling itself is naturally gluten-free (composed of eggs, dairy, sugar, and vanilla). For the crust, use a high-quality gluten-free all-purpose flour blend. Look for blends that contain xanthan gum, as this helps provide structure and elasticity that is missing in gluten-free flours, making the dough easier to handle and preventing a crumbly crust.
Follow a standard pie crust method, using cold butter or shortening and ice water, but be aware that gluten-free dough can be more delicate and may crack more easily when rolling. Chilling the dough well is essential. Blind bake the gluten-free crusts as you would traditional ones. For the custard filling, ensure that any additional flavorings, such as extracts, are certified gluten-free if necessary for strict dietary needs.
Exploring Different Flavor Combinations
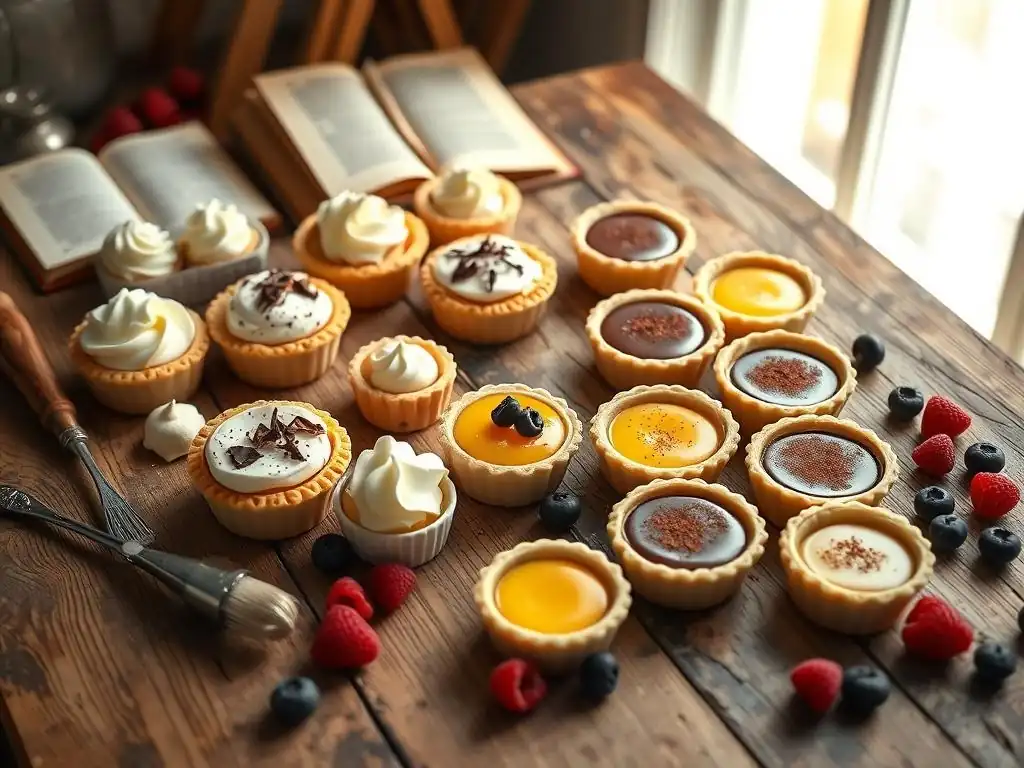
Beyond the classic vanilla, chocolate, and coconut mini cream pie recipes and basic custard tarts, there's a world of flavor combinations to explore. For cream pies, consider adapting recipes for lemon meringue (using a lemon curd filling), banana cream, peanut butter, coffee-flavored mocha, or tangy key lime (often using condensed milk for the base). These variations often involve different thickening agents and flavor profiles but fit beautifully into the mini pie format.
For custard tarts, experiment with infusing the dairy with unique flavors like Earl Grey tea, lavender, or even spices like cardamom or star anise. Seasonal variations like pumpkin spice custard tarts are popular in the fall. You can also incorporate elements into the tart shell before baking, such as a layer of caramel, toasted nuts, chocolate chips, or a scattering of berries, allowing the custard to set around them for delightful surprises in every bite.
Conclusion: Enjoying Your Homemade Mini Cream Pies & Custard Tarts
Making adorable mini cream pies and exquisite custard tarts is a rewarding baking project that yields impressive results perfect for any occasion. Whether you choose a classic vanilla mini cream pie recipe, a rich chocolate indulgence, or an elegant custard tart, these individual desserts are sure to delight. From mastering the flaky crust to achieving a smooth filling and adding those final decorative touches, each step offers a chance to hone your baking skills.
With a little practice and attention to detail, you can create a stunning array of these delightful treats that are as enjoyable to look at as they are to eat. So gather your ingredients, follow these steps, and get ready to bake some miniature masterpieces!
Frequently Asked Questions
What makes mini cream pies and custard tarts so appealing?
Their small size makes them perfect for individual servings and portion control. Plus, they're incredibly charming and visually appealing!
What are the key ingredients needed for most mini cream pie recipes?
Typically, you'll need flour, butter, and sugar for the crust, and ingredients like milk, eggs, and vanilla for the cream filling. Some recipes may call for gelatin to help set the filling.
Can I use store-bought pie crust for mini cream pies?
Yes, store-bought pie crust is a great time-saver and perfectly acceptable. Just make sure to adjust baking times as needed.
What are some variations I can make to my mini cream pie recipes?
Experiment with different flavor extracts like almond or lemon. You can also add fresh fruit or a chocolate ganache topping for extra flair.
How do I prevent my mini cream pie crusts from shrinking during baking?
Blind baking the crust with pie weights or dried beans is crucial. Also, be sure to chill the dough thoroughly before baking to minimize shrinkage.
Final Reflection: The Enduring Allure of the Mini Cream Pie
The miniature cream pie, a seemingly simple confection, holds a surprising power to evoke joy and connection. From intimate gatherings to grand celebrations, these delightful treats consistently deliver a burst of creamy sweetness and a touch of elegant charm that transcends the everyday. Their small size makes them perfectly portioned for indulgence without overwhelming, a detail that speaks volumes in our increasingly health-conscious world.
The enduring popularity of the mini cream pie reflects a deeper cultural yearning for comfort and nostalgia. These little pies represent a perfect blend of classic baking techniques and modern convenience, allowing bakers of all skill levels to create something truly special. They're a canvas for creativity, easily adaptable to diverse flavor profiles and decorative styles. The best things in life are small,
a saying often applied to simple pleasures, perfectly encapsulates the appeal of these miniature masterpieces. Their ability to bring smiles and shared moments makes them more than just a dessert; they're a symbol of connection and celebration.
Now, I invite you to consider the possibilities. Don't just bake these mini cream pies; experience them. Share them with loved ones, experiment with unique flavor combinations, and let the process of creation become a moment of mindful enjoyment. Let the sweet aroma fill your kitchen, and the satisfaction of crafting something beautiful and delicious fill your heart. The journey of making these mini pies is as rewarding as the delightful result itself. Go forth and create your own miniature masterpieces!
Unleash Your Inner Pastry Chef!
Thanks for joining us on this delightful baking journey! We hope you've gained some delicious inspiration and newfound confidence in your pastry skills. Ready to take your mini pie game to the next level?
- Whip up a batch of mini cream pies or custard tarts this weekend! Use the recipe as a starting point and experiment with different flavor combinations.
- Share your creations on social media using #BakeWithEaseMiniPies – let's see those gorgeous golden-brown crusts!
- Challenge yourself: Try a completely new flavor combination using the techniques you learned today.
What unique twist will you add to your next batch of mini pies? Let us know in the comments below!