
Creating Decorative Finishes for French Pastries

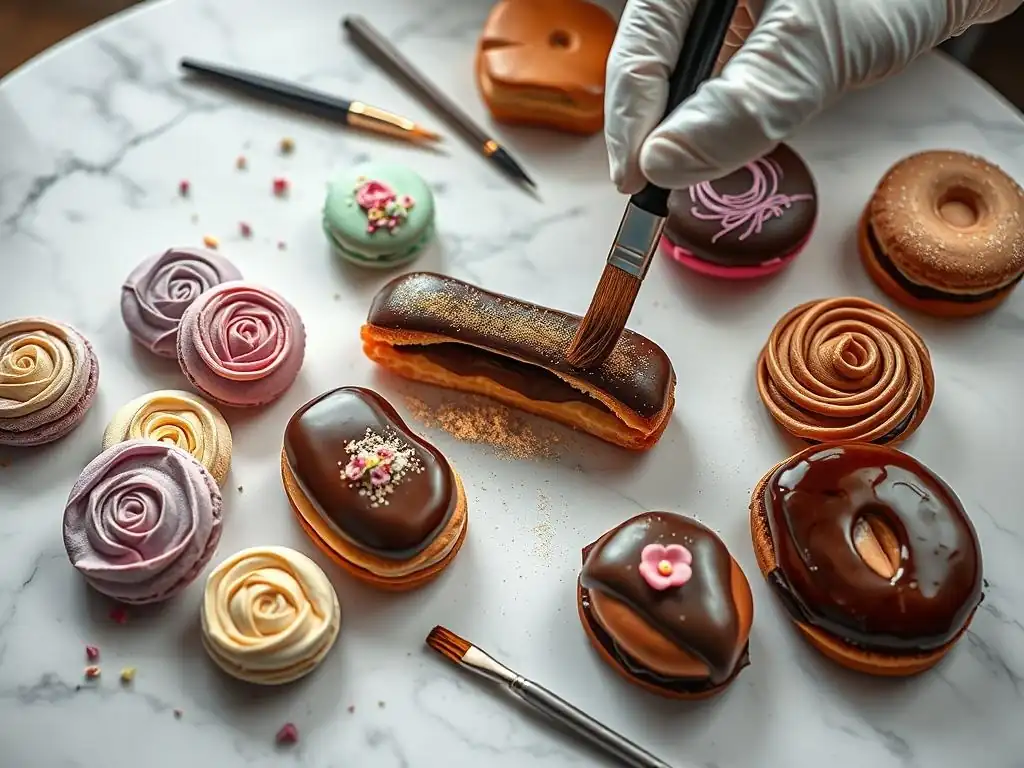
Welcome to BakeWithEase, your culinary playground!
Ever wondered how French pastries achieve that effortlessly elegant look? This article unveils the secrets behind stunning French pastry decorating techniques, offering a glimpse into the artistry that elevates simple ingredients into edible masterpieces. Get ready to unlock your inner pâtissier and discover the surprisingly simple methods to create breathtaking finishes. Let's begin the journey into the delicious world of decorative pastries...
- Creating Decorative Finishes for French Pastries: Elevate Your Baking with BakeWithEase
- Introduction to French Pastry Decorating Techniques
- Essential Tools & Ingredients for French Pastry Decorating
- Mastering Classic French Pastry Glazes
- Royal Icing Techniques for French Pastry Decoration
- Chocolate Decoration for French Pastries
- Fruit Decorations for French Pastries
- Working with Edible Flowers on French Pastries
- Advanced French Pastry Decorating Techniques
- Tips and Tricks for Perfect French Pastry Decorations
- Conclusion: Unleash Your Creativity with French Pastry Decoration
-
Frequently Asked Questions
- How do I achieve a professional-looking glaze on my French pastries?
- What are some common French pastry decorating techniques for beginners?
- What tools are essential for French pastry decorating techniques?
- How can I prevent my French pastry decorations from melting or smudging?
- Where can I find inspiration for French pastry decorating techniques?
- Final Reflection: The Enduring Allure of French Pastry Decoration
- Unleash Your Inner Pastry Artist!
Creating Decorative Finishes for French Pastries: Elevate Your Baking with BakeWithEase
Introduction to French Pastry Decorating Techniques
Why Decorative Finishes Matter in French Pastry Presentation
In the world of French pastries, the visual appeal is almost as crucial as the taste. A perfectly crafted tartelette or an elegantly glazed éclair isn't just food; it's a work of art. Decorative finishes transform simple baked goods into exquisite creations that tantalize the eyes before they even reach the palate. Mastering French pastry decorating techniques allows you to add that professional touch, conveying sophistication and attention to detail. It signals quality and care, making your pastries stand out whether you're baking for a special occasion or simply elevating an everyday treat.
Beyond aesthetics, decorative finishes can also serve functional purposes. Glazes, for instance, can seal in moisture, prolonging freshness, while chocolate decorations can add a delightful textural contrast. Learning these diverse techniques, from simple dusting to intricate piping, opens up a world of creative possibilities. It's about understanding how color, texture, and form come together to create a harmonious and memorable dessert experience, truly embodying the spirit of French patisserie.
An Overview of Common French Pastry Decorations
French pastry decoration encompasses a rich variety of techniques, each suited to different types of pastries and desired effects. Simple yet effective methods include dusting with powdered sugar or cocoa powder, often applied through stencils for patterns. Another fundamental technique is applying glazes – from the classic apricot glaze providing a beautiful sheen to fruit tarts, to the glossy mirror glaze essential for entremets and certain cakes.
More intricate French pastry decorating techniques involve piping work, whether using buttercream, ganache, or royal icing to create swirls, borders, or delicate lacework, particularly popular on macarons and petits fours. Chocolate is a staple, used for tempering and creating elegant garnishes like curls, shavings, or molded shapes. Fruit is often arranged artfully, especially on tarts, and sometimes candied for preservation and visual appeal. Edible flowers add a touch of natural elegance, while advanced methods like airbrushing or sugar work allow for truly spectacular, complex designs seen in professional patisseries.
Essential Tools & Ingredients for French Pastry Decorating
Must-Have Tools for Precise Pastry Decoration
Achieving professional-looking French pastry finishes requires specific tools designed for precision and control. Piping bags and a variety of tips (round, star, leaf, etc.) are indispensable for applying creams, icings, and ganaches neatly. For smooth glazes, an offset spatula is crucial for spreading evenly, while a fine-mesh sieve ensures powdered sugar or cocoa is clump-free.
More specialized tools include pastry brushes for applying glazes, chocolate scrapers or combs for creating textures, and stencils for applying patterns with powders or airbrushing. A good quality digital thermometer is vital for techniques like tempering chocolate or making sugar syrup for glazes, ensuring ingredients reach the correct temperatures. For delicate work like placing small garnishes or edible flowers, tweezers are surprisingly useful. Investing in these tools will significantly improve the execution of various French pastry decorating techniques.
Key Ingredients for Creating Stunning Pastry Finishes
The foundation of beautiful French pastry decorations lies in high-quality ingredients. For glazes, gelatin (sheet or powder) is often used to achieve that coveted glossy, stable finish, while high-purity glucose syrup can prevent crystallization in sugar-based glazes. Fine granulated sugar or confectioners' sugar is essential for icings and dusting.
Chocolate used for tempering and decorations should be couverture chocolate, containing a higher percentage of cocoa butter (typically 30-39%) which allows it to set with a beautiful snap and shine when properly tempered. Fresh, vibrant fruits are key for tart decorations, often requiring a simple sugar syrup or clear glaze brushed over them to enhance their appearance and prevent drying. Food coloring, specifically gel or powder colors, is needed for vibrant icings and glazes, as liquid colors can alter consistency. Understanding how these ingredients interact is fundamental to mastering French pastry decorating techniques.
Mastering Classic French Pastry Glazes
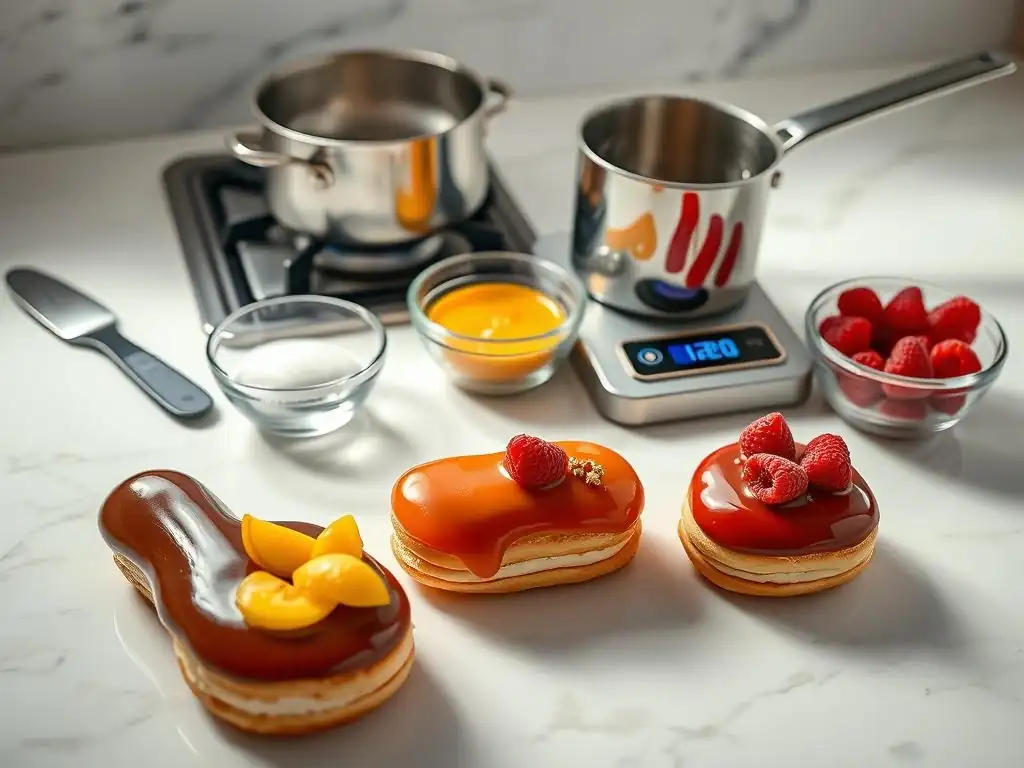
The Art of the Perfect Mirror Glaze for Eclairs
A mirror glaze, or glaçage miroir, provides a stunningly smooth, reflective finish that is iconic in modern French patisserie, especially for pastries like eclairs, entremets, and tarts. The key to its success lies in achieving the correct temperature and consistency.
Typically made from condensed milk, sugar, water, gelatin, and often white chocolate or cocoa powder, the mixture is heated, cooled, and then poured over a perfectly frozen pastry. The ideal pouring temperature is usually between 30°C and 35°C (86°F to 95°F) – too hot, and it will be too thin and run off; too cold, and it will be too thick and won't flow smoothly.
Applying the glaze requires a swift, confident motion, pouring it generously over the frozen item placed on a wire rack. Excess glaze drips off, leaving a flawless, even coating. Air bubbles are the enemy of a smooth mirror glaze; straining the mixture and tilting the pot gently to release bubbles before pouring are crucial steps. Once poured, the glazed pastry is allowed to set in the refrigerator for about 15-20 minutes before handling. Mastering this French pastry decorating technique elevates your bakes to professional standards.
How to Make a Traditional French Apricot Glaze
Traditional French apricot glaze, or nappage, is a simple yet elegant finish commonly used on fruit tarts, pastries, and brioches to add shine, enhance color, and protect the fruit or pastry from drying out. It's typically made by heating apricot jam (preferably high-quality with a good fruit content) with a little water or fruit juice. The mixture is brought to a simmer and stirred until the jam dissolves and the glaze is smooth.
After simmering for a few minutes to reduce slightly and thicken, the glaze is often strained through a fine-mesh sieve to remove any fruit pieces or impurities, resulting in a perfectly clear and smooth consistency. It's applied warm using a pastry brush directly onto the cooled pastry or fruit. The warmth allows it to spread easily and create a thin, even layer. This classic French pastry decorating technique is quick, effective, and adds a beautiful, rustic sheen. Approximately 100g of jam with 2 tablespoons of water is a common starting ratio.
Chocolate Glaze Techniques for French Pastries
Chocolate glazes offer a rich, decadent finish to many French pastries, from éclairs to religieuses. A simple chocolate glaze can be made by melting chocolate with butter or cream, creating a ganache-like consistency that sets softly. For a glossier finish, a glaze similar to mirror glaze but flavored with cocoa powder and dark chocolate is often used. This type of glaze also requires precise temperature control, typically poured around 30-32°C (86-90°F) over chilled or frozen pastries.
Another common method is dipping. Small pastries like choux puffs for profiteroles or religieuses are often dipped directly into warm chocolate glaze. The excess is allowed to drip off before setting. For éclairs, the glaze is often spread smoothly over the top using an offset spatula. Achieving a smooth, even chocolate glaze requires working relatively quickly as the glaze cools and sets. Using high-quality chocolate is paramount for both flavor and a beautiful, shiny finish, making it a key part of French pastry decorating techniques.
Royal Icing Techniques for French Pastry Decoration
Preparing Royal Icing for Delicate Pastry Designs
Royal icing is a classic choice for intricate, delicate decorations on French pastries, particularly macarons, petits fours, and decorated cookies often served alongside pastries. It's traditionally made from powdered sugar, egg whites (or meringue powder), and sometimes a little lemon juice or water for consistency. The key is whipping the ingredients until a smooth, stiff consistency is achieved, though the exact thickness can be adjusted by adding more liquid (for flooding) or more sugar (for piping details).
Using pasteurized egg whites or meringue powder is recommended for food safety. A basic recipe might use 250g powdered sugar to 1 medium egg white. The mixture needs to be beaten slowly at first to combine the sugar and egg white without creating too many air bubbles, then at a slightly higher speed until it reaches the desired consistency. It dries hard and brittle, making it perfect for detailed work that holds its shape. Properly prepared royal icing is stable and holds fine lines, essential for precise French pastry decorating techniques.
Piping Techniques for Royal Icing on French Pastries
Piping with royal icing allows for incredible detail and artistry on French pastries. Different piping tips create various effects: small round tips (like Ateco #1 or #2) are used for fine lines, dots, and writing; star tips (like Wilton #16 or #18) create ruffled borders or rosettes; and leaf tips can add botanical elements. The consistency of the royal icing is crucial for successful piping – it should be firm enough to hold its shape but fluid enough to flow smoothly through the tip without breaking.
For outlining designs on macarons or cookies, a medium consistency is often used. For filling areas (flooding), a thinner consistency is needed, allowing the icing to spread smoothly within the outline. Holding the piping bag correctly, applying even pressure, and controlling the height and speed of your hand are fundamental skills. Practice is key to mastering the various piping techniques, from simple swirls to complex lace patterns, making royal icing a versatile tool in French pastry decorating techniques.
Coloring Royal Icing for French Pastry Art
Adding color transforms royal icing into a vibrant medium for French pastry decoration. Gel or powder food colorings are preferred over liquid colors because they are highly concentrated and do not significantly alter the icing's consistency. A tiny amount of gel color often produces a deep hue. It's best to add color gradually, mixing thoroughly after each addition, until the desired shade is achieved.
To create different shades of the same color, prepare a batch of the base color and then divide it, adding more coloring to some portions. For very dark colors like black or deep red, it can be helpful to make the icing a day in advance, as colors often deepen over time. Always mix the color in well to avoid streaks. Proper coloring is essential for creating visually appealing designs that complement the elegance of French pastries, enhancing the overall impact of these French pastry decorating techniques.
Chocolate Decoration for French Pastries
Tempering Chocolate for Decorative Elements
Tempering chocolate is a fundamental skill for creating stable, shiny, and snappy chocolate decorations for French pastries. Untempered chocolate will set with streaks, a dull finish, and a soft texture. Tempering involves heating and cooling chocolate to specific temperatures to align the cocoa butter crystals. For dark chocolate, this typically means heating to around 45-50°C (113-122°F), cooling to 28-29°C (82-84°F), and then gently reheating to 31-32°C (88-90°F). Milk and white chocolate have slightly lower temperature ranges.
There are several tempering methods, including the seeding method (melting chocolate and adding finely chopped untempered chocolate to cool it) and the tabling method (pouring melted chocolate onto a cool surface like marble and working it with a scraper until it reaches the target temperature). Using a digital thermometer is crucial for accuracy. Properly tempered chocolate is essential for creating professional-looking garnishes that hold their shape at room temperature, a vital aspect of French pastry decorating techniques.
Creating Chocolate Garnishes for Pastries: Curls, Shavings, and Leaves
Chocolate garnishes add elegance and texture to French pastries. Chocolate curls are made from tempered chocolate that has been spread thinly on a surface (like the back of a baking sheet) and allowed to set slightly, but not completely hard. A metal scraper or knife is then pulled across the surface at an angle to create delicate rolls or curls. The thickness of the chocolate layer and the angle of the scraper affect the size and shape of the curl.
Chocolate shavings are simpler, made by running a knife or vegetable peeler along the edge of a block of tempered or untempered chocolate. For chocolate leaves, real leaves (like rose or mint, washed and dried) are brushed with melted tempered chocolate. Once set, the real leaf is carefully peeled away, leaving a detailed chocolate replica. These simple yet effective French pastry decorating techniques add a touch of sophistication to cakes, tarts, and plated desserts.
Chocolate Painting Techniques for French Pastries
Chocolate can also be used like paint for intricate designs on French pastries or on transfer sheets to create decorative elements. Melted tempered chocolate can be applied with fine brushes to create patterns directly onto set ganache, fondant, or even chilled pastry surfaces. Different colors can be achieved using colored cocoa butter or adding oil-based food coloring specifically designed for chocolate.
Another method involves painting designs onto acetate or chocolate transfer sheets. Once the chocolate sets, the sheet is peeled away, leaving the design transferred onto the chocolate. This is often used for creating patterned bands around cakes or individual decorative pieces. For intricate details, a piping bag with a very fine tip can be used to draw with chocolate. These artistic French pastry decorating techniques allow for personalized and highly detailed finishes.
Fruit Decorations for French Pastries
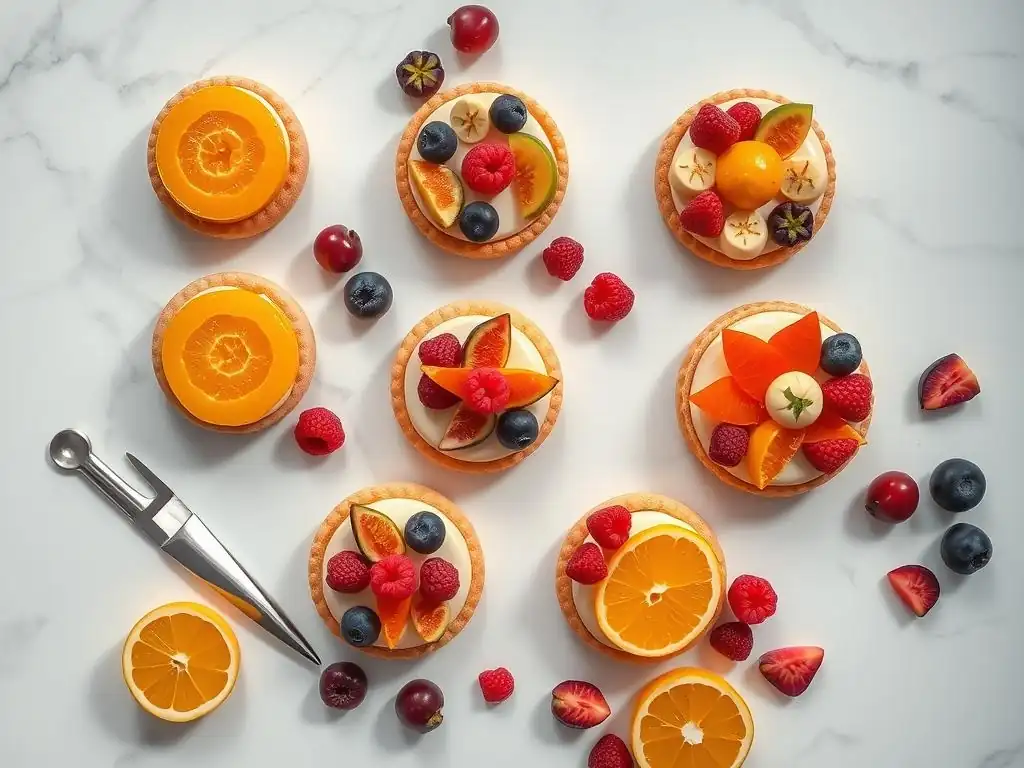
Preparing Fresh Fruit for Pastry Decoration
Fresh fruit is a vibrant and delicious way to decorate French pastries, particularly tarts and entremets. Proper preparation is key to ensuring the fruit looks appealing and stays fresh. Fruits like strawberries, raspberries, blueberries, kiwi, and citrus segments are commonly used. They should be washed gently and dried thoroughly to prevent moisture issues. Strawberries are often hulled and sliced, while larger fruits may be cut into uniform pieces or segments.
For fruit that browns quickly, such as apples or bananas, dipping them in a solution of water and lemon juice (approximately 1 tablespoon of lemon juice per cup of water) can help prevent oxidation. Arranging fruit requires an eye for color, shape, and pattern. Overlapping slices or creating concentric circles are common techniques. A final brush of warm apricot glaze or a clear nappage adds shine and protects the fruit, enhancing this natural French pastry decorating technique.
Creating Fruit Tarts and Tartlets: Decoration Techniques
Fruit tarts and tartlets are quintessential French pastries where fruit decoration is paramount. After baking the tart shell and filling it (often with pastry cream or frangipane), the fruit is arranged artfully on top. For a classic look, sliced fruits like apples, pears, or peaches are often arranged in overlapping patterns. Berries can be placed individually or clustered together.
The arrangement should be visually balanced, considering both color and shape. For example, combining vibrant red strawberries with deep blue blueberries or green kiwi slices creates a beautiful contrast. A final step is often brushing the fruit with a warm clear glaze (like nappage) to give it a glossy finish and seal it. This traditional French pastry decorating technique highlights the natural beauty of the ingredients. Approximately 5-10ml of glaze per individual tartlet is usually sufficient.
Candied Fruit Decorations for French Pastries
Candied fruit, or fruits confits, offers a jewel-like, long-lasting decoration for French pastries, especially traditional cakes like the galette des rois or fruitcakes. The process involves slowly simmering fruit pieces in sugar syrup over several days, gradually increasing the sugar concentration until the fruit is saturated and translucent. Common fruits include cherries, citrus peel (orange, lemon), melon, and angelica.
Once candied, the fruit is drained and can be used whole, sliced, or chopped. Its vibrant color and chewy texture make it an excellent garnish. It can be arranged decoratively on top of glazes, pressed into doughs before baking, or used within fillings that are then decorated. Candied citrus peel, cut into fine strips (julienne), is a classic garnish for many chocolate or cream-based French pastries. While time-consuming to make from scratch, high-quality store-bought candied fruit is readily available and a staple in French pastry decorating techniques.
Working with Edible Flowers on French Pastries
Selecting and Preparing Edible Flowers
Edible flowers add a delicate, elegant, and sometimes whimsical touch to French pastry decoration. Not all flowers are edible, and it is crucial to use only varieties that are specifically grown for culinary use, free from pesticides or chemicals. Popular choices include pansies, violets, rose petals, lavender, calendula, and borage. They add pops of color and a subtle floral aroma or flavor.
When sourcing edible flowers, look for reputable suppliers or grow them yourself organically. Before use, gently rinse the flowers under cool water and pat them dry with paper towels. The petals are typically used, though some smaller flowers can be used whole. Remove any green parts (calyx, stem) as they can be bitter. Prepare them just before decorating for the freshest look, as they are delicate and wilt easily. This natural French pastry decorating technique requires careful handling.
Arranging Edible Flowers for Elegant Pastry Presentation
Arranging edible flowers on French pastries is an art form focused on creating a natural, organic beauty. Flowers can be placed individually, clustered, or scattered across the surface of cakes, tarts, or plated desserts. Consider the size, shape, and color of the flowers in relation to the pastry. A single, perfectly placed bloom can be striking, while a cluster might create a garden-like effect.
Flowers can be placed directly onto moist surfaces like glazes, buttercream, or ganache, where they will adhere naturally. For drier surfaces, a tiny dot of royal icing, melted chocolate, or edible glue can be used to secure them. Rose petals can be scattered or arranged in patterns. Pansies and violets, with their flat faces, are perfect for laying flat on top of glazes or creams. This French pastry decorating technique adds a touch of sophistication and natural beauty.
Preserving Edible Flowers for Longer Lasting Decorations
While fresh edible flowers are ideal for immediate use, they can also be preserved for longer-lasting decorations using techniques like crystallizing. Crystallizing involves coating the flowers or petals in egg white and then dusting them heavily with superfine sugar. They are then left to dry completely, often for 24-48 hours, until they become brittle and sugar-coated.
Crystallized flowers retain their shape and color remarkably well and have a delicate, sugary crunch. They are perfect for decorating pastries that need to sit for a while or for preparing decorations in advance. Store them in an airtight container in a cool, dry place. Another simpler method is drying flowers, though this often results in a more muted color and fragile texture compared to crystallizing. Preserving flowers expands the possibilities within French pastry decorating techniques.
Advanced French Pastry Decorating Techniques
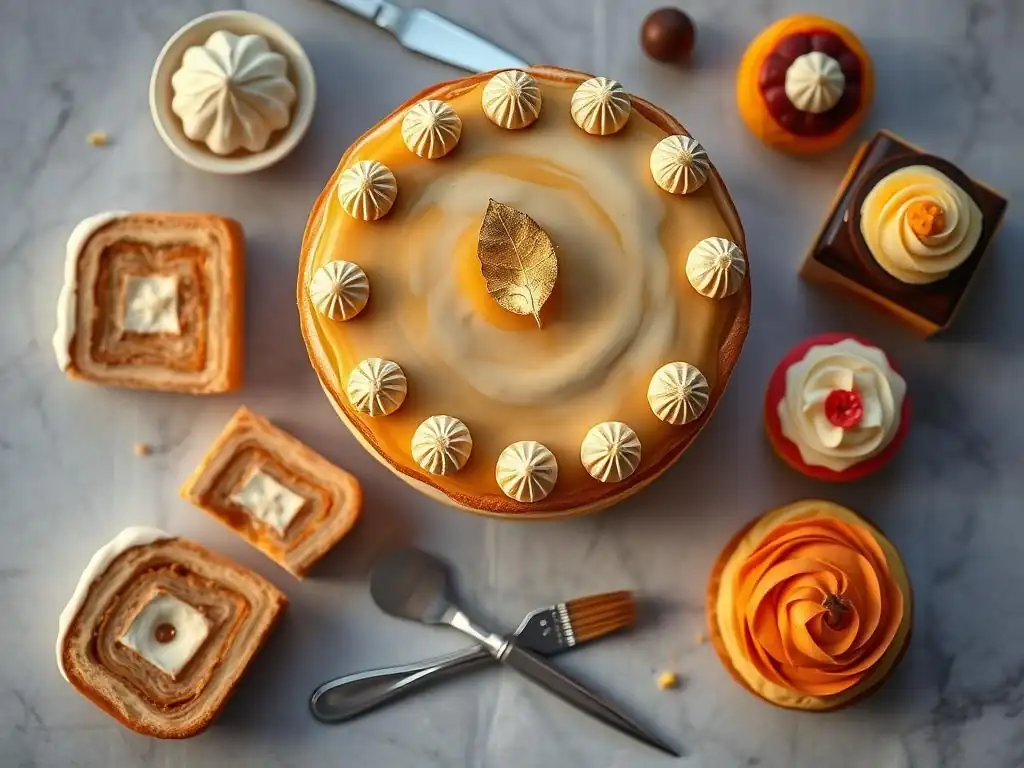
Airbrushing Techniques for Pastry Decoration
Airbrushing allows for smooth, gradient color application and intricate stenciled designs on French pastries, particularly cakes and entremets. An airbrush uses compressed air to spray a fine mist of edible food coloring onto the pastry surface. This technique provides a level of control and evenness that is difficult to achieve with traditional brushing or spraying.
Specialized edible airbrush colors are available, designed to be thin enough to pass through the airbrush nozzle without clogging. Colors can be layered to create depth or blended for ombré effects. Stencils can be used to create sharp patterns or images. Airbrushing requires practice to control the spray intensity and distance from the pastry, typically starting with a low pressure and building up color gradually. This advanced French pastry decorating technique is popular in professional settings for achieving flawless finishes.
Sugar Work and Isomalt Decorations for French Pastries
Sugar work, including using isomalt, allows for the creation of stunning, often translucent or sculptural decorations for elaborate French pastries. Isomalt is a sugar substitute that is more stable and less prone to crystallization than traditional sugar, making it easier to work with for pulled, blown, or cast sugar pieces. It is typically melted (around 170-180°C or 338-356°F), colored, and then shaped while still pliable.
Techniques include pulling sugar to create ribbons or bows, blowing sugar into hollow spheres or figures, and casting melted sugar or isomalt into molds to create solid shapes. These decorations can be used to create dramatic toppers, delicate structural elements, or shimmering accents. Working with hot sugar requires extreme caution due to the high temperatures. Mastering sugar work is one of the most challenging but rewarding French pastry decorating techniques.
Using Stencils for Intricate Pastry Designs
Stencils are a versatile tool for applying intricate patterns or images onto French pastries, offering a way to achieve complex designs with relative ease. Stencils can be used with various mediums, including powdered sugar, cocoa powder, airbrush colors, or even thin royal icing or ganache. For dusting, the stencil is placed firmly on the pastry surface, and the powder is sifted over it. The stencil is then carefully lifted straight up to reveal the pattern.
For airbrushing, the stencil is held or secured against the surface, and edible airbrush color is sprayed over it. For icing or ganache, a thin layer is spread over the stencil using an offset spatula, and the excess is scraped away before the stencil is lifted. Stencils range from simple geometric shapes to elaborate lace patterns or logos. Using stencils is an effective way to add professional-looking detail, enhancing the visual appeal of pastries using these French pastry decorating techniques.
Tips and Tricks for Perfect French Pastry Decorations
Preventing Common Decoration Mistakes
Even experienced bakers encounter challenges when decorating French pastries. One common issue is runny glaze or icing; this is often due to incorrect consistency or temperature. Ensure ingredients are measured precisely and follow temperature guidelines for glazes. Another mistake is uneven application; practice with piping bags and spatulas helps achieve smooth finishes. Cracks in chocolate decorations can occur if the chocolate wasn't properly tempered or if it experienced sudden temperature changes.
Handling delicate decorations like tempered chocolate pieces or edible flowers requires patience and often the use of tools like tweezers. When dusting with powdered sugar through a stencil, hold the stencil firmly to prevent bleed under the edges. For mirror glaze, ensure the pastry is completely frozen and the glaze is at the correct temperature for the best flow and coverage. Learning from mistakes is part of mastering these French pastry decorating techniques.
Achieving a Professional Finish on Your Pastries
Achieving a professional finish on French pastries involves attention to detail and consistency. Sharp edges on glazes or icings can be achieved using clean, precise cuts or tools. Smooth surfaces require careful spreading with an offset spatula or rotating the pastry while pouring glaze. For piped decorations, consistent pressure and speed are key to uniform lines and shapes.
Using high-quality ingredients makes a significant difference in both appearance and taste. Taking the time to properly prepare each element, such as tempering chocolate correctly or straining glazes, contributes to a flawless result. Finally, presenting the pastry on a clean plate or cake board enhances its overall professional look. These refined aspects of French pastry decorating techniques elevate your baking from homemade to haute patisserie.
Storing Decorated French Pastries Properly
Proper storage is essential to maintain the appearance and freshness of decorated French pastries. Pastries decorated with delicate elements like fresh fruit, edible flowers, or tempered chocolate should generally be stored in the refrigerator. Use an airtight container to prevent them from drying out or absorbing odors from other foods.
Pastries with royal icing decorations should be stored in a cool, dry place, as moisture can cause the icing to soften or bleed. Avoid refrigerating items with royal icing unless the pastry itself requires refrigeration, and be aware that condensation can affect the icing. Mirror-glazed pastries are best stored in the refrigerator and brought out shortly before serving. Understanding the specific needs of different decorative elements ensures your beautiful French pastry decorating techniques last.
Conclusion: Unleash Your Creativity with French Pastry Decoration
The Importance of Practice in Mastering French Pastry Art
Mastering French pastry decorating techniques is a journey that requires practice, patience, and passion. From the foundational skills of making smooth glazes and stable icings to the more advanced artistry of sugar work and airbrushing, each technique builds upon the last. Don't be discouraged by imperfections in your early attempts. Every piped line, every poured glaze, and every arranged piece of fruit is an opportunity to learn and improve.
Set aside dedicated time to practice specific techniques, perhaps focusing on one new skill each week. Watch tutorials, read detailed guides, and don't be afraid to experiment. The more you practice, the more intuitive the movements will become, and the better you will understand how different ingredients and tools behave. This dedication is the true key to unlocking your creativity and achieving beautiful, professional results with French pastry decorating techniques.
Frequently Asked Questions
How do I achieve a professional-looking glaze on my French pastries?
To achieve a professional glaze, ensure your glaze is smooth and lump-free. Apply it evenly over a cooled pastry, and consider using a chocolate mirror glaze for an extra glossy finish.
What are some common French pastry decorating techniques for beginners?
Beginners can start with simple techniques like dusting with powdered sugar, applying a basic buttercream swirl, or drizzling melted chocolate. These are effective and easy to master.
What tools are essential for French pastry decorating techniques?
Essential tools include a piping bag and tips for creating various designs, an offset spatula for smooth frosting, and a turntable for even decorating.
How can I prevent my French pastry decorations from melting or smudging?
To prevent melting, ensure your pastries are completely cooled before decorating. Consider using chocolate or glazes that are tempered correctly for stability.
Where can I find inspiration for French pastry decorating techniques?
BakeWithEase.com offers a variety of step-by-step guides and recipe examples for decorating French pastries. You can also find inspiration on social media platforms like Instagram and Pinterest.
Final Reflection: The Enduring Allure of French Pastry Decoration
The artistry of French pastry decoration isn't merely about aesthetics; it's a reflection of culinary heritage, precision, and the enduring power of visual appeal in the food industry. In a world increasingly dominated by fleeting trends, the timeless elegance of techniques like piping, glazing, and sculpting on French pastries continues to captivate and inspire. The meticulous detail and refined skill involved elevate these treats beyond simple desserts; they become edible works of art.
The influence of French pastry decorating techniques extends far beyond the patisserie itself. It's a source of inspiration for countless bakers and pastry chefs worldwide, shaping trends and influencing the visual language of desserts across cultures. The beauty of a well-decorated pastry is in its ability to evoke emotion and delight, a testament to the power of artistry in the culinary world.
This quote encapsulates the enduring impact of these techniques, highlighting their ability to transcend mere functionality and become a powerful form of communication. The intricate details, the perfect swirls, the gleaming glazes – they all speak volumes about the dedication and passion of the artisan.
Consider the impact of these techniques on your own baking. Don't be afraid to experiment, to push boundaries, and to find your own unique voice within the rich tradition of French pastry decoration. Practice your piping skills, explore different glazes, and dare to create your own signature designs. The journey of mastering these techniques is as rewarding as the final product itself. Embrace the challenge, celebrate the process, and let your creativity flourish. The world awaits your beautifully decorated French pastries.
Unleash Your Inner Pastry Artist!
Thanks for joining us on this delicious journey into the world of decorative French pastry finishes! We hope you’ve gained some valuable techniques and inspiration. Now it's time to put your newfound skills to the test!
- Master a new piping technique: Choose one of the techniques we discussed (e.g., rosettes, shells, or leaves) and practice until you achieve your perfect swirl! Challenge yourself to create a design you've never tried before.
- Share your creations: Post a picture of your beautifully decorated pastry on social media and tag #BakeWithEase – we'd love to see your artistic flair!
- Experiment with colors and flavors: Try incorporating different food colorings or flavor extracts to create unique and visually stunning pastries. What unexpected flavor combinations will you explore?
Ready to transform your baking game? What stunning design will you create next?