
From Beginner to Pro: Your Sourdough Starter Mastery Guide


Welcome to BakeWithEase, where the joy of baking becomes a delicious reality! Ever wondered how to keep your sourdough starter thriving and ready for that perfect loaf? Get ready to unlock the secrets with our guide, offering essential sourdough starter maintenance tips that will elevate your baking from good to truly exceptional. Discover the key to consistent results and flavorful bakes – your sourdough journey starts now!
- Understanding the Basics of Sourdough Starter
- Creating Your First Sourdough Starter: A Step-by-Step Guide
- Sourdough Starter Maintenance Tips for Long-Term Success
- Advanced Sourdough Starter Management Techniques
- Sourdough Starter Feeding Ratios: Finding Your Perfect Balance
- Sourdough Starter Discard: Creative Ways to Reduce Waste
- Reviving a Neglected Sourdough Starter: A Rescue Mission
- Baking with Your Sourdough Starter: From Levain to Loaf
- Mastering Sourdough Starter: Common Mistakes to Avoid
- Troubleshooting Your Sourdough Starter: A Comprehensive Guide
- Sourdough Starter: Maintaining Peak Performance for Baking Excellence
- Frequently Asked Questions
- Final Reflection: The Enduring Magic of the Sourdough Starter
- Unleash Your Inner Baker: Start Your Sourdough Journey Today!
Understanding the Basics of Sourdough Starter
What is Sourdough Starter and Why Use It?
A sourdough starter is a fascinating, living culture made from just two ingredients: flour and water. It's a natural leavening agent, meaning it's packed with wild yeasts and bacteria that work together to make your bread rise.
Unlike commercial yeast, which is typically a single strain of Saccharomyces cerevisiae, a sourdough starter hosts a diverse ecosystem of microorganisms, primarily lactic acid bacteria and wild yeasts from the flour and surrounding environment. This microbial community consumes the sugars in the flour, producing carbon dioxide gas (which causes dough to rise) and organic acids like lactic and acetic acid, giving sourdough its characteristic tangy flavor and unique texture.
Using a sourdough starter connects you to centuries of baking tradition, offering a deeper understanding of the fermentation process. Beyond the unique flavor profile and chewy crumb it imparts to baked goods, sourdough is often considered easier to digest for some people compared to bread made with commercial yeast. This is partly due to the longer fermentation time and the work done by the bacteria in breaking down certain components of the flour. Mastering your starter is the foundational step to unlocking a world of delicious and wholesome sourdough breads, pastries, and more.
Key Ingredients for a Flourishing Sourdough Starter
The foundation of a healthy sourdough starter lies in the quality of its core ingredients: flour and water. For flour, many bakers recommend starting with unbleached all-purpose flour or bread flour, as these provide a good balance of nutrients for the microbes. Whole grain flours, particularly rye or whole wheat, can accelerate initial activity because they contain more nutrients and naturally occurring wild yeasts and bacteria on the grain husks. For example, a starter made with 50% rye and 50% bread flour might become active faster than one made solely with all-purpose flour.
Water quality is equally important. Chlorine in tap water can inhibit or even kill the beneficial microorganisms in your starter. It's best to use filtered or non-chlorinated water. If using tap water, simply let it sit out in an open container for 24 hours to allow the chlorine to dissipate. The temperature of the water also plays a role; lukewarm water (around 75-80°F or 24-27°C) can help activate the microbes, especially during the initial stages or when reviving a sluggish starter. Avoid using hot water, which can kill the yeast and bacteria.
Essential Equipment for Sourdough Starter Preparation
Getting started with your sourdough journey requires only a few basic tools, most of which you likely already have in your kitchen. A non-reactive container is crucial for housing your starter. Glass jars, like mason jars or old jam jars, are excellent choices because they are easy to clean, non-reactive, and allow you to observe the starter's activity (bubbles, rise, etc.). Avoid using metal containers, especially reactive metals like copper or aluminum, which can negatively interact with the acids produced by the starter.
You'll also need a scale for accurate measurements. While volume measurements (cups, tablespoons) can be used, weighing your flour and water ensures consistency, which is vital for successful sourdough starter maintenance tips and overall starter health. A digital kitchen scale that measures in grams is highly recommended.
Other useful tools include a spoon or spatula for mixing (non-metal is preferred, but a metal spoon is generally fine for quick mixing), and a loose-fitting lid or cloth cover for the container (the starter needs to breathe, so an airtight seal is not ideal). A rubber band or marker placed at the starter's initial level on the jar is also helpful for tracking its rise.
Creating Your First Sourdough Starter: A Step-by-Step Guide
Day 1-3: Initial Mixing and Observation
Starting your sourdough starter is a simple process of combining equal parts flour and water and giving it time. On Day 1, mix about 50 grams of lukewarm non-chlorinated water with 50 grams of unbleached all-purpose or whole grain flour in your clean glass jar. Stir until well combined, ensuring no dry pockets of flour remain. The consistency should be like a thick batter or paste.
Scrape down the sides of the jar and loosely cover it with a lid or cloth. Place the jar in a warm spot, ideally between 70-80°F (21-27°C). Over the next couple of days, you might see little to no activity, or perhaps just a few small bubbles. This is normal; the microorganisms are just starting to wake up and multiply.
During Day 2 and Day 3, you generally don't need to feed the starter yet. Simply observe it. You might notice some tiny bubbles forming, a slight increase in volume, or perhaps a watery layer (hooch) on top. The smell might be mild or slightly yeasty.
It's important to resist the urge to feed too early, as the initial flour needs time to be consumed by the developing microbial population. Just give it a stir once or twice a day if you like, to redistribute nutrients and oxygen, and continue keeping it in a warm location. Consistency in temperature and observation is key during these initial, quiet days.
Day 4-7: The Feeding Process Begins
By Day 4, you should hopefully start seeing more consistent signs of life, such as noticeable bubbling or a slight rise. This is when you typically begin the regular feeding schedule. The standard feeding ratio is 1:1:1 by weight: 1 part starter, 1 part fresh flour, and 1 part fresh water.
For instance, if you keep 50 grams of your starter, you would feed it with 50 grams of flour and 50 grams of water. Before feeding, discard a portion of the starter to manage its volume and ensure the fresh food is readily available to a manageable population of microbes. Keeping only a small amount, say 50 grams, is common for home bakers to minimize discard.
Feed your starter once every 24 hours during this period. Mix the reserved starter with fresh flour and water, stir thoroughly, and return it to its clean jar (it's a good idea to move it to a clean jar every few days to prevent crusty buildup). Place a rubber band or mark at the level of the fresh starter to track its rise.
You should observe it becoming more active after feeding, potentially doubling in size within 12-24 hours and showing many bubbles throughout. The smell might become pleasantly yeasty or slightly acidic. If activity is still slow, maintaining a consistent warm temperature (75-80°F) and using a mix of all-purpose and whole wheat/rye flour can help boost activity.
Day 8-14: Recognizing Signs of a Healthy and Active Starter
By the end of the second week, with consistent daily feeding and a warm environment, your sourdough starter should be showing robust signs of health and activity. A mature starter will typically double or even triple in volume within 4-8 hours after being fed, depending on the temperature and feeding ratio. You'll see numerous bubbles throughout the culture, not just on the surface, and the texture will be light and airy.
A common test for readiness is the "float test": drop a small spoonful of starter into a glass of water. If it floats, it generally indicates enough carbon dioxide is trapped within the starter to make it buoyant, suggesting it's active and ready for baking.
The smell is another key indicator. A healthy, active starter will smell pleasant – yeasty, slightly sweet, and perhaps mildly tangy, like yogurt. A strong, pungent smell resembling nail polish remover or acetone can indicate that the starter is hungry and has produced excess alcohol; this usually resolves with more frequent feeding or a larger feeding ratio. A mature starter, consistently fed and maintained, is essential for successful sourdough baking. Recognizing these signs is part of mastering effective sourdough starter maintenance tips.
Sourdough Starter Maintenance Tips for Long-Term Success
Daily Sourdough Starter Feeding Schedule and Best Practices
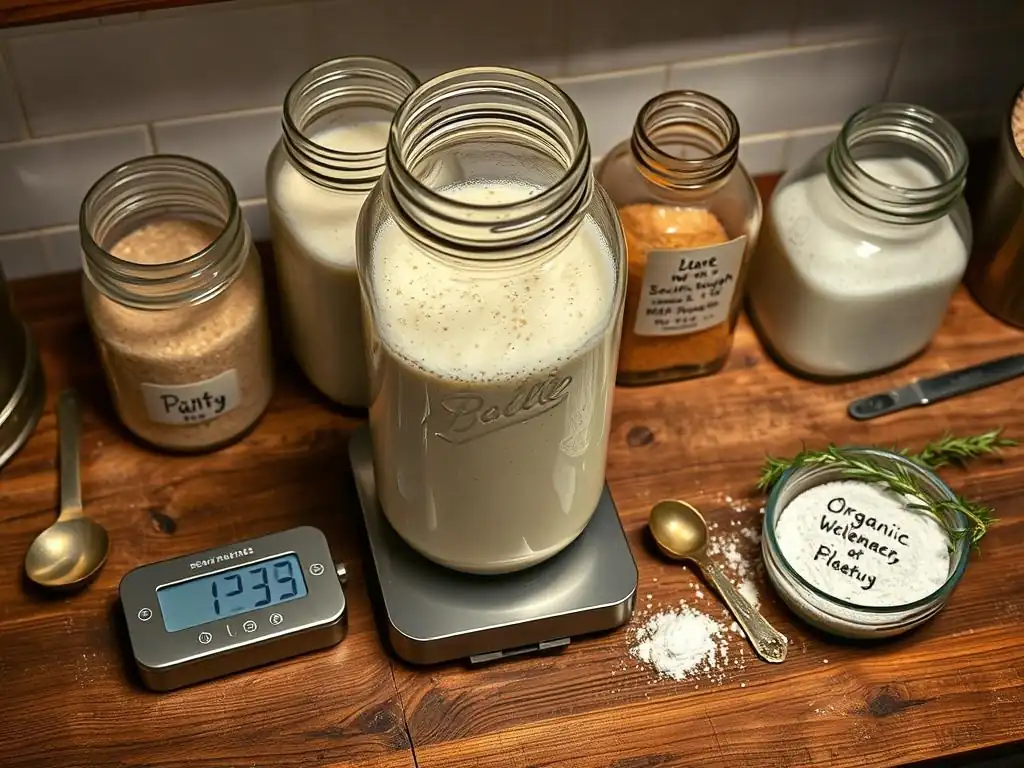
Consistent feeding is one of the most important sourdough starter maintenance tips for keeping your culture healthy and active, especially if you plan to bake frequently. If kept at room temperature (around 70-75°F or 21-24°C), a starter typically needs to be fed once every 24 hours. The standard feeding ratio is 1:1:1 (starter:flour:water by weight).
For example, keeping 50g of starter and feeding it with 50g of flour and 50g of water is a common practice for home bakers. This ratio provides enough food for the microbes for about a day, allowing them to consume the fresh flour and peak in activity before becoming overly acidic or hungry.
To maintain a manageable amount of starter and ensure enough fresh food is available to the active microbes, it's necessary to discard a portion before each feeding. The amount you keep is up to you, but keeping a smaller amount (e.g., 25-50g) is often more economical in terms of flour usage and reduces the amount of discard.
Always feed your starter when it has peaked and is just beginning to fall, or when it shows signs of being hungry (like a strong, acidic smell or hooch). Feeding at the same time each day helps establish a routine, contributing significantly to effective sourdough starter maintenance tips.
Optimizing Room Temperature for Sourdough Starter Activity
Temperature plays a critical role in the activity level of your sourdough starter. The wild yeasts and bacteria thrive in warm environments, typically between 75-80°F (24-27°C). At these temperatures, a healthy starter can double or triple in size within 4-8 hours after feeding. Keeping your starter consistently within this range will promote vigorous activity, leading to a strong starter ready for baking. Finding a warm spot in your kitchen, such as on top of the refrigerator, near a warm appliance, or in a proofing box, can help maintain the ideal temperature.
Conversely, cooler temperatures slow down microbial activity. If your kitchen is cooler, say below 70°F (21°C), your starter will take longer to rise after feeding, potentially 8-12 hours or even longer. While slower fermentation can sometimes develop more complex flavors, very low temperatures can make the starter sluggish. If you live in a cold environment or during winter, finding a way to provide consistent warmth is a key sourdough starter maintenance tip for ensuring reliability. Using lukewarm water for feeding can also give the microbes a slight boost.
Troubleshooting Common Sourdough Starter Problems
Even with diligent sourdough starter maintenance tips, you might encounter issues. One common problem is a starter that seems inactive or sluggish, not rising much after feeding. This could be due to inconsistent feeding, cool temperatures, or using chlorinated water. Try moving the starter to a warmer spot, ensuring you're using non-chlorinated water, and feeding it consistently every 24 hours with a 1:1:1 ratio. Sometimes, switching to a mix of flours (like adding some rye) or increasing the feeding ratio (e.g., 1:2:2) can give it a boost.
Another issue can be a very strong, unpleasant smell, often described as alcoholic or like nail polish remover (acetone). This smell indicates that the yeast have consumed all the sugars and are now producing alcohol as a byproduct, essentially telling you the starter is very hungry. This is a sign you need to feed it more frequently or with a larger ratio of fresh flour and water. Discarding a larger portion before feeding can also help reduce the concentration of these byproducts. Understanding these signs and how to react is crucial for effective sourdough starter maintenance tips.
Identifying and Addressing Mold in Sourdough Starter
Mold is perhaps the most concerning issue you might encounter with your sourdough starter. It typically appears as fuzzy, discolored patches on the surface, often green, black, or even pink or orange. Unlike the harmless hooch (a liquid layer), mold is a sign that unwanted fungi have taken hold. If you see any signs of mold, unfortunately, the safest course of action is to discard the entire starter and begin again. Mold spores can penetrate throughout the culture, even if you only see patches on the surface, and some molds can produce harmful toxins.
Preventing mold is much easier than dealing with it. Always use clean jars and utensils when handling your starter. Store the starter in a non-reactive container with a loose-fitting lid or cloth cover to allow airflow, which discourages mold growth (mold loves stagnant, humid environments). Feeding your starter regularly keeps the beneficial yeasts and bacteria active and dominant, making it harder for mold to establish itself. Maintaining proper sourdough starter maintenance tips, especially cleanliness and regular feeding, is your best defense against mold.
Dealing with a Sluggish or Inactive Sourdough Starter
A sluggish or inactive sourdough starter can be frustrating, especially when you're ready to bake. The most common culprits are temperature and feeding schedule. If your starter isn't doubling within a reasonable timeframe (4-8 hours at room temperature, or 8-12 hours in cooler conditions), try moving it to a warmer spot. Aim for 75-80°F (24-27°C). Using lukewarm water for feeding can also help wake it up. Ensure you are feeding it regularly, typically every 24 hours at room temperature. If you've been inconsistent, commit to a strict daily feeding schedule for a few days.
Another effective strategy is to adjust your feeding ratio or flour type. If you're currently using a 1:1:1 ratio, try increasing the amount of fresh flour and water relative to the starter, such as a 1:2:2 or even 1:3:3 ratio. This provides more food for the existing microbial population, allowing it to multiply and become more active.
Incorporating a small amount of whole rye or whole wheat flour (e.g., 10-20% of the total flour) can also give a boost, as these flours contain more nutrients and microbes. Patience is key; sometimes, a starter just needs a few consistent feedings in optimal conditions to bounce back. These are important sourdough starter maintenance tips for keeping your culture vibrant.
Proper Sourdough Starter Storage: Fridge and Room Temperature
How you store your sourdough starter depends on how often you bake. If you bake several times a week, keeping your starter at room temperature with daily feedings is ideal, as it keeps the starter consistently active and ready to use. Store it in a warm spot, as mentioned earlier, and follow your regular feeding schedule. This method ensures peak performance whenever you need it, though it does require daily attention and results in more discard.
For less frequent bakers (once a week or less), storing your starter in the refrigerator is an excellent option for easier sourdough starter maintenance tips. Refrigeration significantly slows down the microbial activity, meaning you only need to feed it about once a week. To store, feed your starter as usual, let it sit at room temperature for 1-2 hours after feeding to start the fermentation, and then place it in the fridge with a loose lid.
When you're ready to bake, take it out, let it come to room temperature, and feed it one or two times over 12-24 hours until it's active and bubbly again. This reduces the frequency of feeding and the amount of flour used, making long-term sourdough starter maintenance tips more manageable.
Advanced Sourdough Starter Management Techniques
Adjusting Hydration Levels for Different Recipes
Hydration refers to the ratio of water to flour in your sourdough starter, typically expressed as a percentage (water weight / flour weight * 100%). A standard starter is usually maintained at 100% hydration (equal weights of flour and water). However, you can adjust your starter's hydration for specific purposes or recipes.
For example, a stiffer starter (lower hydration, e.g., 50-70%) can be useful for certain types of bread or pastries, and it tends to ferment more slowly and produce less acetic acid (less sourness). A more liquid starter (higher hydration, e.g., 120-150%) ferments faster and can be easier to mix into doughs.
To change hydration, simply adjust the ratio of water to flour when feeding. If you want to create a 70% hydration starter from your 100% starter, feed 50g of your 100% starter with 50g of flour and only 35g of water (35g water / 50g flour = 0.7 = 70%). You may need a couple of feedings at the new ratio to stabilize the starter at the desired hydration. Understanding how hydration affects fermentation speed and flavor is a key aspect of advanced sourdough starter maintenance tips and control.
Strengthening a Weak Sourdough Starter
If your starter is consistently sluggish despite optimal temperature and regular 1:1:1 feeding, it might benefit from a more intensive approach to strengthen its microbial population. One effective method is to increase the frequency of feeding. Instead of feeding every 24 hours, try feeding every 12 hours, or even every 8 hours if you can monitor it closely and it's peaking quickly. This provides a continuous supply of fresh food, encouraging rapid multiplication of the yeasts and bacteria and helping the beneficial microbes dominate.
Another technique is to increase the feeding ratio significantly for a few cycles. Instead of 1:1:1, try 1 part starter to 3 or 4 parts fresh flour and water (e.g., 1:3:3 or 1:4:4). This dilutes the existing population more relative to the new food, giving the microbes ample resources to grow without quickly running out.
Using a blend of flours, particularly adding some nutritionally rich whole grain flour like rye or whole wheat, can also provide a wider spectrum of nutrients that different microbes in your starter might prefer, helping to boost overall activity and resilience. These advanced sourdough starter maintenance tips can help revive and strengthen a tired culture.
Creating Different Types of Sourdough Starters (e.g., Rye, Whole Wheat)
While most beginners start with an all-purpose or bread flour starter, you can easily transition or create starters using different types of flour. A rye starter, for example, is known for its rapid activity and tangy flavor profile. To create one, simply start feeding a small amount of your existing starter (or start a new one) exclusively with rye flour and water. Due to the higher enzyme activity and nutrient content in rye, it often becomes very vigorous quickly.
Similarly, you can create a whole wheat starter by feeding with whole wheat flour. Whole wheat starters are also quite active and contribute nutty, earthy flavors to bread. Some bakers maintain separate starters for different flours, while others keep a "mother" starter (perhaps all-purpose or a blend) and then build a smaller quantity of a specific flour starter (like rye or whole wheat) as a "levain" specifically for a recipe.
Experimenting with different flours adds another dimension to your sourdough journey and offers flexibility in your baking. Adjusting feeding strategies based on flour type is part of effective sourdough starter maintenance tips for diverse cultures.
Sourdough Starter Feeding Ratios: Finding Your Perfect Balance
Understanding the Impact of Flour Type on Feeding Ratios
The type of flour used in your starter significantly impacts how it behaves and how often it needs feeding, influencing optimal sourdough starter maintenance tips. Different flours have varying levels of protein, starches, and enzymes, all of which affect the rate at which the microbes consume the food.
Whole grain flours like rye and whole wheat typically contain more nutrients and active enzymes than refined flours like white bread flour or all-purpose flour. This means starters fed with whole grains often ferment faster and require more frequent feeding or a higher feeding ratio to prevent them from becoming overly acidic or running out of food too quickly.
For instance, a 1:1:1 feeding ratio might be perfectly adequate for a white flour starter at room temperature for 24 hours. However, a rye starter at the same temperature might peak and start to fall within 8-12 hours on a 1:1:1 ratio, indicating it might need a 1:2:2 or even 1:3:3 ratio to last 24 hours, or simply need to be fed twice a day. Understanding these differences allows you to tailor your feeding strategy, which is a crucial part of advanced sourdough starter maintenance tips.
Adjusting Feeding Ratios Based on Environmental Factors
Environmental factors, primarily temperature, are major determinants of how quickly your starter ferments and thus influences the optimal feeding ratio. At warmer temperatures (75-80°F / 24-27°C), microbial activity is high, and the starter will consume its food rapidly. This means you might need a higher feeding ratio (e.g., 1:2:2 or 1:3:3) to ensure the starter has enough food for the desired time between feedings, such as 24 hours. Alternatively, you might stick to a 1:1:1 ratio but feed it more frequently, perhaps every 12 hours.
In cooler environments (below 70°F / 21°C), fermentation slows down considerably. A 1:1:1 ratio might last for 24 hours or even longer. If you find your starter is still rising and active after 24 hours in a cool environment, you might stick to the 1:1:1 ratio. However, if it's peaking very slowly, maintaining a slightly higher temperature or using a slightly larger feeding ratio can help. Observing your starter's behavior at your specific kitchen temperature is key to dialing in the right ratio and frequency, vital for personalized sourdough starter maintenance tips.
How to Calculate the Optimal Feeding Ratio for Your Needs
Calculating the optimal feeding ratio involves balancing the amount of starter you keep with the amount of fresh flour and water you add, based on how quickly you want it to ferment and how long you need it to last between feedings. The ratio is expressed as Starter : Flour : Water by weight. A 1:1:1 ratio means for every 1 part starter, you add 1 part flour and 1 part water. If you keep 25g of starter, you add 25g flour and 25g water.
To make your starter last longer between feedings (e.g., for 24 hours in a warm environment), you need to provide relatively more food. This means increasing the ratio of fresh flour and water to the starter. A 1:2:2 ratio (25g starter + 50g flour + 50g water) provides twice as much food per amount of starter compared to 1:1:1.
If you need it to last even longer or are dealing with a very warm environment or active flour, you might go up to 1:3:3 or even 1:4:4. The "optimal" ratio is the one that results in your starter peaking and being ready to use at the time you plan to feed it again or bake with it. Experimentation based on your specific conditions is key to mastering these sourdough starter maintenance tips.
Sourdough Starter Discard: Creative Ways to Reduce Waste

Delicious Recipes Using Sourdough Starter Discard
A significant byproduct of regular sourdough starter maintenance tips is the discard – the portion you remove before feeding to keep the volume manageable. While you could simply throw it away, discard is a valuable ingredient that can be used in numerous delicious recipes. Unlike active starter used for leavening bread, discard is typically used when it's past its peak and doesn't have the leavening power to make things rise significantly on its own (unless combined with baking soda or powder).
Popular ways to use discard include making quick breads like muffins, scones, or pancakes, where the tang adds a lovely depth of flavor. Crackers and flatbreads are also excellent uses, yielding wonderfully crisp results. Even sweets like cookies, brownies, or cakes can benefit from the slight tang and unique texture discard provides. Using discard in these recipes is a fantastic way to minimize waste and explore new flavors and textures in your baking repertoire. There are countless recipes available online specifically for sourdough discard.
Composting Sourdough Starter Discard
If baking with discard isn't your preference or you simply have too much, composting is an environmentally friendly way to deal with it. Sourdough starter discard is essentially just fermented flour and water, making it a perfectly suitable addition to your compost bin. The microbes in the starter can even help break down other organic materials in the compost.
Simply add the discard directly to your compost pile. If you have a large amount, it's a good idea to mix it in with other materials (like brown leaves or kitchen scraps) rather than adding it in one thick layer, which could potentially become a bit slimy. Ensure your compost pile has a good balance of "greens" (nitrogen-rich, like food scraps) and "browns" (carbon-rich, like leaves or cardboard) and is turned regularly for aeration. Composting is a simple and effective part of responsible sourdough starter maintenance tips.
Reviving a Neglected Sourdough Starter: A Rescue Mission
Step-by-Step Guide to Rehydrating and Reactivating a Dormant Starter
If you've left your refrigerated starter for longer than a week or found a dried-out or neglected starter, don't despair! Often, they can be revived. For a refrigerated starter that's been neglected for several weeks or months, take it out of the fridge. There might be a lot of hooch on top; you can pour this off or stir it in (stirring it in can add more tang). Take a small amount of the starter (say, 20-30g) from below the surface if possible, as this part might be more viable.
Place this small amount in a clean jar. Add an equal weight of lukewarm non-chlorinated water and whisk to combine. Then add an equal weight of fresh flour (e.g., 20-30g water and 20-30g flour) and mix thoroughly. The consistency should be like a thick batter.
Cover loosely and place in a warm spot (75-80°F / 24-27°C). Feed this small amount every 12-24 hours (depending on temperature and activity) with fresh flour and water, discarding down to the small amount you started with before each feed. It might take several days (3-7) of consistent feeding before you see robust activity again. Patience and consistent feeding are the most important sourdough starter maintenance tips for revival.
Signs of Successful Sourdough Starter Revival
As you consistently feed your neglected starter, look for the familiar signs of life returning. The first indication is often the appearance of bubbles, initially small and few, but gradually increasing in number and size. You should also start to notice a gradual increase in volume after feeding. A successfully revived starter will double or triple in size within 4-8 hours after feeding when kept at a warm room temperature.
The smell will also improve. Initially, a neglected starter might smell very strong, alcoholic, or even unpleasant. As the beneficial bacteria and yeasts become dominant again with regular feeding, the smell will transition to a pleasant, yeasty, and mildly tangy aroma. Once your starter is consistently doubling in size within a predictable timeframe after feeding and passes the float test, it's considered successfully revived and ready for baking. Celebrating these signs is a rewarding part of mastering sourdough starter maintenance tips and rescue.
Baking with Your Sourdough Starter: From Levain to Loaf
Understanding the Levain Build Process
For many sourdough bread recipes, you don't use your entire "mother" starter directly in the dough. Instead, you build a "levain" (sometimes called a preferment or leaven) using a small amount of your active starter. A levain is essentially a smaller, specifically prepared culture that is at its peak of activity when you're ready to mix your dough. This allows you to keep your main starter at a manageable size and consistency while creating the precise amount of highly active leavening needed for a specific recipe.
To build a levain, you typically mix a small amount of your active starter with fresh flour and water according to a ratio specified in your recipe (common ratios are 1:1:1, 1:2:2, or 1:5:5 starter:flour:water). For example, a recipe might call for 100g of levain built at a 1:2:2 ratio. You would mix 20g of your active starter with 40g of flour and 40g of water.
The levain is then left at room temperature until it matures and peaks, which typically takes 4-12 hours depending on the ratio and temperature. Using a peak-activity levain is crucial for successful oven spring in your bread, highlighting the importance of timing in sourdough starter maintenance tips.
Incorporating Your Sourdough Starter into Bread Recipes
Once your levain (or starter, if the recipe calls for it directly) is at its peak of activity, it's ready to be incorporated into your bread dough. Most sourdough bread recipes follow a similar pattern: mixing the levain with water, then adding flour and salt. The active starter or levain provides the necessary microorganisms to ferment the dough, creating carbon dioxide for rise and organic acids for flavor and structure.
The amount of starter or levain used varies by recipe, but it's often between 10% and 30% of the total flour weight in the recipe. For example, a recipe with 500g of flour might use 100g of levain (20% of flour weight). The timing of when you add the starter can also vary; some recipes use an autolyse step (mixing flour and water first) before adding the starter and salt. Ensuring your starter or levain is healthy, active, and used at its peak is the result of good sourdough starter maintenance tips applied to the baking process.
Tips for Achieving the Perfect Sourdough Crust and Crumb
Achieving the iconic chewy crust and open, airy crumb of sourdough bread is the ultimate goal for many bakers. Beyond a strong, active starter, several factors contribute. Proper dough development through mixing, stretching and folding, or kneading builds gluten structure, which is essential for trapping the gases produced by fermentation. Long, slow fermentation periods (bulk fermentation and proofing), often involving time in the refrigerator, develop flavor and make the dough easier to handle.
Baking technique is also critical. High heat and steam are necessary to achieve a good oven spring and a crisp crust. Baking in a Dutch oven or using a baking stone with steam (like a tray of hot water or ice cubes) creates the steamy environment needed for the crust to expand before it sets. Scoring the dough before baking allows for controlled expansion. Understanding how your starter's activity level, influenced by your sourdough starter maintenance tips, interacts with dough development and baking methods is key to perfecting your loaf.
Mastering Sourdough Starter: Common Mistakes to Avoid
Overfeeding and Underfeeding: Finding the Right Balance
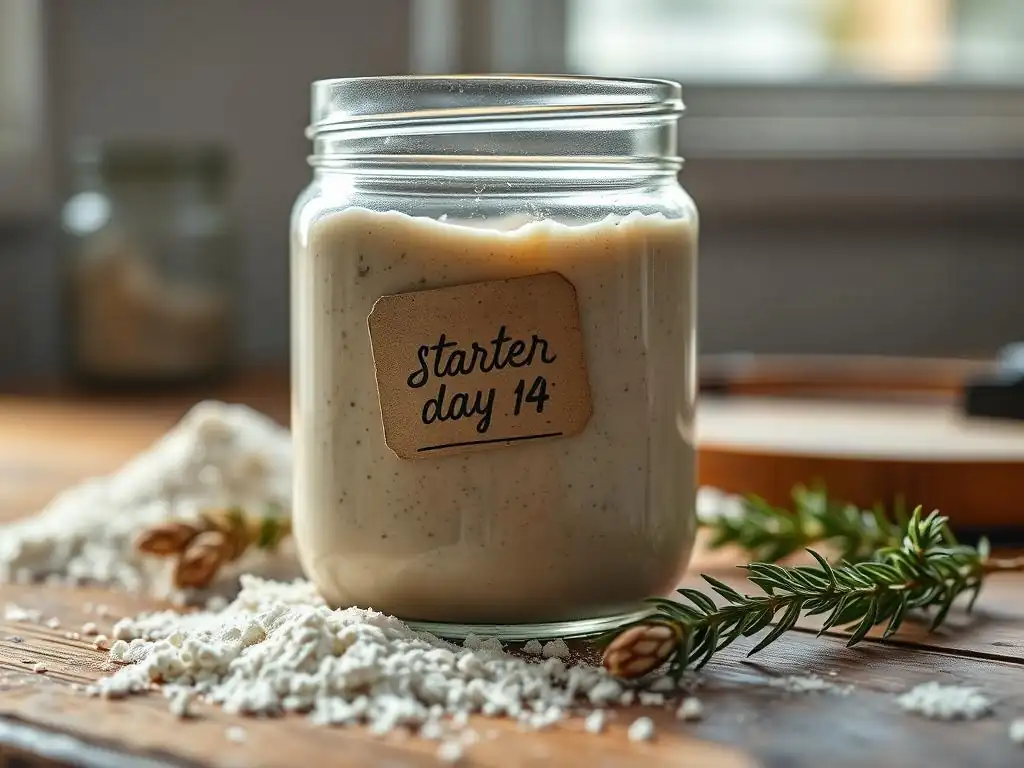
One of the most common pitfalls in sourdough starter maintenance tips is getting the feeding balance wrong. Overfeeding, especially in the initial stages, can dilute the microbial population before it has a chance to establish itself, leading to a sluggish starter. It also wastes flour. Underfeeding, on the other hand, starves the microbes, leading to a very acidic starter with a strong, unpleasant smell (hooch) and potentially a loss of vitality.
Finding the right balance means observing your starter and adjusting your feeding ratio and frequency based on its behavior and your environment. At room temperature (70-75°F), a 1:1:1 ratio fed every 24 hours is a good starting point. If your starter is peaking much faster than 24 hours, increase the ratio (e.g., 1:2:2). If it's not peaking within 24 hours, your environment might be too cool, or you might need to increase the frequency to every 12 hours for a while. Consistency and observation are your best tools here.
Using Contaminated Water or Flour
The quality of your ingredients directly impacts the health of your sourdough starter. Using chlorinated tap water is a frequent cause of sluggishness or failure, as chlorine is designed to kill microorganisms, including the beneficial ones in your starter. Always use filtered or non-chlorinated water. If using tap water, let it sit out for 24 hours to allow the chlorine to evaporate.
Similarly, using flour treated with bleaching agents can also be detrimental to your starter. Bleached flour may contain chemicals that inhibit microbial growth. Opt for unbleached flours, preferably organic if possible, as these are less likely to contain residual chemicals. Ensuring your water and flour are clean and free from inhibiting substances is a fundamental aspect of successful sourdough starter maintenance tips.
Neglecting Temperature Control
Temperature is arguably the single biggest factor influencing the speed and health of your sourdough starter's fermentation. Neglecting to consider or control the temperature can lead to wildly inconsistent results. A starter kept in a cold kitchen will be slow and potentially overly acidic, while one kept in a very hot spot might peak and crash too quickly, becoming hungry and weak between feedings.
Finding a consistent warm spot (75-80°F / 24-27°C) is ideal for maintaining an active starter ready for baking. If you cannot maintain this temperature consistently, understand that your starter's behavior will vary, and you'll need to adjust your feeding schedule accordingly. For example, if your kitchen is consistently cooler (65-70°F / 18-21°C), your starter might take 12-18 hours to peak on a 1:1:1 ratio, meaning daily feeding is still appropriate but you might need to wait closer to the 24-hour mark. Recognizing the impact of temperature is a core part of effective sourdough starter maintenance tips.
Troubleshooting Your Sourdough Starter: A Comprehensive Guide
My Starter Isn't Rising: What to Do?
If your sourdough starter isn't rising after feeding, several factors could be at play, even with diligent sourdough starter maintenance tips. First, check the temperature of its environment. Is it too cold? Move it to a warmer spot, ideally 75-80°F (24-27°C). Second, consider the age of your starter. If it's less than two weeks old, this variability is normal; just keep feeding it consistently. For a mature starter, ensure you are feeding it regularly (every 24 hours at room temp, or weekly if refrigerated and revived).
Also, check your water source – are you using chlorinated water? Switch to filtered or rested tap water. Ensure you are using unbleached flour. If all these factors seem correct, try adjusting your feeding ratio. Increase the amount of fresh flour and water relative to the starter (e.g., from 1:1:1 to 1:2:2 or even 1:3:3) for a few feedings. Adding a small amount of rye or whole wheat flour to your mix can also provide a boost. Be patient; sometimes, a starter just needs a few days of consistent, optimal conditions to regain its vigor.
My Starter Smells Bad: Is It Safe to Use?
The smell of your sourdough starter can tell you a lot about its health. A healthy, active starter should smell pleasant – yeasty, slightly sweet, and mildly tangy. If your starter smells strongly of alcohol or acetone (like nail polish remover), it's usually a sign that the yeast have consumed all the available sugars and are producing excess alcohol. This indicates the starter is very hungry. While the smell isn't necessarily harmful, it means the starter's balance is off, and it might not perform optimally for baking.
To address this, increase the frequency of feeding or the feeding ratio. Try feeding every 12 hours instead of 24, or increase your ratio to 1:2:2 or 1:3:3. This provides more food for the microbes, allowing them to consume the sugars and reduce alcohol production. If the smell is truly foul or rancid, or if you see any signs of mold (fuzzy patches), it's best to discard the starter and start over, as these could indicate harmful bacteria. Regular feeding as part of your sourdough starter maintenance tips helps prevent these unpleasant odors.
My Starter is Too Sour: How Can I Tone It Down?
A sourdough starter's tanginess comes from the organic acids produced by the lactic acid bacteria. If your starter is becoming excessively sour, it indicates that the conditions are favoring acid production, often due to long periods between feedings or cooler temperatures which slow down yeast activity more than bacterial activity. While some tang is desirable, too much can be unpleasant.
To reduce the sourness, adjust your feeding strategy to favor yeast activity and provide more frequent fresh food. Increase your feeding ratio (e.g., 1:2:2 or 1:3:3), which dilutes the existing acids and provides ample fresh sugar for the yeasts. Feed more frequently, ideally when the starter has peaked or just begun to fall, rather than waiting until it's very hungry and acidic. Increasing the temperature slightly (aiming for the upper end of the 75-80°F range) can also encourage faster yeast activity relative to bacteria. Consistent, generous feeding is a key sourdough starter maintenance tip for controlling sourness.
Sourdough Starter: Maintaining Peak Performance for Baking Excellence
Consistent sourdough starter maintenance tips are the bedrock of successful sourdough baking. By understanding the needs of your starter – consistent feeding with quality ingredients, optimal temperature control, and regular observation – you can ensure your culture remains vibrant, active, and ready to leaven your loaves. Whether you keep it at room temperature for daily use or in the fridge for less frequent baking, establishing a routine is crucial.
Troubleshooting issues like sluggishness, off smells, or excessive sourness becomes easier once you understand the underlying causes and how to adjust your feeding and storage methods. Mastering these techniques not only ensures a reliable leavening agent but also deepens your connection to the ancient craft of baking. With dedication to these sourdough starter maintenance tips, you'll be well on your way from a beginner baker to a pro, creating delicious, perfectly risen sourdough bread every time.
Frequently Asked Questions
What is a sourdough starter and why is it important?
A sourdough starter is a fermented culture of flour and water that contains wild yeasts and bacteria. It's crucial for making sourdough bread because it provides the leavening power and characteristic tangy flavor.
How often should I feed my sourdough starter?
The frequency of feeding depends on whether the starter is stored at room temperature or in the refrigerator. A room-temperature starter needs feeding once or twice a day, while a refrigerated starter only needs feeding once a week.
What is the ideal consistency of a sourdough starter?
The ideal consistency is similar to a thick pancake batter or a smooth yogurt. It should be pourable but not too runny. This helps ensure proper fermentation and gas production.
How do I know when my sourdough starter is ready to use?
A ready-to-use starter will have doubled in size after feeding and will be bubbly and active. It should also have a slightly sour and yeasty aroma, indicating it's ready to leaven bread.
What are some common problems with sourdough starters and how can I fix them?
Common problems include mold growth, inactivity, or a foul odor. Mold requires discarding the starter. Inactivity can be fixed with regular feedings. A foul odor may require adjustments to the feeding ratio or flour type.
Final Reflection: The Enduring Magic of the Sourdough Starter
The humble sourdough starter, a living testament to patience and precision, remains a powerful symbol of connection to our culinary heritage in a world increasingly dominated by instant gratification. Its maintenance, though seemingly simple, unlocks a deeper understanding of fermentation and the symbiotic relationship between humans and microorganisms. This journey from beginner to pro, as detailed in this guide, is not just about mastering sourdough starter maintenance; it's about embracing a mindful process that yields incredible rewards.
The impact of sourdough baking extends far beyond the delicious loaves it produces. It fosters a sense of community, connecting bakers across generations through shared experiences and the exchange of knowledge. The rhythmic feeding, the careful observation of its rise and fall – these become meditative practices, offering a respite from the frenetic pace of modern life. Bread is the staff of life,
they say, and in the case of sourdough, it's a staff imbued with the magic of time, patience, and a living culture.
Now, consider your own starter. What lessons have you learned from its journey? What patience and dedication have you cultivated? Don't just stop at mastering the maintenance; experiment! Try different flours, observe the variations in your starter's activity, and most importantly, enjoy the process of creating something truly unique and delicious. The world of sourdough awaits your exploration – embrace the challenge, and the rewards will be immeasurable.
Unleash Your Inner Baker: Start Your Sourdough Journey Today!
Thanks for joining us on this sourdough adventure! We hope you gained valuable insights and feel empowered to tackle this rewarding baking process. Ready to take the next step?
- Nourish your starter: Follow the guide's instructions carefully, and don't forget to name your starter! It's the first step in building a beautiful baking relationship.
- Share your sourdough success (or struggles!): We'd love to hear your experiences. Join our BakeWithEase community and connect with fellow bakers.
- Bake your first loaf: The most rewarding part is ahead! Try the recipe we suggested or experiment with your own variations. Let us know how it turned out!
What will your first sourdough creation be? Let's start a conversation in the comments below!