
Shaping Freeform Basic White Bread: Easy Steps

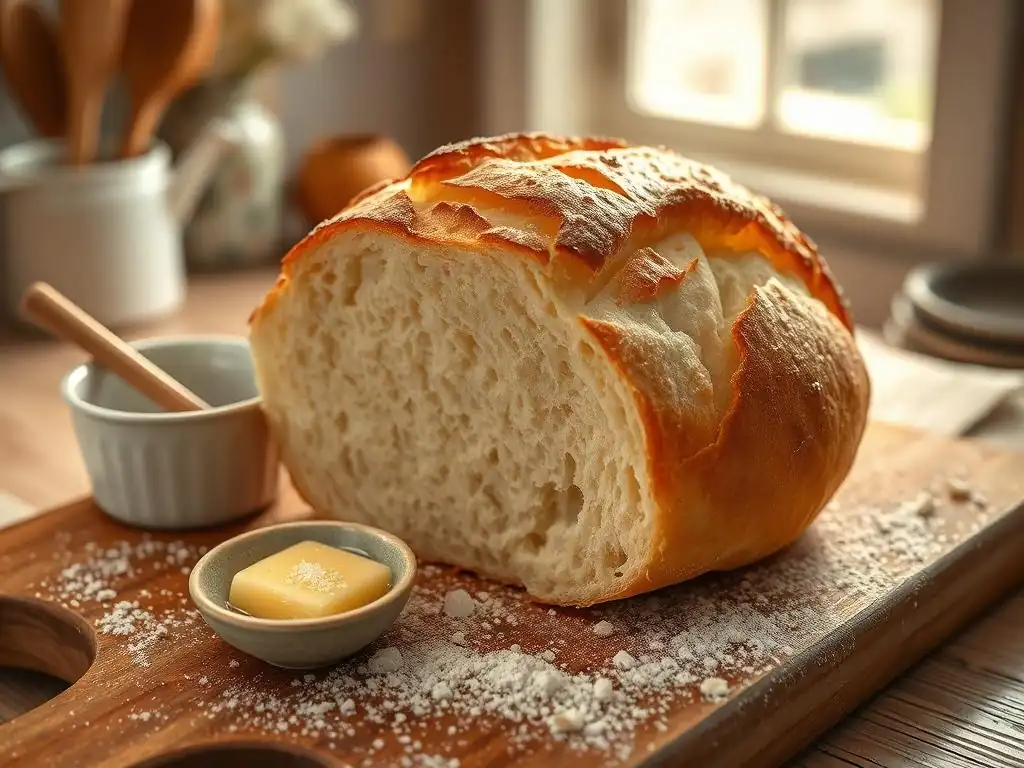
Welcome to BakeWithEase, your trusted companion in the delightful world of baking! Ever dreamed of creating a rustic loaf with a perfect crust and airy crumb? Our freeform white bread recipe unlocks the secrets to effortless, artisan-style baking. Discover how simple shaping techniques can transform basic ingredients into a beautiful and delicious bread, no special equipment required. Intrigued? Let's get started and bake your masterpiece!
- Introduction to Sourdough Boule Baking
- Essential Ingredients for Your Sourdough Boule
-
Step-by-Step Guide to Shaping a Sourdough Boule
- Step 1: Mixing the Dough: Autolyse and Initial Mix
- Step 2: Bulk Fermentation: Developing Flavor and Strength
- Step 3: Folding the Dough: Strengthening the Gluten Network
- Step 4: Shaping the Boule: Creating Tension and Structure
- Step 5: Proofing the Boule: Cold Retardation for Flavor
- Step 6: Scoring the Boule: Preparing for Baking
- Step 7: Baking Your Sourdough Boule to Perfection
- Tips for Perfecting Your Sourdough Boule
- Storing and Enjoying Your Homemade Sourdough Boule
- Conclusion: Embrace the Art of Sourdough Baking
- Frequently Asked Questions
- Final Reflection: The Simple Joy of Freeform Bread
- Unleash Your Inner Baker: Craft the Perfect Loaf!
Introduction to Sourdough Boule Baking
Baking your own sourdough boule is a deeply rewarding journey, transforming simple ingredients through natural fermentation into a loaf with complex flavor and a beautiful, rustic crust. Unlike commercial yeast baking, sourdough relies on a living culture, a starter, which brings a unique character to the bread. This guide will walk you through the essential steps, from understanding your starter to achieving that perfect bake.
Crafting a sourdough boule is more than just following a recipe; it's about understanding the process and the living dough. The slightly tangy aroma and chewy interior of a well-made sourdough boule are unparalleled. It requires patience and attention, but the result is a loaf that is both nourishing and incredibly satisfying to create from scratch.
Why Choose Sourdough? Flavor and Natural Leavening
Sourdough offers a depth of flavor that commercial yeast breads simply cannot replicate. The long fermentation process, driven by wild yeasts and lactic acid bacteria present in the starter, breaks down the flour over time, creating organic acids like lactic and acetic acid. These acids contribute the signature tanginess associated with sourdough, ranging from mild and creamy to distinctly sour, depending on factors like fermentation time, temperature, and starter hydration.
Beyond flavor, sourdough acts as a natural leavening agent. The wild yeasts consume sugars in the flour, producing carbon dioxide gas, which causes the dough to rise. Simultaneously, the lactic acid bacteria contribute to the dough's structure and extensibility, making it easier to work with and contributing to a more open crumb structure in the final loaf. This natural process also helps to predigest some of the starches and proteins in the flour, potentially making sourdough easier to digest for some people compared to conventional bread.
Understanding Sourdough Starter for Boule Baking
Your sourdough starter is the heart and soul of your boule. It's a living ecosystem of flour and water, hosting a community of wild yeasts and lactic acid bacteria. For successful sourdough baking, especially for a boule, your starter needs to be active and healthy. An active starter will typically double or triple in volume within 4 to 8 hours after feeding, show numerous bubbles throughout, and float when a small piece is dropped into water.
Maintaining a consistent feeding schedule is crucial for a robust starter. Most bakers feed their starter daily or every other day when keeping it at room temperature, using equal parts (by weight) of starter, water, and flour.
The specific hydration level of your starter (the ratio of water to flour) can influence the flavor and activity; a 100% hydration starter (equal weight of water and flour) is common and versatile for many sourdough recipes, including a rustic boule. Understanding its behavior – how it rises and falls after feeding – is key to knowing when it's ready to leaven your dough effectively.
Essential Ingredients for Your Sourdough Boule
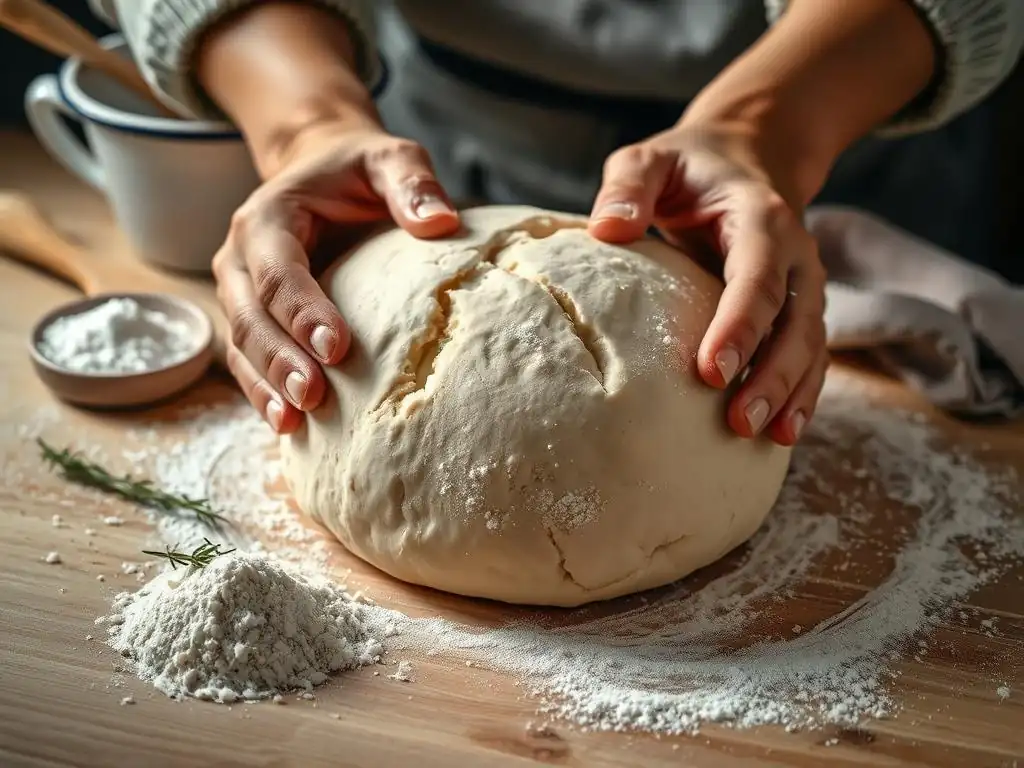
Crafting a beautiful sourdough boule requires just a few simple ingredients. The quality and type of each ingredient play a significant role in the final outcome, influencing everything from the dough's handling characteristics to the bread's texture and flavor. Let's look at the foundational elements.
Using high-quality ingredients is perhaps the most impactful step you can take to improve your sourdough baking. Fresh flour, properly filtered water, and good quality salt make a noticeable difference in the dough's performance and the finished bread's taste. Think of these ingredients as the building blocks; starting with strong ones sets you up for success in achieving a delicious and visually appealing boule.
High-Protein Bread Flour: Providing Structure
High-protein bread flour is essential for developing a strong gluten network in sourdough dough. Gluten, formed when the proteins glutenin and gliadin in the flour combine with water and are worked (through mixing and folding), provides the structure that traps the carbon dioxide gas produced by the starter. A flour with a protein content typically between 12% and 14% is ideal for sourdough, as it allows for the development of enough strength to support the long fermentation and high hydration often used in boule recipes.
The robust gluten structure developed with high-protein flour is what gives sourdough its characteristic chewiness and helps the loaf hold its shape during baking, preventing it from spreading out too much (often called "pancaking"). While all-purpose flour can be used, it generally contains less protein (around 10-11%) and may result in a flatter loaf with a less open crumb. Choosing a good quality bread flour is a foundational step towards achieving that coveted airy interior and sturdy crust.
Sourdough Starter: The Natural Leavening Agent
As previously discussed, your active sourdough starter is the sole source of leavening in a sourdough boule. It's a complex mixture of wild yeasts and bacteria that work together to make the dough rise and develop flavor. Using a starter that is at its peak activity – typically several hours after feeding when it has significantly increased in volume and is full of bubbles – is critical for achieving good oven spring, which is the final burst of rising that happens in the hot oven.
The health and activity of your starter are directly influenced by how you feed and maintain it. Regular feedings with fresh flour and water, keeping it at a consistent temperature, and discarding a portion before feeding help to maintain a balanced microbial population. A healthy, active starter will ensure your dough ferments properly, develops the desired tangy flavor, and rises effectively during both the bulk fermentation and proofing stages, leading to a beautiful and well-risen boule.
Water: Achieving Optimal Dough Hydration
Water plays multiple vital roles in sourdough baking: it hydrates the flour, activating gluten development; it dissolves salt and sugars; and it provides the medium for the microbial activity in the starter and the dough. The ratio of water to flour, known as hydration, significantly impacts the dough's consistency and the final bread's crumb structure. Sourdough boules often use relatively high hydration levels, ranging from 70% to over 80% (meaning the water weight is 70-80%+ of the flour weight). Higher hydration doughs tend to produce a more open, airy crumb, but can be stickier and more challenging to handle.
Using clean, room-temperature water is generally recommended. Chlorinated water can sometimes inhibit microbial activity in the starter and dough, so letting tap water sit out for a while or using filtered water can be beneficial. The temperature of the water also influences the dough temperature, which in turn affects fermentation speed. Using slightly warmer water can help kickstart fermentation in a cooler environment, while cooler water can slow it down, useful in warmer conditions or for longer fermentation times.
Salt: Enhancing Flavor and Controlling Fermentation
Salt is more than just a flavor enhancer in bread; it plays a crucial role in controlling fermentation and strengthening the gluten structure. By slowing down the activity of both yeast and bacteria, salt helps to regulate the rate of rising, preventing the dough from over-fermenting too quickly. This slower, more controlled fermentation allows for better flavor development. Typical salt levels in sourdough range from 1.8% to 2.2% of the total flour weight.
In addition to managing fermentation, salt tightens the gluten network, making the dough stronger and more elastic. This results in dough that is easier to handle and shape, and a loaf that holds its structure better during baking. Without salt, the dough would be slack and difficult to work with, and the resulting bread would be bland and potentially gummy. Adding salt at the correct stage (usually after the autolyse period) and ensuring it is evenly distributed are important steps for a successful bake.
Step-by-Step Guide to Shaping a Sourdough Boule
The process of transforming your fermented dough into a beautifully shaped boule ready for baking involves several key steps, each contributing to the final structure, texture, and appearance of your bread. From the initial mixing to the final scoring, attention to detail at each stage is crucial for success. While this guide focuses on a sourdough boule, understanding these fundamental steps is beneficial for any freeform white bread recipe you might attempt.
Mastering these steps takes practice, but the principles remain consistent. The goal is to develop strength, build tension on the surface, and prepare the dough for its final rise and the intense heat of the oven. Patience and observation are your best tools throughout this process.
Step 1: Mixing the Dough: Autolyse and Initial Mix
The process often begins with an autolyse, where flour and water are mixed together and allowed to rest for 20 minutes to an hour or more. This resting period allows the flour to fully hydrate and enzymatic activity to begin breaking down starches and proteins, which helps with gluten development without active kneading. It makes the dough more extensible and easier to work with later.
After the autolyse, the starter and salt are added, and the dough is mixed until all ingredients are evenly incorporated. This initial mix can be done by hand or with a stand mixer. The goal is to bring everything together into a shaggy mass, ensuring the starter and salt are distributed throughout the dough. Avoid over-mixing at this stage; the subsequent folding steps will develop the gluten further.
Achieving the Right Dough Consistency
After the initial mix, your dough should feel cohesive but likely still quite shaggy and possibly sticky, especially if you are working with high hydration. It shouldn't have dry pockets of flour, and the salt and starter should be fully integrated. The consistency will depend on your hydration level – higher hydration doughs will be wetter and more difficult to handle than lower hydration ones.
As you mix, the dough will start to come together into a rough ball. It might stick to the bowl or your hands, which is normal for sourdough. The important thing is that all the ingredients are combined. The dough will gain strength and become less sticky during the subsequent bulk fermentation and folding stages.
Step 2: Bulk Fermentation: Developing Flavor and Strength
Bulk fermentation, or the first rise, is a critical period where the dough develops flavor, volume, and strength. This stage begins after the initial mixing and ends when the dough is divided and pre-shaped. During bulk fermentation, the wild yeasts in the starter produce carbon dioxide, causing the dough to rise, while the lactic acid bacteria produce organic acids, contributing to the characteristic sourdough tang.
The duration of bulk fermentation is highly dependent on temperature and the activity of your starter. It can range from 3-4 hours in a warm environment (around 78-80°F or 25-27°C) to 8-12 hours or even longer in a cooler environment. The dough is typically folded several times during the first few hours of bulk fermentation to build strength. You'll know bulk fermentation is complete when the dough has increased significantly in volume (usually 50-100%), looks visibly gassier, and has a domed top with some bubbles on the surface.
Optimizing Temperature and Time for Bulk Fermentation
Temperature is the single biggest factor influencing the speed of bulk fermentation. Warmer temperatures accelerate microbial activity, leading to faster rising and potentially more lactic acid production (creamier tang). Cooler temperatures slow everything down, resulting in longer fermentation times and often more acetic acid production (sharper tang). Aiming for a consistent dough temperature throughout this stage is beneficial.
For many home bakers, maintaining a dough temperature between 75-80°F (24-27°C) is ideal for a bulk fermentation lasting around 4-6 hours with regular folding. If your kitchen is cooler, you might need to find a warmer spot (like a proofing box, oven with the light on, or near a warm appliance) or simply allow significantly more time.
Conversely, in a very warm kitchen, you might need to use cooler water or reduce the fermentation time to prevent over-fermentation. Observing the dough's activity is more important than strictly adhering to a time – it should look alive and significantly increased in volume.
Step 3: Folding the Dough: Strengthening the Gluten Network
Folding the dough during bulk fermentation is a technique used to build strength and develop the gluten structure without intensive kneading. It helps to align the gluten strands, distribute the yeast and bacteria evenly, regulate dough temperature, and provide structure to the dough mass. Typically, 3-5 sets of folds are performed during the first 2-3 hours of bulk fermentation.
Each set of folds involves gently stretching a portion of the dough up and folding it over itself, rotating the bowl, and repeating until all sides have been folded. This process incorporates air and creates layers, improving the dough's elasticity and ability to hold gas. As you perform the folds over time, you'll notice the dough becoming smoother, stronger, and more cohesive.
Techniques for Gentle and Effective Dough Folding
Two common folding techniques are the "stretch and fold" and the "coil fold." For stretch and folds, with wet hands, grab the dough from one side, stretch it gently upwards without tearing, and fold it back over the center of the dough. Rotate the bowl a quarter turn and repeat this process 3-4 times to complete one set of folds.
Coil folds are particularly effective for high-hydration doughs. With wet hands, slide your hands under the center of the dough in the bowl or container. Gently lift the dough, allowing the ends to stretch downwards. Fold the dough under itself like a coil. Rotate the container and repeat this lifting and coiling motion 2-3 times. Both techniques should be performed gently to avoid degassing the dough too much while still building tension.
Step 4: Shaping the Boule: Creating Tension and Structure
Shaping is the process of forming your dough into its final shape before proofing. For a boule (a round loaf), the goal is to create a tight skin of surface tension on the dough while gently degassing it and creating internal structure. Proper shaping is crucial for the loaf to hold its form during proofing and baking and contributes significantly to good oven spring and a desirable crumb structure.
Shaping sourdough can feel intimidating at first, especially with stickier, high-hydration doughs. Working on a lightly floured surface and using a bench scraper can be very helpful. The key is to work relatively quickly and confidently, using gentle but firm movements to create tension without tearing the dough's surface.
Techniques for Creating a Round Boule Shape
There are several methods for shaping a boule, but they all aim to gather the dough into a taut round. One common technique involves gently pre-shaping the dough into a loose round after bulk fermentation and a short rest (bench rest of 20-30 minutes).
Then, for the final shape, gently flatten the dough slightly into a disc, fold the top third down, fold the bottom third up over that, and then fold the sides in. Finally, flip the dough over and use a bench scraper or your hands to gently pull and tuck the dough under itself, rotating it slightly as you go, to create surface tension and form a smooth ball.
Another effective method involves placing the dough on a lightly floured surface and using a bench scraper in one hand and your other hand (or two hands) to cup the dough, rotating it while gently pulling it towards you or pushing it against the surface. This action builds tension on the surface, creating a smooth skin. The goal is a round, taut ball that feels like it has some internal structure and can hold its shape.
Step 5: Proofing the Boule: Cold Retardation for Flavor
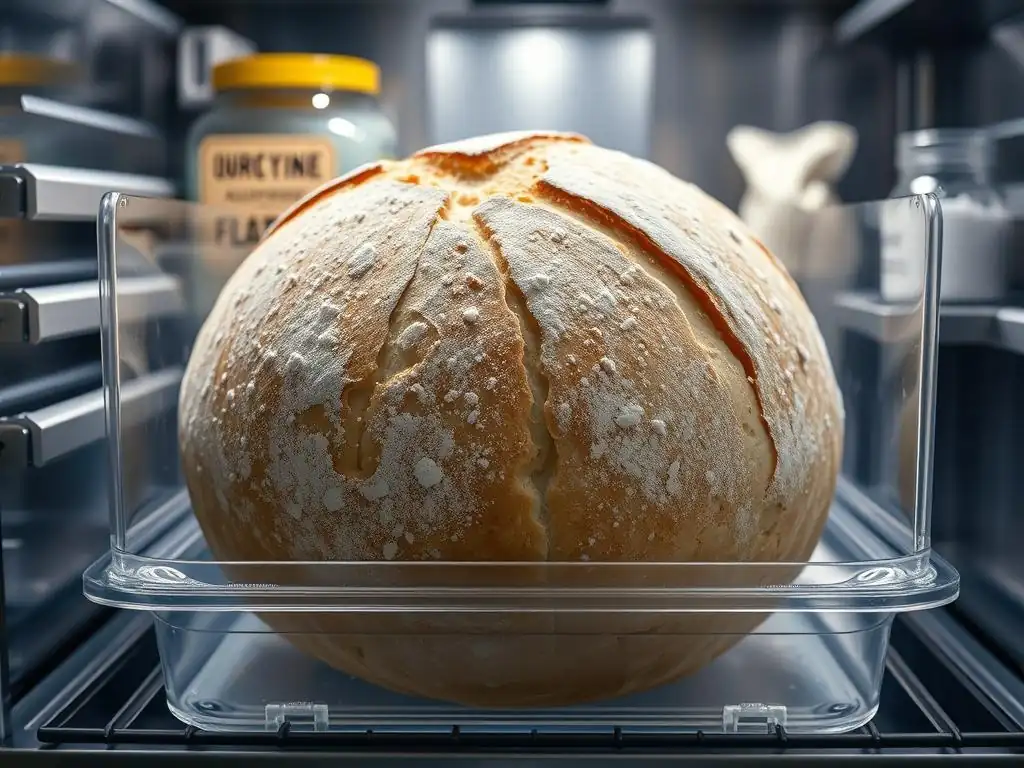
After shaping, the dough undergoes its final rise, known as proofing or secondary fermentation. For sourdough boules, cold retardation (proofing the dough in the refrigerator) is a popular technique. This slow, cold proof typically lasts anywhere from 12 to 48 hours. The cold temperature significantly slows down yeast activity, preventing the dough from over-proofing quickly, while allowing the lactic acid bacteria to continue their work, deepening the flavor of the bread.
Cold proofing also makes the dough easier to handle and score just before baking, as it firms up in the cold. The long, slow fermentation contributes to a more complex flavor profile and can improve the dough's structure. While room-temperature proofing is also an option (usually 1-4 hours depending on temperature), cold retardation is favored by many sourdough bakers for its flavor benefits and scheduling convenience.
Ensuring Proper Proofing for Optimal Oven Spring
Knowing when your dough is perfectly proofed is crucial for achieving good oven spring. Over-proofed dough will have exhausted much of its leavening power and may collapse in the oven or spread out flat. Under-proofed dough hasn't developed enough gas and strength yet and will result in a dense loaf with poor oven spring. The cold proofing method makes judging doneness simpler, as the process is much slower.
A common test for proofing is the "poke test." Gently press a floured finger into the side of the dough. If the indentation springs back immediately, it's likely under-proofed. If it stays indented and slowly springs back partway, it's likely perfectly proofed. If the indentation stays completely and doesn't spring back at all, it's likely over-proofed. For cold-proofed dough, this test is usually done after it comes out of the fridge just before baking.
Step 6: Scoring the Boule: Preparing for Baking
Scoring involves making cuts on the surface of the dough just before it goes into the oven. This isn't just for decoration; it serves a vital purpose in controlling how the loaf expands during baking. As the dough hits the hot oven, the rapid production of steam and gas causes it to expand (oven spring). Scoring provides weak points in the dough's surface, allowing it to tear in a predictable pattern rather than bursting randomly.
Proper scoring directs the oven spring, helping the loaf achieve maximum volume and a beautiful shape. It also influences the crumb structure by allowing the internal gases to escape in a controlled manner. Use a very sharp blade, like a razor blade (often called a "lame"), held at an angle for best results.
Why Scoring Matters: Controlling Expansion and Creating Visual Appeal
The primary functional reason for scoring is to control the expansion during oven spring. Without scoring, the crust would set quickly in the heat, and the internal pressure from expanding gases would cause the loaf to burst open haphazardly, usually along the sides. Scoring directs this expansion upwards and outwards through the cuts you make.
Beyond the functional aspect, scoring is also an art form. The patterns you create add visual appeal to the finished loaf, making each boule unique. From simple crosses to intricate designs, scoring allows bakers to put their personal touch on their bread, transforming a simple loaf into a work of edible art.
Scoring Patterns for Sourdough Boule
Simple scoring patterns are often the most effective for a classic boule shape. A single straight cut across the top, or a cross pattern (two perpendicular cuts), are common and allow for excellent expansion. Holding the blade at about a 45-degree angle when making these cuts helps to create a "lip" or "ear" on the crust as it expands.
More complex patterns, such as multiple parallel cuts, a square or diamond grid, or decorative leaf or wheat stalk designs, are also popular. For these patterns, some cuts might be purely decorative and shallower, while one or two main cuts are deeper to guide the primary expansion. Practice on less important loaves to get a feel for how different cuts behave in the oven.
Step 7: Baking Your Sourdough Boule to Perfection
Baking is the grand finale, where the dough transforms into a fully cooked loaf with a beautiful crust and open crumb. Sourdough boules are typically baked in a very hot oven, often with steam, especially during the initial phase. High heat provides the necessary energy for maximum oven spring, while steam keeps the crust pliable, allowing the loaf to expand fully before the crust sets.
A Dutch oven is a popular tool for baking sourdough boules at home because it effectively traps the steam released by the dough itself, mimicking a professional bread oven. Baking usually involves an initial period with the lid on (creating steam) followed by a period with the lid off (allowing the crust to brown and crisp up).
Oven Temperature and Baking Time Guidelines
Preheating your oven to a very high temperature, typically between 450°F and 500°F (230°C to 260°C), is essential. If using a Dutch oven, place it in the oven while it preheats. Once the oven and Dutch oven are fully preheated (usually takes 30-60 minutes), carefully transfer your scored dough into the hot Dutch oven.
Bake the loaf with the lid on for the first 20-25 minutes. This traps steam, promotes oven spring, and keeps the crust soft. After this initial phase, remove the lid and continue baking for another 20-30 minutes, or until the crust is deep golden brown and the internal temperature of the bread reaches about 205-210°F (96-99°C). The total baking time is usually around 40-55 minutes, depending on the size of the loaf and your oven.
Achieving a Crispy Crust and Open Crumb
Achieving a crispy crust requires high heat and a dry environment during the final stage of baking. The initial steaming phase in the Dutch oven or with added steam (if baking on a baking stone) is crucial for allowing the dough to expand. Once the crust has set but is still pliable, removing the lid (or venting the oven) allows the moisture to escape, leading to a beautiful, crackly crust.
An open, airy crumb structure is a hallmark of well-made sourdough. This is developed through proper gluten development (mixing and folding), sufficient bulk fermentation and proofing (gas production), and excellent oven spring (rapid expansion in the heat). Baking at a high temperature with initial steam maximizes the dough's potential for expansion before the internal structure sets, resulting in those desirable large holes.
Tips for Perfecting Your Sourdough Boule
Baking sourdough is a skill that improves with practice. Even with a solid understanding of the steps, you might encounter challenges along the way. Learning to identify and troubleshoot common issues will help you consistently produce delicious loaves.
Don't be discouraged by imperfect bakes. Each loaf offers a learning opportunity. Pay attention to how your dough feels, how it responds to folding and shaping, and how it behaves during fermentation. Keep notes on your process, including temperatures and timing, to help you identify what works and what doesn't.
Troubleshooting Common Sourdough Challenges
One common issue is a flat loaf with poor oven spring. This can be caused by several factors, including an inactive starter, under-proofed or over-proofed dough, or insufficient shaping (lack of surface tension). If your starter isn't doubling reliably, feed it more frequently or adjust its hydration until it becomes vigorous. Pay close attention to the dough's volume increase during bulk fermentation and the poke test during proofing to gauge readiness. Ensure you're creating adequate tension during shaping.
Another frequent problem is a gummy or dense crumb. This might indicate under-baking – the internal structure hasn't fully set. Ensure you're baking until the internal temperature reaches the target range of 205-210°F (96-99°C). It can also result from under-fermentation (not enough gas production) or insufficient gluten development. Review your bulk fermentation timing and folding techniques.
Addressing issues like flat loaves, gummy textures, etc.
If you consistently get flat loaves, consider if your starter is truly active enough; it should be visibly bubbly and nearly double in volume within a few hours of feeding. Also, evaluate your shaping technique – are you creating enough surface tension to help the loaf hold its shape? Sometimes, a slightly lower hydration dough can be easier to shape and result in better structure for beginners.
For gummy textures, the most likely culprit is under-baking. Invest in an instant-read thermometer to check the internal temperature reliably. If the temperature is correct, review your bulk fermentation time. Was the dough allowed to increase sufficiently in volume? A short bulk fermentation can lead to a tight, gummy crumb. Conversely, slightly over-proofed dough can also sometimes result in a less open, slightly denser crumb, although it usually manifests more as a flat loaf.
Adjusting Hydration for Different Flour Types
Different types of flour absorb water differently. Whole wheat flour, for example, typically absorbs significantly more water than white bread flour due to the presence of the bran and germ. This means that a recipe calling for 75% hydration with white bread flour might require 80% hydration or more when substituting a significant portion of whole wheat flour to achieve a similar dough consistency.
Even different brands of the same type of flour can vary in their absorption rates. Environmental factors like humidity can also play a small role. It's important to feel the dough as you mix and adjust the water slightly if needed to achieve the desired consistency – it should be hydrated enough to develop gluten but not so wet that it's impossible to handle. Start with the recipe's recommended hydration and make small adjustments based on how the dough feels.
Storing and Enjoying Your Homemade Sourdough Boule
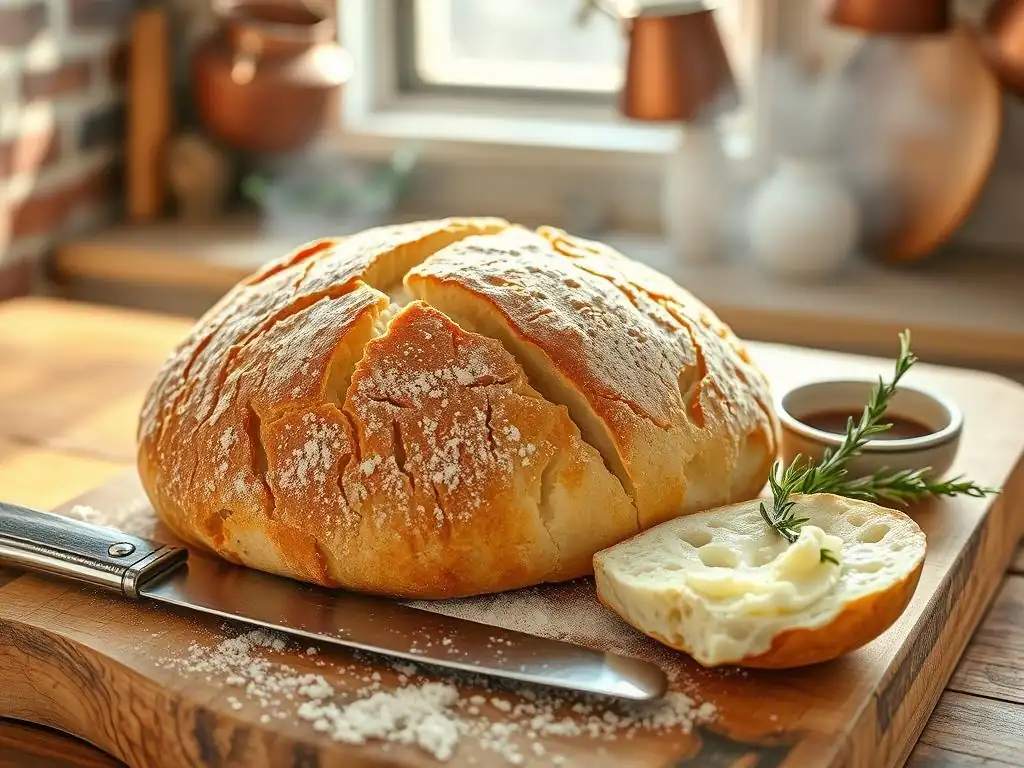
Once your beautiful sourdough boule is baked and has cooled completely (resist the urge to cut into it too early! ), you'll want to store it properly to maintain its freshness and enjoy its delicious flavor and texture for as long as possible.
A properly cooled loaf is essential before storage. Cutting into hot bread can result in a gummy interior because the internal starches haven't finished setting. Allow your boule to cool on a wire rack for at least 2-3 hours, or even longer for a larger loaf.
Keeping Your Bread Fresh for Longer
The best way to store a sourdough boule to preserve its crispy crust is to store it cut-side down on a cutting board. For longer storage, once cut, wrap the remaining portion tightly in beeswax wrap, linen bread bags, or place it in a large, airtight container or a plastic bag. While plastic can soften the crust over time, it's very effective at preventing the interior from drying out. Avoid refrigerating sourdough, as this can actually cause it to go stale faster.
For storage beyond a couple of days, freezing is an excellent option. Allow the loaf to cool completely, then either freeze it whole or sliced. Wrap it tightly in plastic wrap, then in foil or a freezer bag, ensuring as little air as possible is trapped. Frozen sourdough can last for several months. To enjoy, thaw at room temperature (or pop frozen slices directly into a toaster or oven). Reheating a whole or partial loaf in a moderate oven (350°F or 175°C) for 10-15 minutes can help revive the crust.
Serving Suggestions for Sourdough Boule
A freshly baked sourdough boule is incredibly versatile. Its hearty crust and tangy interior make it perfect for simple enjoyment with just a smear of good quality butter. It's also the ideal vehicle for soaking up sauces or olive oil.
Consider using slices for open-faced sandwiches, toast with avocado or jam, or as the base for bruschetta or crostini. Cubes of slightly stale sourdough make fantastic croutons or the foundation for panzanella salad. The robust flavor stands up well to strong cheeses, cured meats, and vibrant vegetables.
Conclusion: Embrace the Art of Sourdough Baking
Baking a sourdough boule is a rewarding process that connects you with the ancient craft of bread making. From nurturing your starter to mastering the gentle shaping techniques and achieving that perfect bake, each step is a learning experience. The result is a loaf that is not only delicious but also a testament to your patience and effort.
Whether you're aiming for a classic rustic boule or exploring different freeform white bread recipe variations, the principles of sourdough baking provide a solid foundation. Don't be afraid to experiment, learn from each bake, and most importantly, enjoy the process and the incredible bread you create.
Enjoy the Satisfaction of Baking Your Own Sourdough Boule
There's a unique sense of accomplishment that comes from pulling a warm, fragrant sourdough boule from your oven. The crackle of the crust as it cools and the anticipation of slicing into it to reveal the crumb are moments to savor. Sharing a loaf you baked yourself with friends and family adds an extra layer of joy to the experience.
Embracing the art of sourdough baking means accepting that not every loaf will be perfect, but every attempt builds skill and understanding. With each boule you bake, you'll become more attuned to the nuances of your starter, your dough, and your environment, leading to increasingly successful and satisfying results. Happy baking!
Frequently Asked Questions
What exactly is freeform bread shaping?
Freeform bread shaping means shaping a loaf without using a pan. This allows for a rustic appearance and crispier crust.
Is a freeform white bread recipe suitable for beginners?
Yes, this recipe is designed with simplicity in mind. The steps are broken down to be easy to follow, even for new bakers.
What are the key ingredients in a basic freeform white bread recipe?
The core ingredients are typically flour, water, yeast, and salt. Sometimes a touch of sugar or oil is added for texture and flavor.
How does shaping affect the final outcome of the bread?
Proper shaping creates tension on the surface of the dough. This helps the bread maintain its structure and develop a good crust.
What can I do if my dough is too sticky to shape easily?
Add a small amount of flour to your work surface and hands. Avoid adding too much, as this can make the bread tough and dry.
Final Reflection: The Simple Joy of Freeform Bread
The art of baking freeform white bread isn't just about creating a loaf; it's about connecting with a fundamental human experience—the creation of something nourishing and beautiful from simple ingredients. This seemingly straightforward process, detailed in the steps above, offers a surprising depth of satisfaction, a quiet rebellion against the perfectly uniform, and a reminder of the inherent beauty in imperfection.
The influence of homemade bread, particularly this simple white loaf, extends far beyond the kitchen table. It speaks to a growing desire for connection to our food sources, a yearning for simpler times, and a rejection of mass-produced uniformity. It's a tangible link to generations past, a quiet act of self-sufficiency, and a delicious way to share something meaningful with loved ones. Bread is the staff of life,
a simple phrase, yet it encapsulates the profound significance of this humble food.
Now, consider your own kitchen. Imagine the warmth of the oven, the satisfying knead of the dough, the intoxicating aroma filling your home. Don't let the simplicity of this recipe fool you; it's an invitation to slow down, to connect with your hands and your senses, and to experience the profound satisfaction of creating something delicious and entirely your own. Try it. Embrace the imperfections. And savor the taste of connection.
Unleash Your Inner Baker: Craft the Perfect Loaf!
Thanks for joining us on this bread-baking adventure! We hope you've gained the confidence to tackle freeform baking. Now it's time to put your newfound skills to the test.
- Knead your way to success: Try baking your own freeform loaf today using the techniques we've shared. Experiment with different flours and hydration levels to find your perfect recipe!
- Share your creations: Post a picture of your beautiful, rustic loaf on social media and tag us – we’d love to see your baking journey!
- Explore new flours: Branch out and try using whole wheat, rye, or spelt flour in your next freeform bread experiment. What unexpected flavors will you discover?
So, what unique ingredient will you add to your next freeform bread masterpiece? Let's hear your ideas in the comments below!