
Baking GlutenFree Sourdough: Is It Possible? (Yes!)

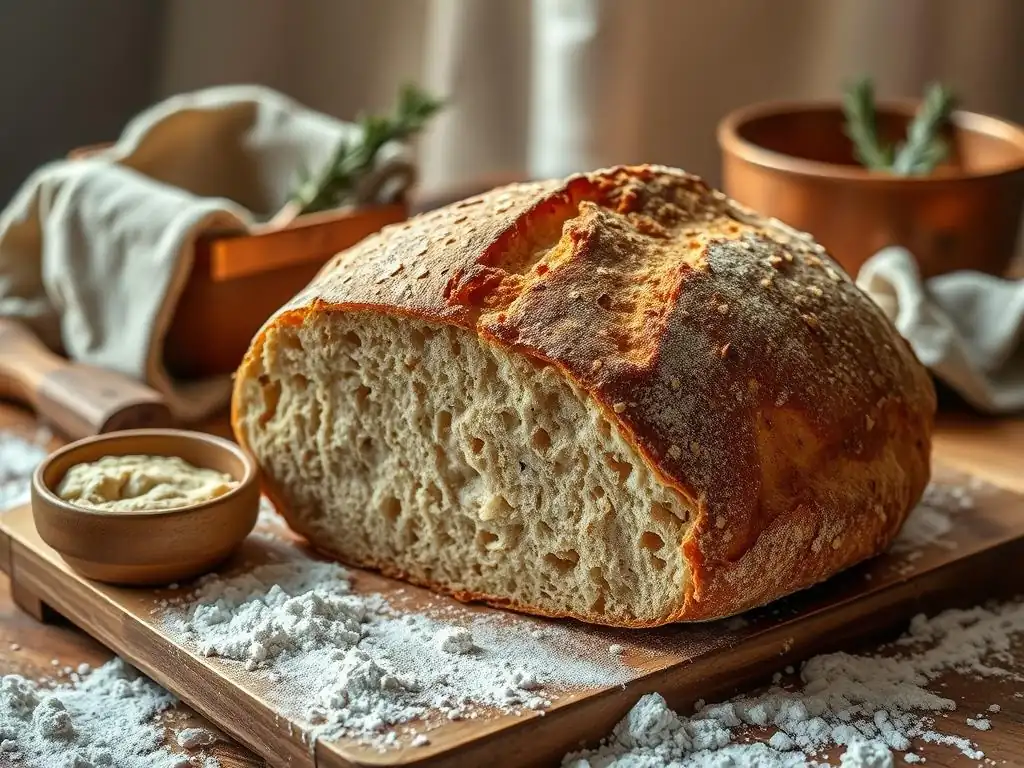
Welcome to BakeWithEase, your haven for all things baking! Ever wondered if you could achieve the seemingly impossible – a truly delicious, crusty, and satisfying gluten-free sourdough bread? Prepare to have your assumptions challenged. We're diving deep into the secrets behind crafting this elusive loaf, revealing a recipe so simple, you'll be pulling warm, fragrant bread from your oven in no time. Discover the techniques and ingredients that make it all possible, and get ready to experience the joy of gluten-free sourdough like never before. Intrigued? Let's get baking!
- Baking Gluten-Free Sourdough: A Comprehensive Guide
- Introduction to Gluten-Free Sourdough Bread Baking
- Key Ingredients for Optimal Gluten-Free Sourdough
-
Gluten-Free Sourdough Bread Recipe: A Detailed Walkthrough
- Step 1: Revitalizing Your Gluten-Free Sourdough Starter
- Step 2: Mixing the Gluten-Free Sourdough Dough
- Step 3: Bulk Fermentation for Flavor Development
- Step 4: Shaping Your Gluten-Free Sourdough Loaf
- Step 5: Proofing Your Gluten-Free Sourdough
- Step 6: Baking Your Gluten-Free Sourdough Bread
- Step 7: Cooling and Savoring Your Gluten-Free Sourdough
- Troubleshooting Common Gluten-Free Sourdough Issues
- Tips and Tricks for Consistent Gluten-Free Sourdough Success
- Variations on the Classic Gluten-Free Sourdough
- Conclusion: Elevating Your Gluten-Free Sourdough Baking
- Frequently Asked Questions
- Final Reflection: The Unexpected Joys of Gluten-Free Sourdough
- Unleash Your Gluten-Free Sourdough Power!
Baking Gluten-Free Sourdough: A Comprehensive Guide
Introduction to Gluten-Free Sourdough Bread Baking
Welcome to the rewarding world of gluten-free sourdough baking! For many who avoid gluten, the idea of baking that perfect, tangy loaf might seem like a distant dream. Traditional sourdough relies heavily on the gluten network in wheat flour to trap gases and create structure. Without gluten, we need different techniques and ingredients to achieve similar results – a beautifully risen loaf with a delightful crust and crumb.
This guide will walk you through the nuances of creating a delicious glutenfree sourdough bread recipe. We'll explore the essential ingredients, the steps involved in the process, and how to troubleshoot common issues. Whether you're a seasoned baker or new to the sourdough journey, mastering a gluten-free version is absolutely within reach with the right knowledge and patience.
The Appeal of Gluten-Free Sourdough: Health and Flavor
The popularity of gluten-free diets continues to grow, driven by necessity for those with celiac disease or gluten sensitivity, and by choice for others seeking different dietary approaches. However, many commercially available gluten-free breads lack the depth of flavor and satisfying texture found in traditional loaves. This is where crafting your own glutenfree sourdough bread recipe shines. Sourdough fermentation breaks down starches and phytic acid, potentially improving nutrient absorption and digestibility.
Beyond the potential health benefits, the characteristic tangy flavor developed through fermentation adds a complexity that is often missing in standard gluten-free baked goods. The slow fermentation process also contributes to a more appealing texture, moving away from the dense or crumbly nature sometimes associated with gluten-free breads. A homemade glutenfree sourdough bread recipe offers a unique opportunity to enjoy a bread that is both nutritious and bursting with flavor.
Addressing the Unique Challenges of Gluten-Free Dough
Working with gluten-free dough presents distinct challenges compared to wheat-based dough. The absence of gluten means there is no natural elastic network to provide structure and trap the carbon dioxide produced by fermentation. This can lead to doughs that are more like thick batters, less pliable, and prone to collapsing if not handled correctly. Achieving adequate rise and an open crumb structure requires careful ingredient selection and precise technique.
Hydration levels often differ significantly in gluten-free recipes. Gluten-free flours tend to absorb liquids differently than wheat flours, and some require higher hydration to prevent a dry, crumbly result. Furthermore, the fermentation indicators you might be familiar with in wheat sourdough (like the 'windowpane test') don't apply. Instead, bakers must rely on visual cues like volume increase and surface bubbles, which can vary depending on the flour blend used in your glutenfree sourdough bread recipe.
A Guide to Successful Gluten-Free Sourdough Baking
Success in baking a glutenfree sourdough bread recipe hinges on understanding the properties of gluten-free flours, the role of binders, and the specific needs of a gluten-free starter. Patience is also key, as fermentation times can vary based on temperature and starter activity. Don't be discouraged if your first attempt isn't perfect; each bake is a learning opportunity.
This guide aims to demystify the process, providing clear steps and explanations. We'll cover everything from building a strong gluten-free starter to shaping and baking your loaf. By focusing on the specific requirements of gluten-free ingredients and techniques, you'll be well-equipped to create a delicious and satisfying glutenfree sourdough bread recipe right in your own kitchen.
Key Ingredients for Optimal Gluten-Free Sourdough
Crafting a great glutenfree sourdough bread recipe begins with selecting the right ingredients. Since gluten is absent, we rely on a combination of gluten-free flours and binders to replicate the structure and texture needed for a successful sourdough loaf. The quality and type of these ingredients significantly impact the final outcome, from the crumb structure to the crust development.
Understanding how different gluten-free flours behave and the function of binders is crucial. Unlike wheat flour, which contains the proteins that form gluten when hydrated and kneaded, gluten-free flours lack this inherent structure. This necessitates a thoughtful approach to combining flours and incorporating ingredients that can help hold the dough together and support its rise during fermentation and baking.
Gluten-Free Flour Blend: The Cornerstone of Structure
The foundation of any glutenfree sourdough bread recipe is the flour blend. Using a single gluten-free flour often results in a poor texture – for example, rice flour alone can be gritty, while tapioca starch can be gummy. A successful blend combines different flours and starches, each contributing specific properties like structure, softness, flavor, and browning capabilities.
Many commercial gluten-free flour blends are available, but crafting your own allows for customization and control over the final taste and texture of your glutenfree sourdough bread. A typical blend might include a mix of whole grain flours (like brown rice, sorghum, or millet) for structure and nutrition, and starches (like tapioca, potato, or cornstarch) for lightness and binding. Aim for a balance that provides both substance and elasticity when combined with binders and liquids.
Selecting the Ideal Flour Blend for Sourdough's Texture
Choosing or creating the right gluten-free flour blend is critical for achieving that desirable sourdough texture – a chewy crust and a somewhat open, moist crumb. A common ratio often involves roughly 40-60% whole grain gluten-free flours and 40-60% starches, though this can vary. For instance, a blend might be 40% brown rice flour, 20% sorghum flour, 20% tapioca starch, and 20% potato starch. Experimentation with different ratios is encouraged to find what works best for your specific glutenfree sourdough bread recipe.
The grind of the flour also matters. Finer flours tend to absorb liquid more quickly and evenly, contributing to a smoother dough. Coarser grinds, like some brown rice flours, can lead to a slightly grittier texture. Reading ingredient labels carefully or grinding your own flours can help you achieve the desired particle size for your glutenfree sourdough bread recipe.
Individual Gluten-Free Flours: Properties and Contributions (e.g., Brown Rice Flour, Tapioca Starch)
Each gluten-free flour brings unique characteristics to a blend.
- Brown Rice Flour: Provides structure and fiber. It has a slightly nutty flavor and can contribute to a pleasant crust. However, it can sometimes result in a slightly gritty texture if not finely ground. It's a common base for many glutenfree sourdough bread recipe blends, often making up a significant portion.
- White Rice Flour: Lighter in texture than brown rice flour and has a neutral flavor. It contributes to the overall structure but lacks the fiber and nutrients of brown rice.
- Sorghum Flour: Offers a soft texture and a mild, slightly sweet flavor. It's a good source of fiber and protein and works well in combination with other flours to improve the crumb of a glutenfree sourdough bread recipe.
- Millet Flour: Provides a slightly sweet, nutty flavor and contributes to a tender crumb. It's a whole grain flour rich in nutrients.
- Oat Flour (Certified Gluten-Free): Adds a lovely flavor and tenderness. Ensure it is certified gluten-free to avoid cross-contamination, which is crucial for a true glutenfree sourdough bread recipe.
- Buckwheat Flour: Despite its name, buckwheat is gluten-free. It has a strong, earthy flavor and contributes to a darker crust and denser crumb. Use in moderation if you prefer a milder taste.
- Tapioca Starch (or Tapioca Flour): Derived from the cassava root, this is a pure starch. It provides elasticity and chewiness to the dough, helping to bind ingredients together and create a lighter texture. It's essential for preventing a dense or crumbly loaf in a glutenfree sourdough bread recipe.
- Potato Starch: Another pure starch that contributes to a light and fluffy texture. It works synergistically with tapioca starch and other flours.
- Cornstarch: Similar to potato and tapioca starch, cornstarch helps soften the crumb and bind the dough. It's widely available and often used in gluten-free blends.
The Gluten-Free Sourdough Starter: Cultivating Flavor and Rise
Just like traditional sourdough, a glutenfree sourdough bread recipe relies on a vibrant, active starter. This starter is a living culture of wild yeasts and bacteria that ferment sugars in the flour, producing carbon dioxide (for rise) and organic acids (for flavor). Building and maintaining a gluten-free starter requires the same principles as a wheat starter, but uses gluten-free flours.
A healthy gluten-free starter should be bubbly, smell pleasantly tangy (like yogurt or fruit), and reliably double in volume within a few hours after feeding when kept at a warm temperature (around 75-80°F or 24-27°C). The specific flours used to feed the starter can influence its activity and the flavor profile of your final glutenfree sourdough bread recipe.
Building and Maintaining a Robust Gluten-Free Starter
Building a gluten-free starter typically involves mixing a gluten-free flour blend (often brown rice flour or a mix of brown rice and sorghum) with water and letting it ferment at room temperature. You feed it daily by discarding a portion and adding fresh flour and water. Within 7-14 days, depending on ambient temperature and consistency of feeding, you should have a bubbly, active starter ready for your glutenfree sourdough bread recipe.
Maintaining the starter involves regular feeding. If you bake frequently (several times a week), keeping it at room temperature with daily feeding (e.g., a 1:1:1 ratio of starter:flour:water by weight) is ideal. For less frequent baking, storing the starter in the refrigerator and feeding it weekly (e.g., a 1:2:2 or 1:3:3 ratio) is sufficient. Always use filtered or non-chlorinated water, as chlorine can inhibit microbial activity.
Optimizing Starter Activity Through Consistent Feeding
The key to a reliable gluten-free starter is consistent feeding and observation. Feed your starter when it looks hungry – typically when it has peaked and is starting to deflate. Using a consistent feeding ratio (e.g., 1 part starter, 2 parts flour, 2 parts water by weight, or 1:2:2) helps maintain a stable culture. The temperature at which you keep your starter significantly impacts its activity; warmer temperatures speed up fermentation.
Before using your starter for a glutenfree sourdough bread recipe, give it a 'refresh' feed (often 1:2:2 or 1:3:3) and wait until it has risen significantly and shows lots of bubbles – this is its peak activity, usually 4-8 hours after feeding at room temperature. Using a starter at its peak ensures maximum leavening power for your dough.
Other Essential Ingredients for Enhanced Results
Beyond the flour blend and starter, a few other ingredients play vital roles in a successful glutenfree sourdough bread recipe. These additions help improve dough handling, structure, moisture retention, and overall loaf quality. They compensate for the lack of gluten in different ways.
Understanding the function of these ingredients allows you to adjust them based on your specific flour blend and desired outcome. They are not merely fillers but active components that contribute to the structure and palatability of your gluten-free sourdough bread.
Binders: Xanthan Gum, Psyllium Husk, and Structural Support
Binders are indispensable in most glutenfree sourdough bread recipes. They mimic some of the properties of gluten by absorbing water and creating a gel-like network that helps hold the dough together and trap gases.
- Xanthan Gum: A common binder derived from fermented sugar. Used in small amounts (often 0.5% to 1% of the total flour weight), it provides elasticity and structure. Too much can result in a gummy texture.
- Psyllium Husk (or Psyllium Husk Powder): Made from the seeds of the Plantago ovata plant. It is highly absorbent and forms a strong gel, contributing significantly to the structure and softness of gluten-free bread. Psyllium husk powder is more potent than whole husks, so recipes will specify which to use. A typical amount might be 2-4% of the total flour weight. Psyllium is often preferred in sourdough for its ability to create a more open crumb structure compared to xanthan gum alone.
Many successful glutenfree sourdough bread recipes use psyllium husk, sometimes in combination with a smaller amount of xanthan gum, to achieve optimal structure and texture.
Liquids: Water, Milk Alternatives, and Their Impact on Dough Hydration
Water is essential for hydrating the flours and activating the starter and binders. The type of water matters – filtered water is best. The amount of water determines the dough's hydration level, which is expressed as a percentage of the total flour weight. Gluten-free doughs often require high hydration (75-90% or even higher) to prevent dryness and achieve a good crumb.
Other liquids like milk alternatives (almond milk, soy milk, oat milk - ensure certified gluten-free) can be used, adding richness and contributing to browning. However, water is the most common liquid base for a classic glutenfree sourdough bread recipe. Adjusting hydration based on the specific flour blend used is crucial, as different flours absorb liquid differently. For example, brown rice flour absorbs less water than sorghum flour.
Gluten-Free Sourdough Bread Recipe: A Detailed Walkthrough
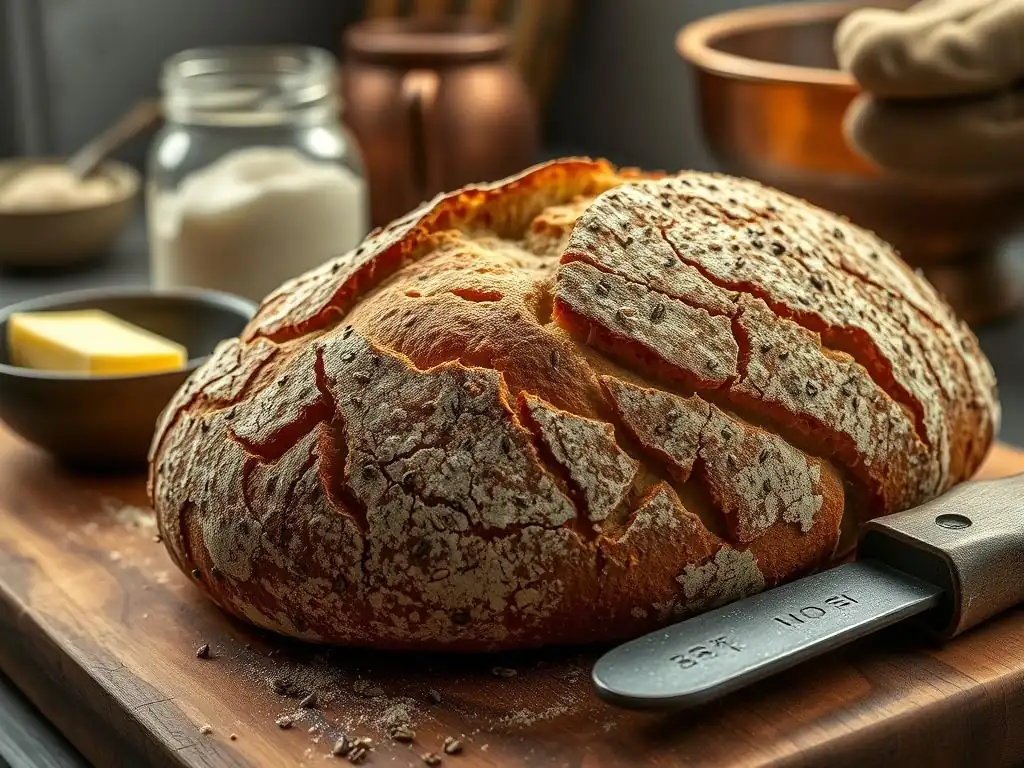
Creating a delicious glutenfree sourdough bread recipe involves several distinct stages, each playing a vital role in the final loaf. While the fundamental process mirrors traditional sourdough, the handling techniques and visual cues differ significantly due to the absence of gluten. This section provides a step-by-step guide.
This walkthrough assumes you have an active gluten-free sourdough starter ready to use. Remember that timing is approximate and will vary based on your environment temperature and starter activity. Pay attention to the dough's visual cues rather than strictly adhering to times.
Step 1: Revitalizing Your Gluten-Free Sourdough Starter
Before you begin mixing your glutenfree sourdough bread recipe, ensure your starter is active and ready. If your starter is in the refrigerator, take it out 12-24 hours before you plan to mix the dough. Give it a good feed (e.g., discard all but 20-30g, then feed with 60g gluten-free flour blend and 60g water - a 1:3:3 ratio is excellent for building strength).
Let the starter sit at room temperature (ideally 75-80°F or 24-27°C) until it has significantly increased in volume (doubled or nearly doubled) and is full of bubbles. This typically takes 4-8 hours depending on the temperature and starter health. A simple test is the float test: drop a small amount of starter into a glass of water; if it floats, it's usually ready. This revitalization ensures your dough gets the necessary lift.
Step 2: Mixing the Gluten-Free Sourdough Dough
Mixing gluten-free sourdough dough is less about traditional kneading and more about combining ingredients thoroughly to hydrate the flours and activate the binders. The dough will likely feel more like a thick batter or paste than an elastic wheat dough. Precision in measurements, especially of flours and liquids, is paramount for a consistent glutenfree sourdough bread recipe.
Using a kitchen scale to weigh all ingredients is highly recommended for accuracy. Small variations in flour or water can significantly impact the dough consistency and final loaf.
Achieving the Desired Dough Consistency and Elasticity
Combine your active gluten-free starter, water, and flour blend in a large bowl. If using psyllium husk powder, some recipes recommend mixing it with the water first and letting it gel for a few minutes before adding the flours. Add any other dry ingredients like salt and binders (if not pre-mixed). Mix everything thoroughly using a sturdy spoon or a stand mixer fitted with a paddle attachment until no dry spots remain.
The dough consistency should be thick and cohesive, pulling away from the sides of the bowl, but likely too wet and sticky to handle easily like wheat dough. It won't develop traditional elasticity. The binders will create a different kind of structure. Aim for a consistency that holds its shape somewhat but is still quite soft. This is the typical feel for a glutenfree sourdough bread recipe dough.
Gentle Folding Technique for Even Hydration and Strength
Unlike the vigorous kneading of wheat dough, gluten-free sourdough benefits from gentle folding. This technique helps distribute hydration evenly and builds some structure through the activated binders without tearing a delicate gluten-free network (which doesn't exist). Perform 2-3 sets of folds during the first 1-2 hours of bulk fermentation.
To fold, wet your hands slightly to prevent sticking. Grab one side of the dough from underneath, stretch it up gently, and fold it over the center. Rotate the bowl and repeat 3-4 times until all sides have been folded. This process helps create some tension and strength in the dough, improving the final structure of your glutenfree sourdough bread recipe loaf. Allow 30-45 minutes rest between sets of folds.
Step 3: Bulk Fermentation for Flavor Development
Bulk fermentation (or the first rise) is where your starter does its work, producing carbon dioxide and developing the characteristic sourdough tang. This stage is crucial for flavor and initial rise in your glutenfree sourdough bread recipe. Place the mixed dough in a lightly oiled container with straight sides (for easy monitoring of volume increase) and cover it.
The duration of bulk fermentation depends heavily on the ambient temperature. At a warm room temperature (75-80°F or 24-27°C), it might take 4-8 hours. At cooler temperatures (68-72°F or 20-22°C), it could take 8-12 hours or longer. Look for visual cues rather than relying solely on time.
Understanding the Role of Bulk Fermentation in Gluten-Free Baking
During bulk fermentation, the yeasts in your starter consume sugars, producing gas that causes the dough to rise. The bacteria produce lactic and acetic acids, contributing to the sourdough flavor. For a glutenfree sourdough bread recipe, this stage is also when the binders fully hydrate and form their structural network.
Sufficient bulk fermentation is necessary for good flavor development and a well-risen loaf. Under-fermentation will result in a dense loaf with little flavor, while over-fermentation can lead to a collapsed structure and overly sour taste. Finding the sweet spot is key to a successful glutenfree sourdough bread recipe.
Monitoring Dough Volume and Adjusting Fermentation Time
Monitoring the volume increase is the primary way to track bulk fermentation progress in a glutenfree sourdough bread recipe. The dough should increase by about 50-75% of its original volume. Unlike wheat dough which might double or triple, gluten-free dough often shows a less dramatic increase due to the lack of a strong gluten network.
Look for signs like visible bubbles on the surface and edges of the dough. The dough might also appear slightly domed. If your kitchen is cool, consider placing the dough in a slightly warmer spot, like inside a turned-off oven with the light on, to encourage fermentation. If it's too warm, fermentation will happen faster. Adjust the time based on these observations.
Step 4: Shaping Your Gluten-Free Sourdough Loaf
Shaping gluten-free sourdough dough requires a gentle touch, as it's often stickier and less elastic than wheat dough. The goal is to create some surface tension to help the loaf hold its shape during proofing and baking, contributing to better oven spring. Prepare your banneton basket by generously dusting it with a gluten-free flour (like rice flour or a blend) or lining it with a floured cloth.
Turn the dough out onto a lightly floured surface (use a gluten-free flour). Use a bench scraper to help handle the sticky dough. Avoid adding excessive flour, which can dry out the crust.
Techniques for Shaping Delicate Gluten-Free Dough
Since gluten-free dough is less amenable to traditional shaping techniques like stretching and folding, simpler methods are often more effective for a glutenfree sourdough bread recipe. A common approach is the 'envelope fold': gently pat the dough into a rough rectangle, then fold the top third down and the bottom third up, like folding a letter. Then, fold the left side over and the right side over.
Another technique involves gently pulling the edges of the dough towards the center to create a round shape, using the bench scraper to help tuck the dough underneath. The key is to handle the dough minimally and gently to avoid degassing it too much. Work relatively quickly.
Creating Surface Tension for Optimal Oven Spring
Once shaped, gently lift the dough using the bench scraper and your hand and place it seam-side up into your prepared banneton basket. The seam-side up placement means that when you invert it onto your baking surface, the smooth top (which was on the bottom of the banneton) will be facing up, ready for scoring.
The light tension created during shaping, combined with the support of the banneton, helps the dough maintain a taut surface. This surface tension is crucial for controlling the expansion during baking (oven spring) and achieving a desirable crust on your glutenfree sourdough bread recipe.
Step 5: Proofing Your Gluten-Free Sourdough
Proofing (the second rise) allows the shaped loaf to increase in volume and develop further flavor before baking. For gluten-free sourdough, proofing is often done in the refrigerator (cold proofing). This slows down fermentation, allowing flavors to deepen and making the dough easier to handle and score.
Place the banneton with the shaped dough inside a plastic bag or cover it tightly with plastic wrap to prevent drying. Refrigerate for 8-24 hours. Cold proofing also helps achieve a better crust and oven spring when the cold dough hits the hot oven.
Creating the Ideal Proofing Environment for Consistent Results
While cold proofing in the refrigerator is standard for many glutenfree sourdough bread recipes, a shorter room temperature proof (1-4 hours) can also be done, especially if your bulk fermentation was on the shorter side or your kitchen is cool. The ideal temperature for room temperature proofing is similar to bulk fermentation (75-80°F or 24-27°C), but watch the dough closely as it can over-proof quickly.
Regardless of temperature, keeping the dough covered is essential to prevent a skin from forming, which would inhibit rise and scoring. The banneton helps the dough maintain its shape during this stage.
Determining Proofing Completion Through Visual Cues
Determining when a gluten-free loaf is perfectly proofed can be tricky, as the poke test (where a gentle poke leaves an indentation that slowly springs back) is less reliable than with wheat dough. Instead, rely on visual cues. The dough should look visibly increased in volume (perhaps 30-50% increase from its shaped size) and feel slightly soft and airy.
If cold proofing, the dough will have increased somewhat in the refrigerator. It should still feel substantial but not overly dense. Over-proofed gluten-free dough can spread out when inverted or collapse during baking. When in doubt, it's often better to slightly under-proof than over-proof for a glutenfree sourdough bread recipe.
Step 6: Baking Your Gluten-Free Sourdough Bread
Baking is where the magic happens – the final rise (oven spring) and the development of the crust and interior crumb. High heat and initial steam are key to a great crust and maximum oven spring for your glutenfree sourdough bread recipe. Using a Dutch oven or a baking stone with steam is highly recommended.
Preheating your oven and baking vessel properly is crucial for achieving a good result. Don't rush this step.
Preheating Your Oven for Even Baking and Crust Formation
Preheat your oven with your Dutch oven or baking stone inside to a high temperature, typically 450-500°F (230-260°C). Allow at least 30-60 minutes for the baking vessel and the oven itself to reach and stabilize at this temperature. This high initial heat provides the burst of energy needed for oven spring.
If using a Dutch oven, preheat the pot and lid together. If using a baking stone, place it on the middle rack and prepare a method for creating steam, such as placing a tray of water or ice cubes on a rack below the stone just before loading the bread.
Achieving a Golden-Brown Crust and Thoroughly Cooked Interior
Once the oven and vessel are preheated, carefully invert your proofed gluten-free sourdough dough from the banneton onto parchment paper or directly into the hot Dutch oven. Score the top of the loaf quickly and confidently with a sharp razor blade or lame. Scoring allows the bread to expand in a controlled manner.
Bake with steam (lid on Dutch oven or with steam setup) for the first 20-25 minutes. This steam keeps the crust pliable, allowing the loaf to expand fully. After this initial phase, remove the lid (or steam setup) and continue baking for another 25-35 minutes at a slightly lower temperature (often reduced to 425-450°F or 220-230°C) until the crust is a deep golden brown and the internal temperature reaches 205-210°F (96-99°C). This ensures the interior is fully cooked.
Utilizing a Dutch Oven for Enhanced Crust and Oven Spring
A Dutch oven is arguably the easiest way to bake a fantastic glutenfree sourdough bread recipe at home. It traps the steam released by the dough during the initial baking phase, creating the perfect steamy environment needed for maximum oven spring and a thin, crispy crust.
Place the scored loaf on parchment paper, then carefully lower it into the preheated Dutch oven. Put the lid on and bake as directed. Removing the lid for the second half of the bake allows the crust to dry out and brown beautifully. If you don't have a Dutch oven, a baking stone with a steam tray can work, but the Dutch oven is often more effective at trapping steam.
Step 7: Cooling and Savoring Your Gluten-Free Sourdough
Once baked, immediately transfer the loaf from the Dutch oven or baking stone to a wire cooling rack. This allows air to circulate around the loaf, preventing the bottom crust from becoming soggy and allowing steam to escape from the interior.
Allow the glutenfree sourdough bread to cool completely before slicing. This is perhaps the hardest step! Slicing too early traps steam, resulting in a gummy interior. A large loaf may need 2-3 hours to cool fully. Patience here is rewarded with the best possible texture and flavor from your glutenfree sourdough bread recipe.
Troubleshooting Common Gluten-Free Sourdough Issues
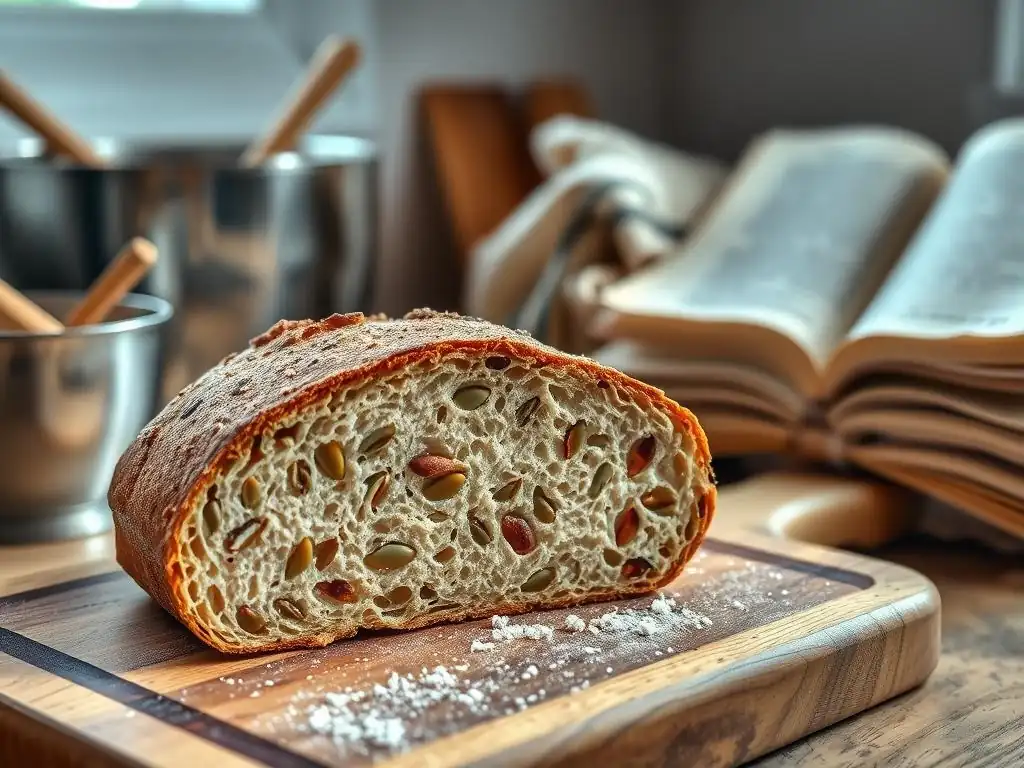
Even with a detailed glutenfree sourdough bread recipe, challenges can arise. Gluten-free baking has its own set of potential pitfalls distinct from wheat baking. Understanding common issues and their likely causes can help you diagnose problems and improve your results on subsequent bakes.
Don't view setbacks as failures, but as opportunities to learn more about how your specific ingredients and environment affect the baking process. Keep notes on your bakes – temperature, times, dough feel – to help identify patterns.
Dense or Gummy Gluten-Free Sourdough
A dense or gummy texture is one of the most common complaints with gluten-free bread, including sourdough. This can be incredibly frustrating after investing time in your glutenfree sourdough bread recipe. Several factors can contribute to this undesirable outcome, often related to hydration, fermentation, or ingredient balance.
Identifying the specific cause is the first step towards fixing it. It might be a single issue or a combination of factors interacting.
Insufficient Hydration, Under-Proofing, or Incorrect Flour Blend
- Insufficient Hydration: Gluten-free flours need adequate moisture to hydrate properly and prevent a dry, dense crumb. If your dough felt too stiff or paste-like during mixing, it might have needed more water. Try increasing the hydration by 5-10% in your next glutenfree sourdough bread recipe attempt.
- Under-Proofing: If the dough didn't ferment long enough during bulk fermentation or wasn't proofed sufficiently after shaping, it won't have developed enough gas to create an open structure. The starter might also not have been active enough. Ensure your starter is vigorous and that your dough shows visible signs of fermentation (volume increase, bubbles).
- Incorrect Flour Blend: The balance of whole grain flours and starches is crucial. Too many heavy whole grain flours without enough starches or binders can result in a dense loaf. Ensure your blend is appropriate for a glutenfree sourdough bread recipe, often including a good proportion of starches like tapioca or potato starch, and sufficient psyllium husk.
Flat Gluten-Free Sourdough Loaf
A loaf that spreads wide rather than rising upwards can be disheartening. This indicates a lack of structural integrity or insufficient leavening power at the point of baking. This is a common issue when perfecting a glutenfree sourdough bread recipe without the inherent strength of gluten.
Causes often relate back to the starter's strength, handling of the dough, or proofing duration.
Weak Starter, Over-Proofing, or Insufficient Gluten Replacement
- Weak Starter: If your gluten-free starter isn't vigorous and active (not doubling or showing many bubbles after feeding), it won't produce enough gas to lift the loaf during fermentation and baking. Ensure your starter is consistently fed and used at its peak for your glutenfree sourdough bread recipe.
- Over-Proofing: This is a frequent culprit. If the dough proofs for too long, the structure created by the binders can weaken, and the gas produced can escape. The dough loses its tension and can't hold its shape when transferred to the oven. It's better to slightly under-proof than over-proof gluten-free sourdough.
- Insufficient Gluten Replacement: Not using enough binder (like psyllium husk or xanthan gum) means the dough lacks the internal network needed to trap gases and support the loaf's structure as it rises. Ensure your glutenfree sourdough bread recipe includes the recommended amount of binder, often 2-4% psyllium husk by flour weight.
Sour Taste Imbalances in Gluten-Free Sourdough
While a pleasant tang is desired in sourdough, an overly sour or vinegary taste can be off-putting. This usually indicates an imbalance in the fermentation process, where acid production outweighs the gas production or develops excessively.
Factors influencing sourness include fermentation time, temperature, starter ratio, and even the type of flour used in the starter and dough.
Over-Fermentation, Incorrect Starter Ratio, or Flour Choice
- Over-Fermentation: Allowing the bulk fermentation or proofing to go on for too long, especially at warm temperatures, gives the bacteria more time to produce acids. This results in a stronger, sometimes unpleasant, sour flavor. Shorten fermentation times in warmer conditions or try cold proofing to slow acid development in your glutenfree sourdough bread recipe.
- Incorrect Starter Ratio: Using a very large percentage of starter relative to the flour in your recipe can speed up fermentation dramatically, potentially leading to excessive sourness before the dough has adequate time to develop structure. Using a more moderate starter percentage (e.g., 15-25% of flour weight) allows for a slower, more controlled fermentation.
- Flour Choice: The type of flour used to feed your starter and in your dough can influence the balance of yeast and bacteria and thus the flavor. Some flours, like rye (if used in a starter you then convert to gluten-free or in small amounts in the blend), can encourage more acetic acid production (vinegary taste). Experimenting with different gluten-free flour blends for your starter and dough can help adjust the flavor profile of your glutenfree sourdough bread recipe.
Tips and Tricks for Consistent Gluten-Free Sourdough Success
Achieving consistent results with a glutenfree sourdough bread recipe requires attention to detail and a few helpful practices. These tips can help minimize variables and improve your chances of baking a beautiful loaf every time.
Incorporating these habits into your baking routine will build confidence and lead to more predictable outcomes.
Weighing Ingredients for Precise Results
This is perhaps the most important tip for any baking, but especially crucial for gluten-free sourdough. Measuring flours and liquids by volume (cups) is notoriously inaccurate because flours can pack down differently. Using a digital kitchen scale to weigh all ingredients provides precision, ensuring you are using the exact ratios intended in your glutenfree sourdough bread recipe.
For example, 1 cup of brown rice flour can weigh anywhere from 120g to 140g depending on how it's scooped. Using weights eliminates this variability, leading to more consistent dough hydration and structure.
Understanding and Adjusting Hydration Levels
Hydration level (water weight as a percentage of flour weight) is a key factor in gluten-free dough consistency. A typical glutenfree sourdough bread recipe might have a hydration of 80-90%. However, different flour blends absorb water differently. Environmental humidity can also play a role.
Pay attention to how your dough feels during mixing. If it seems too stiff, add a tablespoon or two more water. If it seems excessively wet and loose, slightly reduce the water next time. Note the hydration level and dough consistency in your baking journal to help you make adjustments for your specific flour blend and environment.
Employing a Banneton Basket for Shape and Structure
A banneton (proofing basket) is invaluable for providing support to the relatively soft gluten-free dough during proofing. It helps the loaf maintain its shape and develop surface tension, which translates to better oven spring.
Dust the banneton generously with a gluten-free flour like rice flour or use a floured linen liner to prevent the dough from sticking. When you invert the dough for baking, the shape is preserved, ready for scoring and expansion. It significantly improves the final appearance and structure of your glutenfree sourdough bread recipe.
Scoring Techniques for Controlled Expansion and Appearance
Scoring (making cuts on the surface of the dough just before baking) is essential. It allows the steam and gases produced during oven spring to escape in a controlled manner, preventing the crust from bursting unpredictably. It also allows you to create beautiful patterns on your loaf.
Use a very sharp blade (a razor blade or lame works best) and make quick, confident cuts about 1/2 inch deep. For a simple ear, make one long, curved slash along the side. For more intricate designs, shallow cuts work well. Scoring the taut surface of a cold-proofed loaf is often easiest and yields the cleanest cuts for your glutenfree sourdough bread recipe.
Variations on the Classic Gluten-Free Sourdough
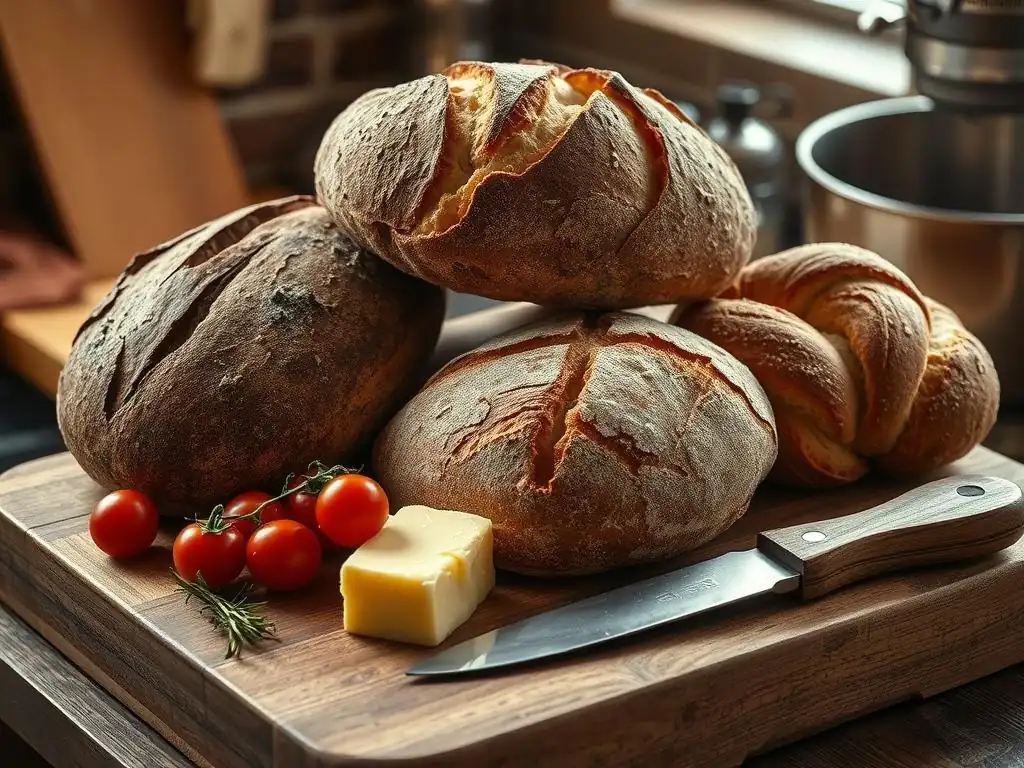
Once you've mastered a basic glutenfree sourdough bread recipe, you can explore exciting variations to add flavor, texture, and nutritional value. The principles remain the same, but adding other ingredients can make your loaf even more unique and delicious.
Experimenting with additions allows you to customize your gluten-free sourdough bread recipe to your personal taste preferences and dietary needs.
Incorporating Seeds and Grains for Texture and Nutrition
Adding seeds or cooked grains is a popular way to enhance gluten-free sourdough. They add lovely texture, nutty flavors, and boost the nutritional profile. Seeds like sunflower, pumpkin, sesame, and flaxseeds can be added directly to the dough during mixing (typically 10-20% of the total flour weight).
Pre-soaking seeds or grains (like quinoa or millet) overnight or cooking them first is often necessary to prevent them from absorbing too much moisture from the dough, which could result in a dry loaf. Incorporate them gently during the final stages of mixing or during the first set of folds in your glutenfree sourdough bread recipe.
Crafting Gluten-Free Sourdough Rolls or Baguettes
The same glutenfree sourdough bread recipe dough can be used to make smaller formats like rolls or baguettes. The process is similar, but shaping and baking times will differ. Rolls require less shaping effort and bake faster (perhaps 20-30 minutes).
Baguettes require a different shaping technique to create the elongated form and often benefit from being baked on a perforated baguette pan or directly on a baking stone with steam. Adjusting the scale of your glutenfree sourdough bread recipe to make smaller items is a great way to practice shaping and baking techniques.
Experimenting with Different Flour Combinations for Unique Flavors
The beauty of a homemade glutenfree sourdough bread recipe is the ability to customize the flour blend. Don't be afraid to experiment with different ratios of flours like sorghum, millet, buckwheat, or even teff flour to alter the flavor, color, and texture of your loaf.
For example, increasing the percentage of buckwheat flour will give a darker loaf with a stronger, earthier taste. Adding oat flour can contribute tenderness and a slightly sweet note. Keep notes on your experiments to track which combinations you enjoy most for your glutenfree sourdough bread recipe.
Conclusion: Elevating Your Gluten-Free Sourdough Baking
Embarking on the journey of baking a glutenfree sourdough bread recipe is a rewarding experience. It combines the ancient art of sourdough fermentation with the unique challenges and possibilities of gluten-free ingredients. While it requires patience and attention to detail, the result is a loaf that is far superior in taste and texture to many store-bought options.
We've covered the essential ingredients, the detailed steps from starter to cooling, and how to troubleshoot common issues. Armed with this knowledge, you are well on your way to baking delicious gluten-free sourdough bread consistently.
Embracing the Art and Science of Gluten-Free Sourdough
Baking gluten-free sourdough is both an art and a science. It requires understanding the scientific principles of fermentation and ingredient interactions, combined with the intuitive feel and observation that comes with practice. Each loaf is a unique creation, influenced by the subtle variations in your starter, flours, and environment.
Don't be discouraged by imperfections. Every bake teaches you something new about your ingredients and process. Embrace the learning curve, pay attention to the dough, and enjoy the process of mastering your glutenfree sourdough bread recipe.
Baking is often a communal activity. Share your experiences, successes, and challenges with other bakers. The gluten-free baking community is full of helpful tips and inspiration. Photograph your loaves, share your glutenfree sourdough bread recipe variations, and celebrate your achievements.
There's immense satisfaction in slicing into a loaf of gluten-free sourdough bread you baked yourself, knowing you created something delicious and healthy from simple ingredients. Enjoy the process, share the bounty, and keep baking!
Frequently Asked Questions
What is gluten-free sourdough bread?
Gluten-free sourdough bread is a bread made without gluten, using alternative flours like rice or almond. It utilizes sourdough fermentation to create a tangy flavor and airy texture.
Can anyone make gluten-free sourdough bread?
Absolutely! With the right ingredients and techniques, bakers of all levels can master gluten-free sourdough. Start with our step-by-step guides to ensure success.
What are the best flours for gluten-free sourdough?
Commonly used flours include rice flour, almond flour, and sorghum flour. Combining these can create a balanced texture and flavor for your sourdough.
How long does gluten-free sourdough take to rise?
Gluten-free sourdough typically takes longer to rise compared to traditional sourdough, often requiring several hours or overnight. Patience is key to achieving the best results!
Where can I find a gluten-free sourdough bread recipe?
You can find an excellent gluten-free sourdough bread recipe on our website, BakeWithEase.com. We provide easy-to-follow instructions and tips to help you create delicious bread at home.
Final Reflection: The Unexpected Joys of Gluten-Free Sourdough
The quest for a truly delicious gluten-free sourdough bread is not just a culinary challenge; it's a testament to human ingenuity and our persistent desire for flavor and texture. This article has explored the seemingly impossible task of replicating the complex flavors and airy crumb of traditional sourdough using gluten-free flours, proving that with patience, experimentation, and the right techniques, it's entirely achievable. The journey, however, is far more rewarding than the final loaf.
The impact of gluten-free baking extends far beyond dietary restrictions. It represents a growing movement towards inclusivity and accessibility in the culinary world. For many, the ability to enjoy a homemade loaf of sourdough, free from the constraints of gluten, is a significant step towards a more fulfilling and enjoyable life. Food is symbolic of love when words are inadequate.
- Alan D. Wolfelt. This rings especially true for those who have had to navigate the limitations of dietary restrictions, finding joy and connection through the creation and sharing of food. My own journey with gluten-free sourdough has been a testament to this, revealing the power of food to connect us to ourselves and others.
Now, it's your turn. Don't be intimidated by the seemingly complex process. Embrace the challenge, experiment with different gluten-free flour blends, and savor the journey of discovery. The reward—a warm, crusty loaf of gluten-free sourdough bread, bursting with flavor and made with your own two hands—is well worth the effort.
The satisfaction isn't just in the eating; it's in the making, in the connection to tradition, and in the empowerment of creating something delicious and nourishing for yourself and those you love. So, gather your ingredients, preheat your oven, and embark on your own gluten-free sourdough adventure. The possibilities are endless.
Unleash Your Gluten-Free Sourdough Power!
Thanks for diving into the world of gluten-free sourdough baking! We hope you've gained the confidence to tackle this rewarding challenge. Now it's time to put your newfound knowledge into action.
- Bake your first gluten-free sourdough loaf! Don't be afraid to experiment with different gluten-free flour blends and hydration levels – that's part of the fun!
- Share your baking journey with our community on social media using #GlutenFreeSourdoughBakeWithEase. Let's inspire each other!
- Explore our extensive recipe archive for more gluten-free baking inspiration – you might discover your new favorite bread!
What unique flavor will you create in your first gluten-free sourdough masterpiece?