
The Ultimate BakeWithEase Guide to Tempered Chocolate.

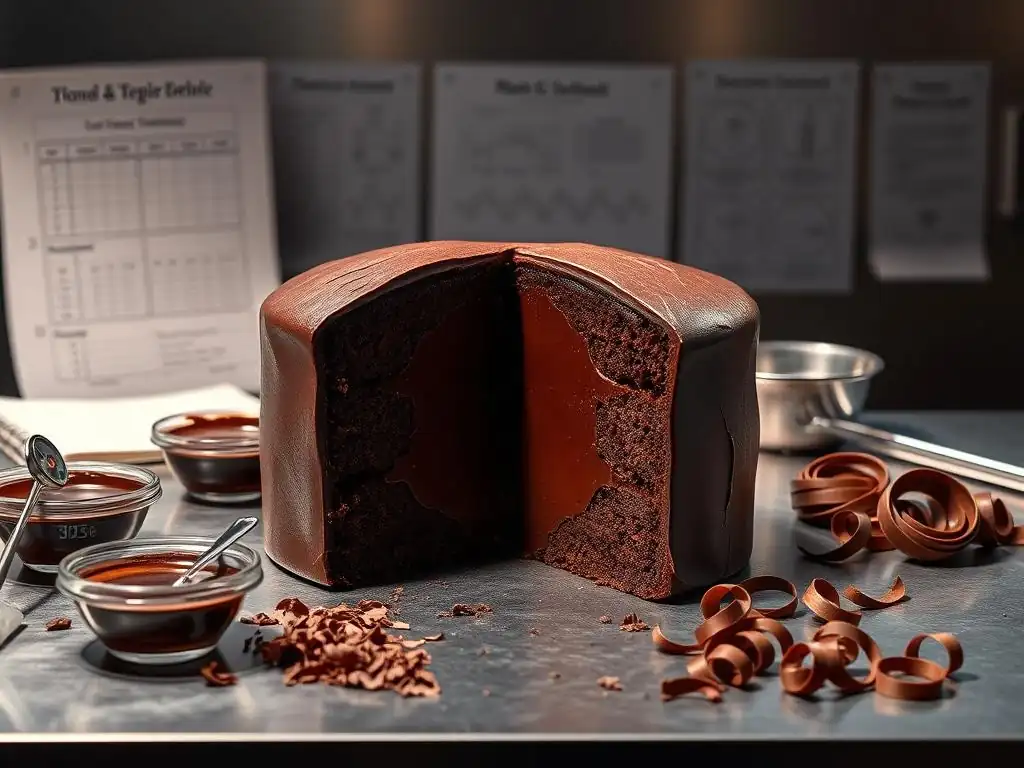
Welcome to BakeWithEase, your trusted partner in conquering the world of baking! Ever struggled with achieving that perfect snap and shine with your chocolate? Our latest guide dives deep into tempered chocolate troubleshooting, unlocking the secrets to a flawlessly finished product. Discover the common pitfalls and expert solutions that will transform your chocolate creations from frustrating failures to stunning successes. Ready to elevate your baking game? Let's get started!
- Understanding Chocolate Tempering: A BakeWithEase.com Deep Dive
- Mastering the Art of Tempering Chocolate: BakeWithEase's Step-by-Step Methods
-
Tempered Chocolate Troubleshooting Guide: Solving Common Problems with BakeWithEase
- Common Tempering Chocolate Issues: A Quick Reference Chart
- Problem 1: Chocolate is Seizing - Causes and Solutions
- Problem 2: Chocolate is Blooming - Identifying Fat and Sugar Bloom
- Problem 3: Chocolate is Too Thick or Too Thin - Adjusting the Consistency
- Problem 4: Chocolate Won't Set Properly - Ensuring Proper Crystallization
- BakeWithEase's Expert Tips for Perfect Tempered Chocolate
- Using Tempered Chocolate in Your BakeWithEase Recipes
-
Frequently Asked Questions
- What is tempered chocolate, and why is it important?
- What are the common signs that my chocolate is not properly tempered?
- What are some common mistakes that lead to tempering failures?
- How can I fix chocolate that has been improperly tempered?
- What tools are essential for successful chocolate tempering?
- Final Reflection: Mastering the Art of Tempered Chocolate
- Unlock Your Chocolate Mastery!
Understanding Chocolate Tempering: A BakeWithEase.com Deep Dive
Tempering chocolate is a fundamental technique in advanced baking that transforms dull, brittle chocolate into a glossy, stable, and beautifully snapping confection. At BakeWithEase, we believe mastering this skill opens up a world of possibilities, from crafting professional-looking bonbons to creating elegant chocolate decorations. It's the process of carefully heating and cooling chocolate to stabilize the cocoa butter crystals, ensuring a desirable texture and appearance. Without proper tempering, chocolate will be soft, streaky, and prone to developing an unsightly white or gray film known as bloom.
This guide will walk you through the 'why' and 'how' of tempering, offering practical methods and, importantly for anyone starting out, a comprehensive tempered chocolate troubleshooting guide to help you navigate common pitfalls. Whether you're dipping treats, molding figures, or simply wanting your chocolate bark to look its best, understanding and applying tempering techniques is key. It's a process that requires patience and precision, but the results are incredibly rewarding, producing chocolate that melts smoothly in the mouth and holds its shape at room temperature.
Why Temper Chocolate? Exploring the Benefits
Tempering chocolate provides several crucial benefits that elevate finished products from amateur to professional. Firstly, it gives chocolate a beautiful, lasting shine and a satisfyingly crisp snap when broken. This is directly related to the stable crystalline structure of the cocoa butter achieved through tempering. Instead of melting easily and leaving a waxy residue, properly tempered chocolate hardens firmly and maintains its structure, which is essential for molded chocolates, dipped items, and decorative elements.
Furthermore, tempering prevents fat bloom, the common issue where cocoa butter separates and rises to the surface, creating a dull, grayish appearance. It also helps the chocolate contract as it cools, making it easier to release from molds. Products made with tempered chocolate are more stable at room temperature and less susceptible to melting quickly, which is vital for confectionary intended for display or shipping. For instance, a perfectly tempered chocolate bar will remain solid and appealing much longer than one that has not been tempered correctly, resisting temperatures up to around 75-80°F (24-27°C) before softening significantly.
The Science Behind Tempered Chocolate: Cocoa Butter and Crystal Formation
The magic of tempering lies in controlling the crystallization of cocoa butter, the fat component in chocolate. Cocoa butter can solidify into six different crystal forms (labeled Type I through Type VI), each melting at a different temperature. The most desirable form for confectionery is Type V beta crystals, which melt around 88-91°F (31-33°C) for dark chocolate, slightly lower for milk and white chocolate. These Type V crystals are stable, shiny, and provide the desired snap.
Tempering involves melting the chocolate completely (destroying all crystal forms), then cooling it to a specific temperature range while agitating it. This cooling and agitation encourage the formation of stable Type V crystals. The chocolate is then gently reheated slightly to melt any less stable crystal forms that may have also formed, leaving only the desired Type V crystals. This process ensures that when the chocolate sets, it solidifies predominantly into this stable, desirable structure, resulting in the characteristics of properly tempered chocolate: shine, snap, and resistance to bloom.
Identifying Untempered vs. Tempered Chocolate: A Visual Guide
Distinguishing between untempered and tempered chocolate is relatively simple once you know what to look for. Properly tempered chocolate will have a smooth, even surface with a high gloss or shine. When broken, it will produce a clean, sharp snap. It will also set firmly and quickly at room temperature, usually within minutes, and feel solid and cool to the touch. A classic example is a high-quality chocolate bar; it shines and snaps cleanly.
In contrast, untempered chocolate often looks dull, streaky, or matte after it sets. It may develop grayish patches (fat bloom) or a powdery white surface (sugar bloom). Untempered chocolate is typically soft and may bend or crumble rather than snap when broken. It also takes much longer to set and can feel sticky or waxy. If you've ever melted chocolate chips and let them set without tempering, you've likely seen these characteristics – a visual indicator that the desirable crystal structure was not formed.
Mastering the Art of Tempering Chocolate: BakeWithEase's Step-by-Step Methods
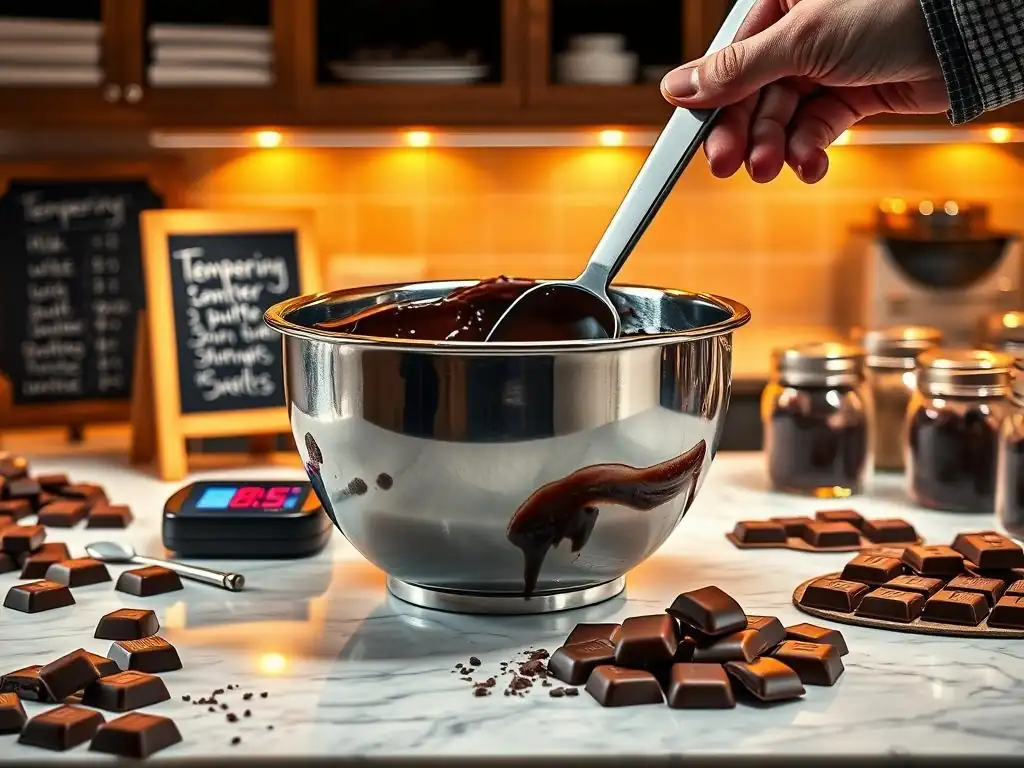
Tempering might sound intimidating, but with the right approach and a bit of practice, it's achievable for any home baker. The goal across all methods is the same: melt the chocolate, cool it while encouraging stable crystal formation, and then raise the temperature slightly to the working temperature. We'll explore three popular methods used by bakers.
Consistency is key when tempering. Using a reliable thermometer is crucial, as even a few degrees can make a significant difference in crystal formation. Remember that different types of chocolate (dark, milk, white) have slightly different temperature requirements due to varying cocoa butter and sugar content. Dark chocolate typically requires the highest temperatures, followed by milk, and then white chocolate.
Method 1: Seeding Method - Your Go-To for Consistent Results
The seeding method is often recommended for home bakers because it's relatively straightforward and doesn't require specialized equipment like a marble slab. It involves using a small amount of already tempered chocolate (the "seed") to introduce stable Type V crystals into a batch of melted chocolate. This acts as a template, encouraging the melted chocolate to solidify into the desired structure.
This method works well for batches of various sizes and is particularly useful when you have leftover tempered chocolate. It relies on precise temperature control and careful stirring to ensure the seed crystals disperse evenly and initiate crystallization throughout the melted chocolate.
Step 1: Melting the Chocolate for Seeding
To begin the seeding method, finely chop the majority of your chocolate. Reserve about 20-25% of the chocolate in solid form to use as your "seed." Place the chopped chocolate (75-80%) in a heatproof bowl set over a saucepan of barely simmering water (a double boiler setup), ensuring the bottom of the bowl does not touch the water. Alternatively, you can melt the chocolate carefully in a microwave, heating in 30-second intervals and stirring well after each, until it's mostly melted.
Heat the chocolate until it reaches its initial melting temperature, which is typically around 115-120°F (46-49°C) for dark chocolate, 105-110°F (40-43°C) for milk chocolate, and 100-105°F (38-40°C) for white chocolate. Stir frequently with a clean, dry spatula to ensure even melting and prevent scorching. Once fully melted and smooth, remove the bowl from the heat or microwave.
Step 2: Adding Seed Chocolate: The Tempering Magic
Once the chocolate is fully melted and has reached the target initial temperature, remove it from the heat. Add the reserved, finely chopped "seed" chocolate to the melted chocolate. Stir continuously and gently with a spatula. The goal here is for the residual heat of the melted chocolate to melt the seed chocolate while simultaneously cooling the entire mixture down.
Continue stirring until all the seed chocolate has melted and the temperature of the mixture drops to the working temperature: 88-91°F (31-33°C) for dark chocolate, 86-88°F (30-31°C) for milk chocolate, and 82-84°F (28-29°C) for white chocolate. This cooling process, facilitated by the seed chocolate and continuous stirring, encourages the formation of stable Type V crystals. If the temperature drops too low and some seed pieces won't melt, you can gently warm it slightly over the double boiler for just a few seconds, stirring constantly, until they melt, but do not let the temperature go above the target working range.
Step 3: Testing for Proper Temper: The Snap Test
After the chocolate has cooled to the target working temperature and you've stirred sufficiently, it's time to test if it's properly tempered. The simplest and most reliable method for home bakers is the "snap test" or "setting test." Dip the tip of a clean, dry knife, spoon, or piece of parchment paper into the chocolate.
Scrape off any excess chocolate and observe it. Properly tempered chocolate should begin to set and become matte within 2-5 minutes at room temperature (around 68-70°F or 20-21°C). Once fully set, it should be firm, shiny, and snap cleanly when bent or broken. If it takes longer to set, appears streaky, or is soft, the chocolate is likely not in temper, and you'll need to troubleshoot or repeat the process.
Method 2: Tabliering (or Marble Slab) Method - For the Experienced Baker
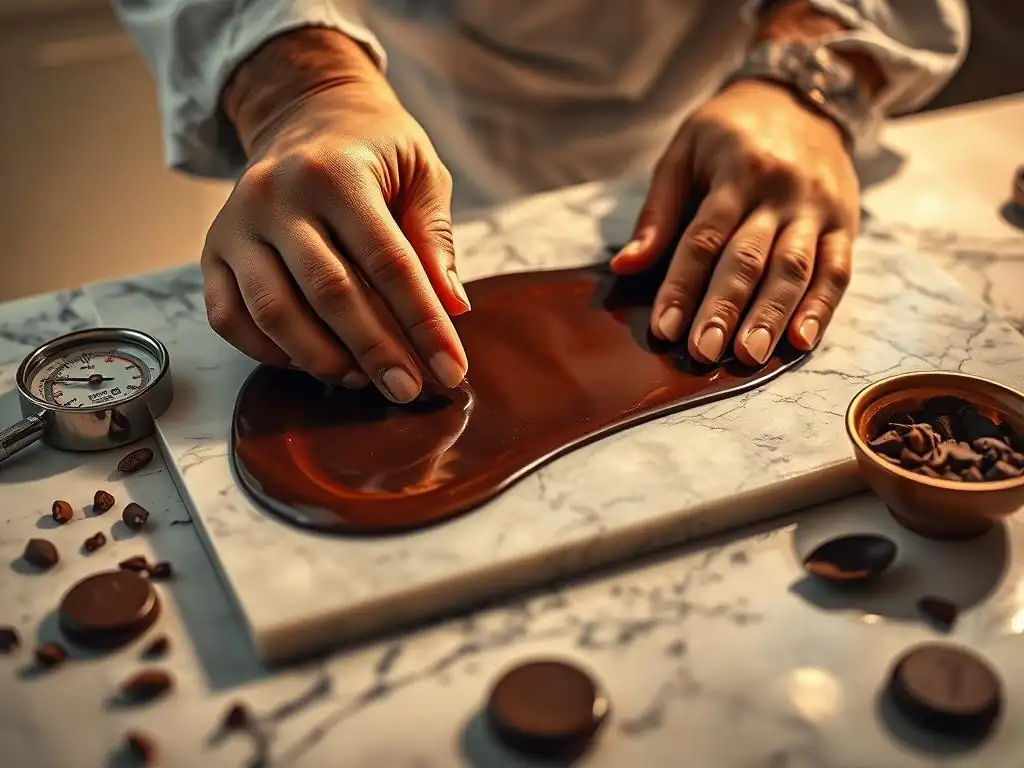
The tabliering method, also known as the marble slab method, is a classic technique used by professional chocolatiers. It involves pouring melted chocolate onto a cool, smooth surface, typically a marble or granite slab, and working it with spatulas to cool it rapidly while encouraging crystal formation. This method requires a bit more practice and a suitable surface, but it allows for precise temperature control and rapid cooling.
This technique is visually impressive and effective for larger quantities of chocolate. It demands constant movement and monitoring of the chocolate's texture and temperature as you work it across the cold surface.
Step 1: Melting the Chocolate for Tabliering
Start by finely chopping your chocolate. As with the seeding method, melt the chocolate in a heatproof bowl over a double boiler or carefully in the microwave, stirring frequently. Heat the chocolate until it is fully melted and reaches the initial melting temperature, similar to the seeding method: 115-120°F (46-49°C) for dark, 105-110°F (40-43°C) for milk, and 100-105°F (38-40°C) for white chocolate. Ensure there are no solid pieces remaining and the chocolate is completely smooth.
Once melted, remove the bowl from the heat. Ensure your marble or granite slab is clean, dry, and cool (room temperature is fine, but slightly cooler is better). Have two clean, dry metal spatulas or scrapers ready – one for spreading and one for gathering.
Step 2: Working the Chocolate on the Marble Slab
Pour about two-thirds of the melted chocolate onto the center of the cool marble slab. Reserve the remaining one-third in the bowl and keep it warm (you can place the bowl back over the warm, not simmering, water or use a heating pad set on low). Using one spatula to spread the chocolate thinly across the surface and the other to gather it back towards the center, work the chocolate continuously. The goal is to cool the chocolate rapidly while agitating it to promote Type V crystal formation.
As you work the chocolate, its temperature will drop, and it will start to thicken slightly. Keep working it until it reaches a temperature of around 82-84°F (28-29°C) for dark chocolate, 80-82°F (27-28°C) for milk chocolate, and 78-80°F (26-27°C) for white chocolate – this is the crystallization temperature. At this point, it should be noticeably thicker and have a slightly matte appearance. Don't let it get too thick or start to set hard on the slab.
Step 3: Assessing Temper and Maintaining Temperature
Once the chocolate on the slab reaches the target crystallization temperature and has thickened, quickly scrape it back into the bowl with the reserved, warmer chocolate. Stir the mixture thoroughly with a spatula. The warmer chocolate will slightly raise the temperature of the cooled chocolate, bringing the entire batch to the working temperature (88-91°F / 31-33°C for dark, 86-88°F / 30-31°C for milk, 82-84°F / 28-29°C for white).
Test the temper using the snap test described in Method 1. If it sets correctly within 2-5 minutes with a shine and snap, it's in temper. If not, you may need to repeat the process with a smaller portion on the slab or adjust the temperature. While working with the tempered chocolate, maintain its temperature within the working range using a gentle heat source, like a heat lamp or a bowl over very warm (not hot) water, stirring occasionally.
Method 3: Using a Tempering Machine - A Time-Saving Solution
For those who frequently work with chocolate or want a more automated process, a chocolate tempering machine can be a valuable investment. These machines take the guesswork out of temperature control by automatically heating, cooling, and maintaining the chocolate at the precise temperatures required for tempering. They use various mechanisms, such as forced air cooling or circulating coolants, to achieve the desired temperature curve.
Tempering machines are particularly useful for production environments or for home bakers who want to temper larger quantities of chocolate consistently. They reduce the labor involved in constant stirring and temperature monitoring, allowing you to focus on the application of the tempered chocolate.
How Tempering Machines Work
Chocolate tempering machines typically work by following a pre-programmed or user-set temperature cycle. You add chocolate (either solid or pre-melted) to the machine's basin. The machine first heats the chocolate to the initial melting temperature to melt all crystals. Then, it cools the chocolate down to the crystallization temperature while often agitating it with a stirring mechanism to promote Type V crystal formation.
Finally, the machine gently raises the temperature back up to the working temperature and holds it there. Some machines use a "seeding" method internally, requiring you to add solid chocolate pieces, while others rely purely on temperature control and agitation. Higher-end machines may have precise digital controls and continuous tempering capabilities, allowing you to add chocolate as you use it.
Tips for Using a Tempering Machine Effectively
Using a tempering machine simplifies the process, but a few tips can ensure success. Always start with clean, dry chocolate and ensure the machine itself is perfectly clean and dry, as even a drop of water can seize chocolate. Read your machine's instructions carefully, as temperature settings and procedures can vary by model. Calibrate your thermometer periodically if your machine has a manual temperature setting option.
For optimal results, fill the basin with a sufficient amount of chocolate as recommended by the manufacturer; underfilling can sometimes affect the tempering cycle. Test the temper periodically using the snap test, especially when you first start using the machine or if you change chocolate brands. Keep the lid closed on the machine when not actively using the chocolate to help maintain the temperature and prevent contamination.
Tempered Chocolate Troubleshooting Guide: Solving Common Problems with BakeWithEase
Even with careful execution, tempering chocolate can sometimes go awry. Don't get discouraged! Understanding common issues and how to fix them is a key part of mastering the process. This comprehensive tempered chocolate troubleshooting guide will help you identify problems and provide practical solutions to get your chocolate back in temper.
Most tempering problems stem from temperature control issues or the presence of moisture. By diagnosing the specific problem, you can often salvage your batch of chocolate without having to start completely over. Remember, practice makes perfect when dealing with tempered chocolate troubleshooting.
Common Tempering Chocolate Issues: A Quick Reference Chart
Here's a quick look at some frequent problems encountered when tempering chocolate, which we'll delve into in more detail:
- Chocolate becomes thick, lumpy, or hardens unexpectedly:Seizing
- Chocolate develops a dull, grayish, or streaky surface after setting:Fat Bloom
- Chocolate develops a white, powdery surface after setting:Sugar Bloom
- Chocolate is too runny or too thick for its intended use:Consistency Issues
- Chocolate doesn't set properly, remains soft, or takes a very long time to harden:Won't Set
Understanding these visual cues is the first step in utilizing this tempered chocolate troubleshooting guide effectively. Each issue has distinct causes and corresponding solutions.
Problem 1: Chocolate is Seizing - Causes and Solutions
Chocolate seizing is one of the most frustrating tempering problems. It occurs when chocolate suddenly transforms from a smooth, liquid state into a thick, lumpy, unworkable mass. This happens when a small amount of liquid, most commonly water, comes into contact with melted chocolate. The sugar and cocoa solids clump together around the water molecules, causing the chocolate to seize. Overheating chocolate can also sometimes lead to a form of seizing, though it's more accurately described as burning or scorching.
Rectifying seized chocolate due to water is difficult for tempering purposes, but it can often be salvaged for other uses. If seized due to overheating, the flavor is usually compromised. Preventing seizing is far easier than fixing it during the tempering process.
Overheating Chocolate: Prevention and Recovery
Overheating chocolate occurs when it's heated too quickly or to too high a temperature, especially during the initial melting phase. This can scorch the chocolate, giving it a burnt flavor and potentially causing it to seize or become grainy because the sugar crystals burn. Dark chocolate should typically not exceed 120°F (49°C), milk 110°F (43°C), and white 105°F (40°C) during melting.
To prevent overheating, melt chocolate gently over a double boiler with barely simmering water or in short intervals in the microwave (30 seconds maximum at a time, stirring between each). Always stir frequently to distribute heat evenly.
If you suspect you've overheated chocolate but it hasn't seized, remove it from the heat immediately, stir constantly, and let it cool slightly. If it tastes burnt or has seized, it's usually not salvageable for tempering or fine confectionery, but you might be able to use it in baked goods by stirring in a tablespoon or two of hot oil or melted butter to create a thick sauce, though the flavor will still be affected.
Water Contamination: How to Avoid and Remedy
The most common cause of seizing is water contamination. Even a single drop of water or steam coming into contact with melted chocolate can initiate the seizing process. This is why it's crucial that all your equipment – bowls, spatulas, thermometers – are perfectly clean and completely dry. When using a double boiler, ensure the simmering water doesn't touch the bottom of the chocolate bowl and that steam doesn't escape and condense into the chocolate.
If your chocolate seizes due to water, it's generally not recoverable for tempering or delicate applications. The chocolate's texture is fundamentally altered. You can sometimes salvage it for use in baking by stirring in a tablespoon or two of a hot liquid like vegetable oil, melted butter, or cream (depending on the recipe) until it becomes a thick, usable ganache-like consistency. However, this mixture cannot be tempered and will not set with a snap or shine. Prevention is absolutely key here: keep water far away from your melting chocolate.
Problem 2: Chocolate is Blooming - Identifying Fat and Sugar Bloom
Chocolate bloom is a common issue that results in an unappealing appearance, but it doesn't necessarily mean the chocolate is unsafe to eat (though the texture can be unpleasant). There are two types of bloom: fat bloom and sugar bloom. Both indicate that the chocolate was either not tempered properly or was stored incorrectly after tempering. Addressing bloom is a key part of any tempered chocolate troubleshooting guide.
While bloomed chocolate can often be re-melted and tempered correctly (in the case of fat bloom) or used in baking, it cannot simply be wiped away or fixed without re-processing. Identifying the type of bloom helps determine the cause and potential solutions.
Fat Bloom: Causes and Corrective Actions
Fat bloom appears as a dull, grayish film or streaks on the surface of chocolate. It happens when the unstable fat crystals (those not forming the desired Type V structure) separate from the cocoa solids and rise to the surface, recrystallizing there.
This is most commonly caused by improper tempering (not achieving or maintaining the stable Type V crystal structure) or by storing tempered chocolate at fluctuating temperatures or in too warm conditions. For example, if tempered chocolate is stored above its melting point (even slightly) and then cools, the fat crystals can rearrange into unstable forms, leading to bloom.
To correct fat bloom, the chocolate must be re-tempered. Chop the bloomed chocolate finely and go through your chosen tempering method (seeding, tabliering, or machine). By melting the chocolate completely, you destroy all existing fat crystals, including the unstable ones that caused the bloom. Then, the tempering process guides the cocoa butter back into forming stable Type V crystals. Ensure proper temperature control throughout the process and store the finished, tempered chocolate correctly to prevent future bloom.
Sugar Bloom: Causes and Solutions
Sugar bloom appears as a white, powdery, or gritty layer on the surface of chocolate. This occurs when moisture comes into contact with the chocolate's surface. The moisture dissolves some of the sugar crystals, and as the moisture evaporates, the sugar re-crystallizes on the surface in larger, visible crystals. This is often caused by condensation, which happens when cold chocolate is brought into a warmer, humid environment (like taking chocolate directly from a refrigerator into a warm kitchen). Storing chocolate in a damp environment can also cause sugar bloom.
Unlike fat bloom, sugar bloom cannot be fixed by simply re-tempering the chocolate because the sugar crystals are on the surface and their structure has changed due to moisture. While the chocolate is still safe to eat, the texture will be gritty. You can melt down sugar-bloomed chocolate and use it in baked goods (like brownies or cakes) where the sugar bloom won't be noticeable, or where the sugar will dissolve during the baking process.
However, it is not suitable for applications where a smooth texture is desired, such as dipping or molding. Prevention is the best solution: store chocolate in a cool, dry place with minimal temperature fluctuations.
Problem 3: Chocolate is Too Thick or Too Thin - Adjusting the Consistency
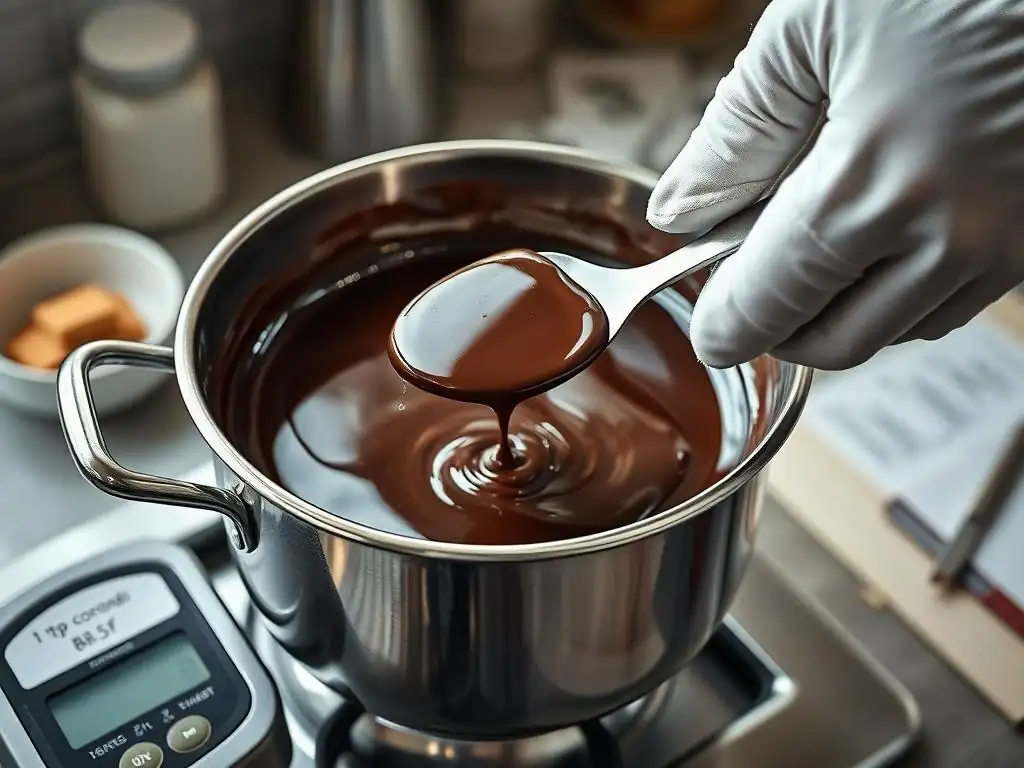
Sometimes, even if tempered correctly, your chocolate might not have the ideal viscosity for your specific application. It might be too thick for dipping delicate items or too thin to build up layers in a mold quickly. This isn't strictly a tempering error but rather an issue of managing the chocolate's flow properties at the working temperature. Different chocolates inherently have different viscosities based on their cocoa butter content and how they are processed.
Adjusting consistency requires careful manipulation of the chocolate's composition while maintaining its temper. Adding certain ingredients can alter viscosity, but it must be done in a way that doesn't disrupt the delicate balance of the tempered crystal structure.
Adjusting Viscosity: Adding Cocoa Butter or Chocolate Liquor
If your tempered chocolate is too thick, you can thin it slightly by adding a small amount of melted, tempered cocoa butter or a very small amount of vegetable oil (though oil can slightly affect flavor and mouthfeel). Cocoa butter is the preferred method for maintaining chocolate purity and temper. Melt cocoa butter separately and temper it, then stir a small amount (start with 1-2%) into your tempered chocolate until the desired consistency is reached. Be careful not to add too much, as this can make the chocolate too runny.
If your tempered chocolate is too thin, the easiest way to thicken it is by adding more solid chocolate of the same type and stirring until it melts and incorporates, effectively increasing the ratio of solids to fat. Alternatively, you can add a small amount of pre-melted and tempered chocolate liquor (pure ground cocoa mass), which is thicker than cocoa butter. Always test the temper after making adjustments, as adding ingredients can slightly alter the temperature and crystal structure.
Problem 4: Chocolate Won't Set Properly - Ensuring Proper Crystallization
One of the most frustrating issues in a tempered chocolate troubleshooting guide is when the chocolate simply refuses to set properly, remaining soft, sticky, or taking hours to harden. This is a clear indication that the chocolate is not in temper – the stable Type V crystals did not form correctly, or unstable crystals are preventing proper solidification. The two main culprits are usually incorrect temperature control during the tempering process or issues with the seeding material if using that method.
Getting chocolate to set with a firm snap is the ultimate goal of tempering. If it's not setting, it means the process needs to be revisited, focusing on the critical temperature stages and agitation.
Temperature Control: The Key to Setting
If your chocolate won't set, the most likely cause is that you either didn't cool it down far enough during the crystallization phase or you overheated it when bringing it back up to the working temperature, melting away the stable Type V crystals you created. For example, if using the seeding method for dark chocolate, failing to cool it below 90°F (32°C) while stirring may mean insufficient Type V crystals formed. Conversely, if you successfully cooled it but then heated it above 91°F (33°C) before using it, you might have melted those essential crystals.
To fix this, you'll need to re-temper the chocolate. Melt it completely again, destroying all unstable crystal forms. Then, carefully repeat your chosen tempering method, paying strict attention to the temperature ranges for melting, cooling/crystallizing, and working temperatures. Use a reliable thermometer and stir consistently during the cooling phase to ensure even crystal formation. Ensure your workspace is cool enough (ideally 68-70°F or 20-21°C) for the chocolate to set properly after it's applied.
Seeding Issues: Troubleshooting the Seeding Method
If you are using the seeding method and your chocolate won't set, the problem might lie with your seed chocolate. The seed chocolate must be properly tempered itself to introduce the correct Type V crystals. If your seed chocolate is not in temper, it won't effectively initiate the desired crystallization in the melted chocolate. Ensure you are using high-quality, commercially tempered chocolate or previously tempered chocolate that you know was successful.
Another seeding issue is using too little or too much seed chocolate, or not stirring long enough. Using too little seed might not introduce enough stable crystals. Not stirring continuously while the temperature drops might result in uneven crystallization.
If the temperature drops too low and the mixture becomes too thick before all the seed melts, it can also lead to problems. If this happens, gently warm it slightly while stirring vigorously until the seed melts, but do not exceed the working temperature. If problems persist, re-melt everything and try again with fresh, properly tempered seed chocolate, ensuring you stir until the target working temperature is reached.
BakeWithEase's Expert Tips for Perfect Tempered Chocolate
Achieving perfect tempered chocolate consistently involves more than just following a method; it requires attention to detail and understanding the nuances of working with this sensitive ingredient. Here are some additional expert tips from BakeWithEase to help you succeed.
From selecting the right chocolate to storing your finished creations, these tips cover essential aspects often overlooked but crucial for achieving that professional shine and snap. Mastering these details will greatly improve your tempered chocolate troubleshooting skills and overall success rate.
Choosing the Right Chocolate: Quality Matters
The quality of the chocolate you use significantly impacts the outcome of your tempering efforts. High-quality couverture chocolate, which has a higher percentage of cocoa butter (typically 30-39%) compared to standard baking or eating chocolate, is ideal for tempering. The extra cocoa butter makes it easier to work with and achieve a stable temper. Look for chocolate specifically labeled as "couverture."
Avoid using chocolate chips directly for tempering, as many contain stabilizers or less cocoa butter which can interfere with proper crystal formation. While some high-quality chip brands can be tempered, it's generally best to start with bar chocolate or callets (small drops) designed for tempering. Different brands and types of chocolate will behave slightly differently, so you may need to make minor temperature adjustments based on the specific product you're using.
Maintaining the Ideal Temperature: A Crucial Factor
Maintaining the correct temperature is paramount throughout the tempering process and while working with the tempered chocolate. Use a reliable digital thermometer to monitor temperatures precisely. Once your chocolate is tempered and at its working temperature, you need to keep it within that narrow range (e.g., 88-91°F for dark) as you use it.
If the chocolate cools too much, it will start to thicken and potentially set in the bowl, requiring gentle reheating back to the working temperature. If it gets too warm, you risk melting the stable Type V crystals, causing it to lose its temper and requiring you to re-temper. A gentle heat source like a heat lamp, a warming pad on low, or placing the bowl over a bowl of warm water (not hot!) can help maintain the working temperature while you dip or mold. Stir the chocolate occasionally to ensure even temperature distribution.
Working with Tempered Chocolate: Best Practices
Once your chocolate is in temper and at the correct working temperature, work efficiently. Have all your molds, dipping items, or surfaces ready before you start. Keep your workspace relatively cool and dry – ideally between 68-70°F (20-21°C) with low humidity. Avoid drafts or sudden temperature changes, which can disrupt the setting process and potentially cause bloom.
When dipping items like strawberries or cookies, ensure they are completely dry and at room temperature. Cold or wet items can shock the chocolate, causing it to set unevenly or seize. For molding, ensure molds are clean, dry, and at room temperature. Pour the chocolate smoothly, tapping molds gently to remove air bubbles. Allow items to set undisturbed in a cool, dry place (not the refrigerator, unless specifically required and the temperature change is managed carefully to avoid condensation) until fully hardened and shiny.
Storage Solutions: Keeping Your Tempered Chocolate Perfect
Proper storage is essential to maintain the shine, snap, and bloom-free state of tempered chocolate. Store finished tempered chocolate pieces or confections in a cool, dry place with a consistent temperature, ideally between 60-68°F (15-20°C). Avoid direct sunlight, heat sources, and areas with high humidity.
A pantry or cupboard away from appliances is often suitable. Avoid refrigerating tempered chocolate unless absolutely necessary, as the cold temperature can dull the shine and the transition to warmer air can cause condensation, leading to sugar bloom. If you must refrigerate, place the chocolate in an airtight container before chilling, and allow the sealed container to come to room temperature slowly before opening to minimize condensation.
Using Tempered Chocolate in Your BakeWithEase Recipes
Tempered chocolate is a versatile ingredient that can elevate many baking and confectionery projects. Its stable nature, beautiful finish, and satisfying texture make it perfect for applications where chocolate is the star or needs to hold a specific shape. At BakeWithEase, we encourage you to explore the many ways you can incorporate this skill into your repertoire.
From simple dipped treats to intricate molded figures, working with tempered chocolate allows for creativity and precision. It's an essential technique for anyone looking to make professional-looking desserts and confections at home.
Applications of Tempered Chocolate: From Bonbons to Decorations
The uses for tempered chocolate are numerous and varied. It's essential for making molded chocolates and bonbons, as it contracts as it cools, allowing for easy release from the mold and a smooth, glossy finish. Dipping fruits (like strawberries or cherries), nuts, cookies, or candies in tempered chocolate results in a thin, crisp coating that sets quickly and doesn't melt easily in your hands.
Tempered chocolate is also used for creating decorative elements like chocolate curls, shards, feathers, or piped designs, as it holds its shape once set. Making chocolate bark is another popular application, allowing you to embed various toppings into a stable chocolate base. Even simply coating truffles or cake pops with tempered chocolate provides a superior finish compared to untempered or compound coatings.
Recipe Ideas: Incorporating Tempered Chocolate into Your Baking
Ready to put your tempering skills to use? Here are a few ideas for BakeWithEase recipes that benefit greatly from tempered chocolate:
- Homemade Chocolate Bars: Create your own custom chocolate bars with mix-ins like nuts, dried fruit, or caramel.
- Dipped Pretzels or Cookies: A simple yet classic application for a shiny, crisp coating.
- Molded Chocolate Shapes: Make festive shapes for holidays or elegant squares for petit fours.
- Chocolate Bark: Spread tempered chocolate thinly and top with anything from crushed peppermints to pistachios and cranberries.
- Truffle Coatings: Achieve a smooth, professional finish on your homemade chocolate truffles.
- Chocolate Decorations: Pipe intricate designs or spread chocolate onto acetate to create shards or curls for cake decorating.
Experiment with different types of chocolate – dark, milk, white, or even flavored varieties – to see how they behave when tempered and how they complement other flavors in your baking.
Advanced Techniques: Working with Colors and Textures in Tempered Chocolate
Once you're comfortable with basic tempering, you can explore more advanced techniques like coloring chocolate or adding textures. Oil-based or fat-soluble food colors are specifically designed for chocolate; water-based colors will cause seizing. You can mix these colors directly into your tempered white chocolate to create vibrant hues for molding or decorating. For a marbled effect, swirl different colors of tempered chocolate together before pouring into molds or onto a surface.
Adding texture can involve embedding ingredients into molds before pouring the tempered chocolate (like crushed nuts or cocoa nibs) or creating textured surfaces on chocolate decorations using tools or textured mats while the chocolate is still wet. You can also work with different chocolate viscosities to create thicker or thinner coatings for specific effects. These advanced techniques, combined with a solid understanding of tempering and tempered chocolate troubleshooting, allow you to create stunning and delicious chocolate artistry.
Frequently Asked Questions
What is tempered chocolate, and why is it important?
Tempered chocolate is chocolate that has been heated and cooled in a specific way to create stable cocoa butter crystals. This process results in a shiny, snappy finish and prevents blooming, a dull, white coating on the surface.
What are the common signs that my chocolate is not properly tempered?
Signs of improperly tempered chocolate include a dull or streaky appearance, a soft or crumbly texture, and the formation of white streaks or bloom on the surface.
What are some common mistakes that lead to tempering failures?
Common mistakes include overheating the chocolate, not stirring enough during the cooling process, and introducing moisture into the melted chocolate.
How can I fix chocolate that has been improperly tempered?
The best way to fix improperly tempered chocolate is to re-temper it. This involves melting it again and following the tempering process carefully, ensuring the correct temperatures are reached.
What tools are essential for successful chocolate tempering?
Essential tools include a reliable thermometer, a heat-proof bowl (preferably glass or stainless steel), and a spatula or scraper for consistent stirring. A double boiler or microwave are also helpful for melting the chocolate.
Final Reflection: Mastering the Art of Tempered Chocolate
The pursuit of flawlessly tempered chocolate remains a crucial skill for any serious baker, and its impact on the final product is undeniable. A perfectly tempered chocolate shell boasts a satisfying snap, a beautiful sheen, and a melt-in-your-mouth texture that elevates any dessert from good to extraordinary. This guide aimed to demystify the process, providing practical solutions to common tempering challenges, and empowering bakers of all levels to achieve consistent success.
The journey of mastering tempered chocolate is a testament to patience, precision, and the rewarding feeling of transforming simple ingredients into something truly special. It's a skill that transcends mere technique; it's about understanding the science behind the process and appreciating the artistry involved in creating a perfect chocolate shell. The difference between something good and something great is attention to detail.
This quote perfectly encapsulates the essence of successful chocolate tempering. The subtle nuances, the careful monitoring of temperature, and the unwavering dedication to the process all contribute to the final, breathtaking result.
Now, it's your turn. Don't be intimidated by the seemingly complex nature of chocolate tempering. Use this guide as your roadmap, experiment with the techniques, and embrace the learning process. Each batch of tempered chocolate, whether it's a triumph or a learning experience, brings you closer to mastering this exquisite culinary art. Remember the satisfaction of that perfect snap, the gleam of that flawless sheen, and let that drive you to continue refining your skills. The world of chocolate awaits your creative touch.
Unlock Your Chocolate Mastery!
Thanks for joining us on this delicious journey into the world of tempered chocolate! You've now learned the secrets to creating flawlessly shiny, snappable treats. Ready to put your new skills to the test?
- Dive into our free Tempered Chocolate Recipe Collection: We've curated a selection of our most popular recipes, perfect for practicing your newly acquired technique. You'll find everything from elegant truffles to stunning bonbons!
- Share your chocolate creations: Show us your masterpieces on social media using #BakeWithEaseTemperedChocolate – we can’t wait to see what you create!
- Challenge yourself: Try tempering a type of chocolate you haven't worked with before. Dark, milk, or white – the possibilities are endless!
What incredible chocolate creations will you craft next?