
Preserve Your Starter: Easy Guide to Drying Sourdough Starter

Welcome to BakeWithEase!
Ever wondered how to safeguard your precious sourdough starter for future baking adventures? Discover the secrets to effortlessly preserving your starter with our comprehensive guide on drying sourdough starter tips. Unlock the convenience and longevity of your culture, ensuring you're always ready to whip up amazing bakes. Let's dive in and learn how to keep your sourdough journey alive, even when life gets busy!
- Introduction: Why Dry Your Sourdough Starter?
- Drying Sourdough Starter: A Step-by-Step Guide
- Rehydrating Your Dried Sourdough Starter: Reviving Your Culture
- Troubleshooting: Common Issues and Solutions When Drying Sourdough Starter
- Tips for Success: Optimizing Your Sourdough Drying Process
- Long-Term Storage of Dried Sourdough Starter: Keeping Your Culture Alive
- Using Dried Sourdough Starter: Incorporating It into Your Recipes
- Conclusion: Mastering Sourdough Starter Preservation
-
Frequently Asked Questions
- What exactly is drying sourdough starter and why would I do it?
- What are the best methods for drying my sourdough starter, according to BakeWithEase?
- How do I know when my sourdough starter is completely dry and safe to store?
- How long can I store dried sourdough starter, and what are the best storage conditions?
- How do I reactivate my dried sourdough starter after storing it?
- Final Reflection: The Enduring Legacy of Your Sourdough Starter
- Ready to Preserve Your Perfect Starter?
Introduction: Why Dry Your Sourdough Starter?
Sourdough baking has captured the hearts of many home bakers, offering a unique flavor and texture that commercial yeast simply can't replicate. At the core of this craft is the sourdough starter – a living culture of wild yeast and bacteria. However, maintaining a starter requires regular feeding, which can be a commitment, especially if you don't bake frequently. This is where the invaluable technique of drying your sourdough starter comes into play, offering a practical solution for preservation and peace of mind.
Drying sourdough starter tips are incredibly useful for anyone who wants to take a break from baking, travel, or simply wants a backup of their beloved culture. Imagine you've nurtured a starter for months, developing a robust and reliable culture. Losing it due to neglect or an accident would be heartbreaking! Drying provides a simple yet effective way to pause its activity indefinitely, ensuring that your unique blend of microbes is safe and sound, ready to be revived whenever you are ready to bake again.
Guide to Long-Term Starter Preservation
Preserving your sourdough starter long-term ensures that the unique microbial community you've cultivated remains accessible for future baking endeavors. While refrigeration slows activity significantly, it still requires occasional feeding. Drying, on the other hand, halts microbial activity almost completely, allowing the starter to remain viable for years when stored correctly. This method is particularly beneficial for bakers who travel often or experience periods where regular baking isn't feasible.
Effective drying sourdough starter tips focus on removing moisture, which is essential for microbial life. By reducing the water content below a critical threshold, typically around 10%, you create an environment where yeast and bacteria cannot thrive or reproduce. This puts them into a dormant state, like hibernation. When you're ready to bake, simply rehydrating and feeding the starter brings it back to life, often within a couple of days, allowing you to pick up right where you left off.
Benefits of Drying Your Sourdough Starter
The primary benefit of drying your sourdough starter is convenience and flexibility. It liberates you from the daily or weekly feeding routine, allowing you to step away from baking without the worry of your starter dying. This is especially helpful during busy periods, vacations, or even just for a change of pace. Having a dried backup also provides a safety net; if anything happens to your active starter (like mold contamination or accidental discard), you can easily revive your preserved version.
Furthermore, drying sourdough starter tips also highlight the ease of sharing your culture. A dried starter is lightweight, non-perishable, and easy to package and mail, making it simple to share your successful culture with friends, family, or fellow baking enthusiasts across distances. Instead of needing to coordinate shipping of an active, hungry starter, you can send a small bag of flakes or powder that can be easily revived by the recipient, spreading the joy of your unique sourdough.
Drying Sourdough Starter: A Step-by-Step Guide
Drying your sourdough starter is a straightforward process that requires minimal equipment and patience. By following a few simple steps, you can successfully preserve your starter for months or even years. These drying sourdough starter tips are designed to make the process accessible for any home baker.
Materials You'll Need to Dry Your Sourdough Starter
Before you begin, gather the necessary materials. Having everything ready will make the process smoother and help ensure successful drying. You likely have most of these items in your kitchen already, making this a very accessible preservation method.
- Active, healthy sourdough starter (fed and bubbly)
- Parchment paper or silicone baking mats
- Baking sheets or trays
- Spatula or offset spatula
- A clean, dry location (for air drying) or a low-temperature oven/food dehydrator
- Airtight container or bag for storage (glass jar, zip-top bag)
- Optional: Food processor or mortar and pestle for grinding
These materials are simple and readily available, emphasizing the ease with which you can implement these drying sourdough starter tips. Ensuring everything is clean is crucial to prevent contamination during the drying process.
Step 1: Prepare Your Sourdough Starter for Drying
The first crucial step in drying your sourdough starter is ensuring it is healthy and active. Use a starter that has been recently fed and is at its peak or just past its peak activity – meaning it has doubled or tripled in size and is full of bubbles. A robust starter is more likely to survive the drying process and rehydrate successfully later on. Avoid drying a starter that seems sluggish, hasn't been fed recently, or shows any signs of mold.
Feed your starter as you normally would, perhaps aiming for a slightly thicker consistency if you prefer, though a standard 100% hydration starter works perfectly fine. Let it sit at room temperature until it is bubbly and active. This typically takes 4-12 hours depending on the temperature of your kitchen and the vitality of your starter. Using a strong, healthy starter is perhaps one of the most important drying sourdough starter tips for guaranteed success.
Step 2: Spreading the Sourdough Starter Thinly
Once your starter is active and ready, it's time to spread it out for drying. Line baking sheets or trays with parchment paper or silicone baking mats. These non-stick surfaces are essential as the dried starter will peel off easily once brittle. Avoid using wax paper or aluminum foil directly, as the starter may stick.
Pour or dollop your active starter onto the prepared surface. Use an offset spatula or the back of a spoon to spread the starter as thinly and evenly as possible. Aim for a thickness no more than 1-2 millimeters (about the thickness of a credit card). Thinner layers dry much faster and more completely, significantly reducing the risk of mold growth during the drying process. Spreading it thinly is a key drying sourdough starter tip that speeds up the process and minimizes moisture-related issues.
Step 3: Drying the Sourdough Starter Completely (Air Drying, Oven, or Dehydrator)
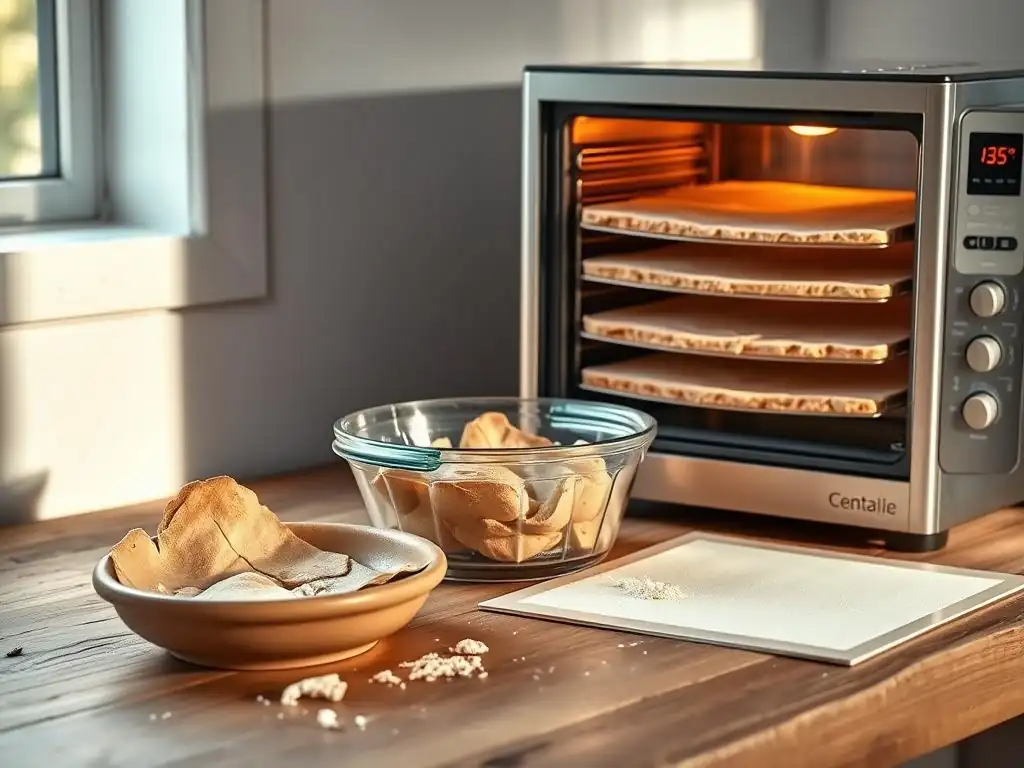
Complete dryness is non-negotiable for long-term preservation. Any residual moisture can lead to mold or bacterial growth over time, rendering your preserved starter unusable. You have a few options for drying, each with its own advantages and considerations regarding drying time and temperature control.
Regardless of the method chosen, the goal is to dry the starter until it is brittle and easily snaps or flakes when bent. It should not be pliable or tacky at all. Achieving this level of dryness is critical for successful long-term storage, and patience is required to ensure all moisture is removed.
Air Drying Sourdough Starter: A Patient Approach
Air drying is the simplest method, requiring no special equipment beyond trays and a suitable location. Spread the starter thinly on parchment paper as described earlier. Place the trays in a warm, dry spot in your home, away from direct sunlight and drafts that might blow contaminants onto the surface. A kitchen counter or a shelf in a dry pantry can work.
The drying time varies greatly depending on the humidity of your environment and the thickness of the starter layer. In a low-humidity climate, it might take 12-24 hours. In a humid environment, it could take 24-48 hours or even longer. Ensure the area is clean and free from pests. Check periodically; the edges will dry first, becoming brittle. Wait until the entire sheet is completely dry and brittle before proceeding. This method is energy-efficient but requires vigilance against contamination and moisture.
Oven Drying Sourdough Starter: Maintaining Low Temperatures
Using your oven at its lowest possible temperature setting offers a faster drying time than air drying. Preheat your oven to the lowest setting, ideally no higher than 100°F (38°C). Many ovens have a "warm" setting or can be set as low as 150°F (65°C); if your oven's lowest is higher than 100°F, prop the oven door open slightly with a wooden spoon to keep the temperature down. High heat will kill your starter!
Place the baking sheets with the spread starter into the low-temperature oven. Leave the door slightly ajar if necessary to regulate temperature and allow moisture to escape. Drying time in the oven is typically much faster, perhaps 3-6 hours, depending on the oven temperature and starter thickness. Check frequently. The starter is done when it is completely brittle and snaps easily. Remove promptly once fully dry. This method requires careful monitoring to avoid overheating.
Using a Food Dehydrator for Sourdough Starter Preservation
A food dehydrator is arguably the most controlled and efficient method for drying sourdough starter. Dehydrators are designed to circulate air at precise low temperatures, making them ideal for preserving cultures. Spread the starter thinly on the dehydrator trays lined with non-stick sheets or parchment paper.
Set the dehydrator temperature to a low setting, ideally between 95°F and 105°F (35°C-40°C). This temperature range is low enough not to harm the microbes but high enough to facilitate efficient moisture removal. Drying time in a dehydrator is typically 4-8 hours, depending on the thickness and the specific model. Check periodically; the starter is fully dry when it is brittle and flakes easily. This method offers reliable results and faster drying times compared to air drying.
Step 4: Breaking and Storing Your Dried Sourdough Starter
Once your sourdough starter is completely dry and brittle, it's time to break it into smaller pieces for storage. You can simply break the large dried sheets into flakes by hand. For easier storage and future use, you can also process the flakes into a powder.
Place the dried flakes into a food processor, blender, or use a mortar and pestle. Pulse or grind until you have a coarse or fine powder, depending on your preference. A powdered starter takes up less space and can sometimes rehydrate more quickly. Store the dried flakes or powder in a clean, airtight container.
Mason jars, zip-top bags with the air squeezed out, or vacuum-sealed bags work well. Label the container clearly with the date it was dried. Store in a cool, dark, dry place, such as a pantry. These simple storage drying sourdough starter tips ensure your culture remains viable.
Rehydrating Your Dried Sourdough Starter: Reviving Your Culture
Reviving dried sourdough starter is like waking up your culture from a long nap. It requires patience, warmth, and consistent feeding, but it's a rewarding process that brings your unique starter back to life, ready to leaven your bread again.
How to Activate Dried Sourdough Starter: A Detailed Process
To activate your dried sourdough starter, you'll need equal parts by weight of dried starter, warm water (around 80-90°F or 27-32°C), and flour. A common starting point is 10 grams dried starter, 10 grams warm water, and 10 grams flour. Combine the dried starter and warm water in a clean jar. Stir well to ensure all the dried flakes or powder are fully submerged and dissolving. Let this mixture sit for 30 minutes to an hour to allow the starter to rehydrate.
After the rehydration period, add the 10 grams of flour to the mixture. Stir thoroughly until no dry flour remains and you have a smooth paste. Cover the jar loosely and place it in a warm spot (ideally 75-80°F or 24-27°C).
Over the next 12-24 hours, you might see small bubbles forming as the culture begins to wake up. Continue feeding it daily with equal parts (by weight) of water and flour (e.g., add 20g water and 20g flour to your current mixture once it shows signs of activity) until it reliably doubles in size within 6-8 hours after feeding. This typically takes 1-3 days, but can sometimes take longer depending on the vitality of the dried starter and the environmental conditions.
Feeding Schedule for Rehydrated Sourdough Starter
Once your rehydrated starter begins showing consistent signs of activity – reliably bubbling and increasing in volume after feeding – you can transition to a regular feeding schedule. Initially, you might need to feed it every 12 hours, especially if it's reviving slowly or the environment is warm. Use a standard feeding ratio, such as 1:1:1 (starter:water:flour by weight) or 1:2:2 if you want to encourage faster growth.
As the starter becomes more vigorous, typically after 2-3 days of regular feeding, you can switch to a daily feeding schedule if you plan to keep it at room temperature. Feed it once every 24 hours using your preferred ratio. Wait until the starter has peaked and started to fall slightly before discarding a portion and feeding the remainder.
If you don't plan to bake immediately, you can transition it to refrigeration once it's consistently active, feeding it once a week. Patience during this revival phase is key; don't rush it, and your starter will reward you with robust activity.
Troubleshooting: Common Issues and Solutions When Drying Sourdough Starter
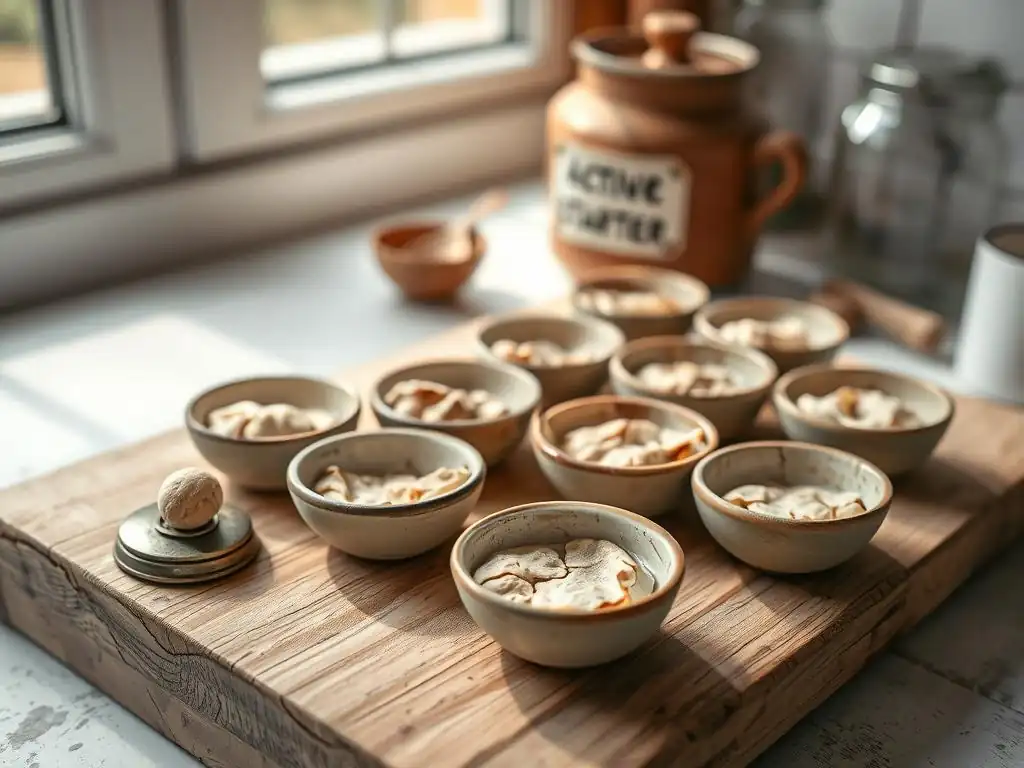
While drying sourdough starter is generally straightforward, you might encounter a few issues. Knowing how to identify and address them is part of mastering these drying sourdough starter tips.
Mold Growth During Drying: Prevention and Solutions
Mold growth is the most common issue when drying sourdough starter, and it almost always indicates incomplete drying or contamination. Mold appears as fuzzy or discolored patches (green, black, orange, or pink) on the surface of the drying starter. Prevention is key: ensure your starter is active and healthy before drying, use clean equipment and surfaces, spread the starter very thinly to promote quick drying, and dry it in a clean, dry environment away from drafts that could carry mold spores.
If you spot mold on your drying starter, unfortunately, the entire batch should be discarded. Mold has root structures that penetrate the food, even if you only see a small patch on the surface. Do not attempt to salvage moldy starter. Learn from the experience – perhaps you need to spread it thinner next time, ensure lower humidity during drying, or speed up the drying process. Proper cleaning and ensuring complete dryness are paramount drying sourdough starter tips to avoid this problem.
Starter Not Drying Completely: Addressing Moisture Issues
Sometimes, despite your efforts, the starter remains pliable or slightly tacky even after extended drying time. This means it hasn't reached the critical low moisture level needed for long-term preservation and is susceptible to mold or spoilage over time. This usually happens in humid environments or when the starter is spread too thickly.
If your starter isn't drying completely, try moving it to a warmer, drier location. If using air drying, consider switching to an oven on its lowest setting with the door ajar or using a food dehydrator, as these methods offer more controlled environments for moisture removal. Ensure the layer is thin. Continue drying until the starter snaps cleanly when bent, with no flexibility. If you live in a very humid climate, a dehydrator or oven drying is often a more reliable option than air drying alone.
Reviving Issues: Starter Not Activating After Drying
After following the rehydration steps, you might find your dried starter is slow to show activity, or perhaps shows no activity at all after several days of feeding. This can be disheartening but doesn't necessarily mean the starter is dead. It could be dormant or need more time and consistent care.
First, ensure you are using warm water (not hot, which can kill it, but warm) and feeding with appropriate flour (unbleached all-purpose or bread flour is best initially). Place the jar in a consistently warm spot (75-80°F or 24-27°C). Try feeding it a slightly thicker consistency (less water) or a higher ratio of new flour/water to starter (e.g., 1:2:2 or 1:3:3) to give the microbes more food.
Sometimes, adding a small amount of rye flour for one or two feedings can boost activity. If after 5-7 days of consistent feeding in a warm environment you see no bubbles or rise, the starter may not have survived the drying process or storage, which highlights the importance of starting with a vigorous starter and ensuring complete dryness for preservation.
Tips for Success: Optimizing Your Sourdough Drying Process
Maximizing the success rate when drying sourdough starter involves paying attention to a few key details. These simple drying sourdough starter tips can make a big difference in the vitality and longevity of your preserved culture.
Choosing the Right Flour for Drying Your Starter
The type of flour used to feed your starter before drying is important. While you can dry a starter made with any flour, starters fed primarily with strong bread flour or a mix including rye flour tend to be more robust and may survive the drying and rehydration process better. These flours provide ample nutrients for the microbes. Ensure your starter is well-established and healthy on its usual flour before drying.
When rehydrating, it's often easiest to start with the same type of flour you normally feed your starter, or a reliable unbleached all-purpose or bread flour. Avoid using whole wheat or rye for the initial rehydration unless that was the primary flour of your starter, as their higher nutrient content can sometimes lead to faster spoilage if the starter is slow to wake up. Starting with a strong, reliable flour is a good drying sourdough starter tip for robust revival.
Maintaining a Clean Environment for Drying
Cleanliness is paramount throughout the drying process. Any contaminants, particularly mold spores or unwanted bacteria, can compromise your starter. Ensure all tools, surfaces, and containers are thoroughly cleaned and dried before coming into contact with the starter. Wash trays, spatulas, and storage jars with hot, soapy water and rinse well.
Choose a drying location that is clean, dust-free, and away from areas where mold might thrive, such as damp basements or bathrooms. If air drying, cover the trays loosely with a clean tea towel or fine mesh screen to protect the starter from airborne dust or insects while still allowing air circulation. A clean process significantly reduces the risk of mold growth during drying, a crucial drying sourdough starter tip.
Ensuring Complete Dryness for Long-Term Storage
We've mentioned it before, but it bears repeating: complete dryness is the single most important factor for long-term storage success. If the starter is even slightly pliable or tacky, it contains enough residual moisture to allow dormant microbes (including potential contaminants) to become active over time, leading to spoilage.
Test for dryness by breaking a piece. It should snap cleanly with no bending or give. If in doubt, continue drying for a few more hours. Over-drying is not a concern; under-drying is. When storing, include a food-grade silica gel packet in the container if possible (ensure it does not touch the starter directly) to absorb any trace moisture, adding an extra layer of security. Achieving bone-dryness is the ultimate drying sourdough starter tip for maximum shelf life.
Long-Term Storage of Dried Sourdough Starter: Keeping Your Culture Alive
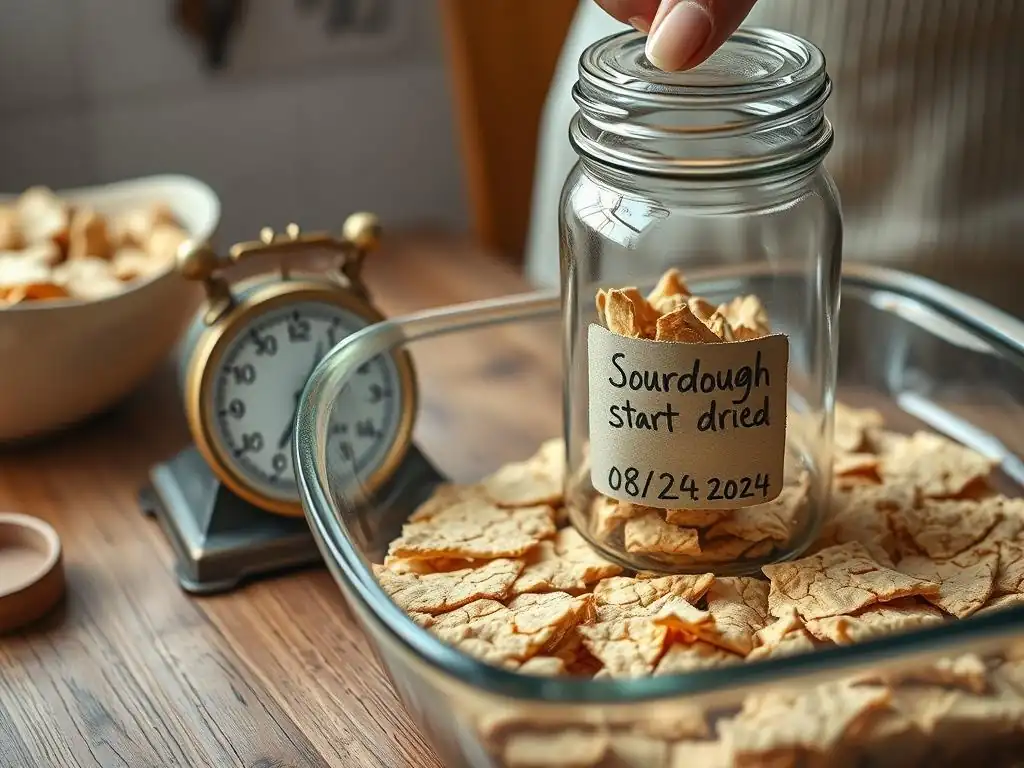
Once successfully dried and broken down, your sourdough starter can be stored for extended periods. Proper storage conditions are essential to maintain its viability.
Best Practices for Storing Dried Sourdough
Store your dried sourdough starter in an airtight container to protect it from moisture and contaminants. Glass jars with tight-fitting lids, Mylar bags, or vacuum-sealed bags are excellent choices. Ensure the container is completely dry before adding the starter.
Keep the container in a cool, dark, and dry location. A pantry shelf, cupboard, or even the refrigerator or freezer are suitable options. While refrigeration or freezing isn't strictly necessary once the starter is fully dry, it provides an extra layer of protection against temperature fluctuations and humidity, further extending its shelf life. Avoid storing it near heat sources like ovens or in areas prone to humidity like under sinks.
Shelf Life of Dried Sourdough Starter
When dried completely and stored correctly in an airtight container in a cool, dark, dry place, dried sourdough starter can remain viable for many years. While some anecdotal evidence suggests viability for a decade or more, a more conservative and reliable estimate is that it will last at least 1-2 years with high chances of successful revival.
The older the dried starter, the longer it might take to revive fully, and its overall vigor upon revival can vary. However, even a small amount of surviving yeast and bacteria can be nursed back to full strength with consistent feeding. If you've followed all the drying sourdough starter tips diligently, you can be confident in the longevity of your preserved culture. It's a good practice to dry a fresh batch every couple of years if you want to ensure maximum vitality for future use.
Using Dried Sourdough Starter: Incorporating It into Your Recipes
Using dried sourdough starter requires rehydrating and activating it first. You cannot typically add the dried flakes or powder directly to a recipe intended for active starter.
Converting Recipes for Dried vs. Active Sourdough Starter
Recipes are usually written for an active, fed sourdough starter, often referred to as "levain" or "preferment" depending on the recipe. To use your dried starter, you must first go through the rehydration and feeding process described earlier until you have a fully active starter that reliably doubles after feeding.
Once your dried starter has been successfully revived and is active, you can use it in any recipe calling for active sourdough starter. The amount of active starter you need for a recipe will dictate how much dried starter you should rehydrate and feed. For example, if a recipe calls for 100 grams of active starter, you might start with 10-20 grams of dried starter and revive it, feeding it until you have at least 100 grams of active starter ready to use. Remember that rehydrating takes time (1-3 days), so plan ahead when you want to bake.
Sourdough Pancake Recipe Using Rehydrated Starter
Here's a simple recipe demonstrating how to use your successfully rehydrated and active sourdough starter. This recipe assumes you have at least 1 cup (about 240g) of active starter ready to go.
Simple Sourdough Pancakes

Ingredients:
*   1 cup active sourdough starter (fed and bubbly)
*   1 large egg
*   2 tablespoons melted butter or vegetable oil, plus more for greasing the pan
*   1 tablespoon sugar (optional, for a touch of sweetness)
*   1/2 teaspoon baking soda
*   1/4 teaspoon salt
*   2-4 tablespoons milk or water (optional, to adjust consistency)

Instructions:
1.  In a medium bowl, gently whisk together the active sourdough starter, egg, melted butter/oil, and sugar (if using).
2.  In a small separate bowl, whisk together the baking soda and salt.
3.  Add the baking soda and salt mixture to the wet ingredients. Stir gently until just combined. Don't overmix; a few lumps are okay. The mixture will get bubbly as the baking soda reacts with the acidic starter.
4.  If the batter seems too thick, add milk or water, one tablespoon at a time, until it reaches your desired pancake consistency.
5.  Heat a lightly greased griddle or non-stick pan over medium heat.
6.  Pour about 1/4 cup of batter per pancake onto the hot surface.
7.  Cook for 2-3 minutes per side, or until bubbles appear on the surface and the edges look set, then flip and cook the other side until golden brown.
8.  Serve immediately with your favorite toppings.
This recipe is a great way to use your rehydrated starter, showcasing its leavening power and tangy flavor in a quick and easy format. It's a testament to the successful preservation achieved by following sound drying sourdough starter tips.
Conclusion: Mastering Sourdough Starter Preservation
Drying your sourdough starter is an incredibly valuable skill for any sourdough baker. It offers unparalleled flexibility, allowing you to take breaks from regular feeding without losing your precious culture. It also provides a reliable backup, safeguarding against accidental loss. By following the simple steps of preparing, thinly spreading, completely drying, and properly storing your starter, you can ensure its viability for years to come.
The process, while requiring attention to detail regarding dryness and cleanliness, is accessible and rewarding. Rehydrating and reviving your dried starter is a magical process, bringing your culture back to life and ready to leaven delicious bread, pancakes, and more. Embracing these drying sourdough starter tips means gaining freedom and security in your sourdough journey.
Embrace the Ease of Drying Your Sourdough Starter
Don't let the commitment of daily feeding deter you from the joys of sourdough baking. Drying your starter is a simple, effective technique that puts you in control. It's a testament to the resilience of these fascinating microbial communities that they can be paused and revived with such success. Take the small amount of time needed to dry a portion of your active starter today, and gain the peace of mind that comes with having a reliable backup. It's one of the most empowering drying sourdough starter tips you can put into practice.
Whether you're planning a vacation, managing a busy schedule, or simply want to share your unique culture, drying is the answer. It's an easy way to preserve your hard work and ensure that your sourdough journey can continue whenever you're ready.
Further Resources for Sourdough Baking
Mastering drying sourdough starter tips is just one part of the wonderful world of sourdough baking. To deepen your skills and explore more recipes and techniques, continue exploring resources dedicated to this craft. Understanding starter health, feeding ratios, proofing times, and baking techniques will further enhance your baking success. Look for detailed guides on maintaining starter, beginner sourdough bread recipes, and advanced techniques like shaping and scoring.
By utilizing reliable resources, you can continue to grow as a baker, creating delicious and satisfying sourdough goods from your revitalized starter. Happy baking!
Frequently Asked Questions
What exactly is drying sourdough starter and why would I do it?
Drying sourdough starter is the process of removing moisture to preserve it for long-term storage. It's useful for backing up your starter or sharing it with others.
What are the best methods for drying my sourdough starter, according to BakeWithEase?
BakeWithEase recommends spreading a thin layer of active starter on parchment paper or a silicone mat and air drying it or using a very low oven temperature.
How do I know when my sourdough starter is completely dry and safe to store?
The dried starter should be completely brittle and easily breakable. There should be no soft spots or signs of moisture remaining.
How long can I store dried sourdough starter, and what are the best storage conditions?
Dried sourdough starter can be stored for several months to even years in an airtight container in a cool, dark place, like the refrigerator or freezer.
How do I reactivate my dried sourdough starter after storing it?
To reactivate, crumble the dried starter and mix it with equal parts water and flour. Feed it regularly until it becomes active and bubbly again.
Final Reflection: The Enduring Legacy of Your Sourdough Starter
The art of preserving sourdough starter transcends mere baking; it's a testament to patience, nurturing, and the enduring connection between past and present. Drying your starter isn't just about convenience; it's about safeguarding a living piece of your baking journey, a legacy you can revive at any time. This simple act ensures that the unique character of your starter, honed over weeks or even months, isn't lost to time.
The process of drying and reviving a sourdough starter mirrors the cyclical nature of life itself – periods of dormancy followed by vibrant renewal. It's a powerful metaphor for resilience and the enduring power of tradition. The best bread is made with love, patience, and a little bit of magic,
a wise baker once said, and that magic resides within the very heart of your starter, waiting to be awakened. The act of preserving it connects us to generations of bakers who have carefully maintained their own unique cultures, a tangible link to a rich culinary history.
Now, consider your own starter. What stories does it hold? What loaves has it birthed? Take a moment to appreciate the living organism you've nurtured, and the power you hold to preserve its legacy. Don't let the knowledge gained from this guide remain dormant. Dry your starter, safeguard its future, and share the joy of baking with others. The next loaf you bake, using your carefully preserved starter, will taste not only delicious, but also of history, patience, and the enduring spirit of sourdough.
Ready to Preserve Your Perfect Starter?
Thanks for taking the time to learn about drying your sourdough starter! We hope you now feel confident in keeping your bubbly friend alive, even when life gets busy. Ready to put your newfound knowledge into practice?
- Dry your starter today! Follow the steps outlined in the article to safely and effectively preserve your precious sourdough culture.
- Share your drying experience! Tell us about your results – did you encounter any challenges or have any tips to share? We'd love to hear from you in the comments!
- Explore our other sourdough recipes – you'll find plenty of inspiration for using your perfectly preserved starter in delicious new bakes.
What creative sourdough recipes will you bake with your dried starter? Let's hear your ideas!