
The Art of Feeding: Simple Techniques for a Strong Starter

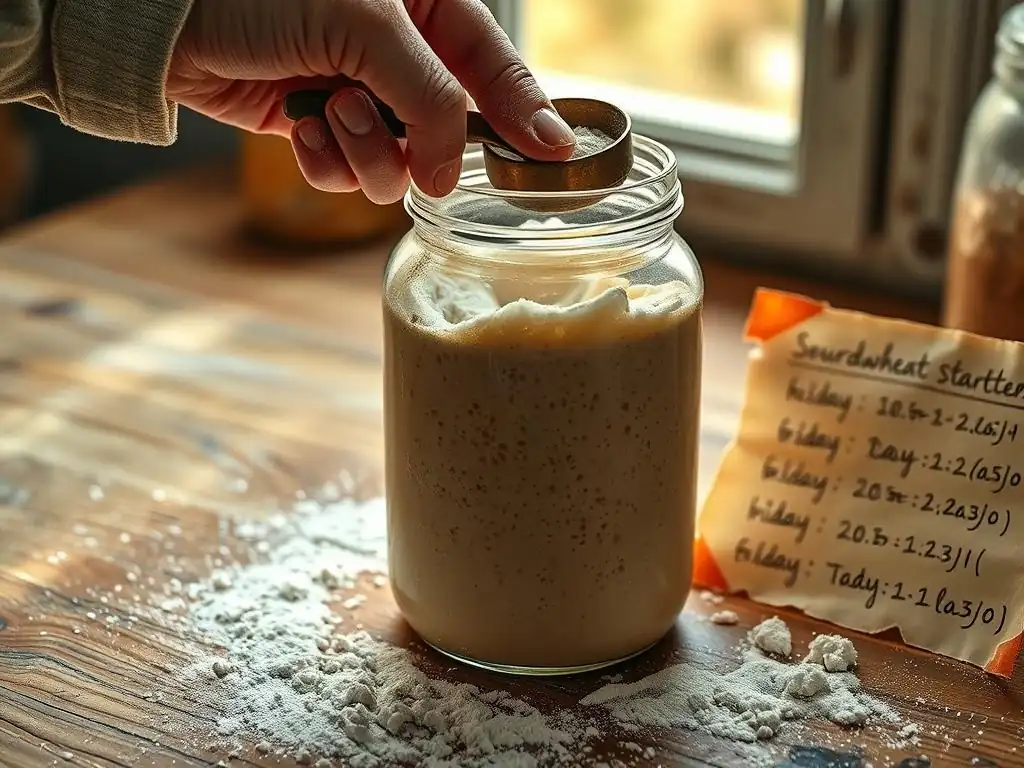
Welcome to BakeWithEase, your companion in the delicious world of baking! Ever wondered how to unlock the full potential of your sourdough? This article dives deep into crafting the perfect sourdough starter feeding schedule, unlocking the secrets to a robust and bubbly starter. But what exactly makes a feeding schedule effective, and how can you tailor it to your starter's unique needs? Let's explore!
- The Art of Feeding: Simple Techniques for a Strong Sourdough Starter
- Introduction to Sourdough Starter Feeding
- Establishing Your Sourdough Starter Feeding Schedule
- Step-by-Step Guide to Feeding Your Sourdough Starter
- Troubleshooting Common Sourdough Starter Feeding Issues
- Maintaining a Healthy Sourdough Starter Long-Term
- Advanced Sourdough Starter Feeding Techniques
- Sourdough Starter Feeding Schedule and its Impact on Baking
- Conclusion: Mastering the Art of Sourdough Starter Feeding
-
Frequently Asked Questions
- What exactly is a sourdough starter feeding schedule, and why is it important?
- How often should I feed my sourdough starter?
- What ratio of flour and water should I use when feeding my sourdough starter?
- How do I know if my sourdough starter is ready to be used for baking after feeding?
- What happens if I miss a feeding of my sourdough starter?
- Final Reflection: Cultivating Patience, Harvesting Flavor
- Unleash Your Inner Baker: Craft the Perfect Starter Today!
The Art of Feeding: Simple Techniques for a Strong Sourdough Starter
Introduction to Sourdough Starter Feeding
Making delicious sourdough bread starts with a healthy, active sourdough starter. Think of your starter as a living ecosystem of wild yeast and beneficial bacteria. Just like any living thing, it needs consistent care and nourishment to thrive. Proper feeding is the cornerstone of maintaining this vibrant culture, ensuring it's ready to leaven your loaves with robust flavor and airy structure. Understanding the basics of feeding is the first step on your journey to mastering sourdough baking.
This article will guide you through establishing and maintaining an effective sourdough starter feeding schedule. We'll explore the 'why' and 'how' of feeding, from understanding the science behind its activity to troubleshooting common issues. By the end, you'll have the knowledge to keep your starter happy, healthy, and consistently ready for baking, making your journey into the world of sourdough much more rewarding.
Why a Consistent Sourdough Starter Feeding Schedule is Crucial
A consistent sourdough starter feeding schedule is paramount for maintaining a strong, reliable starter. Without regular feeding, the yeast and bacteria within the culture consume all available food (the flour) and become dormant or, worse, the beneficial bacteria might be overtaken by less desirable microorganisms. Regular feeding replenishes their food source, encouraging vigorous activity and maintaining the delicate balance of the microbial ecosystem.
Consistency in your feeding schedule for sourdough starter also helps predict its behavior. When you feed your starter at roughly the same time intervals and with the same ratios, you can anticipate when it will peak – the point of maximum activity and leavening power. This predictability is essential for successful sourdough baking, allowing you to time your dough mixing and fermentation steps accurately. A starter fed erratically will behave erratically, leading to inconsistent baking results.
Understanding the Science Behind Sourdough Starter Activity
The magic in your sourdough starter comes from a symbiotic relationship between wild yeasts and lactic acid bacteria (LAB). When you feed your starter, you introduce fresh flour (carbohydrates) and water. The yeasts consume the sugars in the flour and produce carbon dioxide gas (which makes your bread rise) and alcohol. The LAB ferment the sugars, producing lactic and acetic acids, which give sourdough its characteristic tangy flavor and help preserve the starter.
The activity level of your starter is a direct result of this fermentation process. After feeding, the microbes multiply rapidly, consuming the fresh flour. This period of peak activity, often marked by significant rise and bubbling, occurs when the population is highest and food is still abundant. As the food supply diminishes, activity slows down, and the starter starts to collapse. Understanding this cycle helps you interpret your starter's behavior and optimize your sourdough starter feeding schedule.
Establishing Your Sourdough Starter Feeding Schedule
Setting up a routine for feeding your sourdough starter is key to its health and your baking success. The ideal schedule isn't one-size-fits-all; it depends on several factors, primarily storage method and ambient temperature. A starter kept at room temperature generally needs daily feeding, sometimes even twice a day if the environment is warm. A starter stored in the refrigerator, however, goes dormant and only needs feeding about once a week.
When establishing your sourdough starter feeding schedule, consider your baking habits. If you bake frequently (several times a week), keeping your starter at room temperature with daily feedings is convenient. If you bake less often, refrigerating your starter and feeding it weekly or even less frequently is more practical and reduces waste. The goal is to find a rhythm that keeps your starter healthy while fitting seamlessly into your lifestyle.
Determining the Ideal Feeding Ratio for Your Starter
The feeding ratio refers to the proportion of starter, flour, and water you use when feeding. A common and widely recommended ratio is 1:1:1 by weight (e.g., 50g starter, 50g flour, 50g water). This ratio provides enough food for the microbes to become very active within a reasonable timeframe, typically 4-8 hours at room temperature (around 70-75°F or 21-24°C).
Experimenting with different ratios can impact your sourdough starter feeding schedule and activity. A 'leaner' feeding (less food relative to starter, e.g., 1:2:2) will lead to a longer fermentation time between feedings, while a 'richer' feeding (more food relative to starter, e.g., 1:3:3 or 1:5:5) will allow the starter to stay active for a longer period before needing another feed. Choosing a ratio depends on your desired feeding frequency and the temperature of your environment.
Factors Affecting Your Sourdough Starter Feeding Frequency
Several factors influence how often you need to feed your sourdough starter. The most significant are ambient temperature and the type of flour used. Understanding how these variables affect microbial activity is crucial for adapting your sourdough starter feeding schedule effectively. Ignoring these factors can lead to an over-fermented, weak starter or a sluggish, underfed one.
Other factors include the age and maturity of your starter (older starters are often more robust), the hydration level (wetter starters tend to ferment faster), and even the specific microbial makeup of your unique culture. Paying attention to how your starter behaves under different conditions will help you fine-tune your feeding routine for optimal results.
Room Temperature and its Impact
Temperature is perhaps the most critical factor influencing your sourdough starter feeding frequency. Wild yeasts and bacteria are more active in warmer temperatures. At typical room temperature (around 70-75°F or 21-24°C), a starter fed at a 1:1:1 ratio will often peak and begin to fall within 4-8 hours, necessitating daily feeding.
If your kitchen is warmer (above 78°F or 26°C), your starter will ferment much faster, potentially peaking in just 2-4 hours. In such cases, you might need to feed it twice a day to prevent it from becoming too acidic and weak. Conversely, in cooler temperatures (below 68°F or 20°C), activity slows significantly. A starter might take 12-24 hours or even longer to peak, allowing for less frequent feeding, perhaps every 12-24 hours, even at room temperature.
Flour Type and its Impact on Starter Feeding
The type of flour you use for feeding also significantly affects your sourdough starter feeding schedule and activity. Flours with higher protein content and more nutrients, like whole wheat or rye flour, provide more "food" for the microbes and can lead to more vigorous and faster fermentation compared to lower-protein white flours.
Feeding your starter exclusively with bread flour (typically 12-14% protein) or all-purpose flour (typically 10-12% protein) is common, but incorporating some whole grain flour can boost activity. A starter fed with 100% rye flour, for instance, will often peak much faster than one fed with 100% white flour, potentially requiring a more frequent sourdough starter feeding schedule if kept at room temperature. Many bakers find a mix, like 80% white and 20% whole wheat, offers a good balance of activity and ease of handling.
Step-by-Step Guide to Feeding Your Sourdough Starter
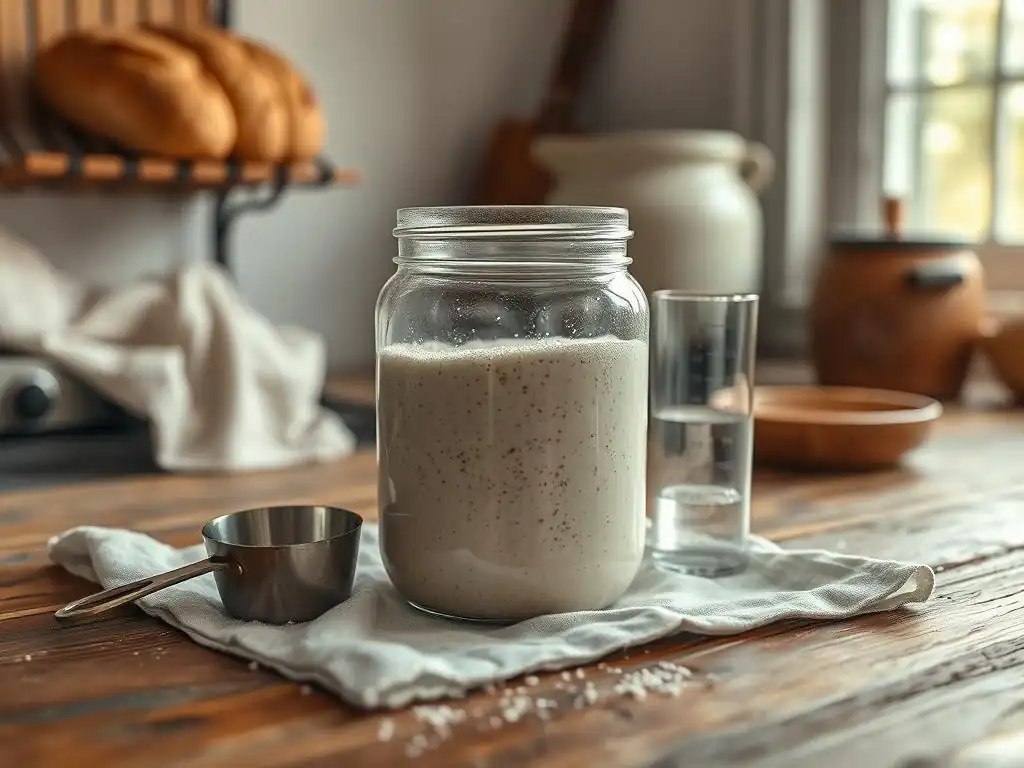
Feeding your sourdough starter is a simple process once you get the hang of it. The goal is to discard a portion of the old starter (to control volume and acidity) and then mix the remaining starter with fresh flour and water in your chosen ratio. This process revitalizes the culture and prepares it for its next cycle of activity. Establishing a consistent routine makes feeding a quick and easy part of your day.
Performing this process regularly is the core of maintaining a healthy sourdough starter feeding schedule. Whether you feed daily on your counter or weekly from the fridge, the fundamental steps remain the same. Accuracy in weighing ingredients is important, particularly if you are aiming for a specific hydration level or feeding ratio.
Gathering Your Supplies for Sourdough Starter Feeding
Before you begin feeding, gather your necessary supplies. You will need:
- Your active sourdough starter
- Fresh flour (the type you regularly use or are experimenting with)
- Fresh water (non-chlorinated is preferred)
- A clean jar or container for the starter
- A scale for accurate measurement (highly recommended)
- A spoon or spatula for mixing
Having everything ready before you start makes the process efficient and minimizes mess. Ensure your jar is clean to prevent introducing unwanted bacteria or mold. Using a scale ensures you maintain your desired feeding ratio accurately, which is vital for predictable starter behavior and consistent results from your sourdough starter feeding schedule.
Flour Selection for Optimal Starter Health
Selecting the right flour for your sourdough starter feeding schedule is crucial for its health and vigor. While many types of flour can be used, organic unbleached all-purpose flour or bread flour are common and reliable choices for a standard starter. These flours provide a good balance of simple and complex carbohydrates for the microbes.
For an extra boost or to develop specific flavors, incorporating some whole grain flour like whole wheat or rye is beneficial. These flours contain more nutrients and bran, which stimulate microbial activity. Many successful starters are maintained on a mix, for example, 80% white bread flour and 20% whole rye flour. Avoid self-rising flour or bleached flours, as additives can harm the culture.
Water Temperature Considerations for Feeding
The temperature of the water used for feeding your sourdough starter can influence its activity. Using lukewarm water, around 75-80°F (24-27°C), can help kickstart activity, especially in a cooler environment. This is because microbes are more active at warmer temperatures, and introducing warm water quickly brings the starter to a favorable temperature range for fermentation.
However, using water that is too hot can kill the yeast and bacteria. Aim for a comfortable lukewarm temperature, not hot. If your room is already warm (above 75°F or 24°C), using room temperature water or even slightly cooler water might be preferable to prevent the starter from fermenting too quickly and peaking before you're ready to use or feed it again, thus helping manage your sourdough starter feeding schedule.
The Mixing Process: Achieving the Right Consistency
Once you have discarded the excess starter and measured your remaining starter, flour, and water according to your chosen ratio, it's time to mix. Combine the starter and water in your clean jar, stirring to disperse the starter. Then, add the measured flour.
Mix thoroughly with a spoon or spatula until there are no dry pockets of flour remaining and the mixture is smooth and cohesive. The consistency should resemble a thick, pourable batter or a sticky dough, depending on your hydration level (typically 100% hydration, meaning equal weights of flour and water, results in a thick batter). Scrape down the sides of the jar to keep it tidy and observe the consistency – it should feel elastic and somewhat sticky.
Identifying Signs of a Well-Fed Sourdough Starter
Recognizing the signs of a healthy, well-fed sourdough starter is essential for timing your baking and maintaining your sourdough starter feeding schedule. A happy starter exhibits predictable behavior after being fed. The most obvious signs are visual: the starter will significantly increase in volume, developing bubbles throughout its structure and on the surface.
Another key indicator is the smell. A healthy starter has a pleasant, tangy aroma, often described as slightly yeasty, acidic (like yogurt or vinegar), and sometimes even fruity. It should not smell strongly of alcohol or acetone, which can indicate it has gone too long between feedings and is producing excessive amounts of metabolic byproducts.
Observing the Rise and Fall of Your Starter
A primary indicator of a well-fed and active starter is its predictable rise and fall after feeding. Within a few hours (the exact time depends on temperature and ratio), a healthy starter will begin to expand, often doubling or even tripling in volume. You'll see bubbles forming and rising through the mixture, and the surface will become domed.
The starter reaches its peak activity when it has reached its maximum height and the surface starts to flatten or even show signs of collapsing slightly. After peaking, it will gradually deflate as the food supply runs out and the gas production slows. For optimal leavening power in baking, it's best to use your starter when it is at or just past its peak. Observing this cycle helps you fine-tune your sourdough starter feeding schedule to match your baking needs.
Recognizing the Aroma of a Healthy Starter
The aroma of your sourdough starter provides valuable clues about its health and microbial balance. A healthy, well-fed starter should have a clean, pleasantly tangy smell. This tanginess comes from the lactic and acetic acids produced by the beneficial bacteria. It might also have a slightly sweet or yeasty undertone.
If your starter smells overwhelmingly of alcohol (like rubbing alcohol or nail polish remover), it's a sign that the yeast has produced a lot of alcohol as a byproduct of consuming all the available sugars. This usually means the starter is hungry and needs to be fed more frequently or with a richer ratio. A foul or moldy smell indicates contamination and usually means you need to discard the starter and begin again.
Troubleshooting Common Sourdough Starter Feeding Issues
Even with a consistent sourdough starter feeding schedule, you might encounter issues. It's normal for a starter's activity to fluctuate based on environmental factors or slight changes in your routine. Learning to identify common problems and knowing how to address them will save you frustration and help you maintain a robust starter.
Most issues can be resolved by adjusting your feeding routine – perhaps changing the frequency, ratio, or even the flour type. Patience is key; sometimes, a starter just needs a few consistent feedings to bounce back. Don't give up if your starter seems sluggish or unusual; troubleshooting is part of the sourdough journey.
Dealing with a Sluggish Starter: Possible Causes and Solutions
A sluggish starter that doesn't rise much or seems inactive can be frustrating. Common causes include:
- Too cool an environment.
- Not enough time has passed since feeding.
- Not discarding enough old starter (too much acid).
- Using chlorinated water.
- Infrequent feeding.
To revive a sluggish starter, try moving it to a warmer spot (like near a warm appliance or in a slightly warm oven that is turned off). Ensure you are discarding at least half, preferably more (like 80-90%), of the old starter before feeding. Feed it consistently at your chosen sourdough starter feeding schedule, perhaps switching to a slightly warmer water temperature or incorporating a small amount of rye or whole wheat flour to boost activity.
Addressing a Watery or Separated Starter
If your starter appears watery on top or has separated into layers (a liquid layer, often called "hooch," on top and a dense layer below), it indicates the starter is hungry and has consumed all its available food. The hooch is a byproduct of fermentation (alcohol and water) and is a sign that the starter needs to be fed.
To fix this, you can either pour off the hooch (though some argue it adds flavor) or simply stir it back in before discarding and feeding. Then, feed your starter according to your regular sourdough starter feeding schedule, or consider feeding it a slightly richer ratio (e.g., 1:2:2 or 1:3:3) or more frequently if this is a recurring issue. A watery starter is usually just hungry, not unhealthy.
Preventing Mold Growth in Your Sourdough Starter
Mold is the one thing you absolutely do not want in your sourdough starter. It typically appears as fuzzy spots of various colors (green, black, white, orange). Mold indicates contamination, and unfortunately, there is no safe way to salvage a moldy starter. You must discard it and start fresh.
Prevent mold by always using clean jars and utensils. Store your starter with a loose-fitting lid or cloth cover that allows it to breathe but prevents contaminants from entering. Ensure your sourdough starter feeding schedule is consistent enough to keep the beneficial bacteria active, as they help create an acidic environment that is inhospitable to mold. If you see mold, discard everything and wash your equipment thoroughly before starting over.
Maintaining a Healthy Sourdough Starter Long-Term
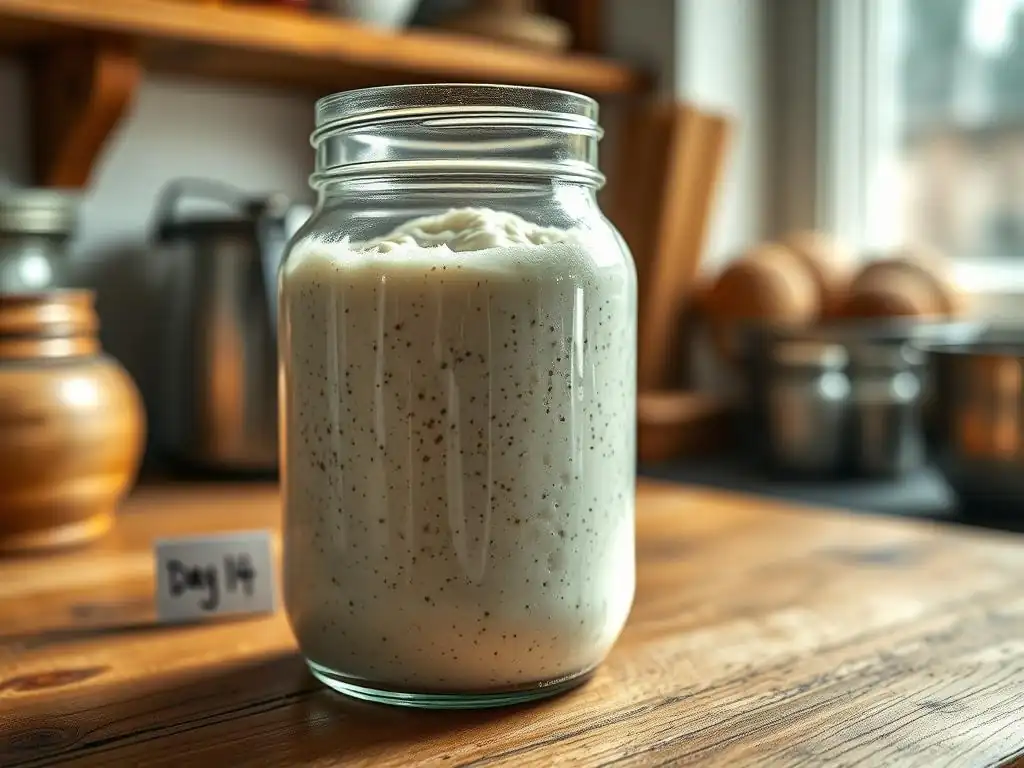
Maintaining a sourdough starter is less about strict rules and more about developing a routine that works for you and your starter. Whether you bake daily or monthly, you can keep a healthy culture with a flexible sourdough starter feeding schedule. The key is understanding how different storage methods affect activity and adjusting your feeding frequency accordingly.
Long-term maintenance involves being responsive to your starter's needs. Pay attention to its smell, texture, and activity level. These signals will tell you if your current feeding routine is working or if it needs adjustment. A little observation goes a long way in keeping your starter vigorous and ready for baking whenever inspiration strikes.
Storing Your Starter Between Feedings
How you store your starter between feedings dictates how often it needs attention. At room temperature (around 70-75°F or 21-24°C), an active starter will need feeding daily, sometimes twice a day in warmer conditions. Keep it in a jar with a loose lid or covered with a cloth secured with a rubber band to allow gases to escape.
For less frequent baking, the refrigerator is your best friend. Storing your starter in the fridge significantly slows down microbial activity, allowing you to reduce your sourdough starter feeding schedule to once a week or even less frequently (some bakers feed every 2-3 weeks successfully). Use a tighter-fitting lid in the fridge to prevent it from drying out, but burp the jar occasionally if it's very active.
Adjusting Your Feeding Schedule Based on Baking Frequency
Your baking frequency is the primary driver for your sourdough starter feeding schedule.
- Baking Daily/Most Days: Keep your starter at room temperature and feed it daily (possibly twice daily in summer) with a 1:1:1 ratio or similar. This keeps it consistently active and ready to use.
- Baking Weekly: Store your starter in the refrigerator. Feed it once a week. Take it out the day before you plan to bake, feed it, let it become active at room temperature, use what you need, and then feed the remainder before returning it to the fridge.
- Baking Infrequently (Every Few Weeks/Months): Store in the refrigerator and feed every 2-3 weeks. You may need 2-3 consecutive feedings at room temperature to revive it fully before it's strong enough to leaven bread.
This flexibility in your sourdough starter feeding schedule minimizes waste while keeping your culture viable.
Reviving a Neglected Sourdough Starter
Even the most diligent baker might occasionally neglect their starter, leaving it unfed in the fridge for too long. A neglected starter might have a thick layer of hooch, smell strongly of alcohol or acetone, and show little to no activity. Don't despair – most starters are remarkably resilient!
To revive a neglected starter:
- Pour off the hooch (optional, but can reduce strong flavors).
- Take a very small amount of the dense starter from the bottom (e.g., 10-20g).
- Feed this small amount with fresh flour and water using a generous ratio, like 1:5:5 (10g starter, 50g flour, 50g water).
- Let it sit at room temperature. It might take 12-24 hours or longer to show signs of life.
- Once it shows some bubbles or slight rise, discard most of it again, keeping a small amount (e.g., 20g), and feed it again with a generous ratio (e.g., 1:4:4 or 1:5:5).
- Repeat this process every 12-24 hours until the starter is consistently doubling or tripling within 4-8 hours after feeding. This usually takes 2-4 consecutive feedings. Then you can resume your regular sourdough starter feeding schedule.
Advanced Sourdough Starter Feeding Techniques
Once you're comfortable with the basics of maintaining a consistent sourdough starter feeding schedule, you might want to explore how different flours can impact your starter's characteristics. Varying the flour type used for feeding can influence the starter's activity level, the speed of fermentation, and even the flavor profile it imparts to your final bread.
Experimenting with flours like whole wheat or rye offers exciting possibilities. These flours behave differently than white flour and can add complexity to your sourdough journey. However, they also require slight adjustments to your feeding routine and expectations.
Experimenting with Different Flour Types for Unique Flavors
Using different flours to feed your sourdough starter isn't just about maintaining health; it's also a way to influence the flavor of your bread. While the majority of the flavor comes from the long fermentation of the main dough, the starter contributes its own acidic profile and microbial byproducts.
For example, feeding a starter primarily with rye flour can result in a more robust, tangy, and complex flavor in the final loaf compared to a starter fed solely on white flour. Using a blend of flours, like adding 20% whole wheat or rye to your usual white flour feed, is a common way to enhance flavor and boost starter activity without drastically changing your sourdough starter feeding schedule or consistency.
Using Whole Wheat Flour in Your Sourdough Starter Feeding
Incorporating whole wheat flour into your sourdough starter feeding schedule is a popular technique. Whole wheat flour contains the bran and germ of the wheat berry, which are rich in nutrients and microbial activity. This often leads to a more vigorous and faster rise in the starter compared to using only refined white flour.
A starter fed with whole wheat flour might peak sooner and develop a slightly different aroma. If you switch to feeding exclusively with whole wheat, you might find you need to adjust your feeding ratio or frequency. A 100% whole wheat starter can be quite active, potentially requiring a slightly shorter sourdough starter feeding schedule if kept at room temperature compared to an all-white starter.
Rye Flour's Impact on Starter Activity
Rye flour has a significant impact on sourdough starter activity and flavor. Rye is exceptionally rich in enzymes and nutrients that wild yeasts and bacteria love, making it an excellent choice for building or boosting a starter. Even a small percentage of rye flour in your feed can dramatically increase activity.
Starters fed with rye flour tend to ferment very quickly and develop a strong, distinctive tangy flavor profile. If you decide to use rye flour frequently in your sourdough starter feeding schedule, be prepared for faster fermentation times. A 100% rye starter at room temperature (70-75°F) might peak in just 2-4 hours, requiring very frequent feeding if not refrigerated. Many bakers use a small amount of rye (e.g., 10-20% of the flour weight) in their regular feed to get the benefits without the extreme speed.
Sourdough Starter Feeding Schedule and its Impact on Baking

The way you feed and maintain your sourdough starter directly impacts the quality of your baked goods. A strong, active starter provides the necessary leavening power for a good rise and contributes significantly to the complex flavors and aromas that define sourdough bread. Your sourdough starter feeding schedule is not just about keeping the culture alive; it's about preparing it for its job in your dough.
Understanding the relationship between your feeding routine and baking results allows you to optimize your starter's condition for specific recipes or desired outcomes. Whether you want a milder or tangier loaf, or need peak activity at a specific time, your feeding schedule is a key lever.
How Feeding Affects the Flavor of Your Sourdough Bread
The flavor of your sourdough bread is heavily influenced by the type and balance of acids produced by the lactic acid bacteria in your starter and dough. How you maintain your sourdough starter feeding schedule impacts this balance.
- Frequent feeding / using starter at peak: Tends to produce a milder, less acidic flavor. This is because you are using the starter when it's most active and before acetic acid production becomes dominant.
- Infrequent feeding / using starter past peak (with hooch): Often results in a tangier, more acidic flavor. As the starter ferments longer and runs out of food, acetic acid (known for its vinegary tang) production increases.
By adjusting your sourdough starter feeding schedule and when you use the starter relative to its peak, you can subtly control the tanginess of your final loaf.
Optimizing Your Feeding Schedule for Different Baking Projects
Your sourdough starter feeding schedule might need slight adjustments depending on what you plan to bake.
- For a standard loaf requiring strong rise: Use your starter when it's at or just slightly past its peak activity (doubled or tripled in size, bubbly). This usually means feeding it 4-8 hours before you plan to mix your dough, depending on temperature and ratio.
- For recipes using a small amount of starter or long bulk fermentation: You might be able to use starter that is slightly past its peak, as the long fermentation time in the dough will allow it to build strength.
- For enriched doughs (with butter, sugar, eggs): These doughs are heavier and require a very strong starter. Ensure your starter is extremely vigorous and used right at its peak.
Consider doing a "levain build" or "preferment" by taking a small amount of your main starter and feeding it separately 4-12 hours before mixing your final dough. This allows you to prepare a specific amount of highly active starter optimally timed for your bake, without disrupting your main sourdough starter feeding schedule.
Achieving Consistent Results Through Proper Feeding
Consistency in sourdough baking starts with a consistent starter. A reliable sourdough starter feeding schedule is the foundation for achieving repeatable results with your bread. When your starter behaves predictably – rising and falling within a known timeframe after feeding – you can confidently time your dough mixing, bulk fermentation, and proofing stages.
Maintaining the same feeding ratio, flour type, and water temperature for your regular feeds helps minimize variables. While environmental temperature will always play a role, a consistent routine allows you to anticipate your starter's behavior and make minor adjustments as needed. This predictability is invaluable as you refine your sourdough skills and aim for that perfect loaf every time.
Conclusion: Mastering the Art of Sourdough Starter Feeding
Mastering the art of feeding your sourdough starter is not about following rigid rules, but about understanding the science behind the culture and developing a consistent routine that suits your lifestyle and baking frequency. A healthy, active starter is the heart of great sourdough bread, providing both the leavening power and the complex flavors that we cherish.
By paying attention to your starter's signals – its rise, fall, and aroma – and adjusting your sourdough starter feeding schedule based on temperature and storage, you can ensure your culture remains vigorous and ready for action. Whether you maintain a starter on your counter with daily feeds or in the fridge with weekly attention, the principles of providing fresh food and maintaining a healthy microbial balance remain the same.
Key Takeaways for a Strong and Active Starter
Here are the key takeaways for maintaining a strong and active sourdough starter:
- [ ] Consistency is Crucial: Stick to a regular sourdough starter feeding schedule based on temperature and storage method (daily at room temp, weekly in the fridge).
- [ ] Use the Right Ratio: A 1:1:1 ratio by weight is a good starting point, but experiment to find what works best for your schedule and environment.
- [ ] Temperature Matters: Warmer temperatures speed up activity, requiring more frequent feeding. Cooler temperatures slow it down.
- [ ] Quality Ingredients: Use unbleached flour and non-chlorinated water. Incorporating some whole grain flour can boost activity.
- [ ] Observe Your Starter: Pay attention to its rise, fall, and aroma to gauge its health and activity level.
- [ ] Don't Be Afraid to Discard: Regularly discarding a portion of the starter before feeding is essential for managing volume and acidity.
- [ ] Troubleshoot Patiently: Most issues like sluggishness or separation can be fixed with consistent, proper feeding.
Resources for Further Learning about Sourdough Starters
For those eager to deepen their understanding of sourdough starters and their feeding schedules, numerous resources are available. Many excellent books dedicated to sourdough baking delve into the microbiology of starters, offering detailed explanations of fermentation processes and how feeding impacts the microbial ecosystem.
Online communities and forums are also invaluable. They provide platforms to ask questions, share experiences, and learn from other bakers who navigate similar challenges with their sourdough starter feeding schedule. Many reputable baking websites and blogs offer in-depth guides, videos, and troubleshooting tips that can further enhance your knowledge and confidence in maintaining a thriving sourdough starter.
Frequently Asked Questions
What exactly is a sourdough starter feeding schedule, and why is it important?
A sourdough starter feeding schedule is a consistent routine of adding flour and water to your starter. This is important because it provides the necessary nutrients for the yeast and bacteria to thrive, resulting in a strong and active starter.
How often should I feed my sourdough starter?
The frequency depends on whether the starter is stored at room temperature or in the refrigerator. At room temperature, feed it once or twice a day. In the refrigerator, feed it once a week.
What ratio of flour and water should I use when feeding my sourdough starter?
The most common ratio is 1:1:1, meaning equal parts starter, flour, and water by weight. Some bakers prefer slightly different ratios, but this is a good starting point for most starters.
How do I know if my sourdough starter is ready to be used for baking after feeding?
A ready starter will be bubbly and doubled in size after feeding. It should also have a slightly tangy, pleasant smell. This indicates the yeast is active and ready to leaven your dough.
What happens if I miss a feeding of my sourdough starter?
Missing a feeding occasionally isn't disastrous. Your starter might become more acidic and develop a layer of hooch (liquid). Simply discard the hooch, feed the starter as usual, and it should recover with subsequent feedings.
Final Reflection: Cultivating Patience, Harvesting Flavor
The meticulous process of feeding a sourdough starter is more than just a recipe; it's a metaphor for nurturing growth, both in the kitchen and in life. The seemingly simple act of mixing flour and water, repeated day after day, yields a powerful result: a vibrant, active starter capable of transforming ordinary flour into extraordinary bread. This dedication to a consistent feeding schedule, as detailed in this article, is key to unlocking the magic of sourdough.
The journey of cultivating a sourdough starter mirrors the journey of personal growth. It requires patience, consistency, and a willingness to adapt to the subtle nuances of the process. There will be setbacks – days when the starter seems sluggish or even fails to rise. But just as with any skill, persistence pays off. The best things in life are worth waiting for.
This sentiment rings especially true when considering the rewarding outcome of a thriving sourdough starter, a testament to the power of consistent effort.
Now, consider your own "starter." What aspects of your life require the same nurturing attention and consistent effort as a sourdough starter? What dreams or projects are you tending to, and how can you apply the principles of patience and dedication learned here to cultivate their growth? Take a moment to reflect on this, and embrace the journey of nurturing your own potential, one mindful step at a time. The rewards, like the delicious aroma of freshly baked sourdough, will be well worth the effort.
Unleash Your Inner Baker: Craft the Perfect Starter Today!
Thanks for taking the time to learn about creating a strong starter—we hope you found the process as exciting as we do! Now it's time to put your newfound knowledge into practice. Ready to bake amazing bread?
- Start your own starter immediately! Gather your ingredients and follow the steps outlined in the article. Document your journey and watch your starter come alive. This is the most important step to truly mastering this foundational baking skill.
- Share your starter story! Tell us about your experience on our social media channels using #BakeWithEaseStarter. We’d love to see your progress and hear your tips.
- Explore our recipe section for delicious starter-based breads and discover new culinary adventures! There's a whole world of flavor waiting to be unlocked.
So, what incredible bread will your starter create first? Let's hear your baking plans in the comments!