
Planning Your French Pastry Baking Schedule: Tips for Success

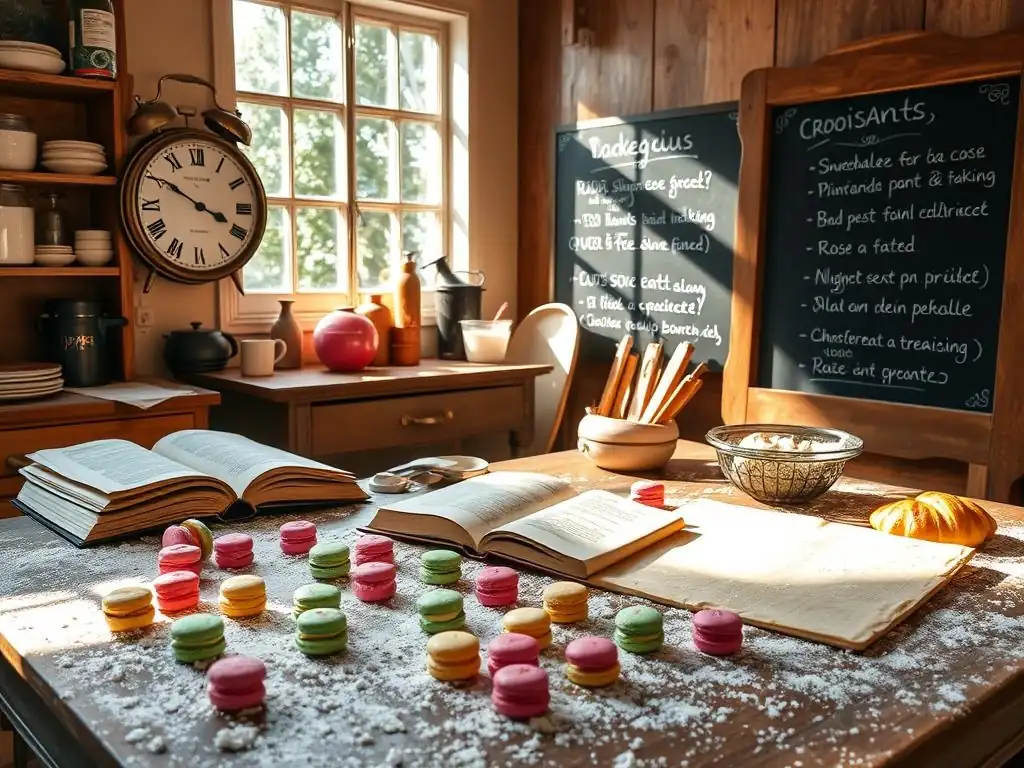
Welcome to BakeWithEase, your partner in culinary creativity! Are you ready to unlock the secrets of exquisite French pastries? Planning a French pastry baking schedule can seem daunting, but with the right approach, it's surprisingly achievable. Discover essential tips and tricks to streamline your baking process and create delectable treats. Intrigued? Let's dive in and transform your baking dreams into a delicious reality!
- Mastering French Pastry: The Key to a Stress-Free Baking Schedule
- Why a French Pastry Baking Schedule is Essential for Baking with Ease
- Creating Your Personalized French Pastry Baking Schedule: A Step-by-Step Guide
- Essential Tips for a Successful French Pastry Baking Schedule
- Troubleshooting Common French Pastry Baking Schedule Challenges
- Example French Pastry Baking Schedule: A Practical Illustration
- Elevate Your French Pastry Baking with a Well-Planned Schedule
-
Frequently Asked Questions
- What is the best way to start planning my French pastry baking schedule?
- How can I manage time-consuming steps like making doughs ahead of time?
- What are some strategies for baking multiple pastries in a single day?
- How important is it to have all my ingredients prepared before I begin baking?
- What should I do if my baking schedule falls behind or I encounter unexpected issues?
- Final Reflection: Mastering the Art of Time in French Pastry Baking
- Unleash Your Inner Pâtissier: Bake Your Dream French Pastries!
Mastering French Pastry: The Key to a Stress-Free Baking Schedule
Embarking on the journey of baking French pastries can be incredibly rewarding, but it often requires precision, patience, and most importantly, a well-thought-out plan. Unlike simpler recipes, classic French pastries like croissants, macarons, or mille-feuille involve multiple steps, specific resting periods, and exact temperatures, making a haphazard approach almost guaranteed to lead to frustration.
A solid French pastry baking schedule transforms potential chaos into a smooth, enjoyable process, allowing you to focus on technique rather than feeling rushed or overwhelmed. It's about understanding the rhythm of doughs and fillings, respecting their required times, and integrating these steps seamlessly into your daily life.
Developing a reliable French pastry baking schedule is akin to following a musical score – each note (or step) must be played at the right time for harmony. For instance, achieving the perfect flaky layers in croissants requires specific chilling times between folds, often totaling 8-12 hours spread over two days. Macarons demand precise drying time for their shells, which can range from 30 minutes to over 2 hours depending on humidity.
Without a schedule, you might find yourself with dough that's too warm to fold, macaron batter that won't form a skin, or custard that hasn't set. Planning ahead ensures each component is ready exactly when needed, making complex recipes feel manageable and significantly increasing your chances of success.
Why a French Pastry Baking Schedule is Essential for Baking with Ease
A structured French pastry baking schedule is more than just a checklist; it's a strategic tool that empowers you to tackle ambitious recipes with confidence. French pastries are renowned for their complexity, often involving multiple components like layered doughs, delicate fillings, and intricate glazes, each with its own timing requirements. Trying to wing it can lead to rushed steps, forgotten ingredients, or mistimed processes, resulting in pastries that fall short of their potential. A baking schedule provides a clear roadmap, breaking down the process into manageable segments and making the entire endeavor feel less daunting, even for beginners.
Ultimately, implementing a French pastry baking schedule is about achieving that desired "bake with ease" feeling. It removes the guesswork and anxiety often associated with challenging bakes. By knowing exactly when to perform each step – from making the détrempe for puff pastry the day before, to chilling tart dough for at least 30 minutes before rolling, or letting eclairs cool completely before filling – you can approach your baking relaxed and focused. This proactive planning not only improves the quality of your final product but also makes the baking process itself a more enjoyable and less stressful experience.
Avoiding Baking Disasters: The Importance of Planning Ahead
Many common French pastry failures can be traced back to poor timing or impatience, both of which are mitigated by a proper French pastry baking schedule. For example, puff pastry requires multiple chilling steps to keep the butter solid and create those distinct layers. Skipping or shortening these 30-60 minute rests between folds will result in a greasy, less flaky pastry. Similarly, chocolate ganache needs several hours, often 2-4 at room temperature or 1-2 in the fridge, to reach the right consistency for piping or filling; using it too soon leads to a runny mess.
Planning ahead allows you to anticipate these crucial steps and allocate sufficient time. It prevents scenarios where you're trying to roll out dough that's too warm and sticking everywhere, or attempting to pipe macarons before a proper skin has formed, leading to cracked shells. By mapping out the entire process from start to finish, including all necessary resting, chilling, and setting times, your French pastry baking schedule acts as a safeguard against impulsive mistakes driven by a lack of time or preparation. It ensures you respect the science behind the bake.
Time Management for Complex Recipes: Save Time and Reduce Stress
French pastry recipes are often multi-day affairs, and without effective time management via a French pastry baking schedule, they can feel overwhelming. Consider croissants: the process typically involves making the dough (Day 1), incorporating the butter block and performing the first few folds (Day 1), chilling overnight (Day 1 to 2), performing final folds and shaping (Day 2), proofing (Day 2), and finally baking (Day 2). Trying to squeeze this into a single day is impractical and exhausting.
A well-structured French pastry baking schedule breaks these tasks into logical, time-efficient blocks. You can prepare components like pastry cream or fruit fillings the day before, saving significant time on baking day. Laminated doughs can be made over several days, fitting the folding and chilling steps around other activities. This approach not only makes complex recipes more approachable but also spreads the workload, reducing stress and allowing you to enjoy each stage of the baking process without feeling rushed.
Understanding Recipe Timelines: From Pate Brisée Rest to Glazing
Every French pastry recipe has its own unique timeline, and understanding these critical phases is fundamental to creating an effective French pastry baking schedule. For a simple tart using pâte brisée, the dough needs at least 30 minutes to an hour of chilling before rolling to prevent shrinking and ensure crispness. Choux pastry, used for eclairs or gougères, requires immediate baking once piped, but the cooled shells need several hours (or overnight) before filling to prevent sogginess.
More complex pastries like opera cake involve multiple layers and components, each with specific setting or cooling times. The ganache and mousseline creams need time to firm up, and the assembled cake often benefits from chilling overnight before glazing for clean cuts. By studying the recipe and identifying these critical time points – resting, chilling, proofing, setting, cooling – you can construct a realistic French pastry baking schedule that respects the nuances of the bake and leads to successful results.
Creating Your Personalized French Pastry Baking Schedule: A Step-by-Step Guide
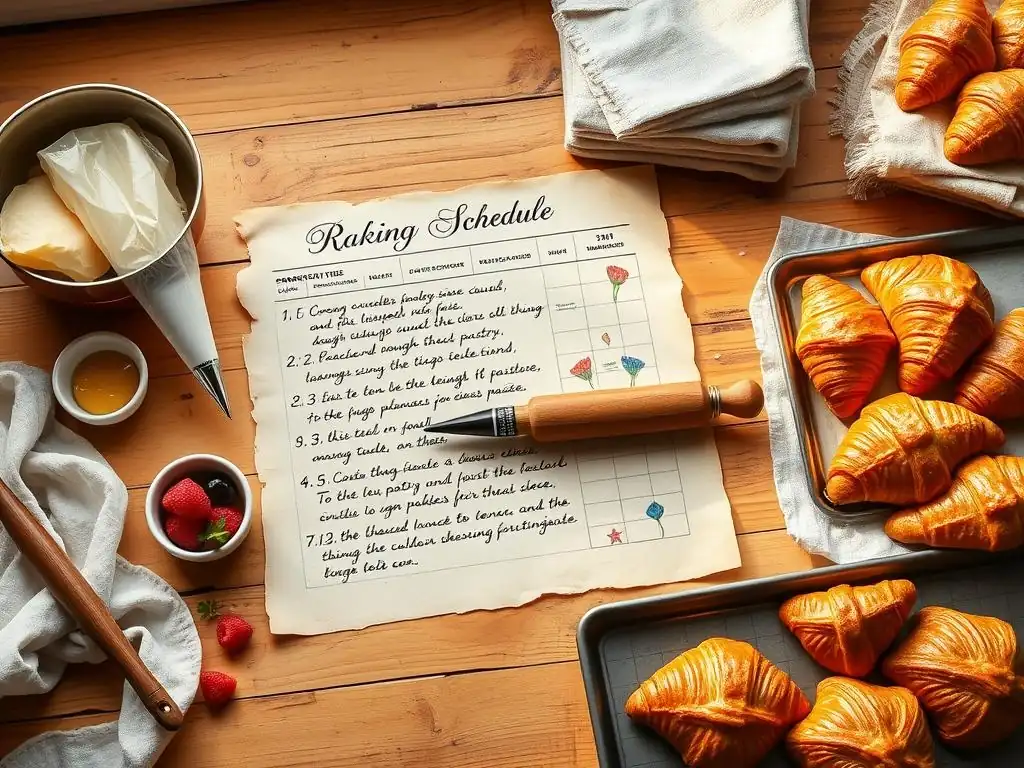
Developing a personalized French pastry baking schedule is a process of tailoring the generic recipe instructions to fit your specific life and available time. It's not about rigid adherence to a clock, but about smart planning that allows flexibility while respecting the critical timing of the pastry. This guide will walk you through the key steps to build a schedule that works for you, ensuring your French pastry ambitions are achievable and enjoyable.
The goal is to create a plan that minimizes stress and maximizes success. Think of it as choreographing your kitchen movements. By breaking down the recipe, assessing your own constraints, and preparing diligently, you can transform a potentially overwhelming project into a smooth, satisfying baking experience. Your personalized French pastry baking schedule will become your trusted companion in the kitchen.
Step 1: Choosing Your French Pastry Recipe
The first step in building your French pastry baking schedule is selecting the specific recipe you want to tackle. The complexity and required time will vary significantly between a simple financier and a multi-layered croquembouche. Start by reading the chosen recipe thoroughly, preferably twice. Pay close attention to the ingredient list, the equipment required, and especially the instructions detailing mixing, resting, chilling, proofing, baking, and cooling times.
Consider recipes that align with your current skill level and available time. If you're new to French pastry, perhaps start with something like sablé cookies or a simple fruit tart before attempting croissants or macarons. Understand that even a seemingly simple tarte Tatin requires precise caramelization and careful inversion. Once you've chosen your recipe, you have the foundation for building your schedule.
Consider Dough Resting Times: Adjusting Chill and Proof Periods
Many French pastry doughs require significant resting or chilling periods. Pâte sucrée (sweet pastry dough) needs at least 30 minutes, often longer, in the refrigerator before rolling to relax the gluten and prevent shrinkage. Laminated doughs like croissant or puff pastry require multiple chilling periods (30-60 minutes each, plus an overnight rest) to keep the butter firm for lamination. Choux pastry batter needs to cool slightly before eggs are added.
These resting times are non-negotiable for achieving the desired texture and structure. When planning your French pastry baking schedule, identify all such required rests and factor them in realistically. If a recipe calls for an overnight chill, that immediately turns it into a two-day project. You might need to adjust these times slightly based on your kitchen's temperature – warmer kitchens might require longer chilling periods.
Dough Type and Consistency: Planning Around Pastry Properties
The type of dough or batter you're working with dictates much of the schedule. A liquid batter like for financiers or madeleines can often be mixed and baked relatively quickly after a short rest. However, a delicate macaron batter requires careful handling and a specific drying time before baking. Rich, butter-laden doughs like brioche or croissant dough need cold temperatures to be manageable.
Understanding the properties of your specific dough or batter allows you to plan accordingly in your French pastry baking schedule. For example, if you're making choux, you know you need to work relatively quickly once the batter is ready to pipe before it cools too much. If you're making puff pastry, you know you'll need ample refrigerator space and time spread out over hours, if not days, to achieve the necessary folds and chilling.
Step 2: Breaking Down Each Recipe into Manageable Tasks
Once you've chosen your recipe and understand its general timeline, the next step in creating your French pastry baking schedule is to dissect it into individual, actionable tasks. Read through the recipe instructions step-by-step and list every distinct action required, no matter how small. This might include "measure flour," "make butter block," "mix dough," "chill dough for 30 min," "roll and fold dough," "chill for 60 min," "shape croissants," "proof croissants," "preheat oven," "bake croissants," "make pastry cream," "chill pastry cream," "assemble pastry," "make glaze," "glaze pastry," etc.
This detailed breakdown reveals the true complexity of the recipe and highlights the interdependencies between steps. For instance, you can't shape croissants until the dough has completed its folds and chilling. You can't fill eclairs until the pastry cream is made and chilled. Listing these tasks makes the overall process less intimidating by presenting it as a series of smaller, achievable goals.
Deconstructing Complex Recipes: Identify Key Stages
Complex French pastry recipes, like Saint Honoré or opera cake, can seem overwhelming initially. Deconstructing them into key stages within your French pastry baking schedule is crucial. An opera cake, for example, involves preparing Joconde sponge, coffee syrup, ganache, coffee mousseline cream, and a chocolate glaze, followed by assembly and chilling. Each of these components is a major stage that can often be prepared independently or in a specific sequence.
Identify these major stages and then break down the tasks within each stage. This hierarchical approach to deconstruction provides clarity and helps you see how different parts of the recipe fit together over time. For a Saint Honoré, the stages might be: making puff pastry, making choux pastry, making crème chiboust, making caramel, assembling and decorating. Recognizing these distinct phases is essential for effective scheduling.
Estimating Time for Each Task: Be Realistic and Account for Breaks
After listing all the individual tasks, estimate the time required for each one in your French pastry baking schedule. Be realistic and err on the side of overestimation, especially if it's your first time making a particular pastry. Don't just consider active working time; factor in passive times like waiting for water to boil, dough to mix properly, or components to cool slightly before the next step.
Crucially, account for breaks! Baking, especially complex French pastries, can be physically and mentally demanding. Building in short breaks (5-10 minutes) and longer pauses during chilling or resting periods will make the process more enjoyable and prevent fatigue-induced errors. For example, kneading dough might take 10-15 minutes, but cleaning up that stage before the next task might take another 5. Be thorough in your estimations.
Step 3: Building Your Weekly Baking Schedule
With your list of tasks and estimated times, you can now construct your personalized French pastry baking schedule, integrating it into your week. Look at your calendar and identify blocks of free time. Some tasks, like making a dough or a filling, might fit into an evening after work. Others, like rolling and folding laminated dough or proofing and baking, might require a dedicated block of time on a weekend.
Don't try to cram everything into one day unless the recipe is truly simple. Leverage the resting and chilling times as opportunities to work on other things or simply relax. A pâte à choux recipe might take an hour of active work followed by an hour of baking, but eclairs need several hours to cool completely before filling – perfect for a break or other activities. Your French pastry baking schedule should work with your life, not against it.
Prioritizing Time-Sensitive Steps: Chilling, Folding, Baking
Certain steps in French pastry are highly time-sensitive and must be prioritized in your French pastry baking schedule. Chilling times for laminated doughs are critical for maintaining the butter's integrity. Skipping or shortening these leads to butter melting out during baking instead of creating layers. Proofing laminated doughs requires a balance – too short, and they won't rise; too long, and the butter can melt, or the structure can collapse. Baking time and temperature are also crucial; underbaked pastries can be dense, while overbaked ones can be dry.
Identify these critical windows in your recipe and schedule them when you know you'll be available and focused. For croissants, the final proof before baking usually takes 1.5-2.5 hours at room temperature (around 24°C), and they need to go into a hot oven immediately when perfectly proofed. Schedule this proofing period for a time when you can monitor them and be ready to bake as soon as they're ready.
Scheduling Baking Around Your Life: Integrating Baking Into Your Routine
The key to a successful French pastry baking schedule is making it fit your personal routine. Are you an early bird? Schedule baking for the morning when the kitchen is cool and quiet. A night owl? Some doughs can be mixed in the evening and chilled overnight. Do you have a busy weekend? Perhaps spread a complex recipe like puff pastry over three evenings instead of trying to do it all on a Saturday.
Think about your work schedule, family commitments, and other activities. Can you make a tart dough on Thursday evening, chill it overnight, roll and blind bake the shell on Friday evening, make the filling, and assemble the tart on Saturday morning? This multi-day approach is often the most practical way to incorporate French pastry baking into a busy life using your French pastry baking schedule.
Step 4: Preparing Your Mise en Place: The Foundation of Efficient Baking
Mise en place, a French term meaning "everything in its place," is fundamental to a smooth and efficient French pastry baking schedule. It involves gathering and preparing all your ingredients and equipment before you begin mixing or cooking. This step, often done the day before for complex recipes, prevents frantic searching for ingredients mid-process and ensures you haven't forgotten anything crucial.
Imagine starting to make macaron shells only to discover you're short on almond flour, or realizing you don't have parchment paper when it's time to pipe choux. These situations interrupt your flow and can compromise the final product. Dedicating time for mise en place eliminates these potential pitfalls and allows you to move through the recipe steps seamlessly according to your French pastry baking schedule.
Gathering Ingredients: Organize and Measure Ahead of Time
For your French pastry baking schedule, take the time to gather all required ingredients from your pantry and refrigerator. Check quantities against the recipe to ensure you have enough. For ingredients used in multiple parts of the recipe (like sugar or eggs), measure out the amounts needed for each stage into separate bowls or containers. This prevents errors and speeds up the process when you reach that step.
Labeling these containers is a helpful practice, especially for complex recipes with many components. For example, you might have containers labeled "Sugar for Meringue," "Sugar for Syrup," "Egg Whites for Shells," "Egg Yolks for Filling." This level of organization, part of your mise en place within your French pastry baking schedule, minimizes confusion and streamlines the baking process.
Preparing Equipment: Ensure Everything is Clean and Ready
Just as important as gathering ingredients is preparing your equipment as part of your French pastry baking schedule. Ensure all necessary bowls, whisks, spatulas, baking sheets, parchment paper, molds, and measuring tools are clean, dry, and readily accessible. If a recipe requires specific equipment like a stand mixer, food processor, or candy thermometer, have them out and ready to use.
For recipes requiring specific temperatures, like tempering chocolate for a glaze or heating sugar syrup for Italian meringue (macarons), have your thermometers clean and ready. If you need chilled bowls for whipping cream or egg whites, put them in the refrigerator or freezer ahead of time. This proactive approach ensures you have the right tools at the right moment, keeping your French pastry baking schedule on track.
Essential Tips for a Successful French Pastry Baking Schedule
Beyond the step-by-step guide, several key tips can help ensure your French pastry baking schedule leads to delicious outcomes. These are lessons learned from experience, designed to help you anticipate challenges and optimize your time and effort. Implementing these tips will make your baking journey smoother and more rewarding.
Remember that baking is a science, but also an art that requires patience and observation. Your French pastry baking schedule is a guide, but being attentive to the look, feel, and smell of your doughs and fillings is equally important. These tips provide a framework for success.
Tip 1: Account for Dough Resting and Chilling Times
As highlighted earlier, resting and chilling times are critical in French pastry. Your French pastry baking schedule must explicitly include these periods. For many doughs, like tart dough or brioche, a minimum of 30 minutes to several hours or even overnight in the refrigerator is necessary for gluten relaxation and easier handling. Laminated doughs require specific chilling periods between folds.
Failing to adequately chill dough can lead to sticky, unmanageable dough that's impossible to roll thinly or shape properly. It can also affect the final texture, resulting in tough tart shells or greasy croissants. Build these rest periods into your French pastry baking schedule with sufficient buffer time, understanding they are just as active a part of the process as mixing or shaping.
Tip 2: Factor in Chill Times Between Folds
For laminated doughs like puff pastry, croissant dough, or kouign amann, the chilling time between folds (or "turns") is paramount. After each turn, the dough needs to rest in the refrigerator for typically 30-60 minutes. This allows the butter layer to firm up again and the gluten network to relax, making the dough easier to roll out for the next turn without tearing the butter layer.
Your French pastry baking schedule for laminated doughs will be structured around these repetitive roll-fold-chill cycles. A classic puff pastry might require six turns, meaning you'll need to schedule six distinct chilling periods throughout the process, in addition to the initial dough rest and final chilling before shaping. These chill times are non-negotiable for achieving those coveted flaky layers.
Tip 3: Batch Baking: Making the Most of Your Oven Time
Many French pastry recipes yield multiple servings. If your oven can accommodate more than one baking sheet at a time, consider batch baking to optimize your French pastry baking schedule. This is particularly useful for items like macarons, financiers, or small tarts. Ensure there is adequate space between baking sheets for proper air circulation, which promotes even baking.
Be aware that baking multiple trays simultaneously might slightly increase the overall baking time or require rotating the trays halfway through for even browning. Plan for this adjustment in your French pastry baking schedule. Batch baking is an efficient way to produce a larger quantity of pastries without significantly extending your active baking time.
Tip 4: Freezing Dough and Baked Pastries: Extend Your Baking Window
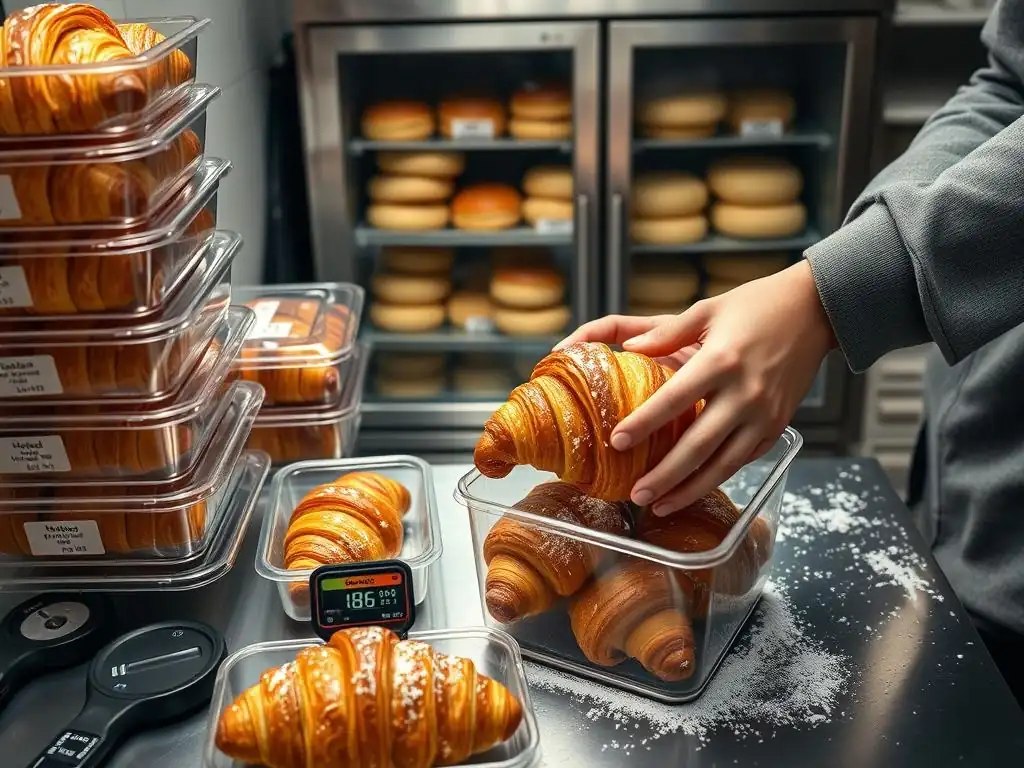
One excellent strategy for managing your French pastry baking schedule and enjoying fresh pastries over time is utilizing your freezer. Many doughs, like puff pastry, tart dough, and even croissant dough (at certain stages), can be frozen. Tart dough can be frozen as a disc or pressed into a shell. Croissant dough can be frozen after shaping but before proofing.
Baked pastries like choux shells, financiers, madeleines, or even fully baked croissants can also be frozen and later thawed or reheated. This allows you to break down the baking process even further in your French pastry baking schedule – bake a large batch when you have time, freeze portions, and enjoy them later. Always wrap items tightly to prevent freezer burn.
Tip 5: Be Flexible and Adaptable: Adjust as Needed
While a French pastry baking schedule provides a crucial framework, it's important to remain flexible and adaptable. Baking is influenced by environmental factors like kitchen temperature and humidity, which can affect dough consistency and proofing times. A warm, humid day might require longer chilling periods or affect macaron drying times.
Learn to read your dough and batter, rather than just the clock. If your croissant dough feels too soft to roll after the scheduled chill time, give it another 15-30 minutes in the fridge. If your macaron shells haven't formed a skin after 30 minutes, let them sit longer. Be prepared to make minor adjustments to your French pastry baking schedule based on how the ingredients are behaving.
Troubleshooting Common French Pastry Baking Schedule Challenges
Even with a meticulous French pastry baking schedule, you might encounter unexpected hurdles. Knowing how to troubleshoot common issues without derailing your entire plan is a valuable skill. Flexibility and quick thinking can often save a bake.
These challenges are part of the learning process. Don't get discouraged; instead, see them as opportunities to deepen your understanding of French pastry techniques and improve your scheduling skills for future bakes.
What to Do When You Run Out of Time
Running out of time is a common challenge when following a French pastry baking schedule, especially with multi-step recipes. If you find yourself pressed for time mid-bake, assess which steps are critical and which can be paused or postponed. For laminated doughs, chilling is your friend – you can often extend a chilling period in the refrigerator for several hours, or even overnight, if needed.
If you've made a filling like pastry cream, ensure it's properly covered and refrigerated. If you're at a stage where dough needs to be baked (like choux), try to complete that step if possible, as baked components can often wait or be frozen. Avoid rushing critical stages like proofing or baking, as this is where quality is most easily compromised. It might be better to pause and resume when you have time, even if it means slightly altering your French pastry baking schedule.
Adapting Your Schedule for Unexpected Events
Life happens, and sometimes your carefully crafted French pastry baking schedule gets interrupted. If an unexpected event arises, quickly determine the current state of your pastry components. Is the dough resting? Is a filling chilling? Many steps can be safely paused by refrigerating or freezing.
For example, if you're in the middle of rolling and folding croissant dough and have to leave, wrap the dough tightly and refrigerate it. You can usually pick up where you left off later that day or even the next. If macarons are drying, cover them loosely and move them to a less humid spot if possible, or pause the process and bake them later. Learn which stages are forgiving of pauses and incorporate this knowledge into your flexible French pastry baking schedule approach.
Dealing with Dough Mishaps and Adjusting Your Plan
Dough mishaps, such as dough that's too sticky, too tough, or tearing during rolling, can throw off your French pastry baking schedule. If dough is too sticky after mixing, it might need a bit more flour (added sparingly) or more mixing time, which slightly alters your timeline. If laminated dough is tearing during rolling, it likely needs more chilling time to firm up the butter.
Recognize the signs of common dough problems and know the standard fixes. A slightly tough tart dough might benefit from extended chilling. If puff pastry butter is squishing out, it definitely needs more time in the fridge. Adjust your French pastry baking schedule to accommodate these fixes, understanding that a little extra time spent correcting an issue is better than proceeding with flawed dough.
Example French Pastry Baking Schedule: A Practical Illustration
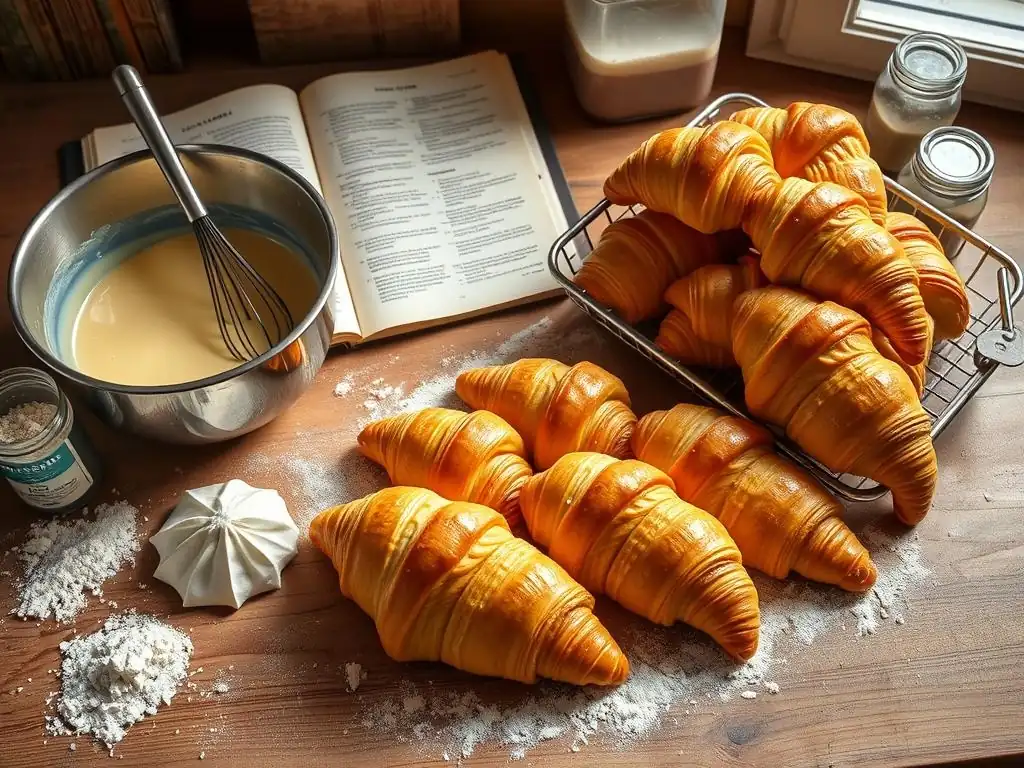
Seeing an example can help solidify how to build your own French pastry baking schedule. Let's outline a possible schedule for two popular French pastries, illustrating how the steps can be spread out over time. These examples are approximations; always refer to your specific recipe for exact timings.
These examples demonstrate how chilling and resting times can be leveraged to break down complex processes into manageable blocks, making ambitious French pastries achievable even on busy days.
Sample Schedule for Croissants
Here's a possible French pastry baking schedule for classic butter croissants, spread over two days:
Day 1:
- Evening (approx. 6:00 PM): Make the détrempe (dough base) and the butter block. Shape détrempe into a rectangle, wrap, and chill overnight (8-12 hours). Shape butter block into a similar sized rectangle, wrap, and chill overnight.
Day 2:
- Morning (approx. 8:00 AM): Incorporate the butter block into the détrempe. Perform the first fold (single or double, depending on recipe). Wrap and chill for 60 minutes.
- Morning (approx. 9:15 AM): Perform the second fold. Wrap and chill for 60 minutes.
- Morning (approx. 10:30 AM): Perform the third fold (if required). Wrap and chill for at least 2-3 hours, or up to 24 hours if needed.
- Afternoon (approx. 1:30 PM): Roll out dough to specified thickness. Cut into triangles. Shape croissants.
- Afternoon (approx. 2:00 PM): Place shaped croissants on baking sheets. Proof at room temperature (24°C) for 1.5-2.5 hours, or until visibly puffy and jiggly. (Alternatively, cold proof in fridge overnight and bake the next morning).
- Afternoon (approx. 3:30 PM - 4:30 PM): Preheat oven. Egg wash croissants (optional). Bake according to recipe (typically 15-20 minutes).
- Afternoon/Evening: Cool on a wire rack. Enjoy!
Sample Schedule for Eclairs
Here's a possible French pastry baking schedule for eclairs, potentially completed in one day with significant waiting time:
Day 1:
- Morning (approx. 9:00 AM): Make pastry cream for filling. Cover surface with plastic wrap and chill for at least 2-3 hours, or until firm. (Can be made the day before).
- Late Morning (approx. 11:00 AM): Make pâte à choux. Transfer to piping bag.
- Late Morning (approx. 11:30 AM): Pipe eclairs onto parchment-lined baking sheets.
- Late Morning/Early Afternoon (approx. 11:45 AM): Bake choux shells according to recipe (typically 20-30 minutes, plus drying time).
- Early Afternoon (approx. 12:30 PM): Remove shells from oven. Immediately pierce or slice to allow steam to escape. Cool completely on a wire rack (at least 1-2 hours, preferably longer).
- Afternoon (approx. 2:30 PM): Prepare chocolate glaze (ganache or fondant).
- Afternoon (approx. 2:45 PM): Fill cooled eclair shells with chilled pastry cream using a piping bag.
- Afternoon (approx. 3:15 PM): Dip tops of filled eclairs in glaze. Allow glaze to set slightly.
- Afternoon (approx. 3:30 PM): Serve and enjoy! (Eclairs are best eaten the same day).
Elevate Your French Pastry Baking with a Well-Planned Schedule
Adopting a structured French pastry baking schedule is a game-changer for anyone looking to improve their skills and enjoy the process more. It shifts your focus from reactive problem-solving to proactive planning, allowing you to anticipate the needs of your doughs and fillings at every stage. This level of organization is not just about efficiency; it's about respecting the craft and the science behind French pastry.
By integrating a French pastry baking schedule into your routine, you gain control over complex recipes that might have seemed intimidating before. You'll find that the steps flow more logically, mistakes are minimized, and the stress often associated with ambitious bakes is significantly reduced. It's a powerful tool for culinary growth.
From Beginner to Pro: The Power of Organization in Pastry Baking
Whether you're attempting your first batch of macarons or perfecting your croissant lamination, organization is key, and a French pastry baking schedule is its cornerstone. Beginners benefit immensely from having a clear roadmap, preventing them from getting lost or overwhelmed by multi-step instructions. Knowing exactly what needs to happen and when builds confidence and reduces the likelihood of critical errors.
For more experienced bakers, a detailed French pastry baking schedule allows for tackling even more complex creations like pièces montées or intricate entremets with multiple components made over several days. It enables efficient use of time and resources, ensuring all elements come together perfectly at the right moment. The discipline of scheduling elevates your baking from following instructions to truly mastering the process.
Enjoy Baking with Ease: Your Path to Delicious French Pastries
The ultimate goal of using a French pastry baking schedule is to make the art of creating beautiful and delicious French pastries accessible and enjoyable. When you're not scrambling to finish a step or worrying if your dough is properly chilled, you can actually savor the experience – the feel of the dough, the aroma filling your kitchen, the satisfaction of seeing your creations take shape.
A well-executed French pastry baking schedule leads to better results – flakier croissants, perfectly risen choux, smooth ganache, and delicate macarons. It transforms potentially stressful projects into rewarding achievements. By planning ahead and respecting the timing required, your path to baking exquisite French pastries is paved with ease and success.
Frequently Asked Questions
What is the best way to start planning my French pastry baking schedule?
Start by identifying the pastries you want to bake and then breaking down each recipe into its individual steps. Then, organize the steps by time requirements.
How can I manage time-consuming steps like making doughs ahead of time?
Many French pastry doughs benefit from resting or chilling, so making them a day in advance is often ideal. This allows for proper gluten development and easier handling.
What are some strategies for baking multiple pastries in a single day?
Plan your schedule around the oven temperature requirements of different pastries. Group pastries with similar baking temperatures together to avoid constant adjustments.
How important is it to have all my ingredients prepared before I begin baking?
Mise en place, or having all ingredients measured and prepped, is crucial for efficiency and accuracy. This ensures a smoother baking process and reduces errors.
What should I do if my baking schedule falls behind or I encounter unexpected issues?
Don't panic! Prioritize the most critical steps and adjust your schedule as needed. Sometimes, a slight delay doesn't significantly impact the final quality of the pastry.
Final Reflection: Mastering the Art of Time in French Pastry Baking
The meticulous planning required for French pastry baking isn't just about efficiency; it's about unlocking the potential for true culinary artistry. A well-structured schedule isn't a constraint, but rather a key that unlocks the secrets to flawlessly executed croissants, delicate macarons, and perfectly layered mille-feuille. Without careful timing and organization, even the most skilled baker can fall short of their potential.
The impact of a well-planned baking schedule extends beyond the individual kitchen. It reflects a broader cultural appreciation for precision and dedication to craft. The very essence of French pastry lies in its delicate balance of ingredients and techniques, a balance that is only achievable through mindful planning. Patience is the mother of all virtues, especially in baking.
– This adage rings particularly true when tackling the complexities of French pastry. The process, with its multiple stages and precise timings, demands patience and a deep understanding of the ingredients' behavior. This dedication to process is a reflection of a larger cultural value placed on craftsmanship and attention to detail.
Now, consider your own baking journey. What adjustments can you make to your approach? Perhaps it's time to embrace a more structured schedule, breaking down complex recipes into manageable steps. Don't be afraid to experiment with different scheduling techniques to find what works best for you. The reward? The exquisite satisfaction of creating beautiful, delicious French pastries, knowing that your careful planning played a crucial role in their success. Embrace the challenge, and discover the joy of mastering your own French pastry baking schedule.
Unleash Your Inner Pâtissier: Bake Your Dream French Pastries!
Thanks for joining us on this delicious journey into the world of French pastry baking! We hope you've gained valuable insights and inspiration to tackle those flaky masterpieces. Now it's time to put your newfound knowledge into action.
- Start planning your baking schedule today! Choose one recipe from the article to start with – don't overwhelm yourself. A well-structured schedule is key to avoiding stress and achieving baking bliss.
- Share your baking adventures! Post a picture of your creation on social media and tag us - we'd love to see your beautiful pastries!
- Dive deeper into our recipe collection. Explore our website for even more delicious French pastry recipes and expert baking tips. We have many more exciting techniques and flavour combinations just waiting to be discovered!
What's the first French pastry you're going to tackle, and what makes you most excited to bake it? Let us know in the comments below!