
From Beginner to Baker: Mastering Ciabatta and Rustic Loaves

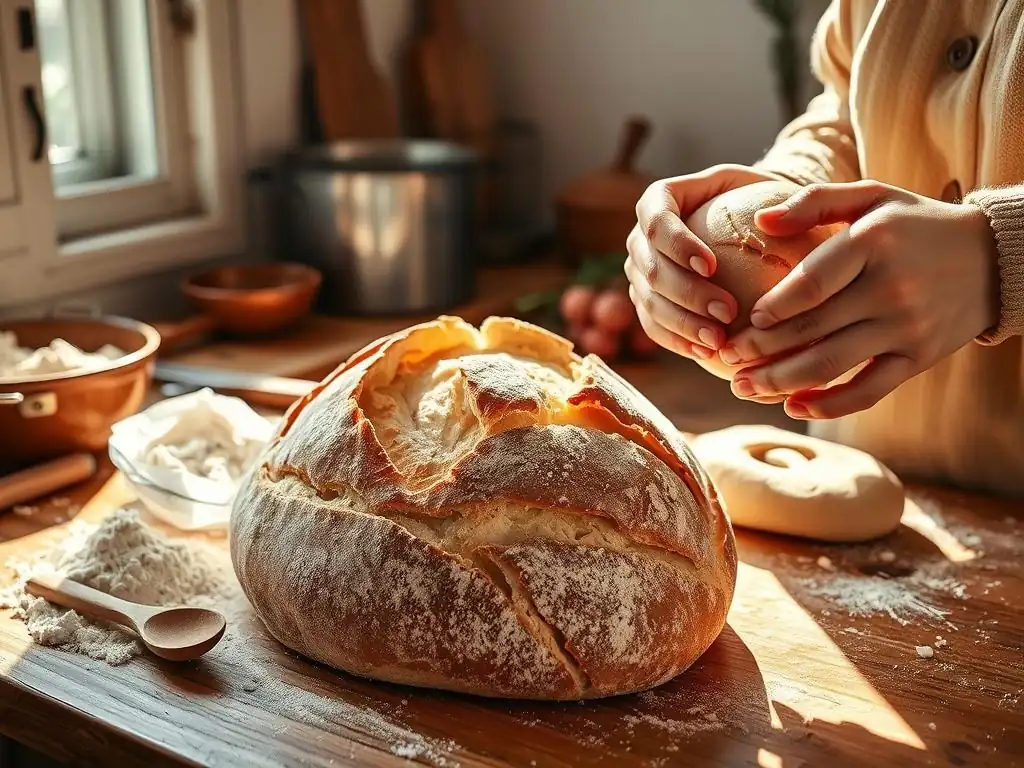
Welcome to BakeWithEase, where the joy of baking meets achievable expertise! Ever dreamt of crafting a perfectly crusty, airy ciabatta? This is where your journey begins. Unlock the secrets to our Ciabatta bread recipe for beginners and discover how to create artisan-quality loaves right in your own kitchen. Ready to transform simple ingredients into bread-baking brilliance? Let's get started!
- Introduction to Ciabatta and Rustic Bread Baking for Beginners
- Demystifying the Ciabatta Bread Recipe for Beginners
- Step-by-Step Ciabatta Bread Recipe Beginner's Guide
- Rustic Loaf Baking: Expanding Your Beginner Bread Baking Skills
- A Simple Rustic Loaf Recipe for Beginner Bakers
- Troubleshooting Common Ciabatta and Rustic Bread Baking Issues
- Tips and Tricks for Baking Better Ciabatta and Rustic Breads
- Beyond the Basics: Advancing Your Bread Baking Skills
- Conclusion: Your Journey from Beginner to Confident Ciabatta and Rustic Bread Baker
-
Frequently Asked Questions
- What makes the BakeWithEase Ciabatta bread recipe beginner-friendly?
- How does the BakeWithEase Ciabatta bread recipe help me improve my baking skills?
- What are the key ingredients needed for the BakeWithEase Ciabatta bread recipe?
- What are some common mistakes beginners make when baking Ciabatta bread, and how does BakeWithEase address them?
- Can the BakeWithEase Ciabatta bread recipe be adapted for different skill levels or dietary needs?
- Final Reflection: The Humble Loaf, a Journey of Discovery
- Unleash Your Inner Baker: Craft Your Perfect Loaf!
Introduction to Ciabatta and Rustic Bread Baking for Beginners
Why Choose Ciabatta and Rustic Loaves as Your First Bread Baking Projects?
Embarking on your bread baking journey can seem daunting, but choosing the right starting point makes all the difference. Ciabatta and rustic loaves, with their relatively simple ingredient lists and forgiving nature, are fantastic choices for beginners. Unlike some other breads that require complex shaping or precise kneading techniques, these loaves often rely on time and hydration to develop their structure and flavor, meaning less hands-on work and more patience is rewarded. The satisfaction of pulling a warm, crusty loaf from your oven that you made yourself is immense and highly achievable with these styles.
Furthermore, the fundamental techniques learned when tackling a basic ciabatta bread recipe for beginner bakers – understanding dough hydration, recognizing fermentation cues, and handling slack dough – form a solid foundation for future bread baking endeavors. You'll quickly grasp concepts like autolyse (mixing flour and water before adding other ingredients) and stretch-and-folds, which are invaluable across many bread types. Starting with a simple, straightforward ciabatta bread recipe beginner-friendly guide allows you to build confidence and skill without being overwhelmed by intricate steps.
BakeWithEase's Guide to Simple Bread Baking
At BakeWithEase, we believe that everyone can bake delicious bread, regardless of their experience level. Our approach focuses on demystifying the process, breaking down complex techniques into manageable steps, and providing clear, easy-to-follow instructions. We understand that the science behind baking can seem intimidating, so we explain why certain steps are important in a friendly, accessible way. This guide is designed specifically with you, the beginner baker, in mind, aiming to make your first attempts at a ciabatta bread recipe or a rustic loaf not just successful, but genuinely enjoyable.
We'll walk you through the essential ingredients, explain their roles, and guide you through each stage of the baking process, from mixing the dough to achieving that perfect golden crust. Our goal is to equip you with the knowledge and confidence to tackle your first ciabatta bread recipe beginner-style and then explore the wonderful world of rustic loaves. Think of us as your friendly guide, providing the tips and tricks you need to turn simple ingredients into impressive, homemade bread.
Demystifying the Ciabatta Bread Recipe for Beginners
Understanding the Key Ingredients in a Ciabatta Bread Recipe
Every great loaf of ciabatta starts with a few fundamental ingredients, each playing a crucial role in creating its signature texture and flavor. The core components are typically just flour, water, yeast, and salt. Understanding how these interact is key to mastering your first ciabatta bread recipe beginner-level. Variations might include a small amount of olive oil, which can contribute to a softer crumb and added flavor, but the basic structure relies on the simple four.
The quality and proportion of these ingredients are vital. Using a reliable recipe designed as a ciabatta bread recipe beginner guide will specify quantities, often using baker's percentages relative to the flour weight. For instance, a typical ciabatta might use 100% flour, 75-85% water, 1-2% salt, and 0.5-1% yeast. Adhering to these ratios is important, particularly when dealing with high hydration doughs, as even small deviations can significantly impact the dough's behavior.
High-Hydration Dough: The Secret to Ciabatta's Open Crumb
High hydration is perhaps the most defining characteristic of ciabatta dough, typically ranging from 75% to upwards of 90% water relative to the flour weight. This means for every 100 grams of flour, you might use 75-90 grams of water. This high water content is what allows for the characteristic airy, open crumb structure with large, irregular holes that ciabatta is known for. While it makes the dough sticky and challenging to handle initially, the resulting texture is well worth the effort.
Working with high-hydration dough requires a different approach than kneading stiffer doughs. Instead of traditional kneading, techniques like stretch-and-folds are used. These gentle movements help develop the gluten network without forcing the water out, allowing the dough to build strength and structure over time. Mastering the feel of a high-hydration dough is a key step in any ciabatta bread recipe beginner's journey, and it becomes intuitive with practice.
Flour Selection: Choosing the Right Flour for Your Ciabatta
The type of flour you use significantly impacts the outcome of your ciabatta. For most ciabatta bread recipe beginner guides, all-purpose flour or bread flour is recommended. Bread flour, with its higher protein content (typically 12-14%), develops gluten more readily and provides a stronger structure capable of supporting the high hydration. All-purpose flour (around 10-12% protein) can also work, resulting in a slightly softer crumb.
Some authentic ciabatta recipes might call for Italian "Tipo 00" flour, which is finely milled and has a specific protein profile. However, for a beginner ciabatta recipe, sticking to readily available bread flour or a good quality all-purpose flour is perfectly acceptable and will yield excellent results. The key is to choose a flour that hasn't been sitting on the shelf for too long, as fresh flour performs better.
Yeast and Fermentation: Achieving the Perfect Rise
Yeast is the leavening agent responsible for making your ciabatta rise, creating the gas that forms those desirable air pockets. Most beginner ciabatta bread recipe instructions will use either active dry yeast or instant yeast. Instant yeast is generally preferred for its convenience as it can be mixed directly into the dry ingredients, while active dry yeast usually needs to be proofed (dissolved in warm water) first to ensure it's alive and active.
Fermentation, the process where yeast consumes sugars and produces carbon dioxide and alcohol, is crucial for both rise and flavor development. Ciabatta often utilizes a pre-ferment, like a poolish or biga, which is a mixture of flour, water, and a small amount of yeast prepared several hours or even a day in advance. This slow, initial fermentation contributes significantly to the complex flavor profile and open crumb structure, setting a good foundation for your easy ciabatta bread baking project.
Step-by-Step Ciabatta Bread Recipe Beginner's Guide
Preparing the Poolish: The First Step to Authentic Ciabatta
Many authentic ciabatta recipes, including those adapted for a ciabatta bread recipe beginner, begin with a poolish. This is a simple pre-ferment typically made by mixing equal weights of flour and water with a tiny amount of yeast. For example, you might mix 100g bread flour, 100g water, and just 0.5g (about 1/8 teaspoon) instant yeast. This mixture is then left at room temperature for 12-18 hours or in the refrigerator for 24-48 hours to develop flavor.
The poolish should become bubbly and active, smelling slightly alcoholic by the time it's ready to be used in the main dough. It adds depth of flavor that's hard to achieve with a direct dough method alone. While some beginner ciabatta recipes might skip this step for simplicity, incorporating a poolish is highly recommended for the best results and is a core element of a traditional ciabatta bread recipe beginner approach.
Mixing the Dough: A Gentle Approach for a Light Texture
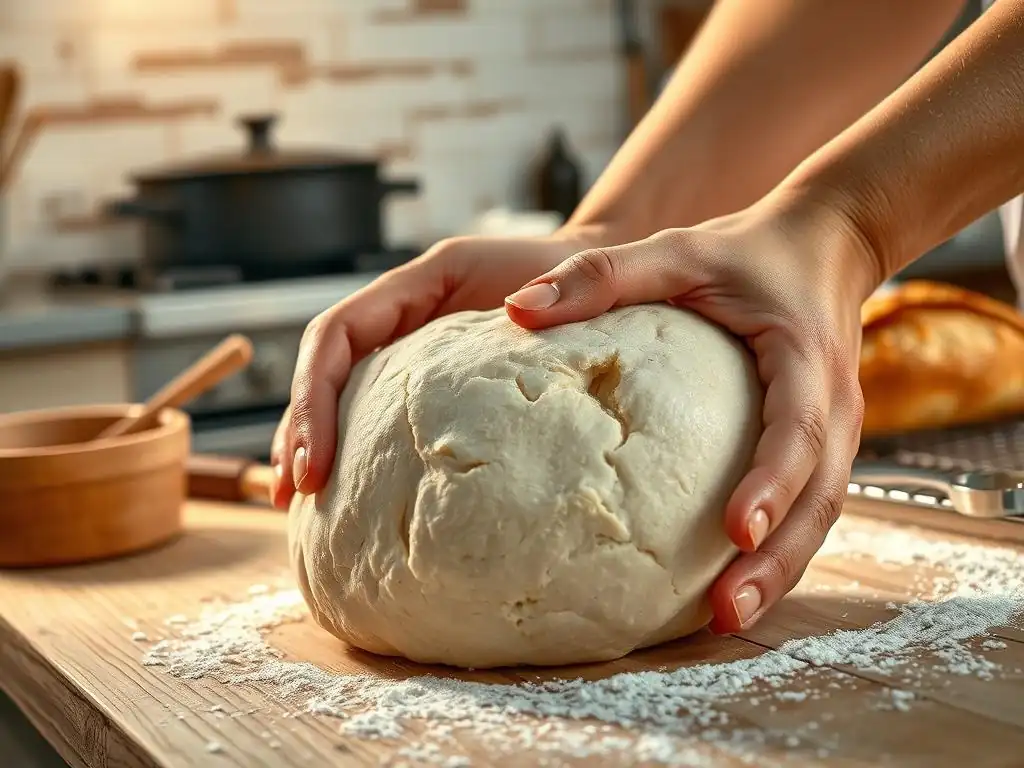
Once the poolish is ready, you'll combine it with the remaining flour, water, salt, and yeast (if using) to form the main dough. Because ciabatta dough is so wet, it's often mixed using a stand mixer with a dough hook or even just by hand using a spoon or spatula initially. The goal isn't traditional kneading, but rather incorporating the ingredients until no dry flour remains. The dough will be very sticky and shaggy at this stage.
After the initial mix, the dough needs time and gentle handling to develop gluten. Instead of continuous kneading, the dough undergoes a series of stretch-and-folds over the next couple of hours. This involves wetting your hands, grabbing one side of the dough, stretching it upwards, and folding it over the center. You rotate the bowl and repeat this motion several times. This process strengthens the dough gradually, preparing it for its significant rise.
Bulk Fermentation: Developing Flavor and Structure
Bulk fermentation, also known as the first rise, is a critical phase where the dough doubles or triples in size and develops significant flavor. For a typical ciabatta bread recipe beginner, this might take 2-4 hours at room temperature (around 70-75°F or 21-24°C), depending on the amount of yeast used and the ambient temperature. During this time, you'll perform several sets of stretch-and-folds, usually every 30-45 minutes during the first half of the bulk ferment.
Observing the dough is key during this stage. It should become visibly larger, lighter, and more aerated with each stretch-and-fold. Bubbles will start to form on the surface. The dough should also become smoother and slightly easier to handle, though still quite slack. Proper bulk fermentation is essential for a light, open crumb, making this period a cornerstone of any successful ciabatta bread recipe beginner method.
Shaping the Ciabatta: Handling the Sticky Dough
Shaping ciabatta is less about creating tension and more about gently coaxing the dough into the desired form. After bulk fermentation, the dough is carefully turned out onto a generously floured surface (semolina flour works well here). Because the dough is so wet, resist the urge to add too much flour to the dough itself, only to the surface and your hands. The dough is typically divided into rectangular or square portions using a bench scraper.
These portions are then gently stretched or patted into shape. The key is to be gentle to avoid deflating the precious air pockets that developed during fermentation. The shaped pieces are then transferred to a couche (a piece of linen or heavy canvas) or parchment paper heavily dusted with flour or cornmeal, often separated by folds in the fabric or paper to prevent sticking as they proof. This minimal handling preserves the airy structure crucial for your easy ciabatta bread.
Baking Your Ciabatta: Achieving a Crispy Crust
Baking ciabatta requires high heat and steam to achieve its characteristic crispy crust and maximum oven spring. Preheat your oven to a high temperature, typically between 450°F and 475°F (230°C and 245°C). Placing a baking stone or steel in the oven as it preheats is highly recommended as it provides a consistent, intense heat source for the bottom of the loaf.
Creating steam in the oven is vital to prevent the crust from setting too quickly, allowing the loaf to expand fully and contributing to a thin, crispy exterior. This can be achieved by placing a tray of hot water on the bottom rack of the oven when you put the bread in, or by using a Dutch oven (more on that later). Bake the loaves until they are deeply golden brown and sound hollow when tapped on the bottom, usually 20-30 minutes depending on size.
Rustic Loaf Baking: Expanding Your Beginner Bread Baking Skills
Introduction to Rustic Bread Baking Techniques
Rustic bread baking encompasses a broad range of styles, often characterized by their simple ingredients, natural fermentation (sometimes using sourdough), hearty crusts, and irregular, open crumbs. These loaves celebrate the natural qualities of flour, water, salt, and yeast (or starter). For a beginner baker, exploring rustic loaves after mastering a basic ciabatta bread recipe beginner approach is a natural progression.
Techniques commonly used in rustic bread baking include autolyse, extended bulk fermentation (often with stretch-and-folds), minimal shaping, and baking with steam, frequently in a hot oven or Dutch oven. The emphasis is often on developing flavor through time and careful handling rather than intensive kneading. Learning to bake a simple rustic loaf for beginners reinforces the fundamental principles you've already started to learn.
Differences Between Ciabatta and Other Rustic Loaves
While ciabatta is a type of rustic loaf, it has distinct characteristics that set it apart from others, especially in a ciabatta bread recipe beginner context compared to a general rustic loaf recipe. The most notable difference is often the hydration level; ciabatta is typically on the extreme high end of the spectrum (75-90%+), resulting in a very wet dough and a uniquely open, airy crumb with large holes. Other rustic loaves might have lower hydration levels (e.g., 65-75%), leading to a dough that is easier to handle and a crumb that is still open but potentially more uniform.
Another difference can be the use of pre-ferments. While a poolish is common in ciabatta, other rustic loaves might use a biga (a stiffer pre-ferment) or rely entirely on a sourdough starter. Shaping also differs; ciabatta is minimally shaped into flat, elongated loaves, while other rustic loaves might be shaped into rounds (boules) or ovals (bâtards) with more surface tension. Understanding these nuances helps when moving from your first easy ciabatta bread to other rustic styles.
A Simple Rustic Loaf Recipe for Beginner Bakers
Ingredients for a Beginner-Friendly Rustic Loaf
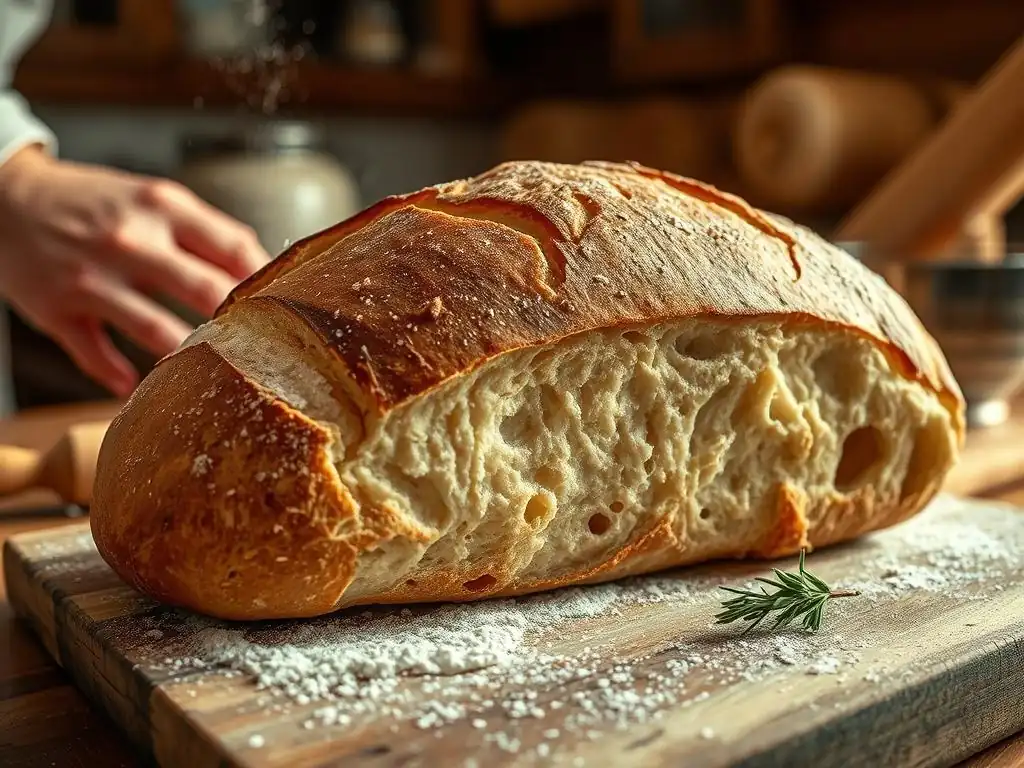
A basic rustic loaf for beginners requires similar simple ingredients to ciabatta, often just flour, water, salt, and yeast. For a loaf around 750-800g, you might use:
- 500g Bread Flour
- 350g Water (70% hydration)
- 10g Salt (2%)
- 3g Instant Yeast (0.6%)
This hydration level (70%) results in a dough that is still wet but significantly easier to handle than ciabatta dough, making it perfect as a next step after mastering a ciabatta bread recipe beginner. The quantities are easy to scale up or down proportionally. Using bread flour is recommended for good structure, but all-purpose can also work.
Step-by-Step Instructions for Baking a Rustic Loaf
Follow these steps for a successful rustic loaf:
- Combine flour, water, and yeast in a bowl. Mix until no dry flour remains. Let rest for 20-30 minutes (autolyse).
- Add salt and mix well to incorporate.
- Perform 3-4 sets of stretch-and-folds over the next 2-3 hours at 30-45 minute intervals.
- Allow dough to bulk ferment until doubled in size (total time 3-4 hours).
- Gently turn dough onto a lightly floured surface. Shape into a round or oval.
- Place shaped dough seam-side up in a floured proofing basket (banneton) or a bowl lined with a floured towel.
- Proof for 1-2 hours at room temperature, or 8-12 hours in the refrigerator.
- Preheat oven to 450°F (230°C) with a Dutch oven inside for at least 30 minutes.
- Carefully invert dough into the hot Dutch oven. Score the top.
- Bake covered for 20 minutes, then uncover and bake for another 20-25 minutes until deep golden brown.
First Rise and Second Rise: Achieving the Right Texture
In bread baking, the "first rise" refers to the bulk fermentation period after the initial mixing and stretch-and-folds, where the dough develops structure, flavor, and doubles in volume. For our simple rustic loaf recipe, this stage typically lasts 3-4 hours at room temperature, depending on ambient temperature and yeast activity. It's crucial to let the dough develop sufficiently during this phase for a light and airy crumb.
The "second rise," or proofing, occurs after the dough has been shaped. This is a shorter rise, where the shaped loaf increases in size and becomes ready for baking. For a rustic loaf, this might take 1-2 hours at room temperature or longer in the refrigerator (cold proofing slows fermentation and develops more flavor). The dough should look puffy but not overly gassy; an easy test is the poke test – if you gently poke the dough and the indentation springs back slowly, it's likely ready to bake. Over-proofing can lead to a dense crumb or collapse.
Scoring the Dough: Creating Beautiful Designs
Scoring, or slashing, the top of the loaf just before baking serves both aesthetic and functional purposes. Functionally, it allows the dough to expand in a controlled manner in the hot oven, preventing it from bursting unpredictably at weak points. This controlled expansion, known as oven spring, helps achieve a good shape and volume. Without scoring, the crust would set too quickly, restricting the loaf's ability to rise fully.
Aesthetically, scoring allows you to create beautiful patterns on the surface of your rustic loaf. Use a sharp blade, like a razor blade (often called a "lame" in baking circles), to make quick, decisive cuts about 1/2 inch deep. Common patterns include a single slash, a cross, or multiple parallel cuts. For a ciabatta bread recipe beginner, scoring isn't typical as the dough is too wet and shaped differently, but it's a key technique for boules and bâtards.
Baking to Perfection: Knowing When Your Rustic Loaf is Ready
Knowing exactly when your rustic loaf is perfectly baked comes with practice, but there are reliable indicators. The most obvious is the color of the crust; it should be a deep, rich golden brown, not just pale yellow. A darker crust often indicates better flavor development and a crispier texture. The bottom of the loaf should also be nicely browned.
Another common test is to tap the bottom of the loaf. If it sounds hollow, it's usually done. For ultimate accuracy, use an instant-read thermometer inserted into the center of the loaf; a fully baked rustic loaf should register an internal temperature of at least 200-210°F (93-99°C). Baking for the recommended time in the recipe is a good starting point, but always check for these visual and auditory cues.
Troubleshooting Common Ciabatta and Rustic Bread Baking Issues
Dough Too Sticky: Tips for Managing High-Hydration Dough
One of the most common challenges when first attempting a ciabatta bread recipe beginner or a high-hydration rustic loaf is managing the sticky dough. With hydration levels often exceeding 75%, the dough will naturally cling to everything. Resist the urge to add excessive amounts of flour to the dough itself, as this will lower the hydration and change the final texture.
Instead, focus on technique:
- Keep your hands wet when handling the dough during stretch-and-folds or shaping.
- Use a bench scraper to help manipulate the dough on the work surface and divide portions.
- Generously flour your work surface and proofing baskets, preferably with rice flour or semolina flour, which are less likely to be absorbed by the dough.
- Accept that high-hydration dough is supposed to be sticky; the goal is to manage it, not eliminate the stickiness entirely.
Bread Not Rising: Identifying Yeast Problems
If your ciabatta or rustic loaf dough isn't rising as expected, the yeast is the most likely culprit. Several factors can inhibit yeast activity:
- Inactive Yeast: The yeast might be old or dead. Check the expiration date on the package. If using active dry yeast, proof it in warm water (around 105-115°F or 40-46°C) with a pinch of sugar before adding it to the flour to ensure it's active. It should become foamy within 5-10 minutes.
- Water Temperature: Water that is too hot (above 130°F or 54°C) will kill the yeast, while water that is too cold will significantly slow down its activity. Use water within the recommended temperature range for activating yeast.
- Too Much Salt: Salt inhibits yeast activity. Ensure you measure salt accurately and don't add it directly on top of the yeast when mixing initially.
- Cold Environment: Yeast fermentation is slower in cold temperatures. Ensure your dough is proofing in a reasonably warm spot, ideally 70-80°F (21-27°C).
Dense Crumb: Understanding Fermentation Issues
A dense crumb in your ciabatta or rustic loaf, lacking those desirable air pockets, is often a sign of under-fermentation. This means the dough didn't have enough time to rise and develop sufficient gas before baking.
- Insufficient Bulk Fermentation: The dough didn't double or triple in size during the first rise. This could be due to inactive yeast (see above) or simply not allowing enough time. Be patient and watch the dough, not just the clock. The dough should look visibly aerated and feel light.
- Insufficient Proofing: After shaping, the dough didn't have enough time for its final rise. The poke test is a good indicator here. If the indentation springs back immediately, it needs more time. If it doesn't spring back at all, it might be over-proofed (which can also lead to a dense crumb, though less common for beginners than under-proofing).
- Rough Handling: Deflating the dough during shaping or transferring can knock out the air pockets. Be gentle, especially with high-hydration dough like that used in a ciabatta bread recipe beginner.
Crust Too Hard or Too Soft: Adjusting Baking Temperatures
The quality of the crust is a hallmark of good ciabatta and rustic loaves, and issues often relate to baking temperature and steam.
- Crust Too Hard/Thick: This can happen if the oven temperature is too low, leading to a longer bake time, or if there wasn't enough steam during the initial phase of baking. Steam keeps the crust soft initially, allowing the loaf to expand fully before the crust sets. Ensure your oven is fully preheated to a high temperature (450-475°F) and that you are generating adequate steam for the first 15-20 minutes of baking.
- Crust Too Soft/Pale: Conversely, a soft or pale crust might mean the oven temperature was too low, the baking time was too short, or the loaf was removed before it was fully done. Ensure the oven is accurately preheated and bake until the crust is a deep golden brown and the internal temperature is correct. Sometimes, leaving the loaf in the turned-off oven for a few extra minutes after baking can help crisp up the crust.
Tips and Tricks for Baking Better Ciabatta and Rustic Breads
Using a Dutch Oven for a Crispier Crust
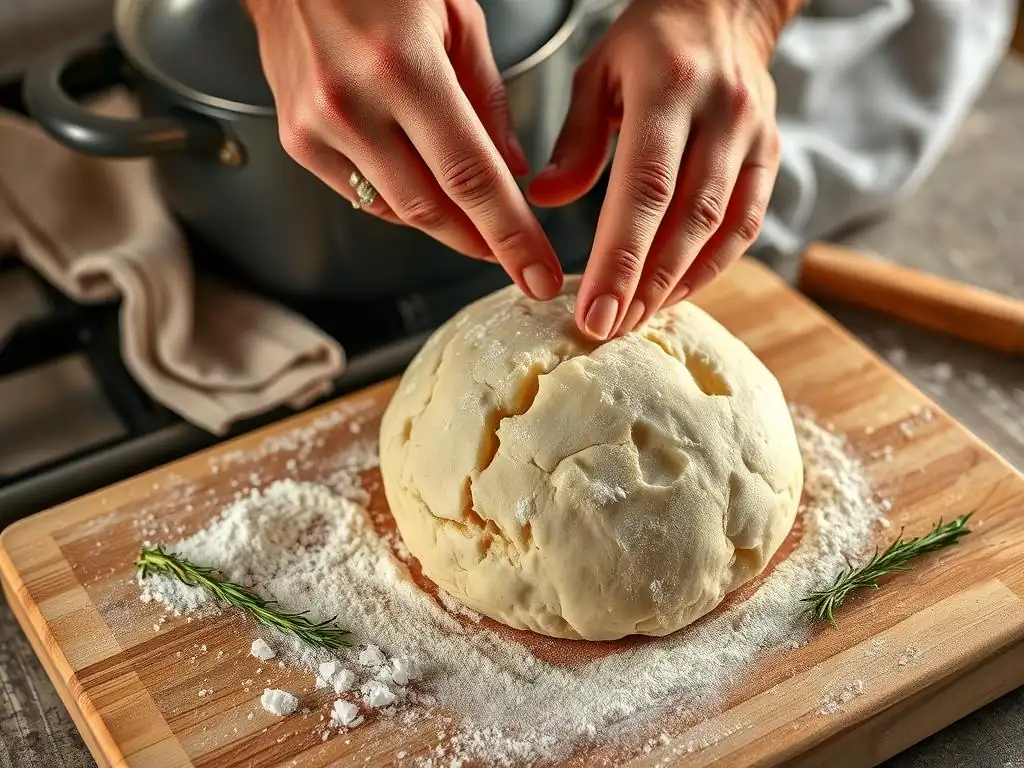
For many beginner bakers tackling a rustic loaf or even a ciabatta bread recipe, using a Dutch oven is a game-changer for achieving a professional-quality crispy crust. The heavy lid of the Dutch oven traps the steam released by the dough as it bakes. This creates a humid environment similar to a professional steam-injected oven, which allows the crust to remain pliable longer, resulting in better oven spring and a thinner, crispier crust once the lid is removed and the bread finishes baking in the dry heat.
To use a Dutch oven, place it in your oven while preheating to a high temperature (e.g., 450-475°F or 230-245°C) for at least 30 minutes. Carefully transfer the shaped dough into the hot Dutch oven (using parchment paper can help), quickly score the dough, place the lid on, and bake for the first 20 minutes. Then, remove the lid and continue baking until the crust is deeply colored. This method is particularly effective for boules and bâtards but can be adapted for smaller ciabatta loaves.
Adding Flavor Variations: Herbs, Olives, and More
Once you're comfortable with a basic ciabatta bread recipe beginner or rustic loaf, you can easily customize them with flavor additions. These inclusions can be mixed into the dough during the initial mixing phase or gently folded in during the stretch-and-fold process.
Popular additions include:
- Herbs: Fresh or dried rosemary, thyme, or oregano add wonderful aromatic notes. Use about 1-2 tablespoons of dried herbs or 2-4 tablespoons of fresh, chopped herbs per 500g of flour.
- Olives: Chopped olives (like Kalamata or green olives) bring a briny flavor. Drain them well before adding to avoid excess moisture. About 1/2 to 1 cup per 500g flour is a good starting point.
- Garlic: Roasted garlic cloves or granulated garlic can infuse the bread with savory depth.
- Cheese: Cubes of hard cheese like Parmesan or Gruyère add richness and flavor.
- Sun-dried Tomatoes: Chopped, oil-packed sun-dried tomatoes add sweetness and tang.
Experiment with different combinations to find your favorites!
Storing Your Ciabatta and Rustic Loaves for Freshness
Freshly baked ciabatta and rustic loaves are best enjoyed within a day or two of baking. However, you can extend their freshness with proper storage. The goal is usually to protect the interior crumb from drying out while trying to preserve some of the crust's crispness, which is tricky.
- Short-Term Storage (1-2 days): Store the cooled loaf at room temperature. For ciabatta, a paper bag is often recommended to help maintain the crust while allowing the crumb to breathe slightly. For rustic loaves, a bread box or simply placing the cut side down on a cutting board can work. Avoid plastic bags for whole loaves, as they trap moisture and will soften the crust quickly.
- Long-Term Storage (Freezing): For longer storage, freezing is the best option. Allow the loaf to cool completely. You can freeze it whole or sliced. Wrap it tightly in plastic wrap, then in aluminum foil or a freezer bag to prevent freezer burn. Frozen bread can last for several months. To reheat, thaw the bread at room temperature, then refresh it in a moderate oven (350°F or 175°C) for 10-15 minutes for a whole loaf, or a few minutes for slices, to revive the crust.
Beyond the Basics: Advancing Your Bread Baking Skills
Exploring Different Flour Types for Unique Flavors
Once you've successfully baked a few loaves using a standard ciabatta bread recipe beginner or rustic loaf guide, you might want to explore how different flours impact the final product. Substituting a portion of the bread flour with other types can dramatically change the flavor, texture, and color of your bread.
Consider experimenting with:
- Whole Wheat Flour: Substituting 10-30% whole wheat flour adds a nutty flavor and more fiber. It also absorbs more water, so you might need to slightly increase hydration.
- Rye Flour: Even a small percentage (5-10%) of rye flour adds a distinct tangy flavor and can affect gluten development (rye has less gluten), resulting in a denser crumb.
- Spelt Flour: An ancient grain, spelt adds a slightly sweet, nutty flavor. It has a more fragile gluten structure than modern wheat, so it's often used in combination with bread flour.
- Semolina Flour: Made from durum wheat, semolina adds a beautiful golden color and slightly coarse texture, often used in Italian breads like Pane di Altamura. It can be used for dusting or incorporated into the dough.
Experimenting with Sourdough Starter in Ciabatta
Transitioning from commercial yeast to a sourdough starter is a significant step in advancing your bread baking skills and can add incredible depth of flavor to ciabatta and rustic loaves. A sourdough starter is a living culture of wild yeast and bacteria that acts as the leavening agent. Using a starter means a longer fermentation process, which develops more complex flavors and can result in a tangier loaf.
To adapt a ciabatta bread recipe beginner to use sourdough, you would typically replace the poolish and commercial yeast with an equivalent weight of active, mature sourdough starter. The bulk fermentation and proofing times will likely be longer, and they are dictated by the starter's activity and ambient temperature rather than fixed times. Learning to read your sourdough starter and dough is key to success in this advanced technique.
Mastering Advanced Shaping Techniques for Rustic Loaves
While a basic ciabatta bread recipe beginner focuses on minimal shaping, and initial rustic loaves might involve simple boules or bâtards, there are many advanced shaping techniques to explore. These methods can improve the structure, appearance, and even the crumb of your bread.
Techniques include:
- Preshape: Giving the dough a preliminary shape after bulk fermentation and before the final shape helps build tension and makes the final shaping easier.
- Stitching: A technique used during bulk fermentation or preshaping to create tension across the dough's surface.
- Complex Scoring Patterns: Moving beyond simple slashes to create intricate designs using multiple blades or specialized tools.
- Braiding or Weaving: While not typical for ciabatta, rustic loaves can sometimes be braided or woven for decorative effect.
Mastering these techniques requires practice and a good understanding of dough tension and handling.
Conclusion: Your Journey from Beginner to Confident Ciabatta and Rustic Bread Baker
You've taken the first step on a rewarding journey into the world of baking. Starting with a simple ciabatta bread recipe beginner guide or an easy rustic loaf provides a solid foundation for mastering core bread baking techniques. You've learned about the crucial roles of high hydration, fermentation, and proper baking temperatures. You've tackled sticky dough, watched for the perfect rise, and achieved that satisfyingly crispy crust.
Remember that baking is a skill that improves with practice. Don't be discouraged by imperfect loaves; each bake is a learning opportunity. Revisit your ciabatta bread recipe beginner notes, troubleshoot issues, and celebrate your successes. As you gain confidence, you can explore variations, experiment with different flours, and even venture into the world of sourdough. The aroma of fresh, homemade bread filling your kitchen is just the beginning. Keep baking, keep learning, and enjoy every delicious moment!
Frequently Asked Questions
What makes the BakeWithEase Ciabatta bread recipe beginner-friendly?
Our recipe focuses on simple techniques and easy-to-find ingredients, guiding you through each step with clear instructions. We prioritize understanding the baking process rather than complex methods.
How does the BakeWithEase Ciabatta bread recipe help me improve my baking skills?
By mastering our Ciabatta bread recipe, you'll gain confidence in working with yeast doughs, understanding hydration levels, and developing shaping techniques applicable to other breads.
What are the key ingredients needed for the BakeWithEase Ciabatta bread recipe?
You'll need basic ingredients like flour, water, yeast, salt, and olive oil. Our recipe emphasizes using readily available ingredients for ease and accessibility.
What are some common mistakes beginners make when baking Ciabatta bread, and how does BakeWithEase address them?
Common mistakes include over-kneading, incorrect hydration, and improper shaping. BakeWithEase provides detailed instructions and tips to avoid these pitfalls and achieve successful results.
Can the BakeWithEase Ciabatta bread recipe be adapted for different skill levels or dietary needs?
While designed for beginners, the recipe is easily adaptable. You can experiment with different flours for unique flavors or adjust the hydration levels for a chewier or softer crumb to suit your preferences.
Final Reflection: The Humble Loaf, a Journey of Discovery
The pursuit of the perfect ciabatta, a seemingly simple goal, reveals a profound connection between patience, precision, and the deeply satisfying reward of handcrafted bread. This journey, from hesitant beginner to confident baker, underscores the transformative power of culinary exploration, a power accessible to anyone willing to embrace the process. The seemingly complex techniques involved in creating rustic loaves like ciabatta actually unlock a deeper understanding of fundamental baking principles applicable far beyond this specific bread.
The influence of sourdough and artisan baking extends far beyond the kitchen; it's a cultural shift towards valuing slow processes, mindful creation, and the appreciation of simple, wholesome ingredients. Bread is the staff of life,
a phrase often repeated, speaks to its fundamental importance, but it also hints at the deeper satisfaction found in creating something so essential from scratch. This experience has solidified my belief in the therapeutic power of baking, a quiet act of creation that connects us to both tradition and our own inner selves.
Now, it's your turn. Don't be intimidated by the seemingly complex world of artisan bread making. Take the leap, embrace the challenge, and discover the joy of transforming simple flour and water into something truly extraordinary. The journey may be long, but the rewards – the aroma of freshly baked bread, the satisfying chew of a perfectly crafted crust, and the pride in your own creation – are immeasurable. Start with a single loaf, and let the journey begin.
Unleash Your Inner Baker: Craft Your Perfect Loaf!
Thanks for joining us on this ciabatta and rustic bread journey! We hope you’ve gained valuable insights and a newfound confidence in tackling these delicious loaves. Ready to take your baking to the next level?
- Bake your own masterpiece: Choose your favorite recipe from the article (or try both!) and get baking. Remember, practice makes perfect!
- Share your creations: Tag us on social media with a picture of your finished loaf – we'd love to see your results! Use #BakeWithEaseCiabatta
- Dive deeper into artisan bread: Explore our other resources on sourdough starters and advanced baking techniques on the BakeWithEase site for more delicious adventures.
Now, tell us: What unique twist will you add to your first ciabatta or rustic loaf?