
Crafting Beautiful Brioche Rolls (Nanterre and À Tête)

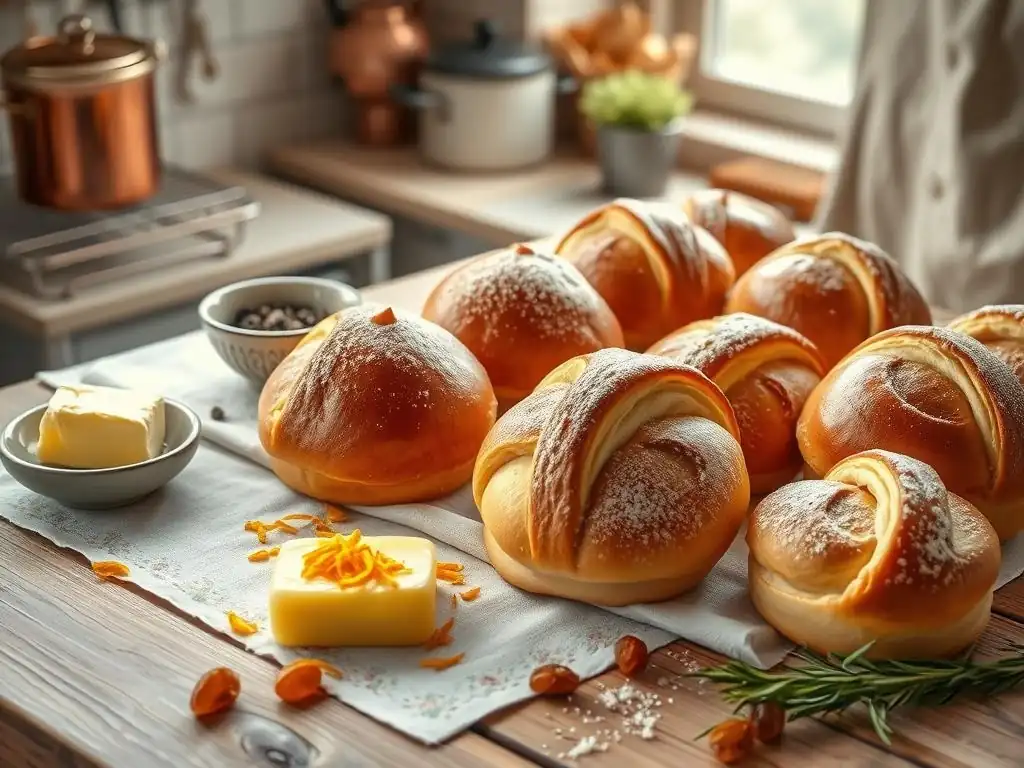
Welcome to BakeWithEase, where we demystify the art of baking! Ever dreamt of crafting those golden, pillowy brioche rolls you see in bakeries? Get ready to turn that dream into reality. This article delves into an easy brioche rolls recipe, guiding you through the steps to create both classic Nanterre and elegant à tête variations. Discover the secrets to achieving that perfect, buttery crumb and impress your friends and family. Curious about how simple ingredients can transform into such delectable delights? Let's get baking!
- Baking Classic Brioche Rolls: Nanterre and À Tête
- Introduction to Brioche Rolls: Nanterre & À Tête Styles
- Mastering the Brioche Dough: A Step-by-Step Guide
- Shaping Techniques: Nanterre Brioche
- Shaping Techniques: À Tête Brioche
- Baking Your Brioche Rolls to Perfection
- Cooling and Storing Your Brioche Rolls
- Troubleshooting Common Brioche Baking Issues
- Serving Suggestions and Flavor Variations
- Conclusion: Embrace the Art of Brioche Baking
-
Frequently Asked Questions
- How does the Nanterre method differ from the À Tête method for brioche rolls?
- What makes a brioche roll "easy" to bake, according to BakeWithEase?
- Can I substitute ingredients in the easy brioche rolls recipe?
- How do I know when my brioche rolls are properly proofed?
- What are some tips for achieving a shiny, golden-brown crust on my brioche rolls?
- Final Reflection: The Enduring Allure of the Perfect Brioche Roll
- Unleash Your Inner Baker: Master the Art of Brioche!
Baking Classic Brioche Rolls: Nanterre and À Tête
Introduction to Brioche Rolls: Nanterre & À Tête Styles
Brioche rolls are a delightful treat, known for their rich, buttery flavor and tender crumb. Unlike standard bread rolls, brioche is an enriched dough, meaning it contains a significant amount of butter, eggs, and sometimes milk or cream, which contribute to its luxurious texture and taste.
Mastering an easy brioche rolls recipe opens up a world of delicious possibilities, from breakfast pastries to bases for gourmet sandwiches. Today, we'll delve into crafting two classic shapes: the elegant Nanterre loaf, traditionally baked in a loaf pan and sliced, and the charming À Tête roll, often called "Parisian" brioche, with its distinctive top knot.
These two shapes, Nanterre and À Tête, showcase the versatility of a single brioche dough. While the ingredients and initial dough preparation are the same, the final shaping and baking vessels differ, resulting in unique presentations. The Nanterre style typically involves placing several balls of dough side-by-side in a loaf pan, which fuse together during baking to create a pull-apart loaf.
The À Tête, on the other hand, is a single roll baked in a fluted mold, featuring a smaller ball of dough perched atop a larger one, symbolizing a head (tête) on a body. Both are fantastic ways to enjoy your homemade brioche rolls.
The Allure of Brioche: Richness and Versatility
Brioche's appeal lies in its unique combination of tenderness and structure, derived from its high fat and egg content. A typical brioche dough can contain anywhere from 30% to 50% butter relative to the flour weight, sometimes even more for particularly rich versions like brioche mousseline. This significant amount of fat shortens the gluten strands, resulting in that characteristic soft, melt-in-your-mouth texture that sets it apart from lean doughs used for baguettes or ciabatta. The eggs also contribute to the richness, color, and nutritional value, adding protein and emulsifiers that help create a smooth, cohesive dough.
Beyond its delightful texture and flavor, brioche is incredibly versatile. While heavenly served simply with butter and jam, it also serves as an excellent base for both sweet and savory applications. Stale brioche makes the most incredible French toast or bread pudding due to its rich crumb. Sliced brioche is perfect for gourmet burgers or sandwiches, its slight sweetness complementing savory fillings. Exploring an easy brioche rolls recipe allows you to create a foundational bread that can be transformed into countless dishes, making it a rewarding baking project.
Achieving Brioche Success at Home: A Reliable Recipe
Creating perfect brioche rolls at home is entirely achievable with a reliable recipe and careful attention to technique. The process involves standard bread-making steps – mixing, kneading, rising (often including a crucial cold fermentation), shaping, and baking – but with specific considerations for the enriched dough. Unlike lean doughs that develop strength through extensive kneading and hydration, brioche relies on the structure provided by the gluten before the large amount of fat is incorporated. Adding butter gradually is key to achieving a smooth, elastic dough that can support its rich ingredients.
A successful easy brioche rolls recipe hinges on patience, particularly during the fermentation stages. The cold proofing step, often overnight in the refrigerator, is non-negotiable for developing deep flavor and making the dough easier to handle for shaping. Don't rush the process; allowing the yeast and enzymes time to work at a cooler temperature significantly improves the final texture and taste. Even for beginners, following a clear, step-by-step guide for this classic enriched dough can lead to beautiful, bakery-quality brioche rolls right from your own oven.
Mastering the Brioche Dough: A Step-by-Step Guide
Making the perfect brioche dough requires precision and patience, but the result is well worth the effort. This enriched dough differs significantly from standard bread doughs due to its high content of eggs and butter. The goal is to develop a strong gluten network before incorporating the fat, allowing the dough to support the richness and achieve that signature tender crumb. Follow these steps carefully for a flawless brioche dough that's easy to handle and bakes up beautifully into your homemade brioche rolls.
The key stages involve activating the yeast, combining ingredients strategically, thorough kneading (often in a stand mixer), and crucial fermentation periods, including a cold rest. Each step contributes to the dough's structure, flavor, and ease of shaping. While it might seem daunting at first, breaking down the process makes this easy brioche rolls recipe accessible to intermediate bakers and even ambitious beginners looking to expand their skills beyond simple loaves.
Ingredients for a Flawless Brioche Dough
Crafting a classic brioche requires high-quality ingredients, as each component plays a vital role in the final product's texture, flavor, and appearance. You'll need strong bread flour (approximately 500 grams for a standard batch), which has a higher protein content than all-purpose flour, providing the necessary structure to support the rich additions. Granulated sugar (around 50-70 grams) contributes to sweetness, tenderness, and helps with browning. Salt (about 10-12 grams) is essential for flavor balance and controlling yeast activity.
The enriching ingredients include eggs (typically 4-6 large ones, weighing roughly 200-300 grams), which add richness, color, and help emulsify the dough, and unsalted butter (a generous amount, often 200-300 grams, cut into small, cold cubes). Milk (around 100-150 ml, lukewarm) provides liquid and additional richness. Finally, active dry or instant yeast (about 7-10 grams) is needed for leavening. Using cold butter is crucial; it's incorporated gradually into the dough, allowing the gluten to develop properly before being coated in fat.
Essential Equipment for Brioche Baking
Having the right tools can make the process of creating your easy brioche rolls recipe much smoother and more successful. A stand mixer with a dough hook is highly recommended for brioche dough, as the kneading required is extensive and the dough can be quite sticky before the butter is fully incorporated. Hand kneading is possible but requires significant effort and patience. You'll also need accurate measuring cups and spoons, and preferably a digital scale for precise ingredient weights, especially for flour, butter, and eggs.
For shaping and baking, the equipment depends on the style of brioche rolls you're making. For Nanterre brioche, a standard loaf pan (approximately 9x5 inches or similar) is necessary. For À Tête brioche, specific fluted brioche molds are traditional, typically 3-4 inches in diameter at the top. You'll also need baking sheets lined with parchment paper, plastic wrap or clean kitchen towels for covering the dough during proofing, and a pastry brush for applying the egg wash before baking.
Step 1: Blooming the Yeast
The first step in many enriched dough recipes, including this easy brioche rolls recipe, is often blooming the yeast, especially if using active dry yeast. This process ensures the yeast is alive and active before you commit to mixing the entire dough. In a small bowl, combine the lukewarm milk (around 100-150 ml, ideally between 105-115°F or 40-46°C) with a pinch of sugar from your measured amount and the yeast (7-10 grams).
Stir gently and let it sit for 5-10 minutes. You should see a foamy layer develop on the surface, which indicates the yeast is active and ready to work.
If you are using instant yeast, blooming is not strictly necessary as it can be mixed directly with the dry ingredients. However, blooming instant yeast can still serve as a quick check of its viability. Regardless of the type of yeast, ensuring it's active is a critical early step to avoid disappointment later in the process when you expect your beautiful brioche rolls to rise.
Step 2: Combining Dry Ingredients
In the large bowl of your stand mixer (or a large mixing bowl if kneading by hand), combine the bread flour (around 500 grams), the remaining sugar (50-70 grams), and salt (10-12 grams). Whisk these dry ingredients together briefly to ensure they are evenly distributed. This simple step prevents pockets of salt or sugar in the dough and ensures consistent flavor throughout your easy brioche rolls.
Once the dry ingredients are combined, create a well in the center. Pour in the bloomed yeast mixture (or just the lukewarm milk if using instant yeast mixed with dry ingredients) and the eggs (4-6 large). Attach the dough hook to your stand mixer and begin mixing on a low speed. If kneading by hand, start incorporating the wet ingredients into the dry with a spoon or your hands.
Mix until a shaggy dough forms and no dry pockets of flour remain. At this stage, the dough will be quite sticky and wet, which is expected before the butter is added. Continue mixing or kneading for several minutes until the dough starts to come together and show some initial signs of gluten development.
Step 3: Incorporating Butter
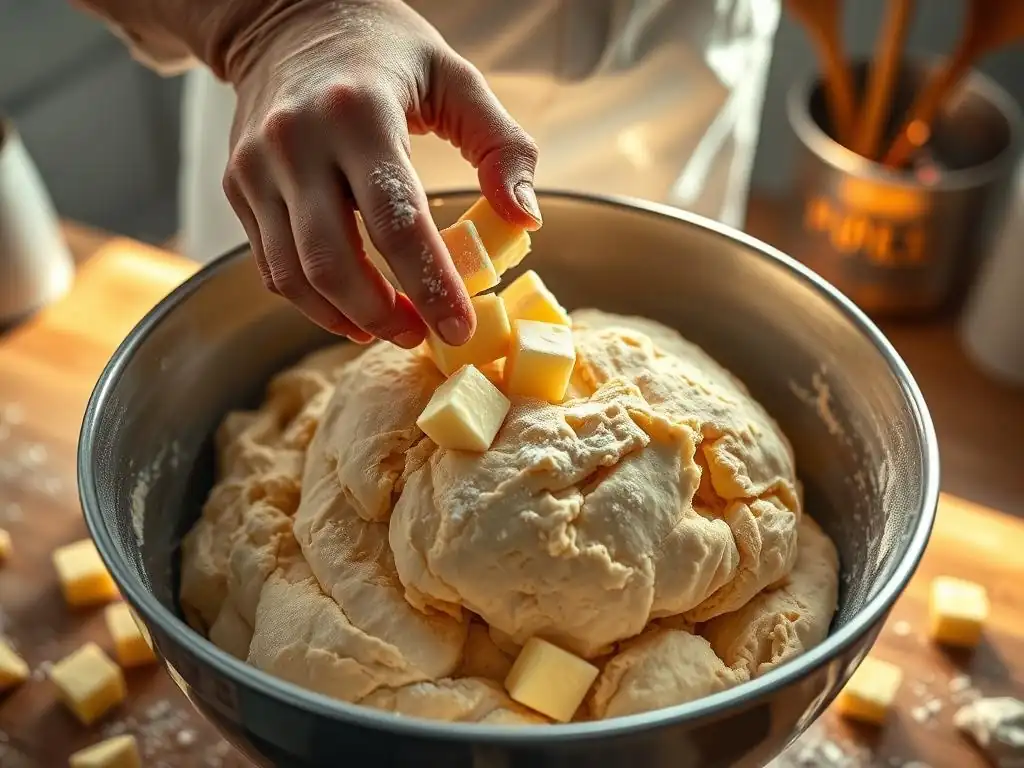
This is perhaps the most crucial step in creating that signature brioche texture. Once the dough has come together and has been kneaded for about 5-10 minutes (in a stand mixer) until it pulls away from the sides slightly and is somewhat elastic, you can begin adding the cold, cubed butter (200-300 grams). Add the butter one cube at a time while the mixer is running on a low speed. Wait until each cube is almost fully incorporated before adding the next. This process is slow, taking 15-20 minutes or even longer.
Adding the butter gradually allows the gluten network, which you've started to develop, to absorb the fat without collapsing. Initially, the dough will look like it's breaking apart and might stick to the sides of the bowl excessively. Be patient and continue mixing.
As the butter is incorporated, the dough will become very smooth, shiny, and elastic. It should eventually pull away cleanly from the sides of the bowl and pass the "windowpane test" – if you stretch a small piece, you should be able to see light through it without it tearing, indicating strong gluten development. This thorough kneading is key to a tender, airy crumb in your easy brioche rolls recipe.
Step 4: Bulk Fermentation
After the dough has been thoroughly kneaded and the butter is fully incorporated, it's time for the first rise, also known as bulk fermentation. Transfer the dough to a lightly greased bowl, turning it once to coat the surface. Cover the bowl tightly with plastic wrap or a damp kitchen towel.
Place the dough in a warm, draft-free place to rise until it has doubled in size. This typically takes anywhere from 1.5 to 3 hours, depending on the temperature of your kitchen and the activity of your yeast. A kitchen temperature around 75-80°F (24-27°C) is ideal for a relatively quick rise.
During this time, the yeast is actively producing carbon dioxide, which causes the dough to expand. The gluten network relaxes, making the dough more extensible and easier to handle later. For an easy brioche rolls recipe, ensuring a good bulk fermentation is vital for a light and airy final product. Keep an eye on the dough; it's better slightly under-proofed than significantly over-proofed at this stage.
Step 5: Cold Proofing for Enhanced Flavor
This step is absolutely essential for achieving the best flavor and texture in your brioche rolls, and it also makes the dough much easier to handle for shaping. Once the dough has doubled in size during the bulk fermentation, gently punch it down to deflate it. Re-cover the bowl tightly with plastic wrap and transfer it to the refrigerator for a cold proofing period. This should ideally be done for at least 6-8 hours, but preferably overnight (12-24 hours).
The cold temperature significantly slows down the yeast activity but allows enzymes to break down starches into sugars, developing complex flavors. The cold also solidifies the butter within the dough, making it firm and less sticky, which is a huge advantage when it comes time to divide and shape the individual brioche rolls. Don't skip this step in your easy brioche rolls recipe; it's a game-changer for both flavor and workability.
Shaping Techniques: Nanterre Brioche
The Nanterre style is a classic way to shape brioche, resulting in a beautiful pull-apart loaf that's perfect for slicing or simply tearing off individual rolls. It's named after the French commune of Nanterre, known for this particular shape. This method involves dividing the dough into several equal portions and arranging them neatly in a loaf pan, where they will rise and fuse together during baking. It's a relatively straightforward shaping technique, making it a great starting point for using your easy brioche rolls recipe dough.
The visual appeal of Nanterre brioche comes from the distinct balls that form the loaf, creating natural breaking points. This shape also ensures even baking and a consistent soft texture throughout the loaf. Mastering this technique allows you to present your rich brioche dough in an elegant and traditional form, ideal for a breakfast table or as a base for savory dishes.
Understanding Nanterre Brioche
Nanterre brioche is characterized by its loaf shape, typically formed by arranging several balls of dough side-by-side in a standard loaf pan. The number of balls can vary, but commonly ranges from 6 to 8 for a standard 9x5 inch pan. As the dough rises and bakes, these balls expand and merge, creating a loaf that is easy to break apart into individual portions. This method showcases the richness and tenderness of the brioche dough beautifully.
Historically, brioche was often baked in larger loaves, and the Nanterre shape is a popular iteration that simplifies portioning. The goal is to create uniform balls so they rise evenly and create a visually appealing, symmetrical loaf. The slight gaps between the balls before proofing disappear as they expand, resulting in a cohesive yet easily separable structure, a hallmark of this classic brioche style.
Dividing the Dough for Nanterre Rolls
After the cold proofing period, remove the chilled brioche dough from the refrigerator. It should be firm and much easier to handle. Lightly flour your work surface. Gently turn the dough out onto the floured surface. The amount of dough from a standard easy brioche rolls recipe (using about 500g flour) will typically yield enough for one large Nanterre loaf or approximately 8-10 individual À Tête rolls.
For a Nanterre loaf in a 9x5 inch pan, you'll want to divide the dough into 6 to 8 equal pieces. Using a bench scraper or knife, cut the dough into the desired number of portions. For accuracy and consistency, you can weigh each portion to ensure they are roughly the same size. For instance, if your total dough weight is around 1000-1200 grams, dividing it into 8 pieces would yield pieces of 125-150 grams each. Uniform division is important for even rising and a symmetrical final loaf.
Shaping Nanterre Brioche: A Detailed Guide
Once the dough is divided into equal portions (e.g., 8 pieces for a standard loaf pan), you need to shape each piece into a smooth ball. Take one portion of dough and gently cup it with your hand on a lightly floured or unfloured surface (depending on how sticky the dough is). Using a circular motion, roll the dough against the surface, applying gentle downward pressure with your hand to create tension on the surface of the ball.
This technique is called "rounding." The goal is to create a smooth, taut surface on the dough ball with the seam tucked underneath.
Repeat this rounding process for all 8 pieces of dough. Once shaped, arrange the balls side-by-side in your prepared loaf pan. You can grease the pan with butter or line it with parchment paper. For an 8-ball loaf, you might arrange them in two rows of four, or one row of eight depending on the pan size and desired look. Ensure there are small gaps between the balls to allow for expansion during proofing.
Proofing Nanterre Brioche Rolls Before Baking
After shaping the Nanterre loaf by placing the balls in the pan, it's time for the final proofing. Cover the loaf pan loosely with plastic wrap or a clean kitchen towel. Place the pan in a warm, draft-free place. The dough needs to rise until the balls have nearly doubled in size and are touching each other, filling the pan. This usually takes 1 to 2 hours, depending on the ambient temperature. You can also proof in a slightly warmer environment (like a turned-off oven with the light on) to speed things up, but watch carefully.
About 15-20 minutes before you plan to bake, gently brush the top of the brioche with an egg wash (usually one egg beaten with a tablespoon of milk or water). This gives the crust a beautiful golden-brown color and shine. Be careful not to deflate the risen dough when applying the egg wash. The loaf is ready to bake when it looks puffy and fills the pan, demonstrating a significant increase in volume since shaping.
Shaping Techniques: À Tête Brioche
The À Tête shape, meaning "with a head" in French, is perhaps the most iconic form of individual brioche rolls. It's characterized by a larger base roll topped with a smaller "head" of dough, traditionally baked in fluted brioche molds. This shape is both elegant and charming, making it a favorite for individual servings. Mastering this technique adds another dimension to your easy brioche rolls recipe repertoire.
While the dough is the same as for Nanterre, the shaping method requires a bit more precision to create the distinct two-part structure. The key is dividing the dough into portions that can be split into a large base and a small top knot, and then joining them securely before proofing and baking.
Exploring À Tête Brioche
À Tête brioche, also known as brioche Parisienne, is a classic individual roll shape instantly recognizable by its top knot. This shape is achieved by taking a single portion of dough, forming it into a pear shape, and then using a finger to create an indentation that allows a smaller piece of dough (the "head") to be securely placed on top of the larger base. The fluted molds traditionally used for À Tête rolls help the brioche rise upwards and maintain its shape during baking, resulting in a tall, elegant roll.
The contrast between the larger, rounded base and the smaller, often slightly more browned top knot is visually appealing. This shape is perfect for serving as individual breakfast rolls or as a sophisticated accompaniment to a meal. Working with the cold, firm dough from the cold proofing step is essential for successfully shaping À Tête rolls, as it prevents the dough from being too sticky and difficult to handle.
Dividing the Dough for À Tête Rolls
After the cold proofing, turn the chilled brioche dough out onto a lightly floured surface. For individual À Tête rolls baked in standard 3-4 inch fluted molds, you'll typically divide the dough into portions slightly larger than you would for simple round rolls, as each portion needs to be split into a base and a head. A standard easy brioche rolls recipe using 500g of flour often yields enough dough for 8-10 À Tête rolls.
Weighing the dough is highly recommended for consistency. Determine the total weight of your dough and divide it by the number of rolls you want to make (e.g., 8 or 10). Let's say you aim for 8 rolls and your dough is 1000g; each portion would be 125g. Cut the dough into 8 equal portions using a bench scraper. Keeping the portions consistent in weight is crucial for uniform rolls that bake evenly and look appealingly similar.
Shaping À Tête Brioche: A Precise Method
Shaping À Tête brioche requires a specific technique. Take one weighed portion of dough (e.g., 125g). Reserve about one-quarter to one-fifth of this portion for the "head" (e.g., 25-30g), and the rest (95-100g) will be the base. Shape the larger piece into a smooth, round ball using the rounding technique described earlier. Then, gently elongate one end of the ball slightly to create a pear shape.
Now, shape the smaller piece of dough into a very smooth, tight ball. Place the larger, pear-shaped piece into a greased fluted brioche mold, with the fatter end at the bottom. Use your finger to create a deep indentation in the top, narrower end of the pear shape, pressing down firmly almost to the bottom of the mold.
Place the small ball of dough (the "head") into this indentation. Gently push the sides of the larger piece around the base of the smaller piece to secure it. Repeat this process for all dough portions, placing each shaped roll into its own mold.
Preparing Brioche Molds for À Tête
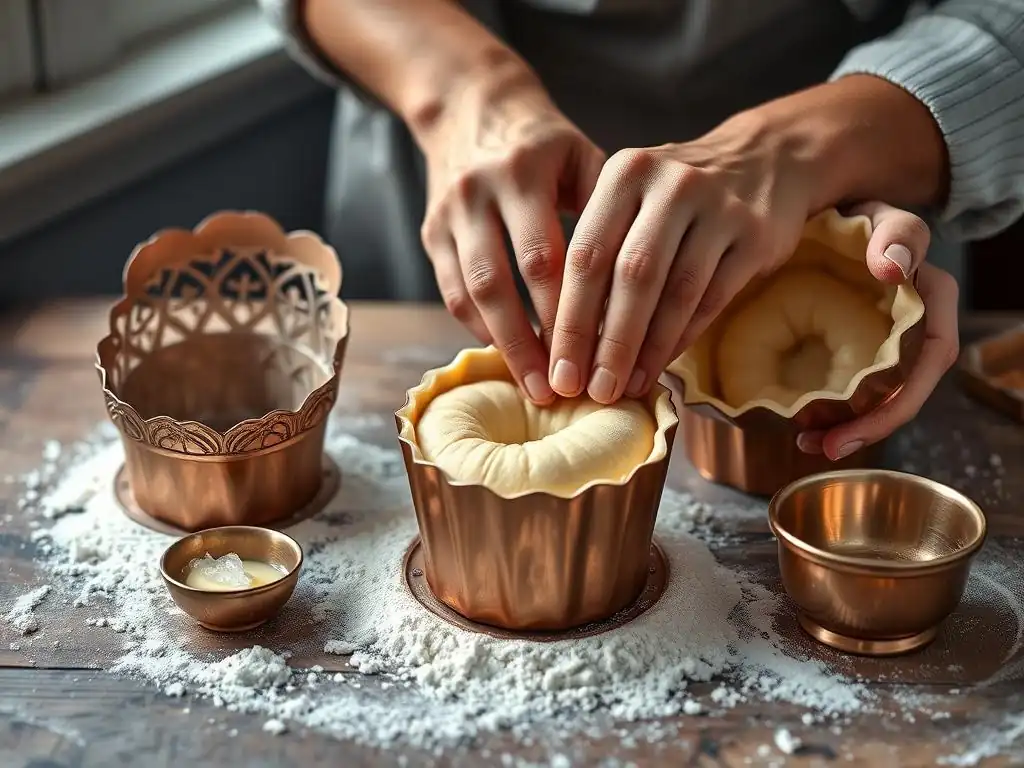
Using traditional fluted brioche molds is key to achieving the classic À Tête shape. These molds, typically made of metal, help the brioche rise upwards and maintain its structure. Before placing the shaped dough into them, the molds must be properly prepared to prevent sticking and ensure easy removal of the baked rolls.
Generously grease each mold with softened butter or a non-stick baking spray. Ensure that butter or spray gets into all the flutes and crevices of the mold. Some bakers also dust the greased molds with flour after greasing, tapping out any excess, for extra insurance against sticking. Properly preparing the molds is a small but vital step that ensures your beautifully risen and baked easy brioche rolls can be easily unmolded without damage.
Proofing À Tête Brioche Rolls Before Baking
Once the À Tête rolls are shaped and placed in their prepared molds, they need to proof before baking. Arrange the molds on a baking sheet (this makes them easier to transfer to the oven). Cover the rolls loosely with plastic wrap or a clean kitchen towel, making sure the covering doesn't touch the dough and inhibit its rise.
Place the baking sheet in a warm, draft-free place to proof. The rolls should rise until they have nearly doubled in size, filling the molds and the "head" is noticeably larger. This typically takes 1 to 2 hours at room temperature. Like with the Nanterre loaf, about 15-20 minutes before baking, gently brush the tops of the rolls with an egg wash for a golden crust. Be very gentle to avoid deflating the delicate risen dough. The rolls are ready when they look significantly puffy and have expanded well within their molds.
Baking Your Brioche Rolls to Perfection
Baking is the final step where your carefully prepared dough transforms into golden, tender brioche rolls. The right temperature and timing are crucial to ensure they are cooked through, have a beautiful crust, and maintain their soft interior. Whether you've shaped Nanterre or À Tête, the baking principles are similar.
Achieving perfection involves preheating your oven properly, knowing what signs to look for during baking, and understanding how to tell when they are done. This stage of your easy brioche rolls recipe brings all your hard work to fruition.
Optimal Baking Temperature
For brioche rolls, a moderate oven temperature is generally recommended to allow the rich dough to bake through without burning the high sugar and fat content on the exterior. A common temperature range is 350°F to 375°F (175°C to 190°C). Baking at 375°F (190°C) often results in a slightly quicker bake and a richer brown crust, while 350°F (175°C) is more forgiving and allows for a more even bake, especially for larger loaves or rolls.
Preheating your oven thoroughly to the chosen temperature is essential. An oven that isn't fully preheated can lead to uneven rising and baking. Allow at least 15-20 minutes after the oven indicates it's reached the temperature to ensure the heat is stable and consistent throughout the oven cavity.
Achieving a Golden-Brown Crust
The beautiful golden-brown crust is a hallmark of well-baked brioche rolls. This color is primarily achieved through the Maillard reaction and caramelization of sugars present in the dough and the egg wash. Applying an egg wash (usually a beaten egg mixed with a little milk or water) just before baking is key. The proteins and sugars in the egg wash brown and create a lovely sheen.
Baking at the recommended temperature range (350-375°F or 175-190°C) facilitates this browning. If you notice your brioche browning too quickly before it's cooked through, you can loosely tent the top with aluminum foil. This protects the crust from direct heat while allowing the interior to continue baking. Conversely, if they aren't browning enough towards the end of the bake time, you can increase the temperature slightly for the last few minutes, but watch them closely.
Determining Baking Time
The baking time for brioche rolls varies depending on their size, shape (Nanterre loaf versus individual À Tête rolls), and your specific oven. Individual À Tête rolls typically bake faster than a larger Nanterre loaf. Small individual rolls (3-4 inches) might take 15-25 minutes, while a 9x5 inch Nanterre loaf could require 30-45 minutes.
Brioche is done when it is deeply golden brown on the top and sides. For a Nanterre loaf, the internal temperature should reach around 190-200°F (88-93°C) when tested with an instant-read thermometer inserted into the center of the loaf (avoiding the bottom of the pan). Individual rolls are harder to temp accurately, but they should feel light for their size and sound hollow when tapped gently on the bottom. Trust the visual cues – a rich golden color indicates they are likely baked through.
Cooling and Storing Your Brioche Rolls
Once your beautiful brioche rolls emerge from the oven, resisting the urge to tear into them immediately can be tough, but proper cooling is vital for the best texture. How you handle and store your brioche determines how long it stays fresh and delicious. Follow these steps to enjoy your easy brioche rolls recipe results to the fullest.
Proper cooling allows the internal structure to set and prevents the crumb from becoming dense or gummy. Storage techniques aim to preserve the moisture and tenderness that make brioche so special.
Cooling Techniques for Optimal Texture
As soon as your brioche rolls are out of the oven, they need to cool properly. For individual À Tête rolls, carefully remove them from their molds immediately and place them on a wire rack. For a Nanterre loaf, let it sit in the pan for 5-10 minutes before carefully turning it out onto a wire rack to cool completely.
Cooling on a wire rack allows air to circulate around the entire surface of the brioche, preventing condensation from forming on the bottom, which can make the crust soggy. Allow the brioche to cool completely before slicing or storing. While warm brioche is tempting, slicing it while hot can compress the tender crumb and make it seem doughy or wet inside. Patience during the cooling process is rewarded with the perfect texture.
Storing for Freshness
Brioche is best enjoyed the day it's baked, as its rich, tender crumb is at its peak freshness. However, you can store it to keep it fresh for a couple of days. Once completely cooled, store brioche rolls in an airtight container or a resealable plastic bag at room temperature. Avoid refrigerating brioche, as the cold temperature can actually cause the starch molecules to recrystallize faster, leading to staling.
When stored properly at room temperature, homemade brioche rolls should stay fresh and soft for 2-3 days. For serving after the first day, a quick warming in a toaster or oven can help revive some of the softness and aroma.
Freezing for Extended Storage
If you won't eat your easy brioche rolls within a couple of days, freezing is the best option for longer storage. Brioche freezes exceptionally well thanks to its high fat content, which helps protect it from freezer burn. Ensure the brioche is completely cooled before freezing.
Wrap individual rolls or the Nanterre loaf tightly in plastic wrap, ensuring no surface is exposed to the air. Then, place the wrapped brioche in a resealable freezer bag or aluminum foil for an extra layer of protection. Label with the date. Brioche rolls can be frozen for up to 2-3 months. To thaw, simply unwrap the frozen brioche and let it sit at room temperature for a few hours, or overnight for a whole loaf. You can also gently warm thawed brioche in a low oven (around 300°F or 150°C) for 5-10 minutes to freshen it up.
Troubleshooting Common Brioche Baking Issues
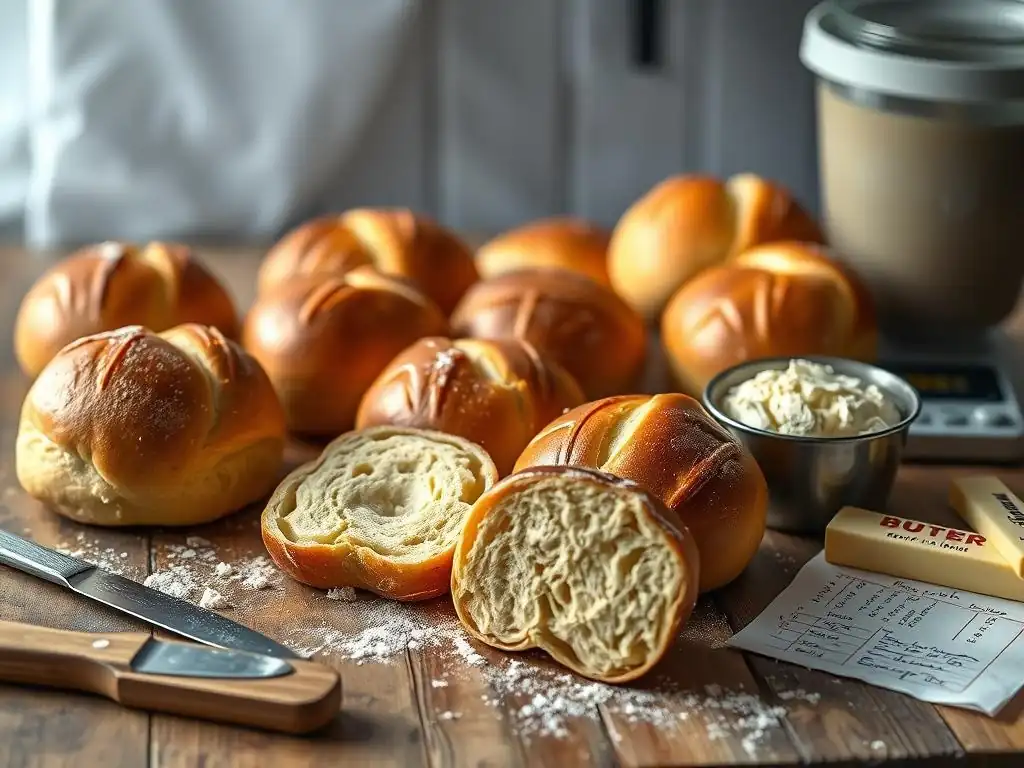
Even with a reliable easy brioche rolls recipe, baking can sometimes present challenges. Understanding common problems and how to address them can help you achieve perfect results consistently. Don't be discouraged if your first attempt isn't flawless; troubleshooting is part of the learning process in baking.
Identifying the cause of issues like sticky dough, poor rise, or dryness is key to correcting them in future bakes. With a little knowledge, you can overcome these hurdles and confidently bake beautiful, delicious brioche rolls.
Addressing Sticky Dough
Brioche dough, especially before the butter is fully incorporated, is inherently sticky due to its high hydration from eggs and milk. However, excessive stickiness after kneading and butter incorporation can indicate a few things. It might mean the dough wasn't kneaded long enough to develop sufficient gluten strength. Remember, the dough should eventually become smooth, elastic, and pass the windowpane test. If it's still very sticky after ample kneading time (20+ minutes in a mixer after adding butter), it might need more development.
Another cause could be adding too much liquid (milk or eggs) or not enough flour. While precise measurements are given, slight variations in flour absorption can occur. If the dough is excessively sticky even after thorough kneading, you can add a tablespoon of flour at a time during the final stages of kneading, but be cautious not to add too much, which can make the brioche dry. Ensuring your cold proofing step is sufficiently long (12+ hours) also significantly helps make the dough much easier to handle by firming up the butter.
Resolving Insufficient Rise
If your brioche dough doesn't rise sufficiently during bulk fermentation or final proofing, several factors could be at play. The most common culprit is inactive or dead yeast. Ensure your yeast is fresh and stored properly (active dry yeast often lasts longer in the refrigerator or freezer once opened). When blooming yeast (Step 1), make sure the milk isn't too hot (above 120°F/49°C can kill yeast) or too cold (below 70°F/21°C will be very slow). Seeing that foamy layer confirms yeast activity.
Other reasons for poor rise include a drafty or too-cold proofing environment, insufficient sugar (which feeds the yeast), or adding salt directly on top of the yeast at the start (salt can inhibit yeast activity in high concentrations). Ensure your proofing location is warm and draft-free (75-80°F/24-27°C is ideal for a quicker rise, or rely on the cold proof for flavor development). If your kitchen is cold, using a proofing box or a turned-off oven with the light on can help provide a warmer environment.
Preventing Dryness
Dry brioche rolls are often a result of over-baking or using too much flour. Brioche is a rich dough and doesn't require as high an internal temperature as lean bread to be considered done. Baking past the recommended time or temperature can dry out the crumb. Use visual cues (golden brown color) and potentially an internal thermometer (190-200°F) for a loaf, and err on the side of slightly under-baked if unsure, as the rolls will continue to cook slightly from residual heat after leaving the oven.
Adding too much flour during the initial mixing or during shaping can also lead to a dry result. Measure your flour accurately, preferably by weight. When shaping, use only minimal flour on your work surface if needed; the cold proofed dough should be relatively easy to handle. Ensuring adequate hydration in the original recipe (from milk and eggs) and proper butter incorporation are also key to a moist, tender crumb in your easy brioche rolls recipe.
Serving Suggestions and Flavor Variations
Your freshly baked brioche rolls, whether Nanterre or À Tête, are incredibly versatile and delicious. While wonderful on their own, they can be transformed into countless culinary delights. Exploring different ways to serve and incorporate flavor variations allows you to get the most out of your easy brioche rolls recipe.
From simple breakfast enjoyment to starring roles in desserts and savory dishes, brioche offers a rich foundation for creativity in the kitchen.
Enjoying Freshly Baked Brioche
The simplest and often most satisfying way to enjoy homemade brioche rolls is fresh from the oven (after cooling properly, of course!). The aroma alone is intoxicating. Serve them warm with softened butter, your favorite jam, or a drizzle of honey. Their rich, slightly sweet flavor makes them a perfect companion for coffee or tea.
For a classic French breakfast experience, slice the Nanterre loaf and serve it alongside croissants and pain au chocolat. Individual À Tête rolls are elegant enough for a special brunch. The tender crumb and buttery taste need very little embellishment to be truly delightful.
Exploring Flavor Variations: Chocolate Brioche and Orange Zest Brioche
Once you've mastered the basic easy brioche rolls recipe, you can easily introduce flavor variations to add excitement. A popular addition is chocolate. Roughly chop about 100-150 grams of dark or milk chocolate and gently fold it into the dough during the last minute or two of kneading, after the butter is fully incorporated. The chocolate melts slightly during baking, creating pockets of gooey deliciousness within the rich crumb.
Another delightful variation is Orange Zest Brioche. Add the finely grated zest of one or two oranges (about 1-2 tablespoons) to the dry ingredients in Step 2. The citrus oils infuse the dough with a wonderful aroma and bright flavor that pairs beautifully with the richness of the brioche. You can also combine flavors, like adding both chocolate chips and orange zest for a chocolate-orange brioche.
Brioche Rolls in Recipes: Brioche Bread Pudding and Gourmet Sandwiches
Stale brioche is not a waste; it's an opportunity! Its rich, absorbent crumb makes it the ideal bread for bread pudding. Cubes of brioche soaked in a custard made from eggs, milk, sugar, and vanilla, then baked until golden and puffy, create a luxurious dessert. A typical recipe might use 300-400 grams of cubed brioche for a standard 8x8 inch dish, soaked in a custard from 4 eggs, 2 cups milk, 1/2 cup sugar, and a teaspoon of vanilla.
Brioche rolls also elevate savory dishes, particularly sandwiches and burgers. The slight sweetness and soft texture of a brioche bun provide a delightful contrast to savory fillings like grilled meat, cheese, or vegetables. Use sliced Nanterre brioche or split individual À Tête rolls for gourmet sandwiches. The sturdy yet tender crumb holds up well to juicy fillings without becoming soggy too quickly, making it a superior choice over standard bread or buns.
Conclusion: Embrace the Art of Brioche Baking
Baking brioche rolls, whether the classic Nanterre loaf or the charming À Tête, is a rewarding project that yields incredibly delicious results. While it requires patience and attention to detail, especially with the enriched dough and cold proofing step, the process is entirely manageable for home bakers looking to expand their skills. Mastering an easy brioche rolls recipe provides you with a versatile foundation for a wide range of culinary applications, from simple breakfast treats to sophisticated desserts and savory meals.
Don't be afraid to experiment with shaping or introduce your own flavor variations once you feel comfortable with the basic dough. Each batch is an opportunity to learn and refine your technique. The satisfaction of pulling golden, fragrant brioche rolls from your oven is immense, and the taste of homemade is simply unparalleled.
Key Techniques for Perfect Brioche
Achieving perfect brioche consistently relies on a few core techniques. First, accurate measurement of ingredients, especially by weight, is crucial for the correct dough hydration and richness. Second, thorough kneading to develop a strong gluten network before adding the butter is essential; the dough must be smooth and elastic. Third, incorporating the cold butter gradually ensures it is fully emulsified into the dough without hindering gluten development.
Finally, the cold proofing step is non-negotiable for both flavor development and ease of handling. Allowing the dough to chill for at least 8-12 hours makes shaping much simpler and results in a deeper, more complex taste. Paying attention to these key steps in your easy brioche rolls recipe will significantly increase your chances of success and lead to consistently wonderful results.
Expanding Your Brioche Skills
Once you're confident with baking basic brioche rolls in Nanterre and À Tête shapes, there are many ways to continue expanding your brioche baking skills. You can try other classic brioche shapes, such as brioche tressée (braided brioche) or brioche couronne (ring-shaped brioche). Experiment with different levels of enrichment, perhaps trying a brioche légère (lighter brioche) with less butter or a super-rich brioche mousseline.
You can also explore different flavor additions beyond chocolate and orange zest, such as dried fruits (like cranberries or raisins), nuts, spices (like cinnamon or cardamom), or other citrus zests (lemon or grapefruit). Brioche dough can also be used as the base for pastries like pain au raisin or even savory scrolls filled with cheese and herbs. The journey of baking with enriched doughs is vast and delicious, offering endless possibilities for creativity in your kitchen.
Frequently Asked Questions
How does the Nanterre method differ from the À Tête method for brioche rolls?
The Nanterre method involves arranging several small dough balls in a loaf pan, resulting in a more uniform texture. The À Tête method, on the other hand, features a distinct head or knob on top of a larger base.
What makes a brioche roll "easy" to bake, according to BakeWithEase?
BakeWithEase focuses on providing simple recipes and step-by-step guides that break down complex baking processes. This includes using easy-to-find ingredients and techniques accessible to bakers of all skill levels.
Can I substitute ingredients in the easy brioche rolls recipe?
While substitutions are possible, it's recommended to stick to the recipe initially. Changes to butter content or egg quantity can significantly impact the brioche's texture and flavor.
How do I know when my brioche rolls are properly proofed?
Properly proofed brioche rolls will appear puffy and almost double in size. Gently pressing the dough should leave a slight indentation that slowly springs back.
What are some tips for achieving a shiny, golden-brown crust on my brioche rolls?
Brushing the rolls with an egg wash before baking is crucial for a glossy finish. Ensuring the oven temperature is accurate and baking until golden brown will also contribute to the desired color.
Final Reflection: The Enduring Allure of the Perfect Brioche Roll
The art of baking brioche, once a laborious undertaking reserved for skilled bakers, is now accessible to everyone, thanks to simplified techniques and readily available ingredients. The seemingly simple act of crafting these golden, buttery rolls transcends mere culinary skill; it's a journey of sensory delight and a testament to the power of patience and precision in the kitchen.
The enduring appeal of brioche lies not just in its exquisite taste and texture, but in its ability to connect us to culinary traditions spanning generations. These rolls, whether the classic Nanterre or the charming À Tête, represent more than just a recipe; they symbolize comfort, celebration, and the simple joy of sharing homemade goodness. Baking is at once child's play and adult joy. And love, of course.
– Paul Hollywood. This quote perfectly encapsulates the emotional resonance of creating something beautiful and delicious from scratch, a feeling deeply intertwined with the process of making brioche.
Now, I invite you to step away from the screen, gather your ingredients, and embark on your own brioche adventure. Don't be intimidated by the seemingly complex steps; embrace the process, savor the aromas, and relish the satisfaction of creating something truly special. The reward – the warm, soft, buttery perfection of a homemade brioche roll – is worth every minute of effort. Let the aroma fill your kitchen, and share the joy with those you love. The legacy of the perfect brioche roll awaits you.
Unleash Your Inner Baker: Master the Art of Brioche!
Thanks for joining us on this delicious journey into the world of brioche! We hope you’ve gained the confidence and knowledge to tackle these beautiful and incredibly rewarding rolls. Ready to take your baking skills to the next level?
- Bake your own Nanterre or À Tête brioche today! Use the recipe and techniques you just learned to create these stunning rolls – the aroma alone will be worth it!
- Share your baking triumph! Post a picture of your creations on social media and tag us – we’d love to see them!
- Explore more classic bread recipes on BakeWithEase.com – from sourdough to croissants, there's a whole world of baking adventures waiting for you.
What unique twist will you add to your next batch of brioche? Let us know in the comments!