
Create Realistic Animal Textures on Cookies with Icing

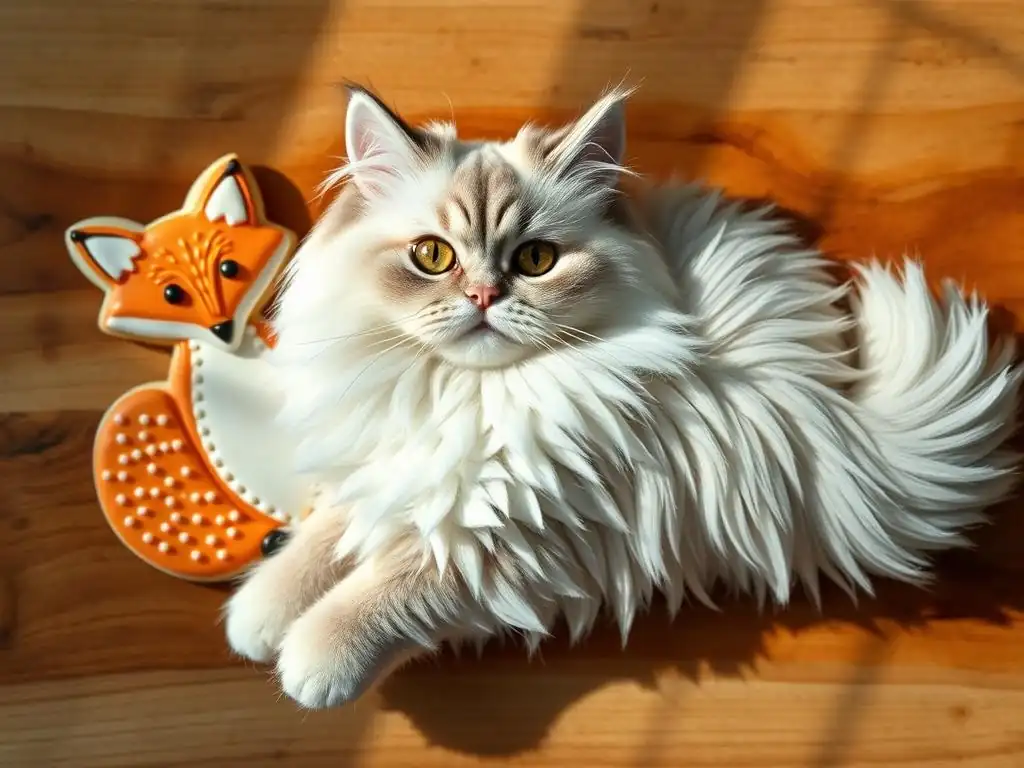
Welcome to BakeWithEase, your companion on a delicious baking adventure! Ever wondered how to achieve those stunning, realistic animal cookie textures you see online? This article unveils the secrets to transforming ordinary animal cookies into miniature masterpieces using icing techniques you can easily master. Get ready to impress with your next batch – let's explore the art of realistic icing together!
- Create Realistic Animal Textures on Cookies with Icing: A BakeWithEase Guide
- Introduction: Elevate Your Cookie Art with Realistic Animal Textures
- Essential Tools & Ingredients for Animal Texture Icing
- Step-by-Step Guide: Icing Realistic Animal Textures on Cookies
- Advanced Techniques for Realistic Animal Icing
- Troubleshooting Common Icing Texture Problems
- Inspiration Gallery: Realistic Animal Cookie Icing Ideas
- Conclusion: Mastering the Art of Realistic Animal Cookie Textures
-
Frequently Asked Questions
- How can I achieve a realistic fur texture on animal cookies?
- What type of icing is best for creating detailed animal features?
- How do I prevent my icing from bleeding colors when creating animal textures?
- What tools are essential for creating realistic animal cookie textures?
- How can I make my animal cookies look more three-dimensional with icing?
- Final Reflection: The Enduring Allure of Edible Art
- Unleash Your Inner Animal Artist!
Embarking on the journey to create realistic animal cookie textures with icing is a rewarding experience that transforms simple cookies into edible works of art. It's a chance to push beyond basic flooding and explore techniques that add depth, dimension, and lifelike qualities to your baked goods. This guide will walk you through the necessary steps and tools, from achieving the perfect icing consistency to applying intricate details that mimic fur, scales, or skin, allowing you to truly unleash your creativity.
Mastering these techniques requires patience and practice, much like learning any new skill. Think of it as building muscle memory; the more you practice outlining a paw print or dry brushing subtle highlights onto a fox's snout, the more natural and precise your movements become. By focusing on the nuances of texture and color, you'll develop the ability to bring your favorite creatures to life on a delicious cookie canvas, achieving truly realistic animal cookie textures icing that will impress everyone.
Achieving realistic animal cookie textures with icing isn't just about technical skill; it's about capturing the essence of the animal. The texture of a cookie's surface can convey whether a creature is fluffy like a lamb, rough like an elephant's hide, or sleek like a fish. These details are crucial for creating cookies that are not just visually appealing but also evoke a sense of recognition and wonder in the viewer.
Consider the difference between a cookie flooded with flat brown icing versus one with meticulously layered brown icing, dry-brushed highlights, and fine lines suggesting individual strands of fur. The latter instantly communicates "bear" with much greater impact and realism. By dedicating time to mastering realistic animal cookie textures icing, you elevate your craft from simple decoration to edible portraiture, telling a small story with each bite.
Essential Tools & Ingredients for Animal Texture Icing
The Icing Arsenal: Royal Icing Consistency for Realistic Textures
Royal icing is the gold standard for cookie decorating due to its ability to dry hard and hold intricate shapes, making it indispensable for creating realistic animal cookie textures icing. However, not all royal icing is created equal; its consistency is paramount. You'll need a range of consistencies, from a thicker outline consistency that holds its shape perfectly to a thinner flood consistency that fills areas smoothly, and various medium consistencies in between for details and textures.
For adding realistic animal cookie textures icing, you'll often work with consistencies thicker than a standard flood but thinner than outline. A "15-second" consistency (where a line drawn on the surface disappears in about 15 seconds) is often ideal for wet-on-wet techniques, while a slightly thicker "20-second" or "toothpaste" consistency is excellent for piping fur or feathers that stand slightly raised. Having these different consistencies prepared and ready is key to executing various texture techniques effectively.
Understanding Royal Icing Stages: From Flood to Stiff Consistency
Royal icing consistency is typically described by how quickly a line drawn on the surface with a spoon or spatula disappears back into the mass.
- Flood Consistency: This is a thin icing, like syrup, that settles completely flat. A line drawn disappears almost instantly (0-5 seconds). Used for filling large areas smoothly.
- Medium Consistency: Thicker than flood, this icing holds a soft peak briefly before it settles. A line disappears in 10-20 seconds. Ideal for wet-on-wet designs and some piped details.
- Outline Consistency: This is thick, like toothpaste, and holds stiff peaks. A line drawn holds its shape indefinitely. Used for creating borders that contain flood icing.
- Stiff Consistency: Even thicker than outline, this holds very firm peaks. Used for piping flowers or dimensional elements.
For realistic animal cookie textures icing, you'll primarily use medium consistencies (15-25 seconds) for adding texture over a flooded base, allowing you to manipulate it before it crusts over.
The foundation of any stunning decorated cookie is the cookie itself. A good cookie base for realistic animal cookie textures icing should be sturdy enough to handle the weight and moisture of multiple layers of icing without breaking. A classic sugar cookie recipe that holds its shape well during baking is often the best choice. Ensure your cookies are completely cooled before you even think about applying icing.
Baking your cookies to an even thickness is also crucial. This ensures consistent baking time and provides a level surface for your icing work. Aim for a thickness of about 1/4 to 3/8 inch. A flat, smooth surface with no bumps or craters is essential for achieving clean outlines and smooth flooded areas, which are the necessary starting point for building realistic animal cookie textures icing.
Color Palette: Achieving Realistic Animal Color Tones with Food Coloring
Achieving realistic animal cookie textures icing relies heavily on getting your colors just right. Animals in nature rarely have flat, uniform colors; their coats, feathers, or skin tones are often a complex blend of shades, undertones, and highlights. Using high-quality gel or paste food coloring is recommended over liquid colors, as they provide vibrant, concentrated color without adding excess moisture that can disrupt your icing consistency.
Building a realistic color palette involves mixing custom shades rather than using colors straight from the bottle. For instance, a lion's mane isn't just yellow; it's a mix of golden yellows, light browns, and even hints of orange or red. A black bear isn't pure black but often has brown or grey undertones. Experimenting with small batches of icing to mix and test colors before committing to a large batch is a wise practice for achieving convincing realistic animal cookie textures icing.
Mixing Custom Colors: Achieving Realistic Brown for Bears, Orange for Tigers
Mixing realistic animal colors requires a bit of artistic intuition and understanding of basic color theory. To get a realistic brown for a bear, start with a base brown and add small amounts of black, grey, or even a touch of purple to create depth and subdue the color. A pure brown can look flat; adding other colors makes it more nuanced.
For tiger stripes, you need a vibrant orange and a deep black. The orange should have yellow and red undertones. Mix your orange base, then create several variations by adding tiny amounts of yellow or red to achieve subtle shifts in hue. The black for stripes should be intense; sometimes adding a tiny drop of blue or green to black food coloring can give it a richer, less flat appearance. Always mix more color than you think you'll need, as it's difficult to replicate a custom shade exactly later.
1. Outlining and Flooding: Creating the Base Layer
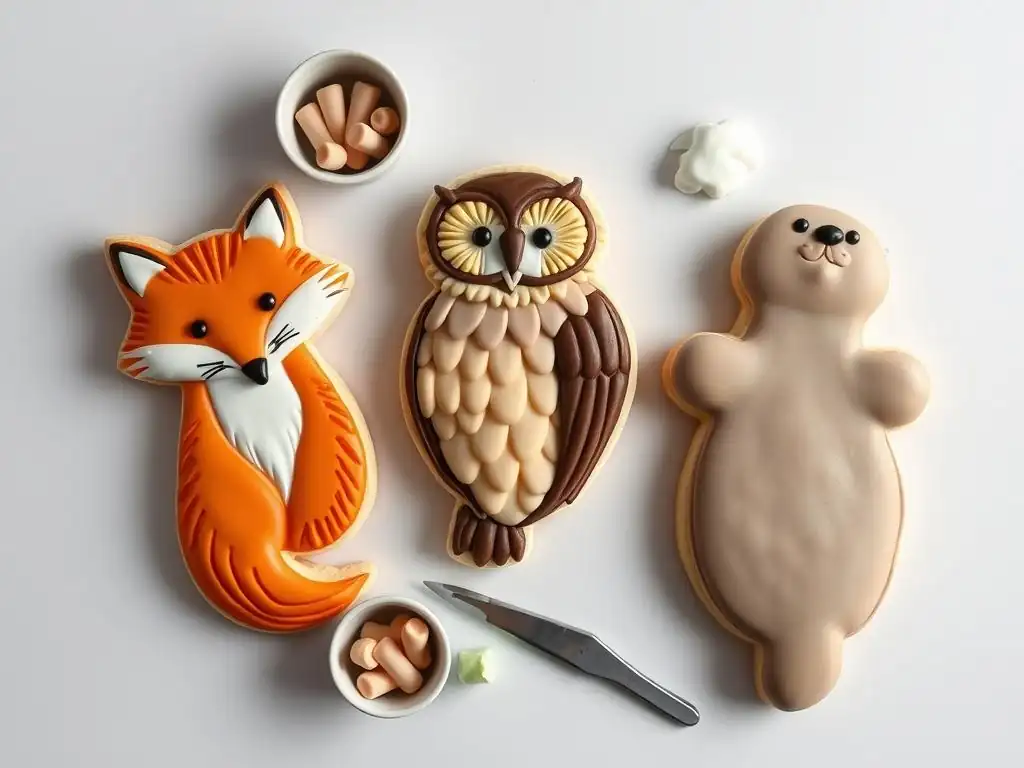
The first step in building realistic animal cookie textures icing is creating a smooth, solid base layer of royal icing. This is done by outlining the cookie shape or a specific section of the animal (like the head or body) with a medium-stiff consistency icing. The outline acts as a dam to contain the thinner flood icing that will fill the area.
Once the outline is piped, immediately fill the enclosed area with flood consistency icing. Use a scribe tool or toothpick to gently guide the icing to the edges, ensuring full coverage and popping any visible air bubbles. This smooth, even surface is the canvas upon which you will build all the subsequent layers and textures that create the realistic animal cookie textures icing effect. Allow this flood layer to dry completely, which can take anywhere from 6 to 24 hours depending on humidity.
Achieving a Smooth, Even Flood: Tips and Tricks
Achieving a perfectly smooth flood is essential for realistic animal cookie textures icing. Here are a few tips:
- Use the correct flood consistency: It should be thin enough to spread easily and level itself, but not so thin that it runs over the outline. A 10-15 second consistency is usually ideal.
- Don't overfill: Fill the area just enough so the icing reaches the top of the outline without overflowing.
- Use a scribe tool: Gently nudge the icing into corners and along the edges. This helps prevent gaps and ensures full coverage.
- Pop air bubbles: Tiny air bubbles can mar the smooth surface. Use your scribe tool to gently coax them to the surface and pop them. Tapping the cookie gently on the counter can also help bubbles rise.
- Dry on a level surface: Ensure your drying rack or tray is perfectly flat to prevent the icing from pooling unevenly.
2. Wet-on-Wet Technique: Building Depth and Dimension
The wet-on-wet technique is a fantastic method for embedding patterns and subtle color variations directly into the base layer while it's still wet, creating seamless realistic animal cookie textures icing. This is perfect for creating soft fur patterns, simple blending, or marbled effects like tiger stripes or leopard spots. You work into the wet flood icing before it crusts over.
To perform this technique, flood your cookie area with the base color. While the flood icing is still very wet (within a minute or two), pipe or drop lines, dots, or shapes of a different color (or colors) onto the wet surface. Then, immediately use a scribe tool or toothpick to drag through the wet colors, swirling or pulling them to create the desired pattern. The key is to work quickly before any part of the base icing begins to crust.
Creating Fur-Like Textures: Using a Fine-Tipped Scribe Tool
For subtle fur textures using the wet-on-wet method, flood the cookie with your base fur color (e.g., light brown for a deer). While the icing is still wet, add lines or dots of a slightly darker or lighter shade of the same color. Then, using a fine-tipped scribe tool, gently pull through these wet lines or dots in the direction the fur would naturally flow.
You can make short, quick strokes for fluffy fur or longer, sweeping strokes for smoother coats. The wet icing allows the colors to blend softly, creating a natural gradient and the illusion of individual hairs lying together. This technique is fundamental for achieving realistic animal cookie textures icing that look soft and natural.
Marbling for Realistic Patterns: Tiger Stripes, Leopard Spots
Marbling is another application of the wet-on-wet technique, perfect for patterns like tiger stripes or leopard spots. For tiger stripes, flood the area with orange. While wet, pipe thin, wavy lines of black icing across the orange. Use a scribe tool to pull through the black lines perpendicularly, creating the characteristic striped pattern.
For leopard spots, flood with a light tan or yellow. While wet, add blobs of brown icing. Immediately add smaller blobs of black icing inside or next to the brown blobs. Use a scribe tool to swirl or drag the colors slightly to create the irregular, ring-like spot pattern. Practicing these patterns on parchment paper first can help you get the motion right before working on your cookies for realistic animal cookie textures icing.
3. Dry Brushing: Adding Subtle Details and Highlights
Dry brushing is a technique borrowed from painting that is incredibly effective for adding subtle shading, highlights, and texture after the base icing layers have dried completely. It involves using a dry brush with a very small amount of concentrated edible dust or coloring. This is crucial for adding depth and realism to your realistic animal cookie textures icing.
Using dry brushing, you can add soft shadows under a jawline, highlights on a forehead, or build up the appearance of fine fur by applying layers of pigment. Because you're working with dry pigment on a dry surface, you have a lot of control over the intensity and placement of the color. This technique allows you to add dimension that's difficult to achieve with wet icing alone.
The Art of Dry Brushing: Selecting the Right Brush and Pigment
Selecting the right tools is key for effective dry brushing. You'll need food-safe brushes, preferably with synthetic bristles that are soft but firm enough to hold pigment. A variety of sizes and shapes are useful: small, pointed brushes (size 0 or 000) for fine details and larger, flat or round brushes for broader areas. Ensure your brushes are completely dry and clean before use.
For pigment, use concentrated edible dusts or powders. Petal dusts, luster dusts (for shimmer, if desired), or specially made edible dry colors work well. Dip just the very tip of your dry brush into the pigment, tap off any excess (like tapping off excess makeup powder), and then apply the color to the dry iced cookie surface using light, sweeping, or stippling motions. Build up the color gradually; you can always add more, but it's hard to remove excess pigment. This technique is vital for adding depth to realistic animal cookie textures icing.
Highlighting Key Features: Snout, Eyes, Ears
Dry brushing is perfect for bringing key facial features to life. Once the base icing is dry, use a slightly lighter shade of edible dust than the base color to add highlights. For example, on a brown bear snout, use a light tan or beige dust. Apply it gently to the bridge of the nose, the area above the eyes, or the tips of the ears.
Using a slightly darker dust, you can add shadows around the eyes, under the chin, or within the folds of skin (like on an elephant). These subtle shifts in light and shadow created by dry brushing add significant depth and make the features pop, contributing greatly to realistic animal cookie textures icing.
4. Adding Fine Details: Bringing Your Animals to Life
Once the main textures and shading are in place, adding fine details is what truly brings your realistic animal cookie textures icing to life. This includes details like pupils in the eyes, whiskers, individual strands of fur, claws, or subtle patterns that couldn't be achieved with broader techniques. Precision is key in this stage.
This step often involves using very fine tools and concentrated colors. It's where the personality of the animal starts to emerge. A simple dot for a pupil can change the entire expression of a cookie face. Adding thin lines for whiskers makes a cat or mouse instantly recognizable. These small details, though time-consuming, are indispensable for achieving truly realistic animal cookie textures icing.
Using Edible Pens: Defining Features with Precision
Edible pens are excellent tools for adding very fine lines and details on a dry icing surface. They are essentially markers filled with food-safe ink. They are perfect for drawing pupils, outlining irises, adding thin whiskers, drawing the separation of toes, or adding tiny details within feathers or scales.
Ensure the royal icing is completely dry and hard before using edible pens, as the moisture from wet icing can cause the ink to bleed. Test the pen on a piece of parchment or scrap icing first to ensure it's flowing smoothly. Use a light touch to avoid indenting the icing surface. Edible pens allow for a level of precision that is difficult to achieve with piped icing, greatly enhancing realistic animal cookie textures icing.
Creating Realistic Eyes: A Step-by-Step Guide
Eyes are often called the windows to the soul, and on a cookie, they are key to conveying character and realism. Creating realistic eyes involves several steps:
- Base: Flood the eye area with white or a pale color and let it dry completely.
- Iris: Flood the iris area with the desired eye color (blue, green, brown) using a small tip or scribe tool to shape it. Let it dry.
- Pupil: Add a dot of black or dark brown icing for the pupil. The size and placement of the pupil significantly impact the expression. Let it dry.
- Highlight: Add a tiny dot or line of white icing or white edible paint/dust on the pupil or iris to mimic a reflection of light. This single highlight makes the eye look wet and alive, adding immense realism to your realistic animal cookie textures icing.
The final stage involves stepping back and refining your work. Look for any imperfections, areas that need a touch more shading or highlighting, or details that could be sharper. This is the time to clean up edges, remove stray icing crumbs, and ensure all the elements come together harmoniously to create convincing realistic animal cookie textures icing.
This stage might involve using a small brush to clean up dry brushing lines, adding another layer of dry pigment for deeper shadows, or using a tiny bit of thick icing to cover a small error. Patience is crucial here; don't rush the final details. Taking the time to perfect the small things can make a significant difference in the overall realism of your animal cookie textures.
Removing Imperfections: Addressing Bumps and Air Bubbles
Despite your best efforts, sometimes imperfections appear. Small bumps in dried flood icing can often be gently filed down using a very fine-grit sanding sugar or a specialized cookie-decorating file. If you notice a small air bubble that wasn't popped during flooding, you might be able to carefully fill it with a tiny dot of matching icing once the base is dry, or incorporate it into the texture design.
For larger issues, sometimes the best approach is to carefully scrape off the affected area once dry and re-flood that section, blending the edges as seamlessly as possible. Addressing these imperfections ensures a clean, professional look for your realistic animal cookie textures icing.
Sealing Your Icing: Ensuring Long-Lasting Texture
Once your realistic animal cookie textures icing is completely dry (this can take 12-24 hours or even longer depending on thickness and humidity), you may consider sealing them if they need to withstand some handling or be packaged. An edible glaze spray can add a slight sheen and provide a protective layer.
Alternatively, careful packaging in cellophane bags can protect the delicate textures from dust and damage. Ensure the icing is fully hardened before packaging to prevent smudging or sticking. Proper drying and optional sealing help preserve the intricate realistic animal cookie textures icing you've worked hard to create.
Advanced Techniques for Realistic Animal Icing
Layering Techniques: Creating Depth with Multiple Icing Layers
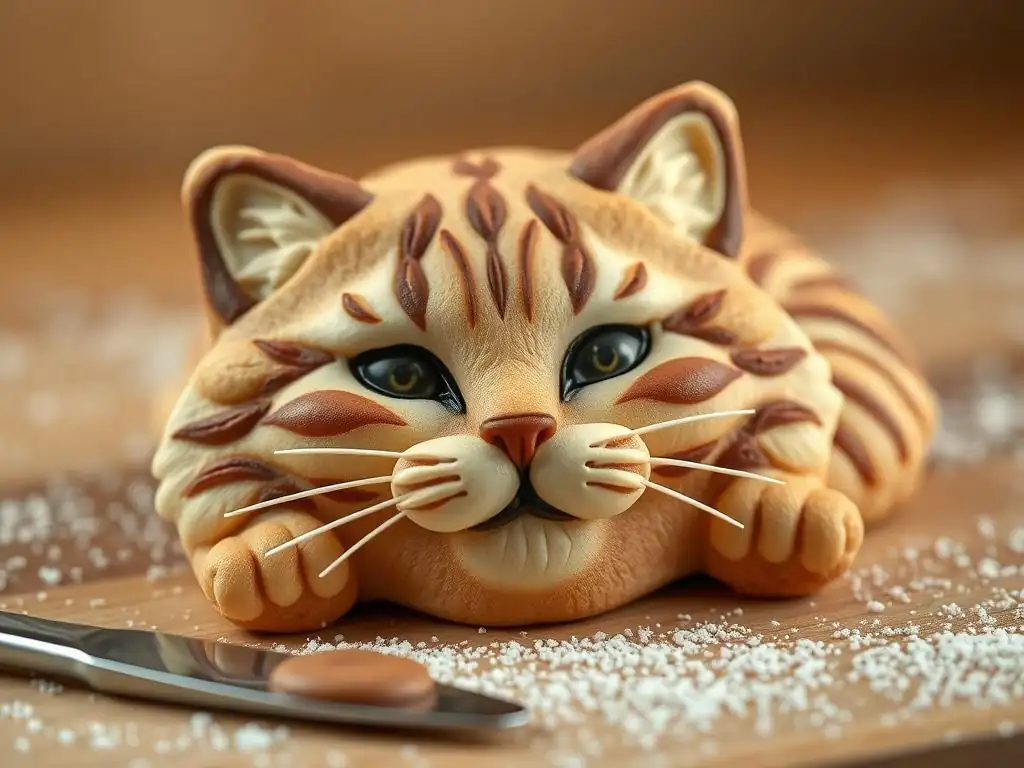
Beyond the basic flood and wet-on-wet, layering dry icing can create remarkable depth and realism in realistic animal cookie textures icing. This involves applying multiple layers of different colored or textured icing, allowing each layer to dry completely before adding the next. This technique is perfect for building up thick fur, scales, or wrinkled skin.
For example, to create thick fur on a wolf, you might flood the base in a medium grey. Once dry, pipe lines or small dots of a slightly darker grey icing and use a scribe tool or brush to pull them into fur-like strokes. Let that dry. Then, repeat with a lighter grey for highlights. This layering creates the illusion of density and overlapping fur, adding significant dimension to your realistic animal cookie textures icing.
Airbrushing for Subtle Gradients: Enhancing Realism
Airbrushing with edible airbrush colors is an advanced technique that allows you to create incredibly smooth color gradients and soft shading, perfect for enhancing realistic animal cookie textures icing. An airbrush sprays a fine mist of color, allowing for subtle transitions that are difficult to achieve with brushes or icing alone.
You can use airbrushing to add soft shadows, blush on cheeks, or gradients of color on feathers or scales. For instance, airbrushing a slight gradient from a darker shade at the base of a feather to a lighter tip adds instant realism. It requires specialized equipment, but the results for realistic animal cookie textures icing can be stunningly lifelike.
Working with Stencils: Achieving Complex Patterns
Stencils can be invaluable tools for applying consistent and complex patterns quickly, such as reptile scales, bird feathers, or intricate skin textures, contributing to realistic animal cookie textures icing. You can use stencils with airbrushing, dry brushing, or even thin royal icing applied with a scraper.
Place the stencil firmly on the dry iced cookie surface. If using icing, apply a thin, even layer over the stencil with a scraper or offset spatula, then carefully lift the stencil straight up. For airbrushing or dry brushing, hold the stencil in place and apply the color lightly. Stencils ensure uniformity in repetitive patterns, saving time while maintaining realism for your realistic animal cookie textures icing.
Creating Custom Stencils: Reptile Scales, Bird Feathers
For unique animals or specific patterns needed for realistic animal cookie textures icing, you might need custom stencils. These can be made from food-safe acetate or mylar sheets. You can draw your design onto the sheet and carefully cut it out using a craft knife, or use a digital craft cutter for more intricate patterns.
Creating a custom stencil for reptile scales, for example, allows you to match the scale size and pattern to a specific type of lizard or snake. For bird feathers, you can design stencils that replicate the layered look of different feather types on a wing or body. Custom stencils give you ultimate control over the patterns in your realistic animal cookie textures icing.
Troubleshooting Common Icing Texture Problems
Icing Spreading Too Much: Solutions for a Stable Texture
One common issue when aiming for realistic animal cookie textures icing is the icing spreading or losing its shape, especially when piping details. This is almost always due to the icing consistency being too thin. If your piped lines or dots are not holding their shape and are melting into the base layer or each other, your icing needs to be thicker.
To fix thin icing, gradually mix in more sifted confectioners' sugar or meringue powder (if using a recipe with meringue powder) until the desired consistency is reached. Do this slowly, mixing thoroughly after each addition, to avoid over-thickening. Ensure you are using the correct consistency for the specific technique you are attempting; flood is for filling, but textures usually require a medium to stiff consistency.
Air Bubbles and Pockmarks: Prevention and Correction
Air bubbles trapped in royal icing can lead to unsightly pockmarks on the surface once dried, detracting from realistic animal cookie textures icing. Prevention is the best cure: mix your royal icing on a low speed to minimize incorporating air, and let the mixed icing rest for 10-15 minutes covered with plastic wrap touching the surface before using.
When flooding, use a scribe tool to gently coax bubbles to the surface and pop them immediately. Tap the cookie gently on the counter after flooding can also help. If you discover dried pockmarks, for small ones, you might be able to fill them with a tiny dot of matching icing or cover them with subsequent texture layers. For larger ones on a base layer, you might need to carefully scrape and re-flood the area.
Icing Cracking: Maintaining Moisture and Flexibility
Sometimes, royal icing can crack as it dries, especially in large flooded areas or thick layers, ruining realistic animal cookie textures icing. This can happen if the icing dries too quickly on the surface while the layers underneath are still wet, or due to significant temperature/humidity changes.
To help prevent cracking, try to control the drying environment. Dry cookies in an area with stable temperature and moderate humidity (around 40-50% humidity is often ideal). Avoid placing them directly under fans or in direct sunlight. For large cookies, some decorators add a tiny amount of corn syrup or glycerin (food grade) to their flood icing (perhaps 1/4 teaspoon per cup of icing) to improve flexibility and reduce cracking. If cracks appear, they can sometimes be carefully filled with matching icing, though this can be tricky to make seamless.
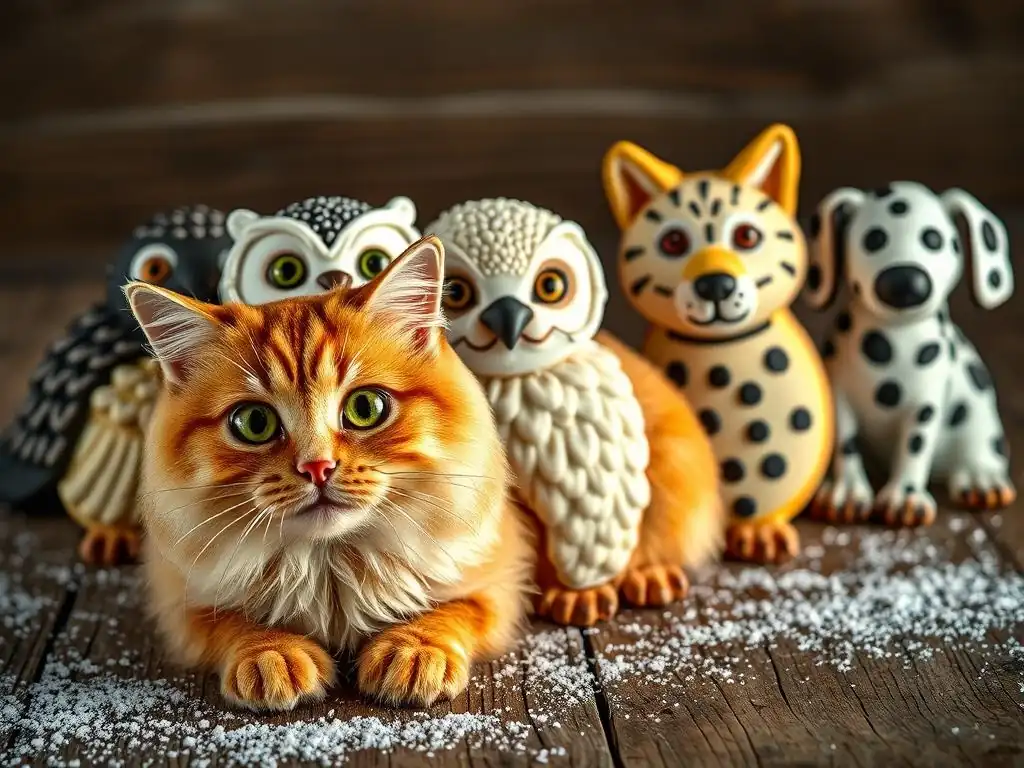
Witnessing examples of expertly decorated realistic animal cookie textures icing can provide immense inspiration. Imagine cookies shaped and textured to look exactly like the head of a majestic lion, complete with a layered, dry-brushed mane, or a delicate bird with intricately piped and layered feathers.
These examples often showcase a combination of the techniques discussed – smooth flooded bases, detailed wet-on-wet patterns, precise dry brushing for shading and highlights, and fine piped or drawn details for eyes and whiskers. Seeing the potential helps you visualize what's possible with realistic animal cookie textures icing and encourages you to try new approaches.
Lions, Elephants, Birds, Reptiles, Domestic Animals
- Lions: Focus on layered icing and dry brushing for the mane, varying shades of gold and brown. Use fine lines for whiskers and realistic eyes with highlights.
- Elephants: Achieve the wrinkled skin texture by flooding with grey icing, then using a scribe tool to create lines and folds while wet. Dry brush darker grey for shadows and lighter grey for highlights.
- Birds: Use layering and piping for feathers, varying colors and direction. Dry brush subtle color gradients and add fine details with edible pens for eyes and beaks.
- Reptiles: Utilize stencils or careful piping and sculpting of thicker icing for scales. Use airbrushing or dry brushing for realistic color patterns and gradients.
- Domestic Animals (Dogs, Cats): Focus on different fur textures using wet-on-wet pulling techniques or layered piping. Pay attention to breed-specific features and coloring for realistic animal cookie textures icing.
Each type of animal presents unique challenges and opportunities for applying realistic animal cookie textures icing techniques.
Practice Makes Perfect: Continuing Your Icing Journey
Mastering realistic animal cookie textures icing is a journey that requires dedication and, most importantly, practice. Your first attempt might not be perfect, and that's okay! Each cookie is an opportunity to learn, refine your techniques, and improve your skills. Start with simpler animals and textures, gradually working your way up to more complex designs.
Set aside dedicated time for practice. Try focusing on one technique at a time – spend an hour just practicing wet-on-wet fur texture on scrap icing or parchment paper. Then practice dry brushing shading. Consistent practice is the single most important factor in developing the precision and artistry needed to create truly realistic animal cookie textures icing.
Once you start creating realistic animal cookie textures icing that you're proud of, don't hesitate to share your work! Share photos online, with friends and family, or even at local events. Your creations can inspire others to try their hand at this detailed form of cookie decorating.
Sharing also allows you to connect with other decorators, learn new tips, and receive constructive feedback. The community of cookie decorators is often incredibly supportive. By sharing your realistic animal cookie textures icing, you not only showcase your talent but also contribute to the vibrant world of edible art, encouraging others to explore their own creative potential.
Frequently Asked Questions
You can achieve a realistic fur texture using a technique called "wet-on-wet" icing. Apply a base layer of icing, then immediately pipe small lines or dots of a slightly different shade on top before the base layer sets. This will create a blended, textured effect.
What type of icing is best for creating detailed animal features?
Royal icing is the best choice for detailed animal features. It dries hard, allowing you to build layers and add fine details without the risk of the icing spreading or smudging. Ensure the consistency is appropriate for both outlining and flooding.
How do I prevent my icing from bleeding colors when creating animal textures?
To prevent color bleeding, use high-quality gel food coloring as opposed to liquid coloring, as they are more concentrated and less watery. Also, allow each layer of icing to fully dry before adding the next.
Essential tools include piping bags, various sizes of piping tips (especially small round tips for details), and a scribe tool or toothpick to manipulate the icing and pop any air bubbles. A turntable can also be helpful.
Use the "layering technique". Start with a base layer of icing, then add details like eyes, noses, and fur in subsequent layers, allowing each layer to dry slightly before adding the next. This will create depth and dimension.
Final Reflection: The Enduring Allure of Edible Art
The meticulous crafting of realistic animal textures on cookies transcends a simple baking technique; it's a testament to the power of creativity and the enduring human fascination with mimicking nature's beauty. This article explored the diverse methods and techniques used to achieve incredibly lifelike animal features using only icing, highlighting the importance of precision, patience, and a keen eye for detail. The results, as demonstrated, are truly captivating, proving that even the most seemingly simple medium can yield extraordinary results.
The impact of this art form extends beyond the deliciousness of the cookies themselves. It speaks to a deeper human desire to connect with the natural world, to recreate its wonders in miniature, and to share that beauty with others. Art washes away from the soul the dust of everyday life.
– Pablo Picasso. This quote, while not directly about cookie decorating, perfectly encapsulates the transformative power of creative expression, a power undeniably present in the detailed artistry of realistic animal cookies. The joy derived from both creating and receiving these intricately designed treats is a testament to this.
Now, it's your turn. Consider the techniques outlined in this article – the careful layering of icing, the strategic use of tools, the patient observation of animal features. Don't be afraid to experiment, to push your creative boundaries, and to discover the unique artistry within yourself. Pick up your piping bag, choose your favorite animal, and let your imagination run wild. The journey of creating these edible masterpieces is as rewarding as the final product itself. Embrace the challenge, and let your cookies tell a story.
Unleash Your Inner Animal Artist!
Thanks for joining us on this fun baking adventure! We hope you've picked up some paw-some techniques for creating realistic animal textures on your cookies. Ready to put your new skills to the test?
- Transform your next batch: Try creating your own animal cookie designs, experimenting with different icing techniques and color combinations. Let your creativity run wild!
- Share your creations: Show off your amazing animal cookies on social media using #BakeWithEaseAnimals. We'd love to see what you come up with!
- Challenge a friend: Dare a fellow baker to recreate their favorite animal using icing. It's a fun way to share this skill and inspire others!
What incredible creature will you bring to life on a cookie next?