
Decorating Cake Boards: An Easy Extra Step

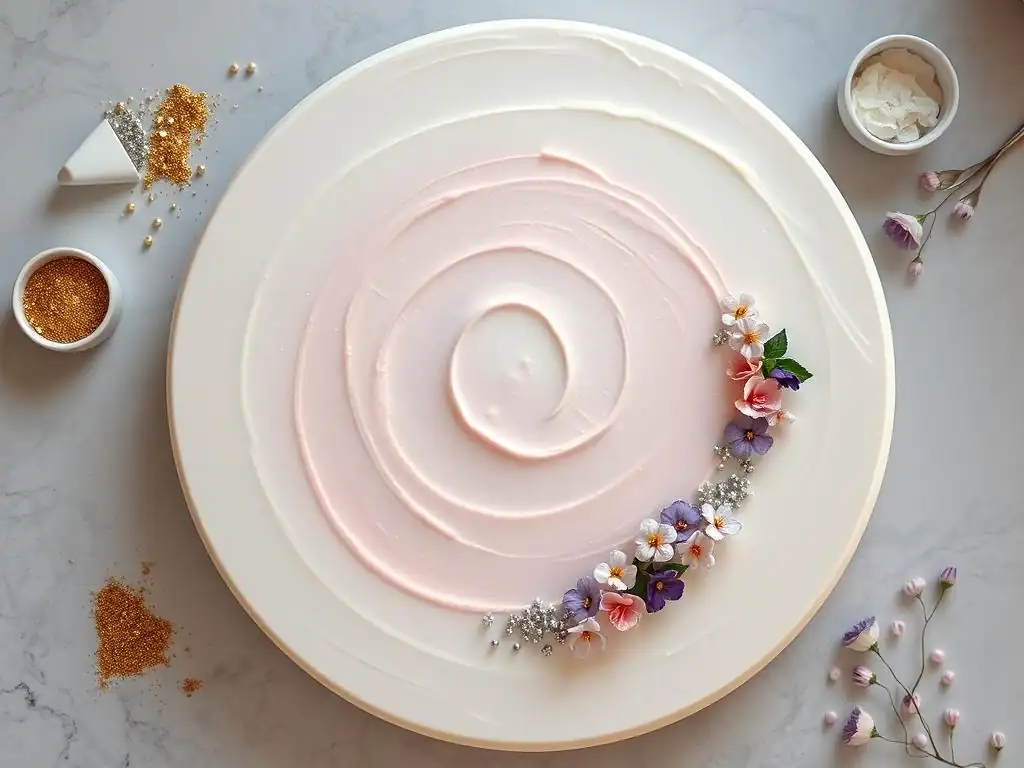
Welcome to BakeWithEase, where we believe everyone can create stunning baked goods! Are you ready to elevate your cake presentation? This week, we're diving into the surprisingly simple world of easy cake board decorating. It's the often-overlooked final flourish that can transform your creation from delicious to dazzling. But where do you even start? Read on to discover our step-by-step guide and unlock the secrets to a picture-perfect finish!
- Decorating Cake Boards: An Easy Extra Step for Stunning Cakes
- Why Easy Cake Board Decorating Matters for Your Cakes
- Essential Cake Board Decorating Supplies & Tools
- Step-by-Step Guide to Easy Cake Board Decorating
- Creative Cake Board Decorating Ideas & Techniques
- Advanced Cake Board Decorating Techniques (Optional)
- Troubleshooting Common Cake Board Decorating Problems
- Maintaining and Storing Decorated Cake Boards
- Easy Cake Board Decorating: Final Thoughts and Inspiration
- Frequently Asked Questions
- Final Reflection: Elevating the Everyday Cake
- Elevate Your Cakes: Unleash Your Inner Cake Artist!
Decorating Cake Boards: An Easy Extra Step for Stunning Cakes
Why Easy Cake Board Decorating Matters for Your Cakes
Elevating Your Cake Presentation with Decorated Boards
The cake board is often an afterthought, seen merely as a functional base. However, transforming it into a decorated element is one of the simplest ways to elevate your cake's overall presentation. Think of the cake board as the frame around a beautiful painting – it enhances the visual impact and draws the eye to your masterpiece.
A plain silver or white board is perfectly functional, but a board covered in themed fondant, textured buttercream, or even just a scattering of sprinkles can take a simple cake from homemade to professional-looking with minimal effort. This easy cake board decorating step adds a polished finish that shows attention to detail, making your cake truly stand out at any celebration.
This seemingly small detail makes a significant difference, especially when showcasing your work online or at events. A decorated board creates a cohesive look, tying together the cake design, colors, and theme. For instance, a child's birthday cake with bright, fun colors can sit on a board covered in matching sprinkles, instantly amplifying the festive mood.
A wedding cake, often featuring intricate details, benefits from a sophisticated board covered in textured white fondant or a subtle pearl finish, adding to its elegance. This simple addition enhances the perceived value and craftsmanship of your baked creation without requiring advanced decorating skills.
The Impact of Cake Boards on Overall Cake Design
The cake board doesn't just support your cake; it's an integral part of the design landscape. Its color, texture, and size influence how the cake itself is perceived. A dark board can make bright cake colors pop, while a light board can lend an ethereal quality to delicate designs.
The board also provides a clean canvas for elements that extend beyond the cake's base, such as elaborate borders, sugar flowers that trail onto the surface, or even text written directly on the board. Mastering easy cake board decorating techniques allows you to integrate these elements seamlessly, creating a harmonious and balanced composition.
Furthermore, the type of board and its decoration can add stability and practicality. For instance, a sturdy, decorated board is essential for tiered cakes, providing a solid foundation for transport and display. Covering the board with fondant or buttercream also allows for easy cleanup if any frosting or crumbs fall during decorating or serving. Considering the board as part of the design from the planning stage opens up a world of creative possibilities, ensuring that your final cake presentation is not just beautiful from the top down, but stunning from the base up.
Easy Cake Board Decorating: A Beginner-Friendly Guide
Many aspiring bakers might feel intimidated by cake decorating, but easy cake board decorating is one area where beginners can achieve impressive results quickly. Unlike intricate piping or complex sugar work, many board decoration techniques are straightforward and require minimal specialized tools. Techniques like simply covering a board with fondant or spreading buttercream evenly are foundational skills that build confidence. Even adding sprinkles or using stencils are accessible methods that don't demand years of practice.
This guide aims to break down these simple techniques, proving that anyone can add a touch of flair to their cake boards. We'll cover basic supplies, simple covering methods, and creative ideas that are perfect for those new to cake decorating. By starting with the board, you can practice fundamental skills like rolling fondant evenly or smoothing buttercream before tackling the cake itself. It's a low-pressure way to enhance your baking projects and make them look more professional from the very first step.
Essential Cake Board Decorating Supplies & Tools
Choosing the Right Cake Board Size and Material
Selecting the correct cake board is the first step in easy cake board decorating. Boards come in various sizes and materials, each suited for different purposes. Cardboard rounds, typically 1/8 inch thick, are common for lighter, single-tier cakes up to about 8 or 9 inches in diameter. For larger or heavier cakes, especially tiered ones, you'll need a sturdier option like hardboard (Masonite) or drum boards, which are usually 1/2 inch thick. These thicker boards provide essential support and prevent sagging, crucial for transporting cakes safely.
The size of the board should ideally be 2 to 4 inches larger than the diameter of your cake. For example, a 10-inch cake typically sits on a 12-inch or 14-inch board. This provides a border for decoration and a practical edge for handling the cake. While plain white or silver boards are the standard, choosing the right material and size for your specific cake ensures both stability and sufficient space for your easy cake board decorating efforts.
Must-Have Decorating Tools for Cake Boards
You don't need a vast collection of tools for easy cake board decorating, but a few essentials will make the process much smoother. For covering boards with fondant, you'll need a rolling pin (a large non-stick one is ideal), a sharp knife or pizza cutter for trimming, and a smoother or fondant paddle to achieve a flawless surface. A dusting pouch filled with cornstarch or powdered sugar is also helpful to prevent sticking.
If you plan to use buttercream, an offset spatula is indispensable for spreading and smoothing. A bench scraper or straight edge can help achieve sharp, clean edges. For adding textures or details, consider having a few basic items like stencils, a small sieve for sifting edible glitter or powdered sugar, and perhaps some small brushes for applying edible glue or paint. Having these simple tools ready simplifies the easy cake board decorating process significantly.
Exploring Different Cake Board Covering Options
There are several popular ways to cover a cake board as part of your easy cake board decorating process, each offering a different look and texture. The most common method is using fondant, which provides a smooth, clean, and professional finish. Fondant can be easily colored and molded, making it versatile for matching any cake theme. A standard 10-inch round board can typically be covered with about 100-150 grams of fondant, depending on how thinly you roll it.
Another simple option is using buttercream. While perhaps less common for covering the entire board due to potential mess, it's excellent for creating textured surfaces or adding a simple layer of color. You can spread it thinly for a smooth look or create swirls and peaks with an offset spatula.
Alternatively, you can cover the board with decorative papers (like wrapping paper or contact paper, covered with a clear protective layer for food safety), fabric, or even edible images printed on sugar sheets. Each method offers a unique aesthetic and level of difficulty, but covering with fondant or buttercream remains the most popular for their versatility and ease.
Step-by-Step Guide to Easy Cake Board Decorating
Preparing Your Cake Board for Decoration
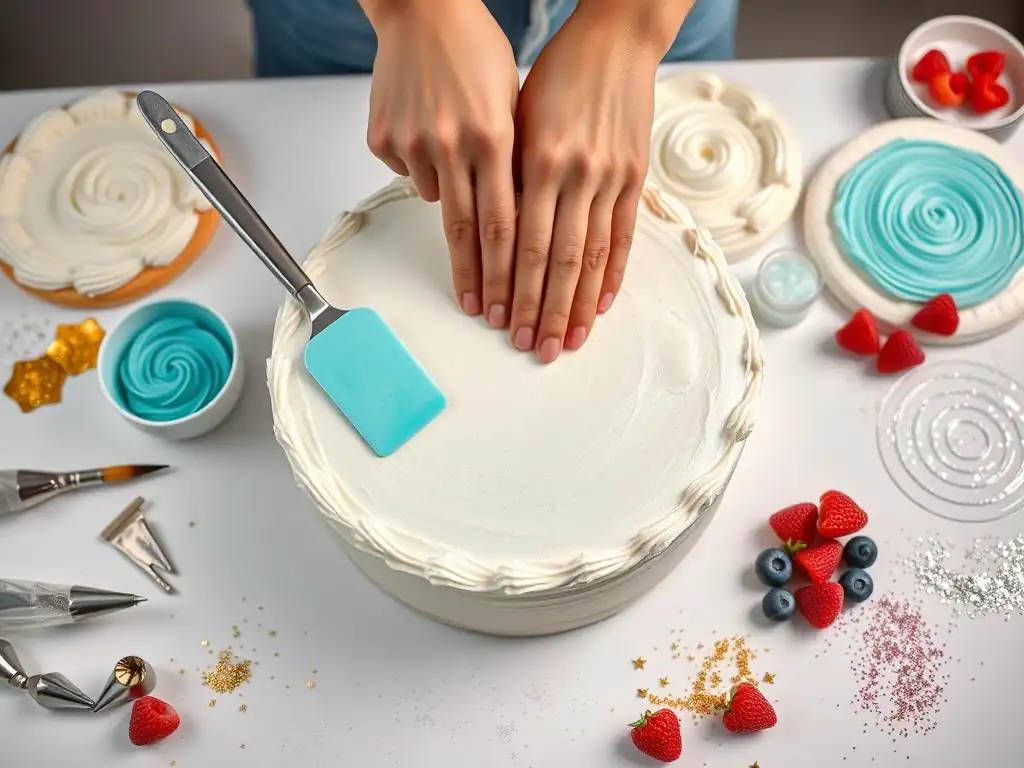
Before you start your easy cake board decorating, proper preparation is key. If using a standard cardboard or drum board, ensure the surface is clean and free of debris. Many boards come with a greaseproof coating, but you might consider wiping it gently with a dry cloth. If you are using a homemade board or one without a coating, you might want to cover it first with a thin layer of cling film or a food-safe barrier before adding your decorative covering, especially if using buttercream. This prevents grease stains from seeping into the board over time.
For boards that will be covered with fondant, a very thin layer of edible glue, piping gel, or even just a tiny amount of water can help the fondant adhere smoothly. Apply this adhesive evenly across the top surface of the board using a brush or clean paper towel. This ensures the fondant stays in place and prevents air bubbles from forming underneath, contributing to a flawless finish for your easy cake board decorating project.
Applying Fondant to Cake Boards: A Simple Method
Covering a cake board with fondant is a fundamental easy cake board decorating technique. Start by kneading your fondant until it is pliable and smooth. Lightly dust your work surface and rolling pin with cornstarch or powdered sugar. Roll out the fondant to a thickness of about 1/8 inch (approximately 3mm), ensuring it's large enough to cover the entire board with an extra inch or two around the edges. A piece of fondant about 12 inches in diameter is typically sufficient for a 10-inch board.
Carefully lift the rolled fondant and center it over your prepared cake board. Gently lay it down, starting from the center and working outwards to avoid trapping air bubbles. Use a fondant smoother or the palm of your hand to smooth the top surface, ensuring it adheres well to the board.
Then, gently smooth the fondant down the sides of the board, molding it around the edge. Use a sharp knife or a pizza cutter held at a 45-degree angle against the board's edge to trim away the excess fondant neatly. You can use the smoother again around the edge for a clean finish.
Covering Cake Boards with Buttercream: A Smooth Finish
Using buttercream for easy cake board decorating creates a softer, often more rustic look than fondant. Start with a batch of smooth, well-mixed buttercream. Place a generous dollop of buttercream in the center of your cake board. Using an offset spatula, begin spreading the buttercream outwards, covering the entire top surface of the board right up to the edges. Don't worry about perfection in this initial spread.
Once the board is covered, use a clean bench scraper or the straight edge of a large spatula held at a slight angle (around 45 degrees) against the board. Starting from one edge, draw the scraper smoothly across the surface, removing excess buttercream and creating a flat, smooth layer. You may need to scrape and smooth several times, wiping the excess buttercream off your tool between passes.
For a perfectly smooth finish, you can gently warm your scraper slightly before the final pass. This method, while potentially messier than fondant, is a very accessible form of easy cake board decorating that utilizes common cake frosting.
Creative Cake Board Decorating Ideas & Techniques
Simple Sprinkles and Edible Glitter for a Festive Look
Adding sprinkles or edible glitter is perhaps the most straightforward easy cake board decorating method, instantly bringing a festive touch to your cake. Once your board is covered with fondant or buttercream (which acts as the adhesive), simply scatter your chosen sprinkles or glitter over the surface. For more control, you can hold the board over a tray to catch excess sprinkles for reuse. A standard 10-inch board might use anywhere from 1/4 cup to 1 cup of sprinkles, depending on how densely you apply them.
For a specific pattern or border, you can apply a thin line of edible glue or piping gel where you want the sprinkles to stick, then pour or carefully place the sprinkles onto the adhesive. Edible glitter can be applied with a dry brush for a light shimmer or mixed with a tiny amount of clear alcohol or extract (like vodka or lemon extract) to create an edible paint for more controlled application. This technique is incredibly versatile and perfect for birthday cakes, holiday treats, or any celebration where a bit of sparkle is desired.
Using Stencils for Intricate Cake Board Designs
Stencils offer a fantastic way to add detailed patterns to your cake board as part of your easy cake board decorating efforts without needing advanced artistic skills. You can use stencils with various mediums, including royal icing, buttercream, powdered sugar, cocoa powder, or edible paint. Place your stencil flat on the surface of your covered board (fondant works best for stencils). Hold it firmly in place or secure it with a few pins if using a sturdy board.
If using royal icing or buttercream, apply a thin, even layer over the stencil using an offset spatula or scraper, ensuring all openings are filled. Scrape off any excess before carefully lifting the stencil straight up. For powdered sugar or cocoa powder, simply sift a fine layer over the stencil. For edible paint, use a sponge or brush to dab the color through the stencil openings. Stencils allow you to create complex-looking patterns – from damask prints to geometric shapes – with relative ease, making your easy cake board decorating look much more intricate than it is.
Creating a Textured Effect on Cake Boards
Adding texture is another simple yet effective easy cake board decorating technique that can elevate the look of your board. This is particularly easy when using fondant or a slightly thicker layer of buttercream. For fondant, you can use impression mats or texture rollers. Simply press the mat firmly onto the rolled-out fondant before applying it to the board, or gently roll a texture roller over the applied fondant. Common textures include wood grain, brick, or various geometric patterns.
With buttercream, you can create textures using different tools or techniques. An offset spatula can be used to create swirls, peaks, or wavy lines. A cake comb with teeth of varying sizes can be dragged through the buttercream to create striped patterns. Even household items like bubble wrap (pressed gently into slightly set buttercream) or a clean paper towel can impart interesting textures. These methods add visual interest and depth to the board, complementing the cake design with minimal fuss.
Advanced Cake Board Decorating Techniques (Optional)
Painting and Airbrushing Cake Boards for a Custom Look
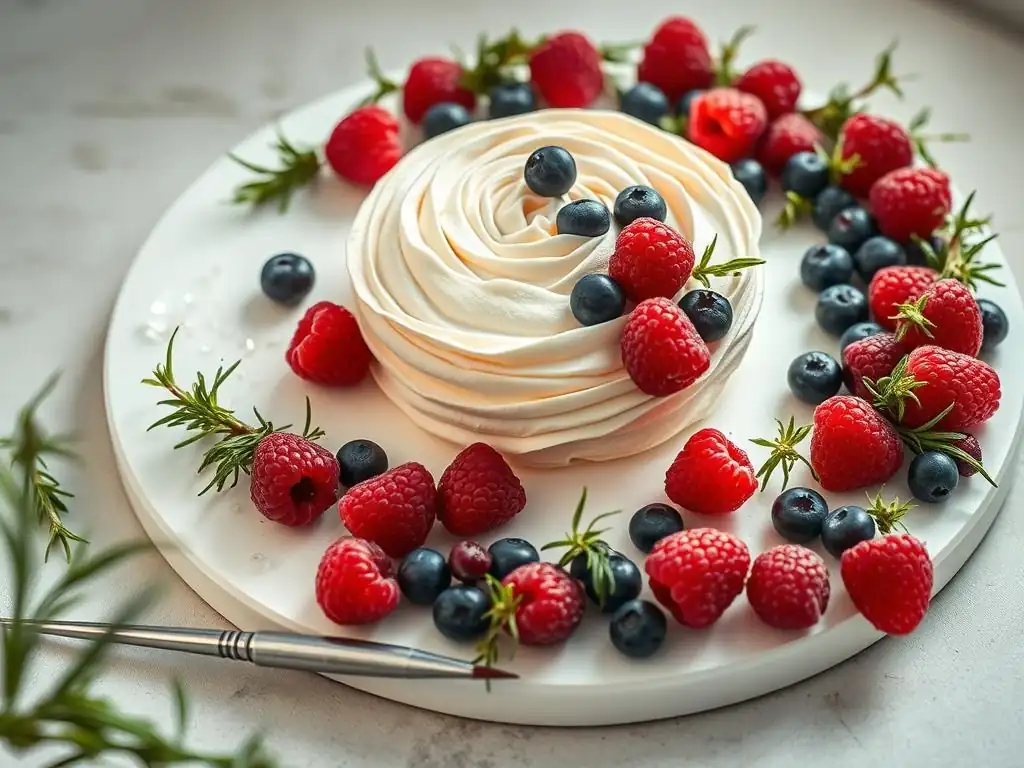
For those wanting to go beyond basic easy cake board decorating, painting or airbrushing offers custom color and gradient possibilities. Once your board is covered in a smooth layer of white fondant, you can use edible paints (gel colors mixed with clear alcohol or extract) and fine brushes to hand-paint designs, patterns, or even text directly onto the surface. This allows for intricate details or artistic flair that might be difficult with other methods.
Airbrushing provides an even more sophisticated finish, allowing for seamless color blending, gradients, and shading. Using an airbrush kit with food-grade colors, you can spray a uniform color over the board, create ombré effects, or use stencils for airbrushed patterns. Airbrushing requires practice to control the spray and avoid oversaturation, but it can achieve stunning, professional results, making your board a true extension of your cake's artistry.
Adding Borders and Edges for a Professional Finish
Adding a border around the edge of your decorated cake board provides a clean, professional finish and helps frame the cake. This can be done with various materials. A simple ribbon secured around the edge of a drum board with double-sided tape is a very common and easy cake board decorating method. Ensure the ribbon is food-safe or that only the non-food contact side is exposed near the cake.
Alternatively, you can use fondant or gum paste to create an edible border. Roll out a long strip of fondant, possibly texturize it or cut it into a decorative shape, and attach it around the edge of the board with edible glue. You can also pipe a buttercream border directly onto the board using a piping bag and tip, matching the border style on the cake itself. These borders cover the raw edge of the board covering and add an extra layer of polish.
Incorporating Cake Board Decorations into the Overall Cake Theme
Truly skilled cake decorators integrate the board decoration seamlessly into the cake's overall theme. This goes beyond just matching colors. For a beach-themed cake, the board could be covered in crushed graham crackers or brown sugar to resemble sand, perhaps with small edible seashells scattered on it. For a garden cake, the board could be textured and colored to look like soil or grass.
Consider the narrative of your cake. If it's a woodland creature cake, paint or airbrush a forest floor scene on the board. If it's a superhero cake, create a cityscape or a cracked ground effect. This level of integration requires more planning and potentially more advanced techniques than basic easy cake board decorating, but it results in a cohesive and impactful display where the board is not just a base, but a vital part of the story the cake tells.
Troubleshooting Common Cake Board Decorating Problems
Preventing Wrinkles and Bubbles in Fondant
One common issue when applying fondant for easy cake board decorating is the appearance of wrinkles or air bubbles. These usually occur because the fondant wasn't rolled evenly, wasn't smoothed down properly, or wasn't adhered well to the board. To prevent this, ensure your work surface and rolling pin are lightly dusted, and roll the fondant to a consistent thickness. Apply a thin, even layer of adhesive (like piping gel or water) to the board before placing the fondant.
When applying the fondant, start from the center and gently smooth outwards, pushing any air towards the edges. Use a fondant smoother to firmly but gently work across the entire surface. If you spot a bubble after application, you can often prick it carefully with a very fine needle or pin, then smooth the area down. For wrinkles around the edges, gently lift the edge slightly, smooth the fondant downwards, and re-trim. Practice makes perfect, and these simple steps significantly reduce these common frustrations.
Achieving a Smooth Buttercream Finish on Cake Boards
Getting a perfectly smooth buttercream finish on a cake board can be tricky, especially if the board isn't perfectly flat or if the buttercream isn't the right consistency. Ensure your buttercream is smooth and free of air bubbles – mixing it on low speed for a few minutes after it's made can help. Apply a generous amount to the board, enough to cover it completely.
When smoothing with a bench scraper, hold the scraper straight and apply even pressure. Don't try to remove too much buttercream at once. Scrape, wipe your tool clean, and scrape again. For stubborn lines, slightly warming your scraper under hot water (and drying it completely) before the final pass can help melt the surface slightly for a smoother glide. If the buttercream is too soft, chill the board in the refrigerator for 10-15 minutes before the final smoothing pass.
Fixing Imperfections and Mistakes on Decorated Boards
Mistakes happen, but most imperfections in easy cake board decorating can be fixed. If you get a smudge on a fondant-covered board, you might be able to gently rub it out with a smooth tool or a clean finger if it's minor. For larger marks or tears, you might need to cut out the damaged section and patch it with a piece of fresh fondant, blending the edges carefully. Alternatively, you can strategically place a decoration, like a sugar flower or a piped dot, over the imperfection.
On a buttercream board, small smudges or inconsistencies can often be re-smoothed with a warm offset spatula or scraper. If a major mistake occurs, you can scrape off the affected area or even the entire layer of buttercream, re-mix it if necessary, and start the smoothing process again. Remember that for easy cake board decorating, minor imperfections are often hidden once the cake is placed on the board and additional decorations are added.
Maintaining and Storing Decorated Cake Boards
Cleaning and Protecting Decorated Cake Boards
Keeping your decorated cake board clean, especially during the cake decorating process, is important. If you've used fondant or a dry medium like sprinkles, use a clean, dry brush (like a soft pastry brush) to gently sweep away any stray crumbs or powdered sugar. For buttercream boards, be extra careful as they are easily smudged. A small, dry brush can help remove crumbs, but avoid touching the surface with your fingers.
To protect the board before the cake is placed on it, especially if working in advance, you can loosely cover it with plastic wrap. Be careful not to press the wrap onto the decorated surface, which could cause damage, especially to buttercream or delicate fondant textures. For travel, once the cake is on the board, the cake box itself provides the main protection, but ensure the board fits snugly so it doesn't slide around.
Proper Storage to Preserve Cake Board Decorations
How you store your decorated cake board depends on the material used. Fondant-covered boards should be stored in a cool, dry place away from direct sunlight. Humidity can make fondant sticky, while dryness can cause it to crack. An airtight container or cake box is ideal. If stored properly, a fondant-covered board can be prepared a day or two in advance.
Buttercream-covered boards should ideally be used shortly after decorating. If you need to store them, place them in an airtight container in the refrigerator. Be aware that condensation can form when moving the board from the cold refrigerator to room temperature, which might affect the finish. Allow it to come to temperature gradually if possible. Boards decorated with non-edible materials or paper should also be stored flat and protected from dust and moisture.
Reusing Decorated Cake Boards: Tips and Tricks
While edible decorations like fondant or buttercream are typically not reused, the sturdy board itself can often be cleaned and repurposed, especially drum boards or Masonite boards. After removing the cake, carefully scrape off any remaining frosting or fondant. For boards covered in non-edible materials like ribbon or decorative paper, these can sometimes be peeled off.
To clean a reusable board, gently wipe it with a damp cloth and a mild soap, being careful not to saturate the board material itself, especially cardboard-based ones. Rinse lightly and dry thoroughly immediately. Ensure the board is completely dry before storing it flat in a clean, dry place. While not all boards are suitable for reuse, opting for sturdier, cleanable materials when possible is a practical tip for bakers who frequently use decorated boards as part of their easy cake board decorating routine.
Easy Cake Board Decorating: Final Thoughts and Inspiration
The Power of Presentation: Making Your Cakes Shine
As we've explored, easy cake board decorating is far more than a trivial step; it's a powerful tool for enhancing the overall appeal of your baked goods. A well-decorated board provides a finished, professional look that elevates even simple cakes. It demonstrates attention to detail and transforms the cake from just a dessert into a centerpiece worthy of admiration. Whether you choose a simple sprinkle border or a fully covered and textured surface, the effort you put into the board significantly impacts how your cake is received.
Think about the last time you saw a stunning cake online or at an event – chances are, the board played a role in the presentation. It provides context, adds color, and creates a visual boundary that helps the cake stand out. Mastering these easy cake board decorating techniques means you're not just a baker, but a cake artist, paying attention to every element of your creation from base to top.
Finding Inspiration for Your Next Cake Board Design
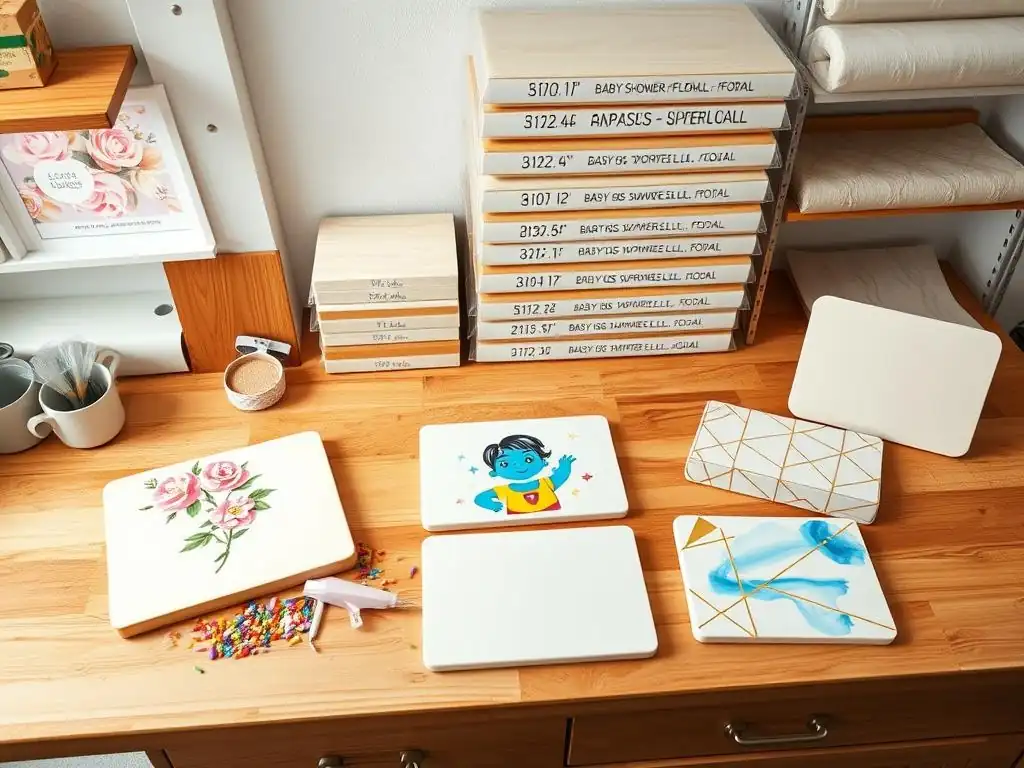
Inspiration for easy cake board decorating can come from anywhere! Look at the cake design itself – the colors, theme, and textures are the most obvious starting points. If your cake has a specific pattern, try to replicate a simplified version on the board using stencils or texture mats. Consider the occasion – a baby shower board might feature soft pastels and simple patterns, while a Halloween board could be black or orange with spooky sprinkles.
Beyond the cake, look at event invitations, party decorations, fabric patterns, or even artwork for ideas. Social media platforms like Pinterest and Instagram are filled with examples of beautifully decorated cake boards. Save ideas that you like, and don't be afraid to start simple. Even just covering a board in a solid color that complements your cake is a form of easy cake board decorating that adds immense value to the presentation.
BakeWithEase's Tips for Mastering Cake Board Decoration
At BakeWithEase, we believe that easy cake board decorating should be fun and accessible. Here are a few final tips:
- Start Simple: Don't try complex techniques on your first attempt. Master covering a board smoothly with fondant or buttercream before moving to stencils or textures.
- Practice Makes Perfect: Use scrap pieces of fondant or leftover buttercream to practice techniques like smoothing or stenciling on a plain board before decorating one for a finished cake.
- Preparation is Key: Ensure your board and workspace are clean and your materials (fondant, buttercream) are the right consistency before you begin.
- Match the Cake: Let the cake's design guide your board decoration choices. The board should complement, not overpower, the cake.
- Have Fun! Easy cake board decorating is a creative outlet. Experiment with colors, textures, and simple decorations. The goal is to enhance your beautiful cake!
By incorporating these easy cake board decorating techniques into your baking routine, you'll find that this small extra step makes a world of difference in the final presentation of your cakes, impressing everyone who sees and tastes your creations.
Frequently Asked Questions
What is the purpose of decorating a cake board?
Decorating a cake board elevates your presentation, adding a professional and polished look to your baked creation. It also helps to protect the cake during transport and handling.
What are some easy materials I can use to decorate a cake board?
You can use a variety of materials like wrapping paper, ribbon, fondant, edible glitter, or even simple frosting to create unique and visually appealing cake board designs. Consider matching the theme or color scheme of your cake.
What's the simplest method for decorating a cake board for beginners?
The easiest method is to cover the board with a layer of wrapping paper or foil, carefully smoothing it out and securing it with tape or glue on the underside. Then, add a decorative ribbon around the edge.
How do I ensure the decorated cake board is food-safe?
Always use food-safe glues or adhesives if needed, and ensure any materials that come into direct contact with the cake are edible or have a barrier layer in between.
Can I reuse decorated cake boards?
Yes, if the decoration is durable and hasn't been damaged, you can reuse cake boards. Ensure they are thoroughly cleaned and sanitized before reuse to prevent contamination and maintain hygiene.
Final Reflection: Elevating the Everyday Cake
Decorating cake boards isn't just about aesthetics; it's about elevating the entire presentation, transforming a simple dessert into a memorable experience. This seemingly small detail can significantly impact the overall impression of your baking, taking it from "good" to "wow." The ease and affordability of the techniques discussed throughout this article make it accessible to everyone, regardless of skill level, proving that even small additions can make a big difference.
The impact of a beautifully decorated cake board extends beyond the visual. It speaks to the care and attention to detail invested in the creation, reflecting a sense of pride and artistry. It's a subtle yet powerful statement, mirroring the sentiment expressed by the renowned pastry chef, The details are not the details. They make the design.
This resonates deeply with me, as I've witnessed firsthand how a thoughtfully decorated base can enhance the enjoyment and appreciation of even the simplest cake.
Now, consider your next baking project. Will you let the cake board remain a blank canvas, or will you embrace the opportunity to add that extra touch of elegance and personality? I encourage you to experiment, to explore the simple techniques outlined in this article, and to discover the joy of transforming a functional element into a captivating design feature. The possibilities are endless, and the reward is a truly unforgettable presentation that will delight both you and your recipients.
Elevate Your Cakes: Unleash Your Inner Cake Artist!
Thanks for taking the time to explore the art of decorating cake boards with BakeWithEase! We hope you now feel confident in adding that extra touch of professional flair to your creations. Ready to put your newfound skills to the test?
- Transform your next cake: Use the techniques you've learned to create a stunning cake board for your upcoming baking project. Think about the colors and styles that will really make your cake pop!
- Share your masterpiece: Post a picture of your decorated cake on social media and tag us @BakeWithEase – we’d love to see your amazing results!
- Explore new design ideas: Browse Pinterest or other craft sites for fresh inspiration and experiment with different textures and colors to find your unique style.
What unique design element will you add to your next cake board to make it truly unforgettable?