
Get a Golden Crust Every Time: Fixing Pale Bread Problems

Welcome to BakeWithEase!
Ever wondered why your homemade bread lacks that desirable golden-brown crust? You're not alone! Many bakers struggle with achieving that perfect bake. In this article, we dive deep into pale bread crust solutions, providing you with the secrets and techniques to transform your loaves from lackluster to luscious. Discover the common culprits behind a pale crust and unlock simple adjustments that will have you baking bakery-worthy bread in no time. Intrigued? Let's get baking!
- Introduction: Why is My Bread Crust Pale?
- Understanding the Science Behind Bread Crust Color
-
Common Causes of Pale Bread Crust and Their Solutions
- Oven Temperature Issues: A Major Culprit
- Insufficient Baking Time: Don't Underbake!
- Steam Issues: Controlling Moisture for a Crispy Crust
- Sugar Content: Enhancing Browning with Sweetness
- Egg Wash: A Simple Trick for a Shiny, Golden Crust
- Milk Wash: A Softer Crust Alternative
- Dough Hydration: The Link Between Moisture and Crust Color
- Oven Rack Position: Where to Place Your Bread for Optimal Browning
- Advanced Techniques for Achieving a Darker Crust
- Troubleshooting Pale Bread Crust: A Step-by-Step Guide
- Preventing Pale Bread: Proactive Baking Tips
- Conclusion: Enjoy Your Perfectly Golden Bread Crust!
-
Frequently Asked Questions
- Why is my bread crust always so pale?
- What temperature should I bake my bread at to get a golden crust?
- How can I add steam to my oven for a better crust without making it pale?
- What ingredients can I add to my dough to promote a darker crust?
- What if I've tried everything and my crust is still pale?
- Final Reflection: The Golden Promise of a Perfect Crust
- Unlock Your Inner Baker: Perfect Loaves, Every Time!
Introduction: Why is My Bread Crust Pale?
The Frustration of Pale Bread: A Common Baking Issue
There's a unique satisfaction in pulling a perfectly baked loaf of bread from the oven – the aroma filling your kitchen, the satisfying weight in your hands, and the promise of a crisp, golden crust. But what happens when that crust is disappointingly pale and soft instead of rich and golden? It's a common frustration for many home bakers, turning what should be a triumph into a minor setback.
A pale crust not only affects the visual appeal of your bread but also impacts its texture and flavor. It often signals that the bread hasn't developed properly, missing out on key chemical reactions that build complexity and structure. Finding effective pale bread crust solutions is a goal for many aiming for baking excellence.
This issue isn't limited to beginners; even experienced bakers can occasionally face the challenge of a lackluster crust. The reasons can be varied, ranging from simple errors in technique to subtle environmental factors. Understanding why your bread crust isn't browning is the first step toward fixing the problem and achieving that desired golden hue. Many bakers seek reliable pale bread crust solutions to consistently produce beautiful, well-baked loaves that look as good as they taste.
BakeWithEase's Guide to Achieving a Perfectly Golden Crust
Welcome to BakeWithEase, your friendly guide to solving common baking woes! If you've ever wondered how to achieve that deep, satisfying golden crust you see in bakeries, you're in the right place. We're diving deep into the science and technique behind crust development, offering practical pale bread crust solutions that you can implement right in your home kitchen. Our goal is to demystify the process and empower you to bake bread with confidence, ensuring every loaf emerges from the oven with a glorious, inviting color.
This guide will walk you through the fundamental principles of crust browning, identify the most frequent culprits behind pale bread, and provide actionable steps to correct them. From adjusting oven settings to incorporating simple ingredients or techniques, we'll cover everything you need to know. Get ready to say goodbye to pale, lackluster loaves and hello to consistently beautiful, golden-brown bread that tastes as amazing as it looks. Mastering these pale bread crust solutions will elevate your baking skills significantly.
Understanding the Science Behind Bread Crust Color
Maillard Reaction: The Key to Browned Bread
The primary reason bread develops a beautiful brown crust is a complex chemical process called the Maillard reaction. This reaction occurs when amino acids (from the protein in flour) and reducing sugars are heated together, typically above 140°C (284°F). It's responsible not just for the browning but also for the development of hundreds of different flavor compounds that give baked goods, roasted meats, and many other cooked foods their characteristic aromas and tastes.
Without a robust Maillard reaction, your bread crust will remain pale and relatively flavorless compared to a well-browned one. Achieving optimal conditions for this reaction is crucial for effective pale bread crust solutions.
The Maillard reaction is distinct from caramelization, which involves the browning of sugars alone at higher temperatures (around 160°C / 320°F for sucrose). While both contribute to crust color and flavor, the Maillard reaction is the dominant force in bread baking, especially at typical oven temperatures. Factors like temperature, pH, and the presence of water influence the rate and extent of this reaction. Ensuring sufficient heat and available sugars are key pale bread crust solutions tied directly to optimizing the Maillard reaction.
The Role of Sugars in Crust Browning
Sugars play a vital role in crust browning, primarily by participating directly in the Maillard reaction and caramelization. Yeast consumes simple sugars during fermentation, producing carbon dioxide and alcohol. However, complex carbohydrates (starches) in the flour are also broken down into simpler, reducing sugars by enzymes like amylase.
These reducing sugars are essential reactants for the Maillard reaction. If the dough doesn't contain enough available reducing sugars by the time it hits the hot oven, the Maillard reaction will be limited, resulting in a pale crust. This highlights why managing fermentation and potentially adding sugar can be effective pale bread crust solutions.
Adding a small amount of sugar (like granulated sugar, honey, or malt) to your dough can provide extra fuel for the Maillard reaction, leading to more rapid and intense browning. For example, adding just 1-2% sugar by flour weight (e.g., 10-20g per 1kg of flour) can make a noticeable difference in crust color. This added sugar doesn't just contribute to browning; it can also slightly alter the crumb texture and flavor profile. It's a simple yet effective technique among the available pale bread crust solutions.
Starch and Crust Color Development
While sugars and proteins are direct participants in the Maillard reaction, starch, the main component of flour, also influences crust development and color, albeit indirectly. As the bread bakes, the starch granules in the crust gelatinize and then dry out, forming a rigid structure. This drying process is essential for the crust to become crisp. Furthermore, enzymes like amylase break down some of the starch into simpler sugars, as mentioned earlier, providing the necessary reactants for the Maillard reaction. The interaction between starch, water, and enzymes is complex and affects the availability of sugars for browning.
On the surface of the crust, as water evaporates, the concentration of sugars and amino acids increases, accelerating the Maillard reaction and caramelization in that specific layer. The type of flour used, with its varying protein and starch content and enzyme activity, can subtly impact the potential for crust browning. For instance, flours with higher diastatic malt content (more active amylase enzymes) can produce more reducing sugars during fermentation, potentially leading to better browning. Understanding these interactions helps in implementing appropriate pale bread crust solutions.
Common Causes of Pale Bread Crust and Their Solutions
Oven Temperature Issues: A Major Culprit
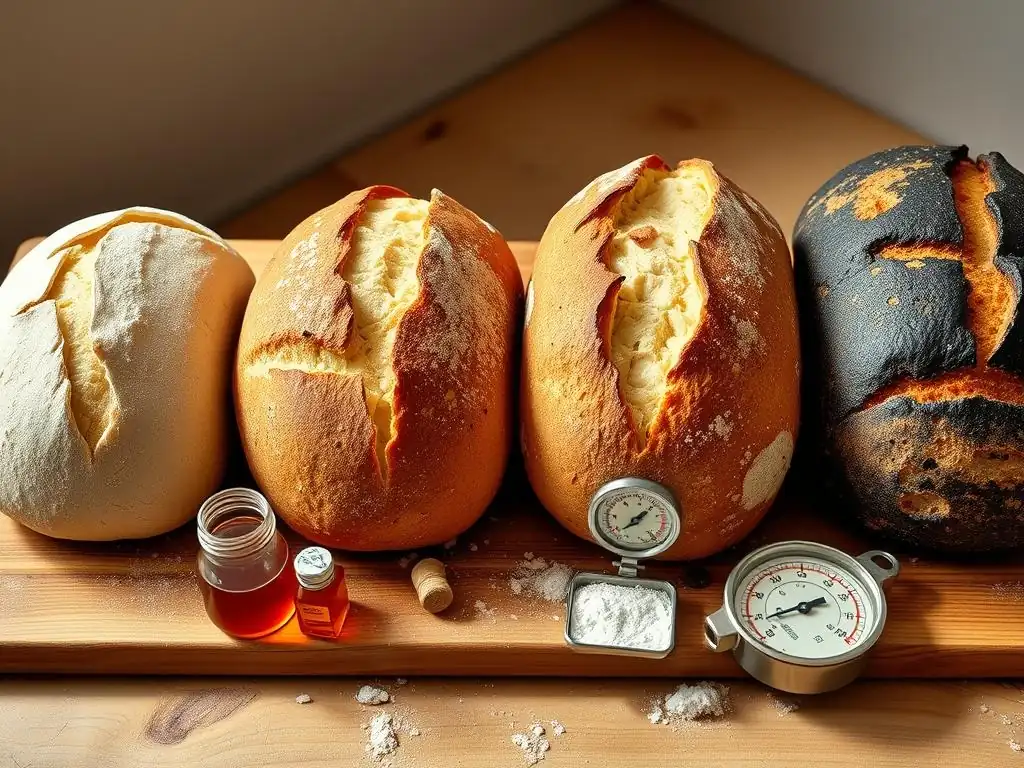
One of the most frequent reasons for a pale bread crust is an inaccurate oven temperature. If your oven isn't reaching the temperature you've set, the Maillard reaction simply won't occur efficiently. This reaction requires temperatures typically above 140°C (284°F), but for good crust development, temperatures often need to be much higher, usually in the range of 200-250°C (390-480°F). A difference of just 20-30 degrees Celsius (35-55 degrees Fahrenheit) can significantly impact how well your crust browns. Many ovens, especially older ones, can be off by this much or more.
Using an independent oven thermometer is one of the most crucial pale bread crust solutions. Place it in your oven and check the actual temperature after it's preheated for at least 20-30 minutes. You might be surprised to find it's lower than your dial indicates. Baking at a reliably high temperature is fundamental for achieving a good crust.
Calibrating Your Oven for Accurate Baking Temperatures
If your oven thermometer shows a consistent discrepancy, you can often calibrate your oven. Consult your oven's manual for specific instructions. Calibration typically involves adjusting a setting (sometimes hidden) to offset the temperature reading. For example, if your oven reads 200°C but an accurate thermometer shows 180°C, you'd adjust the calibration by +20°C. Some ovens allow this adjustment directly through the control panel.
Even without formal calibration, knowing your oven's true temperature allows you to adjust your baking accordingly. If your oven consistently runs 20°C cool, simply set it 20°C higher than the recipe calls for. This simple adjustment is a powerful pale bread crust solution, ensuring your bread bakes at the intended temperature range required for effective browning reactions.
Increasing Oven Temperature for a Deeper Crust Color
Assuming your oven is accurately calibrated or you're adjusting for its inaccuracies, sometimes simply increasing the baking temperature is necessary, especially for lean doughs (those without much sugar or fat). While many recipes call for around 200-220°C (390-430°F), pushing the temperature up to 230-250°C (445-480°F) for the initial part of the bake can dramatically improve crust color. High heat promotes rapid surface drying and accelerates the Maillard reaction.
When baking at higher temperatures, it's often beneficial to start hot to set the crust and achieve good oven spring, then potentially reduce the temperature slightly for the remainder of the bake to prevent the crust from burning before the interior is cooked through. For instance, you might bake at 240°C (465°F) for the first 15-20 minutes, then drop to 220°C (430°F) for the remaining time. Monitoring is key when using higher temperatures as a pale bread crust solution.
Insufficient Baking Time: Don't Underbake!
Underbaking is a common pitfall that results in a pale crust and often a gummy interior. Even if the oven temperature is correct, if the bread isn't left in long enough, the crust doesn't have sufficient time at high temperatures for the Maillard reaction and caramelization to develop fully. The surface needs sustained heat exposure to transform from soft dough to a crisp, brown crust. Rushing the baking process is a sure way to end up with pale results.
Baking time provided in recipes are often estimates. Factors like the actual dough temperature, oven consistency, and even humidity can influence how long a loaf truly needs to bake. Relying solely on the clock is risky; it's crucial to look for visual cues and, ideally, use a thermometer to confirm doneness. Extending the baking time, even by 5-10 minutes, can make a significant difference in crust color and overall doneness, serving as a straightforward pale bread crust solution.
Determining the Right Baking Time for Your Bread
The correct baking time depends heavily on the size and type of loaf. A large, dense loaf will require significantly longer than small rolls. As a general rule, a standard 1-1.5 kg (approx 2-3 lb) loaf of lean bread baked at 220°C (430°F) might take anywhere from 30 to 45 minutes. Smaller loaves or enriched doughs will bake faster. Look for visual cues: the crust should be a deep golden-brown all over (not just on top), and the bottom crust should also be well-colored and firm.
Another traditional test is tapping the bottom of the loaf; it should sound hollow. While this is a useful indicator, it's not foolproof. Combining visual assessment with a thermometer check is the most reliable approach to ensure both adequate crust development and proper internal cooking, addressing pale bread crust solutions related to duration.
Using a Thermometer to Check for Doneness
For absolute certainty that your bread is fully baked and has had enough time for crust development, use an instant-read thermometer. Insert the thermometer into the center of the loaf from the bottom or side, avoiding any large air pockets. Lean bread (like sourdough or French bread) is typically done when the internal temperature reaches 93-99°C (200-210°F). Enriched doughs (containing eggs, butter, or milk) have a slightly lower target, usually 88-93°C (190-200°F).
Reaching the correct internal temperature indicates that the starch has fully gelatinized and the structure is set. By the time the interior reaches this temperature, assuming adequate oven heat, the crust should have had sufficient time and heat exposure to brown properly. If your interior temperature is right but the crust is pale, it points back to oven temperature, steam, or sugar issues, guiding you towards specific pale bread crust solutions.
Steam Issues: Controlling Moisture for a Crispy Crust
Steam plays a critical, though often misunderstood, role in crust development, particularly in the initial stages of baking. When bread is first placed in a hot, steamy oven, the moist environment keeps the surface of the dough pliable for a longer period. This allows the loaf to expand fully (oven spring) before the crust sets.
More importantly for color, steam keeps the surface temperature lower initially, preventing the crust from forming and hardening too quickly. This allows the enzymes (like amylase) more time to break down starches into sugars on the dough's surface, providing more reactants for the Maillard reaction later when the steam dissipates and the surface temperature rises.
Without sufficient steam, the crust forms almost immediately upon hitting the hot oven. This premature setting restricts oven spring and, crucially, means the surface enzymes have less time to create sugars. When the crust does eventually brown, it may be uneven or lighter than desired. Proper steam management is therefore a key pale bread crust solution, especially for achieving a thin, crisp, and evenly colored crust.
The Importance of Steam in the Initial Baking Phase
Steam is most important for the first 10-20 minutes of baking. During this phase, the dough is rapidly expanding due to the production of steam and gases within the loaf. The steamy environment prevents the surface from drying out and setting too soon, allowing for maximum volume increase. It also keeps the surface hydrated, which facilitates enzymatic activity that generates sugars necessary for later browning.
After this initial period, the steam needs to be released from the oven. As the steam dissipates, the surface temperature of the bread rises significantly, allowing the Maillard reaction and caramelization to kick into high gear, leading to the desired browning and crisping. Maintaining steam for too long can inhibit browning, while not using enough steam leads to a thick, pale crust and restricted oven spring. Finding the right balance is part of implementing effective pale bread crust solutions.
Techniques for Creating Steam in a Home Oven
Creating a steamy environment in a standard home oven can be done through several methods:
- Using a baking stone or steel with a steam tray: Place a baking stone or steel on the middle rack and a metal tray (like a broiler pan) on the rack below it. Preheat both thoroughly. Just before loading the bread, carefully pour about 1 cup (240ml) of hot water into the preheated tray. Close the oven door quickly to trap the steam. Be cautious as this produces a lot of hot steam.
- Using a Dutch oven or lidded pot: This is one of the most effective methods. Preheat a Dutch oven or heavy lidded pot in the oven. Place the dough inside, score it, cover with the lid, and bake for the initial period (e.g., 20-30 minutes). The lid traps the moisture released by the bread as it bakes, creating a perfect steamy environment inside the pot. Remove the lid for the rest of the bake to allow browning.
- Spraying the oven walls: Lightly spray the walls of your oven with water just before and immediately after loading the bread. Repeat once or twice in the first 10 minutes. Avoid spraying the light bulb or glass door directly. This method creates less steam and dissipates quickly, so it's less effective than the other methods but can offer some benefit as a supplementary pale bread crust solution.
Sugar Content: Enhancing Browning with Sweetness
As discussed in the science section, sugars are direct participants in the browning reactions. Doughs that are naturally higher in sugar, such as brioche, challah, or sweet rolls, will brown much more readily and deeply than lean doughs like traditional French bread or sourdough. This is because they have a higher concentration of reducing sugars available for the Maillard reaction from the start, in addition to any enzymatic breakdown of starch.
If you're struggling to get a good color on a lean dough, slightly increasing the sugar content can be a simple and effective pale bread crust solution. Adding even 1-2% sugar (relative to flour weight) can make a noticeable difference. For example, in a recipe using 500g of flour, adding 5-10g of sugar might be enough to promote better browning. Consider the impact on flavor, though; adding too much sugar will change the bread's character.
Adding Sugar or Honey to Your Dough for a Richer Crust
Incorporating sugar or honey into your dough mix is straightforward. You can add granulated sugar, brown sugar, honey, or even a touch of molasses during the initial mixing phase. Honey and molasses are particularly effective as they contain a mix of different sugars, including fructose and glucose, which are highly reactive in the Maillard process. They also contribute moisture and distinct flavors.
When adding sugar as a pale bread crust solution, start with a small amount. For a standard lean loaf, 1-2% (5-10g per 500g flour) is a good starting point. For slightly enriched doughs, 3-5% might be appropriate. Be mindful that adding sugar can also affect yeast activity, potentially speeding up fermentation, so monitor your dough closely.
Understanding the Impact of Different Sweeteners
Different types of sugar will have slightly different impacts on your bread. Granulated sugar (sucrose) is a disaccharide that needs to be broken down by enzymes into glucose and fructose to fully participate in the Maillard reaction, though some direct caramelization also occurs. Honey, maple syrup, and molasses contain a higher proportion of monosaccharides (glucose and fructose), which are immediately available for the Maillard reaction, leading to more efficient browning. Malt extract or diastatic malt powder (discussed later) also provide sugars and enzymes that enhance browning.
Using a sweetener that is already in a form readily usable by the Maillard reaction can be a targeted pale bread crust solution. For instance, substituting a small amount of honey for sugar might yield a deeper color with the same sweetness level. Experimenting with different sweeteners can help you find the perfect balance of flavor and color for your bread.
Egg Wash: A Simple Trick for a Shiny, Golden Crust
Applying a wash to the surface of your dough before baking is a classic technique for enhancing crust color and appearance. An egg wash is perhaps the most common and effective. The protein and sugars in the egg, when exposed to heat, undergo the Maillard reaction and caramelization rapidly, resulting in a beautiful, glossy, golden-brown finish. It's a quick and easy pale bread crust solution that provides immediate visual results.
An egg wash also helps adhere seeds, grains, or other toppings to the crust. It creates a more uniform color and can give the crust a slightly richer flavor. While it doesn't impact the crumb structure or overall doneness, it significantly improves the aesthetic appeal of the loaf.
How to Prepare and Apply an Egg Wash
A basic egg wash is made by whisking one whole egg with 1-2 tablespoons of water or milk. The liquid helps thin the egg, making it easier to apply evenly. For a shinier finish, use milk or cream instead of water. For a less shiny but very golden finish, use only the egg yolk mixed with a little liquid. For a duller, darker crust, use only the egg white (though this is less common for bread).
Apply the egg wash evenly over the surface of the shaped dough using a pastry brush just before placing it in the oven. Be careful not to let it pool in crevices, which can create thick, rubbery spots. A thin, even layer is best. Ensure you cover all exposed surfaces for uniform color as a pale bread crust solution.
Variations of Egg Wash for Different Crust Finishes
- Whole Egg + Water: Standard, good color and moderate shine.
- Whole Egg + Milk/Cream: Richer color, more shine, slightly softer crust.
- Egg Yolk + Water/Milk: Deepest golden color, moderate shine, slightly richer flavor.
- Egg White + Water: Less color, more shine, crisper but thinner crust (less common for loaves).
- Egg White + Pinch of Salt: Can help break down egg white structure for easier application and even shine.
Experimenting with these variations allows you to customize the final look of your bread crust.
Milk Wash: A Softer Crust Alternative
If you prefer a softer, less glossy crust than an egg wash provides, a milk wash is an excellent alternative. Milk contains lactose (a sugar) and proteins, which also participate in the Maillard reaction when heated. While it doesn't produce the same deep color or high shine as an egg wash, a milk wash still promotes browning and results in a lovely, soft, golden crust. It's a simple pale bread crust solution that's less intense than egg wash.
A milk wash is particularly suitable for softer bread rolls, enriched loaves, or challah, where a tender crust is desired. It provides a gentle browning effect and helps create a soft texture on the surface.
When to Use a Milk Wash Instead of an Egg Wash
Use a milk wash when you want to enhance browning without adding significant shine or crispness. It's perfect for sandwich loaves, burger buns, or any bread where a soft exterior is preferred. Simply brush the shaped dough with milk (whole milk works best due to its fat content) before baking. You can use it plain or add a pinch of sugar for slightly enhanced browning.
Compare the results of a milk wash versus an egg wash on similar loaves to see which finish you prefer for different types of bread. It's a matter of personal preference and the desired outcome for your specific bake.
Dough Hydration: The Link Between Moisture and Crust Color
Dough hydration, the ratio of water to flour, also plays a subtle role in crust color. Higher hydration doughs (those with a higher percentage of water relative to flour, e.g., 75-80% hydration) tend to stay moist longer in the oven. This extended surface moisture can, similar to steam, allow enzymatic activity to continue longer on the surface, potentially generating more sugars for browning. Additionally, the extra moisture can contribute to a thinner, crispier crust when it finally sets.
However, extremely high hydration doughs can sometimes be challenging to handle and may require specific baking techniques (like baking in a Dutch oven) to manage the moisture and achieve good browning. Conversely, very low hydration doughs might develop a crust too quickly, potentially before sufficient sugars have been generated on the surface, leading to a pale or uneven crust.
Adjusting Dough Hydration for Better Browning
If you consistently get pale crusts with a particular recipe, and other factors seem correct, slightly increasing the hydration (by 2-5%) might help. This isn't a primary pale bread crust solution in isolation but can contribute positively when combined with other techniques. For example, if a recipe calls for 60% hydration, try increasing it to 63-65%. Observe how the dough handles and how the crust develops.
Be aware that increasing hydration will make the dough stickier and potentially harder to shape. It requires some adjustment in handling technique. It's a more advanced pale bread crust solution compared to simply adjusting oven temperature or using a wash.
Oven Rack Position: Where to Place Your Bread for Optimal Browning
The position of your bread within the oven significantly impacts how heat is transferred to the loaf and, consequently, how the crust browns. Heat rises, so placing bread on the top rack will expose the top crust to more radiant heat from the upper element, potentially leading to faster browning on top but less even browning overall.
Placing bread on the bottom rack exposes the bottom crust to more direct heat from the lower element (or the heat source below your baking stone/steel), which can result in a very dark or even burnt bottom before the top is fully browned.
For most bread baking, the middle rack is generally the best position. This allows for even heat circulation around the loaf, promoting uniform browning on all sides – top, bottom, and sides. It provides a balance of radiant heat from the elements and convective heat circulating within the oven.
The Best Rack Position for Even Crust Color
The ideal position for achieving even crust color is usually the center rack or slightly below center. If you are using a baking stone or steel, place it on the middle or slightly below middle rack, as the stone itself will retain and radiate heat upwards, helping to brown the bottom crust.
Baking multiple loaves might require staggering them on different racks, but try to keep them as close to the center as possible without overcrowding the oven, which can impede air circulation and lead to uneven baking and pale spots. Proper rack positioning is a simple yet effective pale bread crust solution.
If your oven has known hot spots or uneven heating, you might need to experiment with rack position or even rotate the loaf halfway through baking to ensure even browning.
Advanced Techniques for Achieving a Darker Crust
Using a Dutch Oven for Enhanced Crust Development
Baking bread in a preheated Dutch oven or other lidded pot is one of the most popular and effective methods for home bakers to achieve a professional-quality crust. As mentioned earlier, the lid traps the steam released by the dough, creating an ideal environment for oven spring and enzymatic activity in the initial phase. When the lid is removed, the dry, intense heat of the preheated pot and oven surrounds the loaf, promoting rapid and deep browning and crisping.
This method is particularly effective for high-hydration, lean doughs like sourdough. It mimics the conditions of a professional deck oven with steam injection. The radiant heat from the hot cast iron or ceramic pot ensures excellent browning on the bottom and sides of the loaf. It's considered by many to be a foolproof pale bread crust solution.
The Benefits of Baking Bread in a Dutch Oven
- Excellent Steam: The lid traps moisture, leading to better oven spring and a thinner, crisper crust.
- Intense Heat: The preheated pot provides intense radiant heat, promoting even and deep browning, especially on the bottom crust.
- Consistent Results: Reduces the variability caused by uneven oven heating or poor steam setup.
- Improved Shape: The pot supports the dough during baking, helping it maintain its shape.
To use a Dutch oven, preheat it with the lid inside your oven at your target baking temperature (often 230-250°C / 445-480°F) for 30-60 minutes. Carefully transfer your shaped dough into the hot pot, score it, replace the lid, and bake for 20-30 minutes. Then, remove the lid and continue baking for another 15-25 minutes until the crust is the desired color.
Broiling for a Final Crust Color Boost (Use with Caution!)
If your bread is fully baked but still looks a bit pale on top, a very brief stint under the broiler can provide a quick color boost. This should be used with extreme caution, as the intense direct heat from the broiler element can burn the crust very quickly – often in a matter of seconds. It is a last-resort pale bread crust solution.
This technique is best suited for loaves that are already mostly golden and just need a touch more color or perhaps some blistered spots. It's not a substitute for proper baking technique but can rescue an otherwise pale loaf.
How to Safely Broil Bread for a Deeper Color
Move the oven rack so the top of the bread is 4-6 inches (10-15 cm) away from the broiler element. Turn the broiler on (usually on high, but monitor constantly). Watch the bread continuously. It can go from golden to burnt in under a minute. Rotate the loaf if necessary for even browning. Remove the bread from the oven as soon as it reaches the desired color. Do not walk away from the oven while broiling bread. This method is a risky pale bread crust solution if not watched carefully.
Malt Powder: A Secret Ingredient for a Rich, Dark Crust
Diastatic malt powder is a secret weapon used by many professional bakers to improve crust color, texture, and flavor. Diastatic malt contains active enzymes (primarily amylase) that break down starch into sugars during fermentation and the initial stages of baking. This increases the availability of reducing sugars on the surface and throughout the dough, fueling the Maillard reaction and leading to darker, richer crust color and a more complex flavor profile.
Non-diastatic malt powder, on the other hand, has had its enzymes deactivated by heat. It primarily acts as a sweetener and flavor enhancer (think malted milk) but doesn't contribute the enzymatic activity that boosts browning in the same way diastatic malt does. Ensure you are using diastatic malt powder if your goal is enhanced enzymatic browning as a pale bread crust solution.
How Malt Powder Affects Crust Color and Flavor
Adding a small amount of diastatic malt powder (typically 0.5% to 1% of the flour weight, so 2.5g to 5g per 500g flour) can significantly improve crust color, especially in lean doughs that undergo long fermentation. The increased sugar availability leads to more vigorous browning. It also contributes a subtle malty flavor and can improve the crumb structure and shelf life of the bread.
Be careful not to add too much diastatic malt, as excessive enzymatic activity can break down the starch and protein too much, resulting in a gummy crumb and a crust that browns too quickly to the point of burning. It's a powerful pale bread crust solution but requires precise measurement.
Troubleshooting Pale Bread Crust: A Step-by-Step Guide
When faced with a pale loaf, systematically review potential causes to find the most effective pale bread crust solutions. Here’s a step-by-step approach:
Step 1: Check Your Oven Temperature and Calibration
This is the most common issue. Use an oven thermometer to verify the actual temperature. If it's consistently off, adjust your setting or calibrate the oven. Ensure you are preheating for long enough (at least 20-30 minutes, longer if using a stone/steel or Dutch oven) to reach and stabilize the temperature. An inaccurate oven is a prime suspect for pale bread crust problems.
Step 2: Evaluate Your Baking Time and Doneness
Did you bake the bread for the full recommended time? Did you check the internal temperature? Ensure the loaf reaches the appropriate internal temperature (93-99°C for lean, 88-93°C for enriched). If the inside is done but the crust is pale, you might need to adjust temperature or use a wash/steam technique on your next bake. Underbaking is a simple cause of pale bread crust problems.
Step 3: Assess Your Steam Application Technique
For lean breads, was sufficient steam present during the first 10-20 minutes of baking? If using a steam tray, was the water hot? If using a Dutch oven, was it properly preheated and the lid kept on for the initial phase? Lack of steam can lead to a prematurely set, pale crust. Improving steam is a key pale bread crust solution for many.
Step 4: Consider Adding Sugar or an Egg Wash
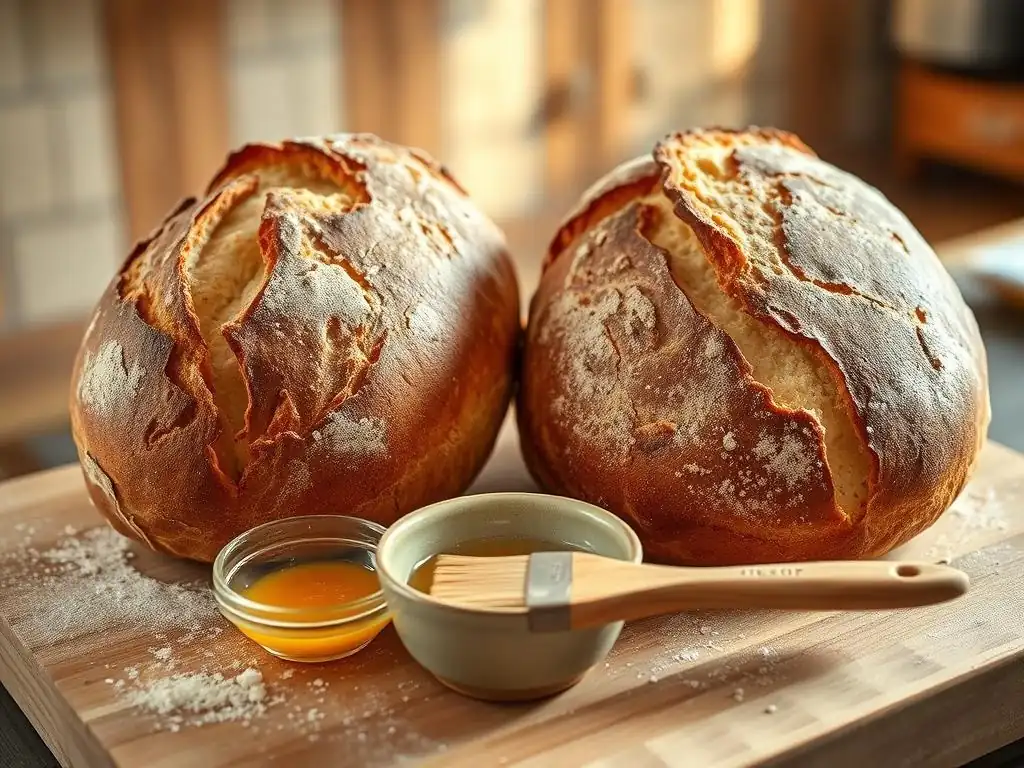
For doughs that are naturally low in sugar, adding 1-2% sugar or malt powder can boost browning potential. Alternatively, applying an egg wash or milk wash just before baking provides readily available sugars and proteins on the surface for rapid browning. These are effective pale bread crust solutions for boosting color.
Step 5: Experiment with Oven Rack Position
Ensure your bread is placed on the middle rack for even heat distribution. If using a baking stone or Dutch oven, confirm it's on the middle or slightly below middle rack. Adjusting position can help achieve uniform color, tackling specific pale bread crust problems related to heat exposure.
Preventing Pale Bread: Proactive Baking Tips
Prevention is often easier than troubleshooting. By incorporating good practices into your baking routine, you can minimize the chances of encountering pale bread crust problems.
Use a Reliable Bread Recipe: Start with Success
Begin with recipes from trusted sources that are known to produce good results. A well-written recipe will guide you on ingredients, fermentation times, shaping techniques, and baking temperatures/times that are designed to achieve a good crust. Don't be afraid to read comments or reviews from other bakers who have used the recipe. A solid recipe is the foundation for avoiding pale bread crust problems.
Control Your Dough Fermentation: A Key Factor in Flavor and Color
Proper fermentation is crucial. During fermentation, yeast and enzymes break down complex carbohydrates into simpler sugars that are necessary for the Maillard reaction. Under-fermented dough might not have developed enough of these sugars, leading to a pale crust.
Over-fermented dough can exhaust the available sugars, also resulting in pale crust, in addition to potentially collapsing in the oven. Learn to recognize the signs of properly proofed dough – it should be visibly increased in size (often doubled), feel airy, and pass the poke test (an indentation should spring back slowly). Managing fermentation is a vital step among pale bread crust solutions.
Monitor Your Bread's Progress During Baking
Don't just set a timer and walk away. Check on your bread periodically, especially in the second half of the bake. Observe the color development.
If it's browning too quickly, you might need to reduce the oven temperature or loosely tent the top with foil. If it's still pale towards the end of the recommended baking time, check the internal temperature and consider extending the bake time or applying one of the pale bread crust solutions like a wash (though this is best done before baking). Active monitoring allows you to catch and correct pale bread crust problems in real-time.
Conclusion: Enjoy Your Perfectly Golden Bread Crust!
Achieving a consistently golden crust on your homemade bread is a rewarding part of the baking journey. It involves understanding a little bit of science – the magic of the Maillard reaction and the role of sugars and heat – and mastering a few key techniques. From ensuring your oven is at the right temperature and using sufficient steam to considering the impact of ingredients like sugar or malt, you now have a comprehensive toolkit for solving pale bread crust problems.
Don't be discouraged by a pale loaf; see it as a learning opportunity. Each bake provides insights into how your ingredients, techniques, and oven interact. By systematically addressing the potential causes and applying the pale bread crust solutions outlined in this guide, you'll be well on your way to pulling consistently beautiful, deeply colored loaves from your oven.
Mastering the Art of Bread Baking with BakeWithEase
At BakeWithEase, we believe that everyone can bake delicious bread. Troubleshooting common issues like pale crusts is just one step in mastering the art. We're here to provide you with clear, practical guidance, whether you're just starting out or refining your skills. Our resources cover everything from basic recipes to advanced techniques, helping you bake with confidence and joy. Keep experimenting, keep learning, and most importantly, keep baking! Solving pale bread crust problems is part of the journey.
Remember that practice makes perfect. The more you bake and apply these pale bread crust solutions, the better you'll become at predicting and controlling the outcome. Soon, achieving that perfect golden crust will be second nature, allowing you to fully enjoy the process and the delicious results.
Further Resources for Troubleshooting Bread Baking Problems
While this guide focuses on pale crusts, many other issues can arise in bread baking, such as dense crumb, poor oven spring, or irregular holes. Understanding the interconnectedness of ingredients, fermentation, shaping, and baking is key to becoming a successful bread baker.
Explore other articles on BakeWithEase for solutions to different bread baking challenges. We cover topics like achieving an open crumb, fixing gummy interiors, understanding yeast activity, and more. Our goal is to be your comprehensive resource for all your baking questions and to help you confidently tackle any pale bread crust problems or other issues that come your way. Happy baking!
Frequently Asked Questions
Why is my bread crust always so pale?
A pale crust often indicates the oven temperature is too low or the baking time is insufficient. Another cause could be too much steam in the oven during the initial baking phase.
What temperature should I bake my bread at to get a golden crust?
The ideal baking temperature for a golden crust typically ranges from 375°F to 450°F (190°C to 232°C). Refer to your specific recipe for the optimal temperature as it may vary. Oven calibration is also important.
How can I add steam to my oven for a better crust without making it pale?
Use steam only in the initial stages of baking for about the first 15-20 minutes. Remove the steam source afterward to allow the crust to dry and brown properly.
What ingredients can I add to my dough to promote a darker crust?
Adding ingredients like milk, sugar, or honey to your dough can encourage a darker crust due to their caramelization properties. Egg washes are also effective for adding color and shine.
What if I've tried everything and my crust is still pale?
Consider using a broiler for the last few minutes of baking, watching very closely to prevent burning. An oven thermometer can help ensure accuracy and rule out temperature discrepancies.
Final Reflection: The Golden Promise of a Perfect Crust
The quest for the perfect loaf, with its deeply golden crust, is more than just a culinary pursuit; it's a reflection of our desire for mastery and the satisfaction of a job well done. This article explored the common culprits behind pale bread crusts – from oven temperature inconsistencies to hydration issues – and offered practical solutions to achieve that coveted golden-brown perfection. These solutions, while seemingly simple, represent a deeper understanding of the baking process and the power of attention to detail.
The pursuit of the perfect crust has resonated throughout history, a symbol of both skill and nourishment. The simple act of baking bread, and the pride in achieving a beautiful crust, connects us to generations past. Bread is the staff of life,
a common saying reminds us of its fundamental importance, and a beautifully browned crust elevates that staff to something truly special. This article aimed to empower bakers of all levels to achieve this level of satisfaction, transforming frustration into fulfillment.
Now, consider your own baking journey. What have you learned about the delicate balance of ingredients and technique? Don't be discouraged by a pale crust; see it as an opportunity for learning and refinement. Experiment with the tips provided, adjust your methods, and embrace the process. The next loaf you bake, with its gloriously golden crust, will be a testament to your dedication and a delicious reward for your efforts. The journey to the perfect crust is ongoing, and each loaf baked is a step closer to mastery.
Unlock Your Inner Baker: Perfect Loaves, Every Time!
Thanks for taking the time to explore the secrets of golden-brown bread! We hope you've gained valuable insights into achieving that perfect crust. Now it's time to put your new knowledge to the test.
- Bake your dream loaf today! Experiment with the tips we shared and see the difference. Don't forget to adjust oven temperature and baking time based on your specific recipe and oven.
- Share your baking triumphs (and challenges!) with us on social media! We'd love to see your perfectly crusty creations. Use #BakeWithEase to connect with our community.
- Explore our other baking guides – we've got tons of tips and tricks to help you master every aspect of baking.
Ready to transform your baking game? What's your next bread-baking adventure?