
Unlock the Secret to Perfect Macaron Feet Every Time

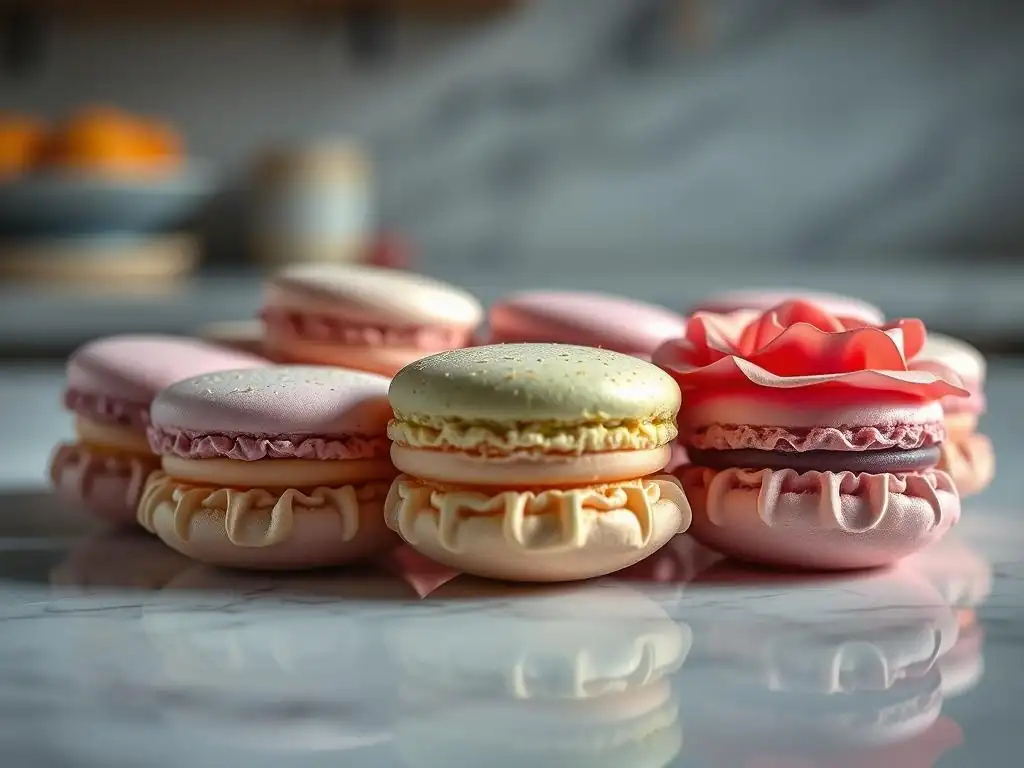
Welcome to BakeWithEase, your haven for all things baking! Ever wondered how to achieve those coveted macaron feet? You're in the right place. We're about to unlock the secrets to creating flawless macarons, step-by-step. Prepare to be amazed as we demystify the process and guide you towards pastry perfection! Ready to bake the perfect batch? Let's get started...
- Mastering Macaron Feet: A Comprehensive Guide
- Introduction: The Allure of Perfect Macaron Feet
- The Science of Macaron Feet Formation
- Step-by-Step Macaron Feet Tutorial
- Troubleshooting Common Macaron Issues
- Advanced Macaron Techniques
- Conclusion: Celebrating Macaron Success
-
Frequently Asked Questions
- How crucial is the macaronage process in achieving perfect macaron feet?
- What type of meringue is best for macarons and why?
- What causes macarons to crack instead of forming feet?
- What ingredients are crucial to consider when baking macarons?
- How can I ensure my macaron shells are uniformly sized and shaped?
- Final Reflection: The Enduring Allure of the Perfect Macaron Foot
- Conquer Your Macaron Feet!
Mastering Macaron Feet: A Comprehensive Guide
Introduction: The Allure of Perfect Macaron Feet
Macarons, those delicate, colorful French confections, are admired for their crisp shells and delightful fillings. Among the many characteristics that define a truly successful macaron, the "foot" stands out. This ruffled, airy base is not just for show; it's a key indicator of a properly baked macaron shell, contributing to its unique texture and structure. Achieving this consistent, beautiful foot is often considered the most challenging aspect of macaron baking, making a reliable perfect macaron feet tutorial highly sought after by bakers.
Understanding how to cultivate this distinctive feature unlocks the door to creating macarons that are not only visually stunning but also possess the ideal delicate chewiness. Whether you're a beginner attempting your first batch or an experienced baker looking to refine your technique, mastering the secrets behind the pied is essential. This guide aims to demystify the process, offering a step-by-step approach and troubleshooting tips to help you achieve those enviable ruffles every time you bake.
Understanding the "Pied": Why Macaron Feet are Desirable
The "pied" (French for foot) refers to the distinctive ruffled edge at the base of a macaron shell. It's formed when the meringue-based batter rises during baking, lifting the top crust while the base remains grounded on the baking sheet. This creates a hollow space that expands into the characteristic foot. Visually, a well-formed foot indicates a properly baked macaron with a stable structure.
Beyond aesthetics, the foot plays a crucial role in the macaron's texture. It provides a slight crispness that contrasts beautifully with the tender interior of the shell and the creamy filling. A macaron without a foot is often dense, flat, or cracked, lacking the airy lightness that makes this pastry so unique. For many bakers, the appearance of a perfect pied is the moment of truth – a sign that their efforts in precise measurement, mixing, and baking have paid off.
Achieving Consistent Macaron Feet: A Step-by-Step Approach
Consistency is key when aiming for perfect macaron feet. This involves meticulous attention to detail at every stage, from ingredient preparation to baking. It's not just about one magical step, but a culmination of precise techniques executed correctly. Following a structured approach, like this perfect macaron feet tutorial, helps build good habits and identify potential issues early on.
Our approach will break down the process into manageable steps, focusing on the science behind each action. We'll cover selecting the right ingredients, mastering the meringue, perfecting the macaronage, and troubleshooting common pitfalls. By understanding the 'why' behind each step, you gain greater control over the outcome, moving from hoping for feet to confidently creating them batch after batch.
The Science of Macaron Feet Formation
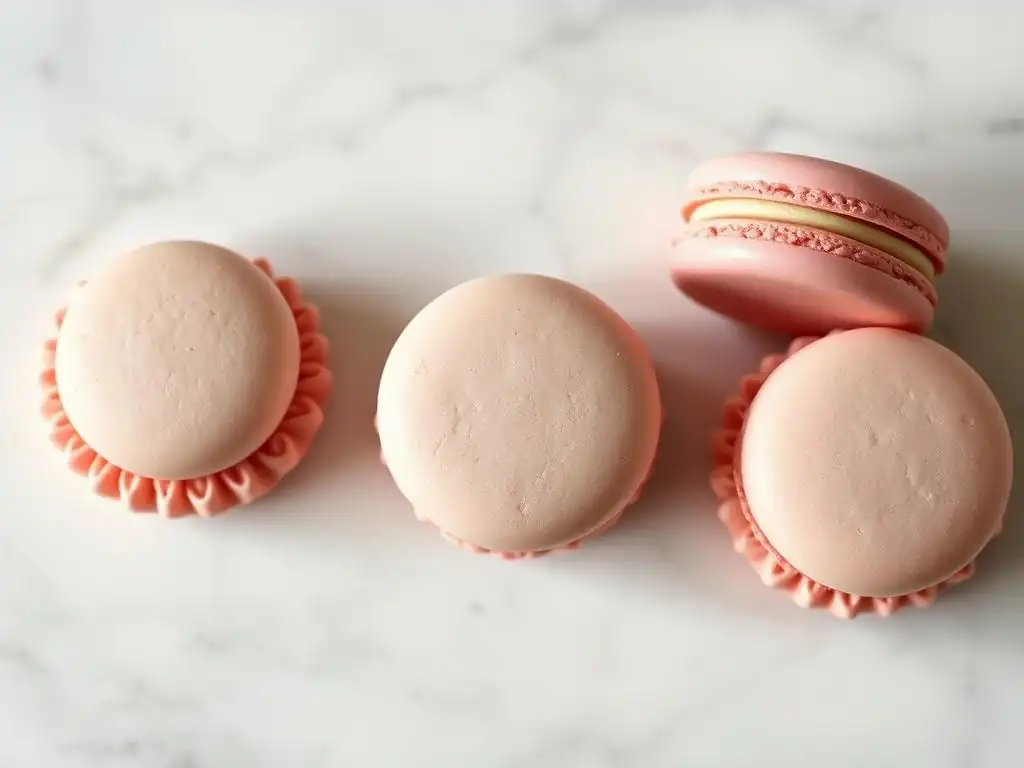
The formation of the macaron foot is a delicate balance of chemistry and physics that occurs during baking. When the macaron batter enters the oven, the heat causes the trapped air pockets within the meringue to expand. Simultaneously, the moisture in the batter turns to steam. The resting period before baking allows a thin skin to form on the surface of the macaron shell.
As the steam and expanding air push upwards, this skin holds the top of the macaron in place, forcing the rising batter to push outwards and upwards from the base, where there is no skin resistance. This controlled expansion creates the characteristic ruffle or "foot." The internal structure, primarily influenced by the ingredients and mixing technique, must be strong enough to support this expansion without collapsing or cracking the shell.
The Role of Key Ingredients
The quality and preparation of your ingredients are fundamental to macaron success, particularly when it comes to developing that desirable foot. Each component plays a specific role in the structure, stability, and texture of the final shell. Using ingredients that are measured precisely and prepared correctly sets the foundation for perfect macaron feet.
Understanding how almond flour, egg whites, and sugar interact is crucial. For instance, the fineness of your almond flour directly impacts the smoothness of the shell and the ease with which the feet can form. Similarly, the state of your egg whites determines the strength and stability of the meringue, which is the backbone of the macaron structure. Sugar, in its various forms, contributes both to sweetness and structural integrity.
Almond Flour: Fineness and Fat Content
Almond flour is the primary dry ingredient in macarons, providing structure and flavor. Its fineness is critical; coarse almond flour can lead to lumpy shells and hinder the smooth rise needed for even feet. Many bakers recommend sifting almond flour multiple times or even processing it briefly with powdered sugar to achieve a superfine texture, ensuring a smooth, unblemished shell surface.
The fat content in almond flour also plays a role. While essential for flavor and texture, excessive fat can weigh down the batter and inhibit the formation of feet. Using blanched, finely ground almond flour typically yields the best results. Aim for a flour that feels like fine powder, not gritty sand, to give your macarons the best chance at developing beautiful, consistent feet.
Egg Whites: The Meringue's Influence
Egg whites are the leavening agent and structural binder in macarons, whipped into a stable meringue. The quality of the meringue is paramount; it must be strong enough to support the almond flour and sugar yet flexible enough to allow for proper expansion during baking. Many bakers advocate for aging egg whites, which involves separating them and letting them sit at room temperature for 24-72 hours, or in the fridge for longer.
Aging is believed to slightly dehydrate the egg whites, altering their protein structure and allowing them to whip into a more stable, less watery meringue. While some modern recipes claim aging isn't strictly necessary, many find it improves meringue stability, which in turn contributes to more reliable foot formation. The goal is a stiff, glossy meringue that holds sharp peaks, indicating sufficient protein denaturation and aeration.
Sugar: Structure and Stability
Sugar serves multiple purposes in macaron shells: it sweetens, stabilizes the meringue, and contributes to the shell's final texture and color. Powdered sugar (confectioners' sugar) is typically mixed with almond flour, while granulated sugar is used to make the meringue. The fine crystals of powdered sugar integrate smoothly with the almond flour.
Granulated sugar, when whipped into egg whites, dissolves and forms a syrup that strengthens the protein network of the meringue. This creates a stable foam capable of trapping air and providing the structure needed for the macaron to rise and form its feet. The ratio of sugar to egg white is crucial; too little sugar can result in a weak meringue, while too much can make the batter too stiff and brittle.
The Art of Macaronage: Achieving the Right Consistency
Macaronage is the critical step where the dry ingredients (almond flour and powdered sugar) are folded into the meringue. This process deflates the meringue slightly and combines the ingredients into a homogeneous batter. The consistency of the batter at the end of macaronage is perhaps the single most important factor determining whether or not you will get perfect macaron feet.
Under-mixed batter will be too stiff, leading to peaked tops and no feet. Over-mixed batter will be too runny, resulting in flat, shapeless discs that spread too much and may crack or have no feet. Mastering the macaronage requires practice and learning to recognize the correct visual cue – the "ribbon stage." This stage signifies the perfect balance of air retention and flow.
The Ribbon Stage: Recognizing Proper Batter Viscosity
The "ribbon stage," also sometimes called the "lava-like" consistency, is the ideal state for macaron batter before piping. To test for this, lift your spatula and let the batter fall back into the bowl. It should fall in a slow, continuous ribbon that eventually melts back into the main mass of batter within about 10-15 seconds, leaving a visible trace for a moment.
If the batter breaks off in clumps and doesn't flow smoothly, it's under-mixed and needs a few more folds. If it flows too quickly and disappears instantly, it's over-mixed. Achieving this precise consistency is a skill developed through repetition. It allows the batter to settle properly after piping, forming a smooth dome, while retaining enough structure to rise and create the foot during baking.
Avoiding Over-Mixing: Preventing Flat Macarons
Over-mixing is one of the most common culprits behind macaron failures, particularly the absence of feet. Excessive folding deflates the meringue too much, removing the air pockets necessary for the batter to rise in the oven. When the batter is over-mixed, it becomes too liquidy; it spreads excessively when piped and lacks the internal structure to push upwards and form the characteristic foot.
To avoid this, fold gently and check the consistency frequently. Stop folding just as the batter reaches the ribbon stage. Remember that the batter will continue to settle slightly in the piping bag. It's better to err on the side of slightly under-mixed than severely over-mixed. If you suspect you've gone too far, unfortunately, there's no real fix for over-mixed macaron batter; it's best to learn from the mistake and start fresh.
Step-by-Step Macaron Feet Tutorial
This section provides a detailed, step-by-step guide designed to walk you through the process of making macarons with a focus on achieving those coveted feet. Each step is crucial, building upon the last to create the ideal conditions for successful macaron development in the oven. Follow these instructions carefully, and you'll be well on your way to mastering this delicate pastry.
Remember that baking is also about learning through experience. Don't be discouraged if your first attempt doesn't yield perfect results. Pay close attention to what happens at each stage, take notes, and make adjustments for your next batch. This perfect macaron feet tutorial is a roadmap, but your specific oven and ingredients may require slight tweaks.
Step 1: Ingredient Preparation
Proper preparation of your ingredients is the essential first step in any baking endeavor, and especially critical for macarons where precision is paramount. This involves accurately measuring all components and preparing the dry ingredients and egg whites correctly before you even think about mixing. Skipping these initial steps can lead to inconsistencies down the line.
Ensure you have all your ingredients weighed out before you begin. Macarons are sensitive to small variations, so using a digital scale is highly recommended over volume measurements. Room temperature ingredients are generally preferred, particularly egg whites, as they whip up to a greater volume and stability than cold ones.
Sifting Dry Ingredients: Ensuring a Smooth Texture
Sifting your almond flour and powdered sugar is non-negotiable for smooth macaron shells and uniform feet. This process breaks up any clumps, removes larger particles from the almond flour, and aerates the mixture slightly. A common ratio is roughly equal parts almond flour and powdered sugar by weight, though recipes vary slightly.
Sift the almond flour and powdered sugar together into a bowl. For extra insurance against lumps and to achieve that superfine texture, you can pulse the two ingredients together briefly in a food processor before sifting, then sift one or two more times. This step directly impacts the texture of your shells and helps prevent issues like bumpy tops that can impede the rise of the foot.
Aging Egg Whites: Improving Meringue Stability (Optional)
Aging egg whites is a traditional technique favored by many macaron bakers for enhanced meringue stability. Separate your egg whites a day or two in advance and store them in a clean, covered container in the refrigerator. Before using, bring them back to room temperature, which typically takes 30-60 minutes depending on the ambient temperature.
While some modern recipes bypass aging with specific techniques (like using Italian or Swiss meringue), many bakers find aged whites produce a stronger, more reliable meringue. The slight reduction in moisture content is believed to improve the protein structure's ability to hold air. If you're struggling with meringue stability or inconsistent feet, aging is a technique worth trying in your perfect macaron feet tutorial journey.
Step 2: Creating the Meringue
The meringue is the foundation of your macaron shell, providing structure and lift. The type of meringue you choose (French, Italian, or Swiss) will influence the texture and stability of your batter, but all require careful execution to achieve stiff, glossy peaks capable of supporting the macaron structure.
Whichever method you select, the goal is a robust meringue that holds its shape. Contamination by even a trace of egg yolk or grease can prevent the egg whites from whipping properly, so ensure your bowl and whisk are spotlessly clean and dry. Start whipping slowly, then gradually increase speed as the whites become frothy.
Meringue Type (French, Italian, Swiss): Choosing Your Method
- French Meringue: Raw egg whites are whipped with granulated sugar added gradually. It's the simplest but least stable, making macaronage more critical.
- Swiss Meringue: Egg whites and sugar are heated gently over a double boiler while whisking until the sugar dissolves, then whipped until cool and stiff. More stable than French.
- Italian Meringue: Hot sugar syrup is slowly streamed into whipping egg whites. This is generally considered the most stable meringue, often yielding consistent feet, but requires handling hot sugar syrup.
Each type has its proponents, and you may find one works better for you or your environment. A perfect macaron feet tutorial can be adapted for any meringue type, though the feel of the macaronage might differ slightly. Many beginners start with French meringue due to its simplicity.
Achieving Stiff, Glossy Peaks
Regardless of the method, the meringue needs to be whipped to the correct consistency: stiff, glossy peaks. When you lift the whisk, the meringue should stand straight up without flopping over. It should look smooth and shiny, not dry or granular. Over-whipping can cause the meringue to break or become grainy, which negatively impacts the macaronage and final texture.
Stop whipping as soon as stiff peaks are achieved. If using French meringue, add the granulated sugar gradually once the egg whites reach soft peaks. For Swiss and Italian, follow the specific heating and sugar incorporation steps before whipping to stiff peaks. The stability of these stiff peaks is what gives the macaron batter the necessary lift to form those beautiful feet.
Step 3: Macaronage Technique
Macaronage is the process of folding the dry ingredients into the meringue. This is where many bakers encounter difficulty, as it requires finding the perfect balance between incorporating the ingredients and deflating the meringue just enough. The technique involves scraping down the sides of the bowl and folding the batter over on itself.
Use a flexible rubber spatula for macaronage. The motion is often described as cutting through the middle and then scraping the batter from the side of the bowl up and over. Rotate the bowl as you fold. The goal is to achieve a homogeneous mixture with the correct flow, without losing too much of the precious air incorporated during meringue making.
Combining Wet and Dry Ingredients: Folding Gently
Start by adding about half of the sifted dry ingredients to the meringue. Fold gently until mostly combined. Add the remaining dry ingredients and continue folding. The initial mixture will be quite stiff. As you continue folding, the batter will loosen and become more fluid.
Do not stir vigorously or beat the batter. The movement should be controlled and deliberate. Scrape the sides and bottom of the bowl to ensure everything is evenly incorporated. The key is patience and observation; watch the consistency closely as you fold, as it can change quickly in the final stages.
Testing Batter Consistency: The "Figure 8" or "Lava-Like" Test
This is the crucial test to determine if your macaronage is complete. Lift your spatula high above the bowl and let the batter fall back down. The batter should flow off the spatula in a thick, continuous ribbon. You should be able to draw a figure "8" with the falling batter without it breaking.
The ribbon should slowly melt back into the surface of the batter in the bowl, leaving a trace for several seconds. If the ribbon breaks easily or is too thick to form an "8," you need a few more folds. If the batter runs off the spatula too quickly and disappears immediately, you've likely over-mixed. Practice this test with each batch as part of your perfect macaron feet tutorial.
Step 4: Piping and Resting
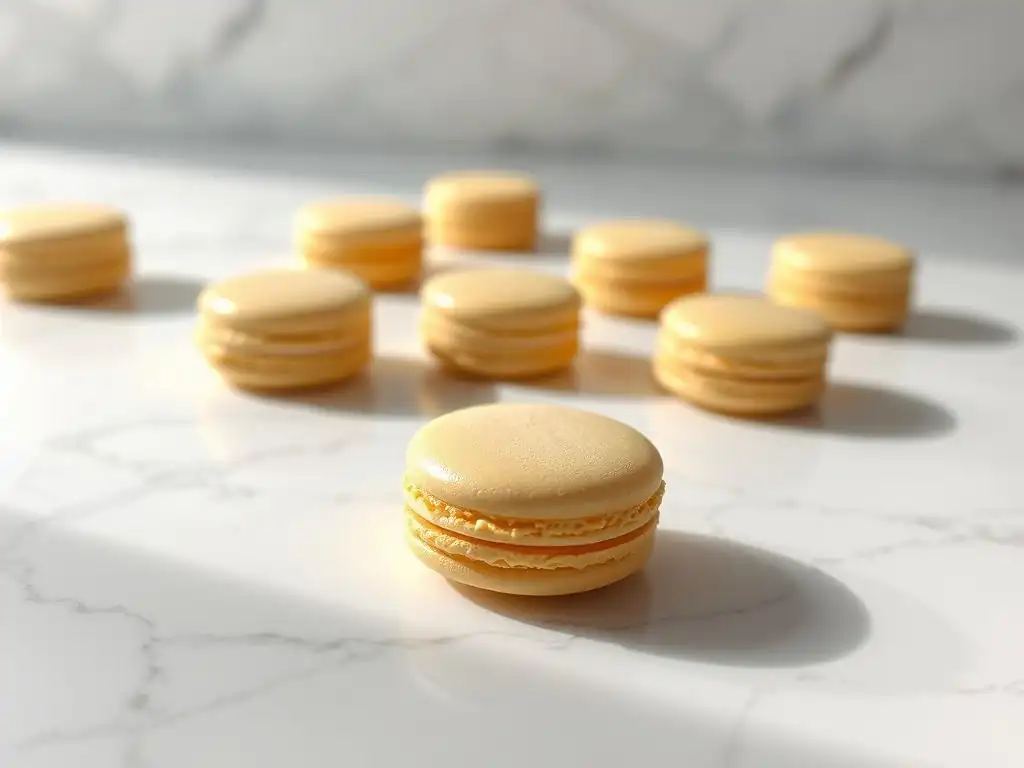
Once the macaronage is complete and the batter is at the correct consistency, it's time to pipe the shells onto your baking sheets. Uniform piping is important for even baking and consistent feet. After piping, the shells need to rest to form a skin, another non-negotiable step for achieving feet.
Use a piping bag fitted with a round tip (e.g., size 1A or 12). Hold the bag perpendicular to the baking sheet and apply even pressure to pipe uniform circles. Stop squeezing, then flick the bag to the side to break off cleanly. Piping onto parchment paper or silicone mats placed on a flat baking sheet helps ensure even heat distribution.
Piping Uniform Macarons: Achieving Consistent Size and Shape
Consistency in size and shape is vital for macarons to bake evenly. If shells are different sizes, smaller ones will overbake while larger ones are still underdone. Use a template placed under your parchment paper or silicone mat as a guide to help you pipe consistently sized circles, typically around 1.5 to 2 inches (3-5 cm) in diameter.
Pipe the batter onto the baking sheet, leaving adequate space between each shell (about 1-2 inches or 2.5-5 cm) as they will spread slightly. Aim for a smooth, round shape. Any small peaks left from piping can usually be smoothed down by gently tapping the baking sheet.
Resting the Macarons: Forming a Skin
After piping, the macarons must rest at room temperature until a skin forms on the surface. This typically takes anywhere from 30 minutes to 2 hours, depending on the humidity levels in your kitchen. The skin is ready when you can gently touch the surface of a macaron shell with your fingertip without any batter sticking to you.
This resting period is crucial for developing feet. The skin allows the steam and expanding air inside the macaron to push downwards and outwards during baking, creating the foot, instead of cracking the top. In humid conditions, resting may take longer, or you might need to use a fan or dehumidifier to aid the process. Do not skip or rush this step in your perfect macaron feet tutorial.
Step 5: Baking for Perfect Feet
Baking is where the magic happens and the feet appear. Proper oven temperature and baking time are critical. Macarons require a relatively low temperature to bake slowly and evenly, allowing the feet to rise without cracking the tops or browning too quickly.
Preheat your oven thoroughly before placing the macarons inside. Oven temperatures can vary significantly, so using an oven thermometer to verify the actual temperature is highly recommended. A common temperature range is 300-325°F ( 150-160°C).
Oven Temperature: Calibration is Key
An accurately calibrated oven is essential for consistent macaron feet. If your oven is too hot, the shells may crack or brown too quickly before the feet have a chance to form properly. If it's too cool, the feet may not rise, and the macarons might be soft or hollow inside.
Use an oven thermometer to check your oven's true temperature. Adjust your oven dial accordingly. For example, if your oven thermometer reads 340°F when the dial is set to 320°F, you'll know to set your dial lower next time. Finding the perfect temperature for your oven is a key part of mastering this perfect macaron feet tutorial.
Baking Time: Monitoring Macaron Development
Baking time typically ranges from 12 to 18 minutes, depending on the size of the macarons and your oven. During baking, watch for the feet to appear within the first 5-8 minutes. The shells should rise and the feet should develop evenly around the base.
The macarons are done when the shells are firm and don't wiggle excessively on the foot when gently nudged. They should lift cleanly from the parchment paper or silicone mat. If they stick, they need a few more minutes. Avoid opening the oven door frequently during the first 10 minutes of baking, as this can cause temperature fluctuations that inhibit feet formation.
Doneness Test: Gentle Wiggle
A simple test for doneness is to gently touch the side of a macaron shell. If it wiggles significantly and feels loose on its base, it needs more time. If it feels stable and only moves slightly with the foot, it's likely done.
Overbaked macarons can be dry and brittle, while underbaked ones will stick to the mat and be soft inside. Finding the sweet spot requires practice, but the wiggle test is a reliable indicator once the feet have formed and the top is set.
Troubleshooting Common Macaron Issues
Even with a detailed perfect macaron feet tutorial, things can sometimes go wrong. Macarons are notoriously finicky! Understanding the common issues and their causes is crucial for improving your technique and achieving consistent success. Don't view failures as setbacks, but as learning opportunities.
Here are some of the most frequent problems encountered by macaron bakers and how to address them. Many issues are interconnected, often stemming from meringue stability, macaronage consistency, or oven temperature.
No Feet: Identifying and Correcting the Problem
Perhaps the most frustrating issue is baking a batch of macarons only to find they have no feet. This indicates that the batter did not rise correctly from the base during baking. Several factors can contribute to this lack of lift.
Common causes include over-mixing the batter, insufficient resting time, or issues with oven temperature. Let's look at these in more detail.
Over-Mixing: Adjusting Folding Technique
As discussed earlier, over-mixed batter is too deflated and runny. It spreads out too much on the baking sheet and lacks the internal structure to push upwards and form a foot. The batter flows too easily off the spatula during the ribbon test.
- Correction: Be more mindful during the macaronage step. Fold gently and check the consistency frequently. Stop folding immediately when the batter reaches the slow, lava-like ribbon stage. It's better to be slightly under-mixed than over-mixed. Practice recognizing the correct consistency.
Insufficient Resting: Ensuring Proper Skin Formation
If the macaron shells are placed in the oven before a proper skin has formed, the steam and expanding air will simply blow out through the top surface, causing cracks or preventing the foot from forming. The skin acts as a barrier, directing the rise downwards.
- Correction: Always perform the touch test before baking. Gently touch the surface of a macaron; if it feels dry and doesn't stick to your finger, it's ready. If your environment is humid, this step will take longer. Consider using a fan to circulate air over the shells to help them dry faster.
Oven Temperature Issues: Adjusting for Optimal Baking
An oven that is too hot or too cool can prevent feet formation. If the oven is too hot, the top can set too quickly and crack before the feet have a chance to rise. If it's too cool, there might not be enough thermal energy to create the steam and lift needed for the feet.
- Correction: Use an oven thermometer to verify your oven's accuracy. Adjust your oven dial based on the thermometer reading. Experiment with slightly lower temperatures (
300-315°For150-155°C) if you consistently get cracked tops with no feet. Ensure the oven is fully preheated.
Cracked Macarons: Preventing Unsightly Cracks
Cracked tops are another common issue that can ruin a batch of macarons. This often happens when the top surface sets too quickly or is too brittle, preventing the internal steam and air from expanding smoothly.
This is frequently linked to oven temperature or excess moisture.
Oven Too Hot: Reducing Temperature
If your oven is too hot, the surface of the macaron can bake and harden before the inside has fully expanded. As the inside continues to heat and expand, the rigid top layer cracks under the pressure.
- Correction: Lower your oven temperature slightly (try dropping by 5-10 degrees Fahrenheit or a few degrees Celsius). Ensure your oven is accurately calibrated with a thermometer. Consider using a double baking sheet (stacking two sheets) to insulate the bottom and slow down the heat transfer.
Excess Moisture: Addressing Ingredient Preparation
Too much moisture in the batter can also contribute to cracking. This might be due to insufficiently aged egg whites, humid conditions, or even inaccurate measurements. Excess moisture turns into steam too rapidly during baking, causing the shell to burst.
- Correction: Ensure egg whites are aged (if following that method) and at room temperature. Sift your dry ingredients thoroughly. Allow sufficient resting time for a good skin to form, especially in humid weather. Sometimes, slightly increasing the baking time at a lower temperature can help dry out the shells slowly.
Uneven Feet: Achieving Uniform Growth
Sometimes, macarons develop feet, but they are uneven, perhaps taller on one side than the other. While not a complete failure, uneven feet detract from the perfect aesthetic and can indicate inconsistencies in technique or equipment.
This is often related to uneven oven temperature or inconsistent piping.
Uneven Oven Temperature: Rotating Baking Sheet
Many ovens have hot spots, meaning the temperature is not uniform throughout the cavity. This can cause macarons on one side of the baking sheet to bake faster and develop feet differently than those on the other side.
- Correction: Rotate your baking sheet halfway through the baking time (e.g., after 7-8 minutes). This helps ensure all the macarons are exposed to similar heat conditions. Knowing your oven's hot spots (using an oven thermometer placed in different locations) can also help.
Inconsistent Piping: Improving Piping Technique
If your macaron shells are not piped uniformly in size and shape, they will bake unevenly. Shells that are thicker on one side or slightly lopsided may develop uneven feet because the heat distribution and batter structure are not consistent.
- Correction: Practice piping using a template to guide you. Apply even pressure on the piping bag and hold it perpendicular to the baking sheet. Aim for consistently sized and shaped rounds. This ensures each shell is the same thickness and diameter, promoting even baking and uniform foot development.
Advanced Macaron Techniques
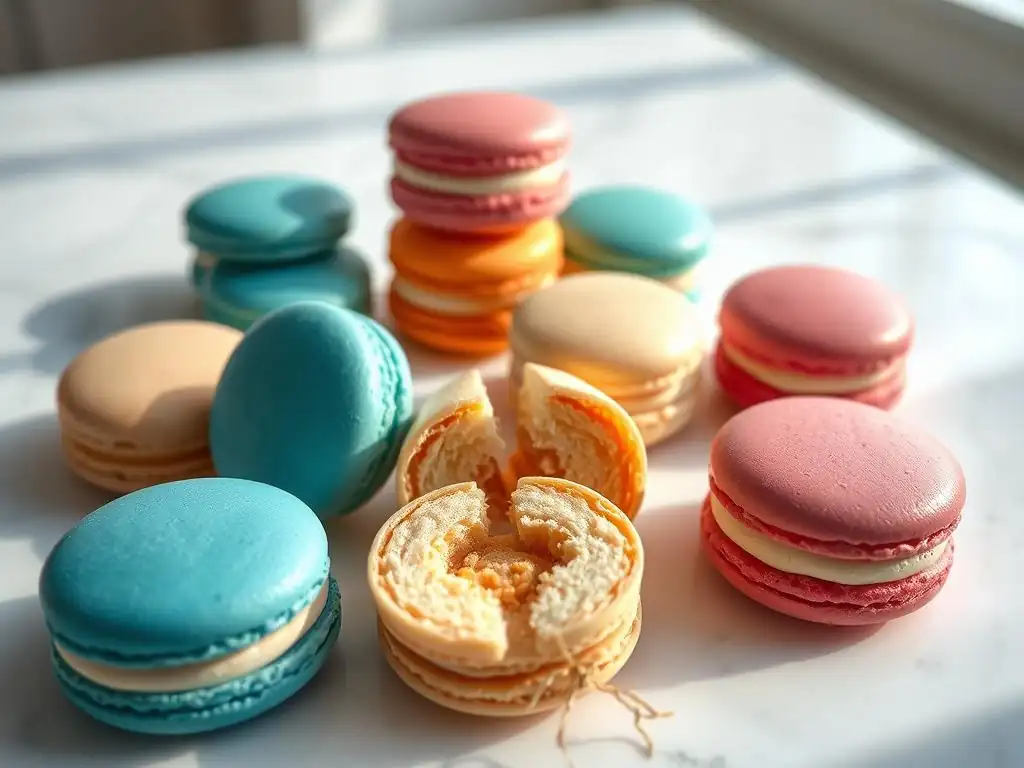
Once you've mastered the basics and are consistently achieving perfect macaron feet, you might want to explore more advanced techniques. These involve adapting your method to challenging environmental factors or incorporating creative elements like flavors and colors while maintaining the integrity of the shell structure.
Venturing into these areas allows you to expand your macaron repertoire and refine your skills further. It's about understanding how variations impact the delicate balance required for success.
Humidity Considerations: Adapting to Environmental Conditions
Humidity is the macaron baker's nemesis. High moisture in the air significantly impacts the resting time required for the shells to form a skin. In very humid conditions, the surface may remain tacky, preventing the necessary skin from developing, which leads to cracked tops or no feet.
Bakers in humid climates often need to take extra steps. This might involve running a dehumidifier in the kitchen, using a fan to blow air gently across the piped shells, or increasing the resting time significantly (sometimes up to 3-4 hours). Some bakers also find that using Italian meringue, which is more stable and less sensitive to moisture, yields better results in humid environments. Adjusting your perfect macaron feet tutorial based on your climate is key.
Flavor and Color Incorporation: Maintaining Macaron Integrity
Adding flavorings and colorings needs to be done carefully to avoid disrupting the macaron batter's delicate balance. Liquid extracts can add too much moisture. Gel or powder food colorings are generally preferred over liquid ones for minimal moisture addition. Add colorings during the meringue stage or just before the final folds of the macaronage.
Flavorings like extracts or cocoa powder should be added sparingly. Cocoa powder, being a dry ingredient, needs to be sifted with the almond flour and powdered sugar. Be aware that adding dry flavorings alters the dry-to-wet ratio slightly, which might require minor adjustments to your technique. The goal is to achieve desired flavor and color without compromising the batter consistency needed for perfect macaron feet.
Alternative Flours: Exploring Gluten-Free Options
While traditional macarons use almond flour, some bakers experiment with other nut flours or even seed flours for allergy reasons or different flavors. Flours like pistachio, hazelnut, or even sunflower seed flour can be used, but they often require adjustments to the recipe because their fat content and particle size differ from almond flour.
When using alternative flours in your perfect macaron feet tutorial, ensure they are very finely ground and sifted thoroughly, similar to almond flour. You might need to experiment with ratios or slightly adjust baking times and temperatures. Results can vary significantly depending on the flour used, so expect a period of testing and refinement.
Conclusion: Celebrating Macaron Success
Achieving perfect macaron feet is a significant milestone for any baker. It represents mastery over a challenging yet rewarding pastry. While the journey may involve failed batches and learning experiences, the satisfaction of piping uniform shells and watching those beautiful feet rise in the oven is truly unparalleled. This perfect macaron feet tutorial has covered the fundamental steps, the science behind the process, and common troubleshooting, equipping you with the knowledge to succeed.
Remember that consistency comes with practice. Each batch teaches you something new about your ingredients, your technique, and your oven. Don't be afraid to experiment slightly once you have a solid foundation, but make only one change at a time so you can isolate its effect. The macaron community is vast and supportive; sharing your experiences and learning from others is part of the fun.
Resources for Further Learning
To continue your macaron journey, explore various online baking forums, culinary websites like BakeWithEase.com, and reputable baking books dedicated to French patisserie. Many experienced bakers share their tips and variations on the perfect macaron feet tutorial.
Consider watching video demonstrations of macaronage and piping techniques, as seeing the consistency and motion can be incredibly helpful. Look for resources that provide specific details on ingredient weights, oven temperatures, and resting times, and compare different methods (French, Swiss, Italian meringue) to see which resonates most with you.
The best way to solidify your macaron skills, including consistently achieving perfect macaron feet, is through continued practice. Bake regularly, even if it's just small batches. Pay attention to the subtle cues your batter gives you.
Once you've baked a successful batch, share your creations! Macarons are meant to be enjoyed. Sharing your perfectly footed macarons with friends and family is a wonderful way to celebrate your progress and get feedback. Keep baking, keep learning, and enjoy the delicious results of your dedication to mastering this exquisite pastry.
- [ ] Measure ingredients precisely using a scale.
- [ ] Sift dry ingredients thoroughly.
- [ ] Whip meringue to stiff, glossy peaks.
- [ ] Achieve the correct "ribbon stage" consistency during macaronage.
- [ ] Pipe uniform shells.
- [ ] Rest shells until a dry skin forms (touch test).
- [ ] Bake in a calibrated oven at the correct temperature.
- [ ] Monitor baking for foot development and doneness.
Frequently Asked Questions
How crucial is the macaronage process in achieving perfect macaron feet?
The macaronage, or folding of the almond flour and meringue, is extremely crucial. It determines the batter's consistency, directly impacting the development of perfect macaron feet.
What type of meringue is best for macarons and why?
While both French and Italian meringue can work, Italian meringue is often preferred. It's more stable due to the cooked sugar, resulting in a more consistent macaron.
What causes macarons to crack instead of forming feet?
Cracking usually indicates that the oven temperature is too high or that the macarons haven't formed a sufficient skin before baking. Allow the macarons to rest longer before baking to prevent this.
What ingredients are crucial to consider when baking macarons?
The key ingredients are almond flour, egg whites, and sugar. Using high-quality ingredients and precise measurements is essential for successful macarons.
How can I ensure my macaron shells are uniformly sized and shaped?
Using a macaron template under your parchment paper is the best way to achieve uniform size and shape. Piping evenly and consistently is also important for professional-looking macarons.
Final Reflection: The Enduring Allure of the Perfect Macaron Foot
The quest for the perfect macaron foot is more than just a baking challenge; it's a testament to the power of precision and patience in achieving culinary artistry. The seemingly small detail of a flawlessly smooth, ruffled foot elevates a simple macaron from a delightful treat to a miniature work of art. This pursuit, as detailed in this tutorial, speaks to a broader desire for mastery and the satisfaction derived from overcoming technical hurdles in the kitchen.
The journey to mastering the macaron foot, for me, has been a fascinating exploration of both scientific principles and artistic intuition. It's a constant reminder that even the most seemingly insignificant details can have a profound impact on the final result. The details are not the details. They make the design.
– Charles Eames. This quote perfectly encapsulates the importance of paying close attention to every step, from the precise weighing of ingredients to the careful monitoring of baking time. The impact of this pursuit extends beyond the kitchen; it underscores the value of dedication and perseverance in any endeavor.
Now, I invite you to take what you've learned and apply it to your own baking journey. Don't be discouraged by initial setbacks – embrace the process, celebrate the small victories, and remember that the pursuit of perfection, in baking and in life, is a rewarding journey in itself. The next time you face a challenge, whether in the kitchen or beyond, channel the spirit of the perfect macaron foot: meticulous attention to detail, unwavering patience, and a dash of joyful experimentation. The results, I promise, will be deliciously rewarding.
Conquer Your Macaron Feet!
Thanks for joining us on this delicious journey to macaron mastery! We hope you gained valuable insights into achieving those perfect, delicate feet. Ready to put your new skills to the test?
- Bake a batch of your favorite macaron flavor using the tips we shared. Let your creativity run wild! Don't be afraid to experiment with new color combinations and fillings.
- Share your macaron creations with us on social media! Use #BakeWithEaseMacarons so we can see your stunning results and celebrate your success together.
- Challenge a friend to a macaron bake-off! Turn your newfound expertise into a fun competition and enjoy the sweet rewards.
Which flavor will you conquer first? Let us know in the comments below!