
Working with Hot Sugar Safely: Essential Tips for Sugar Art

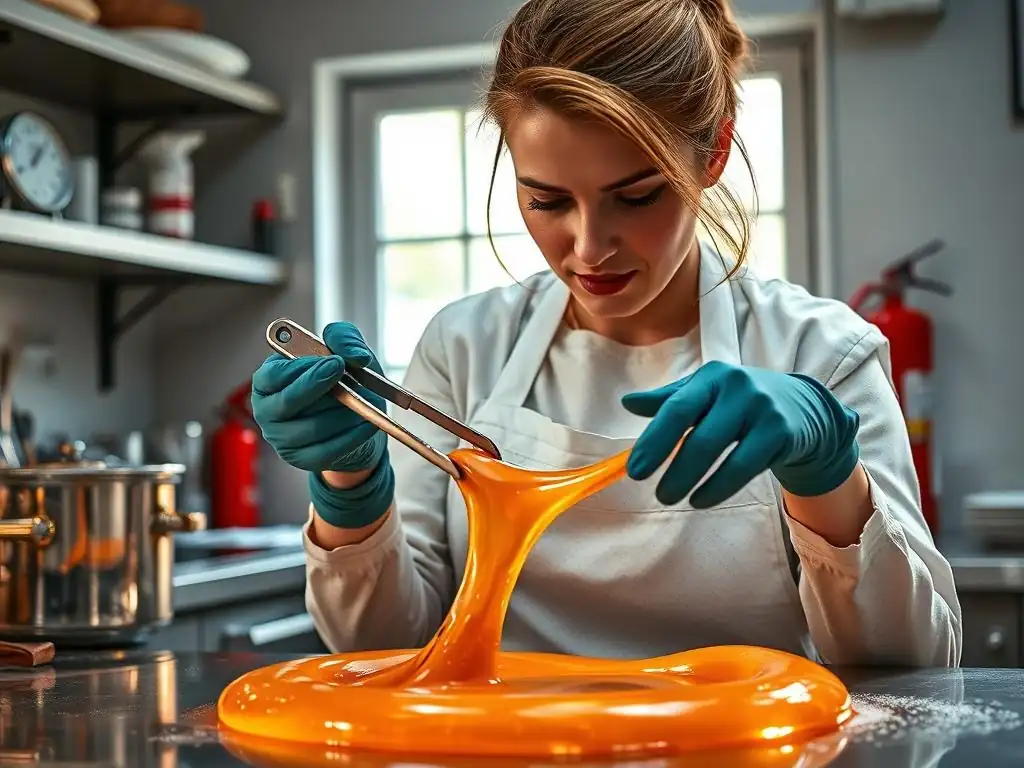
Welcome to BakeWithEase, your trusted guide to the delicious world of baking! Ever wondered how professional pastry chefs create those mesmerizing sugar sculptures? This week, we're diving into the art of working with hot sugar – a technique that can seem intimidating, but is achievable with the right knowledge and precautions. Discover our essential tips for mastering safe hot sugar techniques and unlock a new level of artistry in your kitchen. Ready to turn ordinary sugar into extraordinary creations? Let's get started!
- Introduction to Safe Hot Sugar Techniques for Baking
- Understanding the Risks of Working with Hot Sugar
- Essential Safety Equipment for Hot Sugar Work
- Safe Hot Sugar Handling Techniques: A Step-by-Step Guide
- First Aid for Hot Sugar Burns: What to Do Immediately
- Tips for Preventing Hot Sugar Accidents in Your Baking Projects
- Safe Sugar Art Projects: Ideas for Beginners
- Cleaning Up After Working with Hot Sugar Safely
- Advanced Safe Hot Sugar Techniques: For Experienced Bakers
- Conclusion: Mastering Safe Hot Sugar Techniques
-
Frequently Asked Questions
- What are the most important safety precautions when working with hot sugar?
- What type of equipment is recommended for handling hot sugar?
- What is the best way to cool hot sugar quickly and safely?
- How can I prevent sugar burns while working with hot sugar?
- What are some common mistakes to avoid when making sugar art?
- Final Reflection: The Sweet Science of Safety
- Unlock Your Inner Sugar Artist: Mastering Hot Sugar Safely
Introduction to Safe Hot Sugar Techniques for Baking
Sugar work can transform a simple dessert into a stunning masterpiece. From delicate sugar flowers to intricate caramel cages, the possibilities are vast. However, achieving these beautiful results often involves working with sugar heated to very high temperatures, sometimes exceeding 300°F (about 150°C). At these temperatures, liquid sugar becomes a significant hazard, capable of causing severe burns. Mastering safe hot sugar techniques is not just recommended; it's absolutely crucial for anyone venturing into this area of baking.
Approaching sugar art with a focus on safety allows you to explore creativity without unnecessary risk. By understanding the potential dangers and implementing proper precautions, you can confidently work with hot sugar, turning potential hazards into manageable steps. This guide will walk you through the essential practices and equipment needed to ensure your sugar art projects are both beautiful and safe to create. We'll cover everything from setting up your workspace to handling unexpected situations, ensuring you're well-prepared to practice safe hot sugar techniques.
Why Safety is Paramount When Working with Hot Sugar
Working with hot sugar is inherently dangerous due to the extreme temperatures involved. Sugar heated to the hard crack stage (around 300-310°F or 149-154°C) is significantly hotter than boiling water (212°F or 100°C). Contact with liquid sugar at these temperatures can cause deep, painful burns that penetrate the skin quickly. Unlike water, hot sugar is viscous and sticky, meaning it adheres to the skin, prolonging contact time and increasing the severity of the burn.
The primary concern is preventing serious injury. A third-degree burn from hot sugar can require extensive medical treatment, including skin grafts, and may result in permanent scarring or nerve damage. Even minor splatters can cause painful first or second-degree burns. Prioritizing safe hot sugar techniques ensures that your passion for sugar art remains a joyful and fulfilling pursuit, rather than leading to a painful accident. It's about respecting the material and understanding its potential dangers.
A Baker's Guide to Secure Sugar Art Practices
Developing secure sugar art practices involves a combination of preparation, awareness, and technique. Think of it as building a safety protocol specifically for your baking space when you're working with high-temperature ingredients. This includes having the right safety equipment readily available, understanding the stages of sugar heating, and knowing how to handle the hot liquid safely at every step, from melting to cooling.
Implementing safe hot sugar techniques also extends to your environment. Ensure your workspace is free from clutter, potential tripping hazards, and distractions. Knowing how to react calmly and effectively in the event of a spill or splatter is also a critical part of being prepared. This guide aims to equip you with the knowledge and confidence to approach sugar work with the necessary caution and skill, making safe hot sugar techniques a standard part of your baking repertoire.
Understanding the Risks of Working with Hot Sugar
Working with hot sugar presents unique challenges that differentiate it from handling other hot liquids in the kitchen. Its high temperature and sticky nature make it particularly dangerous. While many bakers are accustomed to the heat of ovens or boiling liquids, the specific properties of molten sugar demand heightened caution and a clear understanding of the risks involved.
Recognizing these risks is the first step toward preventing accidents. It's not about being fearful, but about being informed and prepared. By understanding why hot sugar is dangerous, you can better appreciate the importance of safety measures and techniques designed to mitigate these specific hazards. This knowledge forms the foundation for all safe hot sugar techniques you will employ in your sugar art endeavors.
Burns and Scalds: The Primary Hazards of Hot Sugar
The most significant risk when working with hot sugar is severe burns. At typical working temperatures for pulled or blown sugar (often above 300°F or 150°C), contact with skin causes almost instantaneous damage.
A study on burn injuries indicated that cooking-related accidents are common, and while specific sugar burn statistics aren't always isolated, burns from hot liquids like syrup or candy are known to cause deep tissue damage due to high temperatures and viscosity. For example, contact with liquid at 160°F (71°C) can cause a third-degree burn in just one second, and sugar is handled at nearly double that temperature.
Furthermore, hot sugar tends to stick firmly to skin and clothing, prolonging the exposure and increasing the depth and severity of the burn. Unlike water, which might drip off, molten sugar cools slowly and hardens as it cools, making it difficult to remove quickly without causing further damage. This sticky adherence is a key factor making safe hot sugar techniques absolutely essential to avoid serious injury during any sugar art project.
Preventing Accidents: Preparation is Key
Preventing accidents with hot sugar begins long before you even turn on the heat. Proper preparation of your workspace, equipment, and even your mindset is paramount. Clearing your work area of clutter, ensuring a stable, heat-resistant surface, and gathering all necessary tools beforehand minimizes the need to reach or move awkwardly while handling hot sugar.
Equally important is preparing yourself by wearing appropriate clothing – ideally long sleeves and pants made of natural fibers like cotton, which are less likely to melt onto your skin than synthetics if they come into contact with hot sugar. Having your safety gear, such as heat-resistant gloves and safety glasses, within easy reach is also a crucial part of this preparation. Taking these preliminary steps is a fundamental aspect of practicing safe hot sugar techniques.
Essential Safety Equipment for Hot Sugar Work
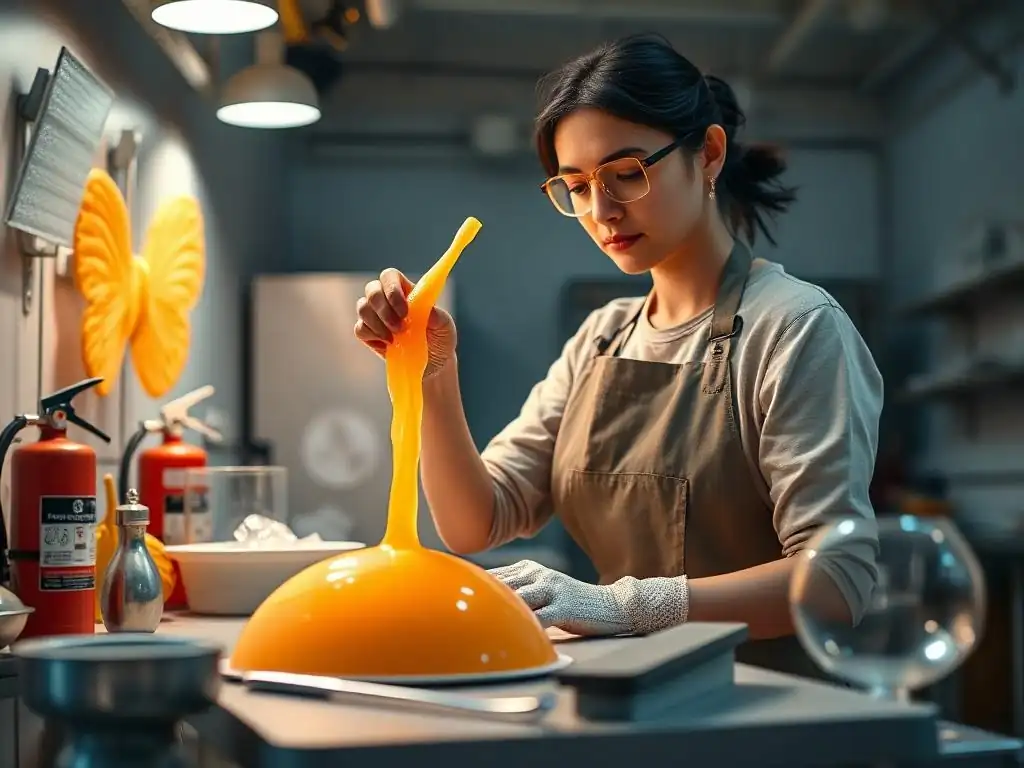
Just as a carpenter needs safety goggles and a construction worker needs a hard hat, a baker working with hot sugar requires specific protective gear. This equipment acts as your first line of defense against the extreme temperatures and sticky nature of molten sugar. Having the right tools on hand isn't an option; it's a necessity for anyone serious about practicing safe hot sugar techniques without risking injury.
Investing in quality safety equipment is a small price to pay for the protection it offers. This gear is designed to withstand high temperatures and protect vulnerable areas like your hands and eyes from direct contact with hot sugar or splatters. Ensure your safety equipment is in good condition and readily accessible before you begin heating any sugar.
Heat-Resistant Gloves: Protecting Your Hands from Burns
Heat-resistant gloves are arguably the most critical piece of safety equipment for sugar work. Standard oven mitts are generally not sufficient, as they are designed for handling hot pans, not direct contact with liquids over 300°F. Look for gloves specifically rated for high temperatures, often made from materials like silicone, aramid fibers, or specialized fabrics. These gloves should allow for enough dexterity to handle tools while providing a robust barrier against heat.
Using heat-resistant gloves significantly reduces the risk of severe burns when pulling, shaping, or handling hot sugar. Even with gloves, caution is still needed, as prolonged contact can eventually transfer heat. However, they provide precious seconds to react and prevent direct skin exposure. Always ensure your gloves are clean and dry before use, as moisture can actually transfer heat more quickly and compromise their protective ability – a key detail for safe hot sugar techniques.
Safety Glasses: Shielding Your Eyes from Splatters
Splattering is an inherent risk when heating sugar, especially if any water or other liquid accidentally comes into contact with the molten sugar. A single drop of hot sugar or syrup in the eye can cause severe damage, potentially leading to permanent vision loss. Standard eyeglasses or sunglasses do not offer adequate protection. You need safety glasses or goggles that provide a secure fit and protection from the sides.
Wearing safety glasses is a non-negotiable step when heating sugar to high temperatures or when working with it in its liquid state. This simple piece of equipment offers vital protection against unpredictable splatters that can occur during boiling, pouring, or even cooling. Making safety glasses a standard part of your setup is a crucial aspect of practicing safe hot sugar techniques.
First Aid Kit: Being Prepared for Minor Injuries
Despite taking every precaution, minor accidents can still happen. Having a well-stocked first aid kit specifically for burns readily accessible is essential. This kit should include items like sterile burn dressings, non-adhesive bandages, antiseptic wipes, and potentially a soothing burn gel (though immediate cooling with water is the primary first aid step). Knowing where your first aid kit is and ensuring it's fully stocked is part of responsible preparation.
Being prepared for minor injuries means you can address small burns or scalds quickly and effectively, minimizing damage and discomfort. While severe burns require immediate medical attention, a readily available first aid kit allows you to handle less serious incidents promptly. This readiness is a vital component of practicing safe hot sugar techniques and ensuring you can handle unexpected situations.
Safe Hot Sugar Handling Techniques: A Step-by-Step Guide
Working with hot sugar involves several distinct phases, each requiring specific safety considerations. From the initial melting process to the final cooling, understanding and implementing safe techniques at every step is crucial. This section breaks down the process, providing a guide to minimize risks and ensure you are practicing safe hot sugar techniques from start to finish.
Following a systematic approach helps to prevent rushed actions or oversights that could lead to accidents. By focusing on safety at each stage, you build confidence and skill, allowing you to create stunning sugar art while keeping yourself safe.
Preparing Your Workspace: Creating a Safe Environment
A safe workspace is the foundation of safe hot sugar techniques. Start by clearing your countertops of any unnecessary items, especially anything flammable or meltable. Ensure your work surface is stable, non-slip, and heat-resistant. Stainless steel, stone, or a thick silicone mat are ideal. Avoid working near edges where the pot could be easily knocked over.
Make sure you have sufficient space to move around comfortably without tripping over cords or bumping into furniture. Having all your tools (spoons, spatulas, molds, etc.) laid out and within easy reach before you start heating the sugar prevents awkward movements while you're handling the hot liquid. A well-organized and clear workspace significantly reduces the likelihood of accidents.
Heating Sugar Safely: Controlling Temperature and Avoiding Splattering
Heating sugar requires patience and attention. Use a heavy-bottomed saucepan, preferably stainless steel, as this distributes heat evenly and reduces the risk of scorching. Never leave heating sugar unattended, even for a moment. Use a reliable candy thermometer clipped securely to the side of the pan to monitor the temperature accurately. Avoid stirring once the sugar begins to boil aggressively, as this can encourage crystallization and also increase the risk of splatters.
If you need to dissolve stubborn sugar crystals on the sides of the pan, use a pastry brush dipped in water to gently wash them down before the sugar reaches high temperatures. Introducing water to very hot sugar can cause violent bubbling and splattering. Heating sugar slowly and monitoring the temperature closely are key aspects of safe hot sugar techniques during the initial phase.
Pouring and Shaping Hot Sugar: Minimizing Risk During Manipulation
Pouring and shaping hot sugar are perhaps the riskiest stages due to direct interaction with the molten material. Always pour sugar onto a heat-resistant surface, like a silicone mat or marble slab. When pouring into molds, do so slowly and steadily from a controlled height to minimize splattering. Wear your heat-resistant gloves and safety glasses during this entire process.
When shaping or pulling sugar, ensure it has cooled slightly to a workable temperature (which is still very hot, often around 180-220°F or 82-104°C, depending on the technique). Work quickly and confidently, but without rushing. Keep a bowl of ice water nearby (but not too close to the hot sugar!) only for cooling tools, not for treating burns – water should be used for burns, but not right next to the hot sugar setup. Minimizing direct contact time and using appropriate tools are vital safe hot sugar techniques here.
Cooling Hot Sugar: Safe Practices for Setting and Solidifying
Once you have poured or shaped your sugar art pieces, they need to cool and solidify. Allow pieces to cool completely on a heat-resistant surface without touching them. Resist the urge to test if they are hard by poking them with ungloved hands. Hot sugar retains heat for a significant amount of time, even after it appears solid on the surface.
Ensure that cooling pieces are placed in a safe location where they won't be accidentally bumped or touched by others, especially children or pets. Once completely cool, the sugar will be hard and brittle. Handling cooled sugar is much safer, but remember that sharp edges can still cause cuts. Patience during the cooling phase is an often overlooked but important part of safe hot sugar techniques.
First Aid for Hot Sugar Burns: What to Do Immediately
Despite the best precautions, accidents can happen. Knowing how to react immediately to a hot sugar burn is crucial. Prompt action can significantly reduce the severity of the injury and minimize long-term damage. Do not panic; a calm and informed response is the most effective way to handle the situation.
Having a plan for first aid is just as important as having the safety equipment itself. Understanding the steps to take for different levels of burns ensures you can provide the necessary immediate care while deciding if further medical attention is needed. This knowledge is a critical component of overall safe hot sugar techniques preparedness.
Recognizing the Severity of a Sugar Burn
Burn severity is typically classified into degrees. A first-degree burn affects only the outer layer of skin, causing redness and pain, similar to a sunburn. A second-degree burn involves the layer beneath, resulting in blisters, redness, swelling, and significant pain. A third-degree burn is the most severe, damaging all layers of skin and potentially underlying tissue; the skin may appear white, charred, or brown, and there may be little or no pain due to nerve damage. Hot sugar is capable of causing second and third-degree burns very quickly.
A fourth-degree burn extends beyond the skin into fat, muscle, or bone. Any burn from hot sugar that is larger than a few inches in diameter, causes blistering, or results in skin that appears white or charred should be considered serious and requires immediate medical evaluation. Even small burns from hot sugar can be deeper than they initially appear due to the temperature and adherence of the sugar.
Immediate Treatment: Cooling and Soothing the Burn
The absolute first step for any hot sugar burn is immediate cooling with cool (not ice-cold) running water. Get the affected area under cool running water for at least 10-20 minutes. This stops the burning process, reduces swelling, and helps alleviate pain. Do not try to peel off the hot sugar; cooling the area will help it harden and potentially detach more easily, or it can be assessed by a medical professional.
After cooling, if the burn is minor (small, only red), gently clean it with mild soap and water and cover it with a sterile, non-adhesive dressing. Avoid applying butter, ice, or home remedies. For burns that are blistering or appear deeper, continue cooling and seek medical attention. Proper immediate cooling is the most vital first aid step for hot sugar burns, reinforcing the importance of preparedness alongside safe hot sugar techniques.
When to Seek Medical Attention
Always seek immediate medical attention for:
- Any burn that is larger than the size of the victim's palm.
- Any burn that appears to be second-degree (blisters) or third-degree (white, charred skin).
- Burns on the face, hands, feet, major joints, or genitals.
- Burns that encircle a limb or body part.
- Burns accompanied by signs of shock (faintness, pale skin, rapid pulse).
- If you are unsure about the severity of the burn.
Contacting a medical professional or going to an emergency room is crucial for serious burns to ensure proper cleaning, assessment for infection risk, and appropriate treatment to promote healing and minimize scarring. Do not hesitate to seek help if you are concerned about a burn, even if you feel you followed all safe hot sugar techniques.
Tips for Preventing Hot Sugar Accidents in Your Baking Projects
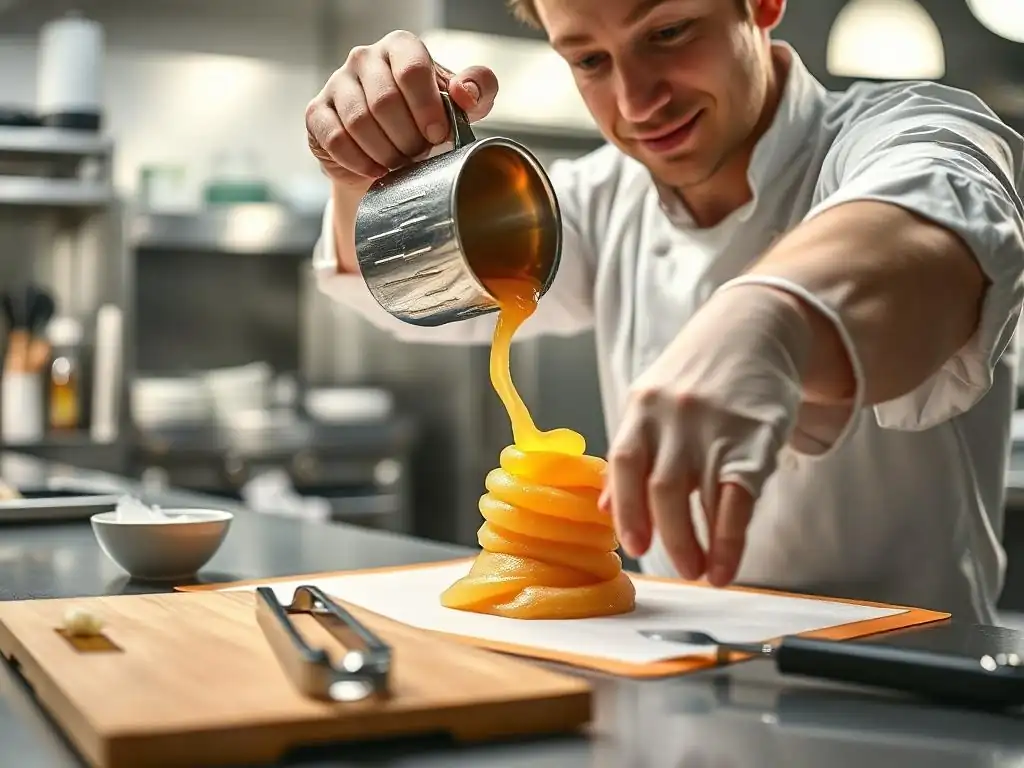
Prevention is always the best approach when working with hot sugar. While safety equipment and knowing first aid are important, focusing on avoiding accidents altogether should be your primary goal. Incorporating these tips into your regular baking routine when working with sugar at high temperatures will significantly reduce your risk.
These tips are simple yet effective strategies that reinforce good habits and create a safer working environment. Making them second nature is key to consistently practicing safe hot sugar techniques without incident.
Always Maintain Focus and Avoid Distractions
Working with hot sugar requires your full attention. Avoid distractions such as talking on the phone, watching television, or engaging in conversations that take your focus away from the task at hand. A moment of inattention is all it takes for a spill or splatter to occur.
Ensure you have dedicated enough time for the project so you don't feel rushed. Rushing can lead to careless mistakes. Treat working with hot sugar with the respect it demands, maintaining focus solely on the process. This concentrated effort is a fundamental aspect of practicing safe hot sugar techniques.
Work in a Well-Ventilated Area
Heating sugar, especially isomalt, can produce fumes. While not typically harmful in small amounts, working in a well-ventilated area helps to disperse any vapors and keeps the air clear. Open a window, turn on a vent hood, or use a fan (directed away from your workspace, so it doesn't disturb the hot sugar or tools).
Good ventilation also helps to manage the heat in your kitchen, making the environment more comfortable and reducing the likelihood of feeling rushed or uncomfortable due to excessive warmth. A comfortable and well-ventilated space contributes to a focused and safe working environment, supporting safe hot sugar techniques.
Keep Children and Pets Away from the Work Area
This is a non-negotiable rule. Children and pets are unpredictable and unaware of the dangers posed by hot sugar. A sudden bump, a curious reach, or a pet weaving underfoot could lead to a catastrophic accident. Ensure they are in a separate, secure area of the house before you begin heating sugar and until all sugar pieces are completely cooled and safely stored.
Clearly communicate to other adults in the household that you are working with hot sugar and that the kitchen is a hazardous zone during this time. Establishing a strict "no-go" zone is essential for preventing accidents involving vulnerable family members, making it a critical part of practicing safe hot sugar techniques in a home environment.
Practice Makes Perfect: Building Confidence Through Safe Repetition
Like any skill, working with hot sugar becomes easier and safer with practice. Start with small batches and simple projects before attempting more complex designs or larger volumes. Each time you work with hot sugar, you build muscle memory and become more comfortable with the handling techniques, all while reinforcing safe habits.
Gradually increase the complexity as your confidence and skill grow. Review safe hot sugar techniques before each session, no matter how experienced you become. Repetition, combined with a constant awareness of safety protocols, is the path to mastering sugar art safely.
Safe Sugar Art Projects: Ideas for Beginners
Starting with simpler projects is an excellent way to build confidence and practice safe hot sugar techniques without the pressure of intricate manipulation. These beginner-friendly ideas focus on techniques that minimize direct handling of very hot sugar, allowing you to get comfortable with the material and the safety protocols.
These projects are not only safer entry points but also yield beautiful results that can enhance your cakes and desserts. They provide valuable learning opportunities regarding temperature control, pouring, and cooling, all within a lower-risk context.
Simple Sugar Decorations: Start with Basic Shapes
One of the easiest ways to start is by pouring hot sugar onto a silicone mat to create simple shapes. You can free-pour abstract designs or use metal cookie cutters placed on the mat (ensure they are sturdy and won't tip). Allow the sugar to cool completely before attempting to move the shapes.
- Task: Pour circles or squares.
- Task: Experiment with free-form drizzles.
- Task: Use cookie cutters on a mat.
This allows you to practice heating sugar to the hard crack stage and safely pouring it without needing to touch or manipulate it while it's molten. It's a foundational exercise in safe hot sugar techniques.
Isomalt Casting: A Safer Alternative to Traditional Hot Sugar
Isomalt is a sugar substitute that is often preferred by professional sugar artists. It melts clearer than granulated sugar, is less prone to crystallization, and, significantly, is less prone to yellowing at high temperatures. While still requiring high heat, some find it slightly more forgiving to work with for casting compared to sucrose.
Isomalt can be melted in the microwave (using a microwave-safe container with a handle) or on the stovetop. This allows for controlled heating and pouring into silicone molds specifically designed for candy or sugar work. Always use heat-resistant gloves and safety glasses. Casting into molds minimizes direct contact with the hot liquid, making it an excellent method for practicing safe hot sugar techniques for beginners.
Sugar Glass Shards for Cake Decoration
Creating sugar glass shards is a simple and visually striking technique. Heat sugar to the hard crack stage and carefully pour a thin layer onto a silicone mat or a baking sheet lined with parchment paper. You can tint the sugar beforehand with gel food coloring designed for candy making.
Once the sugar is completely cool and hard, you can break it into shards of various sizes. This technique involves only heating and pouring, with no direct manipulation of the hot sugar. Breaking the cooled sugar is safe, though caution is needed with sharp edges. This is a straightforward application of safe hot sugar techniques.
Simple Caramel Cage
A caramel cage involves drizzling hot caramel (sugar heated to an amber color) over an inverted, greased bowl or around a cylindrical object covered in parchment paper. Heat sugar (sometimes with a little water or corn syrup) until it reaches a rich amber color, around 320-350°F (160-175°C), depending on desired color. Let it cool very slightly to a thicker, drizzling consistency – it's still extremely hot!
Using a spoon or fork, carefully drizzle the caramel in a random pattern over the prepared form. The caramel hardens quickly. Once completely cool, gently lift the sugar cage off the form. This technique requires careful pouring and handling the form rather than the hot sugar directly, making it a good intermediate step in practicing safe hot sugar techniques.
Cleaning Up After Working with Hot Sugar Safely
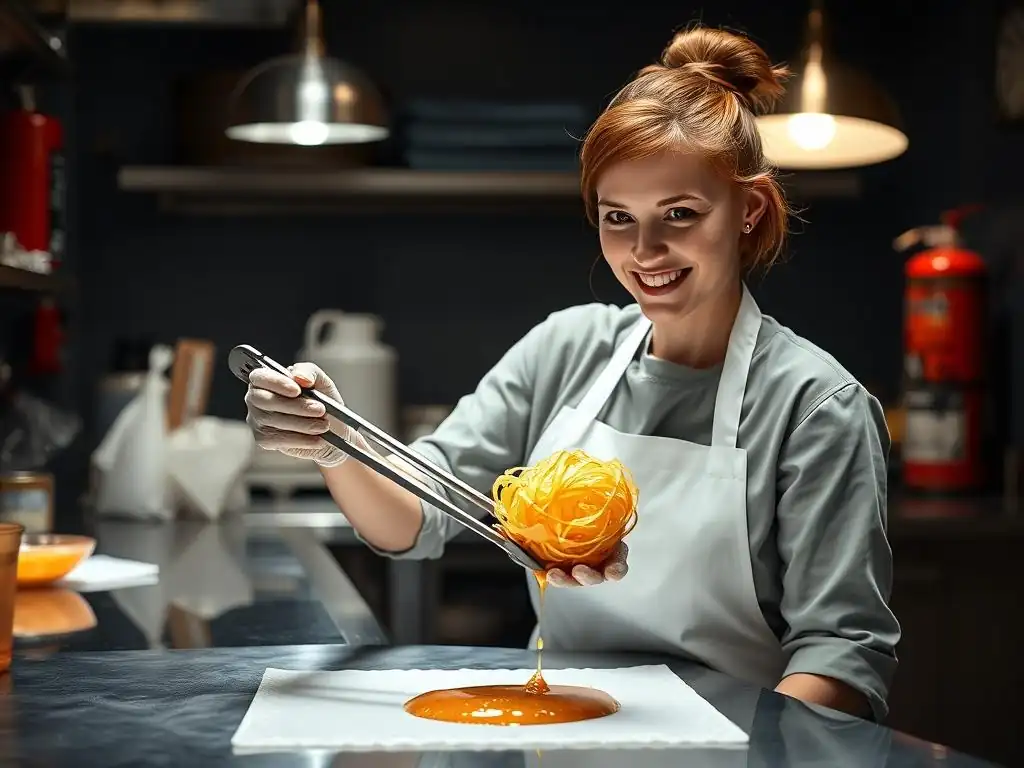
Cleaning up after sugar work can be challenging because hardened sugar is difficult to remove. Trying to scrape or chip it off can damage your tools and surfaces. Furthermore, handling tools that have been in contact with hot sugar requires continued caution until they are completely cool. Safe cleanup is the final, but equally important, step in practicing safe hot sugar techniques.
Knowing the right methods for dissolving and disposing of sugar residue prevents frustration and potential injury from sharp sugar edges or still-warm tools. A systematic approach to cleanup ensures that you safely return your workspace and equipment to a clean state.
Dissolving and Disposing of Leftover Hot Sugar
Never pour leftover hot sugar down the drain, as it will harden and clog pipes. The safest way to deal with leftover sugar in the pot or on tools is to dissolve it in water. Fill the pot used for heating the sugar with hot water and place it back on low heat on the stove. The residual heat will help dissolve the hardened sugar. For tools, place them in a container of hot water to soak.
Once the sugar has completely dissolved, you can safely pour the sugary water down the drain. This method avoids creating solid waste that could damage plumbing. Dissolving allows for easy and safe disposal, a key part of concluding your safe hot sugar techniques session.
Cleaning Tools and Equipment Safely
Allow all tools that came into contact with hot sugar to cool down before attempting to clean them, unless you are dissolving sugar off them as described above. Once cooled, any hardened sugar can usually be dissolved by soaking in hot water. For stubborn bits, you might need to return the tool to the pot of dissolving sugar water.
Be cautious of any sharp sugar edges on cooled pieces or tools before they are dissolved. Use appropriate brushes or sponges once the sugar has softened or dissolved. Ensure all equipment, including your heat-resistant gloves and safety glasses, is cleaned according to the manufacturer's instructions and stored properly for future use. Thorough and safe cleaning is the final step in implementing safe hot sugar techniques.
Advanced Safe Hot Sugar Techniques: For Experienced Bakers
Once you have mastered the basics and feel confident in your safe hot sugar techniques, you might want to explore more advanced sugar art forms. These techniques often involve working with larger quantities of sugar or manipulating the sugar while it is still quite hot and pliable. They require a higher level of skill, speed, and unwavering attention to safety protocols.
Attempting advanced techniques before you are ready can significantly increase the risk of injury. These methods build upon the foundational safe hot sugar techniques learned through simpler projects. Always ensure you are wearing all appropriate safety gear and have a clear, prepared workspace.
Working with Larger Volumes of Hot Sugar Safely
Advanced sugar art, like creating large showpieces, often requires melting larger quantities of sugar. Working with more hot liquid increases the potential hazard if a spill occurs. Use a larger, heavy-bottomed pot that is appropriate for the volume of sugar, ensuring it is stable on the stove.
When pouring larger quantities, plan your route carefully and ensure your receiving surface (e.g., a large silicone mat or multiple mats) is adequately prepared and positioned. You might need assistance from another person who is also familiar with safe hot sugar techniques to manage larger pours or manipulations, ensuring clear communication is vital. Handling increased volume requires scaled-up safety awareness.
Incorporating Color and Flavor Safely
Adding color and flavor to hot sugar must be done carefully. Use gel or powder food coloring specifically designed for candy making, as liquid colors can introduce too much water and cause splattering. Add color before the sugar reaches very high temperatures (e.g., when it's between 250-280°F or 120-138°C) or incorporate powdered color into pulled sugar when it's cooled slightly but still pliable.
Flavors, typically in concentrated oil-based or candy-specific liquid forms, should be added after the sugar is removed from the heat and has cooled slightly. Adding flavorings to extremely hot sugar can cause them to burn off or react violently. Always add carefully and stir cautiously. Knowing when to add these elements safely is part of advanced safe hot sugar techniques.
Creating a Pulled Sugar Ribbon
Pulled sugar involves manipulating sugar that has been heated to the hard ball or soft crack stage (around 250-290°F or 120-143°C) and then cooled slightly on a silicone mat until it is pliable but still very hot. Wearing heavy-duty heat-resistant gloves (sometimes layered with cotton gloves underneath for comfort and sweat absorption), the sugar is repeatedly stretched, folded, and pulled to incorporate air and create a satiny sheen.
This technique requires direct, albeit gloved, contact with hot sugar for an extended period. Speed and confidence are needed to work the sugar before it cools too much, but safety remains paramount. Ensuring your gloves provide adequate thermal protection and having a heat lamp setup to keep the sugar pliable (away from your direct workspace) are part of the safe hot sugar techniques for pulling.
Blowing Sugar Spheres
Blowing sugar involves heating sugar to the hard crack stage (around 300-310°F or 149-154°C), cooling it slightly until pliable, and then using a special sugar pump or blowing tool to inflate it into delicate, hollow shapes like spheres. This is perhaps one of the most advanced and risky techniques, as the sugar is worked while extremely hot and thin.
This technique absolutely requires high-quality heat-resistant gloves and safety glasses. Working quickly and skillfully is necessary to prevent the sugar from cooling and hardening before the shape is formed. The risk of bursting hot sugar is present, making precise temperature control and careful handling essential. Mastering this technique requires extensive practice and unwavering adherence to safe hot sugar techniques.
Conclusion: Mastering Safe Hot Sugar Techniques
Working with hot sugar to create beautiful edible art is a rewarding skill, but it comes with significant risks that must be respected. By understanding the dangers, preparing your workspace, using appropriate safety equipment, and practicing safe handling techniques at every stage, you can minimize the potential for accidents.
Remember that even experienced sugar artists maintain a high level of caution. Safety should never be an afterthought but an integral part of your process from planning to cleanup.
Prioritizing Safety for Beautiful and Delicious Sugar Art
Ultimately, prioritizing safe hot sugar techniques allows you to explore the incredible possibilities of sugar art without fear of serious injury. The beauty of a pulled sugar flower or the elegance of a caramel cage is best appreciated when you know it was created safely.
By consistently applying the principles discussed – preparation, protection, careful handling, and knowing how to respond to emergencies – you can confidently create stunning and delicious sugar art. Embrace safe hot sugar techniques as your foundation, and let your creativity flourish responsibly.
Frequently Asked Questions
What are the most important safety precautions when working with hot sugar?
The most important precautions include wearing protective gear such as heat-resistant gloves and long sleeves, working in a well-ventilated area, and having a bowl of ice water nearby for burns.
What type of equipment is recommended for handling hot sugar?
Using tools like silicone mats, stainless steel pots with heavy bottoms, and heat-resistant spatulas is highly recommended. Avoid using plastic or wooden utensils, as they can melt or burn.
What is the best way to cool hot sugar quickly and safely?
The safest method is to pour the hot sugar onto a silicone mat to spread it thinly, allowing it to cool more rapidly. Avoid submerging it in cold water as this can cause dangerous splattering.
How can I prevent sugar burns while working with hot sugar?
Maintain a safe distance from the hot sugar, avoid splashing, and always pour sugar away from your body. In case of a burn, immediately immerse the affected area in ice water for at least 15 minutes.
What are some common mistakes to avoid when making sugar art?
Common mistakes include overcrowding the pan, not monitoring the temperature properly (using a candy thermometer is crucial), and rushing the cooling process, which can lead to cracking or shattering.
Final Reflection: The Sweet Science of Safety
Working with hot sugar demands respect, but the rewards of mastering safe techniques are immeasurable. The art of sugar crafting, with its delicate spun threads and shimmering sculptures, is undeniably captivating. However, the inherent dangers of molten sugar cannot be overlooked; a single lapse in concentration can lead to severe burns. This article has highlighted the crucial steps—from proper equipment and attire to understanding the nuances of sugar's behavior—necessary to navigate this potentially hazardous medium safely.
The impact of safe sugar handling extends beyond the individual artist. It's about fostering a culture of responsible practice within the wider sugar art community. Sharing knowledge and emphasizing preventative measures is vital to preventing accidents and ensuring the continued enjoyment of this beautiful craft. The price of safety is eternal vigilance,
a sentiment that rings especially true when working with such a volatile material. My own journey into sugar art has been punctuated by both exhilarating successes and humbling near-misses, reinforcing the importance of the precautions discussed here.
Now, it's your turn. Consider the information presented, reflect on your own approach to safety in your creative endeavors, and commit to prioritizing precaution. Don't let the allure of the craft overshadow the need for vigilance. Embrace the sweet science of safety, and let your passion for sugar art flourish without compromise. The beauty of your creations will be all the more rewarding knowing you've achieved them safely and responsibly.
Unlock Your Inner Sugar Artist: Mastering Hot Sugar Safely
Thanks for joining us on this journey into the sweet world of sugar art! We hope you gained valuable insights into working safely with hot sugar. Now it's time to put your newfound knowledge into practice.
- Try a simple sugar flower: Start small! Pick a beginner-friendly project to build your confidence and skills. This is the perfect opportunity to practice your new safety techniques.
- Share your creations: Show off your sugar artistry on social media and inspire others! Use #BakeWithEaseSugarArt to connect with our community.
- Experiment with different sugar types: Explore the nuances of different sugars (granulated, caster, powdered) and see how they affect the texture and consistency of your sugar work.
Ready to transform your kitchen into a sugar art studio? What's the first sugar art project you'll tackle?