
Elegant Plated Desserts: The BakeWithEase Approach

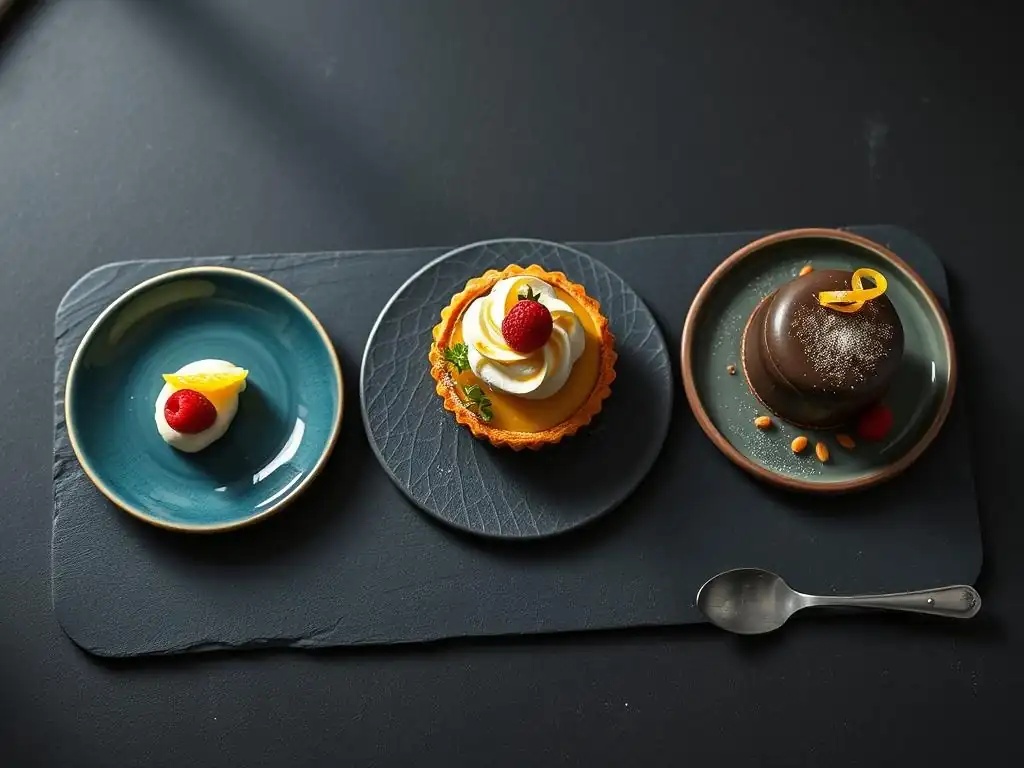
Welcome to BakeWithEase, your haven for all things baking! Ever wondered how to transform a simple dessert into a breathtaking masterpiece? This guide unveils the secrets to elegant dessert plating techniques, taking your creations from delicious to dazzling. Prepare to elevate your presentation skills and impress your guests – let's explore the art of plated desserts together, and discover how even the simplest treats can become unforgettable experiences.
- Mastering Elegant Dessert Plating Techniques with BakeWithEase
- Understanding the Fundamentals of Dessert Plating
- BakeWithEase's Guide to Elegant Dessert Plating Techniques
- Elevating Your Desserts: BakeWithEase's Plating Inspiration
- Advanced Dessert Plating Tips and Tricks from BakeWithEase
- Common Dessert Plating Mistakes and How to Avoid Them
- Maintaining Freshness and Stability in Plated Desserts
- Conclusion: Transforming Your Desserts with Elegant Plating Techniques
-
Frequently Asked Questions
- How important is plate selection when practicing elegant dessert plating techniques?
- What are some simple techniques BakeWithEase recommends for adding height to a plated dessert?
- How can I use sauces effectively to enhance the appearance of my plated dessert?
- What are some common mistakes to avoid when plating desserts elegantly?
- Where can I find inspiration for elegant dessert plating techniques?
- Final Reflection: The Art and Soul of Elegant Dessert Plating
- Unleash Your Inner Pastry Chef!
Mastering Elegant Dessert Plating Techniques with BakeWithEase
Welcome to the world of elegant dessert plating techniques! At BakeWithEase, we believe that presentation is just as important as taste, transforming a delicious dessert into an unforgettable experience. Mastering the art of plating allows you to showcase your baking skills in the most beautiful way possible, delighting the eyes before the first bite. Whether you're a home baker looking to impress guests or aspiring to create restaurant-quality finishes, understanding these techniques is key.
This guide will walk you through the fundamentals and advanced strategies of creating visually stunning plated desserts. We'll explore essential tools, key ingredients, and step-by-step techniques used by professionals. By learning these elegant dessert plating techniques, you'll gain the confidence to elevate your sweet creations from simple treats to edible works of art, making every dessert moment truly special.
Understanding the Fundamentals of Dessert Plating
The Importance of Visual Appeal in Dessert Presentation
The first impression of any dish, especially a dessert, is undeniably visual. Long before your taste buds are engaged, your eyes are evaluating the plate. Studies suggest that the visual presentation of food can significantly influence perceived flavor; a well-plated dessert often tastes better to the diner because their expectations have been elevated. It's estimated that up to 80% of a diner's initial perception of a dish is based purely on its appearance.
This strong connection between sight and taste highlights why elegant dessert plating techniques are crucial. A beautifully arranged dessert signals care, skill, and attention to detail. It tells a story about the components and invites the diner to explore. Consider a simple chocolate cake slice versus a deconstructed version with artfully placed elements – the latter creates intrigue and elevates the perceived value and sophistication, proving that visual appeal is not just aesthetics but an integral part of the culinary experience.
Essential Tools for Elegant Dessert Plating
Having the right tools makes all the difference when aiming for elegant dessert plating techniques. You don't need a professional kitchen's worth of gadgets, but a few key items can dramatically improve your results. An offset spatula, available for roughly $8-$20 depending on size, is invaluable for spreading sauces smoothly or lifting delicate components. Squeeze bottles, often found in sets costing around $5-$15, are perfect for precise application of sauces or coulis in dots, lines, or swirls.
Other useful tools include plating spoons with different shaped tips ($10-$30), which allow for controlled swooshes of sauce, and ring molds ($15-$40 for a set of various sizes) for building neat towers or cutting perfect shapes. Pastry brushes, stencils, and fine-mesh sieves for dusting powdered sugar or cocoa are also helpful. Investing in a few quality tools tailored for elegant dessert plating techniques will significantly enhance your ability to execute intricate designs and achieve polished finishes.
Key Ingredients and Textures for Plated Desserts
Beyond the main dessert component, selecting the right supporting ingredients and focusing on texture contrast is vital for successful elegant dessert plating techniques. Think about elements that add color, crunch, creaminess, or acidity. A vibrant raspberry coulis, easily made by blending about 200g of raspberries with 50g of sugar and a splash of lemon juice, provides beautiful color and a tart counterpoint. Chocolate soil or crumble, often made from flour, sugar, butter, and cocoa, offers a crucial crunchy texture against softer elements like mousse or cream.
Incorporating ingredients that provide textural variety is paramount. Consider adding crisp tuiles (thin cookies), delicate meringue kisses, crunchy candied nuts (approx. $5-$10 for a small batch), or smooth ganache. Fresh fruit (like berries, approx. $3-$6 per punnet), edible flowers (approx. $5-$10 for a small punnet), or microgreens add pops of color and freshness. A well-executed plated dessert should offer a delightful interplay of textures – perhaps a creamy panna cotta with a crisp cookie and a tart berry sauce – creating a more dynamic and enjoyable eating experience.
BakeWithEase's Guide to Elegant Dessert Plating Techniques
Technique 1: The Art of the Sauce Swirl
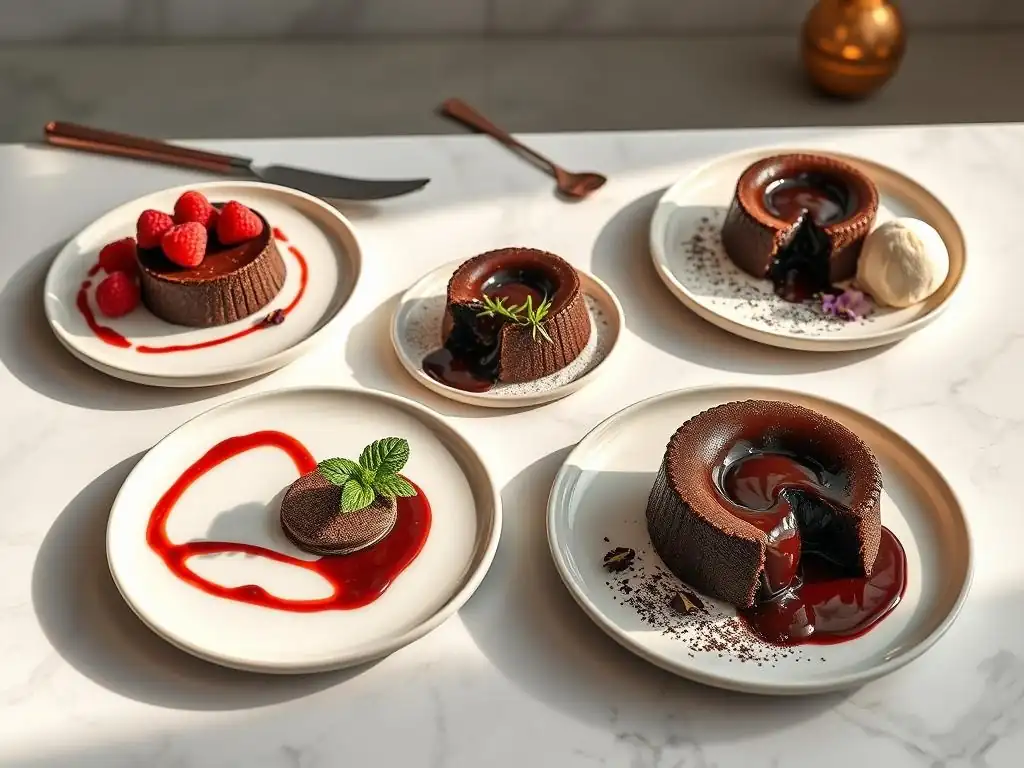
The sauce swirl is a classic elegant dessert plating technique that adds movement, color, and flavor to your plate. It's a simple yet effective way to elevate a dessert's visual appeal. The key is to use a sauce with the right consistency – not too thin that it spreads uncontrollably, and not too thick that it's hard to maneuver. Common choices include fruit coulis, chocolate sauce, or caramel sauce.
To create a swirl, you can use a squeeze bottle or a plating spoon. With a squeeze bottle, apply dots or lines of sauce and then drag a skewer or the tip of an offset spatula through them. With a plating spoon, scoop a small amount of sauce and drag the bottom of the spoon across the plate in a sweeping motion. Practice on a spare plate first to get the feel for the right amount of sauce and pressure needed for a clean, elegant swirl.
Creating Visually Stunning Sauce Swirls
Visually stunning sauce swirls go beyond just a basic swoosh. You can create intricate patterns like concentric circles dragged outwards, parallel lines with a single drag through them, or abstract splatters for a more modern look. Using two different colored sauces can also add complexity and visual interest. For example, a white vanilla sauce and a dark chocolate sauce can be swirled together for a marbled effect.
The placement of the swirl matters too. It can serve as the base for your main dessert component, frame it, or be placed off-center to draw the eye across the plate. Remember to keep the edges clean and avoid drips or smudges, which can instantly detract from the elegance. A well-executed sauce swirl demonstrates precision and adds a professional touch to your elegant dessert plating techniques.
Sauce Consistency for Optimal Plating
Achieving the perfect sauce consistency is critical for elegant dessert plating techniques. Sauces that are too thin will run and lose their shape, creating a messy look. Sauces that are too thick will be difficult to swirl smoothly and may clump. The ideal consistency should be thick enough to hold a shape briefly but fluid enough to be easily dragged or squeezed.
You can adjust sauce consistency by reducing it over heat to thicken it (for fruit purees or caramel) or by adding a small amount of liquid (like water, milk, or juice) to thin it out. For chocolate ganache used for plating, ensuring it's warm enough to flow but not hot is key. Experiment with small batches to find the right balance before plating your final desserts. A sauce that holds its form just long enough is perfect for executing clean, elegant lines and swirls.
Technique 2: Utilizing Height and Dimension
Adding height and dimension is a fundamental aspect of creating visually dynamic and elegant plated desserts. Flat desserts can appear uninteresting, while those with varying levels draw the eye and add a sense of drama and sophistication. Think of a skyline on a plate – different heights create visual interest and guide the viewer's gaze.
Building height can involve stacking components, using supporting structures, or incorporating elements that naturally stand upright. A common method is layering different textures and flavors, such as placing a quenelle of mousse atop a financier base, then adding a crisp tuile standing vertically. Ring molds are excellent tools for building neat, multi-layered towers of mousse, cake, and fruit, often reaching 2-4 inches in height for a striking effect.
Building Layers for Dramatic Effect
Creating layers isn't just about stacking; it's about building a story on the plate. Each layer can introduce a new texture, color, or flavor, making the dessert more complex and exciting. Consider a deconstructed tiramisu: a layer of coffee jelly, topped with a quenelle of mascarpone cream, finished with cocoa soil and a ladyfinger shard.
Using ring molds allows for precise layering. You can pack in cake crumbs, press down a layer of compote, pipe in mousse, and chill until set. Once the mold is removed, you have a perfectly formed tower ready for finishing touches. This technique ensures clean lines and defined layers, which are hallmarks of elegant dessert plating techniques.
Incorporating Vertical Elements in Plated Desserts
Vertical elements break the horizontal plane of the plate and add an immediate sense of height and elegance. These can be delicate edible components like thin chocolate shards, crisp cookie sticks, tall meringue kisses, or even carefully placed fruit slices. A single vertical element can transform a dessert, providing a focal point and adding architectural interest.
For instance, a simple panna cotta becomes more sophisticated with a tall, curved chocolate shard or a fan of thinly sliced caramelized apple standing upright. These elements should be sturdy enough to stand on their own but delicate enough to be easily eaten with the dessert. When incorporating vertical elements, consider their placement in relation to the main components and ensure they complement the overall composition and flavor profile.
Technique 3: Garnishing for Flavor and Aesthetics
Garnishes are the finishing touches that bring a plated dessert together, adding pops of color, bursts of flavor, and crucial textural contrast. They are not merely decorative; effective garnishes are integral to the dessert's overall taste and visual harmony. Choosing the right garnish involves considering how it complements the main dessert in terms of flavor, color, and texture.
Common garnishes include fresh berries (adding acidity and vibrant color), mint sprigs (providing freshness and green contrast), cocoa or powdered sugar dustings (simple yet effective for visual softness or contrast), chocolate shavings or curls (adding chocolate flavor and texture), and candied nuts or seeds (for crunch). A few strategically placed elements are far more effective than a cluttered plate. For example, three raspberries placed off-center can add more visual appeal and flavor balance than scattering a dozen randomly.
Choosing the Right Garnishes
Selecting the appropriate garnishes is key to successful elegant dessert plating techniques. The garnish should enhance, not overpower, the main dessert. Flavor compatibility is paramount – mint pairs well with chocolate or fruit, while citrus zest brightens creamy desserts. Consider the color palette; vibrant garnishes like edible flowers or berry slices can add necessary contrast to monochromatic desserts.
Texture is another crucial factor. If your dessert is smooth and creamy, add a crunchy garnish like a cookie crumble or candied nuts. If it's already crunchy, perhaps a smooth sauce or a dollop of cream is needed. Think about the overall composition and choose garnishes that fill visual gaps, add height, or provide a focal point, ensuring they contribute positively to both the look and the taste of the dessert.
Garnishing Placement and Balance
The placement of garnishes is an art form in itself. Avoid scattering garnishes randomly across the plate; instead, place them deliberately to guide the eye and create balance. Consider the rule of thirds (discussed later) for placing key garnishes. Often, placing garnishes in clusters or along lines of sauce works well.
Balance is achieved by distributing visual weight across the plate. If your main dessert component is heavy on one side, a few garnishes on the opposite side can balance the composition. Don't use too many different types of garnishes on one plate – typically 2-3 types are sufficient to add interest without causing clutter. Each garnish should have a purpose, contributing to either flavor, texture, or visual appeal, ensuring your elegant dessert plating techniques result in a harmonious final product.
Elevating Your Desserts: BakeWithEase's Plating Inspiration
Inspiration 1: Deconstructed Black Forest Gateau Plating
Deconstructing a classic dessert like the Black Forest Gateau is a popular way to employ elegant dessert plating techniques, offering a modern twist on a beloved favorite. Instead of serving a traditional slice, you present the key components – chocolate cake, whipped cream, cherries, and often kirsch – as separate, artfully arranged elements on the plate. This allows for showcasing different textures and temperatures while highlighting the quality of individual ingredients.
A deconstructed Black Forest might feature a base of chocolate soil (made from crumbled chocolate cake or cookie), topped with a quenelle of smooth chocolate mousse or ganache (instead of a dense cake layer). Alongside, you could place a pile of kirsch-soaked cherry compote or fresh cherries, a dollop or quenelle of stabilized vanilla or kirsch-flavored whipped cream, and perhaps a crisp chocolate shard or tuile for height and texture. This approach invites the diner to combine elements in each bite, creating a unique experience.
Step-by-Step Guide to Deconstructing Black Forest Gateau
To deconstruct a Black Forest Gateau, first prepare your components. This could include:
- Chocolate Element: Bake a thin chocolate cake layer to crumble into soil, or prepare a rich chocolate mousse or ganache.
- Cherry Element: Make a cherry compote by simmering cherries with a little sugar and kirsch, or simply use fresh or preserved cherries tossed in kirsch.
- Cream Element: Prepare a stabilized whipped cream (perhaps with a touch of gelatin or cornstarch for stability) or a mascarpone cream.
- Texture/Height: Make chocolate shards from tempered chocolate or bake thin chocolate tuiles.
On the plate, start with a base – perhaps a scatter of chocolate soil or a swoosh of cherry coulis. Place a quenelle of mousse or cream artfully on top or beside the base. Arrange the cherries next to it. Add the crisp element (shard or tuile) vertically or leaning against another component. Finish with a dusting of cocoa powder or a few mint leaves.
Plating Ideas for a Modern Twist on Black Forest Gateau
Beyond the basic arrangement, several plating ideas can add a modern flair to your deconstructed Black Forest Gateau using elegant dessert plating techniques. Consider using a large plate to allow for ample negative space, making the individual components stand out. You could use a ring mold to create a neat tower of mousse and cherry compote, then scatter chocolate soil around it.
Another approach is a linear arrangement, with elements placed in a line across the plate. Play with temperatures – a warm cherry compote served alongside chilled mousse and cream can add an extra dimension. Use contrasting colors effectively: the deep red of the cherries, the rich brown of the chocolate, and the crisp white of the cream offer a beautiful palette to work with. A drizzle of cherry or chocolate sauce can tie the elements together visually.
Inspiration 2: Seasonal Fruit Plating Techniques
Utilizing seasonal fruit is one of the most effective and appealing elegant dessert plating techniques. Fresh, in-season fruit offers vibrant colors, peak flavors, and natural beauty that require minimal manipulation to look stunning. Plating with seasonal fruit connects the dessert to the time of year and ensures the best possible taste experience.
Think about the bounty each season provides. Summer brings bright berries (approx. $4-$7 per punnet), peaches, and apricots; Autumn offers apples, pears, and figs (approx. $2-$5 per pound/fig); Winter features citrus and pomegranates (approx. $1-$3 per fruit); and Spring provides rhubarb and strawberries (approx. $4-$6 per pound/punnet). Incorporating these into your plating, whether fresh, roasted, pureed, or as a compote, adds natural elegance and flavor.
Showcasing Seasonal Flavors Through Plating
The goal when plating with seasonal fruit is to make the fruit the star. This means ensuring the fruit is prepared simply to highlight its natural flavor and beauty. Slices of caramelized apple fanned out, a cluster of fresh raspberries nestled beside a cream element, or vibrant segments of citrus arranged in a circular pattern can all be incredibly effective.
Consider the texture of the fruit – crisp apple slices, soft roasted peaches, juicy berries. Combine these textures with other dessert components. A simple vanilla panna cotta becomes a celebration of summer when topped with a vibrant strawberry compote and a few fresh berries. An autumn tart is enhanced by elegantly fanned pear slices. Elegant dessert plating techniques emphasize the quality and freshness of the seasonal ingredients.
Color Palettes for Seasonal Dessert Presentation
Seasonal fruits offer fantastic color palettes to inspire your plating. Leverage these natural colors to create visually harmonious or contrasting compositions. Summer fruits like strawberries, blueberries, and raspberries offer a palette of reds, blues, and purples that pair beautifully with white creams or light-colored desserts. Autumn fruits like apples and pears provide warm yellows, reds, and greens, while figs offer deep purples that contrast well with lighter elements.
Winter citrus brings bright oranges and yellows. Consider how these colors interact on the plate. A dark chocolate dessert gains vibrancy from bright red berries or orange segments. A light fruit tart can be grounded by darker elements like a chocolate drizzle or cocoa soil. Using the natural colors of seasonal ingredients is a simple yet powerful way to create beautiful and elegant plated desserts.
Inspiration 3: Chocolate Dessert Plating Masterclass
Chocolate is a versatile ingredient that lends itself beautifully to elegant dessert plating techniques due to its rich color and ability to take many forms – from smooth ganache and airy mousse to crisp shards and delicate curls. A chocolate dessert masterclass in plating involves showcasing these various textures and forms on a single plate.
Working with chocolate requires understanding its properties, especially tempering, which is essential for creating shiny, crisp elements like shards or decorative shapes. Tempering dark chocolate typically involves melting it to around 45-50°C, cooling it while agitating to about 28-29°C, and then warming it slightly to 31-32°C for use. Creating elements like chocolate soil, chocolate glaze, or chocolate curls (simply scrape a vegetable peeler across a block of tempered chocolate) provides a range of textures and visual interest.
Working with Chocolate Textures and Shapes
Combining different chocolate textures on a plate is a key aspect of elegant chocolate dessert plating. Imagine a dessert featuring a smooth dark chocolate mousse, a scatter of crunchy chocolate soil, a delicate curved chocolate shard, and a drizzle of shiny chocolate ganache. This provides a delightful textural journey for the diner.
Shapes also play a role. Geometric shapes cut from tempered chocolate, delicate filigree designs, or simple curls and shavings can add visual complexity. Using molds to create specific chocolate forms, like small spheres or rectangles, allows for precise placement and architectural structure on the plate. The contrast between smooth, matte, and shiny chocolate finishes also adds visual appeal.
Creating Elegant Chocolate Dessert Compositions
Creating an elegant chocolate dessert composition involves arranging these varied chocolate elements harmoniously on the plate. Consider a monochromatic scheme using different shades of brown and varying textures. A central element, like a scoop of chocolate ice cream or a small chocolate tart, can be surrounded by carefully placed textures – a swoosh of ganache, a pile of soil, and a few strategically placed chocolate shards.
Using negative space is particularly effective with dark chocolate, allowing the rich color and intricate shapes to stand out against a light plate. Adding a contrasting element, like a raspberry coulis swirl, a mint sprig, or a sprinkle of sea salt, can break up the brown palette and add a pop of color and flavor. The goal is to create a composition that is visually appealing, textural diverse, and highlights the depth of chocolate flavor.
Advanced Dessert Plating Tips and Tricks from BakeWithEase
Mastering the Rule of Thirds in Dessert Presentation
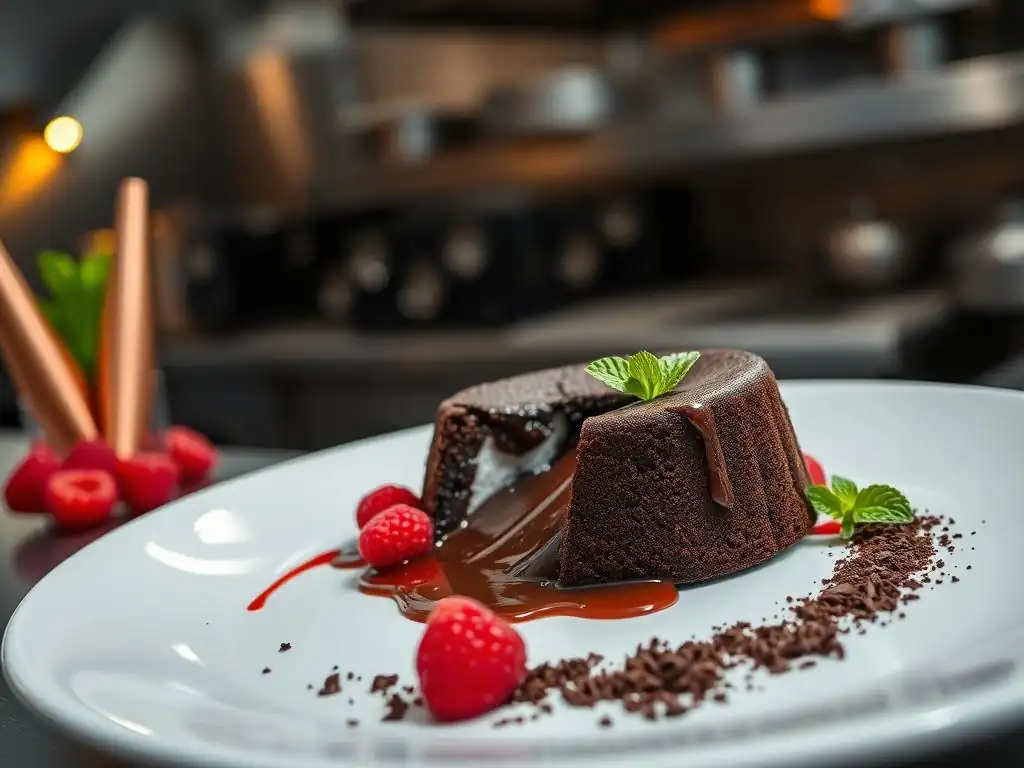
The rule of thirds, a principle borrowed from photography and design, is a powerful tool in elegant dessert plating techniques. Imagine dividing your plate into a 3x3 grid with two equally spaced horizontal lines and two equally spaced vertical lines. The rule suggests placing key elements of your dessert composition at the intersections of these lines or along the lines themselves, rather than dead center.
This off-center placement creates visual tension and interest, guiding the diner's eye across the plate rather than settling in the middle. It makes the composition feel more dynamic and less static. By placing your main component slightly off-center and arranging supporting elements like sauces, garnishes, or smaller components near the intersections, you create a balanced yet visually engaging presentation that feels inherently more sophisticated.
Using Negative Space to Enhance Visual Impact
Negative space, the empty area on the plate, is just as important as the space occupied by the dessert elements in elegant dessert plating techniques. Strategic use of negative space prevents the plate from looking cluttered and allows the plated components to breathe and stand out. It directs the viewer's attention to the artistry of the arrangement.
A common mistake is trying to fill the entire plate. Instead, think of the plate as a canvas where you are painting with food. Leaving ample empty space around your composition makes the elements you do include feel deliberate and significant. A dessert on a large plate with plenty of negative space often feels more refined and elegant than the same dessert crammed onto a smaller plate. Aim to have perhaps 40-60% of the plate covered, letting the rest serve as visual relief.
The context of the dining experience should influence your elegant dessert plating techniques. A dessert for a tasting menu, for example, is typically a small, highly refined portion (often just 2-3 bites), designed to be a delicate part of a larger meal. Plating for a tasting menu allows for intricate details, delicate structures, and artistic arrangements that might take 5-10 minutes per plate to assemble due to the small scale and focus on precision.
In contrast, desserts for a buffet or banquet need to be more robust, stable, and often pre-portioned for efficiency. Individual verrines (desserts in glasses), sturdy tarts, or small, stable cakes are more suitable. While still aiming for elegance, the plating needs to be repeatable quickly and resilient enough to hold up on display. The scale is different, the fragility is lower, and the focus shifts slightly from individual artistic perfection to appealing presentation of multiple servings.
Common Dessert Plating Mistakes and How to Avoid Them
Overcrowding the Plate: Less is More
One of the most frequent errors in elegant dessert plating techniques is putting too many elements on the plate. An overcrowded plate looks messy, confusing, and detracts from the beauty of individual components. It suggests a lack of restraint and can overwhelm the diner visually and texturally. Remember the principle: less is often more.
To avoid overcrowding, start with your main dessert item and add supporting elements one by one, considering how each addition contributes to the overall composition, flavor, and texture. Use negative space intentionally. If you have multiple sauces, choose one or two at most. Limit the number of garnishes to a few well-chosen items placed strategically. A plate that feels balanced and uncluttered is far more elegant than one packed with everything you have.
Neglecting Texture and Flavor Balance
Elegant dessert plating techniques are not solely about visual appeal; they must also consider the eating experience. A common mistake is creating a plate that looks beautiful but lacks balance in texture and flavor. A dessert consisting only of soft components, for instance, can be monotonous to eat, regardless of how artfully the mousse or panna cotta is placed.
Ensure your plated dessert offers a variety of textures – something creamy, something crunchy, something soft, something crisp. Similarly, balance flavors. If your dessert is very sweet, include something tart (like fruit), slightly bitter (like cocoa or dark chocolate), or even a hint of salt to provide contrast and depth. The visual plating should reflect and enhance the sensory experience of eating the dessert, ensuring every element on the plate serves a purpose beyond just looking pretty.
Ignoring the Overall Color Palette
While adding color is important, ignoring the overall color palette can lead to a disjointed or unappealing presentation. Throwing too many disparate colors onto a plate without considering how they work together can look chaotic rather than elegant. A dessert might taste fantastic, but if the colors clash or look unnatural, it detracts from the sophisticated feel you're trying to achieve with elegant dessert plating techniques.
Consider whether you are aiming for a harmonious palette (shades of similar colors, like browns for chocolate with a touch of gold) or a contrasting one (like vibrant red berries against a white background). Use colors intentionally to highlight elements or create visual flow. Be mindful of artificial-looking colors from excessive food coloring. Natural colors from fruits, sauces, and components generally create the most appealing and elegant look.
Maintaining Freshness and Stability in Plated Desserts
Preventing Soggy Components
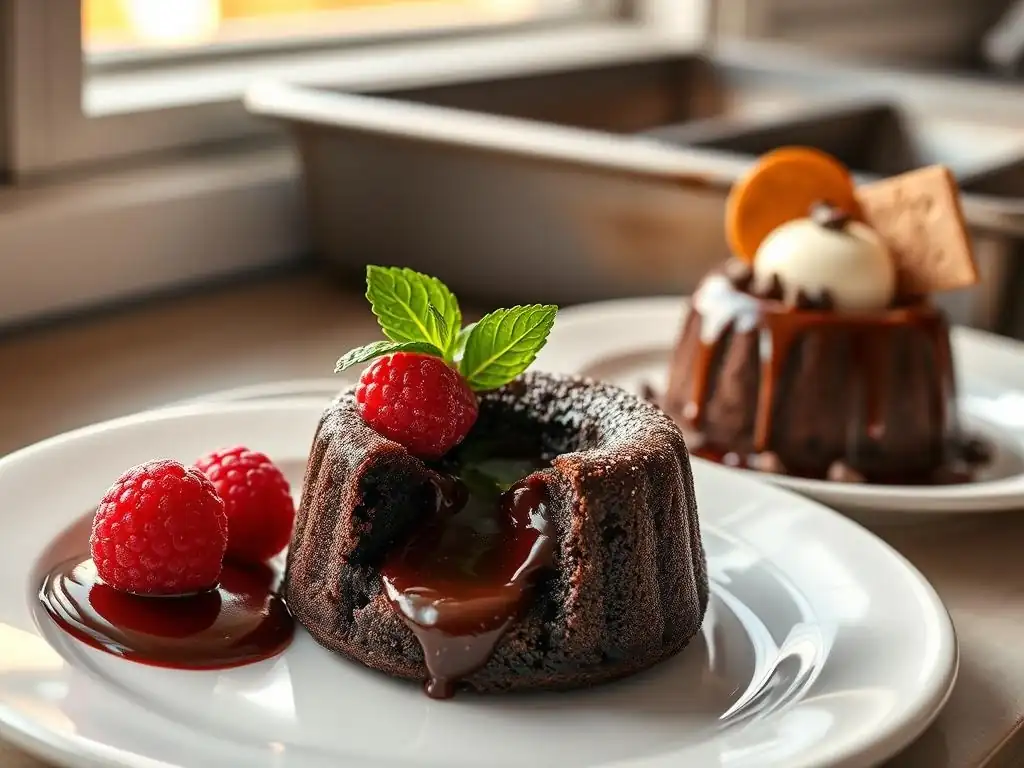
Maintaining the intended textures of your plated dessert components until they reach the diner is crucial for a positive experience. A common issue is delicate, crisp elements becoming soggy from contact with moist components or humidity. This undermines the textural contrast you worked hard to create using elegant dessert plating techniques.
To prevent sogginess, assemble components that are prone to absorbing moisture, like cookie bases, tuiles, or meringues, at the very last minute before serving. If a moist component (like fruit compote) must sit on a crisp base, consider creating a barrier, such as a thin layer of tempered chocolate or a glaze, between the two. Store crisp components in airtight containers away from humidity until ready to plate.
Keeping Garnishes Crisp and Vibrant
Garnishes are often the most delicate elements on the plate and can wilt, dry out, or absorb moisture quickly. Keeping them crisp and vibrant is essential for maintaining the elegance of your plated dessert. Fresh herbs like mint should be stored properly (often with stems in water or wrapped in a damp paper towel) and added just before serving.
Powdered sugar or cocoa powder dustings absorb moisture rapidly and can disappear or clump if applied too early, especially in humid environments. Apply these just before the plate goes out. Edible flowers and microgreens are also sensitive to drying out; keep them chilled and add them at the very end. For garnishes like spun sugar or caramel cages, humidity is the enemy; these must be made and applied immediately before serving to maintain their delicate structure.
Conclusion: Transforming Your Desserts with Elegant Plating Techniques
Mastering elegant dessert plating techniques is a journey that transforms your baking from simply delicious to truly spectacular. By focusing on visual appeal, understanding fundamental principles, utilizing the right tools and ingredients, and practicing key techniques like sauce swirls, building height, and strategic garnishing, you can elevate every dessert you create.
Remember to draw inspiration from deconstructed classics, seasonal ingredients, and the versatile nature of chocolate. Pay attention to advanced tips like the rule of thirds and the power of negative space, and adapt your approach for different dining contexts. By avoiding common mistakes and focusing on maintaining freshness and stability, you ensure that your beautifully plated desserts not only look incredible but also provide the perfect sensory experience. With BakeWithEase, you have the resources to turn every dessert into a masterpiece of flavor and visual artistry.
Frequently Asked Questions
How important is plate selection when practicing elegant dessert plating techniques?
Plate selection is crucial for presentation. The plate acts as a canvas, and its color, shape, and size can dramatically impact the perceived aesthetic appeal of the dessert. Opt for plates that complement the colors and textures of your dessert.
What are some simple techniques BakeWithEase recommends for adding height to a plated dessert?
BakeWithEase suggests using stacked elements, such as layering sauces or components, or incorporating vertical garnishes like tuiles or fruit skewers. This adds visual interest and creates a more dynamic presentation. Consider using a quenelle.
How can I use sauces effectively to enhance the appearance of my plated dessert?
Sauces can be used to create swirls, dots, or abstract designs that add visual flair. Utilize squeeze bottles for precise application and experiment with contrasting colors for a striking effect. Don't use too much sauce.
What are some common mistakes to avoid when plating desserts elegantly?
Avoid overcrowding the plate; less is often more. Ensure your plate is clean and free of smudges. Also, be mindful of color balance and avoid using too many clashing colors, which can detract from the overall presentation.
Where can I find inspiration for elegant dessert plating techniques?
BakeWithEase provides step-by-step guides and visual examples on our website. You can also find inspiration from professional pastry chefs and food stylists featured in cookbooks and online resources. Experimentation is key!
Final Reflection: The Art and Soul of Elegant Dessert Plating
The pursuit of elegant dessert plating isn't merely about aesthetics; it's about elevating the entire dining experience, transforming a simple treat into a memorable moment. In a world increasingly dominated by fleeting trends, the enduring power of thoughtful presentation remains a constant source of delight and connection. The techniques explored in this article – from considering negative space to mastering the art of the drizzle – are more than just skills; they are tools for creating lasting impressions.
The impact of beautifully plated desserts extends far beyond the individual plate. It speaks to a deeper cultural appreciation for artistry and craftsmanship, a desire to find beauty in the everyday. The details are not the details. They make the design.
– Charles Eames. This quote perfectly encapsulates the essence of elegant plating: the seemingly small choices, the careful arrangement, these are what elevate a dessert from good to extraordinary, transforming a simple indulgence into a sensory experience. It's a reflection of our own desire to create something beautiful and share it with others.
Now, consider your own culinary creations. What small changes can you make to elevate your desserts? Don't be afraid to experiment, to play with textures and colors, to find your own unique style. Remember, the most elegant plating is the one that speaks to your personal vision and brings joy to both the creator and the recipient. Embrace the process, find your own artistic voice, and let your desserts tell a story. The journey of mastering elegant plating is a continuous one, filled with delightful discoveries and the rewarding satisfaction of creating something truly special.
Unleash Your Inner Pastry Chef!
Thanks for joining us on this delicious journey into the world of elegant plated desserts! We hope you’ve gained some inspiration and valuable techniques to elevate your baking skills. Ready to put your newfound knowledge into practice?
- Craft your masterpiece: Choose your favorite recipe from the article and bake it today! Don't be afraid to experiment with flavors and decorations.
- Share your creations: Post a picture of your finished dessert on social media and tag us – we’d love to see your culinary artistry! Use #BakeWithEaseElegance.
- Challenge yourself: Try adapting one of the techniques described to a dessert you already know how to bake – you might be surprised by the results!
What innovative plating technique will you try first? Let us know in the comments below!