
Unlock the Secret to Silky Smooth Custard Tarts

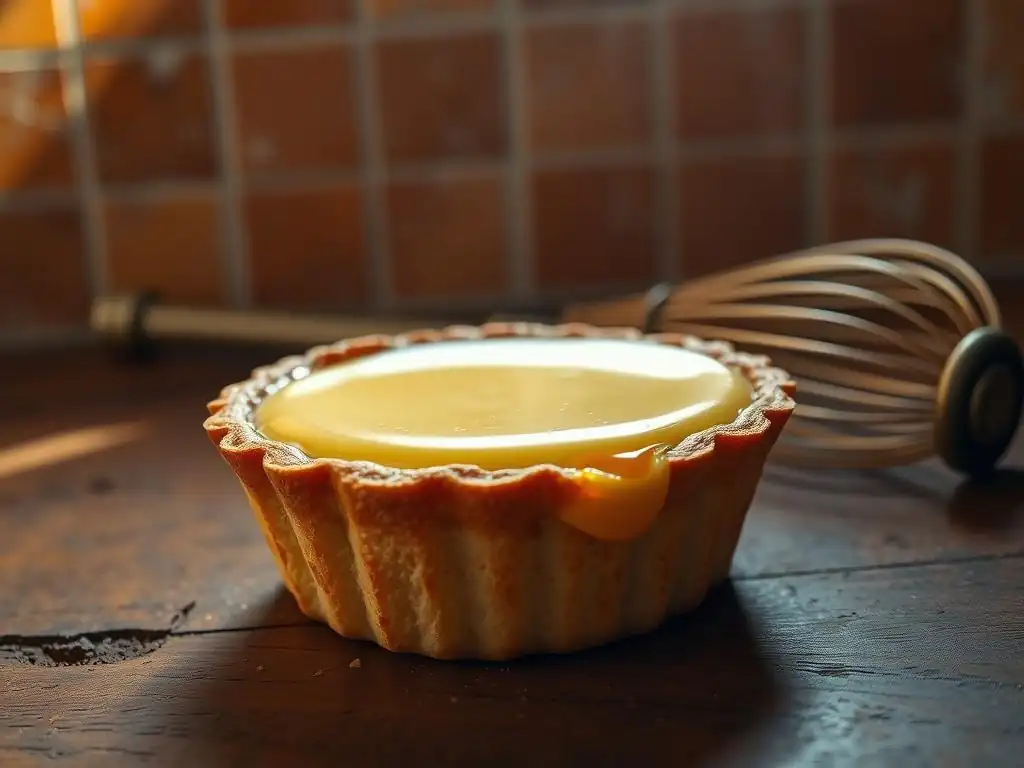
Welcome to BakeWithEase, your haven for baking inspiration! Ever dreamed of creating the perfect dessert that melts in your mouth? Our latest guide unlocks the secret to a silky smooth custard tart recipe, and we're about to show you how achievable it is. Discover the techniques and simple ingredients needed to bake this classic pastry with confidence, and prepare to impress with every golden slice. Ready to embark on this delicious journey?
- Mastering the Classic Custard Tart
- Introduction: The Allure of a Perfect Custard Tart
- Understanding the Key to a Smooth Custard
- Custard Tart Recipe: Ingredients and Equipment
- Step-by-Step Guide: Crafting Your Custard Tart
- Tips for Achieving the Ultimate Smooth Texture
- Variations and Enhancements for Your Custard Tart
- Serving and Storing Your Custard Tart
- Troubleshooting Common Custard Tart Issues
- Conclusion: Enjoying Your Homemade Custard Tart
- Frequently Asked Questions
- Final Reflection: The Enduring Allure of the Perfect Custard Tart
- Unlock Your Inner Pastry Chef: Master the Art of Custard!
Mastering the Classic Custard Tart
Introduction: The Allure of a Perfect Custard Tart
BakeWithEase Presents: Mastering the Custard Tart
Welcome to BakeWithEase, where we unlock the secrets to creating bakery-quality treats right in your own kitchen. Today, we're diving into the world of classic desserts with a focus on achieving the perfect custard tart. A truly great custard tart features a delicate, flaky crust cradling a filling so smooth it feels like liquid silk.
This article will guide you through the process, ensuring your next attempt results in that coveted silky smooth custard tart recipe perfection. We'll cover everything from selecting the right ingredients to mastering the techniques that prevent common pitfalls, making this seemingly complex dessert approachable for bakers of all skill levels.
Achieving a silky smooth texture in your custard tart filling is the ultimate goal. It's what elevates a simple dessert to something truly memorable. This guide is designed to provide you with the detailed knowledge and practical steps needed to consistently produce tarts with a flawless custard interior.
Forget grainy textures or curdled fillings; with the tips and techniques shared here, you'll be well on your way to mastering this timeless classic. Get ready to impress yourself and your loved ones with a custard tart that's rich, creamy, and utterly delicious, all thanks to the precise methods we'll explore together.
Why This Rich and Creamy Custard Tart Recipe is a Crowd-Pleaser
A well-executed custard tart holds a special place in the hearts of dessert lovers. Its appeal lies in the beautiful contrast between the crisp, buttery pastry and the yielding, velvety smooth custard. This particular silky smooth custard tart recipe, when followed correctly, consistently delivers a filling that is luxurious and rich, without being heavy or overly sweet. It's a dessert that feels both comforting and elegant, making it perfect for any occasion, from a casual family gathering to a more formal dinner party. The balance of textures and flavors is simply irresistible, ensuring there's rarely a slice left over.
Moreover, mastering a classic like the custard tart builds fundamental baking skills that transfer to many other recipes. Understanding how to make a good pastry dough, how to handle egg-based fillings, and the importance of temperature control are invaluable lessons for any aspiring baker. This recipe serves as an excellent foundation, providing the techniques necessary not just for a silky smooth custard tart, but for various pies, quiches, and creams. It's a rewarding challenge that, once conquered, adds a truly impressive dessert to your repertoire, guaranteed to receive rave reviews from anyone fortunate enough to try a slice.
Understanding the Key to a Smooth Custard
The Science Behind a Smooth Custard Filling
The secret to a silky smooth custard filling lies primarily in the careful handling of proteins, specifically those found in eggs. When eggs are heated, their proteins unwind and then bond together, causing the liquid to thicken and set. This process, known as coagulation, needs to happen gently and evenly.
If heated too quickly or to too high a temperature (typically above 180°F or 82°C), the proteins coagulate too tightly, squeezing out moisture and resulting in a grainy, rubbery, or curdled texture instead of a smooth, creamy one. The ideal temperature range for setting a custard is often between 160°F and 175°F (71°C and 79°C).
Fats from cream and milk also play a crucial role. They coat the protein molecules, preventing them from bonding too tightly and contributing to the custard's rich, smooth mouthfeel. Using a higher fat content liquid, like heavy cream alongside whole milk, results in a more luxurious and stable custard. Additionally, sugar helps tenderize the protein structure and raises the coagulation temperature slightly, giving you a bit more leeway during cooking. Understanding this delicate balance of heat, time, and ingredients is fundamental to mastering a silky smooth custard tart recipe.
Common Custard Problems and How to Avoid Them
One of the most common issues bakers face is a curdled custard. This happens when the eggs are cooked too much, either by overheating the mixture on the stovetop or baking it at too high a temperature. To avoid this, always cook custard over gentle heat, stirring constantly, and remove it from the heat as soon as it thickens to a nappe consistency (coats the back of a spoon).
For baked custards, a low oven temperature (around 300-325°F or 150-160°C) and a water bath are essential for even, gentle cooking. A grainy texture is often caused by undissolved sugar or insufficient straining; ensure sugar is fully dissolved before heating and always pass the cooked custard through a fine-mesh sieve.
Another frequent problem is a runny custard. This indicates the eggs haven't coagulated enough, meaning the custard was either not heated sufficiently on the stovetop or not baked long enough. While you want a silky smooth texture, it still needs to be set enough to hold its shape when sliced. Using a thermometer is invaluable here; aim for that 160-175°F range internally for doneness. Overcoming these hurdles is key to perfecting your silky smooth custard tart recipe, and they are easily avoided with careful technique and temperature monitoring.
Custard Tart Recipe: Ingredients and Equipment
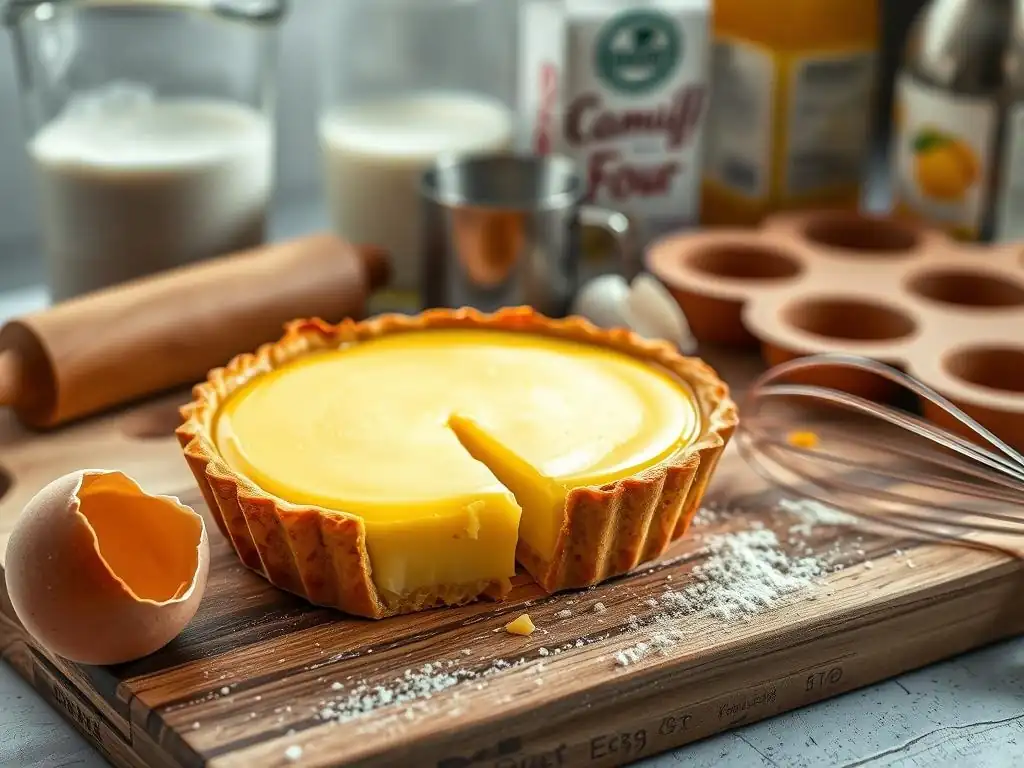
Ingredient Checklist for the Perfect Custard Tart
Flour, Butter, and Sugar: Building the Perfect Crust
For the crust of your silky smooth custard tart, you'll need basic pantry staples: all-purpose flour, cold unsalted butter, a little sugar, and often a pinch of salt. The quality of your butter is paramount here; a high-quality butter with a good fat content (around 82% is excellent) will yield the flakiest, most flavorful pastry.
You'll typically need about 1 ¼ cups (150g) of flour, 1 stick (113g) of very cold butter, 2-3 tablespoons (25-38g) of sugar, and perhaps a tablespoon or two of ice water to bring it all together. The sugar adds a touch of sweetness and helps with browning, making it a sweet shortcrust pastry ideal for desserts.
The cold butter is cut into small cubes or grated and cut into the flour and sugar until the mixture resembles coarse crumbs, with some pea-sized pieces of butter remaining. This is crucial for creating steam pockets during baking, which results in a flaky texture. Adding just enough ice water binds the dough without developing too much gluten, keeping the pastry tender.
Using a food processor is quick, but a pastry blender or even your fingertips can work well, as long as you handle the dough minimally to prevent it from becoming tough. This simple combination, handled with care, forms the essential base for your silky smooth custard tart.
Eggs, Cream, and Vanilla: Crafting the Silky Custard
The heart of a silky smooth custard tart is, of course, the custard filling. You'll need large eggs (typically 4-6 yolks or a combination of whole eggs and yolks for richness), heavy cream (about 1 ½ - 2 cups or 360-480ml), whole milk (about ½ - 1 cup or 120-240ml), sugar (around ½ - ¾ cup or 100-150g, adjusted to taste), and vanilla.
The ratio of yolks to whole eggs affects richness and set; more yolks yield a richer, softer set. Using a mix of heavy cream and whole milk provides the ideal balance of fat for creaminess and liquid for flow.
Vanilla is a key flavor component. A whole vanilla bean, split and scraped, infused into the cream and milk provides the most authentic, deep vanilla flavor. Alternatively, 1-2 teaspoons of high-quality vanilla extract can be used, added towards the end of cooking or just before baking to preserve its delicate aroma. Some recipes might include a touch of nutmeg or lemon zest, but for a truly classic, silky smooth custard tart recipe, vanilla is paramount. These simple, high-quality dairy and egg ingredients form the foundation for that luxurious, smooth texture we're aiming for.
Essential Equipment for Baking Custard Tarts
Tart Pans: Choosing the Right Size and Material
The right tart pan is essential for achieving a beautifully shaped custard tart with a golden crust. A standard 9-inch or 10-inch tart pan with a removable bottom is ideal. The removable bottom makes it incredibly easy to unmold the finished tart without damaging the delicate crust. Metal pans, particularly those made from aluminum or steel, conduct heat efficiently and evenly, promoting good browning of the pastry base. Avoid glass or ceramic pans for the crust, as they don't conduct heat as well, which can lead to a soggy bottom – the nemesis of any tart.
Fluted edges on the tart pan not only look attractive but also help the pastry hold its shape during blind baking. Ensure the pan is clean and dry before pressing the pastry in. For miniature tarts, individual small tartlet pans (3-4 inches) with removable bottoms are also available and work on the same principles. Having a reliable tart pan is the first step towards a successful, perfectly formed silky smooth custard tart ready to be filled.
Thermometers: Ensuring Accurate Custard Cooking
Precision is key when cooking custard, and a reliable thermometer is your best friend. For stovetop custards, an instant-read thermometer is invaluable for ensuring you heat the mixture just enough to thicken and pasteurize the eggs without curdling them. As mentioned, the target range is often between 160°F and 175°F (71°C and 79°C). Going much higher risks scrambling the eggs.
For baked custards, an oven thermometer helps you verify your oven's actual temperature, as they can often be off by 25°F or more. More importantly, a probe thermometer inserted into the center of the custard during baking allows you to monitor its internal temperature. A baked custard is typically done when it reaches around 170-175°F (77-79°C). Using thermometers eliminates guesswork and significantly increases your chances of achieving that perfect, silky smooth custard tart texture every time.
Step-by-Step Guide: Crafting Your Custard Tart
Part 1: Preparing the Sweet Shortcrust Pastry
Making the Dough: A Detailed Guide
Start by measuring your cold flour, sugar, and salt into a large bowl or the bowl of a food processor. Cut the very cold butter into small cubes (about ½ inch or 1cm) or grate it directly into the dry ingredients. If using a food processor, pulse until the mixture resembles coarse meal with some larger, pea-sized pieces of butter visible. This should only take about 10-15 pulses. Avoid over-processing, as this will develop gluten and melt the butter, resulting in a tough crust.
If making by hand, use a pastry blender or your fingertips to cut the butter into the dry ingredients. Work quickly to prevent the butter from warming up. Once the mixture resembles coarse crumbs, add 1-2 tablespoons of ice water, a tablespoon at a time, pulsing (or mixing with a fork) until the dough just starts to come together. It should look shaggy and crumbly but hold together when you squeeze a small amount.
Do not add too much water; a slightly dry dough is better than a sticky one. Turn the dough out onto a clean surface and gently bring it together into a disc. Avoid kneading.
Chilling the Dough: The Importance of Resting
Once the dough is formed into a disc, wrap it tightly in plastic wrap. Chilling the dough is a non-negotiable step for a good pastry crust. It allows the gluten to relax, making the dough easier to roll without shrinking excessively. More importantly, it hardens the butter pieces within the dough. When the cold butter hits the hot oven, it melts and creates steam, pushing apart the layers of dough and resulting in a flaky texture.
Chill the dough in the refrigerator for at least 30 minutes, but ideally 1-2 hours. For best results, especially if you're struggling with dough that's difficult to roll or shrinks, chilling it for several hours or even overnight can make a significant difference. A properly chilled dough is much easier to work with and is crucial for preventing a tough or shrunken crust, laying the groundwork for your silky smooth custard tart.
Rolling and Shaping the Tart Crust
On a lightly floured surface, roll the chilled dough disc out into a circle about 12-13 inches (30-33cm) in diameter and about ⅛ inch (3mm) thick. Work from the center outwards, rotating the dough frequently and lifting it to ensure it's not sticking. If the dough becomes too soft, pop it back in the fridge for 10-15 minutes. Carefully transfer the rolled dough to your 9 or 10-inch tart pan with a removable bottom. The easiest way is to gently roll the dough around your rolling pin and then unroll it over the tart pan.
Gently press the dough into the bottom and up the sides of the pan, ensuring it's snug against the fluted edges. Trim the excess dough by rolling the rolling pin over the top of the pan, or by hand. Patch any tears or thin spots with scraps of dough.
Prick the bottom of the tart shell all over with a fork; this prevents the crust from puffing up during baking. Return the prepared tart shell to the refrigerator or freezer for at least 30 minutes before blind baking. This final chill helps the crust hold its shape and prevents shrinkage during baking.
Blind Baking: Preventing a Soggy Bottom
Blind baking, or pre-baking the tart shell before adding the filling, is absolutely essential for a custard tart to prevent a soggy bottom crust. The wet custard filling would make the unbaked pastry base soft and unappetizing. To blind bake, line the chilled tart shell with parchment paper or foil, pressing it against the sides and into the corners. Fill the lined shell with pie weights, dried beans, or rice, distributing the weight evenly up the sides to support them.
Bake in a preheated oven (typically around 375°F or 190°C) for about 15-20 minutes, or until the edges are set and lightly golden. Carefully remove the weights and parchment/foil. Return the shell to the oven for another 5-10 minutes, or until the bottom is dry and lightly golden brown. This second bake ensures the base is cooked through and sealed. Let the blind-baked shell cool completely on a wire rack before adding the custard filling. A properly blind-baked crust is the sturdy foundation needed for a successful silky smooth custard tart.
Part 2: Creating the Custard Filling
Infusing the Cream: Adding Depth of Flavor (Vanilla Bean)
Start by gently heating the heavy cream and milk in a saucepan over medium-low heat. If using a vanilla bean, split it lengthwise with a sharp knife and scrape out the tiny seeds using the back of the knife. Add both the seeds and the scraped bean pod to the cream mixture in the saucepan. Add about half of the sugar to the cream mixture as well; this helps the sugar dissolve evenly.
Heat the mixture until it is warm but not boiling – just until small bubbles start to appear around the edges of the pan (around 170°F or 77°C). Remove from the heat, cover, and let the vanilla bean steep in the warm cream for at least 15-20 minutes to allow the flavor to infuse deeply. This step is crucial for achieving a rich, aromatic vanilla flavor that complements the silky smooth custard texture. If using vanilla extract, you will add it later.
Tempering the Eggs: Preventing Curdling
While the cream is infusing, whisk the egg yolks (or whole eggs/yolk mix) and the remaining sugar in a heatproof bowl until pale yellow and slightly thickened. Tempering the eggs is a vital step to prevent them from scrambling when the hot cream is added. Slowly ladle about half a cup of the warm, infused cream into the egg mixture while whisking constantly. This gradually raises the temperature of the eggs without cooking them instantly.
Continue adding the warm cream, ladle by ladle, whisking continuously until about half of the cream mixture has been incorporated into the eggs. Once the egg mixture is warm to the touch, you can pour the tempered egg mixture back into the saucepan with the remaining warm cream. Stir well to combine. This process ensures the eggs are gently brought up to temperature, ready for cooking into a perfectly silky smooth custard filling.
Cooking the Custard: Achieving the Perfect Consistency
Return the saucepan with the combined egg and cream mixture to the stovetop over low heat. Cook the custard gently, stirring constantly with a wooden spoon or heatproof spatula, making sure to scrape the bottom and sides of the pan to prevent sticking and scorching. Do not let the mixture boil. The custard is ready when it has thickened enough to coat the back of a spoon (nappe consistency), meaning you can draw a line on the spoon with your finger and the line holds without the custard running back together.
Using an instant-read thermometer, the temperature should be between 160°F and 175°F (71°C and 79°C). This typically takes about 8-15 minutes, depending on the volume and heat level. Immediately remove the pan from the heat. If using vanilla extract instead of a bean, stir it in now. For the smoothest texture, immediately strain the custard through a fine-mesh sieve into a clean bowl. This removes any potential cooked bits of egg or vanilla bean pieces, ensuring a truly silky smooth custard ready for your tart shell.
Part 3: Assembling and Baking the Custard Tart
Pouring the Custard into the Baked Crust
Ensure your blind-baked tart shell has cooled sufficiently on a wire rack. Place the cooled tart shell on a baking sheet; this makes it easier to transfer the tart to and from the oven, especially since the custard will be liquid when poured. Gently pour the strained, still-warm custard filling into the cooled tart shell. Pour slowly and steadily to avoid creating air bubbles on the surface. Fill the tart shell almost to the brim, leaving just a small gap for expansion.
If any small bubbles appear on the surface after pouring, you can gently pop them with a toothpick or the tip of a knife for a perfectly smooth top. The baking sheet provides stability and also helps catch any potential spills if you've filled the tart very full. Getting the custard into the crust smoothly is the final step before the critical baking phase that sets the silky smooth custard tart.
Baking the Tart: Low and Slow is Key
Baking the custard tart requires a gentle, even heat to ensure the custard sets properly without curdling or cracking. A low oven temperature is crucial – typically between 300°F and 325°F (150°C and 160°C). Many bakers also recommend using a water bath (bain-marie) for baked custards.
Place the baking sheet with the filled tart shell inside a larger roasting pan. Carefully pour hot water into the roasting pan until it comes halfway up the sides of the tart pan. The water bath insulates the custard, providing a consistent, gentle heat that promotes even setting and prevents the edges from overcooking before the center is done.
Bake the tart in the preheated low oven. The baking time will vary depending on the size of the tart and the exact oven temperature, but it typically ranges from 30 to 60 minutes for a standard 9 or 10-inch tart. The low and slow approach is paramount to achieving that desired silky smooth custard texture throughout the filling.
Checking for Doneness: The Jiggle Test
Knowing when your silky smooth custard tart is perfectly baked requires careful observation. The most common method is the "jiggle test." Gently nudge the baking sheet. The custard should be mostly set around the edges, but the very center (about a 2-3 inch circle) should still have a slight wobble or jiggle, like firm jelly. It should not look liquid or slosh around.
Alternatively, you can use a probe thermometer inserted into the center (but not touching the bottom crust). The internal temperature should register between 170°F and 175°F (77°C and 79°C). Over 180°F (82°C) and you risk curdling. Once the tart passes the jiggle test or temperature check, carefully remove the roasting pan from the oven, then lift the tart out of the water bath onto a wire rack.
Let it cool completely at room temperature for at least 2-3 hours before chilling. The custard will continue to set as it cools. Do not slice while warm, or it will be runny.
Tips for Achieving the Ultimate Smooth Texture
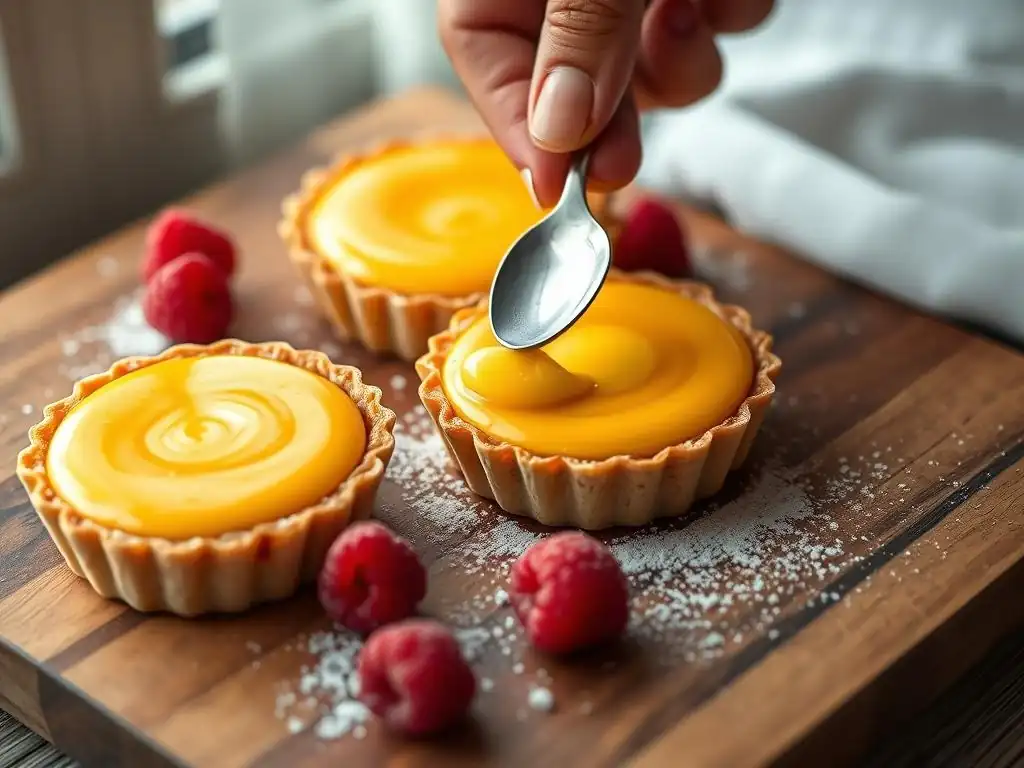
Temperature Control: The Custard's Best Friend
Maintaining precise temperature control is arguably the most critical factor in achieving a silky smooth custard tart. Both during the stovetop cooking (if applicable) and the baking process, overheating is the primary enemy of a smooth texture. As discussed, egg proteins coagulate and tighten at high temperatures, leading to graininess or curdling. Aiming for the 160-175°F (71-79°C) range for doneness allows the proteins to set gently, trapping moisture and fat within a fine network.
Using an oven thermometer ensures your oven isn't running too hot, and a water bath provides a consistent, lower temperature environment for the custard as it bakes. Even after baking, allowing the tart to cool slowly at room temperature before chilling helps the structure stabilize without cracking. Mastering temperature management throughout the entire process is the golden rule for a truly silky smooth custard tart.
Straining the Custard: Removing Imperfections
Straining the custard mixture through a fine-mesh sieve after cooking is a simple yet incredibly effective step for guaranteeing a silky smooth finish. Even with careful cooking, small pieces of coagulated egg, bits of vanilla bean (if used), or undissolved sugar can remain in the liquid. These impurities, while perhaps not affecting flavor significantly, will detract from the desired smooth texture and appearance.
Simply place a fine-mesh sieve over a clean bowl or directly over the cooled tart shell. Pour the cooked custard through the sieve, using a spatula to help it pass through if needed. Discard any solids left in the sieve. This quick step polishes the custard, ensuring it's perfectly homogenous and ready to bake into that flawless, silky smooth custard tart filling.
Avoiding Overbaking: Protecting the Silky Texture
Overbaking is another major cause of textural issues in custard tarts, second only perhaps to overheating on the stovetop. When a custard is baked for too long or at too high a temperature, the protein network becomes too dense, resulting in a firm, rubbery, or even cracked surface. The ideal texture is a delicate set that still yields slightly in the center when gently nudged after baking.
Pay close attention to the baking time and use the jiggle test or thermometer as your guide. Remove the tart from the oven when it meets the doneness criteria, even if the baking time seems shorter than anticipated. Remember, the custard will continue to set as it cools. Trusting the visual cues and internal temperature over a strict timer is key to preventing overbaking and preserving that coveted silky smooth custard tart texture.
Variations and Enhancements for Your Custard Tart
Adding a Citrus Zest: Lemon or Orange Infusion
While a classic silky smooth custard tart relies on vanilla, adding citrus zest can provide a wonderful brightness that cuts through the richness. Before heating the cream and milk, add the finely grated zest of one lemon or one orange to the saucepan. Heat gently as usual, then let it steep with the vanilla bean (if using) for at least 15-20 minutes off the heat.
Strain the cream mixture through a fine-mesh sieve to remove the zest before tempering the eggs. The oils in the zest will have infused into the cream, adding a subtle, fragrant citrus note that pairs beautifully with the creamy custard. This simple addition transforms the classic into a delightful lemon or orange infused silky smooth custard tart.
Spicing Things Up: Cinnamon or Nutmeg
For a warmer, more autumnal twist on the silky smooth custard tart, consider adding spices like cinnamon or nutmeg. These spices complement the dairy and egg base beautifully. You can add a pinch of ground nutmeg or cinnamon directly to the custard mixture before cooking, or infuse whole cinnamon sticks or nutmeg pieces into the cream mixture during the heating step, straining them out afterwards.
A classic English custard tart often features a light dusting of freshly grated nutmeg over the top before baking. This adds aroma and a subtle spice note on the surface. Be mindful not to overdo it, as spices can easily overpower the delicate vanilla flavor. A hint of spice can add intriguing complexity to your silky smooth custard tart recipe.
Fruit Variations: Berry Toppings
While a traditional silky smooth custard tart is served plain, adding fruit can introduce new flavors and textures. Fresh berries, such as raspberries, strawberries, or blueberries, make an excellent topping. They can be arranged on top of the chilled tart just before serving. Their slight tartness provides a lovely contrast to the sweet, rich custard.
Alternatively, you could make a simple berry compote by simmering berries with a little sugar and lemon juice until they break down slightly, then cooling it and spooning it over slices of the tart. Avoid baking the fruit directly in the custard unless the recipe specifically calls for it, as the moisture from the fruit can interfere with the custard's set and prevent you from achieving that desired silky smooth texture.
Serving and Storing Your Custard Tart
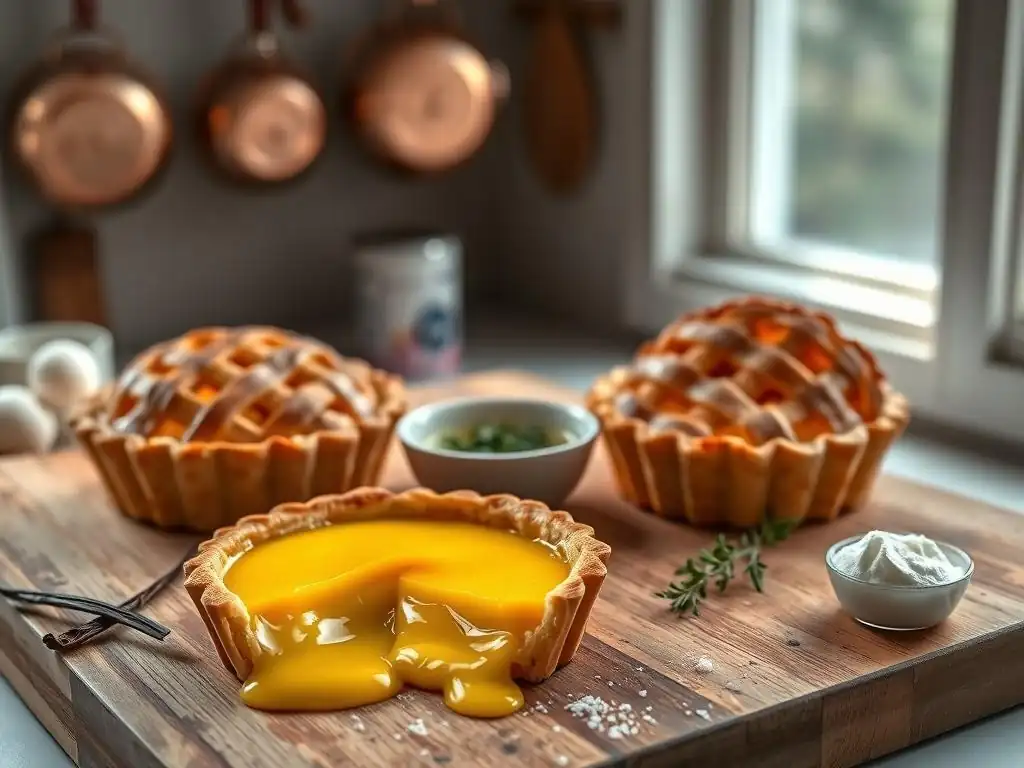
Serving Suggestions: Warm or Cold?
A silky smooth custard tart can be enjoyed either chilled or at room temperature, depending on personal preference. Serving it cold straight from the refrigerator results in a firmer, more set custard. Allowing it to sit at room temperature for 20-30 minutes before slicing can slightly soften the custard, enhancing its perceived silkiness.
Serve slices with a dusting of powdered sugar, a light grating of fresh nutmeg, or alongside fresh berries or a fruit compote as mentioned earlier. Some people enjoy a dollop of whipped cream, though the custard itself is quite rich. Use a sharp knife dipped in hot water and wiped clean to get neat slices, especially when the tart is cold.
Storing Leftovers: Maintaining the Texture
Proper storage is essential to maintain the quality and silky smooth texture of your custard tart. Since it is a dairy and egg-based dessert, it must be stored in the refrigerator. Cover the tart loosely with plastic wrap or aluminum foil, or store individual slices in airtight containers.
The tart will keep well in the refrigerator for 2-3 days. The crust may soften slightly over time due to moisture migration from the custard, but the custard itself should retain its smooth texture if properly baked and stored. For best quality, consume within a couple of days. Freezing is not recommended for custard tarts, as the custard's texture can become grainy or watery upon thawing, compromising that desired silky smooth finish.
Troubleshooting Common Custard Tart Issues
Soggy Crust Solutions
A soggy bottom crust is a frequent complaint with custard tarts. The primary solution lies in effective blind baking. Ensure you fully blind bake the crust until the bottom is dry and lightly golden, not just set around the edges. Using pie weights that cover the entire bottom, not just the sides, helps press the dough down evenly. Pricking the bottom thoroughly with a fork also prevents steam buildup that can lift the crust.
Using a metal tart pan with a removable bottom promotes better heat transfer to the base compared to glass or ceramic. Chilling the formed tart shell thoroughly before blind baking also helps prevent shrinkage and maintains the thickness needed for a sturdy base. If your oven has a bottom heat setting, using it during the final few minutes of blind baking can help crisp up the base further.
Cracked Custard Prevention
Cracks on the surface of a baked custard indicate it has been overcooked or cooled too quickly. When custard bakes too long or at too high a temperature, the outer edges set firmly while the center is still cooking. As the center finishes and contracts slightly upon cooling, the already-set surface can crack under the tension.
Prevent cracks by baking at a low temperature (300-325°F or 150-160°C) and using a water bath to ensure even, gentle heat. Do not bake the custard until it is completely firm all the way through; the center should still have a slight jiggle. Once removed from the oven, let the tart cool gradually on a wire rack before refrigerating. Sudden changes in temperature can cause the surface to contract and crack. A slight crack doesn't affect flavor, but avoiding them results in a more visually appealing silky smooth custard tart.
Runny Custard Fixes
A runny custard filling means the egg proteins didn't coagulate sufficiently to set the mixture. This is usually due to undercooking, either on the stovetop or in the oven. Ensure you cook the stovetop custard until it coats the back of a spoon and reaches the correct temperature range (160-175°F or 71-79°C).
For baked custards, make sure the internal temperature reaches the target (around 170-175°F or 77-79°C) and that the center has only a slight wobble, not liquid movement. Oven temperatures can be inaccurate, so using a thermometer is key. If a baked tart seems slightly underdone after the recommended time, you can carefully return it to the low oven for another 5-10 minutes, checking frequently. Unfortunately, once a custard is significantly undercooked and cooled, it's difficult to salvage its texture, reinforcing the importance of proper cooking the first time for a truly silky smooth custard tart.
Conclusion: Enjoying Your Homemade Custard Tart
Celebrate Your Baking Success
You've done it! You've navigated the steps to create a truly magnificent silky smooth custard tart. From mastering the flaky pastry crust to achieving that perfectly set, velvety filling, you've applied key techniques that distinguish a good tart from a great one. Take a moment to admire your handiwork – the golden crust, the smooth, inviting surface of the custard. The aroma alone is a reward in itself.
Making a custard tart from scratch is a rewarding baking project that culminates in a dessert that is both classic and comforting. The effort put into temperature control, blind baking, and careful cooking pays off in that exquisite, melt-in-your-mouth texture. This silky smooth custard tart recipe isn't just about following instructions; it's about understanding the process and celebrating the delicious results of your baking skills.
Now that you've mastered the art of the silky smooth custard tart with our BakeWithEase guide, it's time to share your success! Slice into that beautiful tart and savor the moment. Whether you're serving it to family, friends, or simply enjoying a slice yourself with a cup of tea or coffee, relish the rich flavor and perfect texture you've achieved.
We love seeing what our community bakes! Share photos of your finished silky smooth custard tart creations and tell us about your experience. Did you try a variation? What tips did you find most helpful? Connect with us and inspire other bakers on their journey to mastering this classic dessert. Happy baking, and enjoy every silky smooth bite!
Frequently Asked Questions
What makes a custard tart silky smooth?
Achieving a silky smooth texture in a custard tart depends on several factors. These include using high-quality ingredients, particularly fresh eggs and cream, and employing a low and slow baking process.
Can I use different types of milk in the custard filling?
While you can use different types of milk, it will impact the texture and richness. For the best results and the desired "silky smooth" finish, we recommend using full-fat cream or whole milk. Using lower-fat options may result in a less creamy, less stable custard.
What's the best way to prevent a soggy crust in a custard tart?
To avoid a soggy crust, blind baking is crucial. This involves pre-baking the crust before adding the custard filling. Also, ensure the crust is completely cooled before adding the filling and use a water bath during baking.
How do I know when my custard tart is done baking?
The custard tart is done when the edges are set, but the center still has a slight wobble. It should look lightly golden brown on top. It will continue to set as it cools.
Can I add flavor extracts to the custard filling?
Yes, you can! However, it's important to use high-quality extracts and add them sparingly. Vanilla extract is a classic choice, but lemon or almond extract can also be delicious additions. Be mindful of the extract's strength to avoid overpowering the custard's delicate flavor.
Final Reflection: The Enduring Allure of the Perfect Custard Tart
The pursuit of the perfect custard tart, with its silky smooth texture and delicate balance of flavors, is more than just a culinary quest; it's a reflection of our desire for simple perfection. This article has explored the nuances of achieving that elusive smoothness, from the careful selection of ingredients to the precise techniques involved in creating a custard that melts in the mouth. The methods discussed remain highly relevant today, in a world increasingly focused on artisanal food and the celebration of classic recipes.
The journey to mastering the custard tart, for me, has been a journey of patience and precision. It's a testament to the power of attention to detail and the rewarding feeling of creating something beautiful and delicious from humble ingredients. The art of cooking is more than just following a recipe; it's about understanding the ingredients and the process, and letting your passion guide you.
This quote resonates deeply, as the subtle variations in temperature and timing can dramatically impact the final result, highlighting the artistry involved in baking.
Now, I invite you to embark on your own custard tart adventure. Don't be afraid to experiment, to tweak the recipe to your liking, and to savor the process as much as the final product. The silky smooth custard tart is not just a dessert; it's a symbol of dedication, precision, and the joy of creating something truly special. Let the pursuit of this culinary perfection inspire you to find similar levels of dedication and care in other aspects of your life.
Unlock Your Inner Pastry Chef: Master the Art of Custard!
Thanks for joining us on this delicious journey into the world of perfectly smooth custard tarts! We hope you've gained some valuable tips and tricks to elevate your baking game. Ready to put your new skills to the test?
- Bake your masterpiece today! Try out the recipe from the article – we bet you'll be amazed at the results. This is your chance to create something truly special.
- Share your creation: Tag us on social media and show off your beautiful custard tarts! We’d love to see your baking success.
- Explore our other recipes: Dive deeper into the BakeWithEase collection for even more delightful dessert ideas!
Ready to transform your kitchen into a pastry paradise? What flavor profile will your next custard creation feature?