
Handling Temperature: Decorating in Warm Kitchens

Welcome to BakeWithEase, your guide to confident baking! Ever struggle with warm kitchen cake decorating? You're not alone! Discover the secrets to flawless frosting and stable designs, even when the temperature rises. Let's conquer the challenges of baking in warmer environments and unlock a world of beautifully decorated cakes. Intrigued? Keep reading to find out how!
- Mastering Cake Decorating in Warm Kitchens
- The Challenge of Warm Kitchen Cake Decorating: Preventing Melting and Sagging
- Choosing the Right Frosting: Prioritizing Stability
- Essential Techniques for Success
- Decorating Tools and Equipment
- Recipes Adapted for Warm Climates
- Troubleshooting Common Problems
- Long-Term Storage
- Conclusion: Enjoying Cake Decorating in Any Climate
-
Frequently Asked Questions
- How does a warm kitchen affect cake decorating?
- What types of frosting are most susceptible to melting in warm temperatures?
- What are some strategies for keeping frosting cool while decorating?
- Can I use a different type of frosting that is more stable in warmer conditions?
- What tools or equipment can help me decorate a cake in a warm kitchen?
- Final Reflection: The Sweet Science of Warm Kitchen Decorating
- Transform Your Warm Kitchen Today!
Mastering Cake Decorating in Warm Kitchens
The Challenge of Warm Kitchen Cake Decorating: Preventing Melting and Sagging
Decorating cakes can be a delightful and creative process, but when faced with a warm kitchen environment, things can quickly become challenging. High temperatures directly impact the stability of your decorating mediums, leading to frustration as frostings melt, ganaches refuse to set, and fondant becomes sticky and unmanageable. Understanding these challenges is the first step toward successful warm kitchen cake decorating. It's not just about comfort; it's about the physical properties of your ingredients reacting to heat.
The primary issues encountered in warm kitchen cake decorating stem from the melting points of fats and sugars. Butter, a staple in many frostings, begins to soften significantly around 25°C (77°F) and melts completely between 30-35°C (86-95°F). Sugar, while stable at room temperature, absorbs moisture from humid air, which is often a companion to heat, leading to stickiness and loss of structure. This environmental stress makes achieving sharp edges, smooth finishes, and intricate details incredibly difficult, often resulting in a sad, slumped creation instead of the intended masterpiece.
Understanding Temperature's Impact on Cake Decorating
Temperature is perhaps the single most critical environmental factor influencing the outcome of your warm kitchen cake decorating efforts. As the ambient temperature rises, ingredients like butter and chocolate transition from solid or semi-solid states to liquid. For buttercreams, this means the fat emulsified with sugar and liquid breaks down, causing the frosting to lose its airy structure and become greasy or runny. Think of a classic American buttercream: its stability relies heavily on the solid state of butter holding everything together.
Beyond just melting, temperature also affects the texture and workability of your materials. Fondant, for instance, can become overly soft and prone to tearing in high heat, making it difficult to roll out thinly or drape smoothly over a cake.
Royal icing, which hardens through evaporation, may take much longer to set in humid, warm conditions, increasing the risk of smudges or collapse before it dries. Even chocolate used for tempering or ganache is highly sensitive; just a few degrees above its working temperature can ruin its temper or prevent a ganache from setting firmly enough to coat or fill a cake.
Why Warm Temperatures Affect Buttercream, Ganache, and Fondant
Warm temperatures directly interfere with the molecular structure and physical properties of common cake decorating mediums. In buttercream, the fat (usually butter) is the structural backbone. As heat increases, the fat crystals in the butter melt, causing the emulsion to break. This leads to the familiar greasy, sliding texture you see when buttercream gets too warm – it simply can't hold its shape or adhere properly to the cake surface, making warm kitchen cake decorating a real test of skill and patience.
Ganache, a mixture of chocolate and cream, relies on the cocoa butter content in the chocolate to set. Different types of chocolate have varying amounts of cocoa butter and different melting points. In a warm kitchen, even a properly made ganache can soften considerably, especially if using milk or white chocolate which have lower melting points than dark chocolate.
Fondant, primarily sugar, water, and stabilizers, becomes pliable with warmth, which is good for working, but excessive heat makes it sticky and overly soft. High humidity often accompanies warmth, causing fondant to absorb moisture from the air, exacerbating its stickiness and making it difficult to handle without deformation or tearing.
Choosing the Right Frosting: Prioritizing Stability
Selecting a frosting that can withstand warmer temperatures is crucial for successful warm kitchen cake decorating. Not all frostings are created equal when it comes to heat resistance. Some rely heavily on butter and are prone to melting, while others incorporate ingredients or techniques that provide greater stability in challenging conditions. Making an informed choice based on the expected temperature and humidity can save you a lot of heartache and rework.
Consider the composition of different frostings. Those with a higher proportion of fat that remains solid at warmer temperatures, or those that set through means other than just chilling (like meringue-based frostings or ganache with a high chocolate ratio), tend to perform better. While you might have a favorite recipe, adapting or choosing a more robust alternative is often necessary for decorating in a warm kitchen. This might mean opting for a meringue-based buttercream over a simple American one, or using a darker chocolate for your ganache.
American Buttercream: Adjusting for Warmer Temperatures
American buttercream, a simple mix of butter, powdered sugar, and liquid, is notorious for its sensitivity to heat due to its high butter content. In a warm kitchen, it can quickly become soft, greasy, and unmanageable. However, you can make adjustments to improve its stability. One common technique is to slightly reduce the butter and increase the powdered sugar ratio. For instance, if your standard recipe uses 1 part butter to 4 parts powdered sugar, you might try 1 part butter to 5 or even 6 parts powdered sugar. This increases the dry structure provided by the sugar.
Another adjustment is to incorporate a small amount of a more stable fat, like vegetable shortening, replacing a portion of the butter (e.g., replacing 1/4 of the butter with shortening). Shortening has a higher melting point than butter. Additionally, ensuring your butter is on the cooler side of "room temperature" (perhaps closer to 18-20°C or 65-68°F) before creaming can help, as can adding a stabilizer like a tiny pinch of meringue powder or cornstarch mixed with the powdered sugar, although these can slightly alter texture.
Swiss Meringue Buttercream: A More Stable Option
Swiss meringue buttercream (SMBC) is generally more stable than American buttercream in warmer conditions. It's made by whisking egg whites and sugar over a double boiler until the sugar is dissolved and the mixture reaches about 71°C (160°F), then whipping it into a stiff, glossy meringue before gradually adding softened butter. The stability comes from the strong protein structure of the cooked egg white meringue.
While SMBC still contains a significant amount of butter and can soften in extreme heat, the meringue base provides a much more resilient structure compared to a simple butter-sugar mixture. It holds its shape better for piping and smoothing. If working in a very warm kitchen, ensure your butter is cool-to-the-touch but still pliable, and consider adding slightly less butter than usual to the meringue base for extra firmness. Chilling the finished buttercream briefly before use can also help.
Italian Meringue Buttercream: Another Stable Choice
Italian meringue buttercream (IMBC) is considered by many to be the most stable of the meringue-based buttercreams, making it an excellent choice for warm kitchen cake decorating. It's made by pouring a hot sugar syrup (cooked to the soft-ball stage, around 115-118°C or 240-245°F) into whipping egg whites, creating a very stable meringue before incorporating butter.
The high temperature of the sugar syrup cooks the egg whites and creates a robust, stable meringue structure that is less prone to collapsing than uncooked meringues. This strong meringue base provides superior heat resistance compared to both American and Swiss varieties. Like SMBC, it can still soften in extreme heat, but it maintains its structure and smoothness much longer. Ensure your butter is cool and firm but not hard when adding it, and don't rush the process of emulsifying the butter into the meringue.
Ganache: Selecting the Right Chocolate and Cream Ratio
Ganache is a versatile and relatively stable option for warm kitchen cake decorating, provided the correct ratio of chocolate to cream is used. The stability comes from the cocoa butter in the chocolate setting as it cools. The higher the percentage of cocoa solids (and thus cocoa butter), the firmer the ganache will set. Therefore, using dark chocolate (with 60% or more cocoa solids) provides the most stable ganache for warmer temperatures.
For a pourable ganache glaze in a warm environment, you might use a ratio of 1 part cream to 1.5 or 2 parts dark chocolate by weight, rather than the standard 1:1 ratio used in cooler temperatures. For a firmer ganache filling or frosting that needs to hold its shape, a ratio of 1 part cream to 2.5 or even 3 parts dark chocolate is advisable.
Milk and white chocolate contain less cocoa butter and require significantly less cream (perhaps 1 part cream to 3 or 4 parts milk chocolate, or 1 part cream to 3.5 or 4.5 parts white chocolate) to achieve a similar level of firmness in warm conditions. Always let ganache cool and thicken sufficiently before using it for warm kitchen cake decorating.
Essential Techniques for Success
Beyond choosing the right frosting, mastering techniques to mitigate the effects of heat is vital for warm kitchen cake decorating. These strategies focus on keeping your materials cool, minimizing their exposure to heat, and creating a stable working environment. Implementing a combination of these techniques can significantly improve your chances of success, even on the hottest days.
Think of these techniques as a multi-layered defense against the heat. You're not just relying on one method; you're employing several tactics simultaneously to keep your frosting and cake cool and cooperative. This proactive approach is far more effective than trying to fix a melted mess after it happens. Preparation and speed become your best friends when decorating in a warm kitchen.
Keeping Frosting Cool: Bowls of Ice and Refrigeration
One of the most straightforward methods for warm kitchen cake decorating is to keep your frosting as cool as possible when you're not actively working with it. If you're using a large batch of buttercream or ganache, keep the portion you aren't currently using in the refrigerator. For the portion you are using, place the bowl containing the frosting over a larger bowl filled with ice water. This creates a makeshift cold bath that helps maintain a cooler temperature.
Stir the frosting periodically while it's over the ice bath to ensure the coolness is distributed evenly. If it starts to get too firm from chilling, remove it from the ice bath and stir or gently mix it for a moment to restore its creamy texture. For piping bags, fill them only partially so the heat from your hands doesn't warm the entire batch, and keep unused filled bags in the refrigerator, taking them out only just before you need them.
Chilling Cakes: Preventing Crumbling and Slipping
A cold cake is much easier to decorate in a warm kitchen than a room-temperature one. Chilling your cake layers significantly reduces the risk of crumbs mixing into your frosting (the dreaded "crumb coat" challenge) and provides a firm surface for the frosting to adhere to. Refrigerate your leveled cake layers for at least 30-60 minutes before you begin assembling and applying the crumb coat.
After applying a thin crumb coat of frosting, return the cake to the refrigerator for another 20-30 minutes, or until the frosting is firm to the touch. This creates a stable base for your final layer of frosting. A cold cake also helps to keep the applied frosting cooler for longer as you work, slowing down the melting process. For intricate decorating, chilling the cake periodically between steps is highly recommended.
Working Efficiently: Minimizing Heat Exposure
Speed and efficiency are key when doing warm kitchen cake decorating. The longer your frosting and cake are exposed to the ambient heat, the faster they will warm up and lose their ideal consistency. Plan your decorating steps in advance to minimize downtime. Have all your tools, colors, and piping tips ready before you start.
Work in stages, especially for complex designs. Apply a layer of frosting, smooth it, and if it starts to soften, pop the cake back into the refrigerator for a few minutes to firm up before continuing. For piping details, work on a small section at a time, keeping the rest of the cake chilled. Try to work during the coolest part of the day, perhaps early morning or late evening, if possible.
Using Cold Packs: Stabilizing the Decorating Surface
Creating a cool surface to work on can make a noticeable difference in warm kitchen cake decorating. If you're using a turntable, place a few flat, frozen ice packs (the kind used for lunch boxes) directly on your counter and place the turntable on top of them. This helps to keep the base of the cake and the lower layers of frosting cooler as you rotate and decorate.
Alternatively, if your turntable has a removable top, you might be able to place ice packs underneath the top surface before placing the cake on it. Ensure the ice packs are wrapped or contained so condensation doesn't create a wet mess. This technique is particularly helpful when applying the final layer of frosting or doing detailed piping work where the cake remains on the turntable for extended periods.
Controlling Humidity: Using a Dehumidifier
Warm temperatures are often accompanied by high humidity, which poses its own set of problems for warm kitchen cake decorating, especially for frostings like fondant, royal icing, and even buttercreams. High humidity causes sugar to absorb moisture from the air, making surfaces sticky, preventing icings from drying properly, and potentially causing colors to bleed.
If you live in a humid climate or are decorating on a particularly muggy day, running a dehumidifier in your kitchen or the room where you are decorating can make a significant difference. Reducing the moisture content in the air helps frostings set faster and prevents the sticky, weeping issues associated with humidity. Aim to reduce humidity levels as much as possible in your decorating space.
Decorating Tools and Equipment
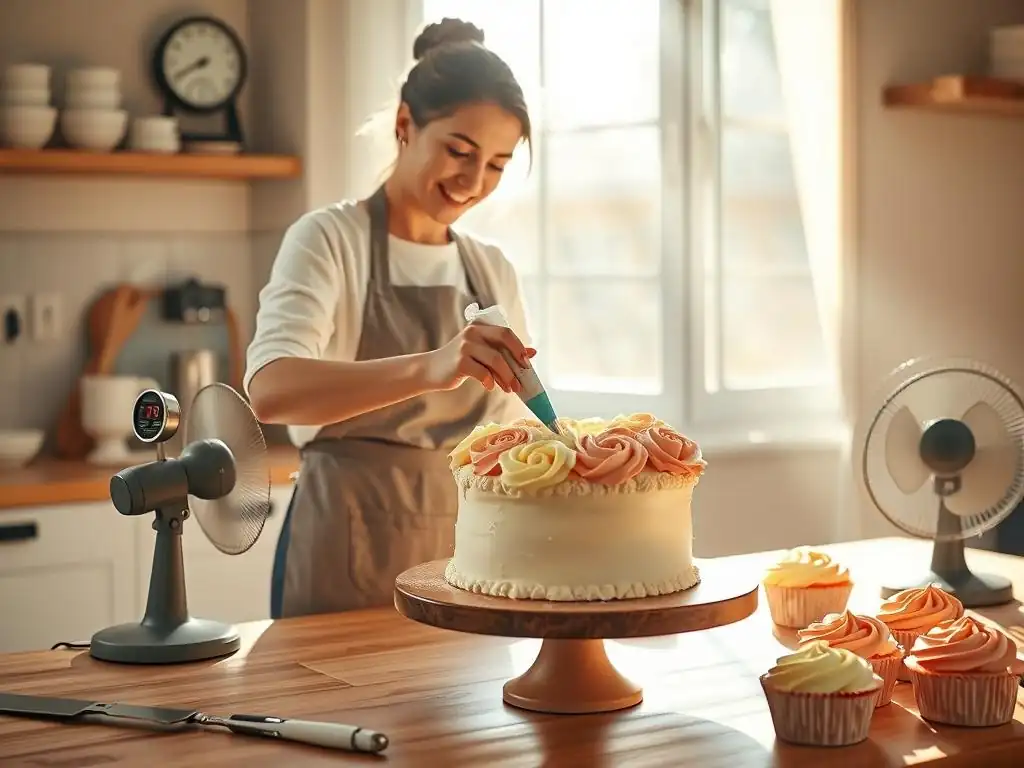
Having the right tools can also aid in warm kitchen cake decorating. Some materials retain heat more than others, and certain tools can be adapted to help keep things cool. While fancy equipment isn't strictly necessary, considering how your tools interact with temperature can give you a slight advantage.
Simple modifications or choices in tool materials can contribute to a smoother decorating process when battling the heat. It's about minimizing heat transfer and maximizing efficiency.
Turntables and Palette Knives: Stainless Steel and Acrylic Options
The material of your tools can play a small role. While not a primary factor, stainless steel palette knives and spatulas can feel cooler to the touch than plastic ones and may transfer less heat from your hand to the frosting, though the effect is minimal compared to other techniques.
For turntables, consider models with a heavy, stable base. Materials like metal or heavy-duty plastic are fine, but the key is stability. Placing the turntable on ice packs (as mentioned earlier) is more impactful than the turntable material itself. Ensure your tools are clean and cool before you start working.
Piping Bags and Tips: Choosing Durable Materials
When piping in a warm kitchen, the heat from your hands will inevitably warm the frosting in the bag. Using disposable plastic piping bags can be beneficial as they are typically thinner than reusable cloth bags, potentially transferring slightly less heat. You can also use the "bag-in-a-bag" method: put your frosting in a smaller piping bag and then place that bag inside a larger one, using the outer bag to hold and squeeze, minimizing direct contact with the inner bag holding the frosting.
Metal piping tips will warm up quickly, but this is generally unavoidable. The key here is working quickly and having multiple bags filled and chilled, ready to swap out as the one you're using warms up.
Using Ice Packs Under the Turntable: Maintaining a Cool Surface
As detailed in the techniques section, using flat ice packs placed directly under your cake turntable is a highly effective method for warm kitchen cake decorating. The cold radiating upwards helps to keep the base of the cake and the lower layers of frosting cooler as you work.
Ensure the ice packs are well-wrapped or contained to prevent condensation from making a mess on your counter. This simple step can significantly extend the working time you have before your frosting starts to soften and slide, particularly when applying crumb coats or final frosting layers.
Recipes Adapted for Warm Climates
Sometimes, adapting your base recipes themselves can provide extra resilience for warm kitchen cake decorating. While the frosting is usually the main concern, the cake's texture and moisture level also play a role. A cake that is too moist might become unstable, while a dry cake can lead to excessive crumbling.
Slight tweaks to ingredient ratios or the addition of specific components can improve the overall performance of your baked goods in challenging warm and humid conditions.
Vanilla Buttercream: Reducing Butter Content
As discussed earlier, reducing the butter content and increasing the powdered sugar is a common adaptation for American buttercream in warm climates. A typical ratio might be 1 part butter to 4 parts powdered sugar. In a warm kitchen, adjusting this to 1 part butter to 5 or even 6 parts powdered sugar (by weight) can create a firmer, more stable frosting less likely to melt quickly.
You might also consider substituting a small portion of the butter (e.g., 1/4 to 1/3) with high-ratio vegetable shortening. This type of shortening has emulsifiers that help create smooth frosting and a higher melting point than butter, adding significant stability. Be aware that this will slightly alter the flavor and texture compared to 100% butter buttercream.
Chocolate Cake: Adding Moisture to Prevent Drying
While not directly related to frosting stability, ensuring your cake remains moist is important. In warmer, potentially drier indoor environments (if using air conditioning or dehumidifiers), cakes can sometimes dry out faster. A moist cake is less likely to crumble excessively during frosting, which is a major issue in warm kitchen cake decorating.
Consider adding ingredients known for retaining moisture, such as buttermilk, sour cream, yogurt, or oil (instead of all butter) to your chocolate cake batter. Using a recipe that incorporates ingredients like applesauce or mashed banana can also help. Over-baking is the primary cause of dry cake, so pay close attention to baking times and test for doneness early using a toothpick.
Troubleshooting Common Problems
Even with the best preparation, you might encounter issues when doing warm kitchen cake decorating. Knowing how to quickly address these problems can save your project from disaster. Common issues include frosting melting, cake crumbling, and colors bleeding.
Having a plan for troubleshooting is essential. Often, the solution involves a quick return to the refrigerator or a slight adjustment to your technique or materials. Don't panic – many problems are fixable with prompt action.
Frosting Melting: Adjusting Butter-Sugar Ratio
If your buttercream starts melting as you're working, it's likely too warm or the butter-to-sugar ratio isn't robust enough for the temperature. If you can, immediately place the cake and the frosting (in its bowl or piping bag) back into the refrigerator for 10-15 minutes to firm up.
If the problem persists, you may need to gently re-whip the frosting after chilling. If it's still too soft, you can try beating in a little more powdered sugar (a tablespoon or two at a time) to increase the structure. For ganache, chilling is usually the only fix; if it's too soft after chilling, the cream-to-chocolate ratio might be too high for the temperature, and you may need to make a new, firmer batch.
Cake Crumbing: Ensuring Proper Moisture Levels
Excessive cake crumbling during frosting is usually a sign the cake is too dry or hasn't been chilled sufficiently. Ensure your cake is thoroughly cooled and well-chilled before attempting to crumb coat. If you're still getting lots of crumbs, apply a very thin, soft crumb coat of frosting and immediately refrigerate the cake until the crumb coat is firm – usually 20-30 minutes.
Once the crumb coat is firm, it will trap any loose crumbs, providing a stable surface for your final frosting layer. Make sure your crumb coat frosting is soft enough to spread easily without tearing the cake surface. For future bakes in warm conditions, consider using a recipe with more moisture-retaining ingredients or slightly reducing baking time.
Color Bleeding: Using Gel Food Coloring
Color bleeding, where vibrant colors spread or run into adjacent frosting areas, is often exacerbated by humidity and sometimes by the type of food coloring used. Liquid food colorings, which contain more water, are more likely to cause bleeding, especially in humid, warm conditions where they don't dry quickly.
For warm kitchen cake decorating, it is highly recommended to use high-quality gel or paste food colorings. These are much more concentrated and contain less liquid, making them less likely to cause bleeding. Use a minimal amount of coloring to achieve the desired shade. If you are layering dark colors next to light colors, ensure the dark color is completely set (perhaps by chilling the cake) before applying the lighter color next to it.
Long-Term Storage
Proper storage is essential to protect your beautifully decorated cake from the heat after all your hard work. Leaving a decorated cake exposed in a warm kitchen can quickly lead to melting, sagging, and spoilage.
Knowing how to store your cake correctly will ensure it looks and tastes its best until it's time to serve. Refrigeration is usually necessary for cakes decorated with most standard frostings in warm environments.
Refrigeration: Protecting Against Melting
For cakes decorated with buttercream, cream cheese frosting, or ganache, refrigeration is almost always necessary in a warm kitchen environment. Once decorated, carefully place the cake in the refrigerator. If the frosting is firm, you can place it directly on a shelf. If it's still soft, chill it uncovered briefly until the surface is firm enough to prevent damage, then cover it loosely with plastic wrap or place it in a cake carrier to prevent it from absorbing odors.
Refrigeration will keep the frosting firm and stable. Allow the cake to sit at room temperature for 30-60 minutes before serving (depending on size) for the best texture and flavor, but be mindful of how quickly it softens in the warm air.
Freezing: Extending Shelf Life
If you need to store a decorated cake for more than a few days, or if you want to prepare components ahead of time, freezing is an option, even for warm kitchen cake decorating. Ensure the cake and frosting are well-chilled in the refrigerator first.
For a fully decorated cake, freeze it uncovered until the frosting is solid (this prevents wrapping from sticking). Then, wrap it tightly in plastic wrap, followed by a layer of aluminum foil or place it in a freezer-safe container. Properly wrapped, most decorated cakes can be frozen for 1-3 months. Thaw the cake slowly in the refrigerator to minimize condensation before bringing it to room temperature for serving.
Conclusion: Enjoying Cake Decorating in Any Climate
Decorating cakes in a warm kitchen certainly presents challenges, but it's far from impossible. By understanding how temperature affects your ingredients, choosing more stable frostings, implementing cooling techniques, and adapting your methods, you can successfully create beautiful and delicious cakes regardless of the mercury reading. Warm kitchen cake decorating requires a bit more planning and patience, but the results are incredibly rewarding.
Don't let the heat deter your creativity. With the right knowledge and a few practical adjustments, you can confidently tackle warm kitchen cake decorating and share your baked masterpieces with friends and family, no matter the weather outside. Embrace the challenge, stay cool, and happy baking!
Frequently Asked Questions
How does a warm kitchen affect cake decorating?
Warm kitchens can make frosting melt and fondant become sticky, making it difficult to achieve clean lines and intricate details. It impacts the stability of your decorations.
What types of frosting are most susceptible to melting in warm temperatures?
Buttercream frostings, especially those made with a high butter content, are the most vulnerable. They have a low melting point and become soft quickly. Cream cheese frostings are also prone to softening.
What are some strategies for keeping frosting cool while decorating?
Chill your frosting and cake frequently in the refrigerator between decorating steps. Use ice packs around your frosting bowl or consider working in short bursts. Consider a cooler room.
Can I use a different type of frosting that is more stable in warmer conditions?
Yes, consider using a frosting that is less susceptible to melting, such as a Swiss meringue buttercream or a stabilized whipped cream. These options tend to hold their shape better.
What tools or equipment can help me decorate a cake in a warm kitchen?
Using a rotating cake stand can allow you to work faster and more efficiently. Consider using chilled spatulas and piping tips. Having a cooling rack can also help.
Final Reflection: The Sweet Science of Warm Kitchen Decorating
The art of cake decorating in a warm kitchen isn't just about aesthetics; it's about mastering the environment. A warm kitchen, while inviting, presents unique challenges to the delicate process of cake creation. From melting chocolate to unstable frosting, temperature plays a crucial role in achieving the perfect confection. This article has explored practical strategies to navigate these challenges and unlock the full potential of your warm kitchen baking space.
The influence of temperature on baking is often underestimated, yet it profoundly impacts the final product. It's a subtle dance between heat and ingredients, a delicate balance that requires both knowledge and intuition. As I researched and wrote this piece, I was reminded of my grandmother's kitchen – always warm, always bustling with the sweet aroma of baking, and always producing cakes of unparalleled perfection. The best things in life are the simple things, and good cake is one of them.
This sentiment encapsulates the heart of this article: embracing the warmth, not fighting it, to create something truly special.
Now, it's your turn. Consider your own kitchen environment. What adjustments can you make to optimize your baking space for cake decorating? Don't let a warm kitchen intimidate you; instead, use this knowledge to elevate your skills and create cakes that are as warm and inviting as the space in which they were made. Embrace the challenge, experiment with different techniques, and discover the joy of baking in your own unique, warm kitchen haven.
Transform Your Warm Kitchen Today!
Thanks for taking the time to explore the art of decorating warm kitchens! We hope you gained valuable insights and inspiration for creating a space that's both beautiful and functional. Now it's time to put those ideas into action!
- Start with a small change: Identify one element in your kitchen—a colorful pot, a new set of towels, or even a strategically placed plant—and see how it instantly transforms the feel of the room. This small step will build your confidence for bigger projects!
- Share your vision: Post a picture of your favorite warm kitchen detail on social media and inspire others with your unique style! Use #BakeWithEaseWarmKitchens to connect with our community.
- Explore further: Dive deeper into our other articles on kitchen design and organization to discover even more creative solutions to enhance your cooking space.
What's the one small change you'll make to your kitchen today to embrace its warmth and charm?