
Your Sourdough Starter Timeline: From Day 1 to ReadytoBake


Welcome to BakeWithEase, your companion in the delightful world of baking! Ever wondered exactly when your sourdough starter will be ready to bake that perfect loaf? This guide unravels the mystery with our detailed Sourdough Starter Timeline, taking you from Day 1 to baking bliss. Discover the signs of a thriving starter and avoid common pitfalls as we guide you through each stage. Ready to embark on this exciting journey?
Welcome to the fascinating world of sourdough! Embarking on the journey to create your own sourdough starter is a rewarding process, but it requires patience and understanding. This sourdough starter timeline guide will walk you through the typical stages of starter development, helping you know what to expect and how to nurture your starter from a simple mix of flour and water into a vibrant, ready-to-bake culture. Following a clear sourdough starter timeline is key to unlocking the magic of naturally leavened bread.
- Understanding the Sourdough Starter Timeline Guide for Baking Success
- Day 1-3: The Initial Sourdough Starter Fermentation Stage
- Day 4-7: Establishing a Regular Sourdough Starter Feeding Schedule
- Day 8-14: Strengthening Your Sourdough Starter for Baking
- Day 15-21 (and Beyond): Reaching Sourdough Starter Maturity and Baking Readiness
- Troubleshooting Common Sourdough Starter Timeline Challenges
- Maintaining Your Mature Sourdough Starter for Long-Term Baking
- Tips for Optimizing Your Sourdough Starter Timeline
- Beyond the Timeline: Expanding Your Sourdough Baking Skills
- Frequently Asked Questions
- Final Reflection: The Enduring Magic of a Sourdough Journey
- Unleash Your Inner Baker: Start Your Sourdough Journey Today!
Understanding the Sourdough Starter Timeline Guide for Baking Success
Creating a healthy, active sourdough starter is the fundamental first step in sourdough baking. It's a living ecosystem of wild yeasts and bacteria that work together to leaven bread and impart that characteristic tangy flavor. Knowing the typical sourdough starter timeline helps manage expectations and provides confidence as you navigate the daily changes.
Think of your starter's development as a journey. There will be periods of intense activity, quiet phases, and sometimes, unexpected detours. This sourdough starter timeline guide is designed to be your roadmap, highlighting the significant milestones and helping you interpret the signs your starter is giving you. Understanding this timeline allows you to react appropriately to your starter's needs, ensuring it becomes strong and reliable for all your baking adventures.
Why a Sourdough Starter Timeline Matters for Baking
Following a sourdough starter timeline is crucial because it demystifies the process and helps you anticipate what should be happening as your starter matures. Without a timeline, beginners might discard their starter too early during a quiet phase (often mistaken for failure) or use it for baking before it's strong enough, leading to flat, dense loaves. A typical starter needs about 7 to 14 days, sometimes longer depending on conditions, to develop the microbial population necessary for consistent leavening.
Moreover, understanding the sourdough starter timeline helps you optimize your feeding schedule and environment. For instance, knowing that early activity might be transient, you won't be discouraged if the bubbles disappear temporarily around day 3 or 4. You'll understand this is a natural part of the microbial succession. This guide empowers you to make informed decisions, such as when to increase feeding frequency or adjust water temperature, significantly increasing your chances of cultivating a robust starter capable of reliably doubling or tripling in volume within a few hours after feeding – a key indicator of readiness.
Key Milestones in Your Sourdough Starter Journey
Your sourdough starter timeline will be marked by several distinct phases and visual cues. The initial days are characterized by unpredictable activity as various microbes compete. Around day 4-7, a more consistent feeding schedule begins, and you should start seeing more predictable bubbling and growth, often doubling in size within 12-24 hours after feeding.
The period from day 8 to 14 is typically when the starter begins to mature. You'll look for signs like consistent doubling in size within 4-8 hours after feeding (at typical room temperature, around 70-75°F or 21-24°C) and a pleasant, tangy aroma. The float test, while not foolproof, can also offer a preliminary indication during this stage. Reaching maturity around day 15-21 means your starter reliably peaks, doubles or triples quickly, smells pleasantly acidic, and is ready to be used for baking sourdough bread.
Day 1-3: The Initial Sourdough Starter Fermentation Stage
The first few days of creating your sourdough starter are all about initiating fermentation. This phase is exciting as you see the first signs of life, but it can also be a bit unpredictable. Don't be alarmed by inconsistent activity; this is perfectly normal as the microbial community begins to establish itself.
During this initial stage of the sourdough starter timeline, you are providing food (flour) and hydration (water) for the naturally occurring yeasts and bacteria present in the flour and air. The specific types and quantities of microbes will vary, leading to different rates and types of activity. Observing these early changes, like tiny bubbles or a change in texture, is your first step in learning to read your starter.
Mixing Flour and Water: Laying the Foundation for Your Starter
To begin your sourdough starter timeline guide, you simply combine equal parts flour and water by weight in a clean jar or container. A common starting point is 50 grams of flour and 50 grams of water. Using filtered or non-chlorinated water is often recommended, as chlorine can inhibit microbial growth. The type of flour can influence the timeline; rye or whole wheat flour often kickstart activity faster than all-purpose flour due to their higher nutrient content and microbial load.
Mix the flour and water thoroughly until no dry bits of flour remain and the mixture forms a thick, paste-like consistency. Cover the container loosely to allow air exchange while preventing contaminants from entering. Placing it in a warm spot, ideally between 70-80°F (21-27°C), will encourage faster development. This initial mix is the foundation upon which your entire starter culture will grow over the next week or two, following the sourdough starter timeline towards maturity.
Observing Initial Activity: Bubbles and Changes in Texture
Within 12 to 48 hours of the initial mix, you might start seeing small bubbles appearing throughout the starter, especially around the edges. The surface might also develop a few larger bubbles. The texture may become slightly more spongy or foamy. This activity is a positive sign that fermentation has begun, driven by various wild yeasts and bacteria metabolizing the sugars in the flour.
However, it's important to note that this early activity can be fleeting. Sometimes, a burst of bubbles appears on day 2, only to subside by day 3 or 4. This is often due to heterofermentative bacteria, which produce gas quickly but don't contribute much to long-term leavening. The important thing is that activity is happening, indicating viable microbes are present. Continue following your sourdough starter timeline guide, even if the bubbles seem to disappear temporarily.
Troubleshooting Early Issues: Common Problems and Solutions
One common issue in the first few days of the sourdough starter timeline is a lack of visible activity. If after 48 hours you see no bubbles, consider increasing the temperature of the storage location or switching to a flour with more nutrients, like rye or whole wheat, for a few feedings. Ensure you are using non-chlorinated water.
Another issue can be a strange or unpleasant smell. In the very early stages, your starter might smell like gym socks, acetone, or even vomit. This is often normal and due to the initial microbial population. As beneficial lactic acid bacteria take over, these smells will dissipate and be replaced by a more pleasant, tangy aroma. Do not discard your starter based on smell alone in the first few days unless you see visible mold.
Day 4-7: Establishing a Regular Sourdough Starter Feeding Schedule
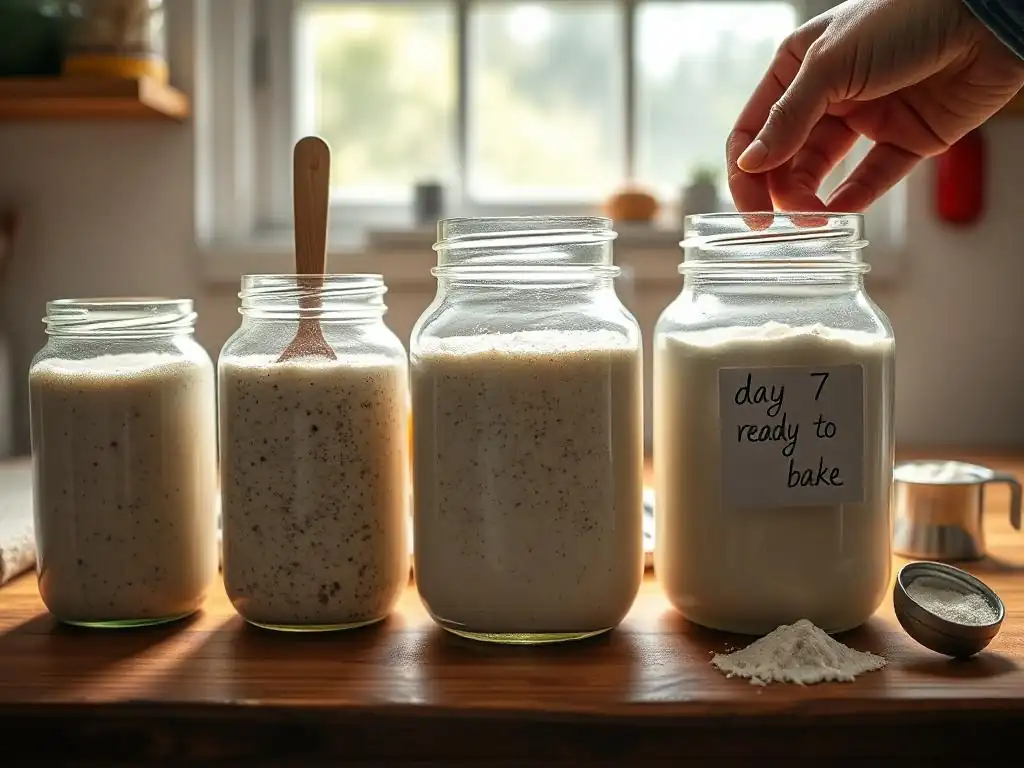
By day 4, the initial burst of activity may have subsided, or it might be continuing. This period is crucial for establishing a consistent feeding routine, which is essential for cultivating the desired yeast and bacterial populations that will reliably leaven your bread. This is where the sourdough starter timeline really starts to take shape with daily care.
Feeding your starter involves discarding a portion of the old starter and feeding the remainder with fresh flour and water. This process serves several purposes: it removes excess metabolic waste products, concentrates the desired microbes, and provides a fresh food source, encouraging strong growth and activity. Sticking to a regular schedule, often once every 24 hours during this phase of the sourdough starter timeline, is key.
Discarding and Feeding: The Key to a Healthy Starter
From day 4 onwards, you will typically begin a daily feeding schedule. The standard approach is to discard a significant portion of your starter before feeding. A common feeding ratio is 1 part starter, 1 part water, and 1 part flour by weight (e.g., keeping 25 grams of starter, adding 50 grams of water and 50 grams of flour). This ensures you are always working with a vibrant portion of the culture and providing ample fresh food.
Why discard? If you simply kept adding flour and water to the original amount, your starter would quickly become enormous, requiring impractical amounts of flour. More importantly, discarding helps maintain a favorable environment for the desired microbes by reducing the concentration of waste products. Following this discard-and-feed rhythm is a cornerstone of managing your sourdough starter timeline effectively.
Recognizing Signs of Activity: Increased Bubbling and Volume
As you continue daily feedings between day 4 and 7, you should start seeing more consistent signs of fermentation. After feeding, your starter should begin to develop bubbles throughout the mixture, not just on the surface. You might also observe a noticeable increase in volume, though it may not yet double in size reliably.
Look for the starter to become noticeably lighter and more airy. The surface may become bubbly or dome slightly before collapsing. These are all positive indicators that the beneficial yeasts and bacteria are multiplying and becoming more dominant. Documenting these changes helps you track your progress along the sourdough starter timeline guide. For example, noting "Day 5: Bubbles throughout, increased by about 25% after 12 hours" provides valuable data.
Understanding the Smell: From Unpleasant to Tangy
During the first week of your sourdough starter timeline, the smell will evolve significantly. The initial unpleasant odors (like acetone or rotting fruit) are often replaced by a smell reminiscent of yogurt or slightly vinegary. This indicates that lactic acid bacteria, crucial for flavor and creating the acidic environment that inhibits undesirable microbes, are becoming dominant.
By day 7, a healthy starter should start to develop a clean, tangy, slightly acidic aroma – the classic sourdough smell. If the unpleasant smells persist, it might indicate that the beneficial bacteria aren't establishing themselves effectively, perhaps due to temperature or feeding issues. However, for most starters following this sourdough starter timeline, the smell transition is a clear sign of healthy development.
Day 8-14: Strengthening Your Sourdough Starter for Baking
This period is often when your starter transitions from an active culture to a truly robust and reliable one. The microbial population should be stabilizing, leading to more predictable behavior. The focus shifts from simply keeping it alive to strengthening it for the demands of leavening bread. This phase is critical in the sourdough starter timeline guide.
Consistency in feeding and environment is paramount during this week. Your starter is building strength, and regular, timely feedings ensure it has the energy and resources to multiply vigorously. Paying close attention to how your starter responds after feeding will give you insights into its health and readiness.
Monitoring Growth and Consistency: Assessing Starter Vigor
Between day 8 and 14, you should observe your starter consistently doubling in size after each feeding within a reasonable timeframe, perhaps 6-12 hours at typical room temperature (70-75°F). Mark the level of your starter in its container immediately after feeding with a rubber band or marker so you can easily see how much it has grown.
A strong starter will not only double but will also show a light, airy, spongy texture throughout. The consistency should be bubbly and somewhat viscoelastic – it might stretch slightly when stirred. If your starter is doubling consistently and reliably within this timeframe after feeding, it's a strong indicator that it's nearing maturity according to the sourdough starter timeline. Inconsistent growth might mean it needs a little more time or a slight adjustment in feeding.
Adjusting Feeding Ratios: Fine-Tuning for Optimal Performance
As your starter gets stronger, you might consider adjusting your feeding ratio. While 1:1:1 (starter:water:flour) is a good standard, some bakers prefer feeding larger ratios, like 1:2:2 or even 1:5:5 (e.g., 10g starter, 50g water, 50g flour), especially if keeping the starter at warmer temperatures or if it's extremely vigorous. Feeding a larger ratio provides more food, allowing the starter to peak and fall over a longer period, which can be convenient.
Experimenting slightly with ratios can help you understand what works best for your specific starter and schedule. For example, if your starter is peaking too quickly (say, within 3-4 hours), feeding a larger ratio might slow it down slightly. If it's still slow to double, ensuring a warm environment and a consistent 1:1:1 ratio is usually the best approach during this stage of the sourdough starter timeline.
The Float Test: A Preliminary Indicator of Readiness
Around day 10-14, when your starter is consistently doubling, you can try a preliminary float test. Take a small spoonful of starter at its peak (when it has doubled or tripled and is full of bubbles) and gently drop it into a glass of water. If it floats, it's often considered a good sign that it's ready to bake with. The float test works because a starter full of carbon dioxide bubbles, produced by the yeast, is less dense than water.
However, the float test is not a definitive confirmation on the sourdough starter timeline guide. Some perfectly good starters don't float, and sometimes starters that aren't quite ready might float temporarily. The most reliable indicators are consistent doubling/tripling within a predictable timeframe after feeding and a bubbly, airy texture. Use the float test as one piece of evidence among others.
Day 15-21 (and Beyond): Reaching Sourdough Starter Maturity and Baking Readiness
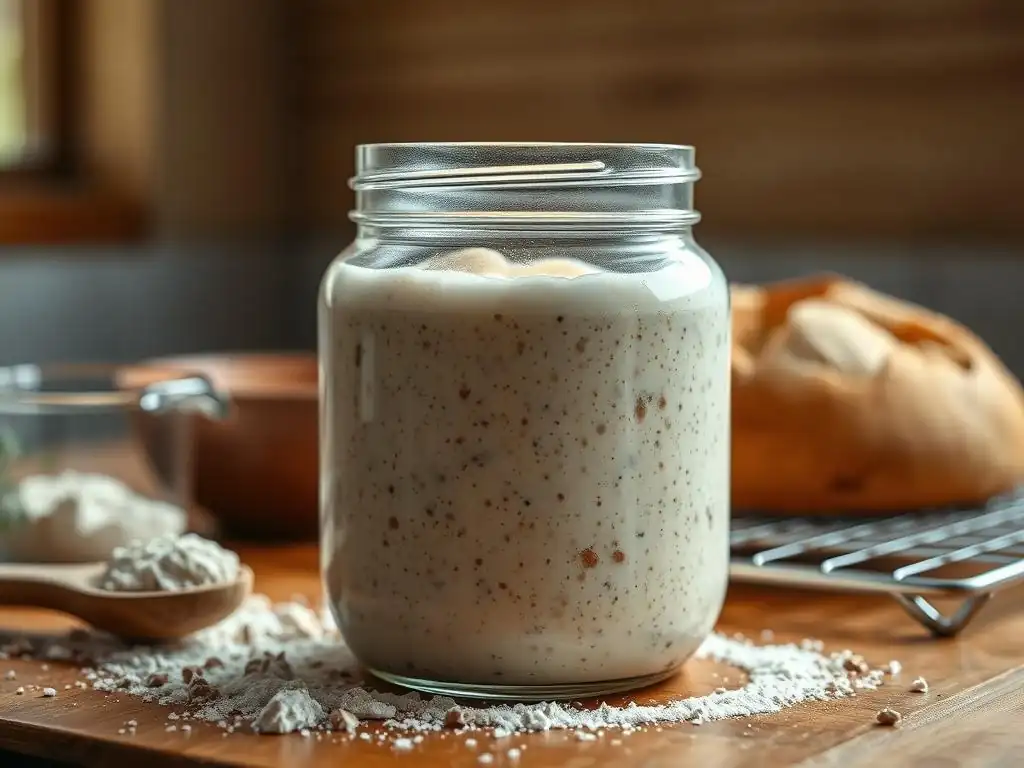
Congratulations! By this point in your sourdough starter timeline, your culture should be mature and ready to leaven your first loaf of sourdough bread. A mature starter is predictable, robust, and capable of consistently rising dough. While some starters might be ready a bit earlier or later, this is the general timeframe for most healthy starters cultivated correctly.
Reaching maturity means the microbial ecosystem within your starter has stabilized. The wild yeasts are actively producing carbon dioxide (for rise) and ethanol, while the lactic acid bacteria are producing various organic acids (for flavor and structure). This balanced activity is what makes a mature starter so effective for baking following the sourdough starter timeline.
Consistent Doubling in Size: The Hallmark of a Mature Starter
The most reliable indicator that your starter has reached maturity on the sourdough starter timeline is its ability to consistently double or even triple in size within 4-8 hours after being fed at room temperature (around 70-75°F or 21-24°C) using a 1:1:1 ratio. This vigorous and predictable rise demonstrates that the yeast population is large and active enough to produce sufficient gas for leavening.
Observe your starter after feeding. Mark the level. A mature starter will rise steadily, develop a domed top, and be full of visible bubbles throughout. It will hold this peak for a period before slowly beginning to deflate. This consistent, vigorous activity after every feeding is the gold standard for readiness according to any comprehensive sourdough starter timeline guide.
Performing the Float Test Accurately: Confirming Baking Readiness
Once your starter is consistently doubling within 4-8 hours, you can perform the float test again, this time with more confidence that it's a valid indicator on the sourdough starter timeline. Take a small amount of starter (about a teaspoon) from the peak of its rise – when it's at its maximum volume and full of bubbles – and gently drop it into a glass of room-temperature water.
If the starter floats immediately, it's a very good sign that it's ready to be used for baking. The trapped carbon dioxide makes it buoyant. If it sinks slowly or immediately, it might mean the starter is past its peak (most of the gas has escaped) or not quite strong enough yet. Remember, consistent doubling is the primary indicator, but a successful float test at the peak of activity provides extra reassurance on your sourdough starter timeline journey.
Understanding Starter Acidity: The Impact on Flavor
A mature sourdough starter should have a pleasant, tangy aroma, indicative of healthy lactic acid production. This acidity is not just for flavor; it also plays a role in dough development and structure. The acids help break down flour proteins, which can contribute to gluten development, and they also help preserve the starter by inhibiting undesirable microbes.
While you won't typically measure the pH of your starter in a home kitchen, the smell is a good proxy. An overly acidic, vinegary, or acetone smell might indicate the starter needs more frequent feeding or a larger feeding ratio to dilute the acid buildup. A balanced, pleasant tang signifies a healthy, mature starter ready to impart delicious flavor to your bread, a key outcome of following the sourdough starter timeline guide.
Troubleshooting Common Sourdough Starter Timeline Challenges
Even when following a sourdough starter timeline guide diligently, you might encounter issues. Don't be discouraged! Most problems are fixable with simple adjustments. Understanding common challenges helps you identify the root cause and take appropriate action to get your starter back on track.
Patience is your best tool when troubleshooting. Avoid making multiple changes at once. Change one variable (like temperature or feeding ratio), observe the starter's response over a few feedings, and then decide if further adjustments are needed. This systematic approach is crucial for navigating bumps in the sourdough starter timeline.
Slow Starter Activity: Identifying and Resolving the Root Cause
If your starter is consistently slow to double or shows minimal bubbling even after day 7 or 10 on your sourdough starter timeline, several factors could be responsible. The most common culprits are temperature, feeding ratio, and water quality.
- Temperature: Sourdough starters thrive in warmer environments, ideally 70-80°F (21-27°C). If your kitchen is cooler, try finding a warmer spot (like on top of the refrigerator, inside a turned-off oven with the light on, or in a proofing box). A difference of just a few degrees can significantly impact activity speed.
- Feeding Ratio: Ensure you are feeding enough flour relative to the amount of starter you keep. A 1:1:1 ratio is standard, but if your starter is very sluggish, ensuring you aren't keeping too much old starter relative to new food is important.
- Water/Flour: Make sure you are using non-chlorinated water. The type of flour can also matter; switching to a mix of all-purpose and whole wheat or rye for a few feedings can sometimes boost activity.
Mold or Unpleasant Odors: Preventing and Addressing Contamination
While some funky smells are normal in the early days of the sourdough starter timeline, visible mold is a sign of contamination and means you should discard the starter and begin again. Mold typically appears as fuzzy patches of various colors (green, black, white, orange). If you see mold, do not try to salvage the starter.
Preventing mold involves using clean jars and utensils, covering the starter loosely but effectively to prevent airborne contaminants, and maintaining a healthy, active culture through regular feeding. A healthy starter's acidity helps inhibit the growth of undesirable mold and bacteria. If you notice a very strong, off-putting smell that persists beyond the first few days, or a pink/orange tinge (which can indicate dangerous bacteria), it's also safest to discard and start fresh, keeping hygiene practices in mind for your next attempt at the sourdough starter timeline.
Inconsistent Results: Maintaining a Stable Environment
If your starter is active some days but sluggish on others, inconsistency in its environment or feeding routine is often the cause. Wild yeasts and bacteria are sensitive to changes. Varying kitchen temperatures throughout the day or feeding at significantly different times can lead to unpredictable behavior on the sourdough starter timeline.
To promote consistency, try to keep your starter in a location with a stable temperature. Feed it around the same time each day. Measure your ingredients carefully using a scale rather than volume measurements, as this ensures a consistent hydration level. Small changes in consistency can make a big difference to your starter's performance. By minimizing variables, you help your starter establish a predictable cycle, making your sourdough starter timeline more reliable.
Maintaining Your Mature Sourdough Starter for Long-Term Baking
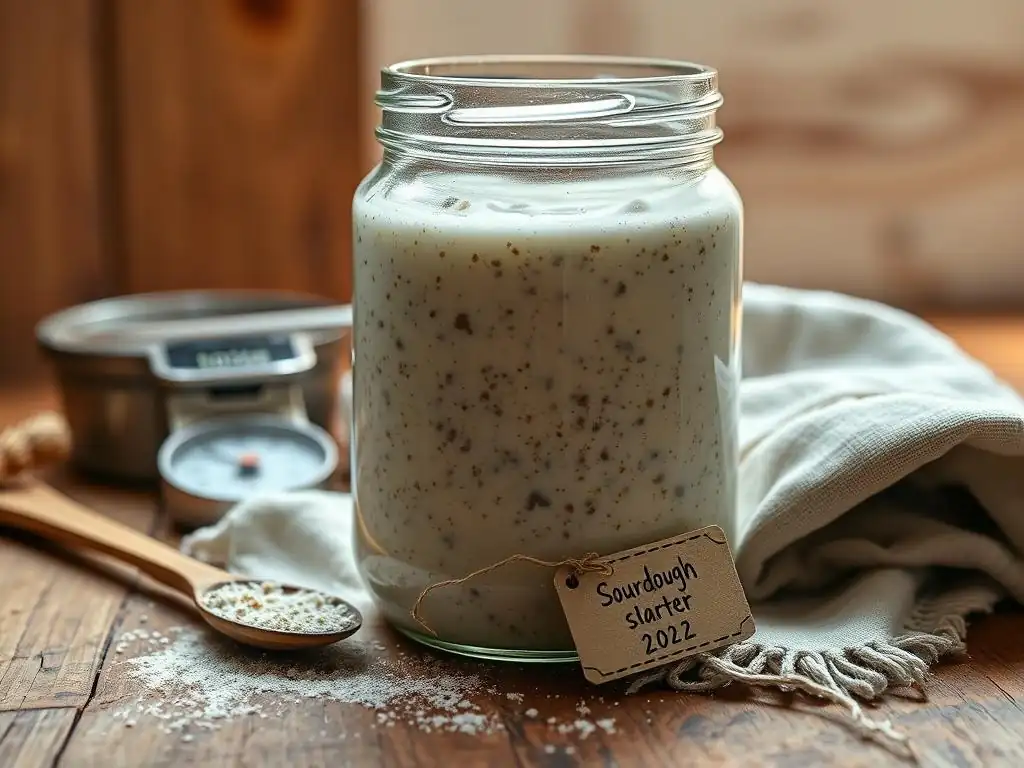
Once your starter has reached maturity following the sourdough starter timeline guide, you'll need to decide how to maintain it based on your baking frequency. A mature starter is robust and can be stored in different ways, but it still requires regular care to stay active and healthy for all your baking needs.
Proper maintenance ensures your starter is always ready when you want to bake and prevents it from becoming too acidic or developing undesirable characteristics. Whether you bake daily or only occasionally, there's a maintenance strategy that fits your schedule and keeps your starter in prime condition.
Storage Options: Refrigerator vs. Room Temperature
The most common storage options for a mature starter are keeping it at room temperature or storing it in the refrigerator. Keeping a starter at room temperature requires daily feeding (or even twice daily if it's very warm or you're using a smaller feeding ratio) to keep it active and prevent it from becoming too acidic. This is ideal if you bake frequently, perhaps every day or two.
Storing your starter in the refrigerator significantly slows down the fermentation process. This allows you to feed it much less frequently, often just once a week. This is the preferred method for most home bakers who bake less often, as it saves on flour and reduces the need for daily maintenance. Both methods are valid ways to maintain your starter long after you've completed the initial sourdough starter timeline.
Feeding Schedules for Stored Starters: Keeping It Active
If you store your mature starter in the refrigerator, it will need to be fed less frequently. A common schedule is to feed it once a week. Take it out of the fridge, discard most of it (leaving maybe 25-50 grams), feed it your usual ratio (e.g., 1:1:1 or 1:2:2), let it sit at room temperature for 2-4 hours to become active, and then return it to the fridge.
When you want to bake with a refrigerated starter, take it out the day before, discard, and feed it 1-2 times at room temperature until it is reliably doubling within 4-8 hours after feeding. This "revival" process wakes it up and ensures it's vigorous enough for baking. This adjusted feeding schedule is a key part of the long-term sourdough starter timeline for bakers who don't bake daily.
Reviving a Dormant Starter: Bringing It Back to Life
If your starter has been neglected in the fridge for longer than usual, or if it seems sluggish after its regular feeding, it might need a little extra care to become fully active again. Signs of a sluggish refrigerated starter might include a strong layer of dark liquid on top (called "hooch"), a very strong acidic or alcoholic smell, and slow activity after feeding.
To revive it, discard most of the starter and feed the remainder with your usual ratio of flour and water. Let it sit at room temperature and feed it every 12 or even 8 hours, discarding most before each feeding, until it is consistently doubling within 4-8 hours and smells pleasantly tangy. This might take 2-3 days of consistent feeding. Think of this as a mini-reset on your sourdough starter timeline to bring it back to its peak performance state.
Tips for Optimizing Your Sourdough Starter Timeline
While the general sourdough starter timeline provides a framework, several factors can influence how quickly and successfully your starter develops. Paying attention to these details can help optimize the process, leading to a stronger, more reliable starter sooner.
Small adjustments in ingredients or environment can make a significant difference in the microbial activity within your starter. By controlling these variables, you take a more active role in guiding your starter through its development stages.
Choosing the Right Flour: Types and Characteristics
The type of flour you use significantly impacts the sourdough starter timeline. Rye flour and whole wheat flour contain more nutrients and a higher concentration of naturally occurring microbes compared to white all-purpose or bread flour. Using some amount of whole grain flour, especially in the initial days, can often accelerate the starter's development and help establish a robust microbial community.
Many bakers start with a mix, such as 50% all-purpose and 50% whole wheat or rye, for the first few days before transitioning to their preferred flour for regular feeding. Once your starter is mature, you can typically feed it with the type of flour you plan to use for baking, whether that's all-purpose, bread flour, or a specific heritage grain. Consistency in flour type after maturity can also help maintain a predictable sourdough starter timeline.
Maintaining Consistent Temperatures: Creating an Ideal Environment
Temperature is perhaps the most critical factor influencing the speed of your sourdough starter timeline. Wild yeasts and bacteria are most active in warmer conditions, typically between 70°F and 80°F (21-27°C). Colder temperatures will significantly slow down fermentation, potentially extending the timeline to maturity.
Find a spot in your home with a stable temperature. Avoid drafty areas or places near ovens that experience wide temperature swings. Options include placing the starter in a proofing box, inside a microwave or oven (turned off!) with the light on, or on top of a warm appliance like a refrigerator. Maintaining a consistent temperature helps ensure the microbes thrive and keeps your sourdough starter timeline on track.
Documenting Your Progress: Tracking Your Sourdough Starter Development
Keeping a simple log or journal of your starter's activity can be incredibly helpful as you follow your sourdough starter timeline guide. Note the date and time of each feeding, the ratio used, the temperature of the room, and your observations (e.g., "Day 5: Small bubbles, smells slightly acidic," "Day 10: Doubled in 8 hours, bubbly texture").
Tracking your progress allows you to see patterns, understand how different conditions affect your starter, and troubleshoot more effectively. If you encounter issues, your notes can help you pinpoint when things changed. This documentation becomes a personalized sourdough starter timeline guide tailored specifically to your starter and environment.
Beyond the Timeline: Expanding Your Sourdough Baking Skills
Reaching the end of the initial sourdough starter timeline is just the beginning! With a healthy, mature starter, a world of sourdough baking possibilities opens up. Your starter is now a powerful tool ready to transform simple flour and water into delicious, naturally leavened baked goods.
Using your starter effectively requires understanding how it interacts with dough and mastering basic sourdough techniques. This goes beyond just the starter's development and into the art and science of using it in recipes.
Using Your Starter in Sourdough Bread Recipes
The primary use for your mature starter is, of course, baking sourdough bread. Most recipes will call for a specific amount of "active" or "ripe" starter. This means your starter should be fed and used when it's at or near the peak of its activity – typically when it has doubled or tripled in volume and is full of bubbles, usually 4-8 hours after feeding (depending on temperature and ratio).
Substituting commercial yeast with your starter requires adjusting recipes, as sourdough fermentation is slower and less predictable than commercial yeast. A general rule of thumb is that 100 grams of active sourdough starter can replace about 7-10 grams of active dry yeast in terms of leavening power, but the fermentation time will be significantly longer. Learning to use your starter effectively in recipes is the next step after mastering the sourdough starter timeline guide.
Exploring Different Sourdough Baking Applications: Discards and More
Your sourdough journey isn't limited to loaves of bread! The "discard" – the portion of starter you remove before feeding – is a valuable ingredient that can be used in a variety of recipes where you want sourdough flavor but don't need the leavening power.
Sourdough discard can be used straight from the fridge in recipes like pancakes, waffles, crackers, muffins, cookies, and even pasta. These recipes use the discard for flavor and moisture, often relying on baking soda or powder for leavening. Exploring discard recipes is a delicious way to minimize waste as you maintain your starter long after completing the initial sourdough starter timeline.
Advanced Sourdough Techniques: Autolyse and Bulk Fermentation
As you become more comfortable using your starter, you can explore advanced sourdough techniques that improve dough structure and flavor.
- Autolyse: This technique involves mixing just the flour and water from your recipe and letting it rest for 20 minutes to several hours before adding the starter and salt. This allows the flour to fully hydrate and gluten development to begin passively, leading to a more extensible dough that's easier to handle.
- Bulk Fermentation: This is the first rise of the dough after mixing in the starter and salt. It's a crucial phase where the starter works to leaven the dough and develop flavor. Monitoring the dough's increase in volume (often aiming for a 30-50% increase) and its texture is key to successful bulk fermentation. Understanding these techniques complements your knowledge from the sourdough starter timeline guide and elevates your baking.
Frequently Asked Questions
What is the ideal temperature for a sourdough starter?
The ideal temperature for a sourdough starter is between 70-75°F (21-24°C). This temperature range promotes optimal yeast activity and fermentation.
How often should I feed my sourdough starter?
During the initial stages, feed your sourdough starter once every 24 hours. As it matures, you may need to feed it twice a day for best results.
What does "ripe" sourdough starter look and smell like?
A ripe sourdough starter will be bubbly and doubled in size. It should have a slightly tangy, yeasty aroma, not an overpowering sour or vinegary smell.
What if my sourdough starter develops mold?
If you see mold, discard the entire starter immediately. Mold indicates contamination and is not safe to use. Start a new starter.
How long does it typically take for a sourdough starter to be ready to bake with?
It typically takes 7-14 days for a sourdough starter to be ready to bake with, but this can vary. The key is to watch for consistent rising and falling after feeding.
Final Reflection: The Enduring Magic of a Sourdough Journey
The journey of creating a sourdough starter is more than just a recipe; it's a testament to patience, observation, and the enduring connection between humans and nature. This timeline, detailing the daily progress from the initial mix to the first loaf, highlights the surprising complexity hidden within something so seemingly simple. The process itself mirrors life's own unpredictable yet rewarding growth, demanding consistent care and attention, yet ultimately yielding something truly unique and delicious.
The impact of sourdough baking extends far beyond the kitchen. It represents a return to traditional methods, a rejection of instant gratification, and a deeper appreciation for the natural fermentation process. This renewed interest in crafting food from scratch speaks to a growing desire for authenticity and connection with our food sources. Bread is the staff of life,
they say, and in the case of sourdough, it's a staff crafted with time, care, and a touch of magic. This journey, shared through this timeline, hopefully inspires others to embark on their own rewarding sourdough adventures.
Now, consider your own life. What seemingly small, slow-growing projects have you abandoned, perhaps prematurely? What if you applied the same patience and consistent care to those endeavors as you would to nurturing a sourdough starter? I invite you to reflect on this, to identify a personal "starter" – a project, a dream, a relationship – and commit to nurturing its growth, one day at a time. The rewards, like the first perfectly risen sourdough loaf, will be well worth the effort.
Unleash Your Inner Baker: Start Your Sourdough Journey Today!
Thanks for taking the time to learn about the exciting world of sourdough baking! We hope you now feel confident and empowered to embark on this rewarding journey. Ready to transform your kitchen into a bread-making haven?
Here’s what you can do next:
- Begin your sourdough starter today! Follow the steps outlined in the article and document your progress. You’ll be amazed at how quickly your starter comes to life.
- Share your sourdough journey! Post a picture of your bubbly starter on social media using #BakeWithEaseSourdough and tag us – we'd love to see your progress!
- Explore other recipes on BakeWithEase.com to find your perfect sourdough bread recipe once your starter is ready.
What exciting bread creations will you bake with your very own sourdough starter?