
Unlock Silky Smooth, Shiny Chocolate Every Time You Bake.

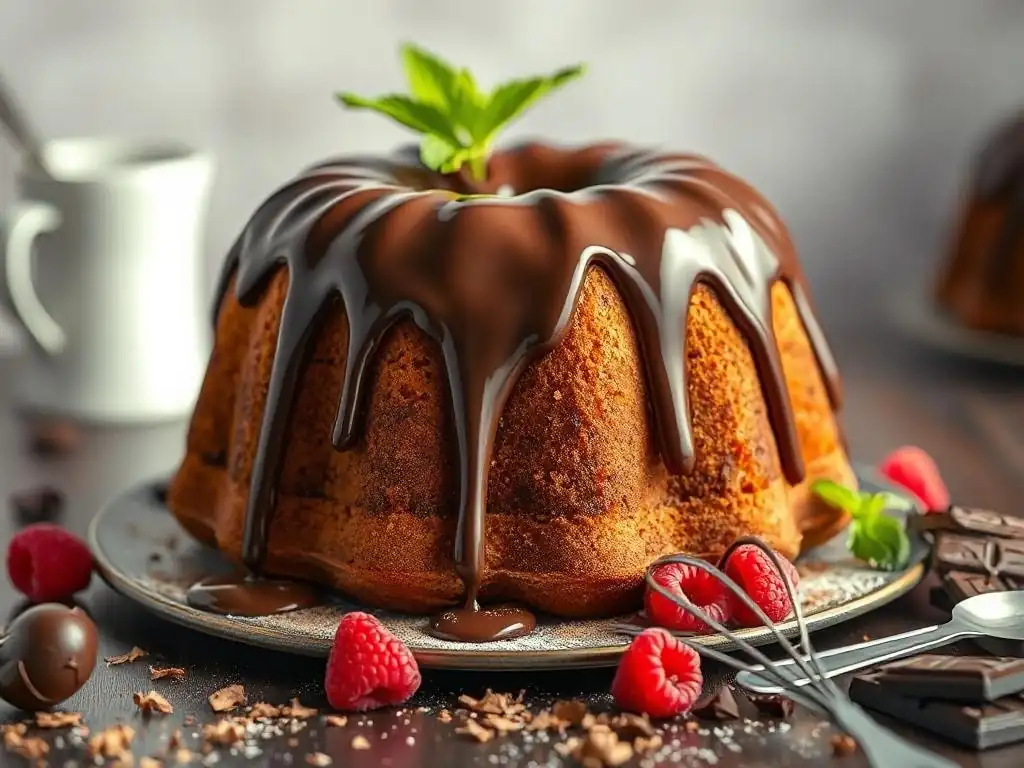
Welcome to BakeWithEase, where baking becomes a joy, not a chore! Ever dreamt of achieving that perfect, glossy finish on your desserts? This week, we're diving into the secrets of creating a flawless chocolate ganache. Is it really as simple as everyone says? Prepare to unlock the secrets with our easy chocolate ganache recipe easy guide and discover how to elevate your baking to a whole new level of professional-looking perfection. Get ready to impress... and maybe even drool a little!
- Unlock Silky Smooth, Shiny Chocolate Every Time You Bake: The Ultimate Guide to Easy Chocolate Ganache
- Introduction to Perfect Chocolate Ganache: BakeWithEase's Guide
- The Easy Chocolate Ganache Recipe: Step-by-Step Instructions
- Troubleshooting Common Chocolate Ganache Problems
- Variations on the Easy Chocolate Ganache Recipe
- Creative Uses for Your Silky Smooth Chocolate Ganache
- Tips and Tricks for the Best Chocolate Ganache Every Time
- Advanced Ganache Techniques for Experienced Bakers
- Conclusion: Mastering the Easy Chocolate Ganache Recipe for Baking Success
-
Frequently Asked Questions
- How do I make a chocolate ganache with an easy recipe?
- What's the secret to getting a shiny chocolate ganache?
- Can I use different types of chocolate in an easy chocolate ganache recipe?
- How can I adjust the consistency of my chocolate ganache?
- Is there a vegan or dairy-free version of an easy chocolate ganache recipe?
- Final Reflection: The Enduring Allure of Perfect Chocolate
- Unlock Your Chocolate Baking Superpowers!
Unlock Silky Smooth, Shiny Chocolate Every Time You Bake: The Ultimate Guide to Easy Chocolate Ganache
Introduction to Perfect Chocolate Ganache: BakeWithEase's Guide
Why Mastering Chocolate Ganache is Essential for Bakers
Mastering an easy chocolate ganache recipe is a fundamental skill that elevates your baking from simple home treats to impressive, professional-looking desserts. Ganache, a versatile mixture of chocolate and cream, serves as a base for countless applications – from rich glazes and decadent fillings to the core of exquisite truffles. Understanding how to make a smooth, stable ganache opens up a world of creative possibilities in the kitchen. It's not just about combining ingredients; it's about understanding the science behind the emulsification process that creates that signature luxurious texture and beautiful sheen.
Beyond its versatility, a perfectly executed chocolate ganache provides a depth of flavor that is unparalleled. Whether you're using dark, milk, or white chocolate, the slow melding with warm cream releases the full aromatic potential of the cocoa solids. This simple technique, once mastered through an easy ganache recipe, becomes a powerful tool in your baking arsenal, allowing you to consistently produce desserts that not only look stunning but also deliver an intensely satisfying chocolate experience. Think of it as the baker's equivalent of a chef's signature sauce – foundational and transformative.
Achieving Silky Smooth, Shiny Chocolate Ganache: The Key to Professional-Looking Desserts
The hallmark of a truly great chocolate ganache is its texture: it should be impeccably smooth, without any graininess or separation, and possess a beautiful, glossy sheen. This silky finish is what makes a ganache glaze on a cake look so inviting or a ganache drip appear effortlessly elegant. Achieving this involves precise temperature control and careful emulsification, ensuring the fat from the chocolate and cream binds together seamlessly. Our easy chocolate ganache recipe focuses on these critical steps to guarantee success, even for those new to working with chocolate.
The shine comes from the way light reflects off the smooth, stable emulsion. If the ganache is broken (where the fat and liquid separate), it will appear dull and potentially greasy. By following specific techniques, such as allowing the warm cream to melt the chocolate sufficiently before stirring and using gentle, consistent motions during emulsification, you can consistently achieve that coveted mirror-like finish. This attention to detail in the process is what separates a good ganache from a truly exceptional one, making your homemade desserts rival those from a high-end patisserie.
The Easy Chocolate Ganache Recipe: Step-by-Step Instructions
Ingredients for a Foolproof Chocolate Ganache
Getting the ingredients right is the first step to a successful, easy chocolate ganache recipe. The quality and type of chocolate and cream you choose significantly impact the final taste, texture, and shine. We recommend starting with a basic ratio, like a 1:1 ratio by weight for a pouring ganache or a 2:1 ratio for a thicker truffle ganache.
Choosing the Right Chocolate for Your Ganache (Semi-Sweet Chocolate, 60-70% Cacao)
For a classic, balanced chocolate ganache, high-quality semi-sweet chocolate is often the preferred choice. Look for chocolate with a cacao percentage between 60% and 70%. This range offers a rich chocolate flavor without being overly bitter, and the higher cocoa butter content contributes to a smoother, shinier finish.
Using chocolate chips can be convenient, but finely chopped chocolate from a bar generally melts more evenly and incorporates better into the cream, leading to a superior emulsion. Avoid using confectionery coating or "baking chips" that contain stabilizers or vegetable oils instead of cocoa butter, as these will not yield the same smooth, shiny result.
The cacao percentage directly influences the ganache's consistency and flavor intensity. A chocolate with 70% cacao will produce a firmer, more intensely flavored ganache than one with 60%. For our easy chocolate ganache recipe, starting around 60-65% is forgiving and yields a lovely balance. Always use chocolate that you enjoy eating on its own; if it tastes good plain, it will taste even better transformed into ganache.
Selecting the Best Cream for a Smooth Texture (Heavy Cream, 36% Fat)
The type of cream is equally critical for achieving a silky smooth, stable ganache. Heavy cream, also known as heavy whipping cream, is essential because it contains a high percentage of milk fat – typically 36% or more. This high fat content is necessary to properly emulsify with the fat in the chocolate, creating a stable and smooth mixture. Lower fat creams, like half-and-half or light cream (which contain around 10-20% fat), do not have enough fat to create a stable emulsion and will likely result in a thin, greasy, or separated ganache.
Using cold, straight-from-the-refrigerator heavy cream is important before heating. The heating process prepares the fat molecules to bind with the melted chocolate. Ensure the cream you use is fresh and hasn't been previously frozen, as freezing can affect its fat structure and ability to emulsify properly. The richness of the heavy cream not only provides the necessary fat for emulsion but also contributes to the creamy mouthfeel of the finished ganache.
Equipment Needed for Easy Ganache Preparation
Making easy chocolate ganache doesn't require a lot of specialized equipment, but having the right tools on hand makes the process much smoother and helps ensure consistent results.
- A medium-sized saucepan for heating the cream.
- A heatproof bowl (glass, ceramic, or stainless steel) that is large enough to hold the chocolate and cream, and ideally fits snugly over the saucepan for a double boiler method if preferred (though direct heating of cream is common).
- A sharp knife and cutting board for finely chopping the chocolate.
- A rubber spatula or wooden spoon for stirring and emulsifying the ganache. Avoid whisks, which can incorporate air and potentially break the emulsion.
- Measuring cups and a digital kitchen scale are highly recommended for accurate ingredient ratios, especially when working with chocolate (weight measurements are more precise).
- Optional: An immersion blender for ensuring a perfectly smooth emulsion, though a spatula is often sufficient if the steps are followed correctly.
Having your equipment prepped and ready before you start is part of the simplicity of an easy chocolate ganache recipe. Ensure your bowl and spatula are clean and completely dry; even a tiny drop of water can cause the chocolate to seize.
Step-by-Step Guide to Making the Perfect Chocolate Ganache
Follow these steps for our foolproof, easy chocolate ganache recipe. Precision and patience are key here.
Step 1: Preparing the Chocolate (Chopping the Chocolate)
The first crucial step is to prepare your chocolate. If you are using chocolate from a bar, chop it very finely. The goal is to create small, uniform pieces. This allows the hot cream to melt the chocolate quickly and evenly, minimizing the amount of stirring needed later and reducing the risk of seizing or a grainy texture. Aim for pieces no larger than a small chocolate chip. If using high-quality chocolate chips, you can often use them as they are, though some prefer to give them a quick chop to ensure uniformity.
Place the finely chopped chocolate (or chips) in your heatproof bowl. Spreading the chocolate evenly in the bottom of the bowl ensures maximum contact with the hot cream when it's poured over. This preparatory step is simple but vital for the success of your easy chocolate ganache. The smaller the pieces, the faster and more completely they will melt from the residual heat of the cream.
Step 2: Heating the Cream (Stovetop Method)
Next, measure your heavy cream accurately using a kitchen scale if possible (weight is more reliable than volume for this). Pour the cream into your saucepan. Heat the cream over medium heat, stirring occasionally, until it just reaches a simmer. You will see small bubbles forming around the edges of the pan, and the surface may show slight ripples. Do not let it come to a rolling boil, as this can cause some of the water in the cream to evaporate, potentially altering your ratio and affecting the texture. Aim for a temperature around 190-200°F (88-93°C).
Heating the cream to the correct temperature is essential. It needs to be hot enough to fully melt the chocolate without additional heat, relying on residual heat for the emulsification. Once the cream is hot, immediately remove the saucepan from the heat. Have your bowl of chopped chocolate ready nearby for the next step in this easy chocolate ganache recipe.
Step 3: Combining Chocolate and Cream (Pouring and Emulsifying)
Carefully pour the hot cream directly over the finely chopped chocolate in the heatproof bowl. Ensure all the chocolate is submerged or at least covered by the cream. This is a critical moment in making easy chocolate ganache. Once the cream is poured, do not stir immediately. Let the mixture sit undisturbed for 5 to 10 minutes. This resting period allows the heat from the cream to slowly and evenly melt the chocolate from the bottom up. Rushing this step and stirring too early can cause the chocolate to seize or result in an uneven texture.
After the resting period, the chocolate should look mostly melted and soft. Now, it's time to emulsify. Start stirring gently in the center of the bowl with your rubber spatula or wooden spoon. Stir in small, concentric circles, gradually expanding your circle towards the edges of the bowl. You will see the mixture transform from a liquidy, separated state into a smooth, glossy, and homogenous ganache. Continue stirring gently until all the chocolate is completely melted and the mixture is uniform in color and texture. This gentle, consistent stirring technique is key to creating that beautiful, stable emulsion.
Step 4: Achieving a Smooth and Shiny Texture (Stirring Techniques)
The technique used for stirring after the initial melt is paramount for achieving a smooth and shiny ganache. As mentioned, start stirring in the center and work outwards. This helps the emulsion begin where the heat is most concentrated and gradually incorporate the outer, cooler chocolate. Avoid vigorous whisking or incorporating air, as tiny air bubbles can make the ganache appear dull or grainy. Think of it as coaxing the mixture into submission rather than beating it.
If after stirring, you still have a few stubborn unmelted chocolate pieces, you can gently warm the bowl very briefly over a pan of simmering water (double boiler method) or in short bursts in the microwave (5-10 seconds at a time), stirring between each burst, only until the remaining chocolate melts. Be extremely cautious not to overheat, as this can break the emulsion. A perfectly emulsified ganache will be thick, smooth, and possess a lovely natural shine.
Step 5: Cooling and Resting the Ganache (Optimal Temperature for Different Uses)
Once your easy chocolate ganache is smooth and shiny, it needs time to cool and set to the desired consistency for its intended use. The final consistency of ganache is determined primarily by the chocolate-to-cream ratio and the temperature. For a pouring glaze or drip, you'll want it slightly warm, perhaps around 85-90°F (29-32°C). For filling cakes or piping, it needs to be cooler and thicker, maybe around 70-75°F (21-24°C), which might take a couple of hours at room temperature. For rolling truffles, it needs to be quite firm, requiring refrigeration for several hours.
Allow the ganache to cool at room temperature, uncovered initially for faster cooling, then covered with plastic wrap pressed directly onto the surface to prevent a skin from forming. Stirring occasionally as it cools can help achieve a uniform texture, especially for thicker ganaches intended for frosting or filling. Be patient during this cooling phase; rushing it by putting warm ganache directly into the fridge can sometimes affect the final texture.
Troubleshooting Common Chocolate Ganache Problems
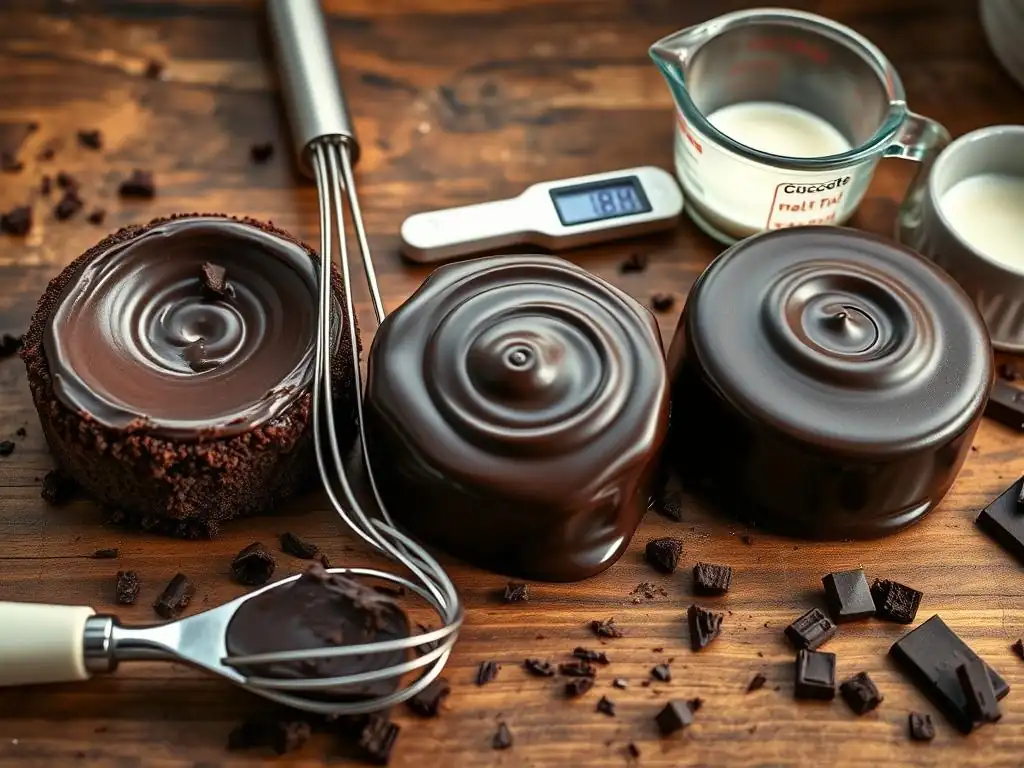
Even with an easy chocolate ganache recipe, sometimes things don't go exactly as planned. Here are solutions to common issues.
My Chocolate Ganache is Grainy: Solutions and Prevention
A grainy texture in chocolate ganache is often caused by one of a few things: overheating the chocolate, insufficient emulsification, or adding water. If your ganache feels gritty, it might be because the chocolate wasn't fully melted before you started stirring, or it melted unevenly. It could also happen if the emulsion broke, causing the sugar crystals in the chocolate to recrystallize. To prevent this, ensure your chocolate is finely chopped, your cream is hot enough but not boiling, and you allow the mixture to rest before stirring gently.
If you find yourself with grainy ganache, there's often a fix. Gently reheat the ganache over a double boiler or in short microwave bursts, stirring constantly, until it becomes fluid again. Be careful not to overheat. Once warm and liquid, you can try to re-emulsify it by stirring vigorously or, for best results, using an immersion blender. Blend until it looks smooth and shiny again. Sometimes adding a tablespoon or two of hot cream while blending can help rescue a broken emulsion.
Why is My Ganache Too Thick or Too Thin? Adjusting Consistency
The consistency of your easy chocolate ganache depends directly on the ratio of chocolate to cream and the temperature. If your ganache is too thick for your intended use (e.g., for glazing), it means you either used too much chocolate relative to cream or it has cooled too much. To thin it out, gently warm the ganache while stirring and/or carefully stir in a tablespoon or two of additional hot cream until the desired consistency is reached. Do this slowly to avoid making it too thin.
Conversely, if your ganache is too thin (e.g., for truffles or frosting), it means you likely used too little chocolate relative to cream or it hasn't cooled enough yet. If it's just warm, letting it cool longer at room temperature or chilling it slightly will thicken it. If cooling doesn't work, you'll need to increase the chocolate content.
Gently reheat the ganache until fluid, then stir in more finely chopped chocolate (start with about 10-20% of the original chocolate weight) and let it sit for 5-10 minutes before gently stirring to emulsify the new chocolate. Cool and check the consistency again.
Preventing Chocolate Seizing During Ganache Making
Chocolate seizing is a sudden hardening and clumping that occurs when melted chocolate comes into contact with even a tiny amount of water or is exposed to sudden temperature changes. This is a common fear when making any chocolate recipe, including easy chocolate ganache. The water causes the sugar particles in the chocolate to clump together, creating a rough, unworkable mass. To prevent this, ensure all your equipment (bowls, spatulas) is completely dry before starting. Avoid adding any water or water-based flavorings (like fruit juice) directly to the melted chocolate.
Another cause of seizing can be overheating the chocolate directly, especially white or milk chocolate, which have lower melting points and higher sugar content. Using the residual heat of the hot cream to melt the chocolate, as described in our easy chocolate ganache recipe steps, is the safest method to prevent overheating and seizing.
If your ganache does seize, it's often difficult to fully rescue, but you can try stirring in a tablespoon of hot cream or melted butter, one at a time, very vigorously, until it becomes somewhat smooth, though it may not regain its original shine or texture. It might still be usable in baked goods where texture is less critical, like brownies.
Achieving a Perfectly Smooth Ganache: Avoiding Common Mistakes
Beyond seizing and graininess, other factors can prevent a perfectly smooth ganache. Over-stirring, especially with a whisk, can incorporate too much air, leading to a dull finish and a slightly foamy texture. Using chocolate of poor quality or chocolate that contains vegetable oils instead of cocoa butter will also result in a ganache that lacks the desired smoothness and shine. The fat content of the cream is also critical; using low-fat cream will prevent a stable emulsion.
To ensure a smooth outcome with your easy chocolate ganache recipe, always start with high-quality ingredients. Chop your chocolate finely for even melting. Heat your heavy cream just to a simmer, not a rolling boil. Pour the hot cream over the chocolate and let it rest for the recommended time before stirring. Stir gently and consistently with a spatula or wooden spoon, starting in the center and expanding outwards, until the mixture is fully emulsified. Patience during the cooling phase also contributes to the final smooth texture.
Variations on the Easy Chocolate Ganache Recipe
Once you've mastered the basic easy chocolate ganache recipe, you can explore delightful variations by simply changing the type of chocolate.
Dark Chocolate Ganache Recipe: Intense Flavor and Deep Color
A dark chocolate ganache is perhaps the most classic variation, offering an intense, slightly bitter chocolate flavor and a deep, rich color. To make a dark chocolate ganache, use chocolate with a higher cacao percentage, typically 70% or more. The ratio of chocolate to cream might need slight adjustment depending on the cacao percentage and your desired consistency, but a 1:1 or 1.5:1 ratio (chocolate to cream by weight) is a good starting point for a versatile ganache.
The process for making dark chocolate ganache follows the same easy steps: heat the heavy cream, pour over finely chopped dark chocolate, let it rest, and then gently stir to emulsify. Because dark chocolate has less sugar and dairy solids than milk or white chocolate, it is often considered the most straightforward type of ganache to make and is less prone to seizing. It pairs wonderfully with red fruits, coffee flavors, and even savory notes like sea salt.
Milk Chocolate Ganache Recipe: Creamy and Sweet Indulgence
For those who prefer a sweeter, creamier profile, a milk chocolate ganache is a delightful option. Milk chocolate contains cocoa solids, sugar, and milk solids, which gives it its characteristic sweetness and lighter color. When making milk chocolate ganache, you'll typically need a higher ratio of chocolate to cream compared to dark chocolate to achieve a similar consistency, as milk chocolate has a lower percentage of cocoa solids and cocoa butter. A common ratio is 2:1 (milk chocolate to cream by weight) for a firm ganache suitable for truffles or frosting, or slightly less chocolate for a pourable glaze.
The process remains similar: heat heavy cream, pour over finely chopped milk chocolate, rest, and stir. However, because milk chocolate has a lower melting point due to its higher sugar and milk content, it's even more crucial not to overheat the cream or the ganache itself during preparation or reheating. Milk chocolate ganache is perfect for filling pastries, topping cupcakes, or as a sweet drip on cakes.
White Chocolate Ganache Recipe: Delicate Flavor and Versatile Use
White chocolate ganache offers a delicate, creamy flavor profile and a pale color that makes it incredibly versatile for coloring or pairing with other flavors. White chocolate contains cocoa butter, sugar, and milk solids, but no cocoa solids, which is why it's not brown. Like milk chocolate, white chocolate requires a higher ratio to cream to achieve a stable ganache due to its composition and lower melting point. A ratio of 2.5:1 or 3:1 (white chocolate to cream by weight) is often needed for a firm ganache, with lower ratios for thinner glazes.
Making white chocolate ganache follows the same basic steps, but extra care must be taken with temperature. White chocolate is the most susceptible to seizing and scorching because of its high sugar content. Heat the cream gently and perhaps slightly less hot than for dark or milk chocolate (aim for just shy of a simmer).
Pour over finely chopped white chocolate, rest, and stir very gently. If it seems reluctant to emulsify, a brief gentle warming over a double boiler is safer than direct heat. White chocolate ganache is excellent for flavoring with extracts, liqueurs, or fruit purees and is a popular base for pastel-colored glazes.
Flavored Chocolate Ganache: Adding Extracts, Spices, and Liqueurs (Vanilla Extract, Coffee Liqueur, Orange Zest)
Once you have a basic easy chocolate ganache, adding flavorings can take it to the next level. Extracts, spices, and liqueurs can be incorporated to create unique and exciting variations. For extracts like vanilla extract, almond extract, or peppermint extract, stir them in after the ganache has been emulsified and is smooth, but while it is still warm. Start with a small amount, like 1/2 to 1 teaspoon per cup of ganache, and taste as you go, as extracts can be potent.
For spices such as cinnamon, chili powder, or cardamom, you can either infuse the cream by heating the spice with the cream and then straining it before pouring over the chocolate, or stir very finely ground spices into the finished ganache. Liqueurs like coffee liqueur, orange liqueur, or raspberry liqueur add both flavor and a touch of alcohol. Stir liqueurs in after emulsification, similar to extracts.
Be mindful that adding liquids can slightly alter the consistency; a tablespoon or two per cup usually doesn't cause an issue. Consider infusing zest (orange, lemon, lime) into the cream as well for a bright, fresh flavor, straining it out before adding the chocolate.
Creative Uses for Your Silky Smooth Chocolate Ganache
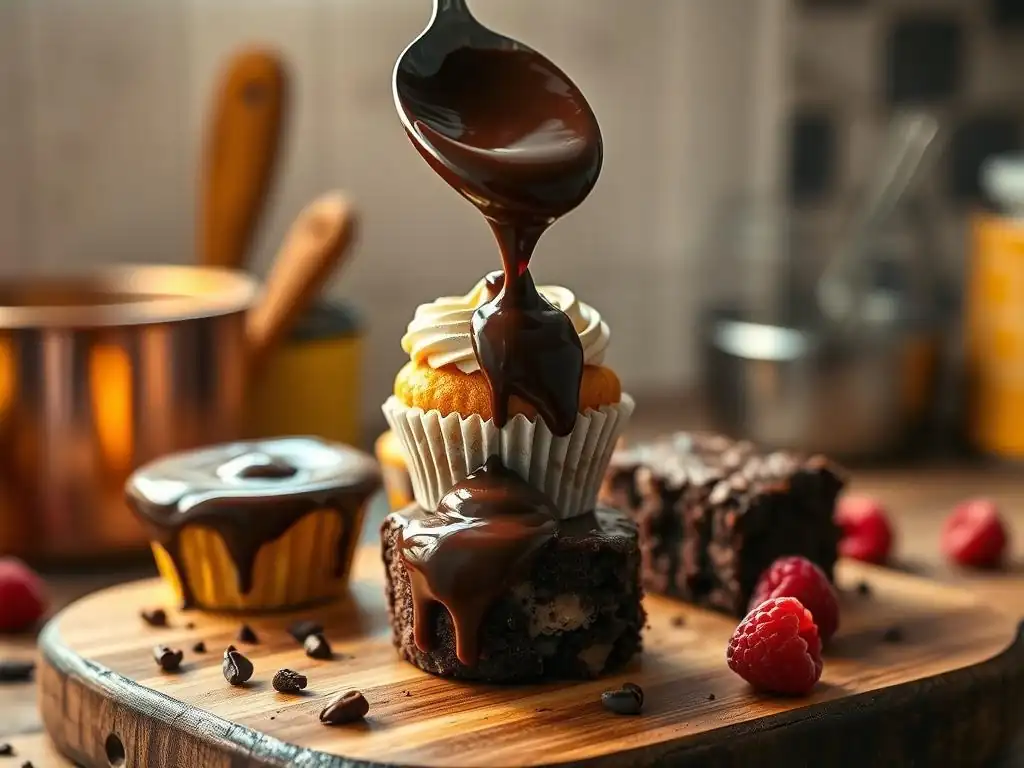
The versatility of an easy chocolate ganache means it can be used in countless ways to enhance your baked goods.
Using Ganache as a Cake Frosting: Smooth and Elegant Finish
Once your easy chocolate ganache has cooled to a spreadable consistency (like soft peanut butter, typically around 70-75°F or 21-24°C), it makes an incredibly rich and decadent cake frosting. A 1.5:1 or 2:1 ratio of chocolate to cream (by weight) is usually ideal for frosting. Simply spread it over cooled cake layers and sides using an offset spatula. The natural smoothness of the ganache provides a beautiful, elegant finish without needing complex frosting techniques.
Compared to buttercream, ganache frosting is less sweet and offers a more intense chocolate flavor. It sets up more firmly as it cools, providing a stable coating for cakes. For example, a classic Black Forest cake often uses a dark chocolate ganache filling or frosting alongside cherries and cream. Its density also makes it excellent for filling between cake layers, providing structural support.
Chocolate Ganache for Truffles: The Perfect Rich Center
Chocolate truffles are one of the most classic applications for chocolate ganache. A firm ganache, typically made with a 2:1 or 2.5:1 ratio (chocolate to cream by weight), is cooled completely until firm enough to scoop or roll into balls. Once rolled, these ganache centers are traditionally coated in cocoa powder, but can also be dipped in tempered chocolate or rolled in nuts, coconut, or sprinkles.
Making truffles from your easy chocolate ganache is surprisingly simple. After the ganache has set in the refrigerator for several hours (or overnight), scoop small portions using a melon baller or spoon and roll them quickly between your palms to form spheres. Work relatively quickly, as the heat from your hands can soften the ganache. Then, roll or dip them in your desired coating. This method produces incredibly rich, melt-in-your-mouth chocolate candies that are far superior to most store-bought versions.
Ganache as a Drip for Cakes and Desserts: Mastering the Drip Technique
The "drip cake" trend relies heavily on using a perfectly consistent, slightly warm chocolate ganache. For a good drip, you need a ganache that is fluid enough to flow down the sides of a chilled cake but thick enough to create distinct drips rather than running all the way to the bottom. A 1:1 or 1.25:1 ratio (chocolate to cream by weight) is usually appropriate, and the ganache should be used when it's warm but not hot, typically around 85-90°F (29-32°C).
To apply a ganache drip, ensure your cake is chilled. This helps the ganache set quickly as it hits the cold surface. You can apply the ganache using a piping bag with a small round tip, a squeeze bottle, or simply a spoon.
For controlled drips, pipe or spoon small amounts near the edge, letting gravity pull them down. For a full coverage drip, pipe a ring around the top edge first, letting it drip naturally, then fill the center and smooth it out. Practicing on the side of an overturned bowl can help you get the temperature and technique just right for your easy chocolate ganache.
Glazing Pastries with Chocolate Ganache: Achieving a Professional Shine
A thin, warm chocolate ganache makes an excellent glaze for pastries like éclairs, cream puffs (profiteroles), or tarts, providing a beautiful shine and intense flavor. For glazing, a 1:1 ratio (chocolate to cream by weight) is standard, used while the ganache is still warm and very fluid, around 90-100°F (32-38°C). The goal is a smooth, even coating that sets with a glossy finish.
To glaze, dip the tops of cooled pastries into the warm ganache, letting excess drip off, or pour the ganache over a cake or tart set on a wire rack. The warmth of the ganache ensures it flows smoothly and evenly. As it cools, the high cocoa butter content in good quality chocolate will help it set with a lovely, reflective shine, giving your homemade pastries a polished, professional look.
Tips and Tricks for the Best Chocolate Ganache Every Time
Beyond the basic steps of our easy chocolate ganache recipe, a few extra tips can help ensure your success.
The Importance of Quality Ingredients for Superior Ganache
We've touched on this, but it bears repeating: the quality of your chocolate and cream is paramount to making truly superior ganache. Using high-quality chocolate with a decent percentage of cocoa butter (check the ingredient list – cocoa butter should be listed early) makes a significant difference in both flavor and texture. Similarly, using heavy cream with a high fat content ensures a stable, smooth emulsion.
Think of it this way: ganache is essentially a two-ingredient recipe (plus maybe a pinch of salt or extract). There's nowhere for poor-quality ingredients to hide. If your chocolate doesn't taste great on its own, your ganache won't either. Investing in good chocolate, like a reputable brand of couverture or high-quality baking chocolate, is the single best way to elevate your easy chocolate ganache.
Temperature Control: The Key to a Smooth and Shiny Finish
Temperature is arguably the most critical factor in making perfect, easy chocolate ganache. The cream must be hot enough to melt the chocolate fully, but not so hot that it scorches the cream or overheats the chocolate. The resting period allows the heat transfer to happen gently. When stirring, the goal is to create a stable emulsion within a specific temperature range where the fats can bind properly.
Using the ganache at the correct temperature for its application is also vital. Too hot, and a glaze will be too thin or melt what it's poured over. Too cold, and it will be too thick to pour or spread smoothly. If your ganache cools too much before you're ready to use it, gently rewarm it over a double boiler or in very short microwave bursts, stirring constantly, until it reaches the desired consistency and temperature. Avoid rapid temperature changes.
Storage and Shelf Life of Chocolate Ganache
Properly stored, easy chocolate ganache can last surprisingly long. Because of its high fat and sugar content, it is relatively stable. At room temperature (below 70°F or 21°C), ganache can typically be stored in an airtight container for up to 2 days. Ensure it is covered with plastic wrap pressed directly onto the surface to prevent a skin from forming.
For longer storage, ganache can be refrigerated in an airtight container for 2 to 3 weeks. Again, press plastic wrap onto the surface. When ready to use chilled ganache, let it sit at room temperature until it softens, or gently warm it as needed for your application. Ganache can also be frozen for several months. Thaw it in the refrigerator overnight, then let it come to room temperature or gently rewarm before using. Always check for any off smells or visible mold before using stored ganache.
Advanced Ganache Techniques for Experienced Bakers
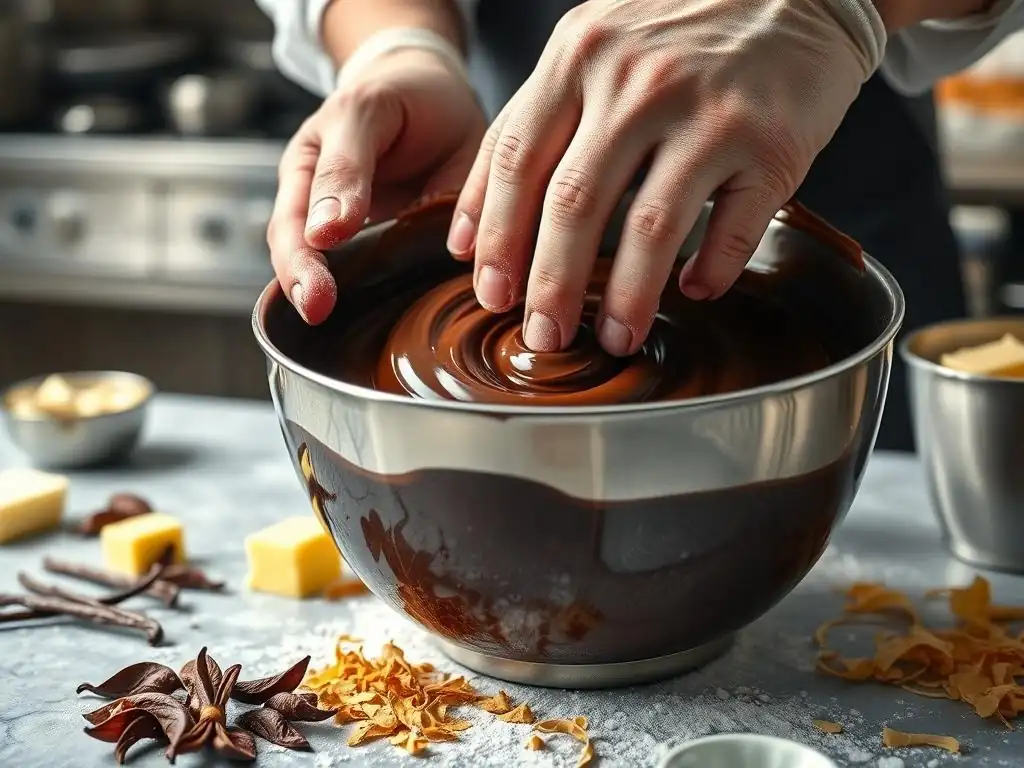
Once you're comfortable with the basic easy chocolate ganache recipe, you can explore more advanced techniques to add complexity and creativity.
Infusing Flavors into Your Chocolate Ganache (Rosemary, Cinnamon, Lemon)
Infusing the cream before combining it with chocolate is a fantastic way to add subtle or bold flavors to your ganache. Hardier herbs like rosemary or thyme, spices like cinnamon sticks, star anise, or cardamom pods, and citrus zest (lemon, orange, lime) work beautifully. To infuse, add the flavoring agent to the cold heavy cream in the saucepan. Heat the cream gently to a simmer, stirring occasionally. Remove from the heat, cover, and let steep for 15-30 minutes (or longer for a stronger flavor).
After steeping, reheat the cream just until hot again, then strain out the flavoring agent using a fine-mesh sieve before pouring the hot, infused cream over your chopped chocolate. This method ensures the flavor is evenly distributed throughout the ganache without adding texture from solid particles. Examples include rosemary-infused dark chocolate ganache for tarts or cinnamon-infused milk chocolate ganache for cupcakes.
Creating a Whipped Chocolate Ganache for Lighter Texture
Whipped ganache offers a lighter, airier texture compared to standard ganache, making it perfect for frosting, filling, or piping. To make whipped ganache, you typically start with a slightly thinner ganache ratio (often 1:1 or 1.5:1 chocolate to cream for dark, 1.5:1 or 2:1 for milk/white). Make the ganache as usual and let it cool completely in the refrigerator until it is very cold and firm, like cold butter (this can take several hours).
Once thoroughly chilled, transfer the firm ganache to the bowl of a stand mixer fitted with a whisk attachment (or use a hand mixer). Whip the ganache on medium-high speed until it becomes light, fluffy, and doubles in volume, similar to whipped cream. Be careful not to over-whip, as it can become grainy. Whipped ganache is less intensely flavored per bite than traditional ganache but offers a delightful melt-in-your-mouth quality.
Using Ganache in More Complex Pastry Creations (Chocolate Tarts, Chocolate Eclairs)
Easy chocolate ganache is a foundational element in many classic and modern pastry creations. For chocolate tarts, a firm ganache (2:1 or 2.5:1 ratio) is poured into a pre-baked tart shell and allowed to set, creating a rich, smooth filling. For chocolate éclairs or profiteroles, a slightly thinner ganache (1:1 or 1.25:1 ratio), often warmed, is used to glaze the tops after they are filled with pastry cream.
Beyond these examples, ganache can be used as a layer in multi-component desserts, such as entremets (layered mousse cakes), or as a filling for delicate pastries like macarons or petit fours. Mastering the easy chocolate ganache recipe allows bakers to confidently tackle these more intricate recipes, knowing they can produce a reliable, delicious chocolate element. Its stability and versatility make it indispensable in the world of fine pastry.
Conclusion: Mastering the Easy Chocolate Ganache Recipe for Baking Success
Elevate Your Baking with Perfectly Smooth Chocolate Ganache
Learning how to make a silky smooth, shiny chocolate ganache is truly a game-changer for any baker. It's a simple technique that yields incredibly impressive results, transforming ordinary desserts into something special. By understanding the basic principles – using quality ingredients, respecting temperature, and employing gentle emulsification techniques – you can consistently produce a ganache that is rich, flavorful, and beautifully textured. Our easy chocolate ganache recipe provides the foundation you need to achieve this success every time.
From classic truffles and elegant cake glazes to versatile fillings and flavorful infusions, the applications for perfectly made ganache are nearly limitless. It's a skill that builds confidence and encourages creativity in the kitchen. Don't be intimidated; with a little practice and attention to detail, you'll be creating stunning, delicious chocolate creations that will impress everyone who tastes them.
BakeWithEase: Your Partner in Mastering Chocolate Techniques.
Frequently Asked Questions
How do I make a chocolate ganache with an easy recipe?
The easiest chocolate ganache recipe typically involves just two ingredients: chocolate and heavy cream. Simply heat the cream, then pour it over the chocolate, let it sit for a minute, and stir until smooth.
What's the secret to getting a shiny chocolate ganache?
Achieving a shiny ganache depends on using high-quality chocolate and ensuring the cream is hot enough to melt it completely. Avoid over-stirring, as this can introduce air and dull the finish.
Can I use different types of chocolate in an easy chocolate ganache recipe?
Yes, you can! The type of chocolate you use will affect the flavor and sweetness of your ganache. Consider using dark, milk, or white chocolate based on your preference.
How can I adjust the consistency of my chocolate ganache?
The ratio of chocolate to cream determines the consistency. More chocolate will yield a thicker ganache, ideal for truffles. More cream will create a thinner ganache, perfect for glazes.
Is there a vegan or dairy-free version of an easy chocolate ganache recipe?
Yes, using dairy-free chocolate and coconut cream or other plant-based creams is a great substitute. The process remains the same, providing a delicious and inclusive ganache.
Final Reflection: The Enduring Allure of Perfect Chocolate
The pursuit of the perfect chocolate ganache—silky smooth, intensely shiny, and flawlessly delicious—is more than just a culinary quest; it's a reflection of our desire for precision and the simple joy of creating something beautiful. This article explored the seemingly simple act of making a ganache, revealing the subtle nuances that separate a good ganache from an exceptional one. From understanding the crucial role of temperature to mastering the art of emulsification, we've uncovered the secrets to consistent success.
The impact of a perfectly executed ganache extends far beyond the individual experience. It's a testament to the power of meticulous technique and the transformative potential of seemingly simple ingredients. The joy of creating something beautiful and sharing it with others is a powerful force, connecting us through shared experiences and fostering a sense of community. As the renowned pastry chef, Pierre Hermé, once said: Pastry is a language of emotion. It speaks to the heart.
This sentiment perfectly encapsulates the emotional resonance of creating and sharing a flawlessly smooth chocolate ganache.
Now, consider your own approach to baking. What small adjustments can you make to elevate your ganache game? Perhaps it's paying closer attention to temperature, experimenting with different cream percentages, or simply taking the time to truly appreciate the process.
I invite you to embrace the challenge, to experiment with the techniques outlined in this article, and to experience the profound satisfaction of creating a ganache that is not only delicious but also a testament to your own culinary artistry. The journey to perfect chocolate is a continuous one, filled with learning, experimentation, and ultimately, the sweet reward of success.
Unlock Your Chocolate Baking Superpowers!
Thanks for taking the time to explore the secrets to perfectly smooth, shiny chocolate! You've now got the knowledge to elevate your baking game. Ready to put it into practice?
- Master the art of tempering: Try the methods outlined in the article – you'll be amazed at the difference! This is your primary focus for immediate impact.
- Share your chocolate creations! Post a picture of your latest masterpiece on social media and tag #BakeWithEaseChocolate. Let's see those shiny results!
- Experiment with different chocolate types: Explore the nuances of dark, milk, and white chocolate to discover your favorite.
What's your favorite type of chocolate to bake with, and what recipe are you tackling next?