
French Meringue Made Easy: Achieve Light, Crispy Peaks Every Time

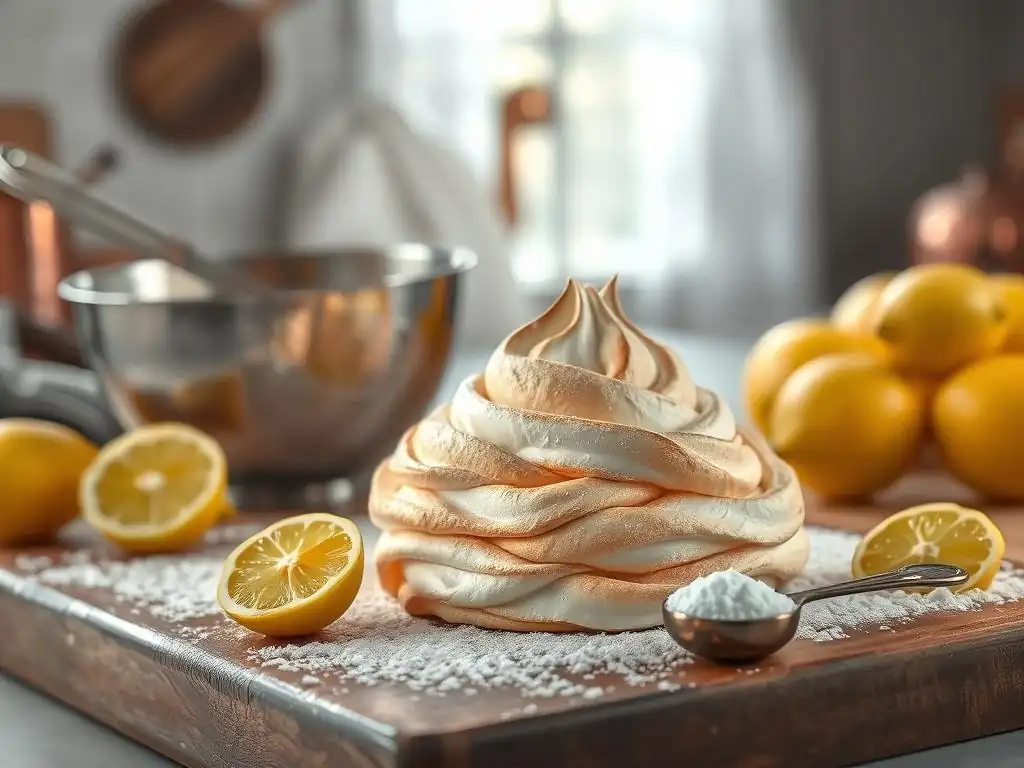
Welcome to BakeWithEase, your guide to unlocking the secrets of delightful baking! Ever dreamt of achieving those perfectly light and airy French meringues? Get ready to say goodbye to meringue mishaps! This week, we're diving deep into easy French meringue recipe tips that will transform your baking game. Discover the simple steps and essential techniques to achieve light, crispy peaks every time. Intrigued? Let's get baking!
- Bake It Better: Mastering the Easy French Meringue Recipe
- Understanding French Meringue: A Baker's Essential
- Easy French Meringue Recipe Tips: Ingredients and Equipment
- Step-by-Step Guide: Creating the Perfect French Meringue
- Baking Your French Meringue: Tips for Crispy Results
- Troubleshooting Common French Meringue Problems
- Using Your French Meringue: Creative Baking Ideas
- Storing Your French Meringue: Keeping it Fresh
- Advanced Tips for Meringue Mastery
- Conclusion: Bake It Better's Guide to Easy French Meringue
-
Frequently Asked Questions
- What exactly is French meringue, and how does it differ from other types of meringue?
- What are the key ingredients needed for an easy French meringue recipe?
- What are some common mistakes to avoid when making French meringue?
- How can I achieve stiff, glossy peaks when whipping the egg whites?
- What are some tips for baking French meringue to achieve a light and crispy texture?
- Final Reflection: The Sweet Science of Effortless Perfection
- Unlock Your Inner Pâtissier: Master the Art of French Meringue!
Bake It Better: Mastering the Easy French Meringue Recipe
Embarking on the journey of meringue making might seem daunting, but the French method stands out as the most straightforward. Often considered the foundational meringue technique, mastering it unlocks a world of light, airy confections. This guide provides easy French meringue recipe tips to help you achieve those perfect, cloud-like peaks every single time, transforming simple ingredients into delightful treats. Whether you're topping a pie or baking delicate cookies, a reliable easy French meringue recipe is an essential tool in any baker's repertoire.
Understanding French Meringue: A Baker's Essential
What is French Meringue and Why Bake It?
French meringue is the simplest and most basic form of meringue, made by whipping egg whites until stiff peaks form, then gradually adding granulated sugar while continuing to whip. The result is a fluffy, glossy mixture that can be piped into shapes and baked at a low temperature until crisp, or used as a topping that is then briefly browned. Its appeal lies in its ethereal lightness and delightful crisp texture once baked.
Baking French meringue is a fantastic way to utilize leftover egg whites and create beautiful, delicate desserts. From classic meringue cookies and pavlova shells to elegant pie toppings, the versatility of an easy French meringue recipe is immense. It requires minimal ingredients – typically just egg whites and sugar – making it accessible and cost-effective. Mastering this technique is a fundamental step for anyone looking to expand their baking skills and add a touch of elegance to their creations.
Key Differences: French vs. Italian vs. Swiss Meringue
While all meringues rely on whipping egg whites and sugar, the method of incorporating the sugar and heat distinguishes the French, Italian, and Swiss varieties. French meringue, as discussed, involves adding granulated sugar to raw, whipped egg whites. It's the least stable of the three when unbaked and requires low, slow baking to cook the egg whites and achieve crispness. This uncooked nature is why it's often preferred for baked items like cookies or pavlova.
Italian meringue is made by drizzling a hot sugar syrup (heated to around 240°F or 115°C) into already whipped egg whites while continuing to whip. The hot syrup cooks the egg whites, resulting in a very stable and glossy meringue that is often used for frosting cakes or as a base for mousses, as it doesn't require further cooking. Swiss meringue involves gently heating the egg whites and sugar together over a double boiler (to about 130-140°F or 55-60°C) while whisking, then removing from the heat and whipping until cool and stiff.
This method also produces a stable, smooth meringue, popular for buttercreams and toppings. The French method, using raw egg whites and simple whipping, remains the easiest starting point for many bakers.
The Science Behind Perfect Meringue Peaks
The magic of meringue lies in the transformation of liquid egg whites into a stable foam. Egg whites are primarily protein and water. When you whip egg whites, the mechanical action denatures, or unfolds, the proteins. These unfolded proteins then trap air bubbles, creating a foam. As you continue whipping, the proteins link together, strengthening the structure and allowing the foam to hold its shape – this is how soft and then stiff peaks form.
Adding sugar is crucial for stabilizing the meringue. Sugar granules disrupt the protein network initially, which is why sugar is added gradually after the egg whites have started to foam. Once dissolved, the sugar molecules surround the protein network, preventing the proteins from collapsing and providing rigidity. Sugar also absorbs some of the water, further stabilizing the foam and contributing to the shiny, glossy appearance. The careful balance of air, protein structure, and sugar is what allows French meringue to hold its shape and bake into a light, crispy confection.
Easy French Meringue Recipe Tips: Ingredients and Equipment
Essential Ingredients for Flawless French Meringue
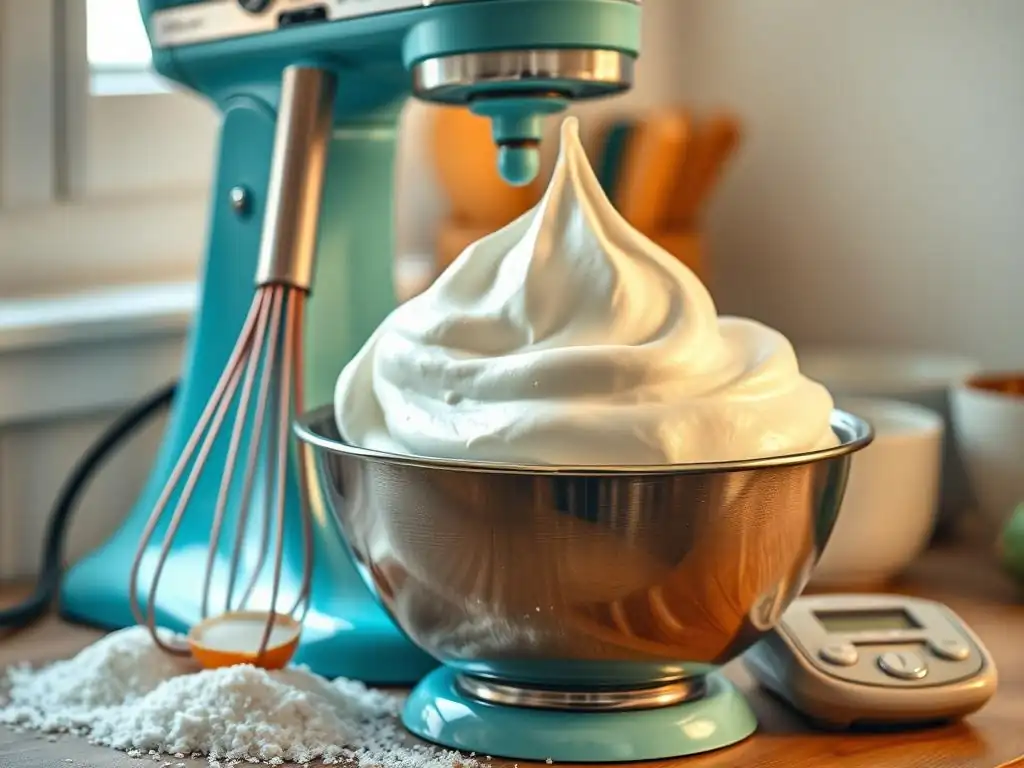
Achieving a successful easy French meringue recipe starts with the right ingredients and careful preparation. The two main components are egg whites and sugar. For best results, use fresh egg whites that are at room temperature; they whip up to a greater volume than cold ones. Typically, a medium egg white weighs about 30 grams. A common ratio for French meringue is roughly twice the weight of sugar to egg whites. So, for 100 grams of egg whites (about 3-4 large eggs), you would use approximately 200 grams of granulated sugar.
Granulated sugar is standard for French meringue, though superfine sugar can be used and dissolves slightly faster, potentially reducing the risk of a grainy texture. Some recipes also include a small amount of acid, such as a pinch of cream of tartar (about 1/8 teaspoon per two egg whites) or a few drops of lemon juice or white vinegar. The acid helps stabilize the egg white foam, making it less likely to collapse and easier to whip to stiff peaks. Ensure your sugar is dry and free-flowing for smooth incorporation.
Must-Have Equipment for Meringue Success
Having the correct equipment is just as important as having the right ingredients when tackling an easy French meringue recipe. The most critical piece is a clean, grease-free bowl and whisk. Even a tiny amount of fat can prevent egg whites from whipping properly. Glass, copper, or stainless steel bowls are preferred; plastic bowls can sometimes retain greasy residues. Before starting, wash your bowl and whisk thoroughly with hot, soapy water, rinse well, and dry completely. Wiping the bowl with a little vinegar or lemon juice can also help remove any lingering grease film.
You can use a hand mixer or a stand mixer with a whisk attachment. A stand mixer is often easier as it allows you to gradually add sugar while whipping continuously. Baking sheets lined with parchment paper or a silicone baking mat are essential for baking your meringue creations. Piping bags and decorative tips are useful for shaping cookies or kisses, but you can also simply spoon dollops onto the baking sheet for a rustic look. An oven thermometer is highly recommended to ensure your oven maintains the low temperature required for drying out the meringue slowly and evenly.
Step-by-Step Guide: Creating the Perfect French Meringue
Step 1: Preparing Your Ingredients and Equipment for Meringue
Begin by separating your egg whites from the yolks. Be extremely careful not to get any yolk into the whites, as yolk contains fat which inhibits whipping. It's often easiest to separate cold eggs, but then allow the whites to come to room temperature for about 20-30 minutes before whipping. Weigh your egg whites for accuracy, or use a reliable count (typically 30g per large egg white). Measure out your sugar according to the weight of your egg whites, usually a 1:2 ratio (egg whites to sugar by weight).
Prepare your baking sheets by lining them with parchment paper or silicone mats. If using a stand mixer, attach the whisk attachment to your clean bowl. If using a hand mixer, ensure your clean bowl is stable on a flat surface. Have your sugar measured and ready to add gradually. If using cream of tartar or acid, have that ready as well. This preparation step is crucial for a smooth process once the whipping begins.
Step 2: Whipping the Egg Whites to Stiff Peaks
Start whipping the egg whites on a low speed until they become foamy, like soap bubbles. If using cream of tartar or acid, add it at this stage. Once the egg whites are foamy, increase the mixer speed to medium. Continue whipping until soft peaks form. Soft peaks are achieved when you lift the whisk, and the peaks droop slightly. This usually takes about 3-5 minutes with a stand mixer, depending on its power.
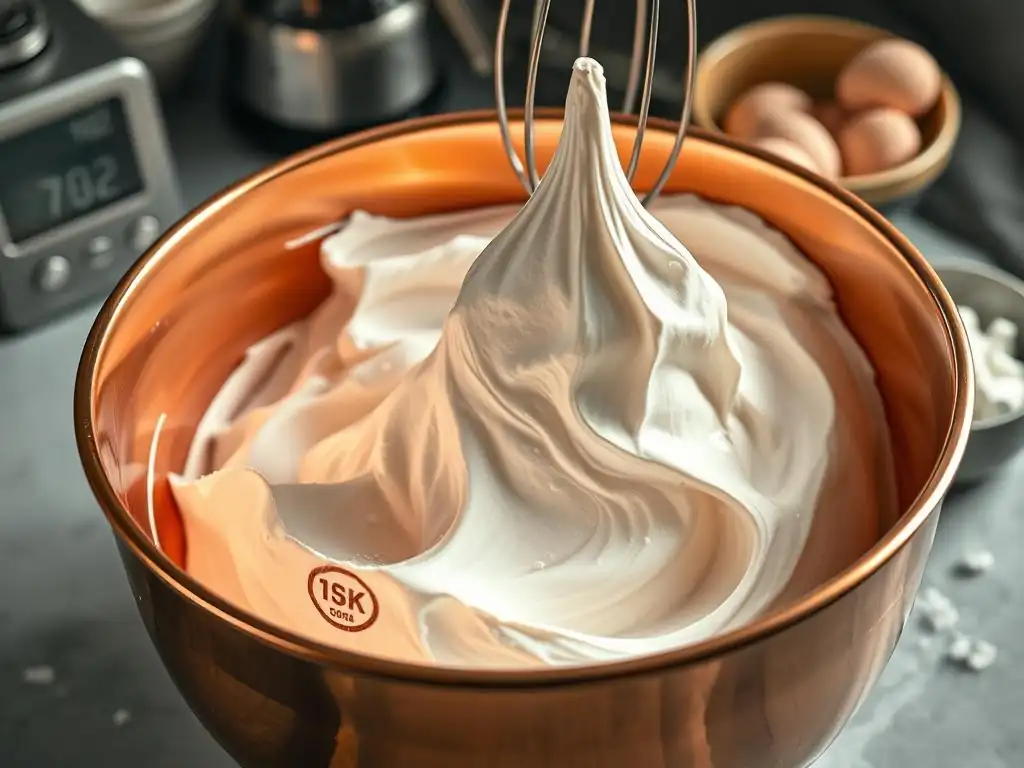
Now, increase the mixer speed to medium-high or high. Continue whipping until stiff peaks form. Stiff peaks stand straight up when the whisk is lifted and hold their shape firmly. Be careful not to over-whip at this stage; the meringue can become dry and granular. The goal is a smooth, glossy foam that holds its shape beautifully. This transition from soft to stiff peaks usually takes another 3-5 minutes.
Step 3: Gradually Adding Sugar for a Stable Meringue
Once stiff peaks have formed, it's time to add the sugar. This is a critical step in creating a stable and glossy French meringue. With the mixer still running on medium-high speed, add the granulated sugar very slowly, about one tablespoon at a time. Wait approximately 15-20 seconds between each addition to allow the sugar granules to begin dissolving into the egg white foam.
Adding sugar too quickly can cause the meringue to deflate or result in a grainy texture because the sugar hasn't had time to dissolve properly. Continue adding sugar gradually until it is all incorporated. The meringue will become thicker, smoother, and very shiny as the sugar dissolves and stabilizes the foam. This process can take 5-10 minutes depending on the amount of sugar and the mixer speed.
Step 4: Achieving the Perfect Glossy Texture
After all the sugar has been added, continue whipping the meringue on high speed for another 2-5 minutes. This final whipping phase is essential for ensuring that the sugar is completely dissolved and the meringue develops that characteristic smooth, glossy sheen. You can test for dissolved sugar by rubbing a tiny bit of the meringue between your thumb and forefinger; it should feel completely smooth with no grittiness.
The finished French meringue should be thick, shiny, and hold very stiff, sharp peaks when the whisk is lifted. It should also look marshmallow-like and slightly sticky. At this point, the meringue is ready to be used immediately for piping or spreading onto your prepared baking sheets. Its stability and glossiness are key indicators of a well-made easy French meringue recipe ready for baking.
Baking Your French Meringue: Tips for Crispy Results
Oven Temperature and Baking Time for French Meringue
Baking French meringue is less about cooking and more about drying it out at a very low temperature. This slow drying process is what creates that signature crisp, melt-in-your-mouth texture. The ideal oven temperature for baking French meringue is typically between 200°F and 250°F (90°C to 120°C). Using a temperature higher than this can cause the meringue to expand too quickly, crack, and brown excessively or even burn before it dries out properly.
The baking time depends heavily on the size and thickness of your meringue pieces and the exact oven temperature. Small meringue kisses or cookies (about 1-2 inches in diameter) might take anywhere from 60 to 90 minutes at 200-220°F (90-105°C). Larger shapes or pavlova shells will require longer, potentially 2-4 hours or even more. The meringue is done when it feels firm to the touch, lifts easily from the parchment paper, and is dry all the way through. It should generally remain white or just turn a very pale cream color.
How to Avoid Cracking and Browning
Cracking in French meringue is often caused by baking at too high a temperature or by sudden changes in temperature. The rapid expansion and contraction of the air bubbles within the meringue as it heats and cools can lead to fissures. Baking at a low, consistent temperature helps prevent this. Using an oven thermometer is crucial to ensure your oven is running at the correct low temperature. Some ovens can fluctuate significantly.
Excessive browning is also a result of too high a temperature. If your meringue starts to brown quickly, reduce the oven temperature further. For particularly sensitive meringues or if your oven runs hot, you can slightly prop open the oven door with a wooden spoon during baking. This allows some heat and moisture to escape, promoting slower drying and preventing browning. Ensure the meringue is placed in the center of the oven rack for even heat distribution.
Cooling Your Meringue for Optimal Crispness
Proper cooling is just as important as baking for achieving perfectly crisp French meringue. Once the baking time is complete and the meringues are dry, turn off the oven. Do not immediately open the oven door and remove the meringues. Leaving them inside the cooling oven allows them to cool down gradually, which helps prevent cracking and ensures they dry out completely in the residual warmth.
You can leave the meringues in the oven with the door slightly ajar (propped open with a wooden spoon) or fully closed, depending on the humidity of your environment. In a humid climate, leaving the door ajar might be better to allow moisture to escape. Allow the meringues to cool completely in the oven, which can take another 1-2 hours or even overnight for larger pieces. Removing them too soon while they are still warm can cause them to become soft or chewy rather than crisp.
Troubleshooting Common French Meringue Problems
Why is My Meringue Flat or Weepy?
A flat meringue that doesn't hold its shape is a common issue, often stemming from problems early in the process. The most frequent culprit is grease. Even a tiny amount of oil or fat on the bowl or whisk can prevent the egg whites from whipping into a stable foam. Ensure all equipment is meticulously clean and grease-free. Another cause is under-whipping; the egg whites must reach stiff peaks before sugar is added.
Weeping, where liquid pools at the base of the meringue, is usually a sign of undissolved sugar. If the sugar is added too quickly or not whipped long enough to fully dissolve, it can leach out during baking or storage. Ensure you add sugar slowly, tablespoon by tablespoon, and whip until the meringue is smooth and no longer feels gritty when rubbed between your fingers. High humidity can also contribute to weeping, as meringue is very sensitive to moisture.
Fixing Over-Whipped or Under-Whipped Meringue
Under-whipped meringue won't hold its shape and will spread or collapse during baking. If you realize the meringue hasn't reached stiff peaks before adding all the sugar, you can try whipping it further, but be cautious. If you notice it's under-whipped after adding all the sugar but before piping, you can often continue whipping on high speed for a few more minutes until it reaches the desired stiffness and gloss.
Over-whipped meringue, on the other hand, is much harder to fix. It looks curdled, grainy, or like cotton wool, and loses its smooth, shiny appearance. The protein structure has been whipped too tightly and starts to break down. Unfortunately, there's no real way to salvage over-whipped meringue for delicate baked goods like cookies. It's best to discard it and start over, being careful to stop whipping as soon as stiff, glossy peaks are achieved.
Dealing with Grainy Meringue Texture
A grainy texture in French meringue is almost always due to undissolved sugar. This happens when the sugar is added too quickly or the meringue isn't whipped long enough after the sugar is incorporated. The sugar granules haven't had sufficient time or agitation to fully dissolve into the egg white foam.
To avoid a grainy texture, add the sugar very slowly, one tablespoon at a time, allowing about 15-20 seconds between additions. After all the sugar is added, continue whipping the meringue on high speed for several minutes until it is completely smooth and glossy. You can perform the finger test (rubbing a small amount between your fingers) to check for any remaining grittiness. If it feels grainy, keep whipping until smooth. Ensuring your egg whites are at room temperature can also help the sugar dissolve more easily.
Using Your French Meringue: Creative Baking Ideas
One of the most popular uses for an easy French meringue recipe is baking classic meringue cookies, often called "meringue kisses." These delicate, airy treats are simple yet elegant. After preparing your French meringue to the stiff, glossy stage, you can pipe it onto prepared baking sheets using a piping bag fitted with a star tip or just spoon dollops for a rustic look.
Bake the cookies low and slow, typically at 200-220°F (90-105°C) for 60-90 minutes, until they are firm and dry. Cool them completely in the oven. These cookies are perfect on their own, perhaps flavored with a little vanilla extract, or used as a light accompaniment to fruit desserts. They demonstrate the delightful crispness achievable with a well-executed easy French meringue recipe.
French Meringue Kisses: A Simple Delight
French meringue kisses are simply small, bite-sized versions of meringue cookies. Their diminutive size makes them quick to bake and perfect for snacking or decorating other desserts. Using a piping bag with a small star tip allows you to create uniform, attractive shapes.
The process is identical to making larger cookies: whip the easy French meringue recipe mixture to stiff, glossy peaks, pipe small kisses onto parchment-lined sheets, and bake at a low temperature (around 200°F or 90°C) for approximately 60-75 minutes. Cool them in the oven. These little bursts of sweetness are incredibly light and make a wonderful addition to a dessert table or as a garnish for cakes and cupcakes.
Incorporating Meringue into Lemon Meringue Pie
Perhaps the most iconic use of French meringue in a larger dessert is as the topping for Lemon Meringue Pie. While Italian or Swiss meringue are sometimes used for their stability, a beautiful, billowy French meringue topping is classic. After the lemon filling is poured into a baked pie crust, the raw French meringue is spread or piped over the top, ensuring it touches the crust all around to prevent shrinking.
The meringue is then typically browned quickly. This can be done with a kitchen torch for precise control over the browning, or by placing the pie under a hot broiler for just a minute or two, watching it very carefully to prevent burning. The heat from the filling and the brief browning cook the raw egg whites just enough. This application showcases the airy texture of an easy French meringue recipe beautifully against the tartness of the lemon filling.
Storing Your French Meringue: Keeping it Fresh
Best Practices for Storing Baked Meringue
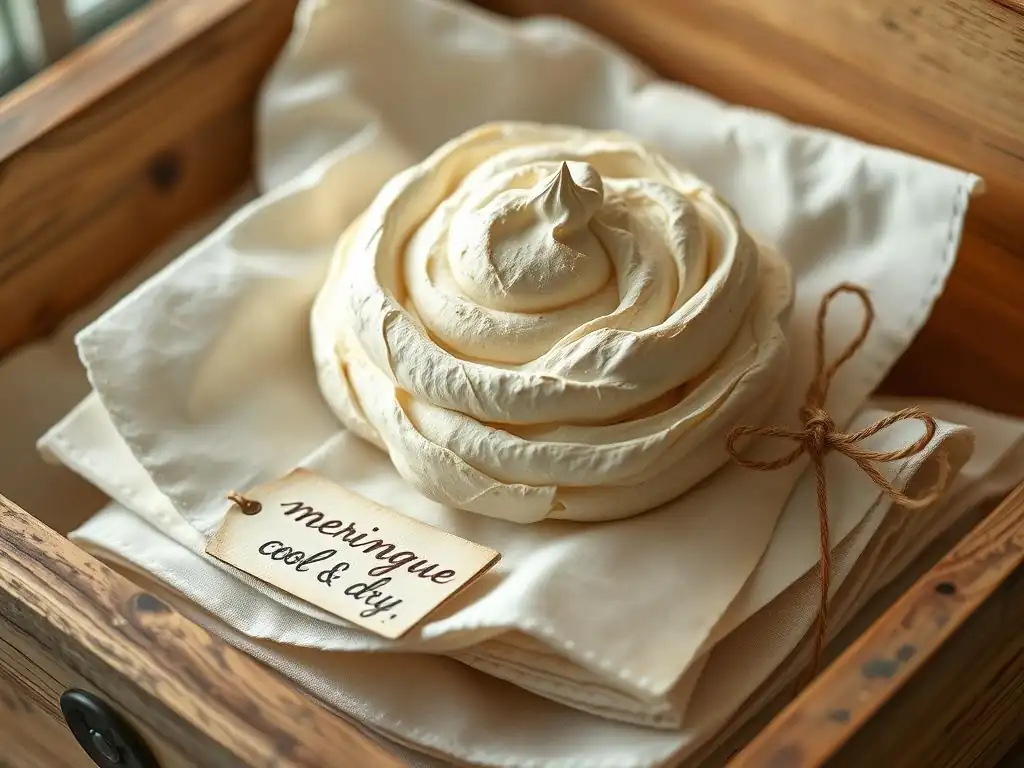
Baked French meringue is highly susceptible to moisture, which can turn its crisp texture soft and chewy. Therefore, proper storage is essential to maintain its delicate structure. Once the meringues are completely cooled (ideally in the turned-off oven), transfer them to an airtight container.
Store the airtight container in a cool, dry place at room temperature. Avoid storing them in the refrigerator, as this environment is often too humid and can cause them to become sticky and soft. Stored correctly, baked French meringue cookies or kisses can remain crisp for up to two weeks. If they lose some crispness, you can sometimes refresh them by baking them again at a very low temperature (around 200°F or 90°C) for 10-15 minutes, then cooling them completely.
How to Store Unbaked Meringue for Later Use
French meringue is best used immediately after it is made. The delicate foam structure starts to break down over time, potentially losing volume and stability. However, if you absolutely must store unbaked French meringue, it can be placed in an airtight container and stored in the refrigerator for a short period, generally no more than 24-48 hours.
During refrigeration, the meringue may lose some of its volume and become slightly less stable. Re-whipping it briefly before use might help, but be careful not to over-whip. Freezing unbaked French meringue is generally not recommended, as the freezing and thawing process severely damages the foam structure, resulting in a flat, weepy mixture that won't bake correctly. For the best results with your easy French meringue recipe, plan to bake it right after whipping.
Advanced Tips for Meringue Mastery
Flavoring Your French Meringue: Extracts and Zests
While a simple French meringue recipe is delicious on its own, adding flavorings can take it to the next level. Extracts like vanilla, almond, peppermint, or lemon can be incorporated. Add extracts after the meringue has reached stiff, glossy peaks and the sugar is fully dissolved. Stir in a small amount (start with about 1/2 teaspoon per cup of meringue) gently by hand or on the lowest mixer speed for just a few seconds to distribute it evenly without deflating the meringue.
Citrus zests, such as lemon, orange, or lime zest, also add a wonderful aromatic flavor. The oils in the zest can sometimes affect the meringue's structure slightly, so add them at the very end and fold in gently. Ensure the zest is very finely grated. Cocoa powder (sifted) can be folded in for chocolate meringue, or finely ground nuts for nutty variations. Experiment with different flavor combinations to find your favorites.
Coloring Your Meringue for Stunning Visuals
Adding color to your French meringue is an easy way to make your baked goods visually appealing, especially for holidays or special occasions. Gel food coloring is the best choice for coloring meringue. Liquid food coloring can add too much moisture, potentially affecting the meringue's stability and texture.
Add gel coloring after the meringue has reached stiff, glossy peaks and the sugar is dissolved. Use a toothpick or a small spoon to add a tiny amount of gel coloring to the meringue, then gently fold it in by hand with a spatula or mix on the lowest speed for just a few seconds until the color is evenly distributed. For marbled effects, add streaks of color and only fold a few times. Remember that colors often intensify slightly during baking, so start with a lighter shade than you desire.
Achieving Different Textures: Soft vs. Hard Meringue
The final texture of your baked French meringue is primarily controlled by the baking temperature and time. A truly "hard" or crispy meringue is achieved by baking at a very low temperature (200-220°F or 90-105°C) for a long duration until it is dried out all the way through. The cooling process in the oven is also crucial for this crispness.
For a meringue that is crisp on the outside but slightly soft or chewy in the center, you can slightly increase the baking temperature (maybe 250°F or 120°C) or decrease the baking time. For example, baking meringue kisses at 250°F (120°C) for 45-60 minutes might yield a chewier center compared to 90 minutes at 200°F (90°C). This softer texture is sometimes desired for larger items like pavlova shells, which are meant to have a slightly marshmallowy interior. Experiment with your oven to find the perfect balance for your desired texture.
Conclusion: Bake It Better's Guide to Easy French Meringue
Mastering the easy French meringue recipe is a rewarding step in any baker's journey. With just a few simple ingredients and careful technique, you can create light, airy, and delightfully crisp confections. By understanding the science behind the peaks, preparing your ingredients and equipment meticulously, and following the step-by-step whipping and baking process, you're well on your way to achieving perfect results.
Remember the easy French meringue recipe tips: ensure everything is grease-free, whip egg whites to stiff peaks before gradually adding sugar, bake low and slow, and cool completely in the oven. Don't be discouraged by initial attempts; practice makes perfect. With this guide from Bake It Better, you have the knowledge to confidently tackle French meringue and add a touch of elegance to your baking repertoire, creating beautiful and delicious treats every time.
Frequently Asked Questions
What exactly is French meringue, and how does it differ from other types of meringue?
French meringue is the simplest type, made by whisking raw egg whites with granulated sugar. It differs from Swiss and Italian meringues, which involve heating the egg whites and sugar.
What are the key ingredients needed for an easy French meringue recipe?
You'll need just two essential ingredients: fresh egg whites and granulated sugar. A pinch of salt or cream of tartar can help stabilize the meringue.
What are some common mistakes to avoid when making French meringue?
Avoid getting any egg yolk or grease in your egg whites, as this can prevent them from whipping properly. Also, make sure your bowl and whisk are completely clean.
How can I achieve stiff, glossy peaks when whipping the egg whites?
Whip the egg whites on medium-high speed until soft peaks form, then gradually add the sugar while continuing to whip until stiff, glossy peaks appear. Patience is key!
What are some tips for baking French meringue to achieve a light and crispy texture?
Bake the meringue at a low temperature (around 200-225°F) for a long time to dry it out completely. Avoid opening the oven door frequently to maintain a stable temperature.
Final Reflection: The Sweet Science of Effortless Perfection
Mastering the art of the French meringue isn't just about achieving airy peaks; it's about embracing a process that, with the right understanding, yields consistently delightful results. The seemingly delicate nature of this classic dessert belies the surprisingly straightforward science behind it. This article has explored the key techniques – from precise ingredient ratios to the crucial role of temperature and time – that unlock the secret to consistently light, crispy meringues. This knowledge empowers even novice bakers to confidently tackle this elegant treat.
The journey of perfecting the French meringue mirrors life's own pursuit of mastery. It requires patience, attention to detail, and a willingness to learn from both successes and failures. The only way to do great work is to love what you do.
- Steve Jobs. This quote resonates deeply, as the joy of creating something beautiful and delicious, like a perfect meringue, is intrinsically linked to the passion invested in the process. The enduring appeal of the French meringue, its delicate beauty and satisfying crispness, speaks to a timeless desire for both culinary and personal excellence.
Now, it's your turn. Don't be intimidated by the seemingly complex nature of French meringues. Armed with the knowledge shared in this article, experiment, embrace the process, and discover the satisfaction of creating your own perfect, airy peaks. The sweet reward awaits – a testament to your dedication and a delicious treat to share with those you love. So, gather your ingredients, and let the baking begin!
Unlock Your Inner Pâtissier: Master the Art of French Meringue!
Thanks for taking the time to explore the delightful world of French meringue with us! We hope you now feel confident in tackling this classic technique. Ready to put your newfound skills to the test?
- Whip up your own batch of perfect French meringue: Use the recipe and tips from this article as your guide, and experiment with different flavorings to create your own signature meringue. Don't be afraid to get creative!
- Share your meringue masterpieces: Post a photo of your creations on social media and tag us – we'd love to see your baking triumphs!
- Explore other BakeWithEase recipes: Dive into our extensive collection of easy-to-follow baking recipes and expand your culinary skills.
What incredible meringue creations will you dream up next?