
Using Stencils for Unique Layer Cake Decorations

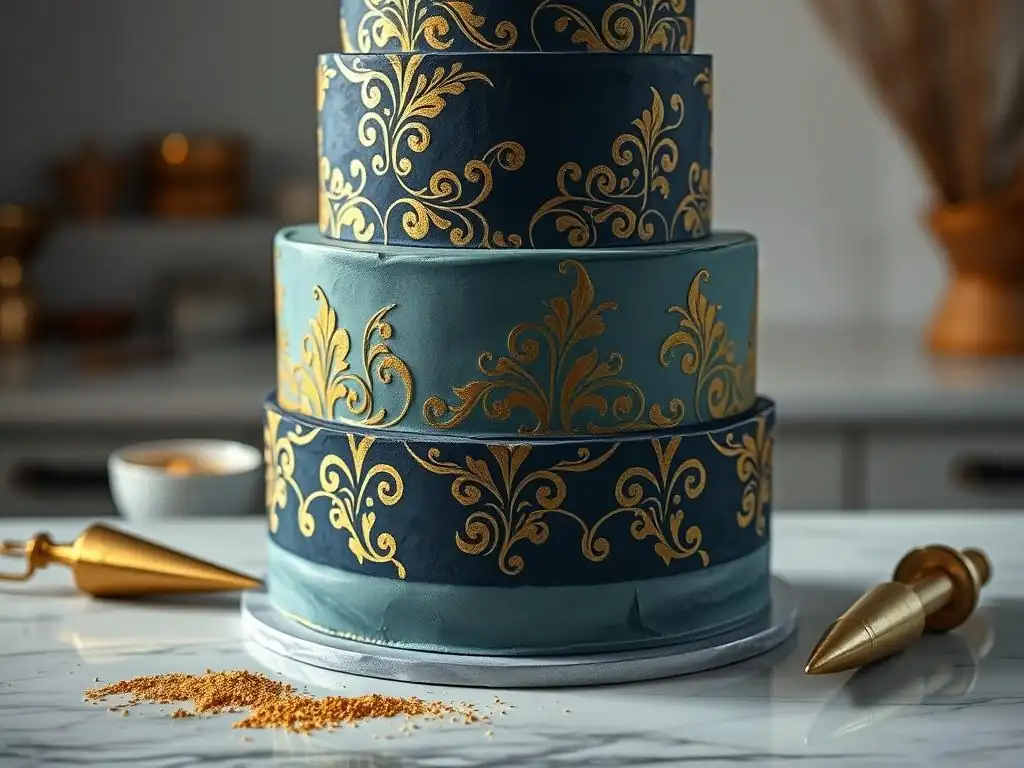
Welcome to BakeWithEase, your trusted companion in the delightful world of baking! Ever wondered how to achieve professional-looking layer cake decorations without years of experience? Dive in and discover the secrets to effortless elegance with our guide on stenciled layer cake decorations, unlocking a world of creative possibilities that are surprisingly simple. Are you ready to elevate your next cake masterpiece?
- Creating Elegant Layer Cakes with Stencils: A Baker's Guide
- Introduction to Stenciled Layer Cake Decorations
- Essential Tools and Materials for Stenciled Cakes
- Step-by-Step Guide: Creating Stenciled Layer Cakes
- Creative Stencil Techniques for Layer Cake Design
- Troubleshooting Common Stencil Problems
- Stenciled Layer Cake Design Ideas and Inspiration
- Maintaining and Cleaning Your Cake Stencils
- Conclusion: Enhance Your Creativity with Stenciled Layer Cakes
-
Frequently Asked Questions
- How do stencils simplify layer cake decorating?
- What types of decorating mediums work best with stencils on layer cakes?
- Are there specific types of stencils recommended for layer cakes?
- How do I prevent the stencil from smudging the frosting when decorating?
- Where can I find stencils specifically designed for cake decorating?
- Final Reflection: The Enduring Allure of Stenciled Layer Cakes
- Unleash Your Inner Cake Artist: Decorate with Confidence!
Creating Elegant Layer Cakes with Stencils: A Baker's Guide
Introduction to Stenciled Layer Cake Decorations
Elevate Your Baking: The Art of Stencil Designs on Cakes
Adding stenciled layer cake decorations is a fantastic way to transform a simple cake into a stunning masterpiece. Stencils allow bakers of all skill levels to achieve intricate, professional-looking patterns that would be difficult or time-consuming to freehand. Whether you're aiming for a delicate lace effect, a bold geometric print, or a whimsical scene, there's a stencil out there to help you bring your vision to life. This technique not only enhances the visual appeal but also adds a touch of artistry that will impress anyone who sees your creation.
Think about the impact of a perfectly smooth buttercream cake suddenly adorned with a repeating floral pattern applied with precision using a stencil. It elevates the entire presentation. From a simple 6-inch round cake for a small gathering to a multi-tiered celebration cake, stenciled designs offer endless possibilities for customization and creativity, making your stenciled layer cake decorations truly unique.
Why Use Stencils for Cake Decorating?
Using stencils offers several key advantages over traditional piping or freehand techniques, especially for achieving consistent and complex patterns. Firstly, they provide a level of accuracy and uniformity that is incredibly challenging to replicate manually. A large damask pattern covering the entire side of an 8-inch tall cake tier can be applied flawlessly with a stencil, whereas piping such a design freehand would require immense skill and patience, often resulting in variations in symmetry and thickness.
Secondly, stencils are a significant time-saver, particularly for intricate designs. Applying a detailed pattern across multiple cake tiers using a stencil can take a fraction of the time it would take to pipe it. This is especially beneficial for bakers working on tight schedules or decorating larger cakes. Furthermore, stencils are reusable and cost-effective, making them a valuable tool in any baker's kit for creating beautiful stenciled layer cake decorations repeatedly.
Exploring Stencil Versatility in Cake Design
The versatility of stencils is truly remarkable, extending beyond just applying flat patterns to the sides of cakes. Stencils can be used on the top surface of a cake, creating a focal point with intricate designs like mandalas or monograms. They can also be used on cupcakes, cookies, and even macarons to create matching treats. The technique isn't limited to just icing; you can use stencils with cocoa powder, powdered sugar, edible paints, or even airbrush colors to create different effects.
Consider using a stencil to apply a subtle texture to a fondant-covered cake before adding other elements, or using a smaller stencil repeatedly to build up a larger, custom design on the side of a tall tier. The ability to combine different stencils, colors, and application methods means that the only limit to your stenciled layer cake decorations is your imagination. This adaptability makes stencils a fundamental tool for both simple and elaborate cake projects.
Essential Tools and Materials for Stenciled Cakes
Selecting Stencils for Layer Cake Decoration
Choosing the right stencil is crucial for successful stenciled layer cake decorations. Stencils come in a vast array of designs, sizes, and materials. When selecting a stencil, consider the size and shape of your cake. A tall tier (e.g., 6-8 inches) might benefit from a full-height stencil, while smaller tiers or the top surface might use shorter or circular stencils. The pattern itself should complement the overall theme of your cake and event.
Look for stencils specifically designed for cake decorating. These often come in flexible materials that can wrap around the curve of a round cake. Consider the intricacy of the design; very fine details can be challenging to work with, especially for beginners, and are often best suited for mediums like royal icing or airbrushing rather than thicker buttercream. A good starting point might be a stencil with a medium-sized, repeating pattern, ideal for practicing your application technique for stenciled layer cake decorations.
Choosing Stencil Material: Plastic and Metal Options
Cake stencils are commonly made from two primary materials: plastic and metal. Plastic stencils are typically made from food-grade acetate or Mylar. They are flexible, relatively inexpensive, and easy to clean. Their flexibility makes them excellent for wrapping around the curved sides of round cakes. However, very thin plastic stencils can sometimes be prone to slight warping or tearing if not handled carefully.
Metal stencils, often made from stainless steel, are more rigid and durable. They are less flexible, making them better suited for flat surfaces (like the top of a cake) or for straight-sided square cakes. Metal stencils can sometimes offer sharper, more precise cuts for intricate patterns. Both materials have their place, and many bakers find it useful to have a collection of both types for various stenciled layer cake decorations projects.
Icing Choices for Stencil Application: Royal Icing and Buttercream
The type of icing you use is critical for achieving clean, defined stenciled layer cake decorations. Royal icing is a traditional choice, especially for intricate or raised designs. Its firm consistency when dry prevents bleeding and allows for sharp lines. It works well on fondant-covered cakes or very firm buttercream crusts. A typical royal icing consistency for stenciling is slightly thicker than piping consistency, similar to peanut butter, ensuring it holds its shape when spread.
Buttercream can also be used, but it requires a very firm recipe (like a crusting buttercream or Swiss meringue buttercream that has been chilled) and careful application. A softer buttercream is more likely to bleed under the stencil. When using buttercream, it's often best to chill the cake thoroughly after applying the base layer of buttercream and before stenciling. This helps the base layer hold up to the pressure of application and prevents the stenciling icing from pulling it up. Aim for a firm, spreadable consistency, not too soft.
Essential Tools: Spatulas, Scrapers, and Stencil Holders
Beyond the stencil and icing, a few essential tools will make applying your stenciled layer cake decorations much easier and more successful. A small offset spatula is indispensable for scooping and applying icing onto the stencil. Its angled blade allows for precise placement. A bench scraper or a large, flat palette knife is perfect for smoothly spreading the icing across the stencil surface, ensuring even coverage and removing excess.
Stencil holders, often magnetic or clip-based systems, can be incredibly helpful, especially when working on tall or multi-tiered cakes. They help secure the stencil firmly against the cake surface, minimizing movement and reducing the risk of bleeding. If you don't have a stencil holder, using a few pins (inserted carefully into the cake board or a sacrificial piece of cake trim behind the stencil) or having a second pair of hands can also help stabilize the stencil during application.
Step-by-Step Guide: Creating Stenciled Layer Cakes
Preparing Your Layer Cake for Stenciling: Achieving a Smooth Surface
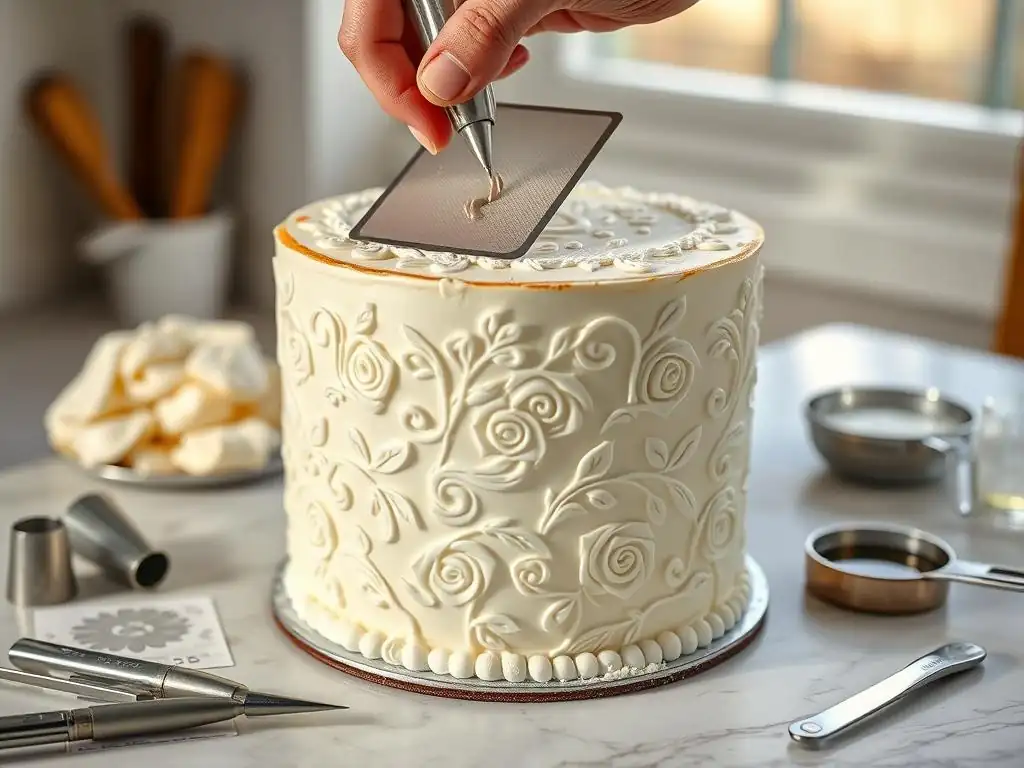
The foundation for beautiful stenciled layer cake decorations is a perfectly smooth cake surface. Whether you are working with buttercream or fondant, the final layer must be as smooth and level as possible. Any bumps, ridges, or imperfections will likely show through the stencil and can make it difficult to secure the stencil flush against the cake.
If using buttercream, apply your final coat and smooth it meticulously using a warm bench scraper or cake smoother. Chill the cake in the refrigerator for at least 30-60 minutes, or until the buttercream is firm to the touch. This creates a stable surface that won't get damaged when you press the stencil against it. For fondant, ensure it is applied smoothly and allowed to set slightly before stenciling. A smooth surface allows the stencil to lay flat, which is essential for crisp lines.
Securing Your Stencil: Techniques for a Clean Application
Properly securing the stencil is perhaps the most critical step in achieving clean stenciled layer cake decorations. For the side of a round cake, carefully wrap the flexible stencil around the cake tier, ensuring the bottom edge of the stencil is level with the cake board or the bottom of the tier. Gently press the stencil against the chilled cake surface to adhere it.
If using a stencil holder, position it around the cake and secure the stencil tightly. If working freehand, you might need to hold the stencil firmly with one hand while applying icing with the other. For square cakes or the top surface, simply lay the stencil flat on the chilled surface, ensuring it is centered or positioned exactly where you want the design. The goal is to have the stencil in complete contact with the cake surface everywhere you plan to apply icing.
Applying Icing Evenly: Achieving Crisp Stencil Lines
Once the stencil is secured, it's time to apply your chosen icing (royal icing or firm buttercream). Place a small amount of icing onto your offset spatula – you don't need a huge dollop. Starting from one edge of the stencil, spread the icing thinly and evenly across the stencil pattern using your bench scraper or large palette knife. Hold the scraper at a slight angle (around 45 degrees) to the stencil.
Use firm, even pressure and work your way across the entire stencil, scraping off any excess icing as you go. The key is to fill the stencil openings completely but avoid building up too much thickness, which can lead to bleeding. Scrape cleanly across the surface multiple times if needed to ensure the layer of icing within the stencil is thin and even. This scraping action also helps to press the icing into the stencil openings and against the cake surface for sharp stenciled layer cake decorations.
Removing the Stencil: Revealing Your Cake Decoration
This is the moment of truth! Once the icing has been applied and scraped smooth across the stencil, it's time to reveal your stenciled layer cake decorations. Carefully and slowly peel the stencil away from the cake. It's best to pull the stencil off in one continuous motion, starting from one edge and peeling it back smoothly.
If you used royal icing, it's often helpful to let it sit for a minute or two to start crusting before removing the stencil, especially if the design has fine details. If using buttercream, remove the stencil immediately after scraping. Pulling the stencil straight out and away from the cake, rather than up, can help prevent smudging. If working on a tall tier with a full-height stencil, peel it off from bottom to top or top to bottom, supporting the cake as needed.
Creative Stencil Techniques for Layer Cake Design
Using Multiple Stencils for Complex Cake Patterns
Combining multiple stencils can create incredibly complex and unique stenciled layer cake decorations that look far more intricate than a single pattern. You might use one stencil for a background texture and another for a focal point design, or layer different colors using the same stencil pattern. For example, you could apply a light color through a geometric stencil across the entire cake, then use a different, smaller stencil or a portion of the same stencil with a darker color in specific areas.
Another technique involves applying a full pattern with one stencil, allowing it to set, and then carefully placing a second, complementary stencil over a specific area of the first design to add details or different elements. This requires careful alignment but can yield stunning, multi-dimensional results. Imagine a subtle damask pattern overlaid with bold initial stencils or a floral pattern enhanced with metallic gold accents applied through a smaller detail stencil.
Incorporating Various Colors with Stencils
Stencils are perfect for adding multiple colors to your stenciled layer cake decorations. The simplest way is to use different colored icings with separate stencil applications. You could stencil the bottom third of a cake tier in one color, clean the stencil, and then stencil the middle third in a different color using the same or a different pattern, and so on.
For more detailed multi-color designs using a single stencil, you can carefully apply different colored icings to specific areas of the stencil openings using a small spatula or even a piping bag with a very small tip. This requires precision but allows you to create designs where different elements of the pattern are different colors. For example, stenciling leaves green and flowers pink within the same floral stencil.
Adding Texture with Stenciled Decorations
Beyond just flat patterns, stencils can be used to add tangible texture to stenciled layer cake decorations. By applying icing slightly thicker than usual through the stencil, you can create a raised design that adds dimension. This works particularly well with royal icing or a very thick buttercream. Once the icing is applied, you can even use a palette knife or scraper to create subtle textures within the stenciled area before the icing sets, like small peaks or swirls.
Another textural technique involves using a stencil with edible paints or airbrush colors on a fondant or crusted buttercream surface. While not creating a raised effect, this adds visual texture through shading and color variation within the stenciled area. You can also use stencils with edible glitter or sanding sugar sprinkled over wet icing for a sparkling, textured effect.
Enhancing Designs with Edible Glitters and Dusts
Edible glitters and dusts are wonderful for adding shimmer and elegance to your stenciled layer cake decorations. The simplest method is to apply your icing through the stencil and, immediately after removing the stencil (while the icing is still wet), gently sprinkle edible glitter or dusting powder over the stenciled design. The wet icing will act as an adhesive, holding the glitter or dust in place.
Alternatively, you can apply the stencil to a dry surface (like crusted buttercream or fondant), lightly spray the exposed areas within the stencil openings with edible adhesive spray or apply a thin layer of edible glue, and then sprinkle the glitter or dust. Once the adhesive is set, carefully remove the stencil. This method is excellent for creating sharp, defined glitter patterns, adding a touch of sparkle to your stenciled layer cake decorations.
Troubleshooting Common Stencil Problems
Preventing Icing Bleed: Achieving Sharp Stencil Definition
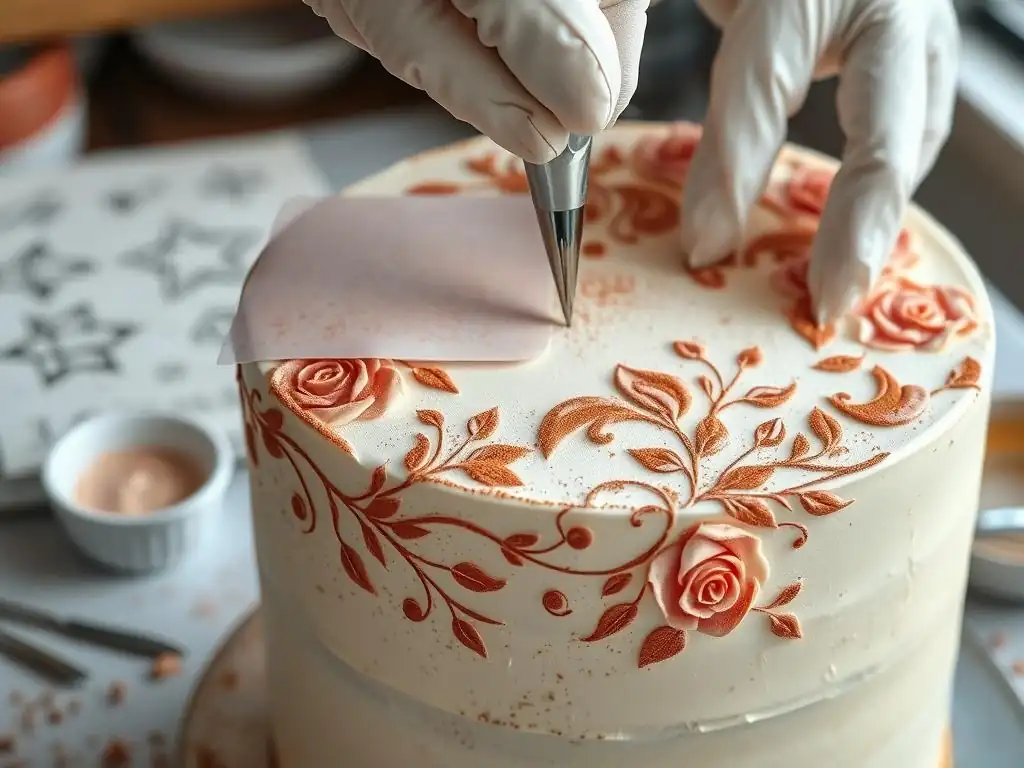
Icing bleed is a common issue that results in blurry, undefined stenciled layer cake decorations. It happens when icing seeps under the edges of the stencil. The primary causes are not having the stencil flush against the cake surface or using icing that is too soft. To prevent bleed, ensure your cake surface is perfectly smooth and chilled firm. Press the stencil firmly and evenly against the cake.
Use icing of the correct consistency – firm royal icing or very firm, chilled buttercream. When applying the icing, use a scraping motion rather than a spreading motion, and don't use too much pressure. The scraping action pushes the icing into the stencil openings rather than under the edges. Removing excess icing cleanly also helps prevent bleed. If using buttercream, work quickly before the cake warms up too much.
Dealing with Air Pockets: Achieving a Flawless Finish
Air pockets under the stencil can also lead to imperfections in your stenciled layer cake decorations, resulting in missing sections or uneven textures. Air pockets occur when the stencil isn't pressed completely flat against the cake surface. This is more likely on uneven surfaces or if the stencil isn't flexible enough for the cake's curve.
To avoid air pockets, ensure your cake surface is impeccably smooth. When applying the stencil, start from one point and smooth it outwards, pressing it firmly against the cake as you go, much like applying a screen protector to a phone. If using a stencil holder, ensure it is tightened sufficiently to hold the stencil taut against the cake. Applying the icing with firm, even pressure during the scraping process also helps to push out any small pockets of air trapped within the stencil openings.
Removing Stencil Residue: Maintaining a Clean Cake Design
Sometimes, after removing the stencil, you might find small bits of icing residue or smudges left on the cake outside of the stenciled pattern. This can detract from the crisp look of your stenciled layer cake decorations. The best way to handle this is to remove the stencil cleanly in the first place by peeling it off slowly and steadily.
If you do have small bits of residue, wait until the stenciled icing is completely set (especially important for royal icing). Then, you can often gently brush away dry residue with a very soft, dry brush. For tiny smudges on buttercream, you can try carefully using a clean, dry paintbrush or a toothpick to gently lift them away. Be patient and work with a light touch to avoid damaging the stenciled design or the underlying cake surface.
Correcting Errors: Fixing Imperfections in Your Stenciled Design
Mistakes happen, even with stenciled layer cake decorations. If you notice a small imperfection after removing the stencil – perhaps a tiny gap in the pattern or a slight smudge – don't panic! For small gaps or areas where the icing didn't fully transfer, you can often carefully fill in the missing section using a tiny amount of the same icing on a toothpick or a very fine paintbrush.
If there's a smudge or bleed that's noticeable, you might be able to gently scrape it away with a sharp, thin blade (like an X-Acto knife reserved for cake decorating) after the stenciled icing has fully hardened. Alternatively, you can try to incorporate the error into the design – maybe add a small piped dot or detail over it.
For significant errors, especially on buttercream, you might need to gently smooth the area and re-chill the cake before attempting to stencil that section again, or choose to cover the area with another decoration element like sprinkles or a sugar flower.
Stenciled Layer Cake Design Ideas and Inspiration
Geometric Stencil Patterns for Modern Cakes
Geometric patterns are incredibly popular for contemporary stenciled layer cake decorations. Think clean lines, repeating shapes like hexagons, diamonds, or chevron stripes. These patterns lend themselves well to modern cake designs, often paired with sharp edges and minimalist aesthetics. A full-height geometric stencil can create a striking visual effect on a tall single-tier cake or across multiple tiers of a wedding cake.
For example, a popular design involves using a hexagon pattern stencil around the side of a cake, which looks fantastic when paired with metallic accents or individual hexagons piped inside the stenciled outline. Another simple yet effective geometric pattern is a plain stripe stencil, which can be used horizontally or vertically to create bold lines. These patterns are often easier for beginners as they have fewer fine details compared to intricate lace or floral designs.
Floral Stencil Designs for Elegant Cakes
Floral stencils offer a timeless and elegant option for stenciled layer cake decorations. These range from delicate trailing vines and intricate lace-like flowers to bold, modern floral motifs. Floral patterns are perfect for wedding cakes, anniversaries, or any occasion calling for a touch of classic beauty.
A common approach is to use a large floral stencil to cover the entire side of a tier, creating a continuous garden-inspired design. Alternatively, you can use smaller floral stencils as accents, perhaps around the base of each tier or clustered near sugar flowers. Imagine a cake tier covered in a subtle stencil of cherry blossoms, or a bold rose pattern applied in vibrant colors. These designs often benefit from being applied with royal icing for maximum detail definition.
Stencils for Birthday Cakes
Stencils can add fun and personality to birthday cakes, catering to a wide range of themes and ages. For kids' cakes, you can find stencils with popular characters, animals, or playful patterns like polka dots or stars. For adult birthdays, consider stencils with elegant scripts for messages, celebratory motifs like balloons or confetti, or patterns that match a specific party theme (e.g., art deco for a Gatsby party, tropical leaves for a summer birthday).
A simple way to customize a birthday cake is to stencil the recipient's age or initials onto the top or side. For a child's cake, stenciling a repeating pattern of dinosaurs or unicorns around the base of a tier is a quick way to add visual appeal. You can even use edible glitter with a star stencil for a sparkling, magical effect on a themed birthday cake. The possibilities for unique stenciled layer cake decorations on birthdays are vast.
Stencils for Wedding Cakes
Wedding cakes demand sophistication and often intricate detail, making stencils an invaluable tool for creating stunning stenciled layer cake decorations. Traditional wedding stencil patterns include damask, lace, monograms, and elegant floral designs. These patterns add a layer of texture and visual interest that complements other wedding cake decorations like sugar flowers or drapery.
Consider using a delicate lace stencil around the base of each tier, or a full-height damask pattern on alternating tiers for a classic look. Monogram stencils are popular for personalizing the cake with the couple's initials, often placed on a prominent tier or the top surface. Applying these patterns with pearlized royal icing or edible metallic dusts can add an extra touch of luxury suitable for a wedding celebration. Stencils help ensure uniformity across multiple tiers, which is essential for a cohesive wedding cake design.
Maintaining and Cleaning Your Cake Stencils
Cleaning Techniques for Different Stencil Materials
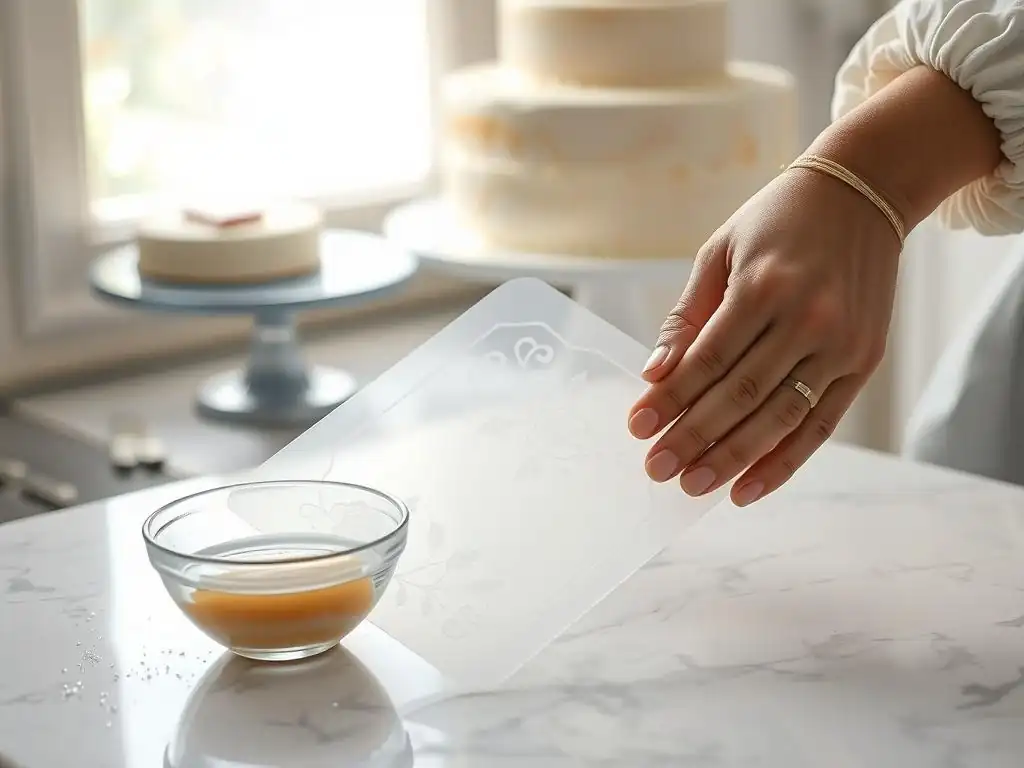
Proper cleaning is essential to keep your stencils in good condition and ready for your next batch of stenciled layer cake decorations. The cleaning method depends slightly on the material and the icing used. For both plastic and metal stencils used with buttercream or royal icing, the best approach is to clean them immediately after use, before the icing has a chance to fully harden.
Rinse the stencil under warm running water to remove the bulk of the icing. Use a soft brush (like a clean toothbrush or a small pastry brush) or a sponge to gently scrub away any remaining icing from the cutouts. For stubborn bits of dried royal icing, you might need to soak the stencil in warm, soapy water for a few minutes to soften it before scrubbing. Avoid using abrasive scrubbers that could scratch or damage the stencil, especially plastic ones. Ensure all icing is removed from the intricate parts of the design.
Storing Your Stencils Properly
Storing your stencils correctly will help maintain their shape and prevent damage, ensuring they are ready for your next stenciled layer cake decorations project. Flat stencils (both plastic and metal) are best stored flat to prevent bending or warping. You can store them in large envelopes, clear plastic sleeves, or dedicated stencil storage binders with plastic inserts.
For flexible plastic stencils designed to wrap around cakes, avoid folding or creasing them sharply. If they came rolled, storing them loosely rolled might be acceptable, but flat storage is generally preferred if space allows. Keep stencils away from direct heat or sunlight, which can cause plastic to warp. Storing them in a clean, dry place away from potential damage (like heavy objects being placed on them) is key to longevity.
Extending the Life of Your Cake Decorating Stencils
Taking good care of your stencils will allow you to create beautiful stenciled layer cake decorations for years to come. Always handle stencils with care, especially intricate designs with thin bridges of material. Avoid pulling or stretching plastic stencils excessively. When cleaning, be gentle and ensure all icing residue is removed, as dried icing can harden and potentially damage the stencil during storage or future use.
If you use stencils with airbrush colors, clean them thoroughly immediately after use, as some colors can stain plastic if left for too long. Inspect your stencils periodically for any signs of damage, like tears or bends, and handle those areas with extra care during application. By following these simple cleaning and storage tips, you can significantly extend the usable life of your cake decorating stencils.
Conclusion: Enhance Your Creativity with Stenciled Layer Cakes
Mastering Stenciled Cake Decorations: A Summary
Mastering stenciled layer cake decorations is a rewarding skill that adds a professional touch to your baking. We've covered the essentials, from choosing the right stencils and tools to preparing your cake, applying the icing with precision, and troubleshooting common issues. The key takeaways are preparation (smooth, chilled cake), technique (securing the stencil, scraping icing evenly), and practice. Starting with simpler patterns and firmer icing can help build confidence before tackling more intricate designs.
Remember that stencils are versatile tools that can be used with various icings and mediums, offering endless creative possibilities. They allow you to achieve complex patterns quickly and consistently, making them ideal for everything from simple home bakes to elaborate celebration cakes. Embrace the process, learn from any mistakes, and enjoy transforming your layer cakes with beautiful stenciled designs.
Resources for Cake Stencils
Cake stencils are widely available from various sources. You can find a huge selection online from dedicated cake decorating supply stores and large e-commerce platforms. Many local craft stores and baking supply shops also carry a range of stencils. Look for stencils made from food-grade materials specifically intended for cake use.
When searching, use terms like "cake stencil," "cookie stencil," "fondant stencil," or "airbrush stencil" depending on your intended use. Consider the size and flexibility described by the seller to ensure it meets your needs for stenciled layer cake decorations on layer cakes. Reading reviews can also be helpful in assessing the quality and ease of use of specific stencils.
We love seeing what you create! Once you've finished your beautiful stenciled layer cake decorations, don't hesitate to share your work. Take clear photos from different angles to showcase the intricate details of your stenciled design. Mention the type of stencil you used and the icing technique you employed – your experience can inspire others.
Sharing your creations is a great way to connect with the baking community, receive feedback, and celebrate your accomplishments. It also helps others who are learning the technique see what's possible. So snap those pictures, share your stunning stenciled layer cake decorations, and encourage other bakers to try this fantastic technique!
Frequently Asked Questions
How do stencils simplify layer cake decorating?
Stencils provide a quick and easy method for achieving intricate designs on your cakes without requiring advanced piping skills. They act as a template for applying decorating mediums.
What types of decorating mediums work best with stencils on layer cakes?
Popular choices include royal icing, powdered sugar, and cocoa powder. The best medium depends on the desired effect and the cake's frosting.
Are there specific types of stencils recommended for layer cakes?
Yes, look for stencils made from food-grade plastic that are flexible and easy to clean. Stencils with larger patterns are often easier to work with on cakes.
How do I prevent the stencil from smudging the frosting when decorating?
Ensure the frosting is firm and chilled before applying the stencil. Secure the stencil tightly against the cake using pins or clips, then gently apply your decorating medium.
Where can I find stencils specifically designed for cake decorating?
You can find cake decorating stencils at specialty baking supply stores, craft stores, and online retailers like Amazon and Etsy. Look for options with designs that complement your cake's style.
Final Reflection: The Enduring Allure of Stenciled Layer Cakes
The art of stenciling layer cakes isn't just a fleeting trend; it's a powerful expression of creativity that continues to elevate the humble cake to a breathtaking masterpiece. From simple elegance to bold, artistic statements, the possibilities are as limitless as your imagination. This enduring technique allows bakers of all skill levels to achieve professional-looking results, transforming ordinary cakes into show-stopping centerpieces.
The impact of stenciling on the cake decorating world is undeniable. It has democratized access to intricate designs, empowering home bakers to create cakes that were once the exclusive domain of professional pastry chefs. The beauty of a well-executed stencil is in its simplicity and impact. It allows the design to speak for itself, enhancing the overall aesthetic without overwhelming the cake.
This quote perfectly captures the essence of why stenciling remains so popular – it's a balance of artistry and accessibility.
Now, consider your own baking journey. What designs have captivated you? What flavors and colors come to mind when you think of creating a truly unique layer cake? I encourage you to pick up a stencil, experiment with different colors and techniques, and unleash your inner artist. Don't be afraid to try something new; the most rewarding creations often come from stepping outside your comfort zone. Let your next layer cake be a testament to your creativity and a delicious celebration of your personal style.
Unleash Your Inner Cake Artist: Decorate with Confidence!
Thanks for taking the time to explore the world of stenciling! We hope you've gained some valuable tips and tricks to elevate your layer cake decorating. Ready to put your newfound skills into action?
- Create your masterpiece! Grab those stencils and get baking. Experiment with different colors and designs to find your unique style. This is your chance to truly personalize your cakes.
- Share your creations! Show off your stunning stencil work on social media using #BakeWithEaseStencils. Let's inspire each other!
- Explore new stencil designs: Consider trying a less common shape, like a geometric pattern or a nature-inspired motif, to truly stand out.
What unique stencil design will you try next to surprise your friends and family?