
Piping Shell Borders: A Classic Layer Cake Decoration

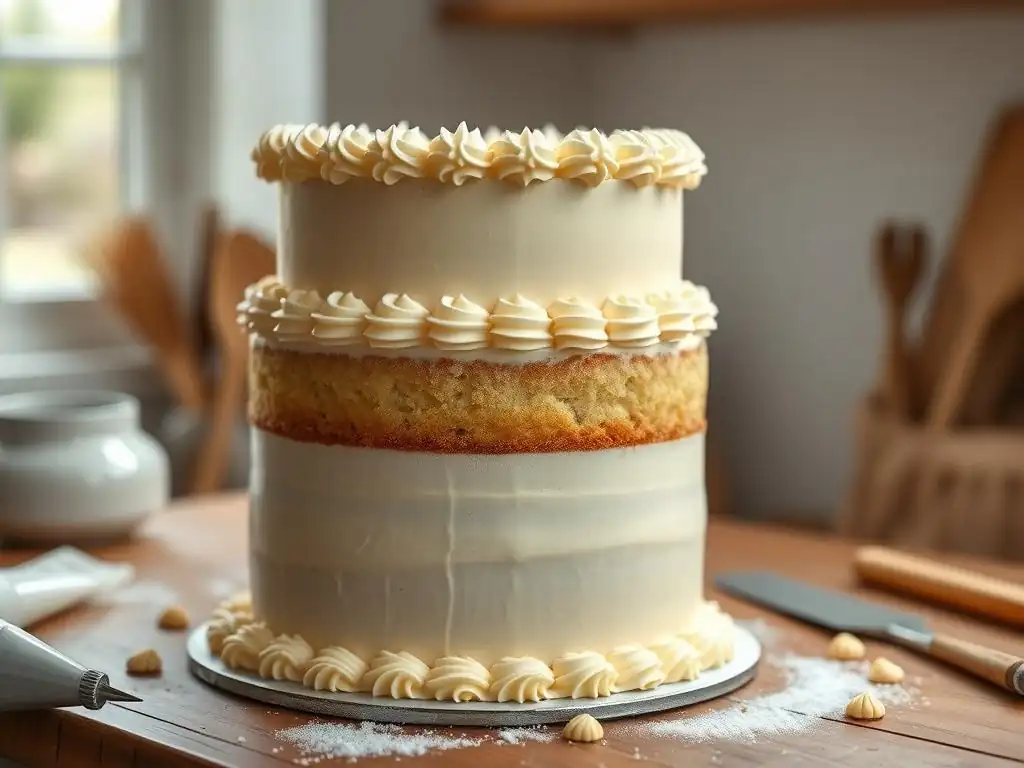
Welcome to BakeWithEase, your trusted companion in the kitchen! Ever wondered how to elevate a simple layer cake into a show-stopping masterpiece? Discover the secrets to creating perfect shell borders in this guide. Unlock the art of elegant cake decoration and transform your baking with ease. Let's get piping!
- Mastering Easy Layer Cake Shell Borders for Elegant Cakes
- Essential Tools and Ingredients for Piping Shell Borders
-
Step-by-Step Guide to Piping Perfect Shell Borders on Layer Cakes
- Preparing Your Layer Cake for Decoration: Leveling and Crumb Coating
- Filling Your Piping Bag with Frosting: Avoiding Air Bubbles
- Practicing Your Shell Border Technique: Mastering the Motion
- Piping the Bottom Border: Creating a Stable Foundation
- Piping the Top Border: Adding a Delicate Finishing Touch
- Troubleshooting Common Shell Border Piping Problems
- Creative Variations on the Classic Shell Border
- Layer Cake Shell Border Inspiration: Examples and Ideas
- Caring for Your Decorated Layer Cake with Shell Borders
- Elevate Your Layer Cakes with Beautiful Shell Borders: A Recap
-
Frequently Asked Questions
- How do I achieve a smooth and even shell border on my layer cake?
- What type of frosting is best for piping shell borders?
- What piping tip is typically used for creating shell borders?
- Can I use different colors of frosting for my shell borders?
- Are there any tips for preventing air bubbles in my frosting when piping shell borders?
- Final Reflection: Mastering the Art of Easy Layer Cake Shell Borders
- Unleash Your Inner Cake Artist: Master the Piping Shell Border!
Mastering Easy Layer Cake Shell Borders for Elegant Cakes
Why Shell Borders Are a Timeless Layer Cake Decoration Technique
Shell borders are a fundamental technique in cake decorating, offering a classic and elegant finish that never goes out of style. This simple yet effective border adds a touch of sophistication to any layer cake, making it look professionally made even if you're a beginner baker. The repetitive, wave-like pattern of shells creates a beautiful frame around the cake, providing a clean transition between the cake sides and the cake board or the top surface. Mastering easy layer cake shell borders is a valuable skill for anyone looking to elevate their homemade creations.
Beyond aesthetics, shell borders also serve a practical purpose. They can help mask any slight imperfections where the cake meets the board or where the top layer joins the side frosting. This makes them particularly useful when learning how to decorate layer cakes. The structured nature of the shell design provides stability and a defined edge, contributing to a neat and polished overall appearance. It's a forgiving technique that yields impressive results, making it an excellent starting point for those new to piping or seeking reliable easy layer cake decoration methods.
Bake Like a Pro: Your Guide to Perfect Layer Cake Shell Borders
Achieving perfect shell borders on your layer cakes is entirely within reach with the right guidance and practice. This guide will walk you through the essential steps, from choosing the right tools to troubleshooting common issues. Think of this as your personal lesson in creating stunning, professional-looking cake edges without needing years of experience. It's about understanding the simple mechanics behind the shell motion and applying consistent technique.
By following these instructions, you'll learn how to prepare your cake properly, select the ideal frosting consistency, and execute the piping motion with confidence. We'll cover everything from the initial crumb coat to the final decorative touch. The goal is to empower you to create beautiful, easy layer cake shell borders that impress everyone who sees (and tastes!) your cake, transforming a simple baked good into a centerpiece.
Essential Tools and Ingredients for Piping Shell Borders
Choosing the Right Piping Tip for Shell Borders: Wilton 1M and Ateco 806 Recommendations
The key to well-defined shell borders lies significantly in selecting the correct piping tip. Two of the most popular and effective choices for creating classic shells are the Wilton 1M and the Ateco 806 (or similar open star tips like Ateco 826 or 828 for larger shells). The Wilton 1M is an open star tip with deep grooves, producing shells with distinct ridges that are immediately recognizable and widely used for many border designs, including the classic shell.
The Ateco 806, part of their open star tip series, offers a slightly different look depending on the specific tip size (806 is a medium-sized star). While similar to the 1M, the Ateco tips can sometimes have slightly different groove patterns or opening sizes, which subtly affects the final look of the shell.
For easy layer cake shell borders, both tips are excellent, but experimenting with both can help you find your preferred style. A standard 1M tip will typically create shells that are about 1 to 1.5 inches long when piped correctly, offering a good balance for most 8-inch or 9-inch layer cakes.
Selecting the Best Frosting for Crisp and Defined Shells: American Buttercream for Stability
The consistency of your frosting is paramount for piping crisp, well-defined shell borders. American buttercream is often recommended for beginners and those seeking easy layer cake shell borders due to its stability and firmness at room temperature. A good American buttercream recipe, typically made from butter, powdered sugar, milk or cream, and vanilla extract, provides the necessary structure to hold the shell shape without collapsing.
For optimal piping, the buttercream should be smooth and creamy but not too soft or runny. If it's too soft, the shells will lose their definition and spread; if it's too stiff, it will be difficult to pipe smoothly and may tear. A common ratio for a stable piping consistency might involve approximately twice the amount of powdered sugar by weight compared to butter (e.g., 1 lb butter to 2 lbs powdered sugar), adjusted with a minimal amount of liquid. Ensure your buttercream is well-mixed to remove air pockets, which can disrupt the piping flow.
Gathering Your Supplies: Piping Bags, Turntable, Offset Spatula, and More
In addition to your piping tip and frosting, you'll need a few other essential tools to make piping easy layer cake shell borders a smooth process. High-quality piping bags, either disposable or reusable, are necessary to hold and dispense the frosting. Disposable bags offer convenience, while reusable bags are more environmentally friendly. You'll also likely need a coupler if you plan to switch tips without changing bags, although for a single border, it's not strictly necessary.
A cake turntable is incredibly helpful for rotating the cake smoothly as you pipe the border, allowing for consistent application without awkward hand movements. An offset spatula is useful for frosting the cake initially and pushing frosting down into the piping bag. Finally, having a bench scraper or straight spatula can help achieve smooth sides on your crumb coat before piping the border. Ensure all your tools are clean and ready before you begin.
Step-by-Step Guide to Piping Perfect Shell Borders on Layer Cakes
Preparing Your Layer Cake for Decoration: Leveling and Crumb Coating
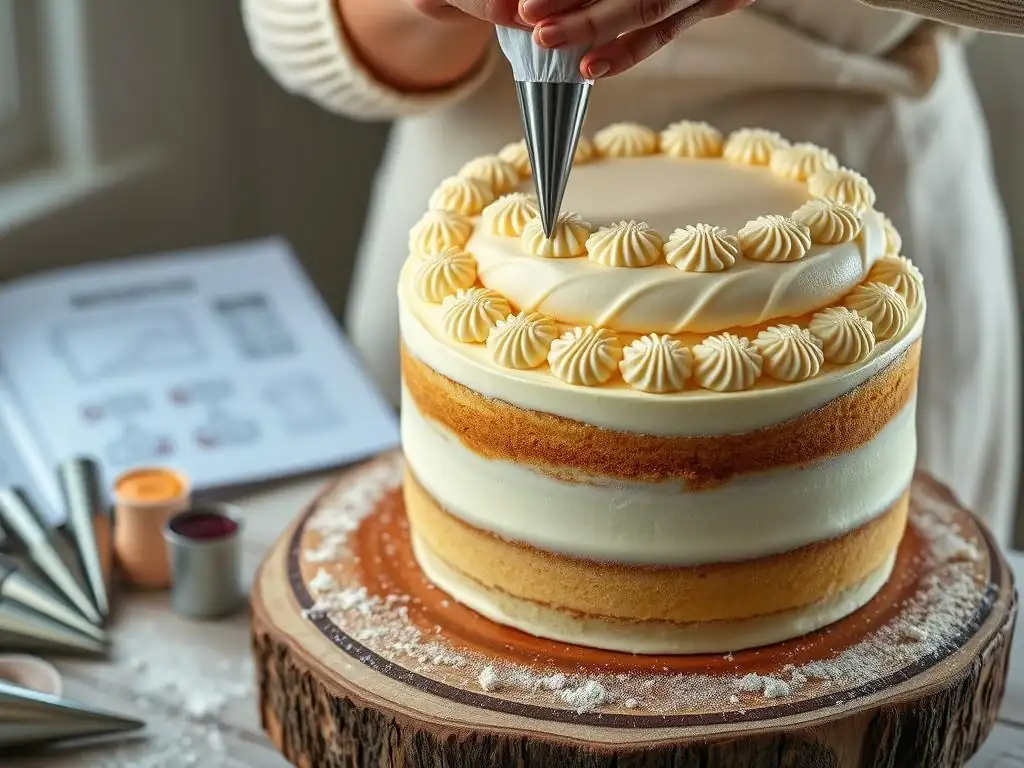
Before you even think about piping, your layer cake needs proper preparation. This involves leveling the cake layers so they are flat and stacking them with your filling of choice. Once assembled, apply a thin, even layer of frosting all over the cake – this is called the crumb coat. The crumb coat traps any loose crumbs, preventing them from showing up in your final decorative layer. Chill the crumb-coated cake in the refrigerator for at least 20-30 minutes until the frosting is firm to the touch.
After the crumb coat is chilled, apply your final, thicker layer of frosting to the sides and top of the cake. Aim for smooth, even coverage using your offset spatula and bench scraper. This final layer of frosting provides a smooth surface for your shell border to sit on and ensures a clean transition. A well-frosted cake makes piping easy layer cake shell borders significantly simpler and more effective.
Filling Your Piping Bag with Frosting: Avoiding Air Bubbles
Properly filling your piping bag is crucial for a smooth piping experience free from frustrating air bubbles. Fold down the top edge of your piping bag (with the tip already inserted and secured, or with a coupler) to create a cuff. Use an offset spatula to scoop frosting into the bag, pushing it down towards the tip as you go. Fill the bag no more than two-thirds full; overfilling makes the bag difficult to handle and control.
Once filled, unfold the cuff and twist the top of the bag tightly just above the frosting. This pressure helps push the frosting down and prevents it from squeezing out the top. Before you start piping on the cake, give the bag a gentle squeeze over a scrap piece of parchment paper to expel any trapped air bubbles. Pipe until the frosting comes out in a smooth, consistent stream. This simple step ensures your easy layer cake shell borders are continuous and free of gaps.
Practicing Your Shell Border Technique: Mastering the Motion
Before piping on your beautifully frosted cake, practice the shell motion on a piece of parchment paper or the inside of an empty cake pan. This allows you to get a feel for the pressure needed and the rhythm of the movement without risking your final cake finish. Use the same tip and frosting consistency you plan to use on the cake.
Understanding the Piping Motion for Classic Shell Borders
The classic shell motion involves squeezing the bag while holding the tip at a slight angle (around 45 degrees to the cake surface). Start squeezing firmly to create the base of the shell. As frosting comes out, gradually decrease pressure and pull the tip downwards and slightly towards you, creating a tail that tapers off. Stop squeezing completely as you lift the tip away. Each shell starts where the tail of the previous shell ended, creating a continuous, wave-like pattern. This "squeeze, pull, release" motion is fundamental to achieving easy layer cake shell borders.
Tips for Achieving Consistent Shell Sizes and Spacing
Consistency is key to a beautiful shell border. Aim to apply consistent pressure for the base of each shell and pull the tail the same length each time. Your speed in pulling the tip will also affect the tail's length. Practice until your shells are roughly the same size and shape. For spacing, the tail of each new shell should slightly overlap the end of the previous shell's tail. This creates a seamless, flowing border. Using a turntable helps maintain consistent angle and distance from the cake. Don't worry if your first few aren't perfect; practice makes progress!
Piping the Bottom Border: Creating a Stable Foundation
Begin piping your shell border along the bottom edge of the cake, where it meets the cake board. Start at an inconspicuous spot (like the back of the cake). Hold the bag with the tip angled slightly towards the cake board. Squeeze to create the base, then pull down and slightly towards you, releasing pressure as you lift away. For the next shell, place the tip just above where the tail of the first shell ended and repeat the motion, slightly overlapping the previous tail.
Continue this process all the way around the base of the cake, using your turntable to rotate the cake smoothly. Maintain consistent pressure and motion. When you reach your starting point, finish your last shell and carefully lift the tip away, aiming to blend it as seamlessly as possible with the first shell. The bottom border provides a stable and decorative edge, making the cake look grounded and complete. It’s a fundamental step for easy layer cake shell borders.
Piping the Top Border: Adding a Delicate Finishing Touch
Once the bottom border is complete, move on to the top edge of the cake. This border can be piped directly on the top surface, along the very edge, or slightly overhanging the side. Hold the piping bag with the tip angled slightly towards the center of the cake or straight up, depending on the desired look and where you want the shells placed relative to the edge.
Start at the back again and pipe your first shell, squeezing to create the base and pulling the tail towards the center of the cake or straight up. Overlap the tail of the previous shell with the base of the next, just like on the bottom. Work your way around the entire top edge, maintaining consistent size and spacing. The top border frames the cake beautifully and adds a delicate finishing touch, completing the easy layer cake shell borders design.
Troubleshooting Common Shell Border Piping Problems
Shells That Are Too Flat or Too Tall: Adjusting Pressure and Angle
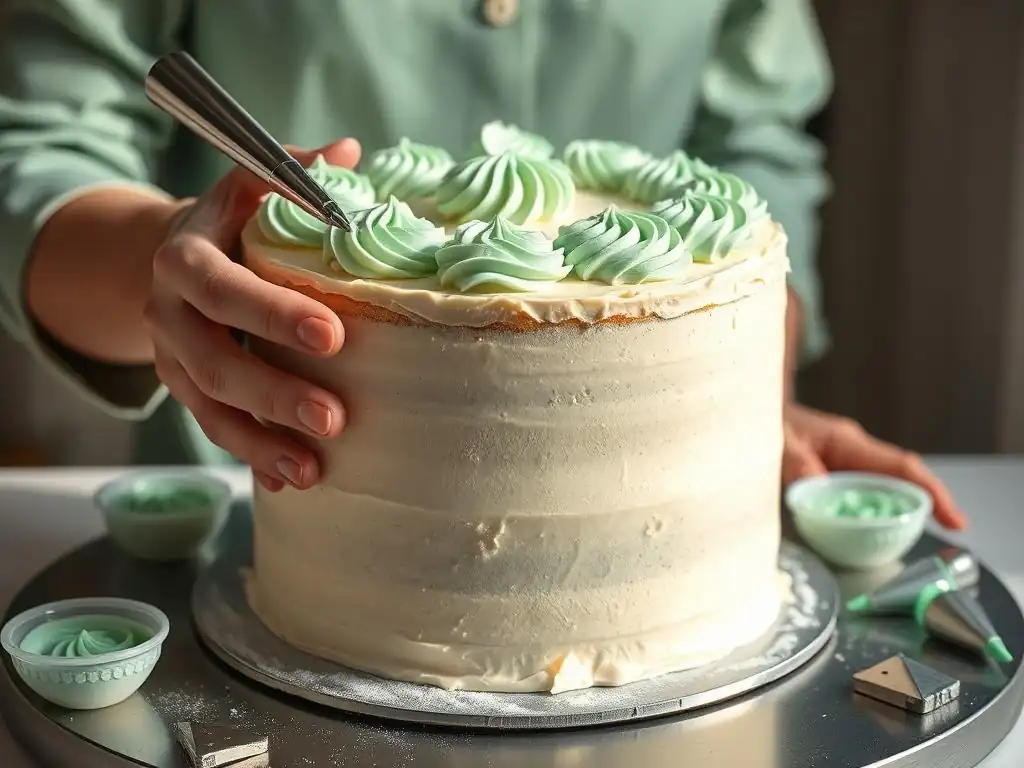
If your shells are coming out too flat, you might not be applying enough pressure initially, or you might be pulling the tail too quickly or at too shallow an angle. Try increasing the initial squeeze pressure to build a fuller base and maintain the angle (around 45 degrees) more consistently as you pull.
If shells are too tall or look like little "kisses" rather than flowing shells, you might be holding the tip too vertically or not pulling the tail out enough before releasing pressure. Angle the tip more towards the surface and ensure you pull the tip away in a smooth, tapering motion.
Uneven Spacing Between Shells: Maintaining Consistency
Uneven spacing is a common issue when first learning easy layer cake shell borders. It usually stems from inconsistent overlap between the shells. Make a conscious effort to place the tip for the new shell at exactly the same point relative to the previous shell's tail each time. Practice on parchment paper to develop a visual sense of the correct overlap. Using a turntable and rotating the cake smoothly and at a consistent speed as you pipe can also help maintain even spacing around the entire cake.
Air Bubbles in Your Frosting: Preventing and Correcting
Air bubbles can cause frustrating gaps and breaks in your otherwise perfect shell border. The best way to deal with them is prevention: ensure your buttercream is well-mixed and smooth before filling the bag, and push the frosting down firmly into the bag, avoiding trapping air. Twist the top of the bag tightly.
Before piping on the cake, expel any air bubbles by squeezing onto parchment paper until the flow is smooth. If you encounter a bubble while piping on the cake, stop, gently massage the bag to move the bubble, and then resume piping, potentially overlapping slightly where the gap occurred.
Frosting That's Too Soft or Too Stiff: Achieving the Right Consistency
Frosting consistency is critical. If your frosting is too soft (perhaps due to being too warm or having too much liquid), your shells will slump and not hold their shape. If this happens, you can try chilling the frosting briefly in the refrigerator (5-10 minutes) or mixing in a little more powdered sugar.
If your frosting is too stiff, it will be hard to pipe smoothly, and the shells might look rough or torn. You can loosen stiff frosting by mixing in a very small amount (like a teaspoon at a time) of milk, cream, or softened butter until it reaches the desired consistency.
Creative Variations on the Classic Shell Border
Inverted Shell Borders: A Modern Twist
The inverted shell border offers a contemporary take on the classic design. Instead of pulling the tail down and towards you, you pipe the base and then pull the tail upwards and away from the previous shell's starting point. This creates shells that point upwards or outwards rather than downwards. It's a simple change in direction that gives the border a completely different feel, often perceived as more modern or whimsical. This variation still utilizes the basic "squeeze, pull, release" motion, making it an easy layer cake shell border variation to learn once you've mastered the classic.
Double Shell Borders: Adding Depth and Texture
For added visual interest and depth, you can pipe a double shell border. This involves piping one row of classic shells and then piping a second row directly above or below the first, slightly offset. Alternatively, you can pipe two rows simultaneously side-by-side if you're using a larger tip or have multiple bags ready. This technique adds significant texture and presence to the cake's edge, making the easy layer cake shell borders stand out even more. It requires a bit more frosting but offers a richer, more layered look.
Using Different Colors for a Striking Effect: Ombre and Contrasting Colors
Adding color can transform a simple shell border into a striking design element. You can use contrasting colors for the top and bottom borders or even alternate colors within a single border. For an ombre effect, gradually blend two or three shades of the same color in your piping bag. Start with the darkest shade at the tip, layer the medium shade on top, and the lightest at the back of the bag. As you pipe, the colors will transition, creating a beautiful gradient effect within the easy layer cake shell borders.
Incorporating Edible Pearls or Sprinkles: Enhancing the Design
Once your shell border is piped, you can enhance it with edible decorations. Placing a small edible pearl or a sprinkle (like a nonpareil or sanding sugar) at the tip or base of each shell adds sparkle and detail. This is a simple way to elevate the design without requiring advanced piping skills. Carefully place the decorations using tweezers or your fingers while the frosting is still fresh and soft enough for them to adhere. This small touch can significantly enhance the visual appeal of your easy layer cake shell borders.
Layer Cake Shell Border Inspiration: Examples and Ideas
Simple and Elegant Shell Border Designs for Beginners
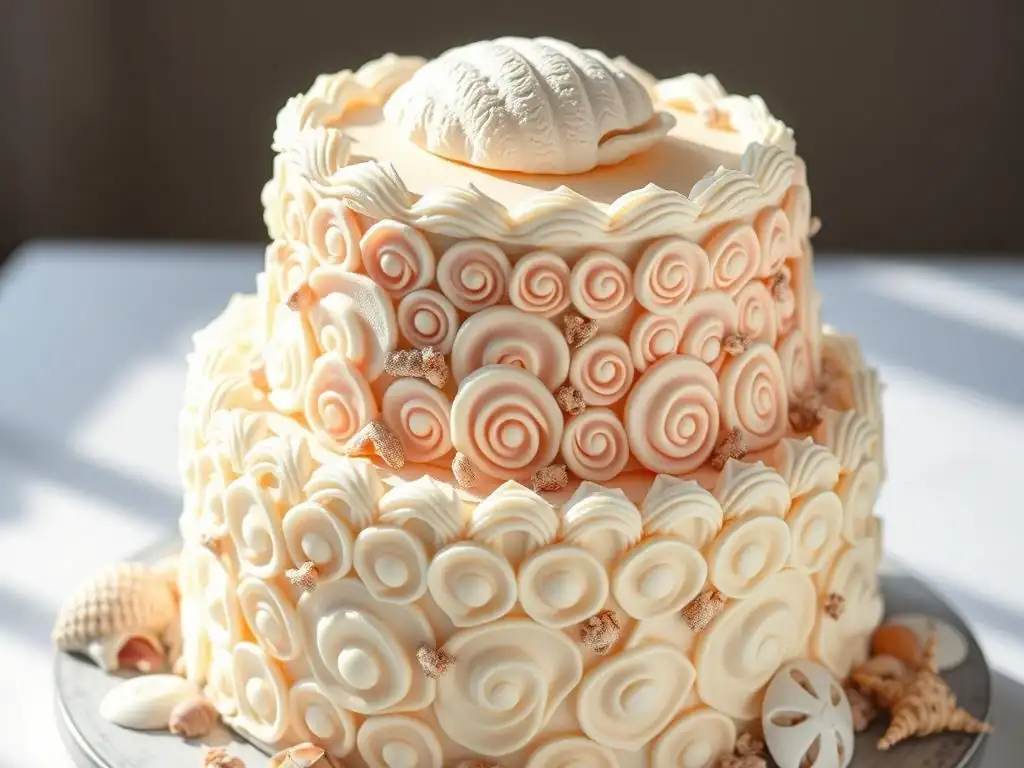
For beginners focusing on easy layer cake shell borders, a single row of classic shells piped in the same color as the cake frosting offers a clean and elegant look. A popular approach is a white or pastel-colored buttercream on a matching cake, creating a subtle, textured edge. Another simple yet effective design is using a slightly contrasting color for the shells (e.g., light pink shells on a white cake) to make the border pop just slightly. Keeping it simple allows you to focus on mastering the technique itself.
Intricate and Detailed Shell Border Designs for Advanced Bakers
More advanced decorators can explore intricate variations. This might include using smaller tips for more delicate shells, piping multiple overlapping rows, or combining shells with other piping techniques like dots or rosettes along the border. Creating a continuous, flowing "S" curve with shells around the cake sides or piping several different sizes of shells in a pattern are examples of more complex designs that build upon the basic easy layer cake shell borders technique.
Seasonal Shell Border Designs: Fall Harvest and Winter Wonderland Themes
Shell borders can also be adapted for seasonal themes. For a fall harvest cake, pipe shells in warm colors like orange, yellow, and brown, perhaps creating an ombre effect. You could add small fondant leaves or pumpkin sprinkles between the shells. For a winter wonderland theme, use white or icy blue frosting and add edible glitter or snowflake sprinkles to the shells. This shows how versatile the easy layer cake shell borders technique can be for various occasions.
Caring for Your Decorated Layer Cake with Shell Borders
Storing Your Cake to Maintain Freshness and Decoration
Proper storage is essential to keep your decorated layer cake looking and tasting its best. If the cake is frosted with buttercream, it can typically be stored at cool room temperature (around 70°F or 21°C) for 2-3 days, loosely covered. For longer storage or in warmer environments, refrigerate the cake in an airtight container or a cake box.
If refrigerating, allow the cake to sit at room temperature for 30-60 minutes before serving so the buttercream softens slightly and flavors are more prominent. Avoid storing uncovered in the fridge, as it can dry out the cake and harden the easy layer cake shell borders excessively.
Transporting Your Decorated Layer Cake Safely
Transporting a decorated layer cake requires care to keep the shell borders intact. Use a sturdy cake box that is slightly larger than the cake. Place a non-slip mat or a few dots of frosting on the bottom of the box or cake board to prevent the cake from sliding.
Carry the box on a flat surface (like the floor of a car) rather than on a seat, especially for longer distances. If it's a hot day, transport the cake in an air-conditioned vehicle. For very delicate easy layer cake shell borders or multi-tiered cakes, consider chilling the cake thoroughly before transport to firm up the frosting.
Elevate Your Layer Cakes with Beautiful Shell Borders: A Recap
Shell Borders: The Key to Professional-Looking Cakes
Mastering the art of piping shell borders is a significant step towards creating layer cakes that look polished and professional. This classic technique, while seemingly simple, provides a beautiful frame that enhances the overall appearance of your baked creations. With the right tools, a stable frosting, and a bit of practice, piping easy layer cake shell borders becomes an achievable skill for bakers of all levels, transforming homemade cakes into stunning centerpieces worthy of any celebration.
By following the steps outlined in this guide, you've learned how to prepare your cake, execute the basic shell motion, troubleshoot common issues, and even explore creative variations. Remember that consistency in pressure, angle, and spacing is key to a beautiful border. Don't be discouraged if your first attempt isn't perfect; practice truly makes perfect when it comes to piping easy layer cake shell borders. Embrace the process, and enjoy the rewarding experience of decorating beautiful cakes.
Frequently Asked Questions
How do I achieve a smooth and even shell border on my layer cake?
Achieving a smooth shell border relies on consistent piping pressure and a steady hand. Practice on parchment paper first to refine your technique before decorating your cake.
What type of frosting is best for piping shell borders?
A stiff buttercream frosting is generally recommended for piping shell borders. It holds its shape well and provides a clean, defined look. Avoid using whipped cream as it is too soft.
What piping tip is typically used for creating shell borders?
A star tip, usually a size 16 or 18, is the most common choice for shell borders. The number refers to the size of the opening and the depth of the ridges.
Can I use different colors of frosting for my shell borders?
Absolutely! Using multiple colors of frosting can add visual interest to your layer cake. Just remember to keep the frosting consistency the same across all colors.
Are there any tips for preventing air bubbles in my frosting when piping shell borders?
To minimize air bubbles, ensure you beat your frosting thoroughly to remove any trapped air. Also, gently tap your piping bag on the counter before piping to release any remaining air.
Final Reflection: Mastering the Art of Easy Layer Cake Shell Borders
The delicate beauty of piped shell borders elevates a simple layer cake into a masterpiece, and their surprising ease of execution makes them accessible to even the most novice bakers. This timeless technique, far from being a relic of the past, continues to inspire awe and delight in the modern baking world, proving that sometimes, the most classic techniques are the most impactful.
The enduring popularity of shell borders speaks volumes about our innate desire for both elegance and simplicity. They represent a perfect balance – a sophisticated finish achieved with surprisingly little effort. This resonates deeply with me, as I've witnessed firsthand the joy that creating these borders brings, both to those who bake them and those who receive the beautifully decorated cakes. The simplest things are often the truest.
This quote perfectly encapsulates the charm of shell borders and their ability to transform an ordinary cake into something extraordinary.
Now, it's your turn. Don't be intimidated by the seemingly intricate designs; embrace the challenge of mastering this classic technique. Pick up your piping bag, experiment with different nozzles, and let your creativity flow. The satisfaction of creating your own beautiful shell border, and the joy it brings to others, is a reward in itself. You might be surprised at the artistry you unlock within yourself.
Unleash Your Inner Cake Artist: Master the Piping Shell Border!
Thanks for joining us on this delicious journey into cake decorating! We hope you've gained some valuable techniques to elevate your baking skills. Ready to put your new knowledge into practice?
- Practice your piping skills: Grab your favorite piping bag and tips, and try creating your own shell borders on a practice cake. Don't worry about perfection – the process is half the fun!
- Share your creations: Show off your stunning shell border cakes on social media using #BakeWithEaseShellBorder. We'd love to see your masterpiece!
- Explore more cake decorating tutorials: Dive deeper into our collection of baking tips and tricks on BakeWithEase.com – we've got plenty more where that came from!
What unique design will you create with your newly mastered piping shell border? Let us know in the comments below!