
Simple Secrets to Authentic Eastern European Pastries

Welcome to BakeWithEase!
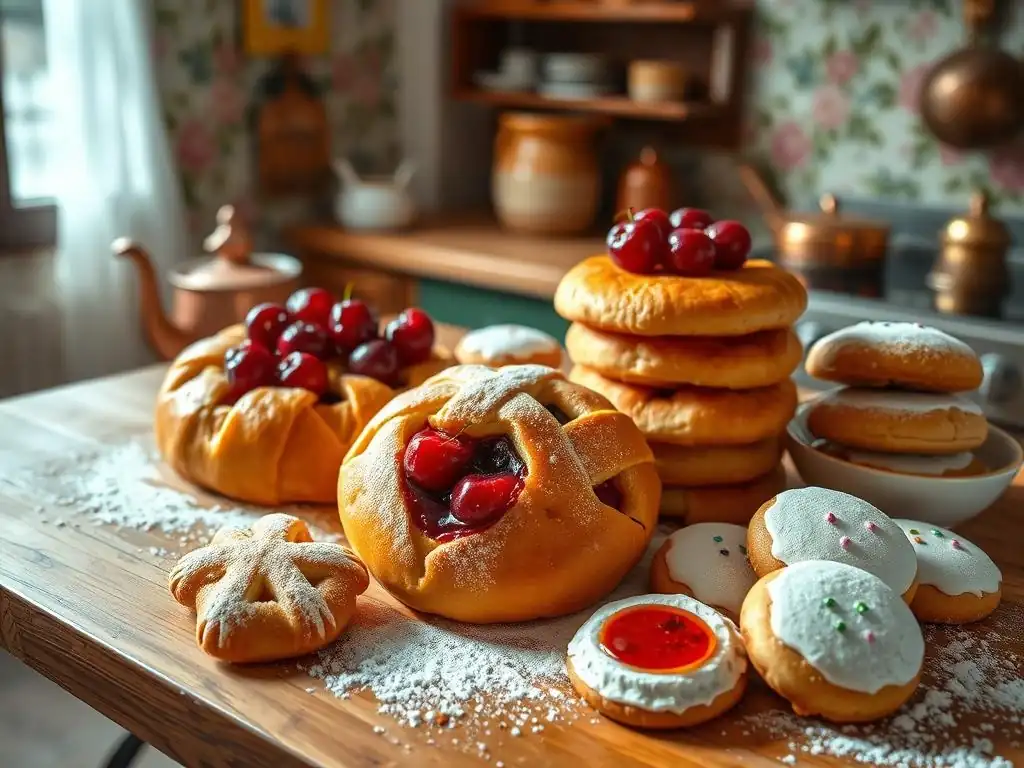
Ever dreamt of creating flaky medovnik or perfectly golden pampushky in your own kitchen? Discover the simple secrets to authentic Eastern European pastries right here. We'll guide you through time-honored techniques and surprisingly easy-to-find ingredients, unlocking a world of delightful flavors. Ready to embark on a baking adventure and bring the taste of Eastern Europe to your table? Let's get started!
- BakeWithEase: Your Guide to Easy Eastern European Pastry Recipes
- Unveiling the Magic of Eastern European Baking
- Essential Ingredients for Authentic Eastern European Pastry Recipes
- Simple Eastern European Pastry Recipes: A Beginner's Guide
- Secrets to Achieving Authentic Flavors in Eastern European Pastries
- Tips and Tricks for Baking Eastern European Pastries with Ease
- Variations and Adaptations of Eastern European Pastry Recipes
- Enjoying Your Homemade Eastern European Pastries
-
Frequently Asked Questions
- What makes Eastern European pastries unique compared to other baking traditions?
- Where can I find easy-to-follow recipes for authentic Eastern European pastries?
- Are there any specific ingredients commonly used in Eastern European pastry recipes?
- What are some tips for achieving the perfect dough consistency when making Eastern European pastries?
- How can I adapt traditional Eastern European pastry recipes to suit modern baking equipment and preferences?
- Final Reflection: The Enduring Sweetness of Tradition
- Unleash Your Inner Pastry Chef!
BakeWithEase: Your Guide to Easy Eastern European Pastry Recipes
Eastern European baking holds a special place in the hearts of many, evoking images of warm kitchens and comforting aromas. These pastries, often rooted in generations of tradition, might seem complex at first glance. However, the good news is that many authentic Eastern European pastry recipes are surprisingly accessible and perfect for the home baker. With a focus on simple, quality ingredients and straightforward techniques, you can recreate these delicious treats in your own kitchen.
Our goal at BakeWithEase is to demystify regional baking styles, and Eastern European pastries are a wonderful place to start. We'll guide you through the essential components, share easy-to-follow recipes, and reveal the secrets to achieving those authentic flavors. Get ready to explore the rich world of Eastern European desserts and discover just how easy it is to bake these delightful treats yourself.
Unveiling the Magic of Eastern European Baking
Exploring the Rich Heritage of Eastern European Desserts
The culinary landscape of Eastern Europe is incredibly diverse, reflecting centuries of history, migration, and cultural exchange. Desserts from this region are often characterized by their comforting simplicity, reliance on seasonal fruits, nuts, poppy seeds, and cheese, and a beautiful balance of flavors that aren't overly sweet. Think of the flaky layers of strudel, the rich swirls of babka, the tender pockets of pierogi filled with sweet delights, or the charming, fruit-filled kolaches.
This heritage is deeply intertwined with celebrations and daily life. For example, in many Slavic cultures, sweet pastries like paska (Easter bread) or kutia (a grain pudding) are central to holiday traditions. The techniques used, such as long fermentation for certain doughs or specific folding methods for filled pastries, have been passed down through families, evolving slightly over time but retaining their core identity. Understanding this background adds a layer of appreciation when you embark on making Eastern European pastry recipes easy enough for a beginner.
Why Eastern European Pastries are Perfect for Home Baking
One of the greatest appeals of Eastern European pastry recipes for home bakers is their forgiving nature and the use of readily available ingredients. While some traditional methods involve longer processes, many classic recipes can be adapted for modern kitchens and busy schedules without sacrificing authenticity. The focus is often on simple doughs – whether yeast-leavened, shortcrust, or even curd cheese-based – paired with rustic, flavorful fillings.
Furthermore, the visual appeal of these pastries, from the intricate braiding of a babka to the neat pockets of a pierogi, comes from achievable techniques. Mastering a basic yeast dough or learning how to properly seal a filled pastry are skills easily acquired. This makes exploring Eastern European pastry recipes a rewarding experience, offering delicious results that impress while building fundamental baking skills. It's a fantastic way to expand your baking repertoire with relatively simple steps.
Essential Ingredients for Authentic Eastern European Pastry Recipes
Key Flour Types for Traditional Baking
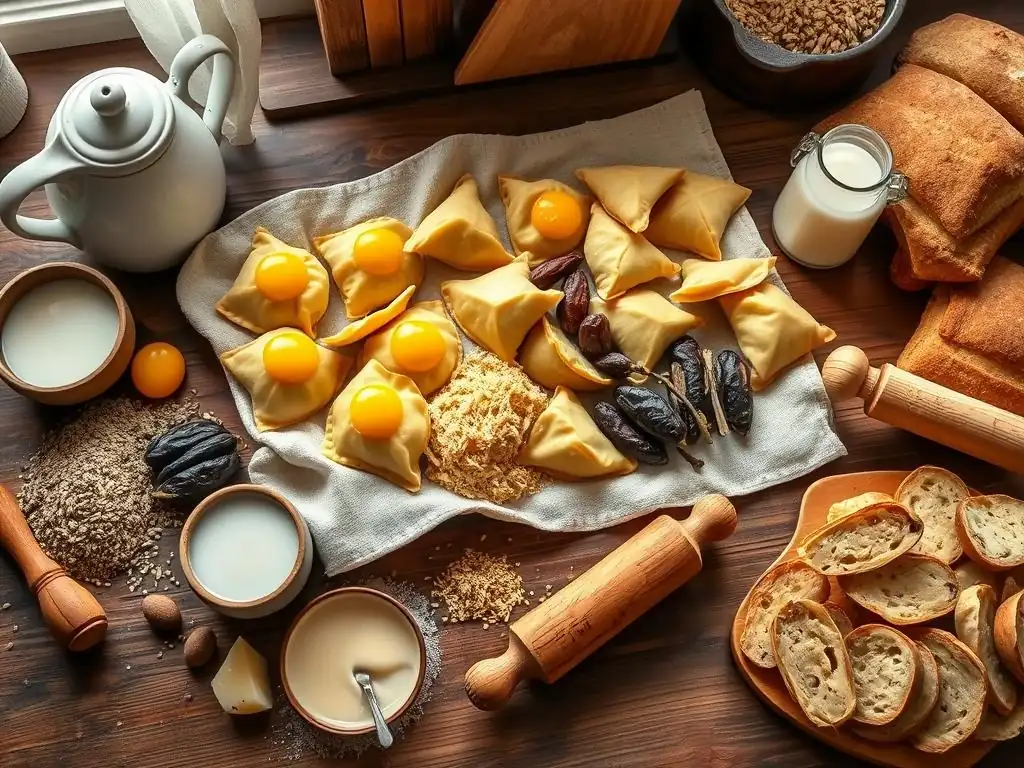
The type of flour used significantly impacts the texture of Eastern European pastries. While all-purpose flour is a versatile staple and works well for many easy Eastern European pastry recipes, traditional baking often utilizes flours with varying protein contents depending on the specific pastry. For instance, many yeast-leavened doughs, like those for babka or some types of rolls, benefit from a bread flour (around 12-14% protein) to develop a strong gluten structure, resulting in a chewy yet tender crumb. This is crucial for doughs that undergo significant rising.
Conversely, pastries requiring a more tender or crumbly texture, such as certain cookies, shortcrusts for tarts, or some pierogi doughs, might traditionally use lower protein flours or a blend. In a home kitchen, a good quality all-purpose flour (typically 10-12% protein) is a reliable starting point for most easy Eastern European pastry recipes. Using unbleached flour is often preferred for its slightly higher protein content and traditional flavor profile.
The Importance of Fresh Dairy in Eastern European Baking
Dairy is a cornerstone of many Eastern European pastry recipes, contributing richness, tenderness, and flavor. Butter, in particular, is indispensable for creating flaky layers in pastries like strudel dough or adding richness to yeast doughs and fillings. Using high-quality butter with a higher fat content (often around 82% butterfat in European-style butter compared to around 80% in many American types) can make a noticeable difference in texture and flavor.
Fresh milk and dairy products like sour cream, farmer's cheese (twaróg in Polish, tvorog in Russian), and quark are also frequently used. Sour cream adds moisture and tang to doughs and fillings, while farmer's cheese or quark are primary ingredients for popular fillings in pierogi, blintzes, and cheesecakes. The freshness of these dairy components is key, especially for unbaked cheese fillings or doughs where their subtle flavor is prominent. Opting for full-fat dairy generally yields the best results in terms of texture and taste for authentic Eastern European pastry recipes.
Sweeteners and Spices That Define Eastern European Flavors
Eastern European pastries typically rely on simple sweeteners, primarily granulated sugar and sometimes honey or fruit preserves. The level of sweetness is often more restrained compared to Western desserts, allowing the natural flavors of fruits, nuts, or cheese fillings to shine. Powdered sugar is frequently used for dusting finished pastries, adding a delicate sweetness and traditional finish.
Spices play a crucial role in defining the character of many Eastern European pastry recipes. Cinnamon is widely used, especially in swirls like babka or in apple fillings. Other common spices include vanilla (often in the form of vanilla sugar or extract), lemon zest (adding brightness to doughs and fillings), and sometimes cardamom, cloves, or nutmeg, particularly in gingerbread-like cookies or spiced cakes.
Poppy seeds are another iconic ingredient, used abundantly in fillings for rolls, cakes, and pastries, often ground and mixed with sugar and milk or honey. These simple yet potent flavorings are essential for achieving authentic tastes in easy Eastern European pastry recipes.
Simple Eastern European Pastry Recipes: A Beginner's Guide
Let's dive into some foundational Eastern European pastry recipes that are perfect for anyone starting out. These recipes are designed to be easy to follow, using common ingredients and techniques accessible to home bakers.
Recipe 1: Easy Kolaches (Cream Cheese Filling)
Kolaches are delightful pastries originating from Central Europe, particularly the Czech Republic, and are popular in communities with Czech heritage. This version focuses on a simple, slightly sweet yeast dough and a classic cream cheese filling, making it one of the most satisfying easy Eastern European pastry recipes you can try.
Step-by-Step Kolache Dough Preparation
Making the dough is the first step. You'll need:
- 2 ¼ tsp active dry yeast
- ¼ cup warm milk (around 105-115°F / 40-46°C)
- ¼ cup granulated sugar
- ½ cup unsalted butter, softened
- 1 large egg
- ½ tsp salt
- 2 ½ to 3 cups all-purpose flour
Here’s a simple process:
- Activate the yeast: In a small bowl, combine the warm milk, a pinch of the sugar, and the yeast. Stir gently and let sit for 5-10 minutes until foamy. This confirms your yeast is active.
- Combine wet ingredients: In a large mixing bowl, cream together the softened butter and the remaining sugar until light and fluffy. Beat in the egg and salt. Stir in the activated yeast mixture.
- Add flour: Gradually add the flour, about half a cup at a time, mixing until a soft dough forms. You might not need all 3 cups. The dough should be slightly sticky but manageable.
- Knead the dough: Turn the dough out onto a lightly floured surface. Knead for about 5-7 minutes until smooth and elastic. If using a stand mixer with a dough hook, knead for 4-5 minutes on medium speed.
- First rise: Place the dough in a lightly greased bowl, turning to coat. Cover with plastic wrap or a clean kitchen towel and let rise in a warm place for about 1 to 1.5 hours, or until doubled in size.
Creating the Perfect Cream Cheese Kolache Filling
While fruit fillings are common, a simple cream cheese filling is incredibly popular and easy to make.
You'll need:
- 8 oz cream cheese, softened
- ¼ cup granulated sugar
- 1 large egg yolk (save the white for an egg wash)
- 1 tsp vanilla extract
- 1 tbsp all-purpose flour or cornstarch (optional, helps stabilize)
Instructions:
- Combine ingredients: In a medium bowl, beat the softened cream cheese until smooth.
- Add sugar and yolk: Add the sugar and egg yolk, beating until well combined and creamy.
- Mix in vanilla: Stir in the vanilla extract. If using, add the flour or cornstarch and mix until just combined.
- Chill: Cover the filling and chill in the refrigerator while the dough is rising. This makes it easier to portion and handle.
Baking Your Homemade Kolaches to Golden Perfection
Once the dough has risen, it's time to assemble and bake your kolaches.
- Punch down the dough: Gently punch down the risen dough and turn it out onto a lightly floured surface.
- Divide and shape: Divide the dough into equal portions. For standard-sized kolaches, about 12-16 pieces (roughly 2-3 ounces each) works well. Roll each piece into a ball.
- Create wells: Place the dough balls on baking sheets lined with parchment paper, leaving about 2 inches between them. Using the bottom of a glass or your fingers, create a shallow indentation or "well" in the center of each ball, leaving a border of dough around the edge.
- Fill the wells: Spoon about 1-2 tablespoons of the chilled cream cheese filling into the center of each well.
- Second rise: Cover the baking sheets loosely with plastic wrap or a towel and let the kolaches rise for another 20-30 minutes, or until slightly puffy.
- Egg wash (optional): Brush the edges of the dough with an egg wash (the reserved egg white mixed with a teaspoon of water) for a golden shine.
- Bake: Preheat your oven to 375°F (190°C). Bake for 12-18 minutes, or until the edges are golden brown and the filling is set.
- Cool: Let the kolaches cool slightly on the baking sheets before transferring them to a wire rack. Enjoy warm or at room temperature! These easy Eastern European pastry recipes for kolaches are sure to become a favorite.
Recipe 2: Quick Babka (Chocolate or Cinnamon Swirl)
Babka, a sweet braided bread often filled with chocolate or cinnamon, is a beloved Eastern European pastry. While traditional babka involves multiple rises and enrichments, this "quick" version simplifies the process while retaining that signature swirled beauty and rich flavor. It's a fantastic example of easy Eastern European pastry recipes you can tackle at home.
Making a Simple Babka Dough
This dough is enriched with butter and eggs, but uses a straightforward mixing and rising process.
Ingredients:
- 1 ½ tsp active dry yeast
- ½ cup warm milk (105-115°F / 40-46°C)
- ¼ cup granulated sugar
- 1 large egg + 1 egg yolk
- ¼ cup unsalted butter, melted and slightly cooled
- ½ tsp salt
- 2 ¼ to 2 ½ cups all-purpose flour
Steps:
- Activate yeast: In a large bowl, combine warm milk, a pinch of sugar, and yeast. Let stand 5-10 minutes until foamy.
- Mix wet ingredients: Whisk in the remaining sugar, egg, egg yolk, melted butter, and salt into the yeast mixture.
- Add flour: Gradually add the flour, mixing with a wooden spoon or in a stand mixer until a soft, shaggy dough forms.
- Knead: Turn out onto a lightly floured surface and knead for about 5-7 minutes until smooth and elastic. Or use a stand mixer with a dough hook for 4-5 minutes. The dough will be soft and slightly sticky.
- First rise: Place dough in a lightly greased bowl, cover, and let rise in a warm place for about 1 hour, or until doubled.
Preparing the Chocolate or Cinnamon Swirl Filling
The filling is what gives babka its iconic swirl.
For Chocolate Filling:
- ½ cup unsalted butter, softened
- ¾ cup powdered sugar
- ⅓ cup unsweetened cocoa powder
- Pinch of salt
- 2-3 tbsp milk (as needed for consistency)
- Optional: ¼ cup finely chopped dark chocolate or chocolate chips
For Cinnamon Filling:
- ½ cup unsalted butter, softened
- ¾ cup packed brown sugar
- 1 tbsp ground cinnamon
- Pinch of salt
Instructions for either filling:
- Combine ingredients: In a medium bowl, beat the softened butter until creamy. Add the sugar (powdered or brown), cocoa powder (if using chocolate), cinnamon (if using cinnamon), and salt. Beat until well combined.
- Adjust consistency: For the chocolate filling, add milk a tablespoon at a time until you have a spreadable paste. For the cinnamon filling, it should be a thick paste.
- Add chocolate (optional): If making chocolate babka, stir in the chopped chocolate or chips.
Braiding and Baking Your Delicious Babka
This is where the magic happens, creating that beautiful swirled pattern.
- Roll out dough: On a lightly floured surface, roll the risen dough into a rectangle, roughly 10x14 inches (25x35 cm).
- Spread filling: Spread the prepared filling evenly over the dough rectangle, leaving a small border along one long edge.
- Roll up: Starting from the long edge opposite the border, tightly roll up the dough into a log. Pinch the seam to seal.
- Chill (optional but recommended): For easier handling, you can wrap the log in plastic wrap and chill for 15-30 minutes.
- Cut and braid: Using a sharp knife, slice the log lengthwise down the center. You will have two halves with the layers of filling visible. Cross one half over the other to form an 'X'. Twist the two halves together, keeping the cut sides facing upwards as much as possible to showcase the layers. Pinch the ends together.
- Place in pan: Carefully transfer the braided loaf into a greased 9x5 inch (23x13 cm) loaf pan.
- Second rise: Cover the pan loosely and let rise for another 30-45 minutes, or until puffy.
- Bake: Preheat oven to 350°F (175°C). Bake for 30-40 minutes, or until golden brown and a skewer inserted into the center (avoiding large pockets of filling) comes out clean. If the top browns too quickly, tent loosely with foil.
- Cool and glaze (optional): Let cool in the pan for 10 minutes before transferring to a wire rack. A simple sugar glaze (powdered sugar mixed with a little milk or lemon juice) can be drizzled over the warm babka. This is one of those easy Eastern European pastry recipes that looks fancy but is quite achievable!
Recipe 3: Simple Pierogi Dough for Sweet Fillings
Pierogi are delightful filled dumplings, versatile enough for savory or sweet fillings. Mastering a basic, tender dough is key to enjoying sweet pierogi. This recipe yields a pliable dough that's easy to work with, making it perfect for various sweet fillings. It's a fundamental dough in the world of easy Eastern European pastry recipes.
Mastering the Basic Pierogi Dough Recipe
This dough requires just a few simple ingredients and minimal kneading.
Ingredients:
- 2 cups all-purpose flour, plus more for dusting
- ½ tsp salt
- 1 large egg
- ½ cup warm water (or milk for a richer dough)
- 1 tbsp melted butter or oil (optional, for tenderness)
Steps:
- Combine dry ingredients: In a large bowl, whisk together the flour and salt.
- Add wet ingredients: In a separate small bowl, whisk together the egg, warm water (or milk), and melted butter or oil (if using).
- Mix dough: Pour the wet ingredients into the dry ingredients. Mix with a fork or wooden spoon until a shaggy dough forms.
- Knead briefly: Turn the dough out onto a lightly floured surface. Knead for just 3-5 minutes until the dough is smooth and elastic. Do not over-knead, as this can make the pierogi tough.
- Rest the dough: Cover the dough with plastic wrap or a bowl and let it rest at room temperature for at least 20-30 minutes. This allows the gluten to relax, making the dough easier to roll out.
Sweet Pierogi Filling Ideas: Fruits, Cheese, and More
The beauty of sweet pierogi lies in the variety of fillings. Here are a few classic and simple ideas:
- Farmer's Cheese (Twaróg/Tvorog): Mix ¾ cup farmer's cheese (or ricotta, drained very well) with 2-3 tbsp sugar, 1 egg yolk, and 1 tsp vanilla or lemon zest. This is a quintessential filling.
- Sweet Cherry: Use about 1 cup of pitted fresh or frozen cherries (thawed and drained). Mix with 1-2 tbsp sugar and 1 tsp cornstarch or flour to absorb juices.
- Blueberry: Similar to cherry, use 1 cup fresh or frozen blueberries (thawed/drained) mixed with 1-2 tbsp sugar and 1 tsp cornstarch.
- Sweetened Poppy Seed: Grind ½ cup poppy seeds finely. Heat in a saucepan with ¼ cup milk or water, 2 tbsp sugar, and a knob of butter. Cook until thickened into a paste.
- Potato & Cheese (Sweet version): Mash 1 cup cooked potato with ½ cup farmer's cheese (or ricotta), 2 tbsp sugar, and a pinch of salt. This might sound unusual but is surprisingly delicious and traditional in some regions.
Prepare your chosen filling while the dough rests. Ensure fruit fillings are not too wet, or they can make the dough soggy.
Cooking Your Sweet Pierogi: Boiling or Pan-Frying
Once filled and shaped, sweet pierogi can be cooked in a couple of ways.
- Roll and Cut: Roll out the rested dough on a lightly floured surface to about ⅛ inch thickness. Use a round cutter (about 2.5-3 inches in diameter) to cut out circles.
- Fill and Seal: Place a small amount (about 1-2 teaspoons) of your chosen sweet filling in the center of each circle. Fold the dough over to create a half-moon shape. Press the edges firmly to seal. You can crimp the edges with a fork for extra security and a decorative finish.
- Boiling: Bring a large pot of lightly salted water to a rolling boil. Gently drop the pierogi into the boiling water, ensuring not to overcrowd the pot (cook in batches). They will sink initially, then float to the top after a few minutes (typically 3-5 minutes depending on size). Once they float, cook for another 1-2 minutes to ensure the dough is cooked through. Remove with a slotted spoon.
- Pan-Frying (Optional after boiling): For extra flavor and texture, melted butter and pan-fry the boiled pierogi in a skillet over medium heat until golden brown and slightly crispy on both sides. This is especially good for cheese or potato fillings.
Serve sweet pierogi warm, often topped with a dollop of sour cream, a sprinkle of sugar, or a drizzle of melted butter. These easy Eastern European pastry recipes for pierogi are incredibly adaptable!
Secrets to Achieving Authentic Flavors in Eastern European Pastries
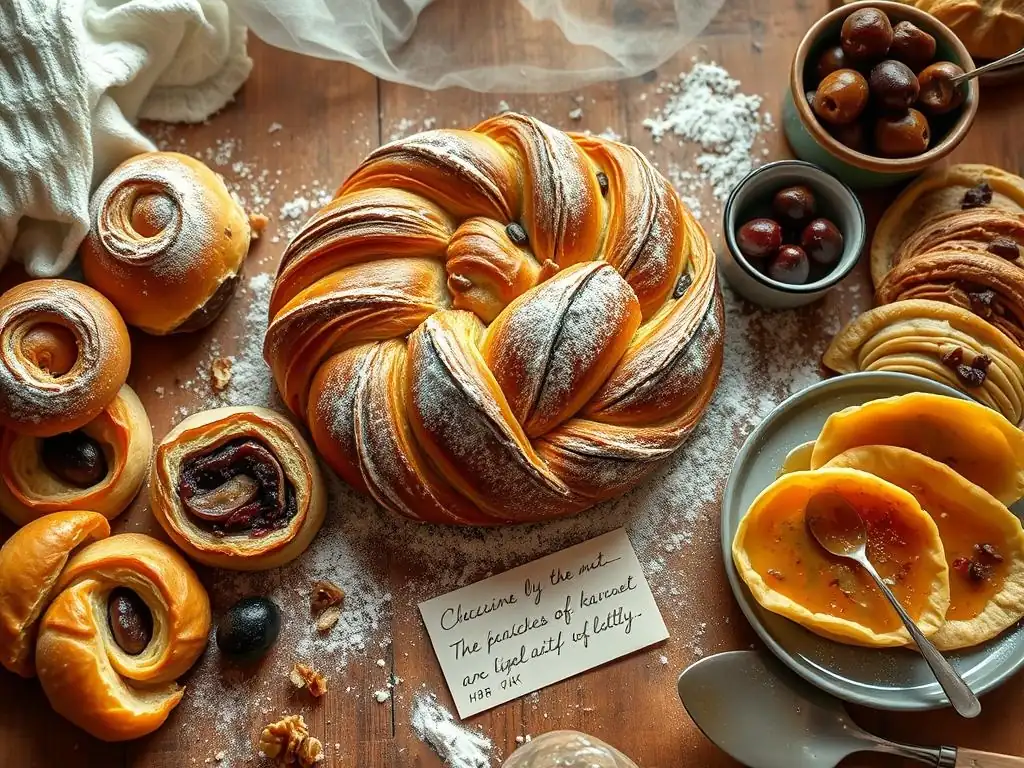
Beyond just following the steps, understanding a few key principles can elevate your easy Eastern European pastry recipes from good to truly authentic. These techniques are often subtle but contribute significantly to the final taste and texture.
The Art of Kneading: Developing Gluten for Perfect Texture
Kneading is fundamental to many Eastern European pastry recipes, particularly those involving yeast doughs like babka or enriched rolls. The process of kneading develops gluten, the protein network in flour, which provides structure and elasticity to the dough. Proper gluten development allows the dough to trap the gases produced by yeast, resulting in a light, airy, and tender crumb after baking. Under-kneaded dough can be dense and heavy, while over-kneading can result in a tough, rubbery texture.
For yeast doughs used in easy Eastern European pastry recipes, aim for a dough that is smooth, elastic, and passes the "windowpane test" – when you stretch a small piece thin enough to see light through it without tearing. This typically takes 5-10 minutes of hand kneading or 4-7 minutes in a stand mixer on medium speed. Pay attention to the feel of the dough rather than strictly watching the clock. A well-kneaded dough is less sticky and easier to handle when shaping pastries.
Temperature Control: Baking Tips for Consistent Results
Controlling temperature is critical at multiple stages when making Eastern European pastry recipes. This includes the temperature of your ingredients, the dough during rising, and the oven during baking. For yeast doughs, using warm (not hot) liquids around 105-115°F (40-46°C) is ideal for activating yeast. The dough should rise in a warm, draft-free environment, ideally around 75-85°F (24-30°C), to ensure a steady and sufficient rise. Cooler temperatures will slow the rise significantly, while excessively hot temperatures can kill the yeast.
During baking, accurate oven temperature is paramount for achieving the correct texture and color. Many Eastern European pastry recipes bake at moderate temperatures, typically between 325°F and 375°F (160°C-190°C), depending on the pastry type. A lower temperature is often used for richer, larger pastries like babka to ensure they cook through without burning the exterior, while smaller items like cookies or some rolls might bake hotter for a shorter time.
Using an oven thermometer is highly recommended, as oven temperatures can vary significantly from the dial setting, sometimes by as much as 25-50°F (15-30°C). Consistent temperature ensures even cooking and beautiful browning.
Using Traditional Baking Techniques for Eastern European Pastries
Many classic Eastern European pastry recipes rely on time-tested techniques that contribute to their unique characteristics. One such technique is the use of pączkownia, a tool used in Polish baking to create the signature indentation in pączki (doughnuts) before frying, ensuring an even cook and the potential for a light "ring" around the center. Another technique involves using a makutra (a ribbed ceramic bowl) and a wooden spoon for grinding poppy seeds or cheese fillings, although a food processor can be used today for convenience.
For pastries like pierogi or dumplings, the sealing method is important. Traditionally, edges are pressed firmly by hand or with a fork, creating a secure seal that prevents fillings from leaking during boiling. For layered pastries like strudel, the dough is stretched incredibly thin, often over a large surface, using hands rather than a rolling pin, a skill honed over generations. While some of these techniques require practice, even in easy Eastern European pastry recipes, understanding their purpose (e.g., proper sealing for pierogi, gentle handling of enriched doughs) helps achieve authentic results.
Tips and Tricks for Baking Eastern European Pastries with Ease
Even with easy Eastern European pastry recipes, a few handy tips can make your baking experience smoother and more successful, helping you navigate common challenges and manage your time effectively.
Scaling Recipes for Different Batch Sizes
Many traditional Eastern European pastry recipes are written for large family gatherings, often yielding dozens of pastries. If you're baking for a smaller household or just want to try a recipe without committing to a massive batch, scaling down is simple. Most ingredients can be halved or quartered proportionally.
However, be mindful of eggs – if a recipe calls for one egg and you need to halve it, you can whisk the egg and use half by weight or volume (a large egg is typically about 50-60g or 3-4 tablespoons). Yeast amounts might need slight adjustment; too little can result in a slow rise, while too much can cause an off-flavor. For small batches, sticking to the original yeast amount or slightly reducing it is often fine.
Baking times might also need slight adjustments when baking smaller quantities or using different pan sizes. Keep a close eye on the pastries, relying on visual cues like golden brown color and the "doneness" tests mentioned in the recipes (like the skewer test for babka). Don't just rely solely on the original recipe's timing. Scaling recipes makes trying out various easy Eastern European pastry recipes much more manageable.
Storing and Freezing Your Homemade Pastries
One of the joys of baking Eastern European pastry recipes is having delicious treats on hand. Proper storage ensures they stay fresh. Most pastries are best stored at room temperature in an airtight container for 2-3 days. Cream cheese or fruit-filled pastries might benefit from refrigeration, especially in warmer climates, though this can sometimes alter the texture of the dough.
Many Eastern European pastries freeze exceptionally well, allowing you to enjoy your baking efforts over a longer period. Unbaked pierogi can be frozen solid on a baking sheet before transferring to a freezer bag; cook them directly from frozen, adding a few extra minutes to the boiling time. Baked goods like babka, kolaches, or rolls can be wrapped tightly in plastic wrap and then foil before freezing for up to 2-3 months.
Thaw wrapped pastries at room temperature, or gently warm them in a low oven (around 300°F / 150°C) for a few minutes to refresh them. Freezing is a great strategy when making large batches of easy Eastern European pastry recipes.
Troubleshooting Common Baking Problems
Even experienced bakers encounter issues, and knowing how to troubleshoot can save your batch of easy Eastern European pastry recipes.
- Dough not rising: Ensure your yeast is fresh and the liquid temperature was correct. If the room is cold, find a warmer spot or create a proofing environment (like a slightly warm oven that's turned off).
- Dry or tough dough: This is often due to too much flour or over-kneading. Measure flour accurately (preferably by weight) and knead only until the dough is smooth and elastic, not stiff.
- Filling leaking from pierogi/kolaches: Ensure the edges are sealed very firmly, pressing out any air bubbles. Don't overfill the pastries. For fruit fillings, make sure the fruit is well-drained and the starch is mixed in.
- Pastries browning too quickly: Your oven might be running hot. Use an oven thermometer. You can loosely tent the pastries with foil during baking if the tops are getting too dark before they are cooked through.
Keep notes on what worked and what didn't; baking is often a process of learning and adjustment, even with easy Eastern European pastry recipes.
Variations and Adaptations of Eastern European Pastry Recipes
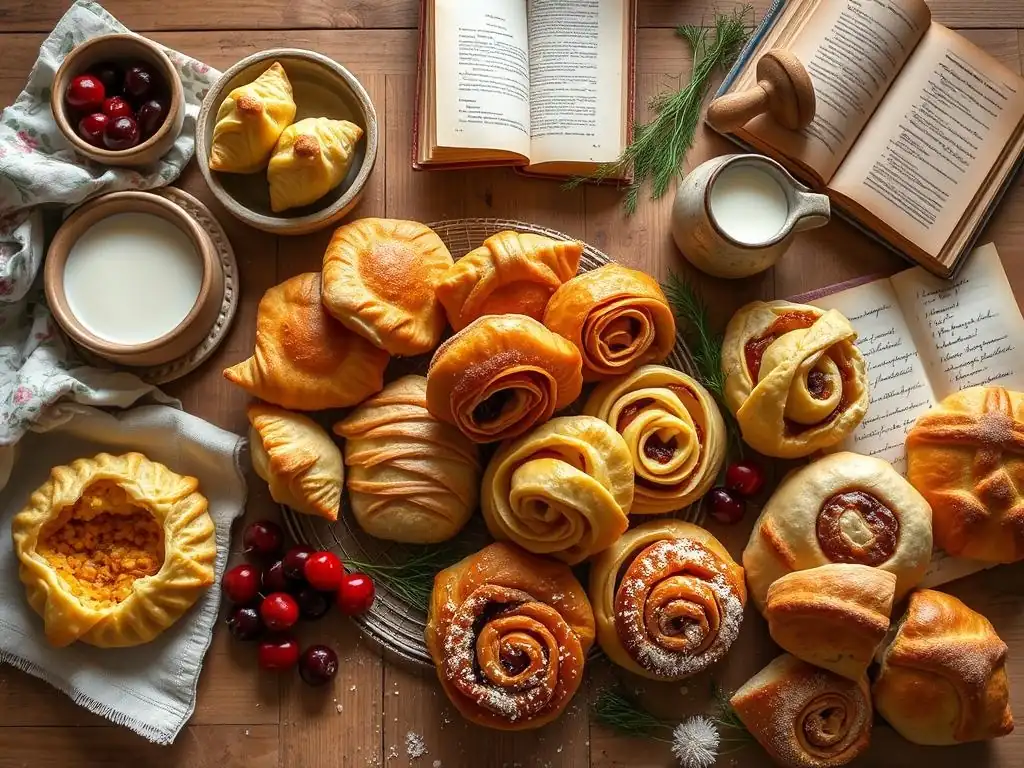
The beauty of traditional recipes lies in their regional variations and the potential for modern adaptations. Once you've mastered the basic easy Eastern European pastry recipes, you can explore this exciting world of possibilities.
Exploring Different Regional Variations of Kolaches
While the cream cheese kolache is popular, especially in the US, the kolache (or koláč) has numerous forms across Eastern Europe. In the Czech Republic, they are often made with various fruit fillings (plum jam, apricot, cherry) or poppy seed and sweet cheese fillings. Some versions feature a streusel topping ( posypka). The dough itself can vary from a simple yeast dough to a richer, brioche-like dough.
Slovak koložvári are similar but can be larger and sometimes filled with cabbage or meat alongside sweet fillings. In Polish cuisine, similar filled buns exist under names like drożdżówki. Exploring these regional differences often involves trying different fillings, tweaking the dough enrichment (more eggs, more butter), or experimenting with toppings like glazes or streusel. Each variation offers a unique taste of local tradition within the broader category of easy Eastern European pastry recipes.
Adapting Babka Recipes for Vegan or Gluten-Free Diets
Traditional Eastern European pastry recipes, including babka, heavily rely on dairy and eggs. However, with increasing dietary needs, adaptations are popular. Vegan babka can be made by substituting butter with vegan butter or oil, milk with plant-based milk (like almond or soy), and eggs with egg replacers (like flax eggs, commercial replacers, or mashed banana/applesauce in some cases, though this can affect texture). The richness might differ slightly, but delicious results are achievable.
Gluten-free babka is more challenging due to the importance of gluten structure in the classic braid. It requires using a blend of gluten-free flours, often combined with binders like xanthan gum or psyllium husk to mimic the elasticity of wheat gluten. Recipes specifically developed for gluten-free baking are recommended, as simply substituting flour cup-for-cup is usually unsuccessful. While the texture won't be identical to traditional babka, it allows those with dietary restrictions to enjoy a version of this beloved easy Eastern European pastry recipe.
Experimenting with Unique Pierogi Fillings
Beyond the classics, pierogi dough is a fantastic canvas for culinary creativity. While traditional sweet fillings include fruit and cheese, you can experiment with combinations or less common ingredients. How about a pear and ginger filling? Or apple with cinnamon and a touch of brown sugar? A sweet potato filling spiced with nutmeg can also work surprisingly well.
For a more decadent twist, consider fillings involving chocolate or nuts. A ground walnut filling sweetened with honey or maple syrup is delicious. Or perhaps a simple chocolate ganache or even Nutella mixed with a little ricotta cheese? The key is to ensure the filling isn't too wet and has enough body to hold its shape within the dough. Experimenting with fillings keeps the world of easy Eastern European pastry recipes exciting and personal.
Enjoying Your Homemade Eastern European Pastries
The best part of baking Eastern European pastry recipes is, of course, savoring the results! These treats are perfect for sharing, celebrating, or simply enjoying with a warm beverage.
Serving Suggestions and Pairing Ideas
How you serve your Eastern European pastries can enhance the experience.
- Kolaches: Often served plain or dusted with powdered sugar. They pair wonderfully with coffee or tea for breakfast or a mid-afternoon snack.
- Babka: Best enjoyed sliced and perhaps lightly toasted. It's rich enough on its own but is excellent with coffee or a glass of milk. A slice makes a satisfying dessert or a special breakfast treat.
- Sweet Pierogi: Traditionally served warm. Classic toppings include a dollop of sour cream, a sprinkle of sugar, or melted butter. Fruit-filled pierogi are also great with a fruit sauce made from the same fruit. Cheese pierogi can be served simply with butter and sugar.
Consider the sweetness and richness of the pastry when choosing a pairing. A simple, slightly tart accompaniment like sour cream balances the sweetness beautifully in many easy Eastern European pastry recipes.
Baking Eastern European pastry recipes is often tied to hospitality and sharing. These pastries make wonderful gifts and are perfect for bringing to potlucks, family gatherings, or holiday celebrations. The act of sharing homemade treats baked with care is a central part of the culture from which these recipes originate.
Present your pastries beautifully – arrange kolaches on a platter, slice and display babka, or serve pierogi in a warm bowl with toppings on the side. Explain the type of pastry and its filling; sharing the story behind the easy Eastern European pastry recipes adds to the enjoyment. Homemade baked goods are a tangible expression of warmth and generosity, making them perfect for connecting with loved ones.
Continuing Your Eastern European Baking Journey
Mastering a few easy Eastern European pastry recipes is just the beginning! The region offers an incredible depth of baking traditions to explore. From layered honey cakes ( medovik) to intricate nut rolls ( potica or makowiec), delicate cookies, and various types of bread, there is always something new to learn and bake.
Challenge yourself with slightly more complex doughs or fillings as you gain confidence. Look for recipes from specific countries or even regions within countries (Polish, Czech, Ukrainian, Hungarian, Russian, Balkan, etc.) to discover unique specialties. With the skills you've built using these easy Eastern European pastry recipes, you're well-equipped to continue your delicious journey through this fascinating baking world. Keep practicing, keep exploring, and most importantly, keep baking with ease!
Frequently Asked Questions
What makes Eastern European pastries unique compared to other baking traditions?
Eastern European pastries often emphasize rustic flavors and simple ingredients, using techniques passed down through generations. Many recipes feature fruit fillings, sour cream doughs, or yeast-based preparations.
Where can I find easy-to-follow recipes for authentic Eastern European pastries?
Websites like BakeWithEase.com are great resources! Look for recipes that highlight step-by-step instructions and easy-to-find ingredients. Don't be afraid to start with beginner-friendly options like Kolaches or Babka.
Are there any specific ingredients commonly used in Eastern European pastry recipes?
Yes! Many recipes call for ingredients like farmer cheese, poppy seeds, sour cream, and various fruit preserves. These ingredients contribute to the distinctive flavors and textures of these pastries.
What are some tips for achieving the perfect dough consistency when making Eastern European pastries?
Pay close attention to the recipe's instructions regarding hydration levels and kneading techniques. Using the correct amount of flour and allowing for proper proofing (for yeast-based doughs) is crucial.
How can I adapt traditional Eastern European pastry recipes to suit modern baking equipment and preferences?
While staying true to the original flavors, you can use stand mixers to simplify kneading and adjust sugar levels to your liking. Consider using high-quality ingredients for enhanced flavor.
Final Reflection: The Enduring Sweetness of Tradition
The simple secrets to authentic Eastern European pastries aren't just recipes; they're a delicious bridge connecting generations and cultures. These time-honored techniques, passed down through families and communities, offer a tangible link to a rich heritage, proving that even the most complex flavors can be surprisingly accessible. The ease with which these recipes can be recreated in modern kitchens speaks volumes about their enduring appeal.
The impact of these pastries extends far beyond the simple act of baking. They represent a powerful symbol of cultural identity, a way to preserve traditions and share stories. These sweet treats evoke memories, fostering a sense of belonging and connection. As the renowned food writer, Michael Pollan, once said, Food is symbolic of love when words are inadequate.
These pastries, in their simplicity and authenticity, speak volumes about the love and care poured into their creation and the communities that cherish them.
Now, it's your turn. Don't just read these recipes; experience them. Gather your ingredients, roll up your sleeves, and let the aroma of warm spices and sweet dough fill your kitchen. Let the process of creating these pastries be a journey of discovery, a connection to a history richer than you might imagine. The result? Not just delicious pastries, but a deeper appreciation for the enduring power of culinary traditions and the simple joys they bring.
Unleash Your Inner Pastry Chef!
Thanks for joining us on this delicious journey into the heart of Eastern European baking! We hope you’ve discovered some inspiring new techniques and recipes. Ready to take your skills to the next level?
- Bake your favorite pastry from the article today! Let us know how it turns out – we'd love to see your creations!
- Share this article with a friend who loves to bake (or wants to learn!). Let's spread the baking joy!
- Consider trying a new, unfamiliar ingredient from the recipes – you might discover your new favorite!
What unique twist will you add to your next Eastern European pastry masterpiece? Let's hear about it in the comments below!