
Crafting Perfect Puff Pastry Turnovers: Techniques for Flaky Results

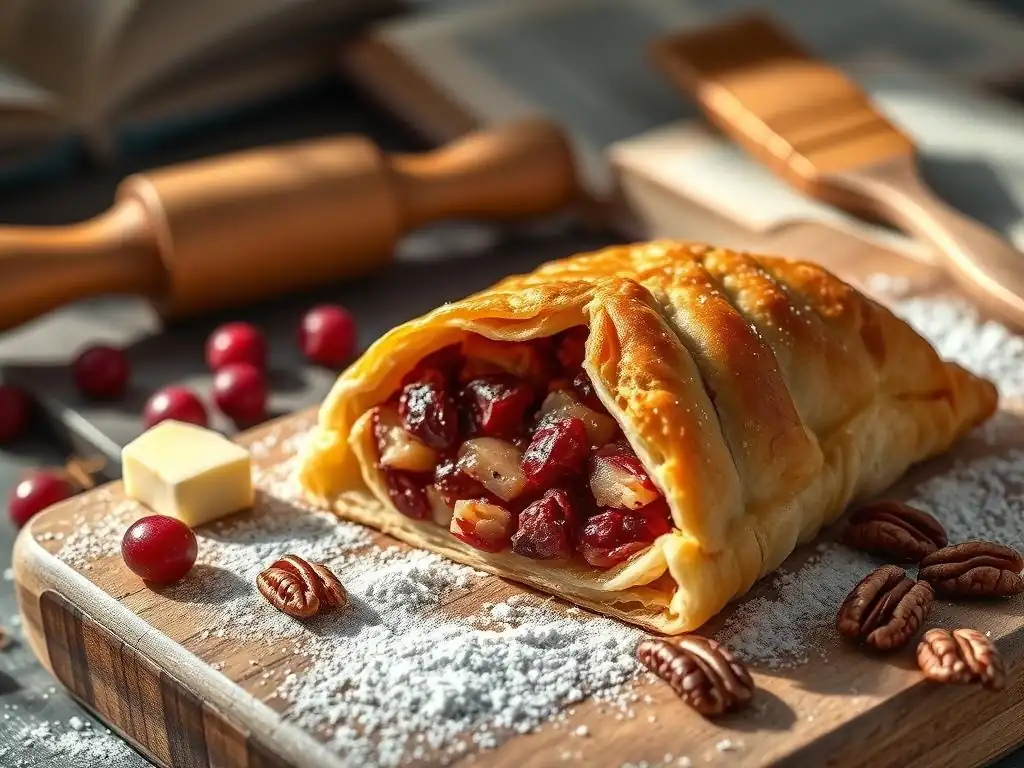
Welcome to BakeWithEase, where baking dreams become delicious realities! Ever dreamt of achieving that perfect, shatteringly flaky puff pastry? Our latest article dives deep into the secrets behind crafting irresistible Flaky Puff Pastry Turnovers, revealing techniques that will elevate your baking from good to gourmet. Curious how to achieve that signature airy texture? Let's unlock the mysteries of puff pastry together...
- Mastering Croissants: Techniques for Buttery, Flaky Perfection
- Introduction to Croissant Baking: A Detailed Guide
- Achieving Optimal Flakiness and Flavor: Core Croissant Techniques
- Step-by-Step Guide: Crafting Authentic Croissants
- Exploring Croissant Variations: Flavors and Fillings
- Baking Your Croissants to Golden Perfection
- Troubleshooting Common Croissant Baking Issues
- Tips for Storing and Enjoying Your Croissants
- Advanced Croissant Techniques for Expert Bakers
- Conclusion: Savoring Your Homemade Croissants
-
Frequently Asked Questions
- How do I ensure my puff pastry turnovers are truly flaky?
- What's the best filling to use in a puff pastry turnover?
- What temperature should I bake puff pastry turnovers at?
- Can I freeze puff pastry turnovers before or after baking?
- What are some common mistakes to avoid when making puff pastry turnovers?
- Final Reflection: The Enduring Allure of the Flaky Turnover
- Unlock Your Inner Pastry Chef: Master Flaky Perfection!
Mastering Croissants: Techniques for Buttery, Flaky Perfection
Introduction to Croissant Baking: A Detailed Guide
Welcome to Advanced Baking: Conquering Croissants
Embarking on the journey to bake croissants at home is a significant step for any intermediate baker. It moves beyond simple cakes or cookies into the delicate art of lamination, a technique that creates those signature buttery layers. While seemingly complex, mastering the croissant is incredibly rewarding, offering a tangible sense of accomplishment and, of course, delicious results. This guide will walk you through the essential steps, from understanding the dough science to the final golden bake, helping you achieve that coveted flaky exterior and tender, airy interior.
Tackling croissants requires patience and precision, but it's entirely within reach with the right approach. Unlike a quick bread, croissants demand time for chilling, folding, and proofing, often spanning two or even three days. This extended process isn't just for show; it's crucial for developing flavor, relaxing the gluten, and ensuring the butter remains cold enough to create distinct layers during baking. Expect to dedicate several hours spread across these days, but the effort invested pays dividends in the final product – a pastry far superior to most store-bought options.
Why Homemade Croissants are a Baker's Triumph
Creating croissants from scratch is often considered a benchmark in baking skill, a true baker's triumph. It demonstrates an understanding of dough handling, temperature control, and the intricate process of lamination. The satisfaction of pulling a tray of golden, puffed pastries from your own oven, filling your kitchen with the irresistible aroma of butter and baked dough, is unparalleled. Each perfect layer is a testament to your dedication and growing expertise in the craft.
Moreover, baking croissants at home gives you complete control over the ingredients, ensuring the highest quality and freshest taste. You can select premium butter with a high fat content, choose the specific flour that yields the best texture, and avoid the preservatives often found in commercial pastries. This not only results in a healthier treat but also one with a depth of flavor and an ethereal flakiness that is simply unmatched. Sharing your homemade croissants with friends and family is a joy, offering them a taste of genuine, artisanal baking.
Achieving Optimal Flakiness and Flavor: Core Croissant Techniques
The Science Behind Croissant Lamination: Yeast, Butter, and Dough
Lamination is the heart of the croissant, the process of repeatedly folding a butter block into dough to create numerous thin layers. At its core, it's a delicate dance between three main components: the yeast-leavened dough, the cold butter block, and careful temperature management. The yeast in the dough produces carbon dioxide during fermentation, which creates air pockets. When baked, the cold butter melts and releases steam, which is trapped between the layers of dough. This steam forces the layers apart, causing the dough to puff up and separate, resulting in that characteristic flaky texture.
The success of lamination hinges on keeping the butter cold and pliable, not soft or melted, throughout the folding process. If the butter becomes too warm, it incorporates into the dough rather than forming distinct layers. This results in a bread-like texture instead of flakiness. The dough itself needs sufficient gluten development to be strong enough to stretch into thin sheets without tearing but relaxed enough to roll out easily. This balance is achieved through careful mixing, kneading, and crucial rest periods in the refrigerator, allowing the gluten to relax and the dough to firm up alongside the butter.
Selecting High-Quality Ingredients for Superior Croissants
The quality of your ingredients directly impacts the final taste and texture of your croissants. Using high-quality butter and the right type of flour are perhaps the two most critical decisions you'll make. These aren't areas to skimp on if you're aiming for truly exceptional results. Think of them as the building blocks of that perfect buttery flavor and delicate flaky structure.
The Importance of European-Style Butter
European-style butter is highly recommended for croissants due to its higher fat content, typically ranging from 82% to 86%, compared to American butter which is usually around 80%. This higher fat percentage means less water, resulting in a more pliable butter that is easier to work with during lamination and creates clearer, more distinct layers. Brands like Plugrá or Kerrygold are popular choices and widely available.
The richness and flavor of high-fat butter also contribute significantly to the luxurious taste of the finished croissant. Using cold, high-quality butter is paramount for creating those distinct layers that separate during baking, ensuring maximum flakiness.
Flour Selection: Protein Content and Gluten Development
Choosing the right flour is also crucial. A bread flour with a protein content around 12-13% is often preferred as it develops sufficient gluten to provide structure and elasticity, allowing the dough to be rolled thin without tearing. However, some bakers prefer using a strong all-purpose flour (around 11.5-12% protein) or a mix, finding that too much gluten can make the dough difficult to roll and potentially lead to a tougher croissant.
The key is finding a balance where the dough is strong enough to withstand the rolling and folding but remains tender. Experimenting with a local bakery's preferred flour blend or a high-quality national brand known for consistency can make a difference in your results.
Step-by-Step Guide: Crafting Authentic Croissants
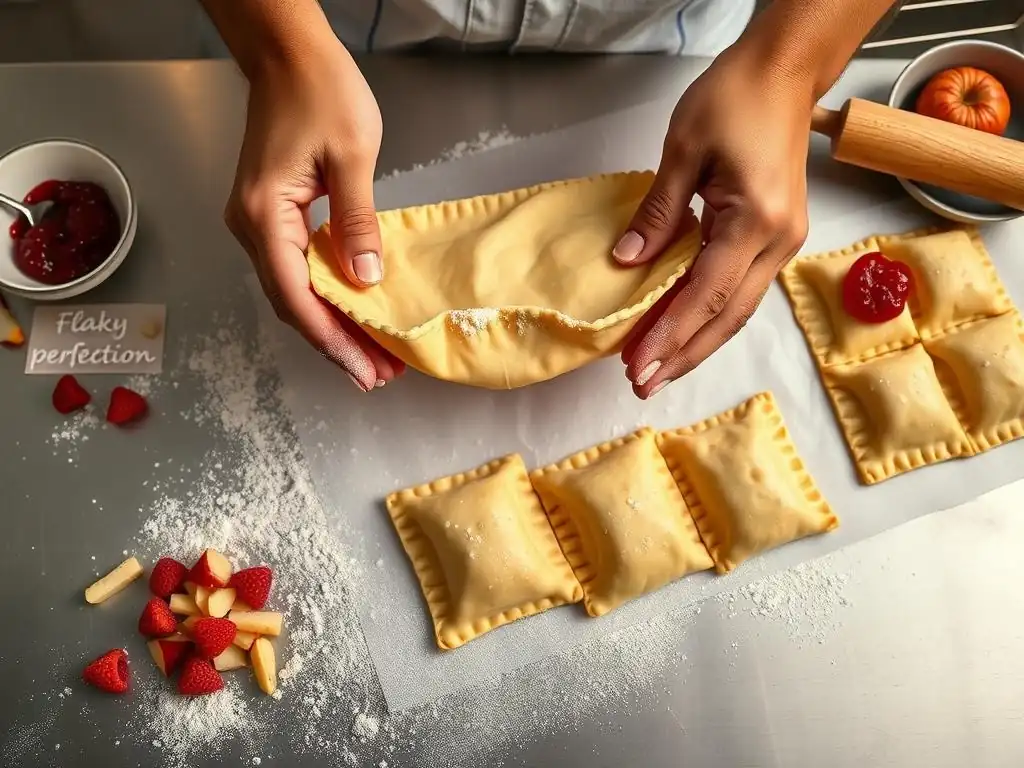
Recipe Overview: Classic Viennese Croissant Recipe
A classic Viennese croissant recipe typically involves a yeast-leavened dough (détrempe) that is laminated with a block of butter (beurrage). The process involves several stages of mixing, chilling, rolling, folding (known as "turns"), more chilling, shaping, proofing, and finally baking. While recipes vary slightly, a common approach uses about 500g of flour, 10-15g of fresh yeast (or half that for dry), 300-320g of milk, 50g sugar, 10g salt, and approximately 250-280g of high-fat butter for the lamination. The total time, including chilling and proofing, often spans 24-48 hours.
The foundational recipe structure remains similar whether you opt for a direct dough or a poolish starter. The direct dough method is simpler and faster, typically mixed, rested, and then laminated. The poolish method, a type of preferment, involves mixing a portion of the flour and water with a small amount of yeast and letting it ferment for several hours (often overnight) before incorporating it into the final dough mix. This prefermentation step adds complexity and depth to the flavor profile, contributing to a more aromatic and nuanced croissant.
Step 1: Preparing the Détrempe (Dough): Poolish vs. Direct Dough
The détrempe is the base dough for your croissants. The first decision is whether to use a direct dough or incorporate a poolish. For a direct dough, all ingredients (flour, yeast, sugar, salt, milk, and sometimes a little butter) are mixed together to form a soft, slightly sticky dough.
This dough is then kneaded until smooth and elastic. For a poolish, you'll mix equal parts flour and water with a tiny amount of yeast (e.g., 100g flour, 100g water, 1g instant yeast) and let it ripen at room temperature for 12-16 hours until bubbly and slightly collapsed. This poolish is then added to the remaining dough ingredients before mixing and kneading.
Choosing the poolish method adds an extra step but greatly enhances flavor complexity through longer fermentation. It also can slightly improve dough extensibility. Whichever method you choose, the goal is a well-developed, smooth dough that is then chilled thoroughly. A typical chilling time after mixing and a brief rest is at least 2-4 hours, or preferably overnight, in the refrigerator. The dough needs to be firm and cold, ideally around 4-6°C (39-43°F), to match the temperature and consistency of the butter block for successful lamination.
Mixing and Kneading for Optimal Gluten Development
Proper mixing and kneading are essential for developing the gluten network in the détrempe. Gluten provides the dough with the necessary structure and elasticity to be rolled out thinly and repeatedly without tearing during lamination. Under-kneaded dough will be weak and prone to breaking, while over-kneaded dough can become tough and difficult to work with. The goal is to achieve a dough that passes the "windowpane test," meaning a small piece can be stretched thin enough to see light through it without tearing.
Using a stand mixer with a dough hook is the most common method for kneading croissant dough. Start on a low speed to combine ingredients, then increase to medium speed for 5-10 minutes until the dough is smooth, elastic, and pulls away from the sides of the bowl. Manual kneading is also possible but requires more effort and time, typically 15-20 minutes. Ensure the dough remains relatively cool during kneading; if it warms up significantly, stop and chill it briefly before continuing.
Step 2: Creating and Incorporating the Butter Block (Beurrage)
The beurrage, or butter block, is the second critical component. It must be prepared so it's the same consistency as the chilled dough – firm but pliable, not hard or soft. Typically, 250-280g of cold, high-fat butter is cut into pieces and then gently beaten or rolled between two sheets of parchment paper to form a rectangle, usually around 15x20 cm (6x8 inches). The exact dimensions will depend on your dough quantity and initial rolling size. The butter should be cold but bendable; if it snaps, it's too cold.
Once the butter block is shaped, it needs to be chilled until it is firm but still slightly flexible, similar to cold modeling clay. This might take 30-60 minutes in the refrigerator, depending on your kitchen temperature. The crucial part of incorporating the butter is enclosing it completely within the chilled dough. The dough is typically rolled into a rectangle twice the size of the butter block, the butter is placed on one half, and the other half of the dough is folded over it, sealing the edges to ensure the butter is fully encased.
Tempering the Butter for Optimal Workability
Tempering the butter block means bringing it to the ideal temperature and consistency for lamination. It should be cold enough to hold its shape and create layers but pliable enough to roll out smoothly alongside the dough without breaking into pieces or squeezing out. If the butter is too hard, it will crack and tear the dough during rolling; if it's too soft, it will melt into the dough. The ideal temperature is typically between 10-13°C (50-55°F).
To temper the butter, take it out of the refrigerator about 15-20 minutes before you plan to use it. Gently tap it with a rolling pin to make it more pliable, then roll it into the desired rectangle shape. If it becomes too soft, return it to the refrigerator for a few minutes. The butter should be able to bend without breaking cleanly. This careful temperature management of the butter block is fundamental to achieving distinct, flaky layers in your finished croissants.
Step 3: The Lamination Process: Turns and Rest Periods
Lamination is the repeated folding and rolling of the dough-encased butter block. Each fold is called a "turn," and between turns, the dough must be thoroughly chilled to relax the gluten and re-firm the butter. A typical croissant recipe requires 3 or 4 turns, often a combination of single and double (or book) folds, to create hundreds of layers. For example, three single turns result in 27 layers (3^3), while one double and two single turns yield 36 layers (4 * 3^2). The number of layers directly impacts the flakiness.
After each turn, the dough must rest in the refrigerator for at least 30-60 minutes, or longer if needed, ensuring it is completely cold and relaxed before the next turn. This resting prevents the dough from shrinking back during rolling and keeps the butter cold and distinct. Rushing this process is a common mistake that leads to poor lamination and less flaky croissants. Labeling the number of turns on the dough package is a helpful way to keep track.
Executing Precise Turns: Single, Double, and Book Folds
Precise execution of turns is vital. A single turn involves rolling the dough into a rectangle, folding one-third up and the other third down over it, like a business letter, creating 3 layers of dough and 2 layers of butter. A double turn (or book fold) involves rolling the dough into a larger rectangle, folding both ends towards the center line, and then folding the dough in half along that line, creating 4 layers of dough and 3 layers of butter.
Each fold must be squared off neatly, and the edges aligned to maintain an even distribution of butter layers. After each turn, rotate the dough 90 degrees before rolling the next turn. This helps create an even shape and distributes the stress on the gluten network. Rolling should be firm but not too hard, applying even pressure to stretch the dough and butter together without squeezing the butter out.
The Significance of Cold Fermentation: Flavor Development
While immediate lamination and proofing are possible, many recipes call for a long, cold fermentation period, often overnight or up to 12-18 hours, after the final turn and before shaping or proofing. This slow fermentation in the refrigerator allows the yeast to work slowly, producing complex flavor compounds that are not present in quickly fermented doughs. This significantly enhances the depth and aroma of the finished croissant.
Cold fermentation also further relaxes the gluten, making the dough easier to roll for shaping. It also ensures the dough is thoroughly chilled, which is crucial for maintaining the layers during the initial stages of baking before the butter melts. A well-fermented dough will have a more nuanced, slightly tangy flavor compared to a dough that is rushed through the process.
Step 4: Shaping and Proofing the Croissants
After the final turn and cold fermentation, the dough is rolled out one last time to a specific thickness, typically around 3-4mm (about 1/8 inch). It is then cut into triangles using a sharp knife or pastry wheel. The base of each triangle is usually 8-10 cm (3-4 inches) wide, and the height is around 20-25 cm (8-10 inches). A small notch is often cut in the center of the base, and the corners are stretched slightly before rolling from the base to the tip to form the classic crescent shape.
Proofing is the final rise before baking and is a critical stage. The shaped croissants need to proof in a warm, humid environment until they are significantly increased in size and the layers are visible, but they should still feel slightly firm and not overly puffy or fragile. Over-proofing can cause the layers to collapse during baking, while under-proofing will result in a dense, bread-like texture.
Ideal proofing temperature is typically 24-26°C (75-80°F) with high humidity (around 75-80%). This can be achieved in a proofing box or by placing the croissants in a slightly warm oven (turned off) with a pan of hot water. Proofing usually takes 2-3 hours.
Achieving Consistent Shape and Uniformity
Consistent shaping is important not just for aesthetics but also for even baking. Try to roll each triangle evenly and roll them up with similar tension. Starting with uniformly cut triangles helps ensure that all croissants are roughly the same size, which is crucial for baking them all at the same time without some burning and others being undercooked. Practicing the rolling technique helps achieve that classic crescent curve and ensures the tip is tucked neatly underneath.
Using a sharp pastry wheel or knife makes clean cuts through the layers, preventing them from being squashed together. Gently stretching the base corners outwards before rolling helps create a wider base, which contributes to a more open interior structure after baking. Aim for a shape that is neither too tight (resulting in a dense center) nor too loose (causing them to flatten out).
Proper Proofing Conditions: Temperature and Humidity
Proper proofing conditions are paramount for achieving the desired light and airy texture. The ideal temperature range of 24-26°C (75-80°F) allows the yeast to be active without melting the butter. High humidity prevents the surface of the dough from drying out and forming a skin, which would restrict the dough's expansion. If the surface dries, the layers cannot separate properly during baking.
If you don't have a dedicated proofing box, you can create a suitable environment in your oven. Turn the oven on to its lowest setting for just a minute or two, then turn it off. Place the tray of shaped croissants inside along with a pan of steaming hot water. Close the door and let them proof. Check on them periodically; they should feel slightly jiggly when gently shaken, and the layers should be clearly defined. They should roughly double in size but not look slack or deflated.
Exploring Croissant Variations: Flavors and Fillings
Sweet Croissant Variations: From Almond to Chocolate
While the classic plain croissant is a masterpiece in itself, its versatility makes it a perfect vehicle for sweet fillings and flavors. Two of the most popular variations are Pain au Chocolat and Almond Croissants, each offering a delightful twist on the original. These variations showcase how the flaky base can be adapted to create new favorites.
Other sweet possibilities include filling the dough with fruit preserves (like raspberry or apricot), rolling in cinnamon sugar before baking, or adding pastry cream. The key is to use fillings that won't leak excessively during baking or compromise the flakiness. Often, these variations are made with the same laminated dough used for plain croissants, simply incorporating the filling during the shaping step.
Pain au Chocolat: Mastering the Classic
Pain au Chocolat, or chocolate croissant, is a beloved classic. It uses the same laminated dough but is cut into rectangles instead of triangles. Two pieces of dark chocolate (typically baton-shaped) are placed at one end of the rectangle, and the dough is rolled up to enclose the chocolate completely. Using high-quality dark chocolate with around 60-70% cocoa content ensures a rich, melty center.
The technique is straightforward: after rolling and cutting the dough into rectangles (e.g., 8x20 cm), place the chocolate batons a couple of centimeters from one end. Roll the dough over the chocolate once, place the second baton, and continue rolling to the end. Ensure the seam is underneath. Proof and bake as you would plain croissants. The result is a perfect balance of flaky pastry and warm, gooey chocolate.
Almond Croissants: A Twice-Baked Delight
Almond croissants are often made using day-old plain croissants, making them a wonderful way to repurpose leftovers. The process involves slicing the croissant horizontally, dipping or brushing it generously with a simple syrup (equal parts sugar and water, sometimes flavored with rum or almond extract), filling it with frangipane (a rich almond cream), and spreading more frangipane on top. They are then sprinkled with sliced almonds and baked a second time until golden brown and the frangipane is set.
This "twice-baked" method gives the croissant a slightly denser but incredibly moist and flavorful interior, while the exterior becomes wonderfully crisp from the re-baking. The combination of sweet syrup, rich almond cream, and crunchy almonds creates a decadent treat that is highly addictive. A typical frangipane recipe includes butter, sugar, almond flour, eggs, and sometimes a little flour.
Savory Croissant Variations: Adding Cheese and Herbs
Croissants aren't limited to sweet applications; they are equally delicious with savory fillings. Cheese is a natural pairing, melting into the flaky layers, while herbs and other savory additions can transform the pastry into a light meal or snack. These variations follow the same lamination process but incorporate the savory elements during shaping or as part of the dough itself.
Common savory fillings include ham and cheese, various cheeses like Gruyère or cheddar, herbs (rosemary, thyme, chives), garlic, or even spinach and feta. When adding solid ingredients like cheese or ham, they are typically placed inside the dough triangle or rectangle before rolling, similar to Pain au Chocolat. Herbs can be mixed into the dough or sprinkled over the rolled-out dough before cutting and shaping.
Ham and Cheese Croissants: A Savory Staple
Ham and cheese croissants are perhaps the most popular savory variation. After rolling and cutting the dough into triangles, a slice of ham and a slice or sprinkle of cheese (such as Gruyère, cheddar, or Swiss) are placed on the wider end of the triangle before rolling it up. The cheese melts during baking, creating pockets of savory goodness within the flaky layers.
For best results, use thinly sliced ham and a good melting cheese. Avoid overfilling, as this can cause the filling to leak out excessively during baking. Some recipes suggest lightly scoring the top of the croissant before the egg wash and sprinkling extra cheese on top for a crispy crust. Bake until golden brown and the cheese is bubbling.
Herb and Garlic Croissants: An Aromatic Twist
Adding herbs and garlic infuses the croissants with wonderful aroma and flavor. Finely chopped fresh herbs like chives, parsley, thyme, or rosemary can be mixed into the détrempe during the initial mixing stage, typically a few tablespoons per 500g of flour. Alternatively, minced garlic (roasted or fresh, used sparingly) or garlic powder can be incorporated.
Another method is to spread a thin layer of softened garlic butter or a mixture of herbs and cheese over the rolled-out dough before cutting the triangles. As the dough is rolled, these flavors are distributed throughout the layers. Proof and bake as usual. The resulting croissants have a subtle savory note that pairs well with soups or salads.
Baking Your Croissants to Golden Perfection
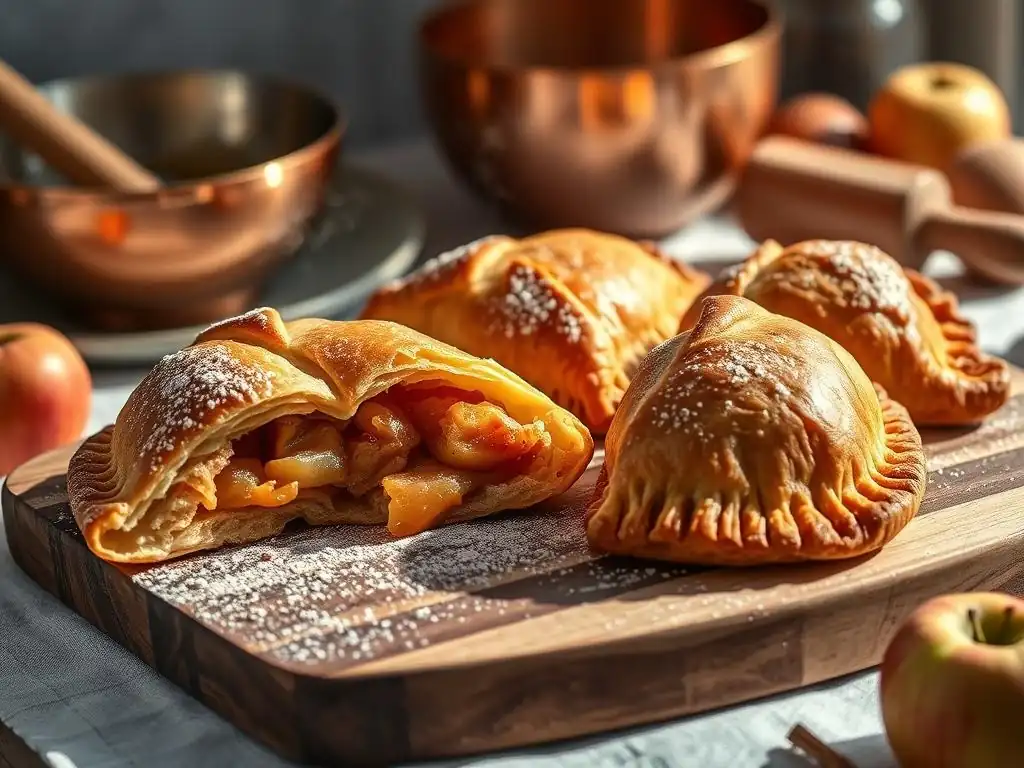
The final step in the croissant journey is the bake. This is where the magic of lamination truly comes to life. The temperature and timing are critical to ensure the butter melts and creates steam, puffing up the layers, while the exterior achieves a beautiful golden-brown color and crispy texture, and the interior bakes through to become light and airy.
Proper preheating of the oven and careful monitoring during baking are essential. A visual cue of a well-baked croissant is its rich, even golden-brown color and its lightness when lifted. The layers should be clearly separated and visible on the sides.
Egg Wash Application: Achieving a Shiny, Even Crust
Applying an egg wash before baking gives the croissants a beautiful, glossy, golden-brown finish. A typical egg wash is made by whisking one or two egg yolks or whole eggs with a tablespoon or two of milk or cream and a pinch of salt (optional). The egg wash should be strained to remove any chalazae or lumps, ensuring a smooth application.
Brush the egg wash gently and evenly over the surface of the proofed croissants using a soft pastry brush. Avoid letting the wash pool between the layers or drip down the sides, as this can seal the layers together and prevent them from separating properly during baking. Apply the wash just before placing the croissants in the oven.
Optimal Baking Temperature and Time: Monitoring Internal Temperature
Croissants are typically baked at a relatively high initial temperature to encourage rapid lift and layer separation, then the temperature is often reduced to ensure they bake through without burning. A common approach is to preheat the oven to 220°C (425°F), place the croissants in, and immediately reduce the temperature to 190-200°C (375-390°F). Baking time usually ranges from 15 to 25 minutes, depending on the size of the croissants and your oven.
Monitoring the internal temperature is the most accurate way to check for doneness. A fully baked croissant should have an internal temperature of around 90-95°C (195-205°F). Visually, they should be deeply golden brown all over, including the sides and underneath. If they are browning too quickly on top, you can tent them loosely with foil.
Utilizing a Baking Stone or Sheet for Even Heat Distribution
Using a baking stone or steel preheated in the oven can significantly improve the bake of your croissants. The stone provides a consistent, high heat source from below, which helps the dough spring rapidly and promotes even browning on the bottom crust. Place the baking stone on the middle rack during the oven preheating phase.
Alternatively, using a heavy-duty baking sheet, preferably a professional-grade one that won't warp at high temperatures, can also help with even heat distribution. Lining the baking sheet with parchment paper prevents sticking and makes cleanup easier. Ensure there is adequate space between croissants on the sheet to allow for expansion and even air circulation during baking.
Troubleshooting Common Croissant Baking Issues
Even with careful technique, issues can arise when baking croissants. Understanding common problems and their causes can help you troubleshoot and improve your results over time. Patience and practice are key to mastering this challenging pastry.
Common issues include dough that's difficult to roll, butter leaking out during lamination or baking, lack of flakiness, a dense interior, or uneven browning. Identifying the likely culprit – often related to temperature, dough development, or proofing – is the first step to fixing it.
Addressing Dough That's Too Warm or Cold
Temperature control is paramount throughout the croissant process. If the dough is too warm during lamination, the butter will melt into the dough, destroying the layers. The dough will also become sticky and difficult to handle. The solution is simple but requires patience: return the dough to the refrigerator immediately and chill it thoroughly until it's firm and cold again, ideally for at least 30-60 minutes.
If the dough (or butter) is too cold, it will be stiff and resistant to rolling. Trying to force it will result in uneven thickness, torn dough, and broken butter layers. If this happens, let the dough rest at room temperature for 5-10 minutes until it becomes slightly more pliable. It should still feel cold to the touch but yield slightly to gentle pressure. Don't leave it out too long!
Preventing Butter Leakage During Baking
Butter leakage during baking, often seen as pools of fat around the croissants on the baking sheet, is typically a sign of insufficient lamination, poor sealing of the shaped croissants, or inadequate proofing. If the layers aren't distinct due to warm butter during turns, the butter doesn't stay trapped. If the seams of the shaped croissants aren't sealed properly, the melting butter can escape. Under-proofed croissants are also denser, and the pressure from melting butter can force its way out.
To prevent this, ensure your butter is cold and properly laminated, seal the seams firmly when shaping, and proof the croissants fully until the layers are clearly visible and they have expanded significantly. Baking at the correct initial high temperature helps set the structure quickly before all the butter melts.
Correcting Uneven Baking, Lack of Flakiness, or Tunnels
Uneven baking can be caused by inconsistent oven temperature, uneven shaping of the croissants, or overcrowding the baking sheet. Ensure your oven thermostat is accurate, rotate the baking sheet halfway through baking, and shape the croissants as uniformly as possible.
Lack of flakiness is almost always due to issues during lamination – the butter wasn't kept cold enough, or the turns weren't executed properly, causing the butter to integrate into the dough. Ensure your rest periods are sufficient and the dough and butter are cold and pliable for each turn.
Large tunnels or uneven holes in the interior can be a sign of over-proofing, where the gluten structure becomes too weak to support the air pockets, or improper shaping, where air gets trapped unevenly during rolling. Ensure you don't over-proof and roll the croissants up evenly from the base to the tip.
Tips for Storing and Enjoying Your Croissants

Once you've successfully baked a batch of croissants, you'll want to enjoy them at their best. Proper storage is key, whether you plan to eat them immediately or save some for later.
Freshly baked croissants are undeniably at their peak within a few hours of coming out of the oven, when the exterior is crisp and the interior is still warm and soft. However, with the right techniques, you can still enjoy delicious croissants later on.
Storing Unbaked and Baked Croissants
Unbaked, shaped croissants can be frozen for later use. Once shaped and placed on a baking sheet, freeze them until solid (about 1-2 hours). Then, transfer them to an airtight container or freezer bag, separating layers with parchment paper. They can be stored in the freezer for up to 2-3 weeks. To bake from frozen, place them on a baking sheet, allow them to thaw and proof at room temperature (this will take longer than fresh proofing, potentially 4-6 hours), then egg wash and bake as usual.
Baked croissants are best eaten the same day. If you have leftovers, store them at room temperature in a paper bag to maintain some crispness (plastic bags will make them soggy). They will lose their initial crispness but can be refreshed. They are typically best consumed within 1-2 days.
Reheating Techniques: Maintaining Flakiness and Crispness
To revive a day-old or refrigerated baked croissant and restore some of its flaky texture, reheating is essential. Avoid the microwave, which will make them rubbery. The best method is using an oven or toaster oven.
Preheat your oven to a moderate temperature, around 175°C (350°F). Place the croissant directly on the oven rack or on a baking sheet. Heat for 5-10 minutes, or until warmed through and the exterior is crisp again. Keep a close eye on them to prevent burning. This method helps evaporate some of the moisture absorbed overnight, bringing back that desirable crunch.
Advanced Croissant Techniques for Expert Bakers
For those who have mastered the basics and want to push their skills further, several advanced techniques offer new challenges and opportunities to refine your croissant game. These often involve experimenting with different ingredients or processes.
Exploring alternative leavening methods or flour types can significantly alter the flavor, texture, and handling properties of the dough, providing a deeper understanding of how each component interacts within this complex pastry.
Working with Sourdough Croissants
Incorporating a sourdough starter (levain) into croissant dough replaces or supplements commercial yeast and adds a distinctive tangy flavor and slightly different texture. Working with sourdough requires understanding your starter's activity and managing longer fermentation times, often entirely cold fermentation in the refrigerator for 24-48 hours or more after lamination.
Sourdough doughs can sometimes be trickier to laminate due to their extensibility, requiring careful handling and sufficient chilling. However, the resulting croissants offer a unique depth of flavor and a more open crumb structure compared to those made solely with commercial yeast. Recipes often use a stiff levain (lower hydration) for better handling during lamination.
Exploring Different Flour Blends for Unique Textures
Experimenting with different flour blends can yield croissants with unique characteristics. While bread flour is standard, some bakers incorporate a percentage of pastry flour (lower protein) for a more tender crumb or even whole wheat flour for added flavor and nutrition (though this can make lamination more challenging).
Using specialty flours, like French T55 or T45 flour specifically milled for viennoiserie, can also impact the outcome. These flours often have specific protein levels and ash content optimized for laminated doughs. Understanding how different protein levels affect gluten development and dough behavior allows experienced bakers to fine-tune their recipes for specific desired textures.
Conclusion: Savoring Your Homemade Croissants
Mastering the croissant is a journey that requires practice, patience, and a willingness to learn from mistakes. Each batch you bake will teach you something new about dough, butter, temperature, and timing. While the process is demanding, the reward of a perfectly baked, flaky, buttery croissant made with your own hands is immense.
Enjoy the fruits of your labor. Whether you eat them warm from the oven, share them with loved ones, or transform them into delicious variations, take pride in having conquered one of baking's most celebrated challenges.
Documenting your process and sharing photos of your successes (and even your learning experiences!) can be incredibly motivating. Connecting with other bakers online or in person provides a community for troubleshooting, exchanging tips, and celebrating achievements. Don't be afraid to show off your flaky puff pastry turnovers recipe skills, even though these are croissants! The techniques learned here are applicable to many laminated pastries.
Consider starting a baking journal to note temperatures, timings, and results for each batch. This data can be invaluable for identifying what worked well and what needs adjustment for future attempts.
Further Exploration of Viennoiserie Recipes
The world of viennoiserie extends beyond croissants. Once you've mastered the basic lamination technique, you can apply it to other delightful pastries like pain aux raisins, danishes, or even kouign amann. Each offers a slightly different shaping method or filling but relies on the same fundamental principles of creating flaky layers through butter and dough lamination. Continue exploring and expanding your repertoire of buttery, layered treats.
Frequently Asked Questions
How do I ensure my puff pastry turnovers are truly flaky?
Achieving flaky puff pastry relies on keeping the butter cold. Work quickly and use cold ingredients to prevent the butter from melting into the dough. This creates distinct layers during baking.
What's the best filling to use in a puff pastry turnover?
The best filling is subjective, but consider something that won't make the pastry soggy. Fruit fillings often work well, as do savory fillings like cheese and herbs. Ensure fillings aren't overly wet.
What temperature should I bake puff pastry turnovers at?
Puff pastry typically bakes at a high temperature, around 400°F (200°C). This helps the pastry rise quickly and achieve that signature puffed and golden brown appearance.
Can I freeze puff pastry turnovers before or after baking?
Yes, you can freeze them! For best results, freeze them unbaked on a baking sheet before transferring them to a freezer bag. You can also freeze baked turnovers but the texture may be slightly altered.
What are some common mistakes to avoid when making puff pastry turnovers?
A common mistake is overworking the dough, which leads to a tough pastry. Also, avoid using warm butter or a warm kitchen, as this melts the butter and ruins the flaky layers.
Final Reflection: The Enduring Allure of the Flaky Turnover
The pursuit of the perfect flaky puff pastry turnover is more than just a culinary quest; it's a testament to the enduring power of simple ingredients transformed by skillful technique. The seemingly effortless elegance of a perfectly layered, golden-brown turnover belies the precision and patience required to achieve that coveted flakiness. This article explored the nuances of creating this pastry masterpiece, from the initial chilling of the dough to the crucial final bake, highlighting the importance of each step in achieving that satisfying crunch.
The journey of mastering puff pastry, for me, has been a lesson in both patience and precision. It's a process that demands respect for the ingredients and a deep understanding of how heat and pressure interact to create that magical texture. The best things in life are worth waiting for,
and this certainly holds true for the flaky perfection of a homemade puff pastry turnover. The reward of biting into that crisp, buttery layer, filled with your favorite sweet or savory ingredients, is a culinary experience that transcends mere sustenance; it's a celebration of craftsmanship and deliciousness.
Now, I invite you to embark on your own pastry adventure. Don't be intimidated by the seemingly complex process; embrace the challenge, experiment with different fillings, and savor the satisfaction of creating something truly special. The journey to mastering the flaky puff pastry turnover is a rewarding one, filled with delicious discoveries and the pride of creating something beautiful and delicious from scratch. The next time you bite into a turnover, remember the journey, the technique, and the joy of creating something truly extraordinary.
Unlock Your Inner Pastry Chef: Master Flaky Perfection!
Thanks for joining us on this pastry adventure! You've just gained the skills to create truly magnificent puff pastry turnovers – ones that are flaky, golden, and bursting with flavor. Ready to take your baking to the next level?
- Bake a batch of your own turnovers today! Use the techniques you learned to create your signature masterpiece. Don't be afraid to experiment with fillings!
- Share your creations! Post pictures of your stunning turnovers on social media and tag #BakeWithEase – we'd love to see your results!
- Explore our other pastry recipes: Dive deeper into the world of delicious baked goods and discover new techniques to impress your friends and family.
What unique filling will you create for your next batch of perfect puff pastry turnovers?