
The Secret to a Vigorous Starter: Understanding Hydration Levels

Welcome to BakeWithEase, your trusted guide to baking bliss! Are you ready to unlock the secrets to a truly exceptional sourdough loaf? This week, we're diving deep into a critical, yet often overlooked, aspect of sourdough baking: sourdough starter hydration levels. Understanding how much water to feed your starter can be the difference between a flat, dense loaf and a beautifully risen, tangy masterpiece. Curious to learn more? Let's explore the science and techniques that will transform your starter and your baking forever!
- Bake With Ease' Guide to Sourdough Starter Hydration
- Why Sourdough Starter Hydration Matters for Baking
- Decoding Sourdough Starter Hydration Levels: A Beginner's Guide
- The Impact of Different Hydration Levels on Your Sourdough Starter
- Troubleshooting Common Hydration Problems in Sourdough Starters
- Adjusting Your Sourdough Starter's Hydration Level: A Step-by-Step Guide
- Maintaining Optimal Hydration for a Healthy Sourdough Starter
- Advanced Hydration Techniques for Sourdough Bakers
- Hydration and Sourdough Bread: Achieving the Perfect Loaf
- Sourdough Starter Hydration: Frequently Asked Questions
-
Frequently Asked Questions
- What exactly does hydration level mean in the context of a sourdough starter?
- Why is understanding sourdough starter hydration levels important?
- How does hydration level affect the consistency of my starter?
- What is the most common hydration level for a sourdough starter, and why?
- Can I change the hydration level of my existing sourdough starter?
- Final Reflection: The Living Water of Your Sourdough Journey
- Unleash Your Baking Potential: Hydrate Your Way to Success!
Bake With Ease' Guide to Sourdough Starter Hydration
Welcome to the fascinating world of sourdough! Achieving a vigorous, healthy starter is the cornerstone of successful sourdough baking. One of the most crucial, yet often overlooked, factors influencing your starter's health and activity is its hydration level. Understanding sourdough starter hydration levels is key to consistency and predicting how your starter will behave.
Whether you're aiming for a light, airy loaf or a dense, rustic boule, the hydration of your starter plays a significant role. This guide will walk you through everything you need to know about sourdough starter hydration, from the basics of what it means to troubleshooting common issues and even experimenting with advanced techniques. Let's unlock the secret to a truly vibrant starter!
Why Sourdough Starter Hydration Matters for Baking
The Importance of Water in Sourdough Starters
Water is not merely a diluent in your sourdough starter; it is an essential reactant and environment provider for the wild yeasts and lactic acid bacteria that make sourdough unique. These microorganisms require water to consume sugars present in the flour and produce the carbon dioxide (for rise) and organic acids (for flavor) that define sourdough. Without sufficient water, their metabolic processes slow down dramatically, potentially leading to a sluggish or inactive starter.
Consider the biological processes occurring within your starter. Yeasts and bacteria need to access nutrients from the flour particles. Water facilitates this access by dissolving sugars and making them available to the microorganisms.
A starter that is too dry limits the mobility of these microbes and their ability to interact with their food source, much like trying to eat dry flour versus a paste. Research indicates that optimal water activity (a measure of available water) is critical for microbial growth and enzymatic activity in fermented products like sourdough. While specific optimal water activity varies slightly among different strains, a general range of 0.95 to 0.99 is often cited for active fermentation, which corresponds to typical starter hydration levels.
How Hydration Affects Starter Activity and Flavor
The hydration level directly impacts the consistency of your starter, which in turn affects its activity and the balance of microbial populations. A higher hydration starter (more liquid) tends to be more active initially, showing bubbles and rise more quickly. This is partly because the microorganisms are more mobile in the liquid medium and can access nutrients faster. However, they may also exhaust their food supply more rapidly.
Conversely, a lower hydration starter (stiffer) ferments more slowly. This slower fermentation can sometimes lead to a different balance of acids produced. Lactic acid bacteria produce both lactic acid (mellow, yogurt-like flavor) and acetic acid (sharp, vinegary flavor). Stiffer starters, with less available water and slower fermentation, often favor the production of acetic acid, which can contribute a tangier flavor to the resulting bread. For example, a 50% hydration starter might develop a significantly different flavor profile over 12 hours compared to a 125% hydration starter fed the same flour at the same temperature.
Achieving Optimal Fermentation Through Proper Hydration
Optimal fermentation isn't just about speed; it's about achieving a balance of activity and flavor development that suits your baking goals. The right sourdough starter hydration levels ensure that your starter peaks predictably and consistently, providing the leavening power you need for your dough. An overly wet starter might peak and fall too quickly, while an overly stiff one might take an excessively long time to become active enough.
Proper hydration also influences the structure of the starter matrix, affecting how well it traps the carbon dioxide produced by the yeasts. A starter with appropriate hydration will develop a robust network that can hold bubbles, leading to the characteristic rise and "float test" readiness. For instance, a 100% hydration starter typically doubles or triples in volume at its peak, exhibiting a light, airy structure filled with bubbles, indicating strong fermentation and readiness for use in dough.
Decoding Sourdough Starter Hydration Levels: A Beginner's Guide
What Does "Hydration Level" Actually Mean?
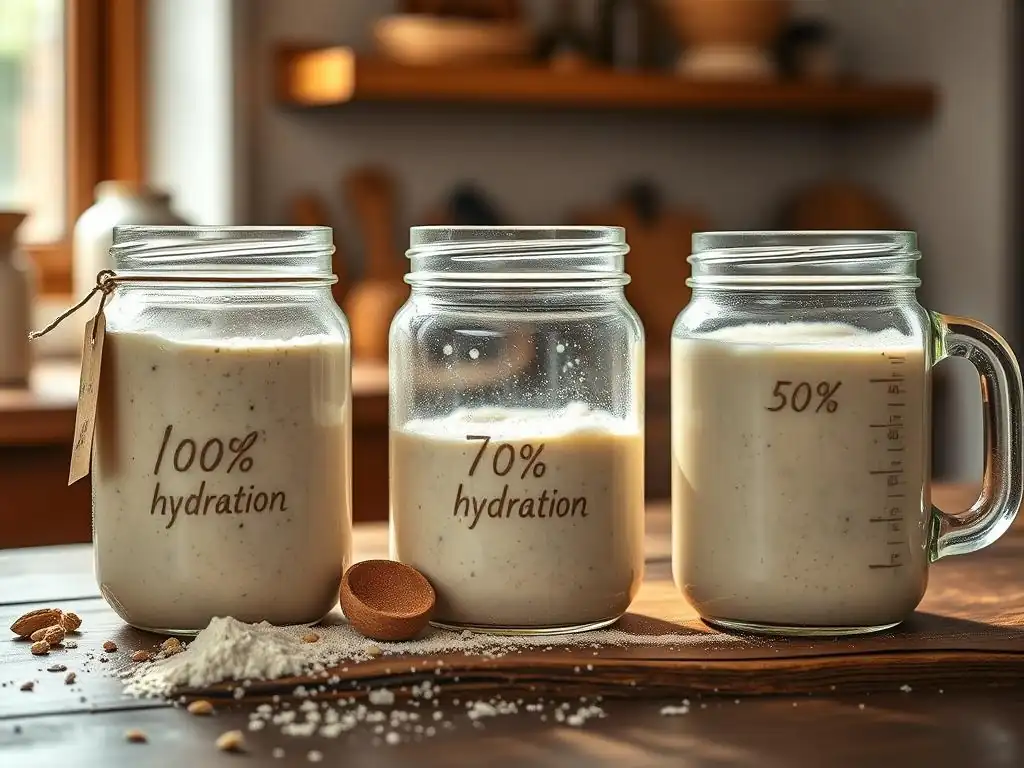
At its core, the hydration level of your sourdough starter refers to the ratio of water to flour by weight. It's expressed as a percentage. This percentage tells you how much water you have relative to the amount of flour. For example, a 100% hydration starter means you are using equal weights of flour and water. If you use 100 grams of flour, you would use 100 grams of water.
This measurement is critical because flour absorbs water differently depending on its type and the environment. By using weight instead of volume, you ensure accuracy and consistency regardless of how tightly packed your flour is or the calibration of your measuring cups. Understanding sourdough starter hydration levels by weight allows for reproducible results every time you feed your starter, which is vital for maintaining its health and predictability.
Common Sourdough Starter Hydration Ratios Explained (50%, 100%, 125%)
Different hydration ratios yield starters with distinct consistencies and fermentation characteristics. The 100% hydration starter is arguably the most common, often referred to as a "liquid" or "pourable" starter, though its actual consistency is more like a thick batter. As mentioned, this involves equal weights of flour and water (e.g., 50g flour, 50g water). This ratio is popular due to its ease of measurement and management, and it provides a good balance of activity and flavor development for many baking applications.
Stiffer starters, like a 50% hydration starter, use half the weight of water compared to flour (e.g., 100g flour, 50g water). These starters have a consistency closer to a firm dough. They ferment more slowly, requiring longer proofing times but often developing more acetic acid for a tangier flavor.
Very liquid starters, such as 125% hydration, use more water than flour (e.g., 80g flour, 100g water). These are quite runny and tend to ferment very quickly, sometimes used for specific types of dough or preferments. Experimenting with these different sourdough starter hydration levels can open up new possibilities in your baking.
Understanding the Baker's Percentage in Sourdough Starters
The hydration level is expressed using the baker's percentage system, a standard in baking that relates the weight of each ingredient to the weight of the flour, which is always considered 100%. In the context of a sourdough starter, the flour is your 100%. The weight of the water is then calculated as a percentage of that flour weight.
So, if you have 100 grams of flour and add 100 grams of water, the water weight (100g) is 100% of the flour weight (100g), resulting in a 100% hydration starter. If you have 100 grams of flour and add 50 grams of water, the water weight (50g) is 50% of the flour weight (100g), giving you a 50% hydration starter. This system provides a universal language for bakers to describe their formulas accurately, including their sourdough starter hydration levels, ensuring recipes can be replicated reliably.
The Impact of Different Hydration Levels on Your Sourdough Starter
High Hydration Starters: Pros and Cons
High hydration starters, typically at 100% or more, are known for their speed and ease of mixing. They are more liquid, making it simple to stir in flour and water during feeding. The increased water content allows for faster access to nutrients by the yeast and bacteria, leading to quicker fermentation cycles. This can be advantageous when you need an active starter relatively quickly, perhaps within 4-6 hours at warm room temperature (around 24-26°C or 75-79°F). The texture is also easy to assess visually for activity, with obvious bubbling and rise.
However, the rapid fermentation in high hydration starters can also be a drawback. They tend to peak and then fall quite quickly once the food is depleted, meaning you have a shorter window of time to use them at their peak activity. For example, a 100% hydration starter fed 1:1:1 (starter:flour:water) might peak in 4-6 hours, while a 1:2:2 feeding might last 6-8 hours, but the peak window is still relatively short compared to stiffer starters.
They can also develop more lactic acid relative to acetic acid, resulting in a milder flavor profile, which might not be desired for bakers seeking a strong tang. Managing sourdough starter hydration levels above 100% requires careful attention to feeding schedules.
Low hydration starters, like those at 50-60%, are much stiffer and resemble a firm dough. Mixing them requires more effort, often needing kneading or vigorous stirring. Their primary advantage is their slower fermentation rate. This means they take longer to peak, offering a more extended window of time to use them. For example, a stiff starter fed 1:1:0.5 (starter:flour:water) might take 8-12 hours or even longer to peak at room temperature, making it more forgiving if you miss the precise peak time.
This slower fermentation often encourages the production of acetic acid, contributing a more pronounced tangy or vinegary flavor to the bread, which is highly valued in certain traditional sourdough styles, like some German rye breads. Stiff starters are also sometimes considered more stable for longer storage in the refrigerator. The main disadvantages are the effort required for mixing and the longer activation time, which might not suit bakers looking for a quick turnaround. The visual cues of activity (rise and bubbles) are also less dramatic than in liquid starters, making it slightly harder to judge readiness by sight alone.
Choosing the Right Hydration Level for Your Baking Needs
The "best" sourdough starter hydration level isn't universal; it depends entirely on your baking goals, schedule, and the type of bread you want to make. If you prioritize speed and ease of handling for everyday baking and prefer a milder tang, a 100% hydration starter is likely a great choice. It's versatile and works well for most standard sourdough bread recipes.
If you bake less frequently, desire a stronger sour flavor, or need a starter that can sit longer at room temperature before use, a lower hydration starter (50-70%) might be more suitable. Some bakers even maintain two starters with different hydration levels to have options available. Consider your typical baking schedule: do you need a starter ready in a few hours, or can you wait half a day? Your answer will help guide your decision on the ideal sourdough starter hydration levels for your kitchen.
Troubleshooting Common Hydration Problems in Sourdough Starters
Identifying an Over-Hydrated Starter
An over-hydrated starter, one with too much water relative to flour (e.g., consistently above 110-120% without intention), will appear excessively liquid or runny, almost like pancake batter or thin paste. It might struggle to hold onto bubbles effectively, leading to a less dramatic rise compared to a properly hydrated starter. While it might show surface bubbles, the overall volume increase could be minimal, and it might collapse very quickly after peaking, if a discernible peak even occurs.
The texture will be very slack and difficult to manage. If you try to use it in dough, you'll notice the dough is much wetter than expected, potentially throwing off the recipe's intended hydration. An over-hydrated starter can also sometimes develop an off-putting smell or attract unwanted mold more easily due to the higher water availability. For instance, if your usual 100% starter doubles in 6 hours and your current batch barely rises but is full of tiny surface bubbles and runny, it's likely over-hydrated.
Recognizing an Under-Hydrated Starter
An under-hydrated starter, one with too little water (e.g., below 90-100% when aiming for 100%), will feel very stiff and dry. It will be difficult to stir or mix the flour and water together smoothly, often resulting in a crumbly or paste-like consistency. The surface might dry out and form a crust quickly, especially if left uncovered.
Activity in an under-hydrated starter will be significantly slower. You might see very few bubbles, and the rise will be minimal or non-existent. The starter might appear dense and heavy. Using an under-hydrated starter in dough will result in a dough that is much stiffer than intended, potentially making it difficult to mix, knead, and develop gluten properly. For example, if your starter typically triples in volume and becomes airy, but now it only slightly puffs up and feels dense after 12 hours, it's likely under-hydrated.
Diagnosing Hydration Issues: Visual Cues and Testing Methods
The most straightforward way to diagnose hydration issues is through visual assessment and touch. A properly hydrated 100% starter should resemble a thick, bubbly batter or a very wet sponge, with a good balance of structure and fluidity. It should pull away from the sides of the jar slightly as it rises and show a domed or relatively flat top at its peak, full of internal bubbles visible on the sides of the jar.
For a more objective measure, especially if you suspect your scale might be off or you're new to judging consistency, you can perform a simple test. Weigh out a small amount of starter, flour, and water according to your target sourdough starter hydration levels (e.g., 20g starter, 100g flour, 100g water for 100% hydration). Mix it up and observe the texture.
Does it match your expectation for that hydration? Compare its activity to previous successful feedings. If the texture or activity is consistently off despite accurate weighing, humidity or flour absorption might be factors, but often the issue lies in incorrect water or flour ratios.
Adjusting Your Sourdough Starter's Hydration Level: A Step-by-Step Guide
How to Increase Hydration in a Stiff Starter
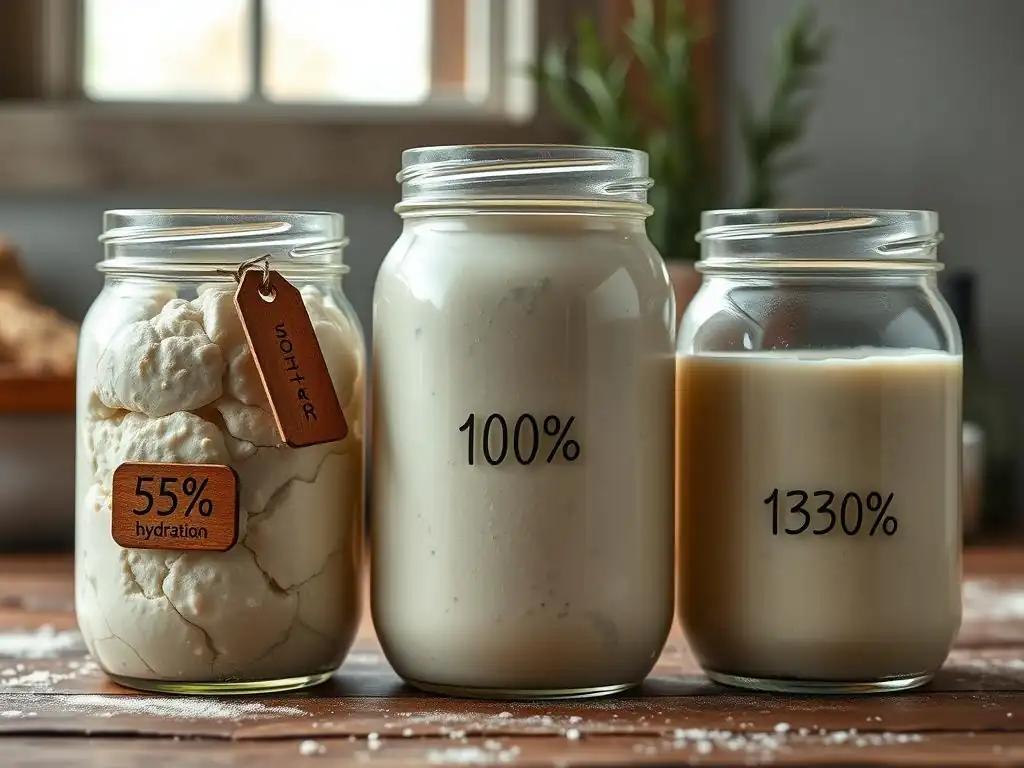
If you have a stiff starter (e.g., 50-70% hydration) and want to transition it to a higher hydration (e.g., 100%), the process is straightforward. Simply adjust the ratio of water to flour in your regular feedings. Instead of feeding with, say, equal parts starter and flour and half that amount of water (for ~50% hydration), you'll gradually increase the water amount.
Let's say you have 50g of a 50% hydration starter and want to move towards 100%. You could feed it with 50g of flour and 60g of water for the first feeding, wait for it to peak, then repeat. The next feeding, you might use 50g starter, 50g flour, and 70g water. Continue increasing the water slightly over a few feedings until the consistency matches your target hydration (e.g., 50g starter, 50g flour, 50g water for 100%). Each feeding dilutes the previous hydration level with the new one, gradually shifting the overall hydration.
How to Reduce Hydration in a Liquid Starter
Similarly, if you have a liquid starter (e.g., 100% or more) and want to make it stiffer (e.g., 50-70%), you'll decrease the amount of water relative to flour in your feedings. Start with your liquid starter and feed it with equal parts starter and water, but more flour than water.
For example, if you have 50g of a 100% hydration starter and want to move towards 50%, you could feed it with 50g of water and 60g of flour for the first feeding. Wait for it to peak, then repeat. The next feeding, you might use 50g starter, 50g water, and 70g flour. Continue increasing the flour amount over several feedings until the consistency is thick and paste-like, indicative of your target lower hydration (e.g., 50g starter, 50g water, 100g flour for 50%). Consistency is key when adjusting sourdough starter hydration levels.
Refining the Texture: Achieving Desired Starter Consistency
Achieving the perfect texture for your desired hydration level sometimes takes a few feedings, especially if you're making a big jump (like from 50% to 150%). Don't expect it to transform overnight. The old starter's hydration will influence the new mixture. Focus on accurately weighing your ingredients according to the target hydration ratio at each feeding.
Pay close attention to how the mixture feels when you stir it and how it looks as it ferments. Does a 100% hydration mix feel like thick batter or watery soup? Does a 50% mix feel like firm dough or sticky paste? Adjust the water or flour very slightly at the next feeding if the consistency is off, even if you weighed correctly – environmental factors or flour absorption variations can play a minor role. Consistency in feeding ratios is the surest way to dial in sourdough starter hydration levels over time.
Maintaining Optimal Hydration for a Healthy Sourdough Starter
Feeding Schedules and Hydration Levels
The frequency of feeding your sourdough starter is closely linked to its hydration level and the temperature it's stored at. Higher hydration starters (100%+) ferment faster, meaning they need to be fed more frequently when kept at warm room temperature (22-26°C or 72-79°F), perhaps every 8-12 hours, to prevent them from becoming overly acidic and weak. A starter fed at a 1:1:1 ratio (starter:flour:water by weight) at 100% hydration will likely need feeding every 8 hours if kept warm.
Lower hydration starters (50-70%) ferment more slowly, allowing for less frequent feedings at room temperature, possibly every 12-24 hours, depending on the temperature. A stiff starter fed 1:1:0.5 might last 12-18 hours between feedings at the same temperature. Understanding how sourdough starter hydration levels influence fermentation speed helps you establish a feeding schedule that keeps your starter active and healthy without excessive waste or acidity buildup.
The Role of Temperature in Starter Hydration
Temperature significantly impacts microbial activity, and its effect is intertwined with hydration. Warmer temperatures (above 24°C or 75°F) accelerate fermentation at any hydration level. This means a starter that is perfectly active and peaks predictably at 22°C (72°F) might ferment too quickly and become overly acidic at 28°C (82°F) if the feeding schedule and hydration aren't adjusted.
Conversely, cooler temperatures (below 20°C or 68°F) slow down fermentation. A 100% hydration starter that peaks in 6-8 hours at 24°C might take 10-14 hours at 18°C (64°F). When storing a starter in the refrigerator (around 4°C or 40°F), activity is greatly reduced, allowing it to be stored for a week or more between feedings, regardless of hydration. However, bringing it back to room temperature and feeding it will be necessary to reactivate it. Managing sourdough starter hydration levels effectively means considering the ambient temperature.
Long-Term Starter Storage and Hydration Considerations
When storing your starter for longer periods, especially in the refrigerator, adjusting the hydration can be beneficial. Some bakers prefer to store a stiffer starter (around 50-70% hydration) in the fridge. The lower water activity and denser structure can make it slightly more resilient to mold and slow down enzymatic degradation over extended periods (though regular feeding is still necessary every 1-3 weeks).
Others successfully store 100% hydration starters in the fridge without issue. The key is consistency and ensuring the starter is healthy and active before putting it into cold storage. Regardless of the sourdough starter hydration levels you choose for storage, always feed it a few times at room temperature after taking it out of the fridge to ensure it regains full vigor before baking with it. You can transition back to your preferred baking hydration during these reactivation feedings.
Advanced Hydration Techniques for Sourdough Bakers
Experimenting with Different Flour-to-Water Ratios
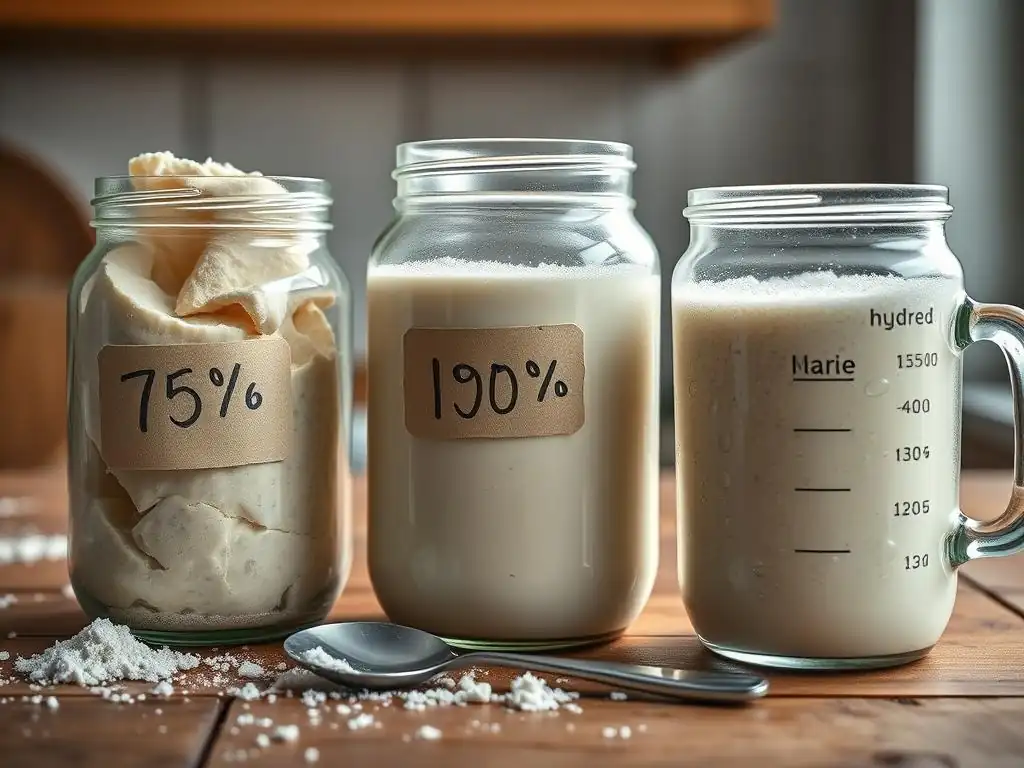
Once you're comfortable with standard sourdough starter hydration levels like 50% and 100%, you can begin experimenting with ratios outside these norms. For instance, some bakers use very high hydration starters (150-200%) for specific applications like poolish-style preferments or very wet doughs. These starters are essentially fermented water with a small amount of flour and starter mixed in. They ferment extremely rapidly.
Conversely, you might explore very low hydration starters (below 50%), sometimes called "pasta madre" or stiff sweet starters, which are traditionally used in enriched doughs like panettone or brioche. These starters are often kneaded into a firm ball and require different handling techniques. Documenting your results when experimenting with varying sourdough starter hydration levels is crucial to understanding their impact.
Using Pre-Ferments with Controlled Hydration
Experienced bakers often use preferments (like poolish, biga, or levain) which are essentially portions of the final dough mixed and fermented in advance. The hydration level of these preferments is often controlled to achieve specific fermentation characteristics. A poolish is typically 100% hydration, a biga is usually stiffer (50-70%), and a levain's hydration varies but is often 100% or matches the main starter's hydration.
Using a preferment allows you to contribute a specific level of acidity and enzymatic activity to your dough without relying solely on your main starter. For example, using a stiff biga (60% hydration) might contribute more acetic acid tang than using a liquid poolish (100% hydration), even if your main starter is 100%. This adds another layer of control over flavor and dough development. Mastering sourdough starter hydration levels in preferments is a step towards more complex baking.
Developing Unique Starter Flavors Through Hydration Manipulation
As mentioned earlier, the hydration level influences the balance of lactic and acetic acids produced by the bacteria in your starter, directly impacting flavor. By consistently maintaining a specific sourdough starter hydration level, you can encourage a particular flavor profile. A continuously stiff starter will likely develop a tangier, more vinegary aroma due to higher acetic acid production.
A continuously liquid starter will tend towards a milder, yogurt-like flavor from predominantly lactic acid. You can even manipulate hydration seasonally or based on what you're baking. For instance, some bakers make their starter stiffer in the summer when temperatures are high to slow down fermentation and prevent excessive acidity, or make it wetter in the winter to speed things up. Intentional manipulation of sourdough starter hydration levels is a powerful tool for flavor development.
Hydration and Sourdough Bread: Achieving the Perfect Loaf
How Starter Hydration Impacts Dough Consistency
The hydration level of your starter directly adds to the overall hydration of your final dough. If a recipe calls for a specific dough hydration (e.g., 75% hydration) and you use a starter that is significantly different from the recipe's assumed starter hydration (often 100% unless specified), you will end up with a dough that is either too wet or too dry.
For example, a standard recipe might assume you are using a 100% hydration starter. If the recipe uses 100g of 100% hydration starter (which contains 50g flour and 50g water) and calls for an additional 450g flour and 325g water, the total dough hydration is calculated as (50g water + 325g water) / (50g flour + 450g flour) = 375g water / 500g flour = 0.75, or 75%.
If you instead used 100g of a 50% hydration starter (containing 67g flour and 33g water) with the same additional flour and water, your total dough hydration would be (33g water + 325g water) / (67g flour + 450g flour) = 358g water / 517g flour ≈ 0.69, or 69%. This difference significantly impacts dough handling and the final crumb.
Adjusting Dough Hydration Based on Starter Hydration
To achieve the target dough hydration specified in a recipe when using a starter with a different hydration level, you need to adjust the amount of water and flour added to the dough. First, calculate the amount of flour and water contributed by your specific starter. For a given weight of starter (let's call it S) at a certain hydration percentage (H), the flour contributed is S / (1 + H/100) and the water contributed is S - (S / (1 + H/100)).
Then, calculate the total flour (Total F) and total water (Total W) needed for the desired dough hydration (Dough H). Total W = Total F * (Dough H / 100). Subtract the flour and water contributed by your starter from the Total F and Total W to find the amount of additional flour and water you need to add. This ensures you hit the target hydration regardless of your sourdough starter hydration levels.
Mastering Sourdough Bread Baking with Hydration Control
True mastery in sourdough baking comes with the ability to control variables like time, temperature, and hydration at both the starter and dough levels. Understanding how sourdough starter hydration levels affect its activity allows you to time your bakes perfectly. Knowing how your starter's hydration contributes to the overall dough hydration enables you to make precise adjustments to achieve the desired dough consistency, which in turn influences the bread's structure, crust, and crumb.
Practice using starters with different hydration levels in the same recipe (adjusting dough hydration accordingly) to see how the fermentation speed and flavor profile change. Pay attention to how the dough feels during mixing, bulk fermentation, and shaping. By consciously controlling starter hydration and adjusting dough hydration, you gain immense flexibility and can tailor your sourdough bread to your exact preferences, moving beyond simply following recipes to truly understanding the process.
Sourdough Starter Hydration: Frequently Asked Questions
Can I change my starter's hydration level?
Yes, absolutely! You can change your sourdough starter's hydration levels quite easily by adjusting the ratio of flour and water you use during feeding. If you want to make a liquid starter stiffer, simply feed it with relatively more flour than water. If you want to make a stiff starter more liquid, feed it with relatively more water than flour.
It might take a few consecutive feedings using the new ratio for the starter's overall hydration to fully transition, especially if you are making a significant change (e.g., from 50% to 150%). Monitor the consistency and activity after each feeding to ensure you are moving towards your desired hydration. It's a flexible aspect of starter maintenance.
How often should I adjust my starter's hydration?
You don't need to adjust your starter's hydration levels frequently unless you have a specific reason to do so, such as wanting to experiment with different bread types that benefit from a different starter hydration, or if you are changing storage methods (like moving from fridge to room temperature). Once you've established a healthy, active starter at your preferred hydration (often 100%), you can maintain that level consistently with each feeding.
Regularly adjusting hydration without a clear purpose can make it harder to predict your starter's behavior. Consistency in feeding ratio (flour:water) is key to maintaining a stable sourdough starter hydration level and predictable activity. Only change it when you have a specific baking goal or storage need in mind.
Does the type of flour affect hydration requirements?
Yes, the type of flour used significantly affects how much water it absorbs and can therefore subtly influence the effective hydration and the feel of your sourdough starter hydration levels. Different flours have varying protein and starch content, which impacts their water absorption capacity. For example, whole wheat flour and rye flour typically absorb more water than white bread flour due to the presence of bran and germ.
This means that a starter made with 100% whole wheat flour might feel stiffer than a starter made with 100% white flour, even though both are technically at 100% hydration by weight. Similarly, a starter made with a significant proportion of rye flour will be very sticky and absorb a lot of water. When working with different flours, you might need to slightly adjust the water amount to achieve the desired consistency, even while aiming for a target hydration percentage. Understanding how flour type interacts with sourdough starter hydration levels is crucial for consistency.
Frequently Asked Questions
What exactly does hydration level mean in the context of a sourdough starter?
Hydration level refers to the ratio of water to flour in your sourdough starter. A 100% hydration starter, for example, has equal parts water and flour by weight. This affects the starter's consistency and activity.
Why is understanding sourdough starter hydration levels important?
Understanding hydration is crucial because it directly impacts the activity and strength of your starter. Different hydration levels favor different microbial populations, affecting flavor and rise time.
How does hydration level affect the consistency of my starter?
Higher hydration levels result in a more liquid or pourable starter, while lower hydration levels create a stiffer, dough-like starter. The consistency influences how easily the starter incorporates into dough.
What is the most common hydration level for a sourdough starter, and why?
The most common hydration level is 100% hydration, often referred to as a 1:1 ratio. This is popular because it's easy to measure and provides a good balance for yeast and bacteria activity.
Can I change the hydration level of my existing sourdough starter?
Yes, you can! By adjusting the ratio of water and flour during feedings, you can gradually shift the hydration level. Make small adjustments to avoid shocking the microbial balance within the starter.
Final Reflection: The Living Water of Your Sourdough Journey
Understanding sourdough starter hydration is not merely a technical detail; it's the key to unlocking the vibrant life within your floury friend. A seemingly small adjustment in the water-to-flour ratio can dramatically impact the starter's health, activity, and ultimately, the quality of your bread. Mastering hydration is the foundation upon which all successful sourdough baking rests.
The journey of nurturing a sourdough starter is a deeply rewarding experience, mirroring the cyclical nature of life itself. It's a testament to the power of simple ingredients, transformed through patience and attention. The best things in life are unseen, they are felt with the heart.
This quote, while not directly about sourdough, perfectly encapsulates the intangible yet profound connection one develops with their starter through careful observation of its hydration and subsequent behavior. The subtle shifts in texture, the lively bubbles, the satisfying rise – these are the rewards of understanding and respecting the delicate balance of hydration.
Now, consider your own starter. Reflect on its journey, its triumphs and setbacks. What have you learned about the importance of precise hydration? Don't just bake bread; cultivate a relationship with your starter. Experiment with different hydration levels, observe the results, and refine your technique. The knowledge gained will not only improve your baking but also deepen your appreciation for the intricate processes of fermentation and the magic that unfolds within a simple bowl. Embrace the journey, and the delicious rewards will follow.
Unleash Your Baking Potential: Hydrate Your Way to Success!
Thanks for diving into the world of perfect starters with us! You've now unlocked the key to consistently amazing bread – mastering hydration. Ready to put this knowledge into action?
- Experiment with different hydration levels: Try a recipe you already love, but adjust the water by 5% and see what happens. Note the texture differences! This is the best way to find your perfect hydration sweet spot.
- Share your baking triumphs (and challenges!) with our community on social media using #BakeWithEaseHydration. We'd love to see your results!
- Consider exploring advanced hydration techniques like autolyse – it's easier than you think and can elevate your baking game significantly.
What surprising texture changes did you discover by altering your hydration levels? Share your experiences in the comments below!