
Avoid These 5 Common Croissant Baking Mistakes


Welcome to BakeWithEase, your guide to effortless baking! Ever dreamt of perfectly flaky, golden-brown croissants? This article dives into Croissant Baking Common Mistakes, revealing the 5 key pitfalls that often stand between you and pastry perfection. Discover these secrets now and elevate your baking game from good to unforgettable!
- Avoid These 5 Common Croissant Baking Mistakes: Bake Like a Pro
- Introduction: Mastering Croissant Baking at Home
- Mistake #1: Ignoring Dough Temperature Control
- Mistake #2: Inconsistent Lamination: The Key to Flaky Croissants
- Mistake #3: Insufficient Proofing: Preventing Dense Croissants
- Mistake #4: Baking at the Wrong Temperature: Ruining Your Croissant Texture
- Mistake #5: Using Low-Quality Ingredients: Compromising Flavor and Texture
- Troubleshooting Common Croissant Baking Problems
- Conclusion: Elevate Your Croissant Baking Skills
-
Frequently Asked Questions
- What's the most crucial step in croissant baking to avoid failure?
- Why are my croissants turning out flat and dense instead of light and airy?
- How can I prevent the butter from leaking out during the croissant baking process?
- What's the best type of flour to use for baking croissants and why?
- What are some common mistakes to avoid during the shaping of croissants?
- Final Reflection: Mastering the Flaky Perfection of Croissants
- Unlock Your Inner Croissant Master!
Avoid These 5 Common Croissant Baking Mistakes: Bake Like a Pro
Introduction: Mastering Croissant Baking at Home
Why Croissant Baking is a Rewarding Challenge
Baking croissants at home is often considered a true test of a baker's skill, but it's also an incredibly rewarding journey. The process involves precise steps, from developing the dough to achieving that signature flaky texture through lamination. Successfully creating a batch of golden, airy croissants from scratch brings a unique sense of accomplishment, far exceeding the joy of a simple cookie or cake. It's a chance to engage deeply with the science and art of baking, understanding how ingredients and technique work together.
Beyond the technical challenge, the reward is in the sensory experience. The aroma of freshly baked croissants filling your home is unparalleled. Biting into a perfectly crafted croissant, hearing the delicate shatter of the crust before reaching the soft, buttery interior, is a moment of pure bliss. Mastering croissant baking common mistakes allows you to consistently achieve this delightful result, transforming your kitchen into a personal patisserie. It’s an investment in time and effort that pays off with delicious, impressive pastries.
The Importance of Avoiding Common Croissant Baking Errors
Successfully baking croissants hinges on meticulous attention to detail, and overlooking key steps can lead to disappointing results, such as dense, tough, or unevenly baked pastries. Many aspiring home bakers encounter similar hurdles, from issues with dough temperature to problems during proofing or baking. Identifying and understanding these common croissant baking mistakes is the first step towards overcoming them and improving your technique.
Addressing these typical pitfalls head-on saves time, ingredients, and frustration. For instance, improper lamination, a frequent issue, directly impacts the flakiness, the hallmark of a great croissant. By learning how to avoid common croissant baking mistakes like this, you ensure that your efforts yield the light, airy layers you're aiming for. This guide focuses on the most prevalent errors to help you navigate the complexities of croissant making and achieve professional-quality results in your own kitchen.
Mistake #1: Ignoring Dough Temperature Control
The Critical Role of Cold Dough in Lamination
Maintaining a consistently cold dough is paramount throughout the croissant-making process, especially during lamination. The cold temperature ensures that the butter remains firm and separate from the dough layers. As the dough is rolled and folded, the cold butter flattens into thin sheets between the dough layers. If the dough or butter is too warm, the butter will melt and integrate into the dough rather than creating distinct layers.
This separation of dough and butter is what creates the hundreds of flaky layers characteristic of a perfect croissant. During baking, the water in the butter turns to steam, puffing up each individual layer of dough. Without the cold butter creating these defined layers, this steaming action is diminished, resulting in a dense, bread-like texture instead of the desired light, airy, and flaky structure. Avoiding this common croissant baking mistake related to temperature is non-negotiable for success.
How to Properly Chill Your Dough for Optimal Results
Proper chilling begins immediately after mixing the dough. The dough should be formed into a rough rectangle, wrapped tightly in plastic wrap, and refrigerated for a significant period, typically at least 4 hours, but preferably overnight. This initial chill allows the gluten to relax and the flavors to develop, while also bringing the dough to a workable temperature for incorporating the butter block.
After enclosing the butter block and performing each fold (turn), the dough must be thoroughly chilled again. Each chilling period should be long enough for the dough and butter to firm up but not so long that the dough becomes too stiff to roll without cracking. A common recommendation is 30-60 minutes in the refrigerator between turns, or even 15-20 minutes in the freezer if you're short on time, though careful monitoring is essential to prevent freezing. Adequate chilling between turns is a key step in preventing common croissant baking mistakes related to butter leakage.
Techniques for Maintaining the Right Dough Temperature
Working quickly and efficiently is one of the best techniques for maintaining the correct dough temperature. Have all your tools ready – a clean, cool surface, a rolling pin, and flour for dusting. Minimize the time the dough spends at room temperature during rolling and folding. If your kitchen is warm, consider using chilled flour or even placing a tray of ice water near your work surface (without letting it touch the dough) to help keep the area cool.
Another effective technique is to work with smaller batches if you are making a large quantity of dough. Keep the portions you are not actively working on refrigerated. Use a dough scraper or bench knife to handle the dough as much as possible, reducing contact with warm hands. If you notice the dough or butter becoming too soft or sticky during rolling, stop immediately, wrap the dough, and return it to the refrigerator for a quick chill before resuming. Mastering these temperature control techniques is vital to avoiding common croissant baking mistakes.
Mistake #2: Inconsistent Lamination: The Key to Flaky Croissants
Understanding the Lamination Process
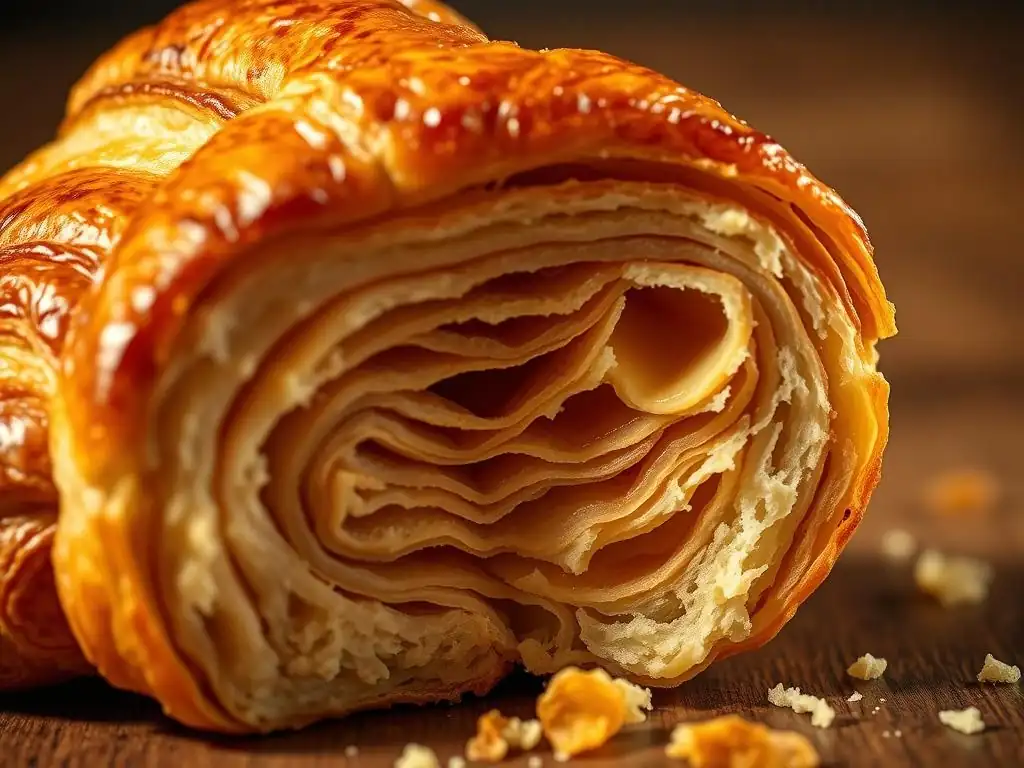
Lamination is the heart of croissant making, the process where layers of dough and butter are created through repeated folding and rolling. It's this technique that gives croissants their signature flaky texture. Typically, this involves enclosing a block of cold butter within the dough and then performing a series of "turns," usually three or four, each consisting of folding the dough into thirds (a single turn) or quarters (a double turn) and rolling it out again.
Each turn multiplies the layers. For example, starting with 3 layers (dough, butter, dough) and performing three single turns (folding into thirds) results in 3 * 3 * 3 * 3 = 81 theoretical layers of dough and butter. Performing a mix of single and double turns can yield hundreds or even thousands of layers, though some merging of layers is expected. The goal is to create uniform, distinct layers that will separate and puff during baking.
Achieving Uniform Layers: Avoiding Tears and Butter Leakage
Achieving uniform layers requires careful and even rolling. Apply steady, consistent pressure with your rolling pin, working from the center outwards in all directions to maintain an even thickness. Avoid pressing down too hard in one spot, which can squeeze the butter out or create weak points in the dough. The dough should be rolled to a consistent thickness, typically around 4-6 mm before cutting.
Tears in the dough are a significant problem as they allow butter to leak out during lamination and baking, disrupting the layer structure. If a small tear occurs, you can sometimes patch it by gently pressing the edges together or using a tiny piece of scrap dough, but major tears are difficult to fix. Butter leakage during lamination usually indicates the butter was too warm or the dough was handled too roughly or not chilled enough between turns. Ensuring proper chilling and gentle handling are key to preventing this common croissant baking mistake.
Best Practices for Perfect Lamination
Start with a butter block that is pliable but still cold and firm, roughly the same consistency as the dough after its initial chill. This allows the butter to flatten evenly with the dough without breaking or melting. Ensure your workspace and tools are cool. Lightly flour your surface and the dough, but avoid using excessive flour, which can be incorporated into the dough and make it tough.
Mark your turns – use your finger to make small indentations on the dough after each fold (one dimple for the first turn, two for the second, etc.) or keep a written log. This prevents confusion and ensures you complete the correct number of turns. Always rest and chill the dough between turns as recommended (typically 30-60 minutes in the fridge) to relax the gluten and re-firm the butter. Patience during the lamination process is crucial to avoiding common croissant baking mistakes.
Mistake #3: Insufficient Proofing: Preventing Dense Croissants
Identifying Under-Proofed vs. Over-Proofed Dough
Proofing is the final rise of the shaped croissants before baking, where the yeast produces carbon dioxide gas, causing the dough to expand and develop its airy structure. Under-proofing occurs when the dough hasn't risen enough. This results in dense, heavy croissants that don't puff up properly in the oven and may have a tight crumb. They often retain a distinct raw dough smell after baking.
Over-proofing, conversely, happens when the dough rises too much or for too long, especially in a warm environment. The gluten structure weakens, and the dough may collapse or spread excessively. When baked, over-proofed croissants often lack structure, may have large, irregular holes, and can taste overly yeasty or even alcoholic due to excessive fermentation. They may also brown too quickly. Recognizing the signs of proper proofing is essential to avoiding this common croissant baking mistake.
The Ideal Proofing Environment for Light and Airy Croissants
The ideal proofing environment for croissants is warm and humid. A temperature between 75°F and 80°F (approximately 24°C-27°C) is generally recommended. This temperature range encourages yeast activity without melting the butter layers, which is critical for maintaining flakiness. Humidity prevents the surface of the dough from drying out and forming a skin, which would restrict expansion.
A simple way to create a warm, humid environment is to place the shaped croissants on a baking sheet inside your oven (turned off!) with a pan of hot water on the rack below. Close the oven door to trap the warmth and steam. Avoid temperatures much higher than 80°F, as this can cause the butter to melt out before baking, leading to greasy, flat croissants. Proofing time varies depending on the temperature, but it typically takes 1.5 to 2.5 hours at 75-80°F.
Tips for Achieving the Perfect Proof
Observation is key to achieving the perfect proof. Don't rely solely on time; look at the dough. Properly proofed croissants should look significantly larger, roughly doubled in size, and appear puffy and jiggly. A common test is the "poke test": gently press the side of a croissant with your finger. If the indentation slowly springs back halfway, it's likely ready. If it springs back completely, it needs more time (under-proofed). If it stays indented or collapses, it's over-proofed.
Ensure the shaped croissants are placed on baking sheets lined with parchment paper with enough space between them, as they will expand considerably. Covering them loosely with plastic wrap or a light cloth can help maintain humidity, but be careful not to press down on the delicate dough. Adjust proofing time based on the ambient temperature of your kitchen. Patience and careful observation are crucial steps in preventing this common croissant baking mistake.
Mistake #4: Baking at the Wrong Temperature: Ruining Your Croissant Texture
Understanding the Importance of Oven Temperature and Time
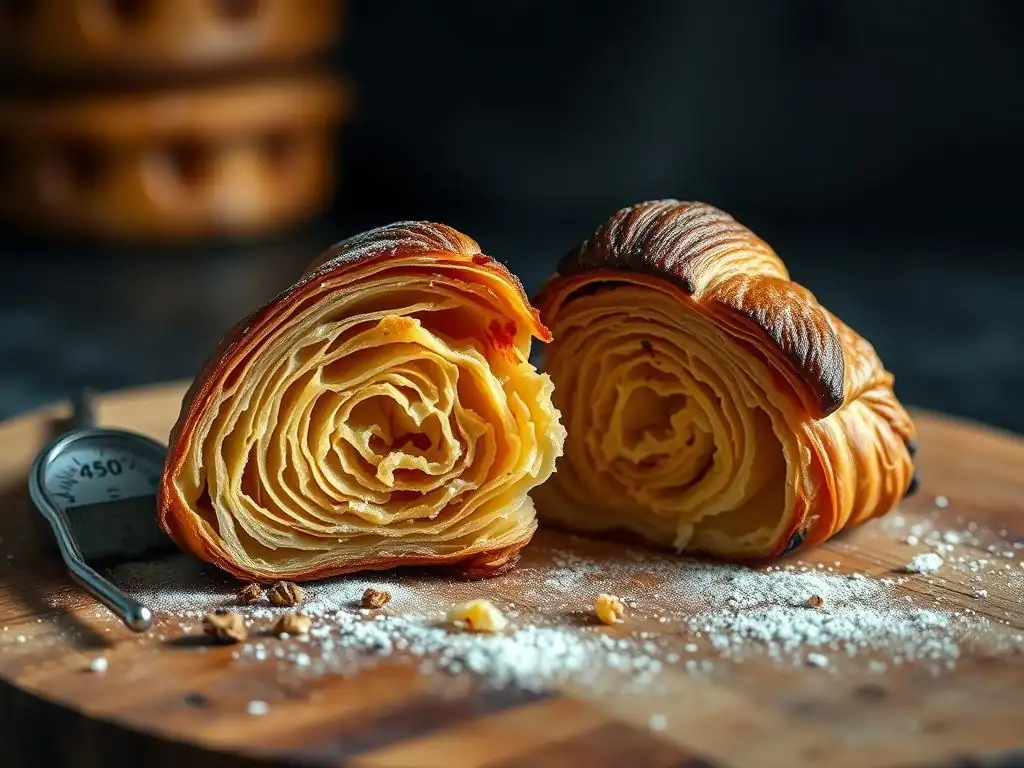
Baking is the final transformation where all your hard work comes together. The oven temperature and baking time are critical for achieving the perfect rise, color, and texture. Croissants typically require a high initial temperature to trigger a rapid rise (oven spring) and set the layers, followed by a slightly lower temperature to ensure they cook through without burning the exterior.
Baking at too low a temperature will result in the butter melting out before the structure is set, leading to flat, greasy croissants. The dough may not rise properly, and the crust will be pale and potentially tough. Baking at too high a temperature can cause the outside to brown too quickly, potentially burning, while the inside remains undercooked and doughy. It's a delicate balance that directly impacts the final texture and appearance. Using an oven thermometer is essential to verify your oven's actual temperature, as they can often be off by 25-50°F (around 15-25°C).
Achieving a Golden-Brown Crust Without Burning the Inside
To achieve that coveted golden-brown crust while ensuring the inside is fully cooked and airy, a two-stage baking process is often recommended. Starting at a higher temperature, such as 400-425°F (around 200-220°C), for the first 10-15 minutes helps create significant oven spring and sets the outer layers. This initial heat encourages the rapid expansion of steam from the butter, creating flakiness.
After this initial period, the temperature is typically reduced to 375-400°F (around 190-200°C) for the remaining 10-20 minutes of baking. This lower temperature allows the heat to penetrate to the center of the croissants, cooking the interior thoroughly and developing the final golden color on the crust without burning it. If you notice some croissants browning faster than others, you can rotate the baking sheet halfway through the baking time. This careful temperature management is key to avoiding this common croissant baking mistake.
Recommended Baking Temperatures
While specific temperatures can vary slightly based on the recipe and your oven, a common and effective approach is:
- Initial Bake: 400-425°F (200-220°C) for 10-15 minutes.
- Reduced Bake: 375-400°F (190-200°C) for 10-20 minutes, or until deeply golden brown and the layers are clearly separated.
The total baking time for a standard-sized croissant is usually between 20 and 35 minutes. Smaller mini-croissants will bake faster, potentially in 15-25 minutes. Look for visual cues: they should be a rich, uniform golden-brown, feel light for their size, and sound hollow when tapped on the bottom. Overcoming common croissant baking mistakes related to oven temperature requires vigilant monitoring and possibly adjusting time based on your specific oven.
Mistake #5: Using Low-Quality Ingredients: Compromising Flavor and Texture
The Impact of Flour Quality on Structure
The type and quality of flour you use have a significant impact on the final structure and texture of your croissants. For croissants, a bread flour or a strong all-purpose flour with a protein content typically ranging from 11% to 13% is recommended. This higher protein content develops sufficient gluten when kneaded, providing the necessary structure and elasticity to withstand the rigorous rolling and folding of lamination without tearing.
Using a low-protein flour, like cake flour (around 7-9% protein), will result in a dough that is too weak and tears easily during lamination, preventing the formation of distinct layers. Conversely, using an overly strong flour might make the dough too tough and difficult to roll thinly. The quality of the milling and the freshness of the flour also matter; fresh flour performs better. Choosing the right flour is a fundamental step in preventing many common croissant baking mistakes.
Choosing the Right Butter for Optimal Flakiness and Flavor
Butter is arguably the most critical ingredient for classic croissants, contributing both flavor and the characteristic flaky layers. European-style butters, which typically have a higher butterfat content (around 82-84%) and lower water content compared to American-style butters (around 80% fat), are often preferred. The lower water content means less steam during baking, allowing the butter layers to melt more slowly and create better separation between the dough layers.
Crucially, the butter must be unsalted. Salt content can vary between brands, making it difficult to control the overall salinity of your dough. Beyond the fat content, the consistency of the butter is vital. It needs to be pliable enough to roll without breaking but firm enough not to melt into the dough during lamination. Some bakers even use specialized "dry" butter specifically designed for lamination due to its higher melting point and lower water content. Skimping on butter quality is a common croissant baking mistake that severely impacts the final result.
The Importance of Fresh Yeast
Yeast is the leavening agent that makes your croissants light and airy during proofing and gives them their final lift in the oven. Using fresh, active yeast is paramount. Expired or inactive yeast will result in little to no rise, leaving you with flat, dense pastries regardless of how perfectly you performed the lamination. Dry active yeast and instant yeast are common choices for home bakers, but ensure they are within their expiration date and stored properly (cool, dry place, or refrigerator/freezer once opened).
If you're unsure about the freshness of your dry yeast, you can "proof" it before adding it to the dough. Dissolve the yeast in a small amount of warm liquid (around 105-115°F or 40-46°C) with a pinch of sugar. If it becomes foamy and bubbly within 5-10 minutes, it's active and ready to use. If not, discard it and use a fresh batch. Using reliable, fresh yeast is a simple step to avoid a significant common croissant baking mistake.
Troubleshooting Common Croissant Baking Problems
Addressing Dough Tears and Butter Leakage
Dough tears and butter leakage are common frustrations during lamination. If you encounter small tears, try to gently pinch them closed or use a small piece of scrap dough to patch them before continuing to roll. For larger tears, it's often best to stop, wrap the dough, and give it a longer chill in the refrigerator (30-60 minutes) to firm everything up before attempting to roll again, being extra gentle.
Butter leakage during rolling usually indicates the butter or dough is too warm. Immediately stop, wrap the dough, and place it back in the refrigerator or freezer until it is sufficiently firm again. Ensure your rolling pin and work surface are cool. If butter is leaking significantly after shaping and during proofing, your proofing environment might be too warm, or the dough was not properly chilled between turns. This is a prime example of a common croissant baking mistake stemming from temperature control issues.
Fixing Uneven Baking and Dark Spots
Uneven baking, where some croissants are darker or more risen than others on the same sheet, can be caused by hot spots in your oven. Using an oven thermometer to understand your oven's true temperature and where it varies is helpful. Rotating your baking sheet halfway through the baking time (e.g., 15 minutes into a 30-minute bake) is a simple and effective way to promote even browning and baking.
Dark spots or burning on the crust while the inside isn't fully cooked often means the oven temperature is too high or the croissants are too close to a heating element. Ensure you are using the recommended two-stage baking temperature (higher initially, then lower). If the tops are browning too quickly, you can loosely tent the baking sheet with aluminum foil for the latter part of the baking time. Adjusting rack position can also help if one area of the oven is consistently hotter. Troubleshooting common croissant baking mistakes like this requires knowing your oven.
Salvaging Over-Proofed or Under-Proofed Dough
If you suspect your dough is under-proofed, the best solution is simply to give it more time in the warm, humid environment, monitoring closely with the poke test until it reaches the correct stage. Baking under-proofed dough is guaranteed to result in dense croissants.
Salvaging over-proofed dough is more challenging. If the dough hasn't completely collapsed but is just slightly over, handle it very gently and bake immediately, being prepared for less oven spring and potentially a weaker structure. If the dough has significantly collapsed or is very fragile and gassy, it may be beyond saving for classic flaky croissants.
In such cases, some bakers punch it down gently, reshape, and bake it as a less-layered pastry or even bread, but the signature croissant texture will be lost. Learning to avoid common croissant baking mistakes during proofing is vital because fixing over-proofed dough is difficult.
Conclusion: Elevate Your Croissant Baking Skills
Recap of the 5 Common Croissant Baking Mistakes to Avoid
Mastering croissant baking at home is a process of learning and refinement, largely centered around avoiding common pitfalls. We've highlighted five of the most frequent croissant baking common mistakes: ignoring dough temperature control, resulting in melted butter and poor lamination; inconsistent lamination technique, preventing the development of flaky layers; insufficient proofing, leading to dense or collapsed croissants; baking at the wrong temperature, which ruins texture and appearance; and using low-quality ingredients, compromising both flavor and structure. Each of these errors, if not addressed, can derail your efforts to create perfect pastries.
By focusing on these key areas – maintaining cold temperatures, practicing precise lamination folds, proofing correctly in a warm, humid environment, calibrating your oven temperature, and selecting high-quality butter and flour – you significantly increase your chances of success. Overcoming these common croissant baking mistakes transforms the challenging process into a rewarding one, allowing you to bake croissants that are beautifully golden, wonderfully flaky, and utterly delicious.
Resources for Further Learning
Improving your croissant baking skills is an ongoing journey. While avoiding these common croissant baking mistakes is a critical step, delving deeper into the nuances of dough development, yeast activity, and the science behind lamination can further elevate your craft.
Consider exploring detailed guides on gluten development, the properties of different types of butter, and the impact of humidity on baking. Many reputable baking resources offer in-depth explanations and visual tutorials on techniques like shaping and folding. Practice is also key; each batch provides valuable lessons. Don't be discouraged by imperfections; view them as opportunities to learn and refine your process. With dedication and attention to detail, you can achieve remarkable results and confidently bake like a pro.
Frequently Asked Questions
What's the most crucial step in croissant baking to avoid failure?
The most crucial step is maintaining the correct dough temperature during lamination. If the butter melts, you'll lose the distinct layers that give croissants their flaky texture.
Why are my croissants turning out flat and dense instead of light and airy?
This is often caused by insufficient proofing. Ensure your croissants have doubled in size and appear jiggly before baking to achieve that signature airy crumb.
How can I prevent the butter from leaking out during the croissant baking process?
Prevent butter leakage by ensuring your butter is cold and firm throughout lamination. Also, avoid overworking the dough, which can soften the butter.
What's the best type of flour to use for baking croissants and why?
Use a strong bread flour with a high protein content. This develops gluten, providing the necessary structure and elasticity for the dough to rise properly.
What are some common mistakes to avoid during the shaping of croissants?
Avoid stretching the dough too thin when shaping, as this can lead to uneven layers and a tough texture. Also, make sure to seal the edges tightly to prevent the filling from leaking out during baking.
Final Reflection: Mastering the Flaky Perfection of Croissants
The pursuit of the perfect croissant, a symbol of buttery, flaky pastry perfection, continues to captivate home bakers worldwide. Yet, the seemingly simple process often yields disappointing results. This article highlighted five common pitfalls – from improper dough handling to insufficient proofing – that stand between aspiring bakers and achieving that coveted, layered masterpiece. Understanding these mistakes is not merely about technical skill; it's about unlocking the potential for culinary artistry in your own kitchen.
The journey of croissant baking, for me, has been a testament to patience, precision, and the rewarding nature of mastering a challenging technique. It's a process that mirrors life itself: requiring careful attention to detail, a willingness to learn from failures, and the satisfaction of seeing your efforts culminate in something truly beautiful. The best things in life are worth the wait,
a sentiment that rings particularly true when that first golden-brown, perfectly layered croissant emerges from the oven.
Now, I invite you to reflect on your own baking experiences. Have you encountered these common croissant mistakes? What lessons have you learned from your triumphs and failures? More importantly, I encourage you to embrace the challenge, to experiment with the techniques discussed, and to find joy in the process of creating something delicious and exquisite. The perfect croissant awaits – all it takes is a little patience, practice, and a dash of unwavering determination.
Unlock Your Inner Croissant Master!
Thanks for taking the time to learn about avoiding those pesky croissant baking pitfalls! We hope you gained valuable insights to elevate your baking game. Now it's time to put that knowledge into action.
- Bake your perfect croissants: Don't just read about it – actually try baking a batch using the tips we shared! Note down your results and what worked best for you.
- Share your croissant creations: Show off your improved baking skills! Post a picture of your delicious croissants on social media and tag us – we'd love to see them.
- Challenge a friend to a croissant bake-off: Turn this newfound knowledge into a fun competition! See who can create the flakiest, most delicious croissants.
Ready to transform your baking skills? What’s your biggest croissant challenge and how will you conquer it?