
The Art of Degassing Baguette Dough: When and How

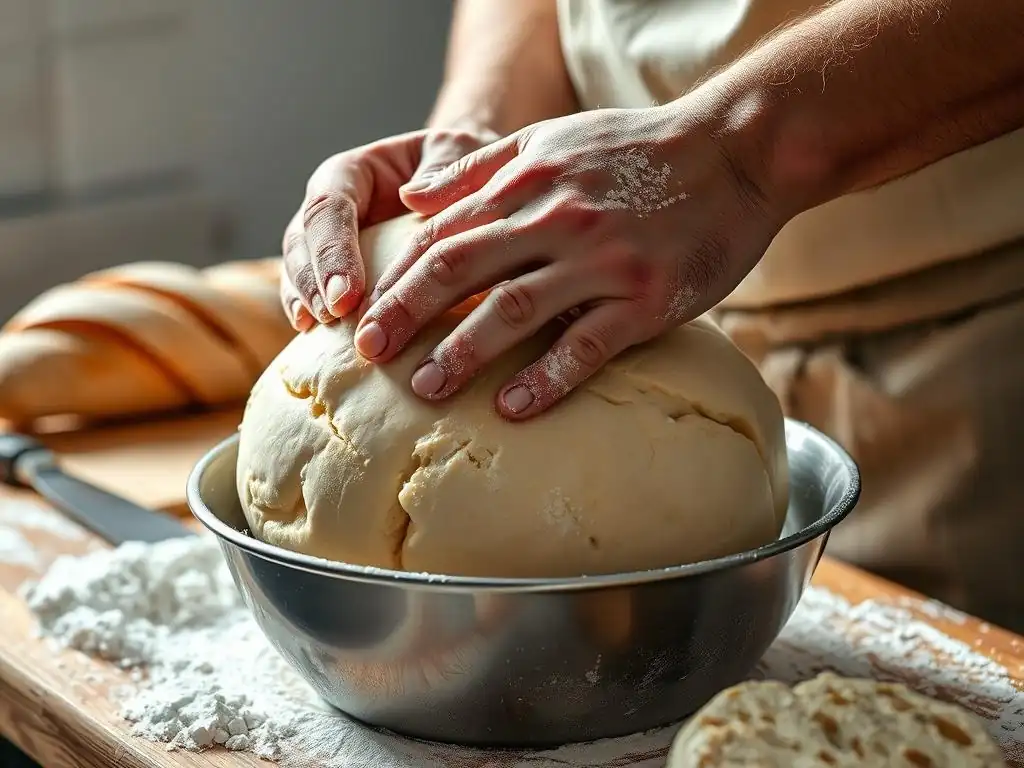
Welcome to BakeWithEase, your partner in creating delicious baked goods! Ever wondered if you're handling your baguette dough just right? This article dives into the essential, yet often overlooked, practice of baguette dough degassing techniques. Discover the secrets to achieving that perfect crumb and crust – and learn exactly when and how to release those trapped gases for a truly exceptional loaf. Let's unlock the full potential of your bread baking!
- Introduction to Baguette Dough Degassing
- What is Degassing and Why Degas Baguette Dough?
- When to Degas Baguette Dough: Identifying the Right Time
- How to Degas Baguette Dough: Step-by-Step Techniques
- Degassing Baguette Dough: A Detailed Guide
- The Impact of Over-Degassing and Under-Degassing Baguette Dough
- Troubleshooting Common Degassing Issues
- Advanced Baguette Dough Degassing Techniques
- Conclusion: Mastering Baguette Dough Degassing for Baking Success
- Frequently Asked Questions
- Final Reflection: The Whispered Secrets of a Perfect Baguette
- Unleash Your Inner Boulanger: Perfect Baguette, Every Time!
Introduction to Baguette Dough Degassing
Understanding the Importance of Degassing in Baguette Baking
Degassing is a fundamental step in baguette dough degassing techniques that significantly impacts the final texture, crumb structure, and overall success of your loaves. It's not just about punching down the dough; it's a deliberate process designed to manage the gases produced by yeast during fermentation. Proper degassing helps redistribute the yeast and nutrients, equalize dough temperature, and develop gluten structure further. Without effective degassing, you might end up with an uneven crumb, large, irregular holes, or a dense, heavy texture, rather than the characteristic open, airy structure with varied hole sizes desired in a classic baguette.
Think of it as refining the internal architecture of your bread. While initial fermentation creates gas pockets, degassing controls their size and distribution. This process is particularly critical for baguettes, where the desired outcome is a relatively open crumb with elongated, irregular holes (alveoli), encased in a thin, crispy crust. Neglecting this step, or performing it incorrectly, can lead to a loaf that doesn't achieve its full potential in volume or texture, missing the hallmark qualities of a perfect baguette. Mastering baguette dough degassing techniques is therefore essential for achieving that sought-after result.
Mastering the Degassing Process for Perfect Baguettes
Mastering the art of degassing involves understanding when and how to apply the right amount of pressure to your dough. It's a balance between removing excess large gas bubbles and retaining enough gas to ensure a good rise during baking. The timing and method of degassing depend on the stage of fermentation and the specific recipe or desired outcome. For example, a gentle fold during bulk fermentation serves a different purpose than a more assertive shaping technique later on.
Achieving perfect baguettes requires attention to detail at every stage, and degassing is no exception. By practicing different baguette dough degassing techniques, such as gentle folds, stretching and folding, or more traditional punching down, you learn to read your dough and respond to its needs. This skill allows you to influence the final crumb structure, moving from a very open, irregular crumb to a slightly tighter, more uniform one, depending on your preference. Consistent results come from understanding the impact of each action on the delicate balance of gas, gluten, and moisture within the dough.
What is Degassing and Why Degas Baguette Dough?
Defining Degassing: Removing Gases from Dough
Degassing, in the context of bread baking, refers to the process of intentionally removing or reducing the amount of gas trapped within the dough. This gas is primarily carbon dioxide (CO2), a byproduct of yeast activity during fermentation. As yeast consumes sugars in the dough, it produces CO2 and alcohol. The CO2 gets trapped within the elastic gluten network of the dough, causing it to rise and expand. Degassing involves manipulating the dough, typically through folding, pressing, or punching, to expel some of this trapped gas.
The degree of degassing can vary from very gentle handling that preserves many small bubbles while eliminating larger ones, to more vigorous techniques that remove a significant portion of the gas. The method chosen depends on the type of bread being made and the desired crumb structure. For baguettes, specific baguette dough degassing techniques are employed to achieve their characteristic open, irregular crumb, distinct from the fine, even crumb sought in sandwich bread. It's a controlled process, not simply destroying all the gas structure.
The Role of Yeast and Fermentation in Gas Production
Yeast, a living microorganism, is the primary engine of fermentation in bread dough. When combined with water, flour (which contains sugars or enzymes that break down starch into sugars), and warmth, yeast becomes active. It consumes simple sugars and releases carbon dioxide gas and ethanol (alcohol) as metabolic byproducts. This process, known as alcoholic fermentation, is what causes the dough to rise. The gluten network, formed by the proteins in flour when hydrated and worked, acts like a balloon, trapping the CO2 gas and allowing the dough to expand significantly.
During the initial bulk fermentation, yeast multiplies and vigorously produces gas, leading to a substantial increase in dough volume – often doubling or tripling depending on conditions. The rate of gas production is influenced by factors like temperature (warmer temperatures increase activity), sugar availability, and yeast concentration. While this gas production is essential for leavening, managing its distribution and volume through baguette dough degassing techniques is crucial for developing the desired internal structure and preventing the dough from becoming over-proofed too early.
Why Degassing Baguette Dough is Crucial for Optimal Texture
Degassing baguette dough is crucial for several reasons, all contributing to the optimal texture. Firstly, it helps to break up large, irregular gas bubbles that form during bulk fermentation, promoting a more even distribution of yeast and nutrients throughout the dough. This leads to a more consistent fermentation in the final proofing stage.
Secondly, the act of degassing, particularly through folding and stretching, helps to strengthen the gluten network. This increased gluten strength is necessary to support the dough's structure, allowing it to hold its shape during proofing and baking and trap gases effectively to create that open, airy crumb.
Furthermore, degassing allows you to reshape the dough, preparing it for the final proof and baking. It releases tension that builds up during fermentation, making the dough more pliable and easier to handle for shaping into the long, slender form of a baguette. Without proper degassing and reshaping, the dough might be too fragile or tight, resulting in a poor shape, uneven oven spring, and a less desirable crumb structure. Implementing effective baguette dough degassing techniques is therefore a non-negotiable step for achieving the signature characteristics of a great baguette.
When to Degas Baguette Dough: Identifying the Right Time

Recognizing Signs of Over-Fermentation in Baguette Dough
Recognizing signs of over-fermentation is key to knowing if your dough might need intervention, including specific baguette dough degassing techniques. Over-fermented dough typically shows excessive volume increase, sometimes more than double or triple its original size, depending on the stage. The surface may appear very bubbly, even slightly collapsed or flattened, as the gluten structure weakens under the pressure of too much gas. The dough often smells strongly acidic or alcoholic, a pungent aroma indicating that the yeast has consumed most available sugars and started producing more byproducts.
Another sign is the "poke test." If you gently poke the dough with a wet finger and the indentation remains completely, without springing back at all, it's likely over-fermented. Properly fermented dough will spring back slowly, leaving a small indentation. Handling over-fermented dough can be difficult; it often feels fragile, sticky, and tears easily because the gluten has been stretched too thin by the excessive gas. While some degassing can help recover slightly over-fermented dough, it's often best to prevent it by monitoring fermentation closely, especially temperature.
Degassing During Bulk Fermentation: Promoting Evenness
Degassing, often in the form of gentle folds, during bulk fermentation serves several important purposes, contributing to effective baguette dough degassing techniques. The primary goal at this stage is not to completely remove all gas, but rather to redistribute it, equalize the dough's temperature (especially important in larger batches), and strengthen the gluten network through handling. Performing 2-4 folds at intervals (e.g., every 30-60 minutes) during a bulk fermentation of 2-4 hours at room temperature (around 70-75°F) helps develop structure and encourages a more even fermentation throughout the dough mass.
These folds gently deflate some of the larger bubbles while creating tension and strength in the dough. This results in a more uniform distribution of yeast and nutrients, preventing localized areas of rapid fermentation or cold spots. It also helps build the gluten structure needed to support the desired open crumb later. The specific number and frequency of folds depend on the dough's hydration level and the desired crumb; higher hydration doughs often benefit from more frequent folds early in the process. This intermediate degassing is a crucial step in building the foundation for a well-structured baguette.
Degassing After Proofing: Fine-Tuning Dough Structure
Degassing after the final proofing stage is generally not recommended for baguettes, as it would collapse the delicate gas structure built during this crucial final rise. The primary degassing and shaping occur before the final proof. However, a very gentle handling or minimal "degassing" might occur incidentally during the transfer of the shaped baguette from the proofing surface to the baking surface (like a peel). This is less about intentional degassing and more about careful handling to preserve the structure.
The main purposeful degassing happens before shaping, after the bulk fermentation. At this point, the dough is divided and pre-shaped (often into rough logs or rounds), allowed to rest briefly (10-20 minutes), and then shaped into the final baguette form.
The shaping process itself involves a degree of degassing as air is pressed out while the dough is folded and rolled. This specific application of baguette dough degassing techniques right before the final proof is critical for achieving the characteristic baguette shape and influencing the final crumb texture, ensuring the gas pockets are elongated along the length of the loaf.
How to Degas Baguette Dough: Step-by-Step Techniques
Gentle Degassing Methods for Delicate Dough
For doughs that are highly hydrated or have undergone a long, slow fermentation (like those often used for baguettes), gentle baguette dough degassing techniques are preferred to preserve some of the delicate gas structure. Aggressive handling can tear the gluten network and result in a dense crumb. Gentle methods aim to redistribute gas and strengthen gluten without completely deflating the dough.
The Folding Technique: A Gentle Approach
The folding technique is a cornerstone of gentle degassing during bulk fermentation. It involves gently stretching a portion of the dough up and folding it over the rest of the dough. Typically, you would perform 3-4 folds, rotating the bowl or dough mass each time to fold from different sides (e.g., north, south, east, west). This incorporates air, builds tension, and redistributes gas bubbles without forcefully expelling them.
Steps for a single fold:
- Wet your hand slightly to prevent sticking.
- Reach under the dough on one side.
- Gently lift and stretch the dough upward.
- Fold the stretched portion over the remaining dough.
- Repeat from the opposite side, then the other two sides, rotating the bowl.
This technique is often repeated several times during bulk fermentation, typically every 30-60 minutes for the first 1.5 to 2 hours, depending on the recipe and dough strength. It's a key method in baguette dough degassing techniques for developing gluten and managing fermentation gently.
The Stretching and Folding Method Explained
Stretching and folding is another gentle degassing method, often used interchangeably with simple folding, particularly for wetter doughs. It involves lifting the entire dough mass from the bowl or container and letting it stretch under its own weight before folding it back onto itself. This method is highly effective for building gluten strength in high-hydration doughs (75% or more water relative to flour weight).
Steps for stretching and folding:
- Lightly wet your hands.
- Reach under the entire dough mass in the bowl.
- Gently lift the dough, letting it stretch downwards as you lift it.
- Once stretched, fold the dangling portion underneath the rest of the dough in your hands.
- Place the folded dough back into the bowl with the seam side down.
- Repeat this process, often 3-4 times per set, rotating the bowl each time.
Like simple folding, stretching and folding is typically done at intervals during bulk fermentation. It effectively degasses larger bubbles, strengthens gluten, and equalizes temperature while being gentle enough to preserve a generally open structure, making it a valuable technique in baguette dough degassing techniques.
More Aggressive Degassing Methods for Stronger Dough
More aggressive degassing methods are typically used for doughs with lower hydration or stronger gluten development, or specifically during the shaping phase of baguette making to expel excess air before the final proof. These methods remove more gas and create a tighter structure, which is then manipulated during shaping to achieve the desired baguette crumb.
Using a Dough Scraper for Controlled Degassing
A dough scraper can be a useful tool for controlled degassing, particularly when working with dough on a floured surface after bulk fermentation. Instead of punching down the entire mass, you can use the scraper to gently lift and fold sections of the dough, pressing out air as you go. This allows for more targeted degassing and shaping.
During pre-shaping, for example, after dividing the dough, you might use a scraper to gently round each piece by pushing and rotating it against the work surface, tucking the edges underneath. This action naturally presses out some gas in a controlled manner. For the final shaping of a baguette, you press down firmly on the dough piece with the palm of your hand to gently but effectively remove most of the gas before folding and rolling. This pressing action, often aided by a scraper to lift and fold, is a key part of baguette dough degassing techniques during shaping.
The "Punch Down" Technique: When and How to Use It
The traditional "punch down" is perhaps the most widely recognized, though often misunderstood, degassing technique. It involves literally punching or pressing the dough mass to deflate it significantly. While common in some bread types (like sandwich loaves for a fine crumb), it's used less frequently or more gently in artisan bread like baguettes, where an open crumb is desired. If used in baguette making, it's typically a gentle pressing down of the entire dough mass after bulk fermentation, before dividing and shaping, rather than a forceful punch.
When used gently:
- Turn the dough onto a lightly floured surface.
- Starting from the center, gently press outwards with the palms of your hands.
- Work your way around the dough, pressing out the gas until it's deflated but not completely flattened or degassed.
This gentle press-down helps consolidate the dough and makes it easier to divide and shape. For baguettes, the focus is on pressing out excess gas and standardizing the dough's state before shaping, rather than eliminating all gas bubbles. The subsequent shaping steps then further refine the degassing and structure. It's one of the more assertive baguette dough degassing techniques but should be applied with care to preserve the potential for an open crumb.
Degassing Baguette Dough: A Detailed Guide
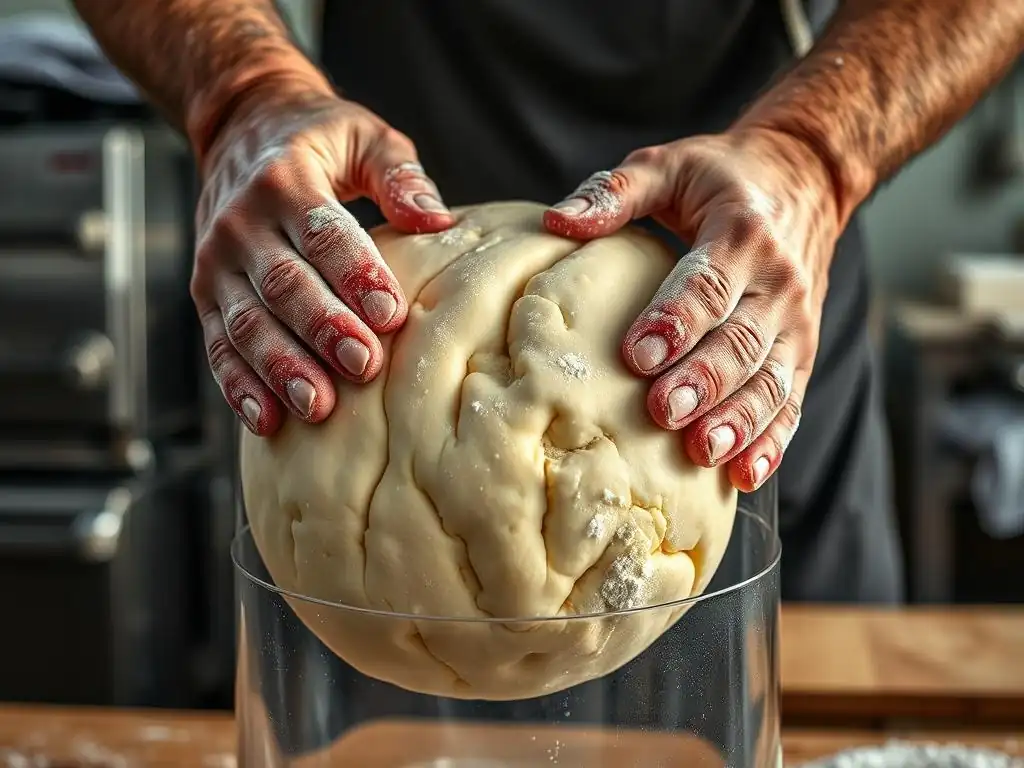
Tools Needed for Effective Degassing
Effective baguette dough degassing techniques don't require a vast array of tools, but a few items can make the process easier and more efficient.
- Large Bowl or Container: For bulk fermentation and initial folding.
- Dough Scraper: Useful for dividing dough, lifting, and controlled pressing during shaping.
- Clean Work Surface: A counter or large cutting board, potentially lightly floured.
- Scale: For accurately dividing the dough into equal portions before shaping.
- Bench Scraper (optional but helpful): Similar to a dough scraper but often with a straight edge, useful for portioning and handling dough on the bench.
- Proofing Baskets (Bannetons) or Couche (Linen Cloth): While not directly for degassing, these support the shaped dough during the final proof and require careful handling (minimal degassing) when transferring the shaped loaves.
Having these simple tools on hand ensures you can handle, fold, and shape your baguette dough effectively at each stage where degassing techniques are applied.
Step-by-Step Guide to Degassing Baguette Dough During Bulk Fermentation
Degassing during bulk fermentation is typically achieved through a series of gentle folds. This process strengthens gluten and redistributes gas without completely deflating the dough.
Assessing the Dough's Condition Before Degassing
Before performing a fold, observe your dough. Has it visibly increased in volume since the last fold? Does the surface look smooth or are large bubbles starting to appear? Does it feel extensible or does it resist stretching? For example, after 45-60 minutes at 72°F (22°C), the dough might have increased in volume by 30-50% and feel more relaxed. If it feels very slack or large bubbles are prominent, it's a good time for a fold. If it still feels tight or hasn't risen much, it might need more time before the next fold.
The goal is to perform folds while the dough still has strength and can handle the manipulation. Typically, you'd perform 3-4 sets of folds over the first 1.5 to 2.5 hours of bulk fermentation, depending on the total fermentation time and dough hydration. Each assessment helps determine if the dough is ready for the next set of baguette dough degassing techniques via folding.
Performing the Fold with Precision
Perform the folds gently but effectively. As described in the "Folding Technique" section, wet your hand, reach under a side of the dough, lift and stretch, and fold it over. Rotate the bowl and repeat 3-4 times to work the dough from all sides.
- [x] Wet hand slightly.
- [x] Reach under dough on one side.
- [x] Gently lift and stretch the dough upwards.
- [x] Fold the stretched portion over the remaining dough.
- [x] Rotate bowl/dough.
- [x] Repeat lift, stretch, fold from opposite side.
- [x] Repeat for the remaining two sides.
This process should take only a minute or two per set of folds. The dough will initially feel tighter after the folds, having been partially degassed and strengthened. This is a successful application of baguette dough degassing techniques during bulk fermentation.
Allowing the Dough to Rest and Ferment Further
After each set of folds, cover the dough and return it to its fermentation environment (e.g., a warm spot on the counter, a proofing box, or the refrigerator). Allow it to rest for the specified interval (e.g., 30-60 minutes) before the next fold or until the end of bulk fermentation. During this rest period, the yeast continues to produce gas, and the gluten relaxes, making the dough ready for the next manipulation.
Monitoring the dough's volume increase and feel between folds is crucial. By the end of bulk fermentation (which might take 2-4 hours at room temperature or 8-18 hours in the refrigerator, depending on the recipe), the dough should have increased significantly in volume (often doubled) and feel airy but still have some underlying structure from the folds. This resting allows the baguette dough degassing techniques applied during folding to contribute to the overall development.
Step-by-Step Guide to Degassing Baguette Dough After Proofing
As noted earlier, intentional degassing after the final proof is generally avoided for baguettes. However, the steps leading up to the final proof involve degassing during shaping. This section will detail the shaping process where degassing occurs.
Assessing the Dough's Condition Before Degassing (Shaping)
After bulk fermentation, the dough is turned out onto a work surface. It should be airy and have roughly doubled in volume. Before shaping, it's typically divided into portions of the desired weight for each baguette (e.g., 250-350 grams is common). These portions are often gently pre-shaped into rough rounds or logs and allowed to rest for 10-20 minutes, covered, to relax the gluten.
Assessing the dough at this stage involves checking its extensibility and relaxation. If it springs back immediately when gently prodded, it needs more rest. If it feels relaxed and slightly puffy, it's ready for shaping. This is the point where significant baguette dough degassing techniques will be applied as part of the shaping process.
Performing the Gentle Degas (Shaping)
The degassing during shaping is not a separate step but is integrated into the shaping process itself. For a baguette, this typically involves gently but firmly pressing the pre-shaped dough piece to remove most of the gas.
Steps for shaping and integrated degassing:
- Take a rested dough portion.
- Place it seam-side up on a lightly floured surface.
- Gently press down on the dough with the palm of your hand, starting from the center and working outwards, to flatten it into a rough rectangle or oval. This expels most of the large gas bubbles.
- Fold the top edge down to the center and press to seal.
- Fold the bottom edge up to the center and press to seal.
- Fold the dough in half lengthwise and seal the seam firmly with the heel of your hand.
- Gently roll the dough back and forth with light pressure, starting from the center and moving outwards, to elongate it into a baguette shape of the desired length. Increase pressure slightly as you roll to maintain an even thickness and continue to refine the degassing.
This series of pressing, folding, and rolling actions constitutes the key baguette dough degassing techniques used before the final proof. It removes excess gas, creates surface tension, and forms the structure needed for the final rise and characteristic crumb.
Shaping the Dough
The final rolling step completes the shaping process. The goal is to create a taut, evenly thick cylinder with a sealed seam. The length will depend on your baking vessel (e.g., a baking stone, a baguette pan). A typical baguette might be 12-16 inches long.
Continue rolling gently, applying slightly more pressure towards the ends if needed to achieve an even shape. Ensure the seam is well-sealed underneath. Place the shaped baguette, seam-side up or down depending on your proofing method (couche or pan), into its proofing vessel. This careful shaping, which includes integrated baguette dough degassing techniques, is the last significant manipulation before the final proof and baking.
The Impact of Over-Degassing and Under-Degassing Baguette Dough
Recognizing the Consequences of Over-Degassing
Over-degassing baguette dough can severely compromise the final loaf. If you are too aggressive or deflate the dough too much, you risk damaging the delicate gluten structure and eliminating too many of the gas pockets needed for leavening. The consequences include:
- Dense Crumb: The most common result. Without sufficient gas retained to expand during baking, the crumb will be tight, heavy, and lack the desired openness.
- Poor Volume: The loaf will not rise adequately in the oven (poor oven spring) because there isn't enough internal gas pressure to expand the dough.
- Lack of Open Structure: The characteristic irregular, open holes (alveoli) will be minimal or absent. The crumb will be fine and uniform, more like sandwich bread than a baguette.
- Tough Texture: Overworking the dough during aggressive degassing can lead to a tough, chewy texture rather than the desired tender crumb encased in a crispy crust.
Recognizing these signs helps you adjust your baguette dough degassing techniques in future bakes. If your baguettes are consistently dense or small, you might be degassing too much during shaping or handling the dough too roughly.
Identifying the Effects of Under-Degassing
Conversely, under-degassing baguette dough also leads to undesirable results. While some gas must be retained, too much trapped gas, especially large, uneven bubbles, can also ruin the texture. Effects of under-degassing include:
- Large, Irregular Caverns: Instead of a network of varied holes, you might get a few giant, hollow spaces within the crumb, surrounded by denser areas. This is often caused by failing to press out large bubbles during shaping.
- Uneven Crumb: The crumb structure will be inconsistent, with areas that are too dense next to areas with excessively large holes.
- Difficulty Shaping: Dough that hasn't been degassed sufficiently during shaping can be overly puffy and difficult to form into a tight, even baguette shape. It may feel slack and lack the necessary tension.
- Potential for Collapse: Very large, unstable gas pockets can sometimes lead to the dough collapsing during proofing or baking.
Finding the right balance in your baguette dough degassing techniques is key. If your baguettes have large, isolated holes or are difficult to shape, you might not be pressing out enough gas during the shaping phase.
Achieving the Perfect Balance: Tips for Consistent Results
Achieving the perfect balance in degassing comes with practice and learning to read your dough. Here are some tips:
- Know Your Dough: Understand the hydration level and flour type, as this influences how much handling it can take. High-hydration doughs need gentler baguette dough degassing techniques.
- Be Intentional with Folds: During bulk fermentation, perform folds to strengthen gluten and redistribute gas, but don't overdo it. 3-4 sets are often sufficient.
- Focus Degassing During Shaping: The main purposeful degassing happens before the final proof, during the shaping process. Press out the gas firmly but without tearing the dough.
- Observe Your Crumb: After baking, analyze the crumb structure. Is it too dense (over-degassed)? Does it have huge caverns (under-degassed)? Use this feedback to adjust your technique next time.
- Practice: Consistent results are built through repetition. Each bake is an opportunity to refine your baguette dough degassing techniques.
By paying close attention to how your dough feels and responds to your touch at each stage, you will develop the intuition needed to apply the right amount of degassing for consistently excellent baguettes.
Troubleshooting Common Degassing Issues

Sticky Dough: How to Handle it During Degassing
Sticky dough is a common challenge, especially with high-hydration baguette recipes. When degassing or folding sticky dough, it can cling to your hands and the work surface, making manipulation difficult and potentially leading to tearing.
To handle sticky dough during baguette dough degassing techniques:
- Use Water, Not Flour (Initially): When folding dough in a bowl during bulk fermentation, wet your hands slightly with water instead of flour. Water prevents sticking without incorporating extra flour into the dough, which can change its hydration and texture.
- Minimal Flour on Work Surface: When turning dough out for shaping and degassing, use the absolute minimum amount of flour necessary on your work surface and dough scraper. Too much flour can create a dry, tough crust and interfere with sealing seams.
- Work Quickly and Confidently: Hesitation can make sticky dough worse. Work with swift, confident movements when folding, stretching, or shaping.
- Use a Bench Scraper: A sturdy bench scraper is invaluable for lifting and manipulating sticky dough on the work surface, minimizing contact with your hands.
Managing stickiness effectively allows you to perform the necessary baguette dough degassing techniques without damaging the dough structure or incorporating excess flour.
Uneven Texture: Correcting Issues with Degassing Techniques
Uneven texture, ranging from large voids to dense spots, is often a direct result of inconsistent baguette dough degassing techniques. This can happen if:
- Folding was Uneven: Folds during bulk fermentation weren't performed consistently across the dough mass, leading to varying gluten development and gas distribution.
- Shaping Was Inconsistent: The pressing and rolling during shaping didn't evenly expel gas, leaving large bubbles in some areas and making others too dense. For example, failing to press out a large bubble before folding and rolling will result in a cavern.
- Resting Periods Weren't Sufficient: Insufficient rest between pre-shaping and shaping can lead to dough that resists manipulation, making even degassing difficult.
To correct uneven texture:
- Focus on Consistent Folding: Ensure you fold from all sides during bulk fermentation, applying similar tension each time.
- Be Thorough During Shaping: When pressing out gas before the final roll, make sure you work across the entire surface of the dough piece, feeling for and eliminating large pockets.
- Practice Even Rolling: When elongating the baguette, apply even pressure along the length of the dough to ensure uniform thickness and gas distribution.
Refining your baguette dough degassing techniques during both bulk fermentation and shaping is key to achieving a consistently open and evenly textured crumb.
Dough Not Rising Properly After Degassing: Potential Causes and Solutions
If your baguette dough doesn't rise properly during the final proof after you've applied your baguette dough degassing techniques and shaped it, several factors could be at play:
- Over-Degassing: The most likely culprit related to degassing. If you removed too much gas or were too rough, you might have collapsed the gluten structure and left insufficient gas for the final rise. The dough might feel dense or heavy.
- Under-Fermentation (Bulk): If the initial bulk fermentation didn't develop enough gas or gluten strength before shaping and degassing, there won't be enough potential for rise in the final proof. The dough might have felt slack or not significantly increased in volume during bulk.
- Insufficient Proofing Time/Temperature: The final proofing environment wasn't warm enough, or the time allocated was too short. Yeast activity is slow at low temperatures. Baguettes typically proof for 45-90 minutes at room temperature (72-75°F / 22-24°C) or longer if retarded in the fridge.
- Inactive Yeast: Your yeast might be old or dead.
Solutions:
- Adjust Degassing: Be gentler during shaping. Focus on pressing out gas rather than aggressively punching down.
- Ensure Proper Bulk Fermentation: Allow sufficient time for the dough to develop and increase in volume before dividing and shaping.
- Optimize Final Proof: Ensure your proofing area is warm enough (around 75-80°F / 24-27°C is ideal for a faster proof, or use a longer, cold proof). Give the dough enough time; it should look visibly puffy and have increased by about 50-75% in volume before baking.
- Check Yeast Viability: Activate a small amount of yeast in warm water with sugar to ensure it's active and bubbly.
Troubleshooting involves reviewing your entire process, but focusing on the intensity of your baguette dough degassing techniques during shaping and the conditions of your bulk and final proof are good starting points.
Advanced Baguette Dough Degassing Techniques
Degassing for Specific Baguette Styles
Different baguette styles may benefit from slight variations in baguette dough degassing techniques. For example:
- Traditional Baguettes (Pain de Tradition): Often made with wetter dough (75%+ hydration) and longer, slower fermentation. These require very gentle folding during bulk fermentation to build strength while preserving a highly open, irregular crumb. Shaping involves careful pressing to degas while maintaining integrity, followed by gentle rolling to elongate.
- Lean Baguettes: Made with simpler ingredients (flour, water, salt, yeast). The focus is on developing strength through folding (gentle degassing) and then precise shaping to create surface tension and an even structure, balancing degassing to avoid large voids but ensure openness.
- Sourdough Baguettes: Sourdough starters can produce a wide range of gas production depending on their activity and the fermentation schedule. Degassing techniques must be adapted based on how much the dough has risen and the desired sourness/crumb. Often, sourdough baguettes benefit from gentle handling and minimal degassing during shaping to preserve the delicate sourdough-induced alveoli.
Understanding the desired outcome for a specific baguette style allows you to tailor your baguette dough degassing techniques – from the frequency and intensity of folds during bulk fermentation to the pressure applied during shaping – to achieve the best results.
Adapting Degassing Methods to Different Flour Types
The type of flour used significantly impacts gluten development and gas retention, which in turn affects how you apply baguette dough degassing techniques.
- High-Protein Bread Flour: Develops strong gluten easily. Can generally handle slightly more vigorous folding and shaping if needed, though gentle methods are still preferred for an open crumb. The robust gluten network effectively traps gas.
- All-Purpose Flour: Lower protein content means less gluten development. Doughs made with AP flour require gentler handling and degassing to avoid tearing the weaker gluten network. Folding is crucial for building sufficient strength.
- Whole Wheat or Specialty Flours: The bran and germ in whole wheat flour can interfere with gluten development and puncture gas bubbles. Degassing techniques must be very gentle to preserve whatever gas structure has formed. You might rely more on stretching and folding during bulk fermentation and be extra careful during shaping to avoid overworking the dough.
Adapting your baguette dough degassing techniques based on the flour's characteristics helps ensure that the dough develops the necessary strength and structure to support a good rise and crumb, regardless of the flour type. It's about working with the dough's inherent properties.
Conclusion: Mastering Baguette Dough Degassing for Baking Success
Recap of Key Degassing Techniques
Mastering baguette dough degassing techniques is paramount to achieving the perfect baguette. We've explored that degassing isn't a single action but a series of intentional manipulations throughout the dough's journey. Key techniques include:
- Gentle folding or stretching and folding during bulk fermentation to build gluten strength, redistribute yeast and nutrients, and equalize temperature. This is a controlled, partial degassing.
- More deliberate pressing and shaping before the final proof to remove excess gas, create surface tension, and form the baguette shape. This is where the majority of purposeful degassing occurs.
- Avoiding significant degassing after the final proof to preserve the delicate gas structure developed for oven spring.
Each technique plays a specific role in influencing the final crumb structure, from promoting an even distribution of holes to ensuring the dough has the strength to hold its shape.
Expert Tips to Elevate Your Baguette Baking
To truly elevate your baguette baking through refined baguette dough degassing techniques, consider these expert tips:
- Learn to Read Your Dough: Pay attention to how the dough feels – its elasticity, extensibility, and puffiness – at each stage. This tactile feedback is invaluable.
- Control Temperature: Consistent fermentation temperature is crucial for predictable gas production and dough development, making it easier to time your degassing steps correctly.
- Be Gentle but Firm: During shaping, press out the gas with purpose, but avoid tearing or ripping the dough. It's a balance of firmness and care.
- Practice Consistency: Try to perform folds and shaping manipulations with similar pressure and technique each time. Consistency leads to predictable results.
- Analyze Your Results: After baking, cut open your baguettes and examine the crumb. Does it match your desired texture? Use this analysis to refine your approach on the next bake.
Applying these tips will help you move from following instructions to intuitively understanding your dough's needs.
Practice and Refinement: Becoming a Baguette Dough Degassing Pro
Becoming a pro at baguette dough degassing techniques is a journey of practice and refinement. No two batches of dough are exactly alike, influenced by factors like ambient temperature, humidity, and subtle variations in ingredients. Each time you bake, you gain more experience in assessing the dough and applying the appropriate techniques.
Don't be discouraged by imperfect results. A baguette that is too dense or has large voids is a learning opportunity. Note what you did, compare it to the outcome, and adjust your approach next time. As you practice folding, pressing, and shaping, your feel for the dough will improve, allowing you to confidently apply the baguette dough degassing techniques needed to create beautiful, airy baguettes consistently. Enjoy the process, and soon you'll be baking baguettes with that signature open crumb!
Frequently Asked Questions
What exactly is degassing baguette dough, and why is it important?
Degassing is the process of removing excess gas from the dough during the bulk fermentation stage. This helps to create a more even crumb structure and prevent overly large, undesirable air pockets in the final baguette.
When is the optimal time to degas baguette dough?
The best time to degas is during the bulk fermentation stage, typically after the dough has risen significantly. You'll usually degas it once or twice, depending on dough strength and fermentation time.
How do I properly degas baguette dough without ruining it?
Gently deflate the dough using a light touch, avoiding excessive force. You can use a bench scraper or your fingertips to gently press out the accumulated gases.
What happens if I don't degas my baguette dough at all?
Skipping degassing can lead to a baguette with an uneven crumb, large, irregular air pockets, and potentially an overly sour flavor due to uncontrolled fermentation.
Are there any alternative methods to degassing baguette dough?
While not strictly degassing, some bakers prefer to use gentle folding techniques during bulk fermentation. This method helps redistribute the gases and strengthen the dough without completely deflating it.
Final Reflection: The Whispered Secrets of a Perfect Baguette
The art of degassing baguette dough isn't merely a technical process; it's the key to unlocking the airy, crisp perfection we crave in this iconic bread. Mastering this seemingly simple step elevates your baking from good to extraordinary, impacting not only the texture but also the overall flavor profile of your final product. The subtle nuances of gas release directly translate to a superior eating experience, a testament to the power of mindful technique.
The journey of understanding degassing has profoundly changed my own approach to baking. It's not just about following a recipe; it's about understanding the why behind each step. It's about feeling the dough, sensing its readiness, and responding intuitively. This mindful engagement with the process fosters a deeper connection to the craft itself. The baker's touch is not just about skill, but about a deep understanding of the ingredients and the process.
This quote, though not directly about degassing, perfectly encapsulates the spirit of mindful baking that degassing techniques embody.
Now, it's your turn. Consider the subtle shifts in your own baking practice. Experiment with different degassing methods, observe the results, and refine your technique. Don't be afraid to deviate from the prescribed steps; allow your intuition to guide you. The pursuit of the perfect baguette is a journey of continuous learning and refinement, a testament to the enduring magic of bread making. Embrace the process, and the reward will be a loaf that speaks volumes about your dedication and passion.
Unleash Your Inner Boulanger: Perfect Baguette, Every Time!
Thanks for taking the time to explore the art of degassing baguette dough with us! We hope you now feel more confident in achieving that perfect airy crumb. Ready to put your new knowledge into practice?
- Your First Degassed Delight: Try degassing your next baguette dough and notice the difference in texture and rise. Take notes on your experience – what worked best for you?
- Share Your Success (or Challenges!): Post a picture of your perfect (or not-so-perfect!) baguette on social media and tag #BakeWithEaseDegas. Let’s learn from each other!
- Explore other baking techniques: Dive deeper into our archives for more tips on crafting amazing bread. We've got plenty of resources to help you on your baking journey!
What surprising difference did degassing make to your baguette dough? Share your insights below!