
Troubleshooting Common Sugar Work Problems: Fix Crystallization, Breakage & More


Welcome to BakeWithEase, where we unlock the secrets to baking success! Ever wondered why your sugar work sometimes goes awry? This is a common challenge, even for experienced bakers. Dive into our guide on sugar crystallization troubleshooting tips and discover expert solutions to prevent and fix those frustrating issues. Let's transform those baking mishaps into masterpieces – keep reading to elevate your skills!
- Introduction to Sugar Work Challenges
- Understanding Sugar Crystallization
- Addressing Sugar Breakage and Brittleness
- Tackling Humidity
- Preventing Yellowing and Discoloration
- Troubleshooting Sticky Sugar: Solutions for Handling Issues
- Common Mistakes and How to Avoid Them
- Advanced Troubleshooting: Complex Problems
- Essential Tools for Successful Troubleshooting
- Conclusion: Mastering Sugar Work Through Troubleshooting
-
Frequently Asked Questions
- What causes sugar crystallization when making caramel?
- What are some quick fixes to prevent sugar crystallization?
- How can I rescue a batch of caramel that has already crystallized?
- Why did my sugar work break after cooling, and how can I prevent it?
- Can humidity affect my sugar work, and if so, how do I manage it?
- Final Reflection: The Sweet Science of Sugar Success
- Unlock Your Sugarcraft Potential: Master Confectionery Creations!
Introduction to Sugar Work Challenges
Mastering Sugar Work: Overcoming Common Obstacles
Sugar work, from delicate spun sugar to sturdy poured creations, is a beautiful and impressive art form in baking. However, it's also notoriously temperamental. Achieving that perfect glassy finish, precise shape, or stable structure often feels like navigating a minefield of potential problems. Common hurdles include sugar crystallizing unexpectedly, pieces breaking or becoming brittle, stickiness due to humidity, or unwanted discoloration. These issues can turn a promising project into a frustrating mess quickly.
Successfully mastering sugar work requires understanding the science behind it and developing a knack for troubleshooting. It's not just about following a recipe; it's about controlling variables like temperature, moisture, and even microscopic impurities. By learning to identify the signs of impending problems and knowing the right techniques to prevent or fix them, you can significantly increase your success rate and confidently create stunning sugar decorations. This guide will walk you through the most frequent issues and provide practical, actionable sugar crystallization troubleshooting tips and other solutions.
Understanding Sugar Crystallization
What Causes Sugar Crystallization? Identifying the Culprits
Sugar crystallization is perhaps the most common and frustrating issue in sugar work. It occurs when dissolved sugar molecules revert back to their solid crystalline form, often turning a smooth syrup into a grainy, opaque mass. The primary culprit is the presence of existing sugar crystals that act as seeds. Even a single, tiny, undissolved grain clinging to the side of your saucepan or introduced by a stirring utensil can trigger a chain reaction, causing the dissolved sugar to bond onto it.
Other factors contribute significantly. Stirring the sugar syrup vigorously after the sugar has dissolved and the mixture begins to boil is a major cause. This movement can splash syrup onto the cooler sides of the pan, where water evaporates quickly, leaving behind tiny crystals that can fall back into the syrup. Impurities, such as speckles from butter or other ingredients if not using pure sugar, can also act as nucleation points for crystals to form. Furthermore, rapid cooling or temperature fluctuations can sometimes encourage crystallization in highly concentrated sugar solutions.
Sugar Crystallization Troubleshooting Tips: Prevention is Key
Preventing sugar crystallization is far easier than fixing it. One of the most effective sugar crystallization troubleshooting tips involves starting with clean equipment. Ensure your saucepan is spotless and free of any sugar residue. When dissolving the sugar, you can add the water and sugar to the pan and heat gently without stirring until the sugar is fully dissolved. Swirling the pan gently is acceptable, but avoid introducing a spoon until the mixture is boiling and clear.
Another crucial technique is using a wet pastry brush to wash down the sides of the pan during the initial heating phase. As the sugar dissolves and the syrup starts to boil, sugar crystals can form on the walls of the pan above the liquid line. Dipping a clean pastry brush in water and carefully wiping down the sides dissolves these stray crystals before they can fall back into the syrup.
Adding an acid, such as lemon juice or cream of tartar (potassium bitartrate), is also a classic preventative measure. Acids break down sucrose into glucose and fructose (invert sugar), which are less likely to crystallize. A common ratio is about 1/4 teaspoon of cream of tartar or 1 teaspoon of lemon juice per 2 cups of sugar.
Fixing Crystallized Sugar: Rescue Techniques
Even with the best preventative measures, sometimes crystallization still happens. The good news is that a batch of crystallized sugar isn't always a lost cause, especially if it's only partially affected. The key is to redissolve the sugar crystals.
Dissolving Crystallized Sugar: A Step-by-Step Guide
If your sugar syrup has crystallized, you can attempt to rescue it by adding a small amount of water. Pour just enough hot water into the pan to cover the crystallized sugar mass – typically a few tablespoons for a standard batch. Place the pan back over very low heat. Do not stir initially.
Let the heat and water work to gently dissolve the crystals. You can swirl the pan occasionally, but avoid stirring with a spoon until you see that most of the crystals have melted back into the liquid. Once it appears smooth again, you can slowly increase the heat to continue cooking it to your desired temperature. Be patient during this process; too much heat or premature stirring can make the problem worse.
Preventing Recrystallization: Best Practices for Smooth Sugar Work
After successfully dissolving crystallized sugar, you need to be extra vigilant to prevent it from happening again. Ensure the syrup is completely clear and smooth before increasing the heat significantly. Consider adding a small amount of acid (like lemon juice or cream of tartar) at this stage if you didn't add it initially or if the crystallization was severe – remember, acids help create invert sugar, which inhibits crystallization.
Maintain a steady, even heat while cooking the syrup to the desired temperature (e.g., 300-310°F for hard crack). Avoid sudden temperature drops. Once the syrup reaches temperature, handle it carefully. Pour it onto prepared surfaces (like silicone mats) without scraping the bottom or sides of the pan, as this can introduce stray crystals. Store finished sugar work in a dry environment to prevent moisture absorption, which can also lead to dulling and potential crystallization on the surface over time.
Addressing Sugar Breakage and Brittleness

Why is My Sugar Work Breaking? Common Causes Explained
Breakage and brittleness are frequent and disheartening issues when creating sugar decorations. Often, the root cause is related to the sugar's temperature and internal structure. If sugar is cooked to a very high temperature, like the hard crack stage (around 300-310°F or 149-154°C), it becomes extremely brittle when cooled. While this is necessary for certain applications like pulled or blown sugar, it makes the final product very fragile.
Another common cause is uneven cooling or thermal shock. If a piece of hot sugar is exposed to cold air or a cold surface too quickly, stresses can build within the structure, leading to cracks or shattering. The thickness of the sugar piece also plays a role; very thin sections are inherently more delicate than thicker ones. Additionally, structural design matters – sharp angles or unsupported areas are more prone to snapping than smooth curves or well-supported forms.
Strengthening Sugar Work: Techniques for Durability
While cooked sugar at high temperatures will always be somewhat fragile, there are techniques to improve durability. For poured or cast sugar pieces, ensuring a consistent thickness (at least 1/8 to 1/4 inch for structural elements) can add significant strength. For assembled pieces, using melted isomalt or cooked sugar as a "glue" to join sections provides a stronger bond than simply fitting them together.
When creating pulled or blown sugar, incorporating ingredients like isomalt or glucose syrup into your sugar mixture can make it more pliable and slightly less prone to immediate shattering upon cooling compared to pure sucrose. Glucose syrup, for instance, interferes with the sugar crystal structure, resulting in a slightly tougher, more flexible consistency suitable for pulling and shaping intricate designs.
Working with Brittle Sugar: Handling Tips and Tricks
Handling brittle sugar requires patience and a gentle touch. Once sugar is cooked to the hard crack stage and cooled, it's essentially glass. Work on a stable, level surface, ideally covered with a silicone mat or non-stick parchment paper. Avoid unnecessary movement or jarring of the sugar pieces.
Temperature Control: The Key to Avoiding Breakage
Maintaining the correct temperature is paramount when working with sugar, both during cooking and handling. When cooking, ensure the sugar reaches the precise temperature required for your application (e.g., hard crack for pulled sugar, but perhaps slightly lower for cast pieces that need less brittleness). Overcooking by even a few degrees can dramatically increase brittleness.
When shaping pulled or blown sugar, keep a heat lamp or warming box nearby to maintain the sugar's workability without letting it cool and harden completely too quickly. For assembled pieces, allow poured or cast sugar to cool naturally on a silicone mat away from drafts or sudden temperature changes. Trying to speed up cooling in the refrigerator or freezer is a common mistake that can induce thermal shock and cause cracking.
Adding Stabilizers: Using Cream of Tartar & Glucose Syrup
As mentioned earlier, adding stabilizers like cream of tartar or glucose syrup can improve the workability and reduce the extreme brittleness of sugar. Cream of tartar, an acid, helps invert sucrose, making the final product slightly less prone to crystallization and potentially a little less brittle depending on the application.
Glucose syrup (or corn syrup in the US) is a common additive, often used in a ratio of about 10-20% of the sugar weight. For example, for 2 cups (approx. 400g) of sugar, you might add 40-80g of glucose syrup. Glucose syrup is a non-crystallizing sugar that interferes with sucrose's ability to form a rigid crystalline structure, resulting in a smoother, more pliable, and slightly less brittle sugar mass, ideal for pulling, blowing, and casting intricate shapes.
Tackling Humidity
The Impact of Humidity on Sugar Work
Humidity is the nemesis of sugar work. Sugar is hygroscopic, meaning it readily absorbs moisture from the air. When cooked sugar, especially hard candy or spun sugar, is exposed to high humidity, it begins to absorb water molecules from the surrounding atmosphere. This absorption causes the sugar's structure to break down.
The symptoms of humidity damage are unmistakable: perfectly clear and shiny sugar pieces become sticky to the touch, lose their crispness, and can eventually become dull, cloudy, and even collapse into a sticky puddle. Delicate structures like spun sugar dissolve almost instantly in very humid conditions. This is why professional sugar work is often done in controlled environments.
Dehumidifying Your Baking Environment: Practical Solutions
The most effective way to combat humidity is to control the environment where you are working and storing your sugar creations. If you live in a naturally humid climate or are working on a rainy day, using a dehumidifier in your kitchen or workspace can make a significant difference. Aim for a humidity level below 40% if possible.
Running air conditioning also helps, as it cools the air and removes moisture. Close windows and doors to prevent humid air from entering. While you're cooking, the heat from the stove might temporarily lower the relative humidity right around the pot, but the finished pieces are susceptible once they cool.
Working with Sugar in Humid Conditions: Essential Adjustments
If you cannot fully dehumidify your environment, you can make minor adjustments to your sugar recipe. Increasing the proportion of glucose syrup or isomalt slightly can help, as these are less hygroscopic than sucrose and can offer a little more resistance to moisture absorption. However, this only offers limited protection.
The best strategy when working in high humidity is to work quickly and store finished pieces immediately in an airtight container with food-grade silica gel packets.
Quick Tips for Baking on Humid Days
- Check the weather forecast; plan your sugar work for the driest days.
- Run a dehumidifier or air conditioning in your workspace for several hours before you start.
- Prepare all your tools and surfaces in advance so you can work quickly once the sugar is ready.
- Have airtight containers and silica gel packets ready to store pieces as soon as they cool.
- Consider using isomalt, which is less sensitive to humidity than sucrose.
- Avoid touching the finished sugar pieces with bare hands, as moisture and oils from your skin can cause stickiness. Wear food-safe gloves if possible.
Preventing Yellowing and Discoloration
Understanding the Causes of Sugar Discoloration
Ideally, cooked sugar should remain clear and colorless unless you intentionally add color. However, it can often develop an unwanted yellowish or amber tint. The primary cause of this discoloration is overheating, which leads to caramelization. Caramelization occurs when sugar is heated above its melting point (around 320°F or 160°C for sucrose) and its molecules begin to break down and rearrange, producing compounds that give it a characteristic brown color and nutty flavor.
Even if you don't reach full caramelization temperatures, prolonged heating at lower temperatures or cooking over uneven heat can also contribute to slight yellowing. Impurities in the sugar or pan can sometimes cause localized scorching and discoloration.
Maintaining Sugar's Clarity: Techniques for Perfect Color
To maintain the clarity and prevent yellowing of cooked sugar, precise temperature control is essential. Use a reliable candy thermometer and monitor the temperature constantly. Once the sugar reaches the desired stage (e.g., hard ball, soft crack, hard crack), remove it from the heat immediately.
Cooking over medium, even heat helps prevent hot spots that can lead to localized scorching. Using a clean, heavy-bottomed saucepan distributes heat more evenly. Avoid leaving the sugar syrup simmering for extended periods once it has dissolved; cook it relatively quickly to the target temperature.
Preventing Caramelization: Avoiding Unwanted Color Changes
Preventing unwanted caramelization is simply a matter of preventing overheating. If you are aiming for a specific sugar stage below the caramel point (like hard crack at ~300°F), be extremely careful not to exceed that temperature.
- Use a calibrated thermometer. Test it in boiling water (it should read 212°F or 100°C at sea level).
- Remove the pan from the heat source as soon as the target temperature is reached. The residual heat in the pan will continue to cook the sugar for a moment.
- For delicate work requiring very high temperatures, consider using isomalt instead of sucrose. Isomalt is a sugar substitute that requires a higher temperature to caramelize (around 340°F or 170°C), giving you a larger margin of error before discoloration occurs.
Troubleshooting Sticky Sugar: Solutions for Handling Issues
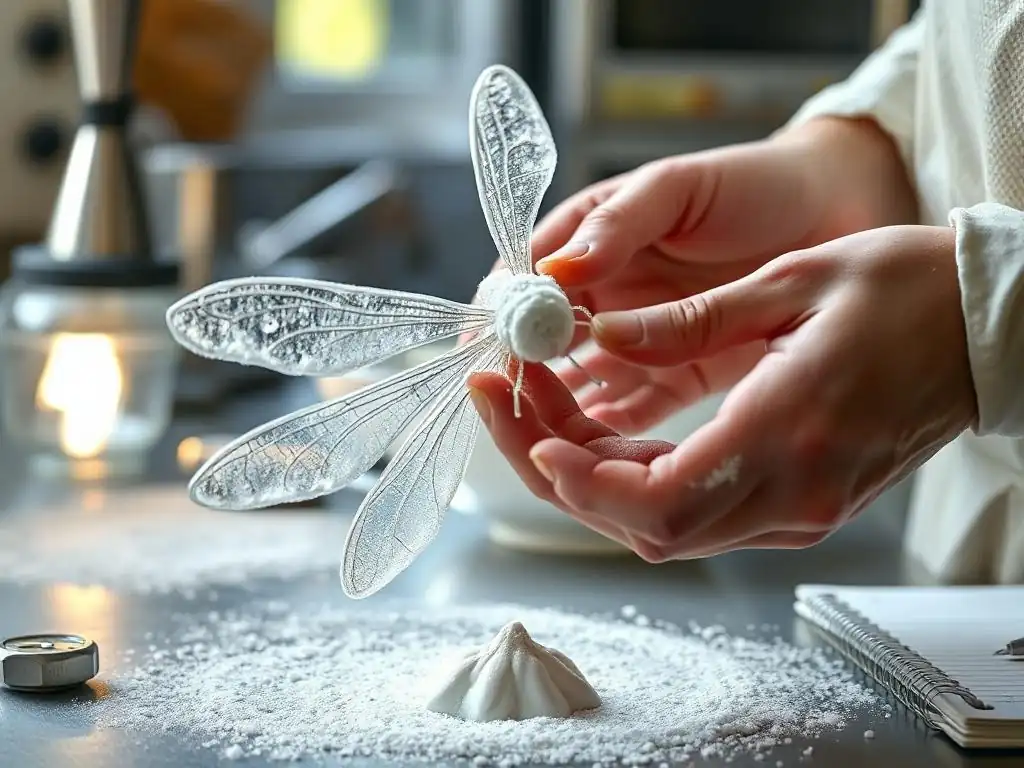
Why is My Sugar Work Sticky? Identifying the Root Cause
Sticky sugar work is almost always a sign of moisture absorption from the environment. As discussed earlier, sugar is hygroscopic. When it cools after cooking, it forms a hard, glassy structure. However, this structure is highly susceptible to moisture. The surface of the sugar begins to absorb water vapor from the air, turning the hard, dry surface into a soft, sticky film.
High humidity is the primary culprit. Poor storage is another major cause; if sugar pieces are left exposed to the air, especially in a humid kitchen, they will quickly become sticky. Touching the sugar with bare hands can also transfer moisture and oils, initiating the stickiness.
Drying Out Sticky Sugar: Methods for Achieving the Right Consistency
Once sugar work has become sticky due to humidity, it's very difficult, if not impossible, to fully restore its original dry, hard texture. The best approach is prevention and proper storage.
However, for minor surface stickiness, you might try placing the sugar pieces in a very low oven (around 150-200°F or 65-90°C) for a short period (5-10 minutes) to try and drive off some of the absorbed moisture. Use extreme caution as this can also cause the sugar to soften and lose its shape if the temperature is too high or the time is too long. This method is risky and not always effective.
Preventing Stickiness: Best Practices
Preventing stickiness relies heavily on controlling humidity and proper handling/storage.
- Work in a dry environment: Use a dehumidifier or air conditioning.
- Work quickly: Minimize the time sugar pieces are exposed to the air after cooling.
- Use silicone mats: Work on silicone mats or non-stick parchment.
- Handle with gloves: Wear food-safe gloves to avoid transferring moisture and oils from your hands.
- Store immediately: As soon as sugar pieces are cool and set, transfer them to an airtight container.
- Use desiccants: Include food-grade silica gel packets or even a layer of uncooked rice in the bottom of your storage container to absorb moisture.
- Consider Isomalt: Isomalt is significantly less prone to stickiness than sucrose, making it a preferred choice for display pieces in humid conditions.
Common Mistakes and How to Avoid Them
Overcooking Sugar: Recognizing the Signs and Preventing It
Overcooking sugar means heating it beyond the temperature required for your specific application or, more commonly, past the point where it begins to caramelize unintentionally. Signs include the syrup turning from clear to yellow, then amber, and finally dark brown, accompanied by a distinct nutty or slightly burnt smell. The texture, if cooled, will be excessively brittle and the taste will be caramelized, which might not be desired for clear sugar decorations.
Preventing overcooking requires constant vigilance and an accurate thermometer. Know the target temperature for your sugar stage (e.g., 240°F for soft ball, 300°F for hard crack). As the syrup approaches the target temperature, pay close attention. Have everything ready before you start cooking so you can remove the sugar from the heat and pour/shape it immediately once the temperature is reached. Remember that sugar continues to cook from residual heat after being removed from the burner.
Under-cooking Sugar: Achieving the Perfect Consistency
Under-cooking sugar means stopping the heating process before the syrup reaches the necessary concentration and temperature for your desired stage. The result is sugar work that is too soft, pliable when it should be hard, sticky, or unable to hold its shape. For example, attempting to pull sugar that has only reached the soft ball stage (240°F) will result in a sticky, gooey mess that won't stretch or hold air.
To avoid under-cooking, always use a thermometer. Don't guess based on visual cues alone, especially if you are a beginner. Cook the sugar exactly to the temperature specified for the technique you are attempting. If your finished sugar work is too soft, you may be able to gently reheat it (if not yet shaped) and cook it a little further, but this isn't always successful and can increase the risk of discoloration or crystallization.
Improper Cooling Techniques: Avoiding Common Errors
How sugar cools is just as important as how it's cooked. Improper cooling can lead to crystallization, breakage, or stickiness. A common mistake is trying to cool sugar too quickly, for example, by placing hot poured sugar directly into a refrigerator or freezer. This rapid temperature change can induce thermal shock, causing internal stresses that result in cracks or shattering.
Another error is allowing sugar to cool in a humid environment, leading to immediate stickiness. For pulled or blown sugar, letting parts cool too much while still working on others can cause sections to become brittle and break as you manipulate the warmer parts. Always cool poured or cast sugar at room temperature on a non-stick surface (like a silicone mat) away from drafts. For pulled/blown sugar, use a heat lamp to keep the mass pliable where needed while working.
Advanced Troubleshooting: Complex Problems

Troubleshooting Pulled Sugar: Achieving Desired Shapes and Textures
Pulled sugar requires the sugar to be cooked to the hard crack stage (~300-310°F), cooled slightly until pliable but still warm, and then repeatedly stretched and folded. Common problems include the sugar becoming too hard too quickly, breaking instead of stretching, or not developing a satiny sheen. If the sugar hardens too fast, it wasn't kept warm enough (use a heat lamp!)
or wasn't worked quickly enough. Breaking can be due to the sugar being too cold, cooked slightly too high, or lacking a stabilizer like glucose. Not getting a satiny sheen means the sugar wasn't pulled and folded enough to incorporate air and align the sugar crystals properly.
- Use a heat lamp constantly.
- Ensure the sugar mixture contains glucose or isomalt for better pliability.
- Work the sugar vigorously once it's cool enough to handle but still warm (around 180-190°F).
- Pull and fold repeatedly until it develops a satiny, opaque look.
Troubleshooting Blown Sugar: Preventing Thin Spots and Breakage
Blown sugar is perhaps the most challenging technique, involving inflating a ball of pulled sugar with air using a pump. Issues include the sugar hardening too fast, developing thin spots that burst, or the entire piece collapsing. The sugar needs to be at the perfect temperature – warm enough to be pliable but cool enough to hold air.
Too hot, it's too soft; too cold, it's too brittle. Thin spots often occur if the sugar isn't evenly heated or if you blow too much air into one area without redistributing the sugar. Breakage is usually due to the sugar cooling too much or being too brittle.
- Maintain the sugar's temperature with a heat lamp.
- Use a high-quality sugar mixture with glucose or isomalt.
- Constantly rotate the sugar ball as you blow to distribute the air and sugar evenly.
- Don't over-inflate; work in stages, allowing the sugar to rest slightly between puffs of air.
- Handle the delicate blown shapes with extreme care once finished.
Troubleshooting Cast Sugar: Avoiding Air Bubbles and Cracking
Cast sugar involves pouring hot, cooked sugar into molds. Problems include air bubbles trapped in the finished piece, cracking upon cooling, or sticking to the mold. Air bubbles are often caused by pouring the sugar too quickly or scraping the bottom of the pan (which can introduce air). Cracking is typically due to thermal shock from cooling too fast or unevenly, or the sugar being cooked slightly too hot, making it excessively brittle. Sticking to the mold happens if the mold wasn't properly prepared or the sugar wasn't cooled completely before demolding.
- Let the cooked sugar sit for a minute or two after taking it off the heat to allow large bubbles to rise, but don't wait so long it starts to set.
- Pour slowly and steadily into the mold, ideally pouring into one spot and letting the sugar flow outwards.
- Tap the mold gently after pouring to help bubbles rise.
- Cool the cast sugar completely at room temperature on a level surface before attempting to demold.
- Ensure silicone molds are clean and dry. For metal molds, you might need a very light application of release spray, though this can sometimes dull the sugar surface.
Essential Tools for Successful Troubleshooting
Thermometers: Ensuring Accurate Temperature Readings
A reliable candy thermometer is arguably the single most important tool for successful sugar work. Sugar stages are defined by specific temperatures, and being off by even a few degrees can mean the difference between a perfect hard crack and unwanted caramel or sticky soft sugar.
- Digital Thermometers: Offer quick, precise readings and are often easier to read. Look for one with a probe that can be clipped to the side of your pan.
- Analog Thermometers: Traditional and reliable, but can be slower to register temperature changes and require careful reading to avoid parallax error.
- Calibration: Always calibrate your thermometer periodically by checking the temperature of boiling water (212°F/100°C at sea level). Adjust readings based on your altitude if necessary (boiling point decreases by about 1°F for every 500 feet above sea level).
Silicone Mats: Preventing Sticking and Breakage
Silicone mats are invaluable for working with sugar. They provide a non-stick surface for pouring, cooling, pulling, and shaping sugar, preventing it from adhering firmly to your countertop. This minimizes breakage when trying to lift or move cooled sugar pieces.
They are also flexible, which can be helpful when working with pulled sugar or carefully peeling cooled sugar shapes away from the surface. Using a silicone mat also provides a slightly insulated surface compared to cold stone or metal countertops, helping to promote more even cooling and reduce the risk of thermal shock and cracking in poured or cast sugar.
Heat Lamps: Maintaining Sugar's Workability
For techniques like pulled or blown sugar, where the sugar needs to remain pliable for extended periods, a heat lamp is essential. It provides a consistent source of gentle heat that keeps the sugar mass warm enough to work with (typically around 130-180°F depending on the stage and technique) without causing it to melt or become too soft.
Working under a heat lamp allows you to take your time shaping, pulling, and inflating the sugar without it becoming brittle and breaking prematurely. Position the lamp safely above your workspace, ensuring the heat is directed onto the sugar mass you are actively working on, while keeping finished pieces or sections you want to cool outside of the direct heat zone.
Conclusion: Mastering Sugar Work Through Troubleshooting
Sugar work is a challenging but incredibly rewarding aspect of advanced baking. While problems like sugar crystallization, breakage, stickiness, and discoloration are common, they are not insurmountable. By understanding the underlying causes – primarily relating to temperature, moisture, and handling – you can implement preventative measures and effective troubleshooting techniques.
Remembering key sugar crystallization troubleshooting tips like using clean equipment, avoiding premature stirring, and adding acid or glucose can save many a batch. Learning to control temperature precisely, manage humidity, and handle fragile cooled sugar with care are skills that develop with practice. Don't be discouraged by initial failures; each attempt teaches you more about the nuances of working with this fascinating medium. With the right knowledge, tools, and a bit of patience, you can overcome common obstacles and create stunning, professional-quality sugar decorations.
Frequently Asked Questions
What causes sugar crystallization when making caramel?
Sugar crystallization often happens due to undissolved sugar crystals or impurities in the mixture. These act as seeds, encouraging the other sugar molecules to clump together and form crystals.
What are some quick fixes to prevent sugar crystallization?
You can prevent crystallization by adding an acid, like lemon juice or cream of tartar, to the sugar mixture. Another tip is to ensure all sugar is completely dissolved before bringing the mixture to a boil.
How can I rescue a batch of caramel that has already crystallized?
Add more water to the pan and gently heat it. This will help dissolve the crystals. Continue cooking the caramel, ensuring all sugar is dissolved and no new crystals form.
Why did my sugar work break after cooling, and how can I prevent it?
Breakage often occurs if the sugar was overcooked or not handled carefully. Ensure you don't cook it too long and cool it gradually to prevent sudden temperature changes.
Can humidity affect my sugar work, and if so, how do I manage it?
Yes, high humidity can cause sugar to become sticky or dissolve. Work in a cool, dry environment and use a dehumidifier if necessary to control the moisture levels.
Final Reflection: The Sweet Science of Sugar Success
Mastering sugar work isn't just about creating beautiful confections; it's about understanding the delicate dance between science and artistry. The seemingly simple act of melting sugar and shaping it into intricate designs reveals a world of subtle variables that can lead to either stunning success or frustrating failure. This article explored the common pitfalls—crystallization, breakage, and uneven textures—highlighting the importance of precise measurements, temperature control, and understanding the properties of different sugars.
The impact of understanding these techniques extends far beyond the kitchen. The principles of careful measurement and precise execution are transferable to countless other endeavors. The difference between ordinary and extraordinary is that little extra.
This quote, while seemingly simple, encapsulates the essence of sugar work and its broader implications. The attention to detail required to achieve flawless sugar creations mirrors the dedication needed to succeed in any field demanding precision and patience. The frustration of a failed batch can be a powerful teacher, emphasizing the importance of learning from mistakes and refining one's approach.
Now, it's your turn. Consider the challenges you've faced in your own pursuits, whether in baking, crafting, or any other area. What parallels can you draw between troubleshooting sugar work and overcoming obstacles in your own life? Embrace the imperfections, learn from each setback, and remember that the journey towards mastery is as rewarding as the final result. The next time you face a challenge, approach it with the same meticulous attention to detail and unwavering patience you would bring to a delicate sugar sculpture. The sweetness of success will be all the more satisfying.
Unlock Your Sugarcraft Potential: Master Confectionery Creations!
Thanks for joining us on this sugary adventure! We hope you've gained valuable insights into troubleshooting common sugar work problems. Now it's time to put your newfound knowledge into practice. Ready to create confectionery masterpieces?
- Tackle your trickiest sugar project: Identify that one project you've been putting off because of past difficulties. Now's the time to give it another try, armed with your new skills!
- Share your sugar success (or struggles!): We'd love to see your creations – and hear about any challenges you conquer (or any new ones you discover!). Share your photos and experiences on our social media!
- Explore advanced sugar techniques: Dive deeper into the world of sugar crafting. Research a new technique you’ve always been curious about – pulled sugar flowers, perhaps? – and give it a go!
So, what amazing sugar creation will you tackle first?